

Derek
-
Posts
1344 -
Joined
-
Last visited
-
Days Won
53
Content Type
Profiles
Forums
Blogs
Events
Gallery
Downloads
Store
Everything posted by Derek
-

Door glass squeegees from Black Dragon
Derek replied to Derek's topic in S30 Series - 240z, 260z, 280z
The squeegees are stapled to the moldings so you would have to cut the staples to remove the old squeegee and glue the new one on. Too Intense Restoration http://www.datsunrestore.com/catalog.html Has them for 47.00 for the pair. This is the direction I plan on going. Derek -
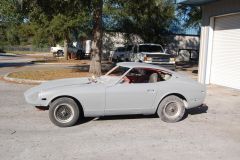
http://orlando.craigslist.org/car/522919429.html Derek
-
I set up a gallery page here http://album.hybridz.org/showgallery.php?cat=836&ppuser=0 if anyone wants to follow my progress. I'm also going to pass on a few pearls of wisdom that I've gleaned so far. #1 Approximately two to three months before you start your project go out and get into a minimum of three or four bar fights. And if your over 35 make one of them a Country Western bar. This will give you an pretty good idea of what your muscles will feel like when your done sanding! #2 Buy good bondo. I used Rage Extreme and it was awesome. It spreads easily and sands easily. I've used cheap bondo's before and there is a difference. Only do small areas at a time and do complete sections. Don't shove a wad of hardening bondo into a dent thinking you'll fix it by sanding. A nice smooth application makes the blocking so much easier. #3 When you start doing the bondo work give your DA to a friend to hold. Unless you do a lot of bodywork all your going to do is turn the area into a giant wave. I hand blocked all of my bondo work and managed to nail everything in two applications of filler. #4 Use a guide coat. I used a rattle can spray lacquer. A guide coat really shows where your at as far as high and low spots when your sanding. #5 Always use sanding blocks. If you can't remove a low spot with a block then it will need more filler. That's it for now. I'm sure I'll have more to add as I get into the paint work. Derek
-
From the album: Refurbish #2
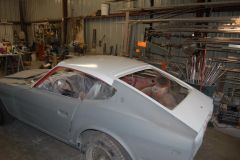
I went back over any areas I broke through with epoxy primer. -
From the album: Refurbish #2
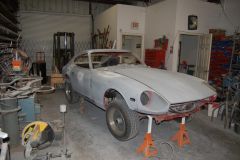
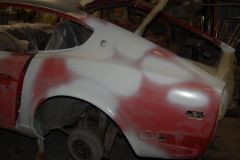
The car is now blocked with 180 grit and ready for a final sanding with 320 to get rid of the 180 scratches. -
From the album: Refurbish #2
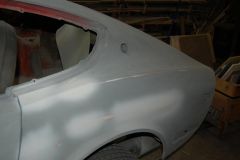
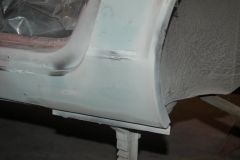
Car is primed with turbo 2K primer and ready for blocking. -
From the album: Refurbish #2
Epoxy primer on the roof and deck lid. -
From the album: Refurbish #2
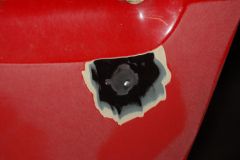
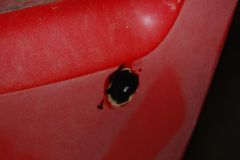
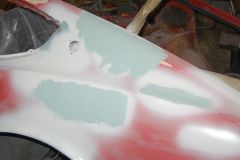
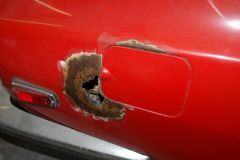
voila! No more lock cylinder. -
From the album: Refurbish #2
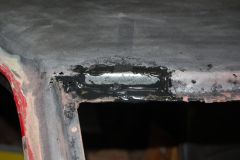
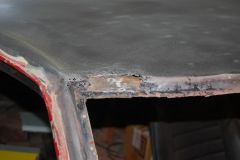
The panel adhesive has been ground back and I'm ready for the bondo. -
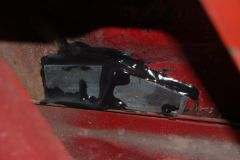
From the album: Refurbish #2
It's not pretty but it gets the job done. -
From the album: Refurbish #2
I decided to do away with the door lock cylinders. I'm installing a keyless entry system so this will be one more level of security. Once again panel adhesive makes quick work of a difficult job. -
From the album: Refurbish #2
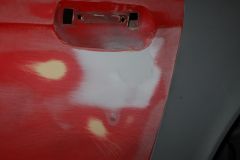
Here's the 1/4 panel patch I glued in. You can see how using a guide coat helps you see what your sanding and what needs more work. -
From the album: Refurbish #2
I put a coat of duraglass down first. Then I top coat with bondo. Duraglass is much stronger than the bondo and is waterproof as well. The bondo I chose is Rage extreme. It was expensive but it laid out easily and sanded like butter. Only do a few areas at a time so you can work the bondo during its optimal sanding period. Also do a search on guide coating and use it!! -
From the album: Refurbish #2
All the rust has been treated with ospho, dried overnight, and then re-sanded. I then painted the really rusty sections with por-15. Now this is the tricky part. If you wait until the por is dry the primer won't stick. The ideal time is when the surface is still tacky but wont leave a trace on your finger when you touch it. Then I sprayed a coat of epoxy primer over all the bare metal. I used Southern Polyurethanes products and couldn't have been happier. -
From the album: Refurbish #2
Couldn't be simpler! -
From the album: Refurbish #2
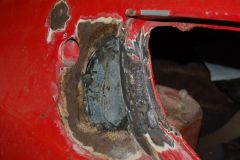
Here I've sanded back all the rust and treated with Ospho. -

From the album: Refurbish #2
This was a tricky repair. Here is where the panel adhesive really comes in handy -
From the album: Refurbish #2
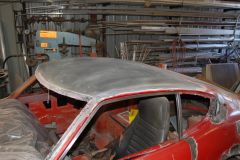
The roof and deck lid were showing signs of surface rust under the paint so I decided to strip the paint down to the metal. -
From the album: Refurbish #2
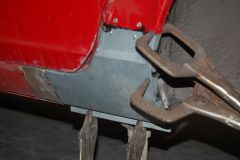
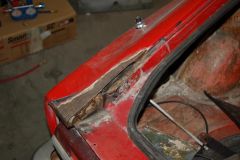
I stripped the clamps and screws this morning and man am I happy with this repair. It was a whole lot easier than welding and has rigidity about it that you don't get with spot welding. -
From the album: Refurbish #2
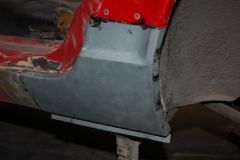
I made a backing plate out of the left over material I cut from the patch panel. I screwed the backing plate to the inside of the ¼ and then screwed the patch panel to it. I then disassembled the piece and got the adhesive gun ready. I reassembled everything but this time with adhesive on all of the contact areas. I made sure that I had a large enough bead so that it would create a water tight seal as well. -
From the album: Refurbish #2
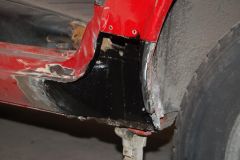
I'm splicing in a repair panel on the bottom of the ¼ panel. The black stuff is por-15 -
From the album: Refurbish #2
When it came time to start repairing the rust my 240Z body I was trying to figure the best way for me to make the repairs. I have a full metalworking shop including a tig, mig, and spot welder so I had a few options to play with. I had been using some pretty awesome adhesives on my foundry patterns and thought I would investigate it more. My theory on the adhesives was that it would be better in two ways. The first would be no metal fatigue from the weld and the second would be superior strength because of th increased contact area. I did some research on the web and found that panel adhesive is some pretty spectacular stuff. I found plenty of tests where the metal would tear before the adhesive would fail. I purchased some SEM 39747 panel adhesive and an application gun. -
From the album: Refurbish #2
-
From the album: Refurbish #2
-
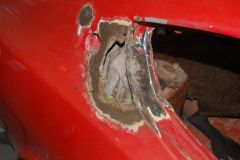
From the album: Refurbish #2
As you can see by the next few pictures there is quite a bit of rust to repair.