240z72
-
Posts
239 -
Joined
-
Last visited
-
Days Won
2
Content Type
Profiles
Forums
Blogs
Events
Gallery
Downloads
Store
Everything posted by 240z72
-
Ya im thinking it will fit perfect just above the pump a bit to the passenger side. I dont think it will fit directly above the pump. I want to be able to get to it without it being a big deal. Thanks Sunny its getting there! Day by day. I try and do something everyday. I hope to be mostly done before the rain hits. Im now working 12hr shifts so time is short but money will be more abundant. Can finally get my companion flanges! $$$
-
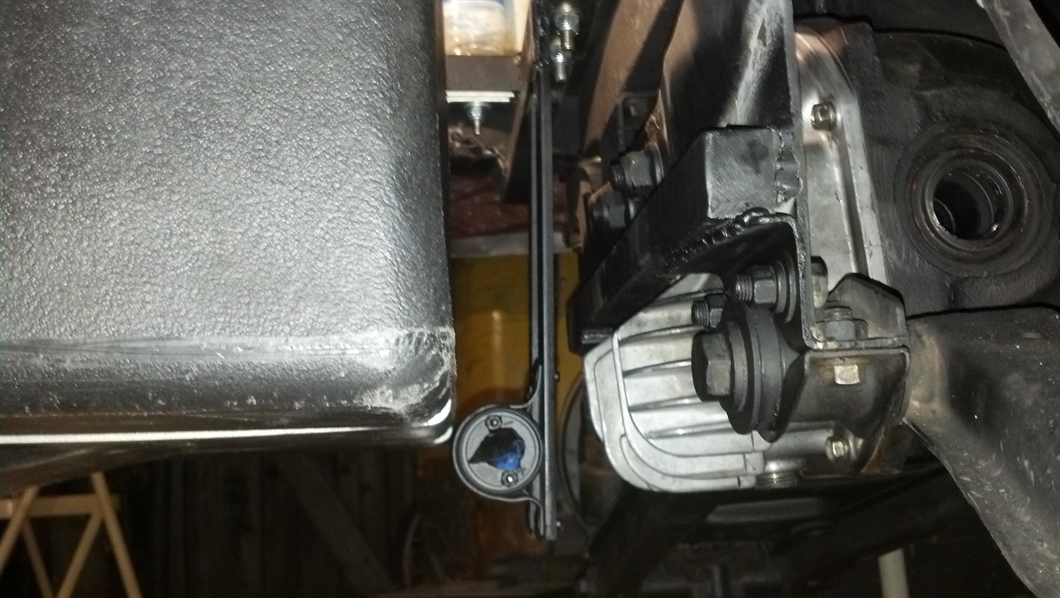
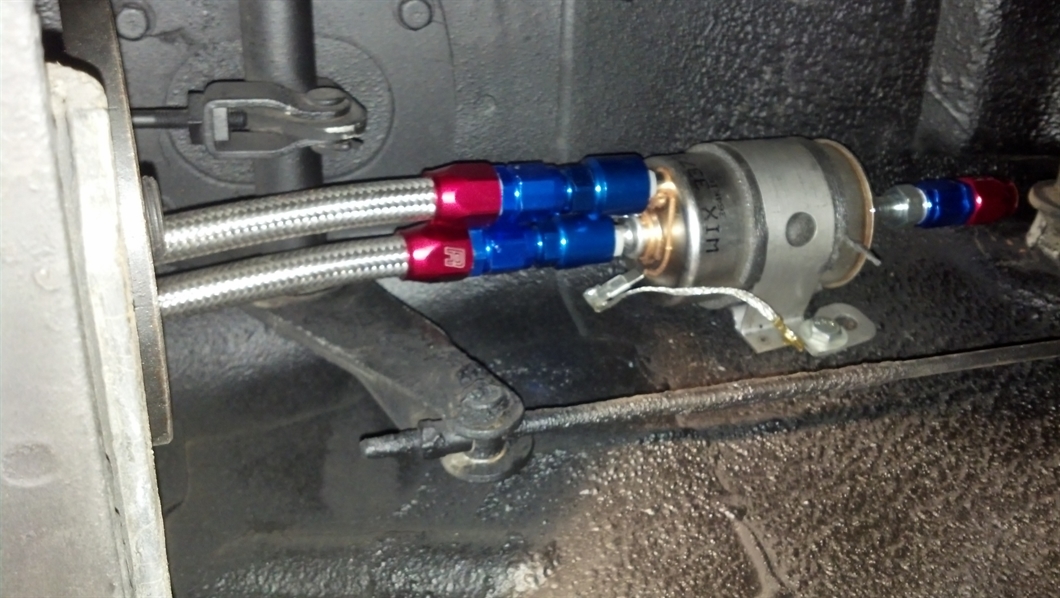
Update: Today I finished fabbing up my fuel pump bracket. It went smooth and came out great. I used 2 lengths of 1/4" strap and a short pice of 90* steel. Then I decided to start pluming the lines to the fuel pump. Boy it was the perfect fit. Not one more fitting could be used haha. I added a fuel shut off valve. Nothing special. Just picked it up at the hardware store. Just make shur it is safe for use with fuel. Tomorrow I plan on installing the C5 fuel filter right next to fuel pump. Will need to fab up another bracket maby. I dont know. Ill figure it out once i get under there again.

-
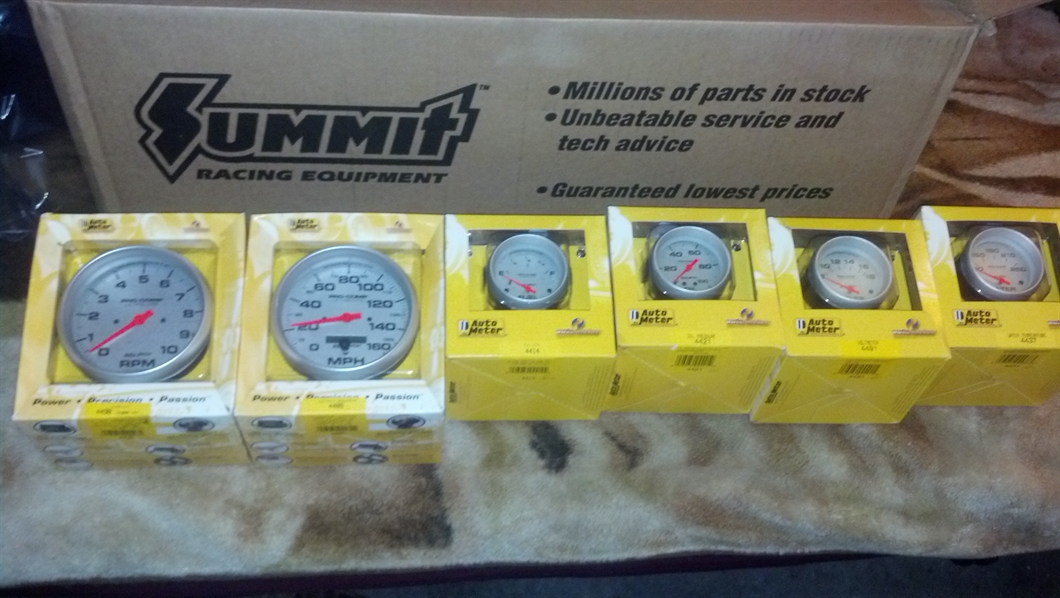
Keith: Ya that dosent sound fun, cleaning it again and agin. Thanks for the heads up! I will see what I can do to fab. something up. It seems like theres more work to be dont on the back end then the actualy motor swap haha. Today I plan on finishing my fuel pump mounting bracket. I just got another package from Summit of some goodies. I bought some AN-NPT fittingS so I can install a shut-off valve for the fuel line, as it was a popular request. Made sense to me. Will update later tonight with some pics.
-

LS/T56/240z Project Mentor Wanted
240z72 replied to RebekahsZ's topic in S30 Series - 240z, 260z, 280z
Rain-ex to the rescue! I love the way the car purrs going down the road. Seems like your getting on top of this clutch issue. -
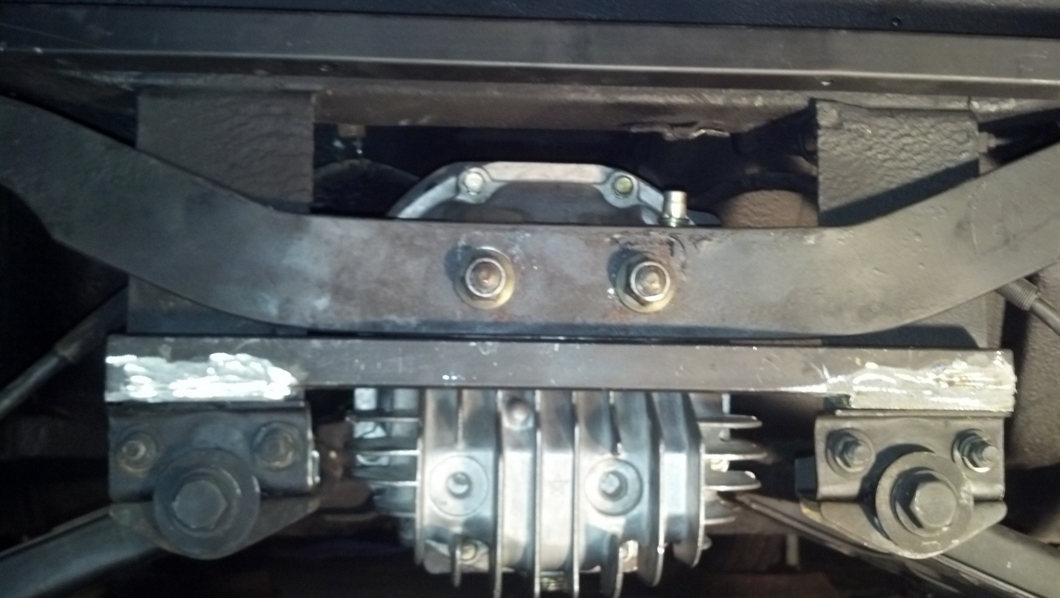
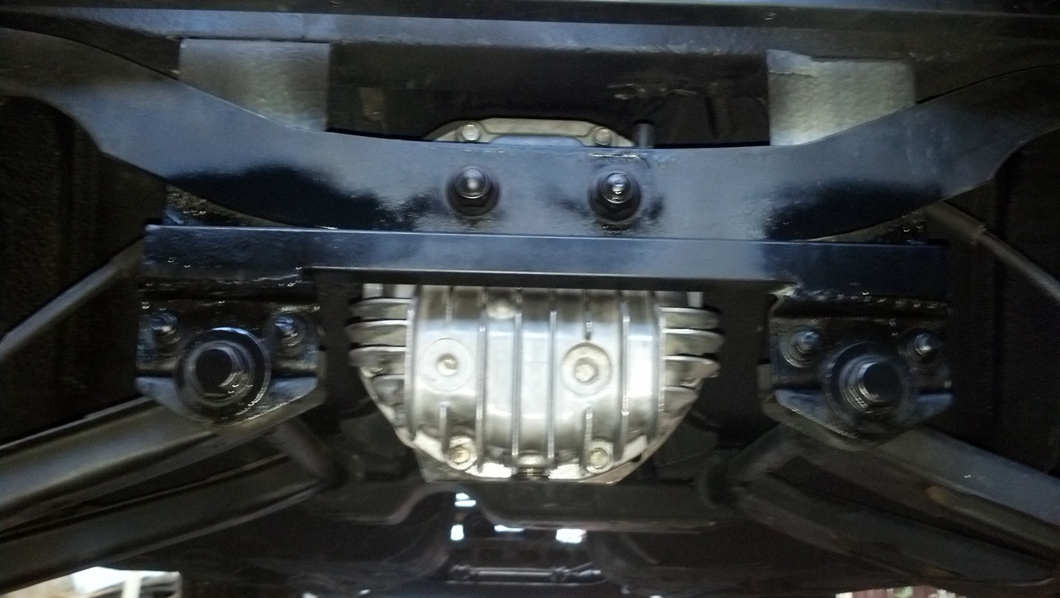
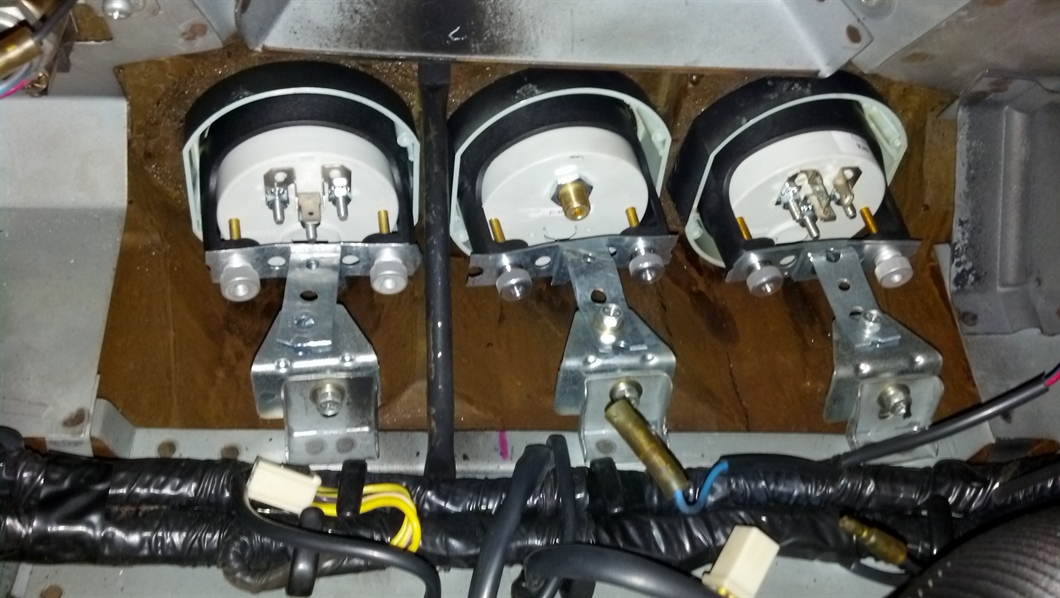
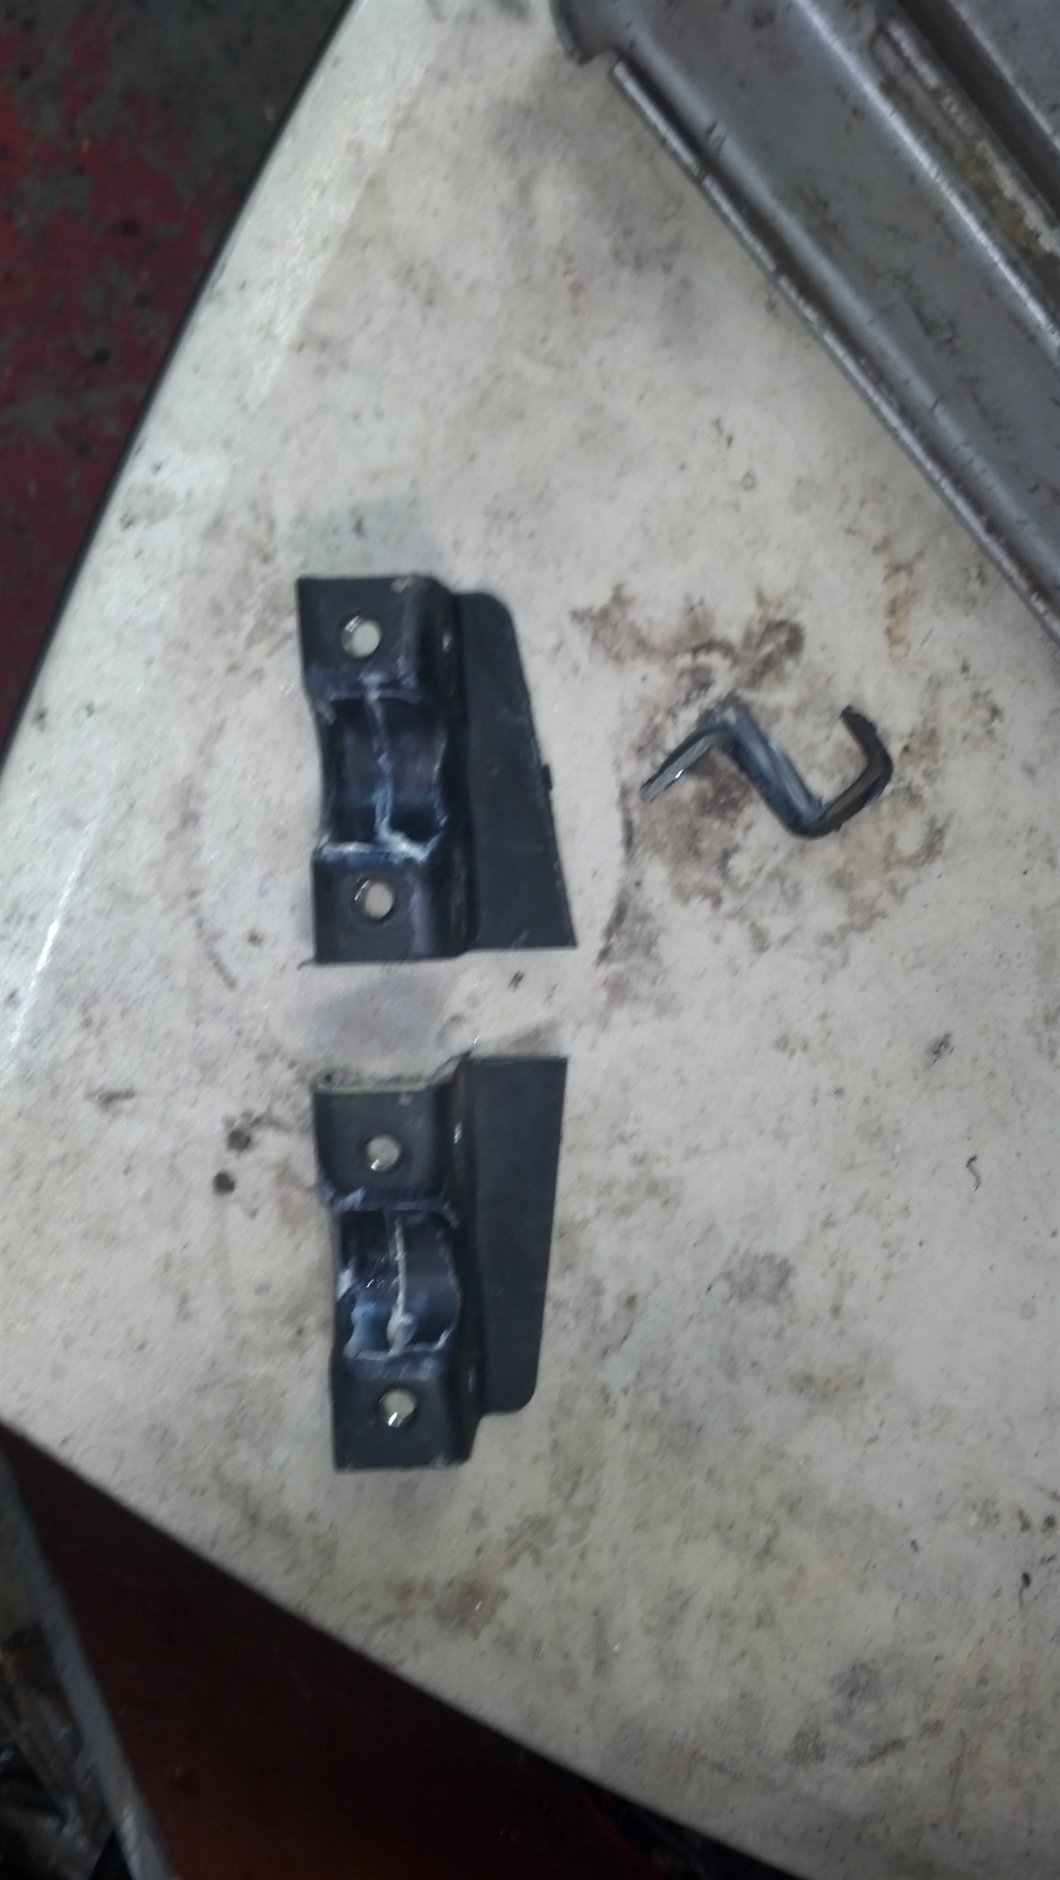
Update. Today I finished my transverse link mod. Its nothing hardcore but I belive it will work. All it is is just some thick wall box tubing with some strap welded to it as spacers. I next moved the fuel cell back about 2 inches to accomidate installing the fuel pump lower right infront of the cell. I fabbed up a bracket today but did not get a chance to finish it as it got late and i cant cut metal at 11pm hahh. Its moving along slow but shur. I also finished the wireing fot my guages in my dash. All thats waiting is to set the dash in place and wire up the senders and ignition. More on the way.
-
No we dident have the same problem. I went over the ecu connections many times..i will never know what my issue was. The car was sold and motor was tore out. Aparrently the motor blew shortly after i sold it. One problem was too much aftermarket stuff on stock ecu. I will never buy a bad running swap again thinking well shoot i can fix that haha.
-
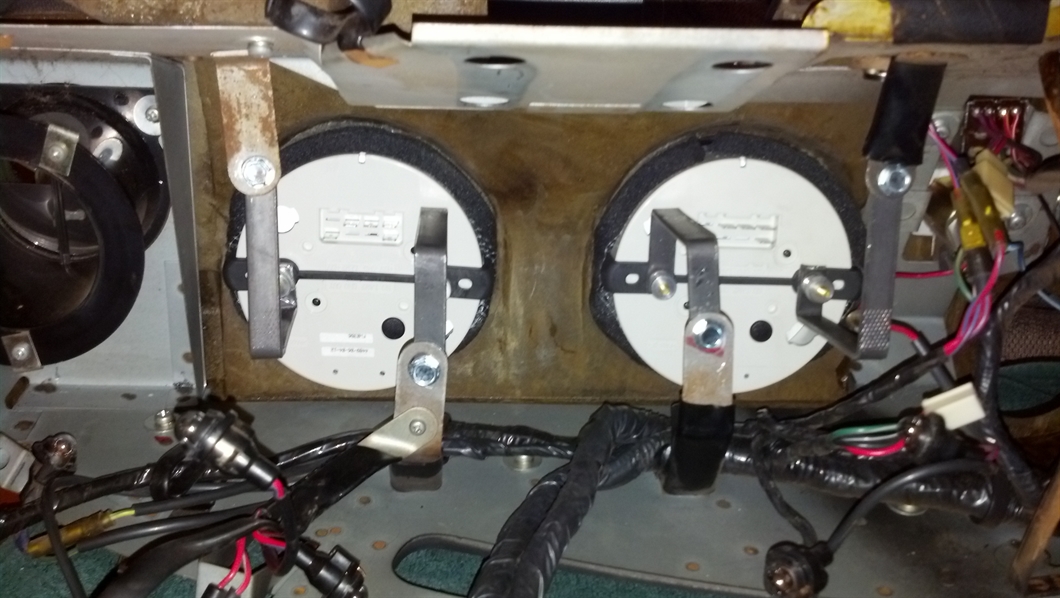
Progress today was minimal. All I managed to do was fab up some littel brackets to mount my guages. I used the original front besels for the smaller ones to fit them in the hole and have the angled effect. I had large gaps on each side of the tach. and speedo. So I used some sticky foam strips to seal and black out the background. It all went well.
-
Need help selecting NEW CLUTCH
240z72 replied to RebekahsZ's topic in Gen III & IV Chevy V8Z Tech Board
Will you do a write up? Im curious about the shim install. Dosent seem too hard but more info the better. Well goodluck with the job commen. If I was local id lend ya a hand. -
Need help selecting NEW CLUTCH
240z72 replied to RebekahsZ's topic in Gen III & IV Chevy V8Z Tech Board
How many more miles!?! LMAO..... -
Damn sunny im sorry to see this. Thats cool you still one-legged it basck home. Were those stock axles? BTW that was a cool vid.
-
Well wouldent that mean the pcm is a 99 anyway, as it forshur came off the motor because I removed all the connections. Thats what i ment though,as in I dont have the RHSC PCM. Sorry.
-
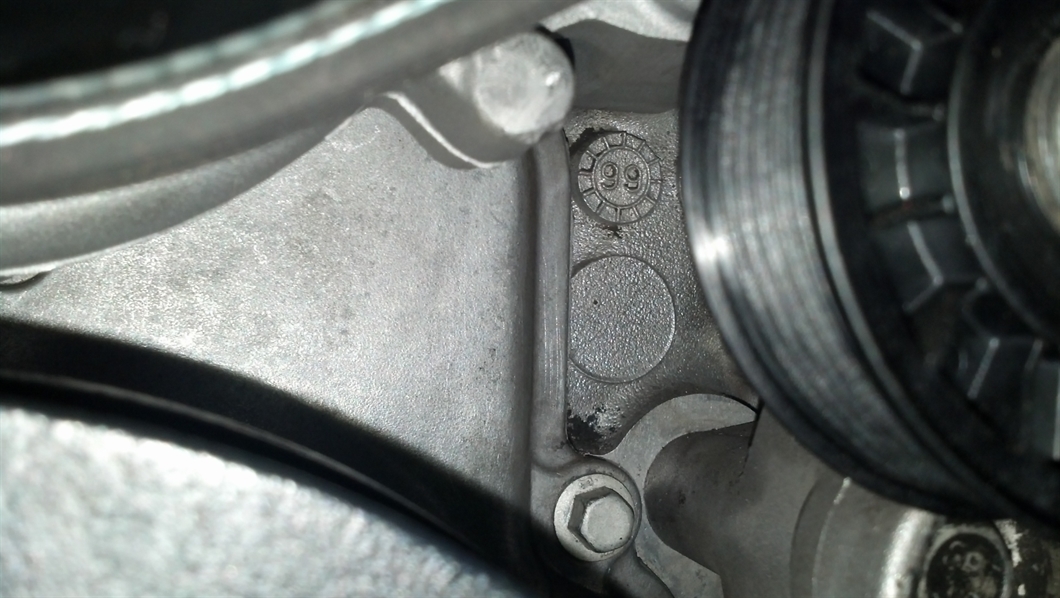
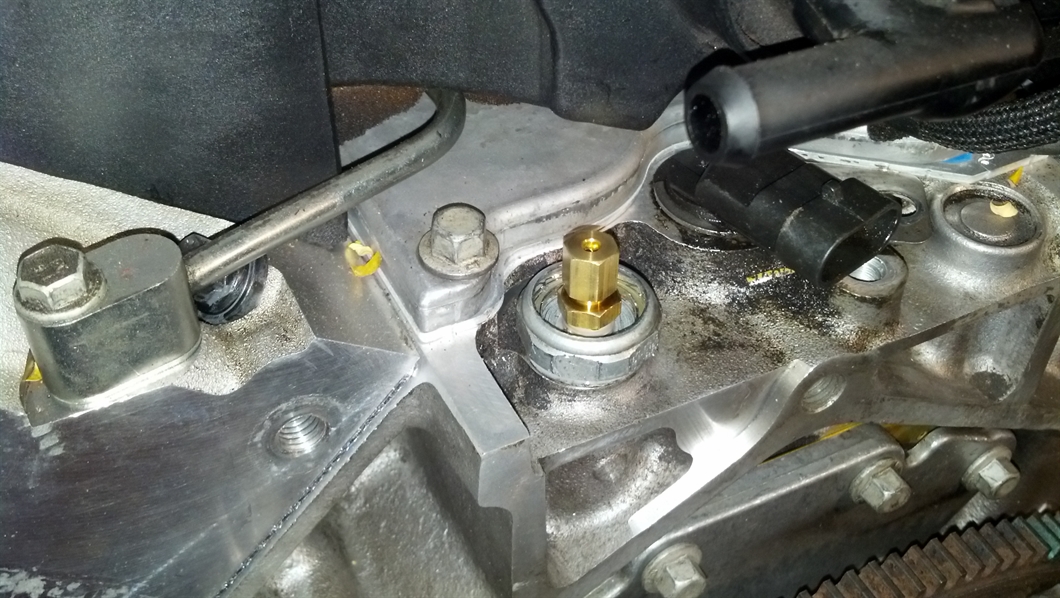
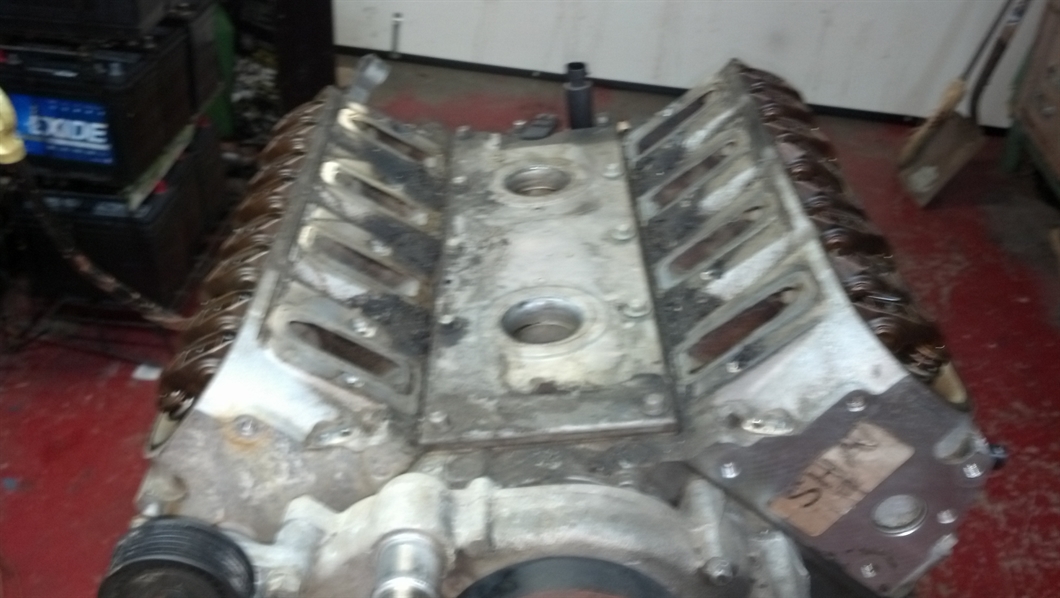
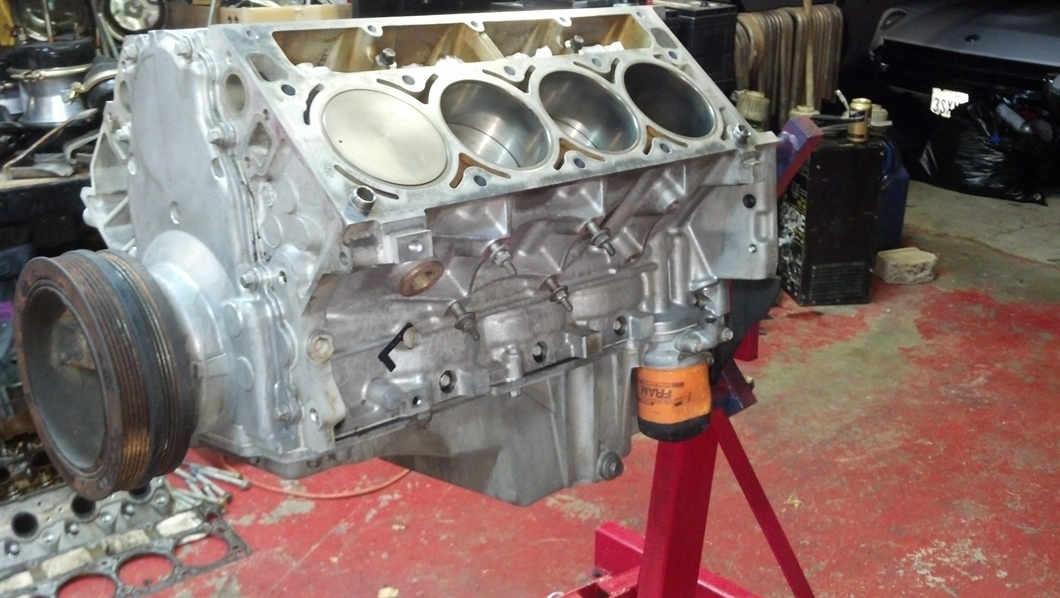
UPDATE!! I did alot of searching on the net running numberes trying to figure out what year my ls1 is. About 30 mins into it I came across a thread in ls1tech. I hope its this easy. If others could verify this for me with their own motors that would be awsome. It seems they cast the year of motor on the front of the block on the drivers side under the water pump port. If this is true I have a 99! So SUNNY I dont have the red headded step child lol. Heres a pic. I hope this is true.
-
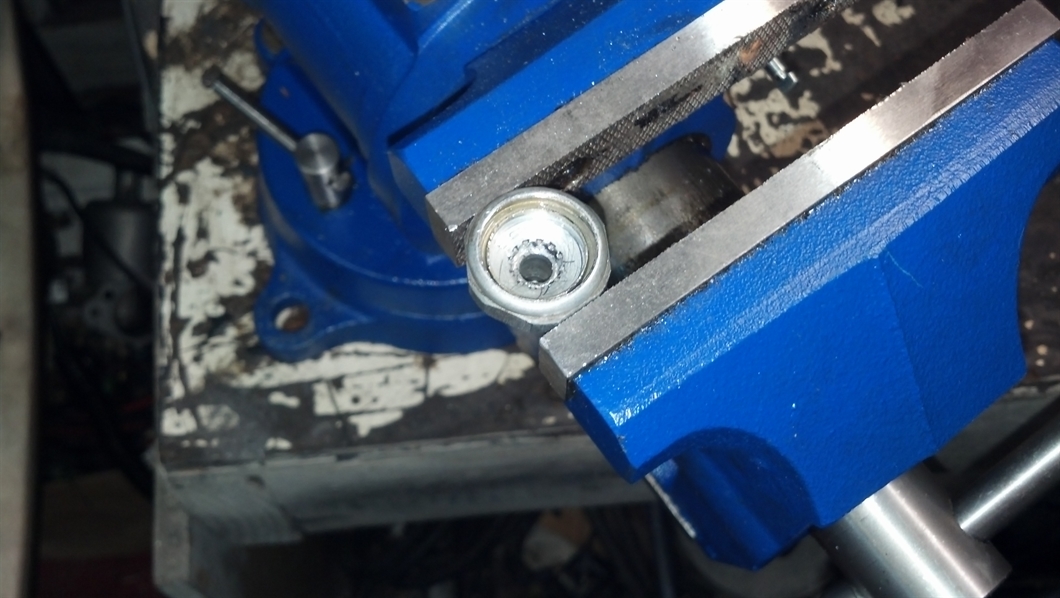
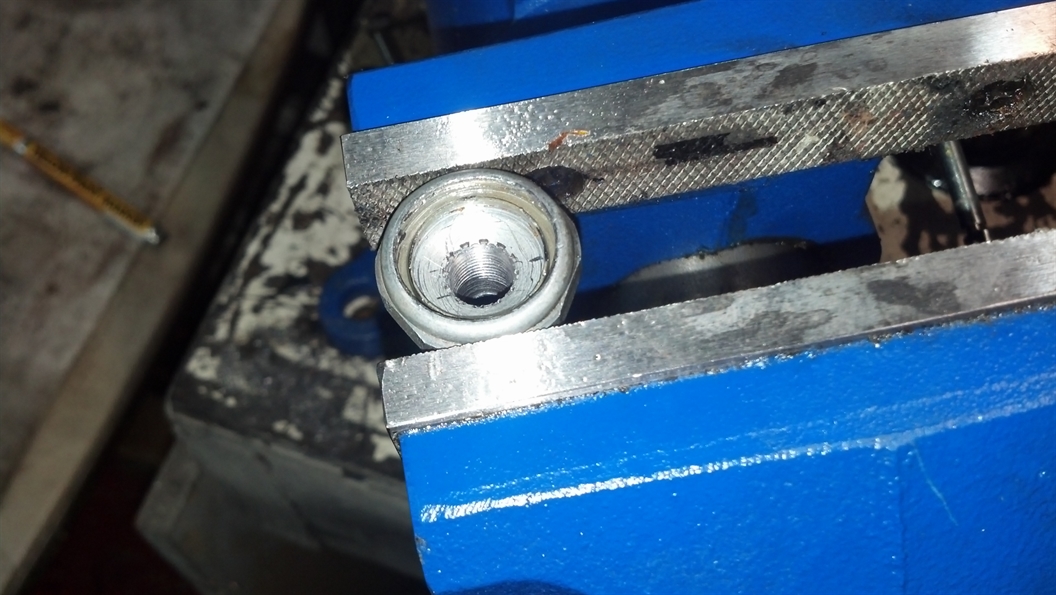
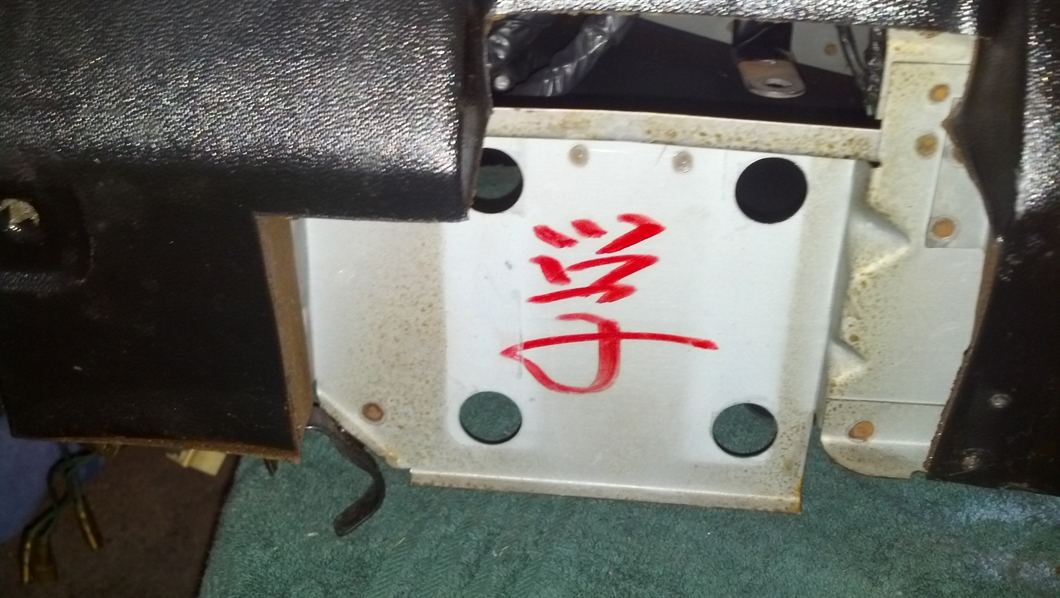
More catching up! After i failed on the fuel system haha, I started on my rearend. I have a CLSD from a 300zxt. From the start I did not like the stiffness of the pinion shaft. It was like the bearing were too tight. Which dident make sence as these things are shimmed. I do alot of wheel bearingS in my line of work and I knew the bearings dident feel right. I disassembled it and found nothing visually wrong. No pits or groving ect. I did have some ruffness in the *** bearing. I even pulled out the dial indicator to test the shaft. All was ok. So I played with it for awhile and got no where fast. I ended up buying a r200 open diff. off a bud and gutted it for parts. I used a caliper to measure the shims and the onse off the CLSD were a few thou. shorter the the ones outta the open. So I swapped shims and the *** bearing. Assembled and bam! Smooth as silk! I was so happy when this turned out. I dont want to have to buy another one haha. If I could find one... Next i moved onto the clutch pack. I bought some clutches off Savage42 to add in the pack. That install went great once i figured out what to do . Then i reassembled the whole thing with fresh seals. Thats about where I was at the moment of starting this thread. So today I had off so I spent most of the day doing things. I pulled out the failed fuel system I installed haha. Gonna redo that next. Also got the diff. installed for good I think haha..I started playing with the transverse link. Modding it to fit the finned cover. I basically cut the middel section off and i plan on just welding/ bolting a strait section of box tubing accross the dog legs. It will be spaced off the dog legs about a 1/2 inch for clearence. heres a few pics. Im not dont yet so i will show the end result later. Heres the section I plan on using. I also removed my dash for guage install and ease of changing and modding a few things. Heres a pic of the guages test fitted. Last thing I did was mod the old broken Oil pressure sending unti off the ls1 to accept the aftermarket oil pressure guage fitting. First I used a 11/32 bit to drill out the fitting. Next I used a 1/8 27 tap to run the threads. Last I used a bit of pipe tape and installed the fitting! Last thing I think its cool how all z dashes have this sig. under the dash. I guess it was the person who assembled the dash. Or inspected it. Whats your sig???? lol MORE TO COME!!
-
Need help selecting NEW CLUTCH
240z72 replied to RebekahsZ's topic in Gen III & IV Chevy V8Z Tech Board
Awsome! I hope you can shift at 6k with no issues. Im glad your getting back on the road. Goodluck! -
Ok thanks guys. Ill dig around and see what I can find. I dont think the PO swapped heads. Only reason I say that is the CHTS is only two wires going to the sensor and IIRC it wasent spliced. Thnaks again for all the info. Jim
-
I sent John at Speartech and email and he said that he will be able to retrieve the year from the PCM. Im still curious as what year motor I have.
-
The head casting codes are 853. Im glad I posted this build. Im not the smartest hot rod builder. I do basically everything with myself and the internet. Ya i was woundering why i had a 2 pin chts. Well hopefully i dont have that red head step child haha. Maby the people saw the manufacture date on the door and it was made in 98 but sold as a 99. Thanks for all the imput on this . Half the reason i started this thread was to have some overwatch and a second opinion from experienced people. I forgot to say its a 5.7l.
-
REALLY? well $&$$#%^!!! As for the intake its not a ls6 it is the ls1 with the EGR port . I will deffently contact Speartec ASAP on this. They could proly scan the PCM and find out what year it is from. I never saw the pull out camaro in person just pics of what was left of it haha. They swore it was a 98. I do have the older style PCM with the red/blue connectors. Any othere ways to see what year this mystery motor is haha???? Yes I will proly remount the pump down low right infront of the tank. Nothing is perminant yet. I dont plan on racing it on a trak anytime soon. but that is a good point on the driveline thing. I may run them thre the passenger side tunnel on the inside of the car. There is no real room on the belly of the 240's.
-
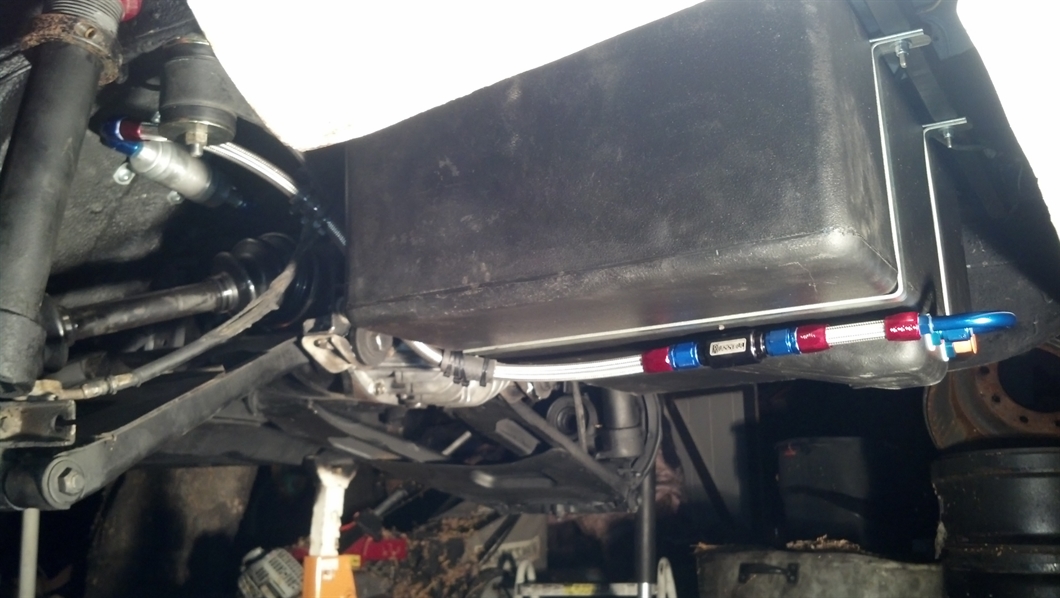
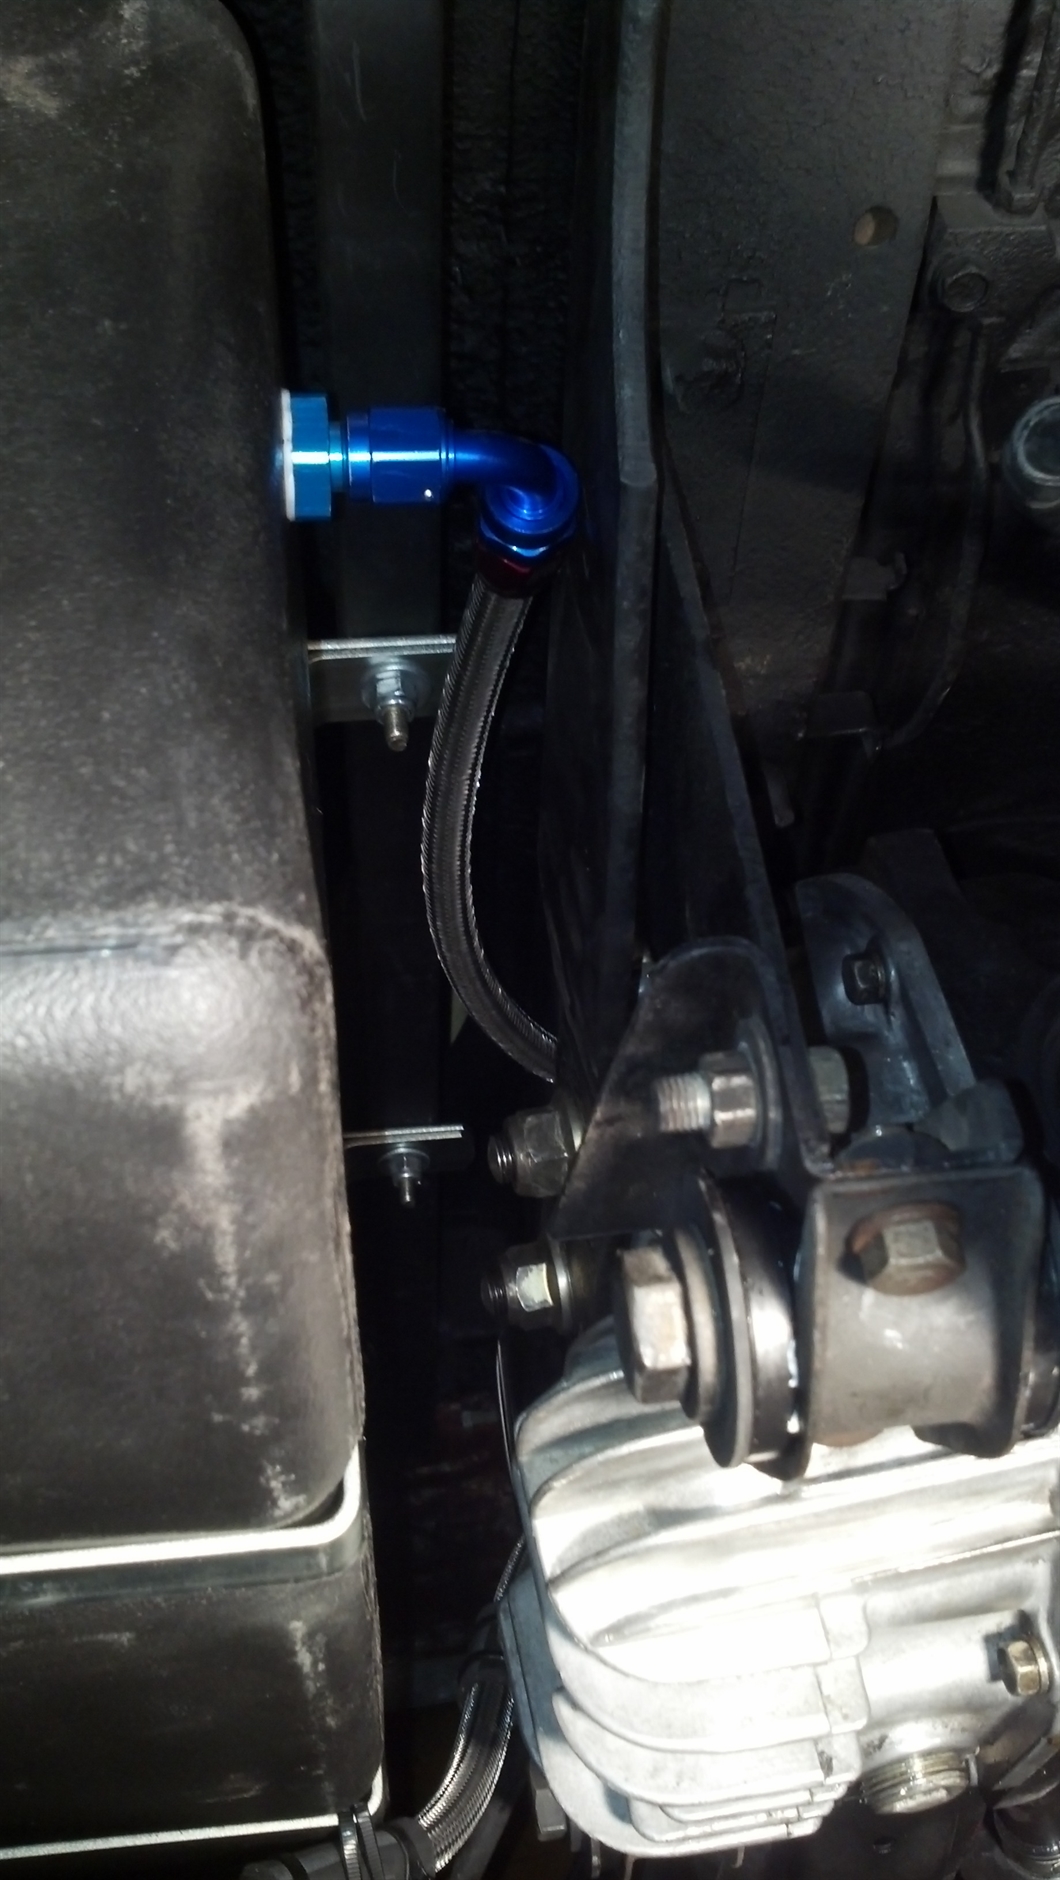
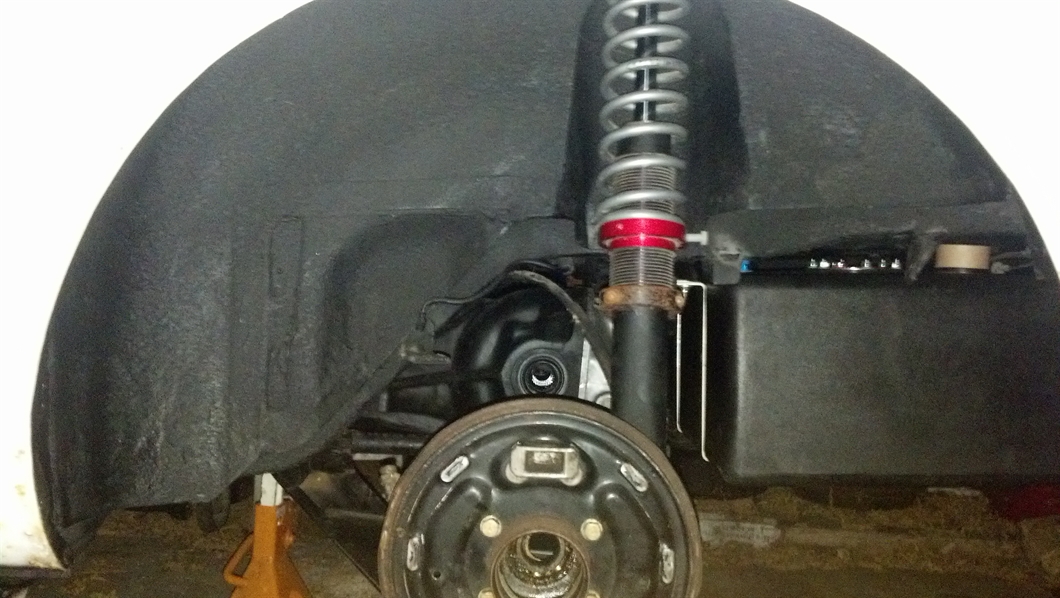
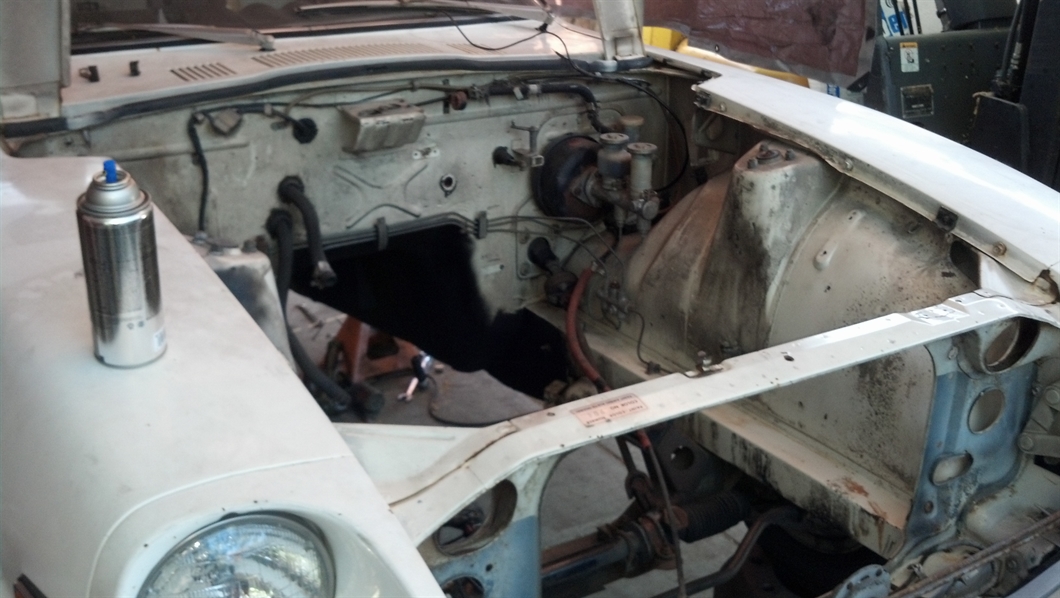
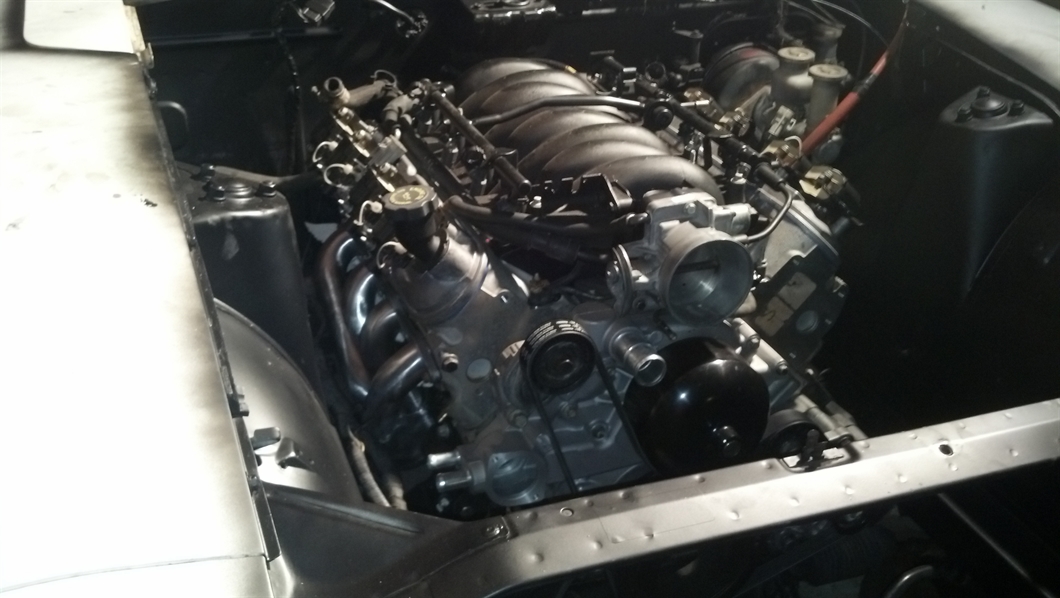
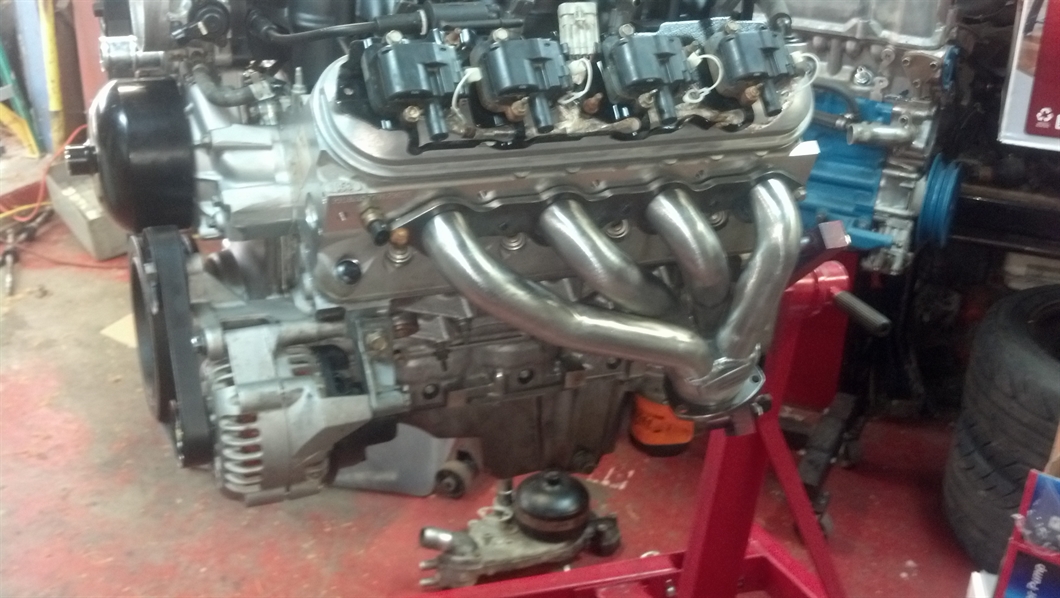
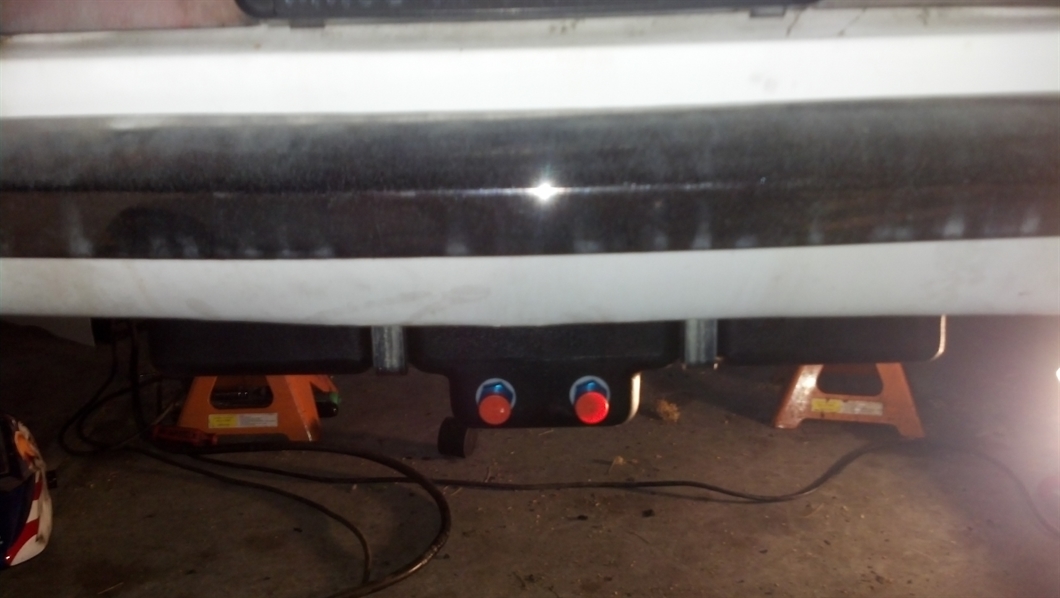
Next I proceeded to plum the fuel lines/system. I installed the rear suspention and diff. to make shur I had the right clearence. I used -8 from the sump to my pump and - 6 as the return and feed to the motor. I used a Russel prefilter and a 225lph Walbro pump. I used the C5 filter/regulator and a ton of Russel line and fittings. I also installed a bulkhead fitting into my tank for the return as I dident want to run another line on the bottom of the tank. This is where I chose to mount my pump. Heres the feed line plumbed to the pump. The sneaky little spot I decided to put the C5 filtr/regulator. Heres the return. (not secured yet). After that hurdel I decided to install the coilovers I had on the rear. Also installed some Tokico 5 ways. Moving on to the motor bay. I pressure washed it out and sanded it. I dont have any pics of it after I sanded it though. (LIKEN THEM PLATES????) After all that I had recived the JCI mounts. The install of the mounts went great! No fitment issues at all. Took about 4 hours to do everything. I then said screw it and decided to do a test fit of just the motor. That went very well. It fell right into the mounts and sat pretty! I just need to trim the alternator vent thing on the back a bit. I even was able to literally drop the shortys on. I hand no issues with the clearenc of them AT ALL. I was actually surprised. Look at that room up front! Ya theres no radiator or intake or fan but still i can stand in there haha... Heres a quick pic of my guages. I also have an Innovate AFR guage i will install later (not pictured). Thats all for now. I have more but its late and i need to get the rest of the the photos off my phone and edited.
-
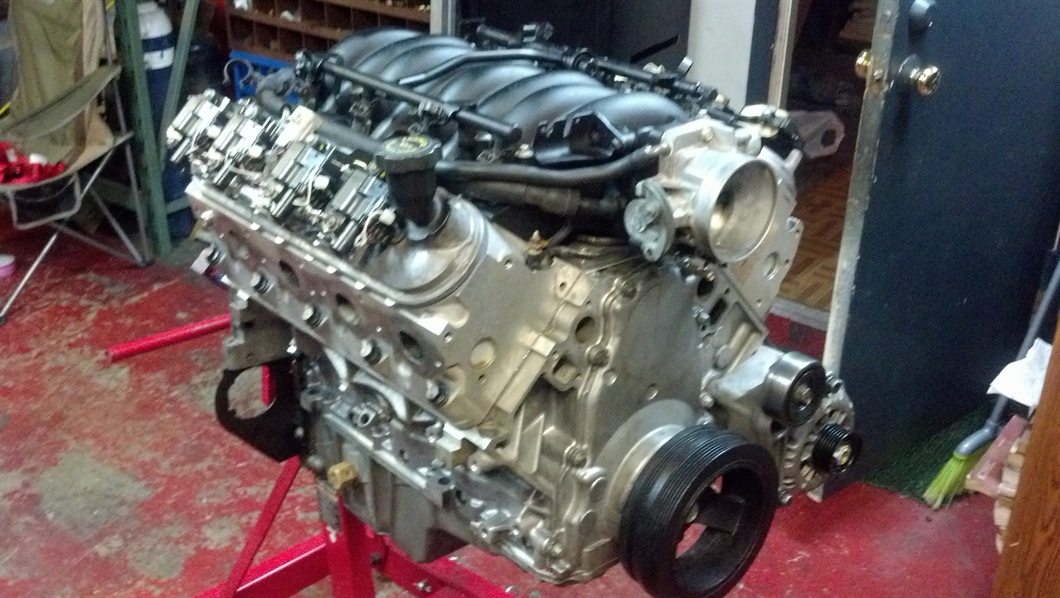
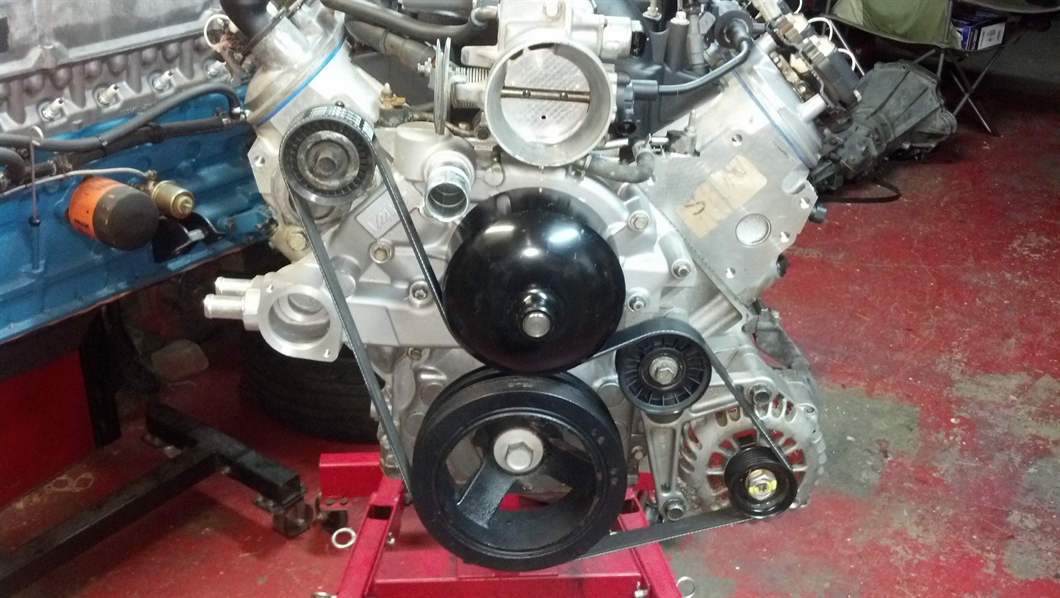
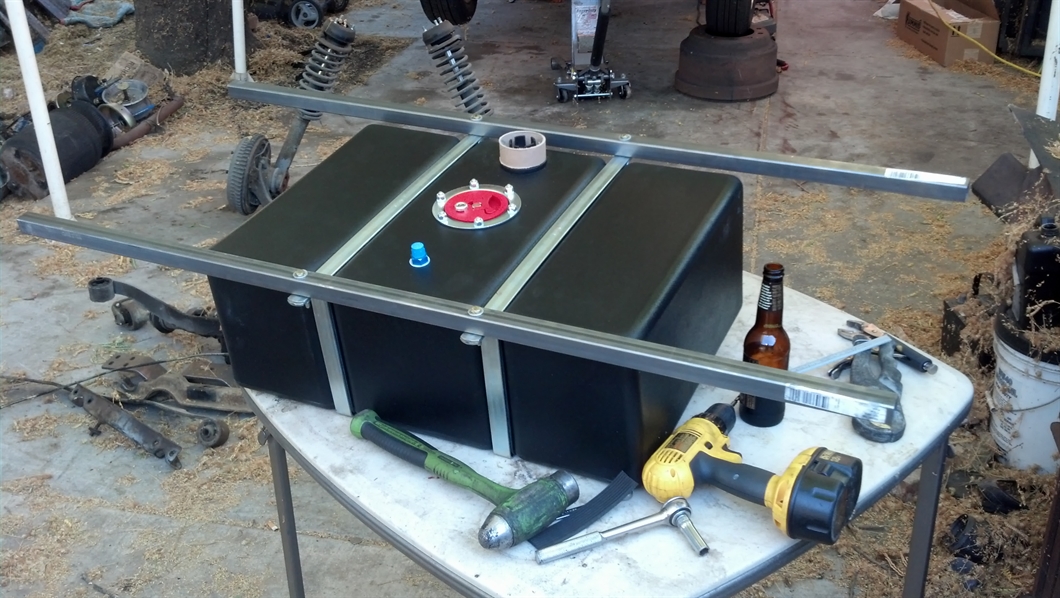
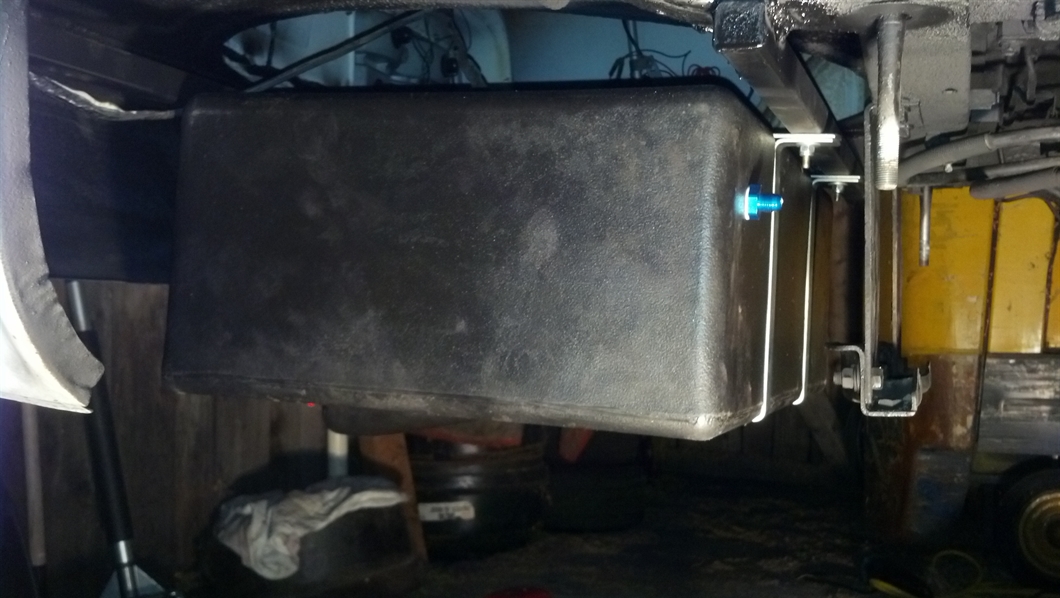
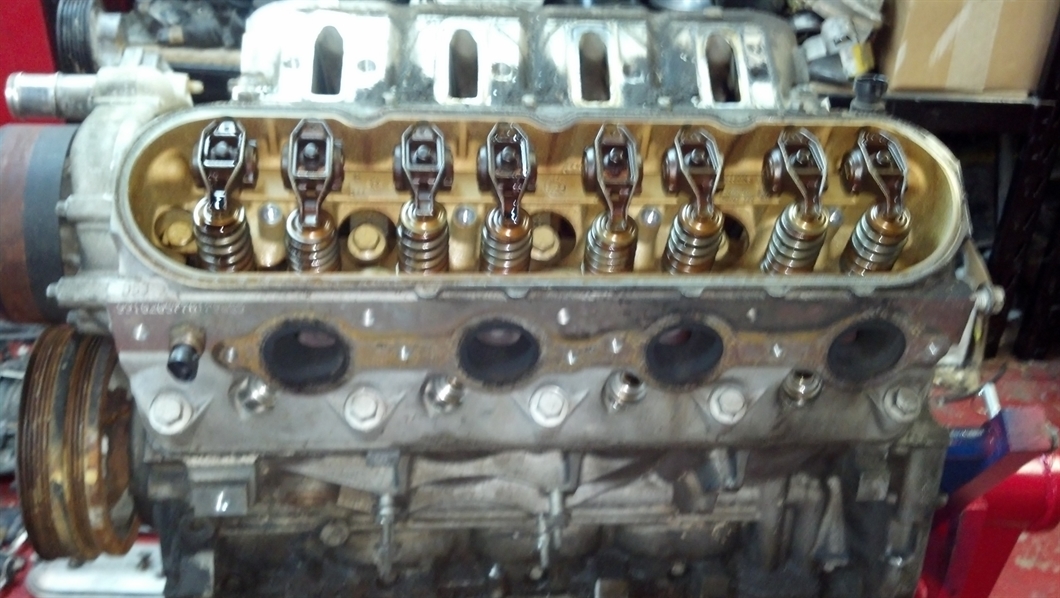
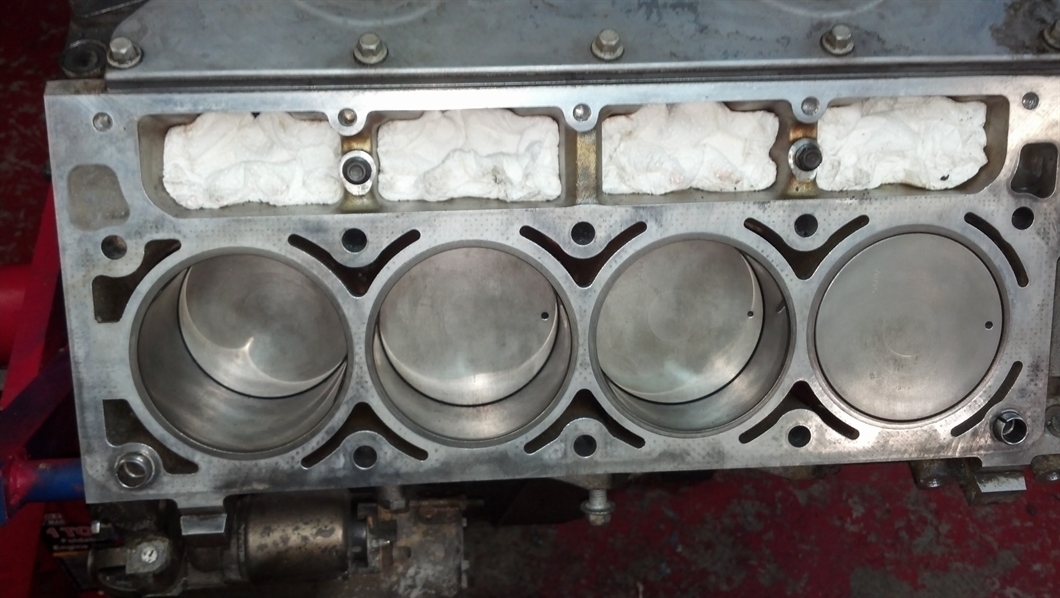
Moving on. I began to reassemble everything wqith new gasket/seals. I lapped my own valves and changed the stem seals in the heads. Installed new head gaskets. Valley cover gasket and a new knock sensor as i broke one removing the harness :/ . I used FEL-PRO gaskets for just about everything.I have a friend that works at Kragens so i get stuff cheap! I painted the intake manifold black again as i couldent for the life of me get the thing clean. Heres a pic of the motor after i got the top end on. Obviously after removing the power sterring and ac stuff i replaced the grooved idoler pully with a grooved one and installed a new water pump with a custome belt. After that the motor sat for a bit waiting for parts and funds. Then i sold my other 1972 240z. MONEY!!!! I then ordered JCI mounts,JTR shorty headders and a ton of expencive fuel system stuff/guages. heres a pic of the headders mocked up. I then moved on to my fuel system. I bought a sumped 16gal. fuel cell from Summit. I bought the mount kit for the tank and fabbed up my own cross braces to mount it in. The mounts that wrapped around the tank were quite loose on the tank so I searched for something durable and wheather proof. I ended up using, guess what? I used a 6 groove serp. belt. LOL. It fit great! Heres a pic of the cell and my FAB frame . (thats a root beer! I had work that night sorry yo!) I then did the first "no going back mod" I cut out the spare tire well and mounted up the fuel cell. I did paint the brackets and capped the ends so no water or moisture mainly as i dont plan to drive in the rain.
-
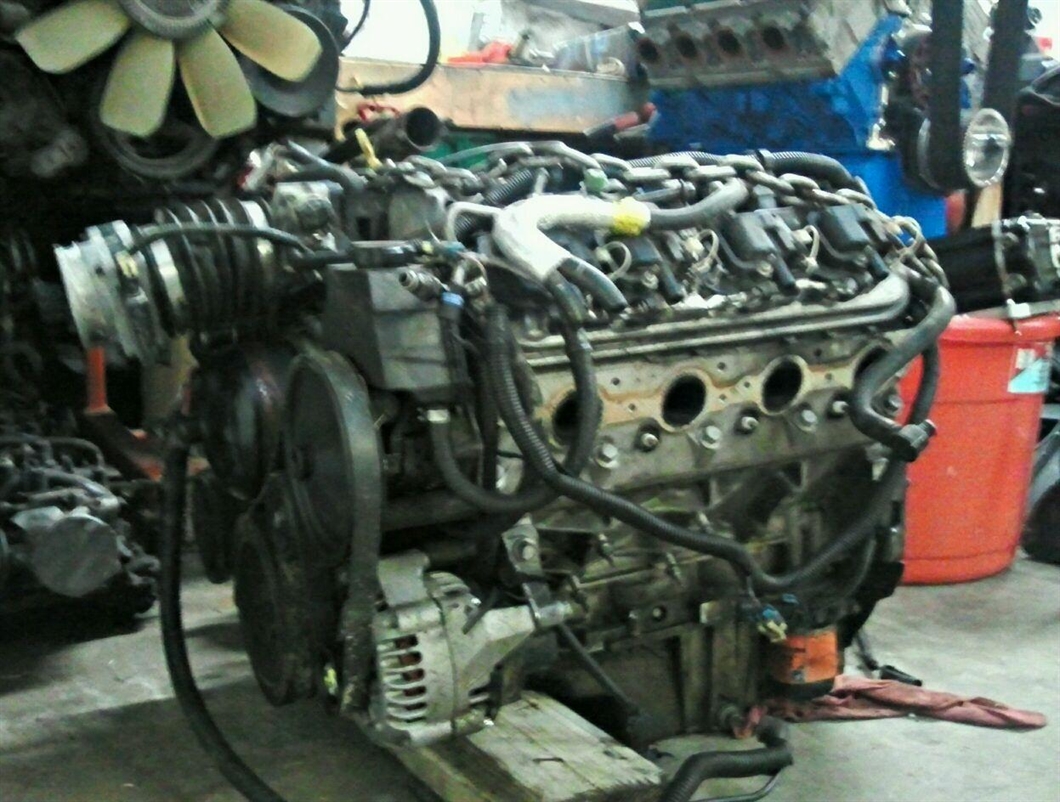
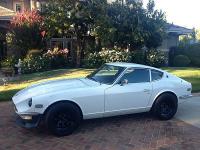
Welcome. I decided to start a build thread on my build. Im fairly deep into the build so I will have to catch up the best I can. A lil history on the car im currently working with is a 1972 240z that I picked up from a tow yard. I lucked out and got this car after it sat in a storage locker for years. I want to say it only has 47,000 miles on it from the condition things are in and how soild the car is. I also found some old paperwork that said it had 34,000 in 1977. It sat inside a storage locker till the lady that owned it eather passed away or left it there. Storage people ordered it to be removed so the tow company I bought it from hauled it off. Then I came along and $1500 later I had the car. They even towed it to my house! The next few days i checked it over. Had the original match number block. I put power to it and checked all the lights and everything worked great! No smoke! Buuutttt I found that the #1 cylender was frozen bad. So i pulled the motor and it sat for awhile as i had two other z's on the raod at the time. Then i got a wild hair to do a v8 swap. Kicked around a few different swaps. Then a friend enlightened me about one of the best, most advanced powerhouses out there. The LS series. And then there was light! I hunted down a ls1 off of craigslist for a good price. I picked it up off a (??) camaro SS as they had the oil pan I needed. I got the whole pull out motor,harness and PCM. I then tracked down the same t56 that came from the motor but the ASS wanted wayyy too much for it. Littel did he know I talked to the people that he bought it from so I knew how much he got it for. I then got one for a good price later on. After that I basically started stacking parts. Odds N ends I needed (flywheel bolts,fuel system stuff, ect). I then proceeded to do a light rebuild on the motor. Heres the motor as i recived it. After I removed the harness and packed it up to send off the Speartech. Heres some pics of the tear down. I then proceeded to clean up and I replace the front and rear cover gaskets along with the main seals. I also did the oil pan gasket. I will continue this thread in another post as I dont want to lose all this typing haha!
-
Hell yea!
-
Thanks for the info Joe
-
How much did the PS unit cost? thanks. AWOSOME BUILD BTW!!!!
-
There is three on ebay right now. Just.looked the other day. I think the cheaper one was 784$. I will keep an eye out id love to get another one myself.