grannyknot
-
Posts
729 -
Joined
-
Last visited
-
Days Won
30
Content Type
Profiles
Forums
Blogs
Events
Gallery
Downloads
Store
Everything posted by grannyknot
-
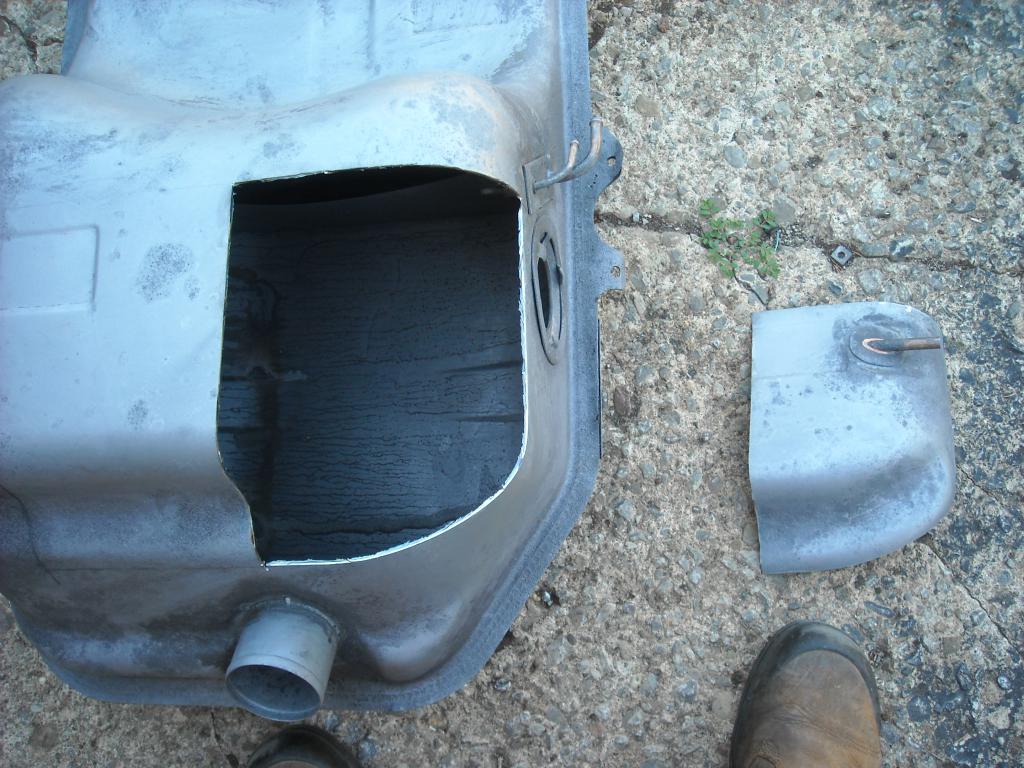
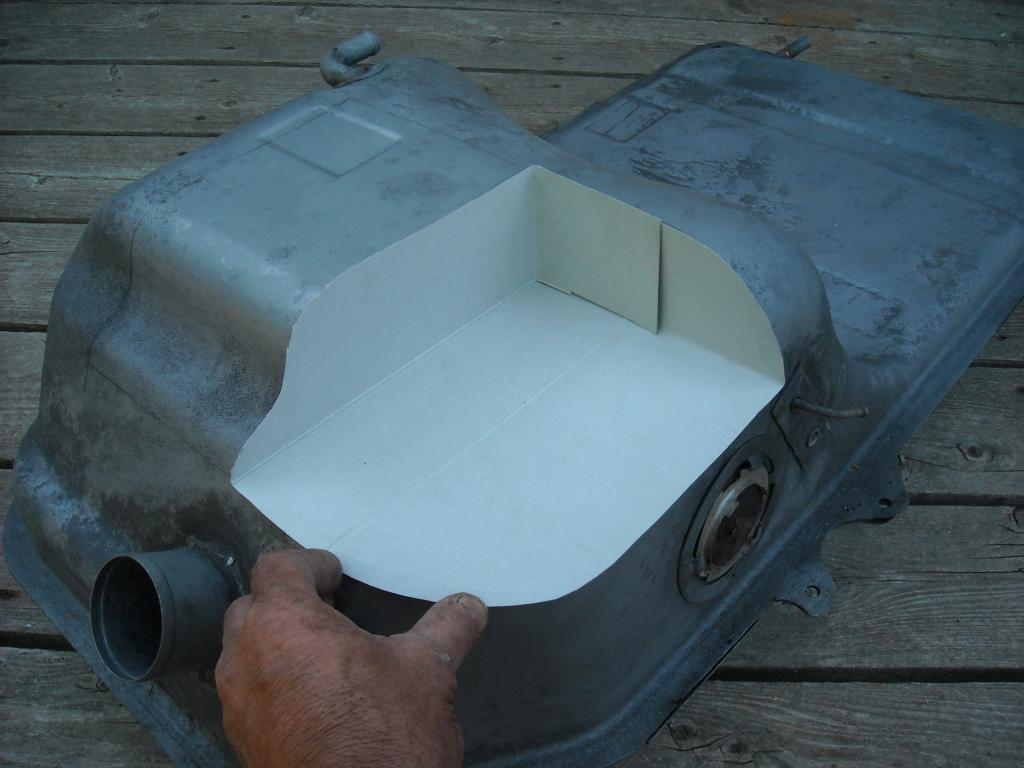
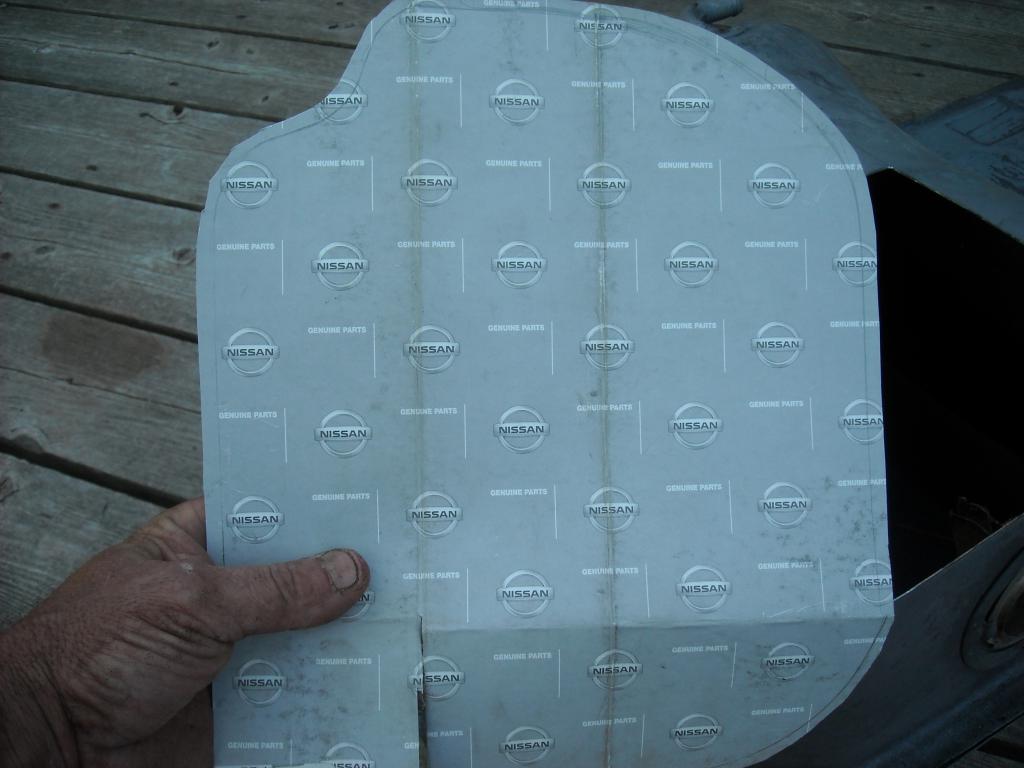
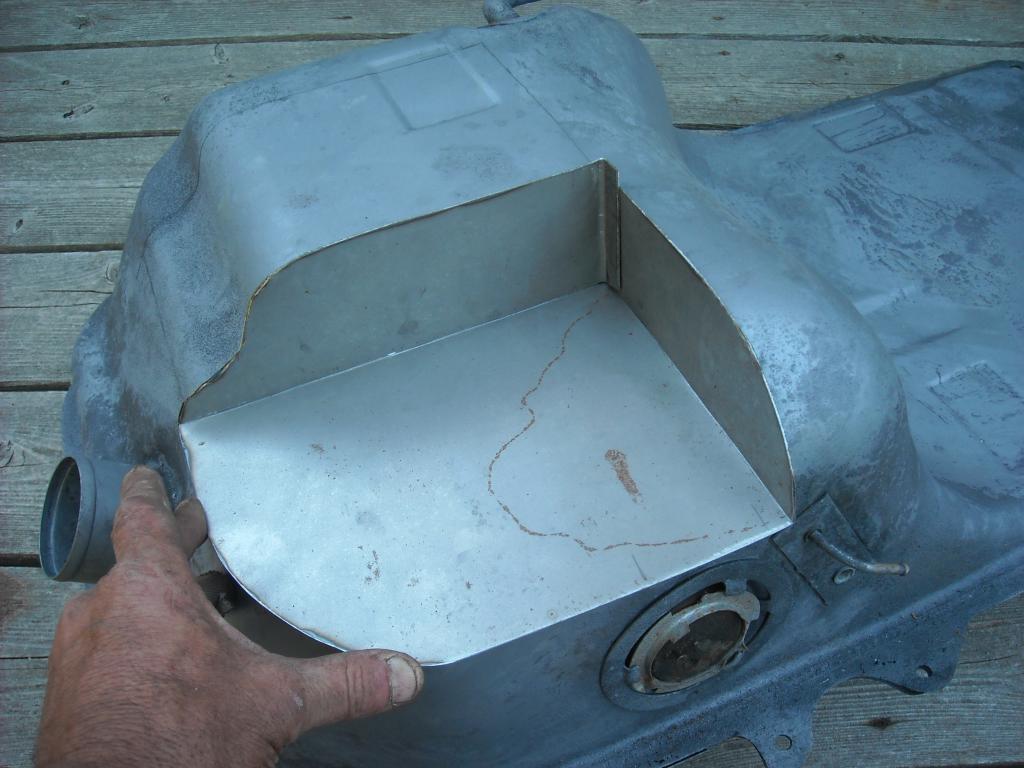
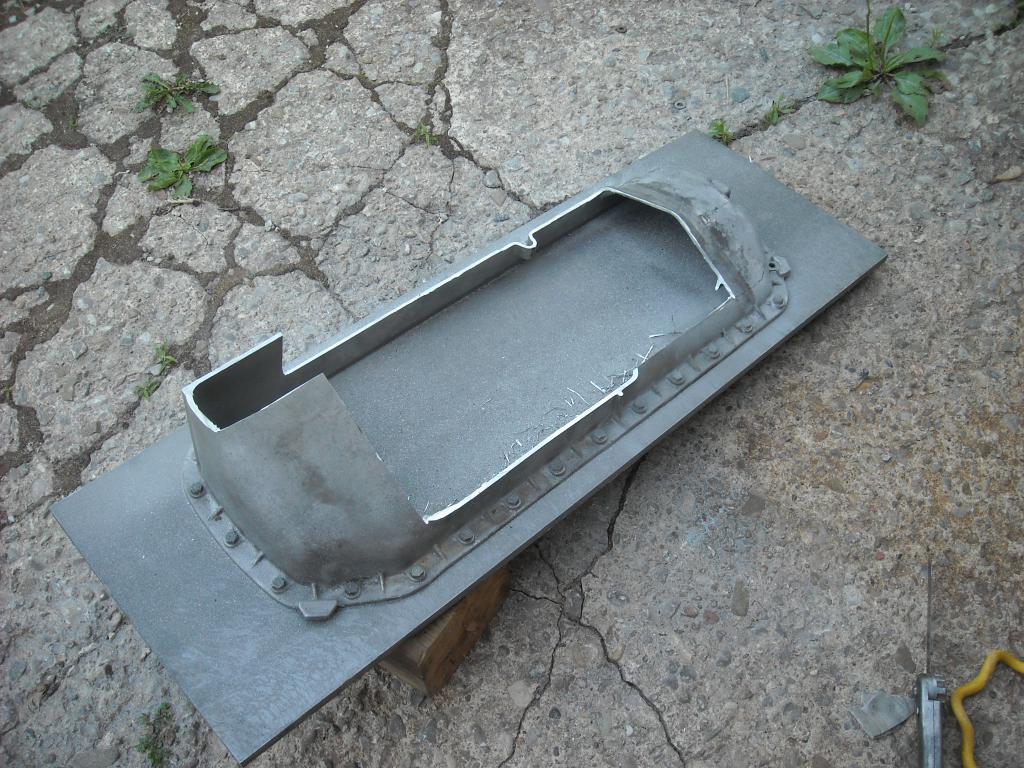
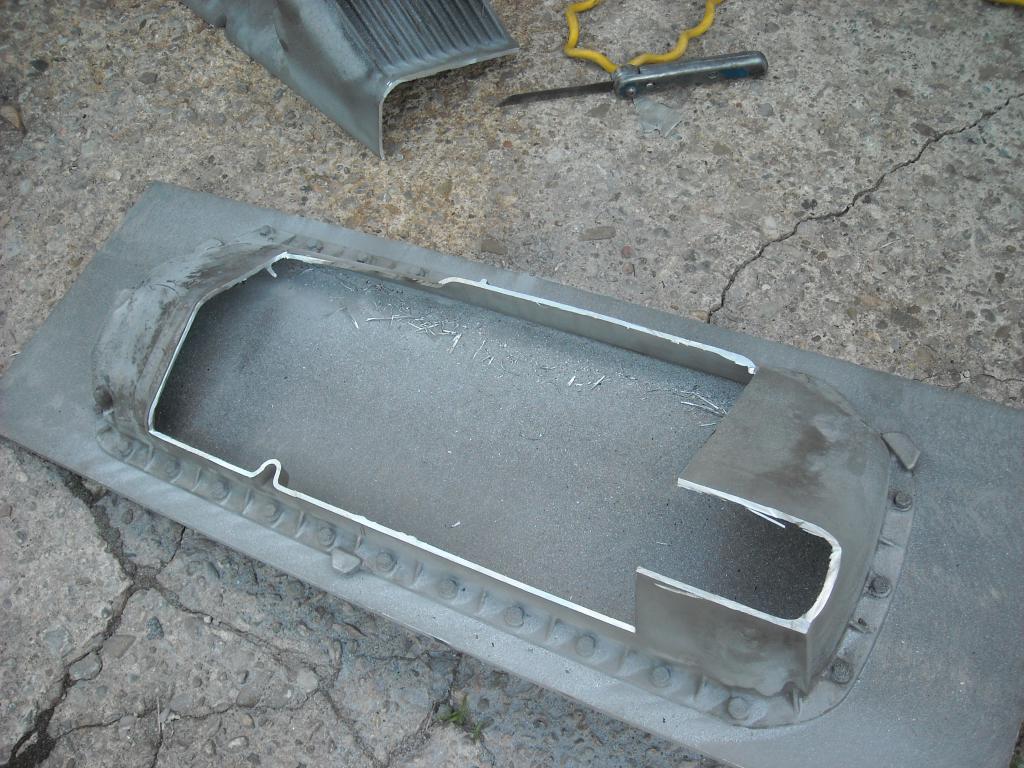
Not having much luck getting the M6 engine going, the ECU is not allowing the fuel pump relay to ground and even with a work around to get the pumps working the ECU is also not sending the pulses to the fuel injectors or power to the Idle control valve. Hitting my head against the wall so I thought I would do something fun like cut into the gas tank. I got the tank back from the chemical dip place, they did a very nice job so now I need to weld in the seat for the bmw fuel pump. I even used Nissan cardboard for the template just to keep everything original

-

Trying to get the ECU to cooperate
grannyknot replied to grannyknot's topic in Ignition and Electrical
OK, I have given the fuel pump relay a common ground and power from the the ignition switch so the pumps start at the second key position,ON and START, I know I have spark, I know I have 12v on the injector plugs but she just won't start up. The starter motor is making some really nasty clashing sounds after a few seconds of starting so I think I will take it in to be rebuilt and scratch my head a little more about what I'm missing. Chris -
ya, it's here, http://www.classiczcars.com/forums/topic/50240-thinking-about-installing-an-bmw-m6-engine-in-my-z/?page=4#comment-496848
-
Trying to get the ECU to cooperate
grannyknot replied to grannyknot's topic in Ignition and Electrical
Chickenman, thanks, I think I have bi passed the whole OBC/anti theft thing by connecting #85 on the main relay to switched power, # 86 is a straight ground wire all the time, #30 and #87 are powered, main relay is working fine with power to the pos side of the ignition coil and power to the injector plugs. The fuel relay has power to #86 and #30 because both of those terminals come straight from the main relay, but no power to #87 because #85 is grounded through the ECU. When cranking the engine I have the fuel feed line off the fuel rail and aimed back into the yellow gas container, there is no power to the fuel pump when the ignition is in ACC or ON or while cranking, the pump only comes on briefly as I let the spring in the ignition switch push the key back to ON when I stop cranking. This is what is driving me nuts, it never did this when installed in the M6. Now as you say I could just find an other circuit that grounds on start up or wire in a separate fuel relay circuit that is triggered by power on and not ground. But something I think I remember reading years ago when I was just getting into the M6 said that the ECU shuts down the fuel pumps under certain conditions, so if I take control of the fuel pumps away from the ECU I may be setting myself up for more problems, or not, I just don't know that much about FI systems. Can you think of a situation where the fuel pumps would need to be shut off while the engine is running? Thanks, Chris -
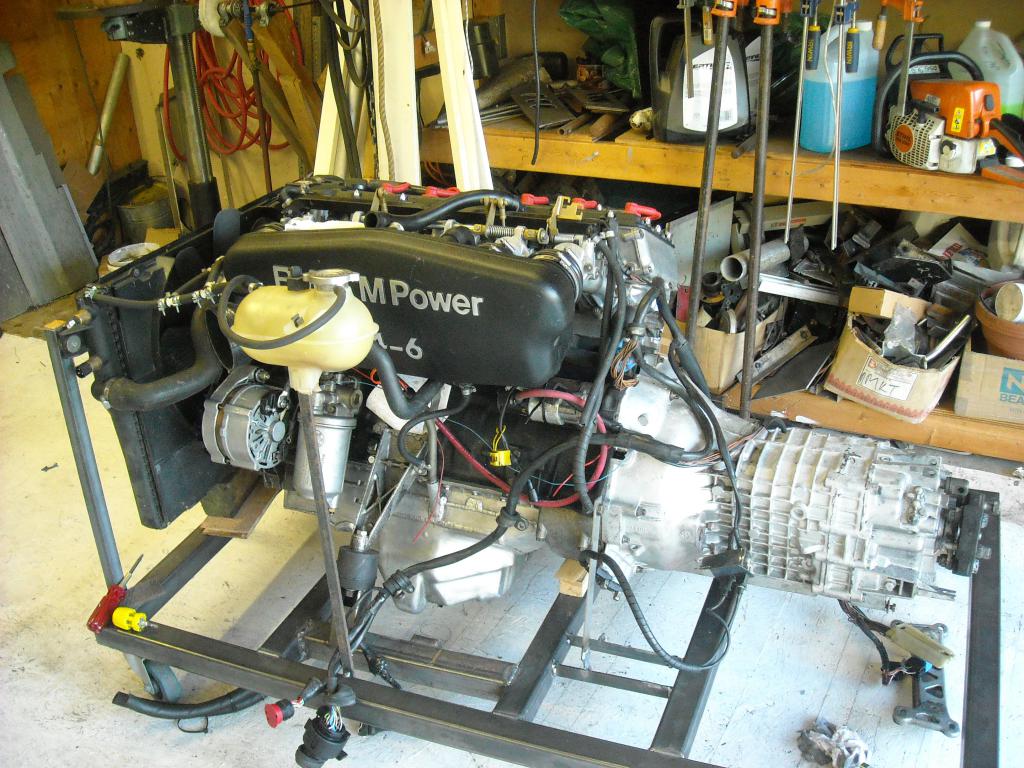
I have an 87 M6 s38b35 engine on a test stand with the proper Motronic 1.0 basic ECU 0 261 200 079 plugged in, I would like to get the engine/ECU running as an independent unit for testing purposes but ultimately it will go in my 72/240Z. The build thread is here,http://forums.hybridz.org/topic/122185-m-powered-z/ Everything is hooked up, engine is turning over with the starter, I have power at the main relay, injectors and coil but can't get the fuel pump relay to work, the ECU controls the #85 ground wire to the fuel relay and I guess I haven't met all the conditions that the ECU needs for that ground to be connected yet. I think I have narrowed it down to pin 3, 4,5,9 or 14 on the main engine plug, all of those wires go into the cab, pin 17, the burglar alarm is what controls the main relay. Pin 3 injection signal, I'm not sure what that does but the ECU should already have that , pin 4 coolant temp transmitter, same thing. Actually the ECU should have signals from all those systems before they come into the cab, this is what is making me shake my head. Can anyone see another reason why the ECU is not connecting #85 on the fuel relay to ground? Thanks, Chris
-
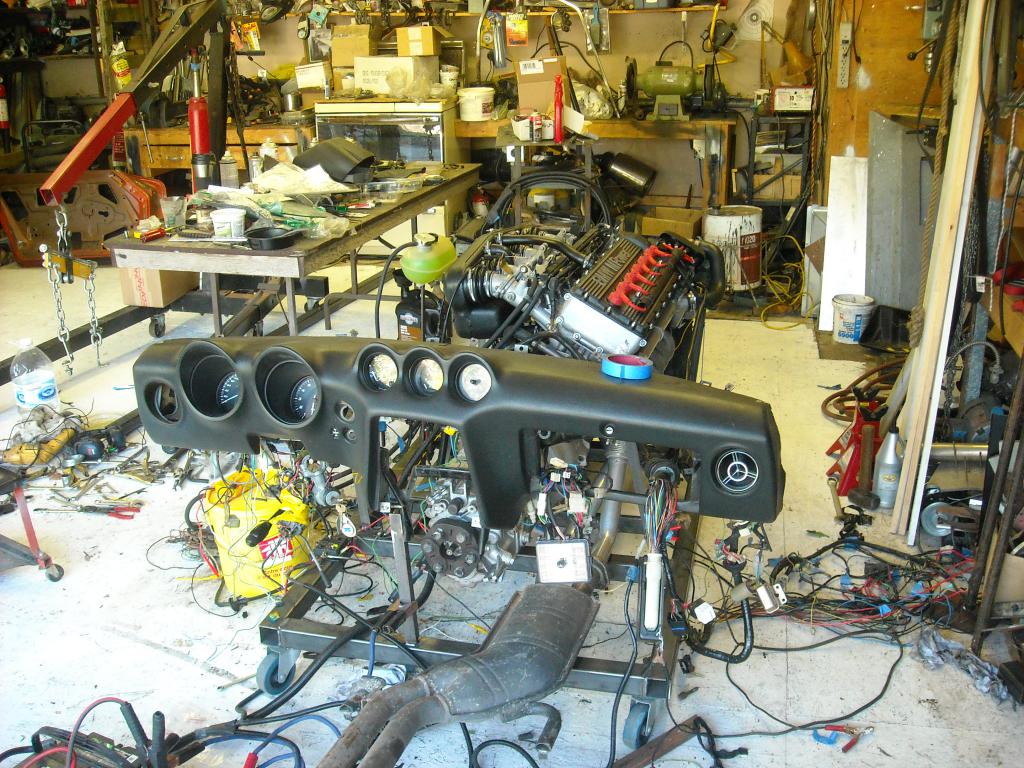
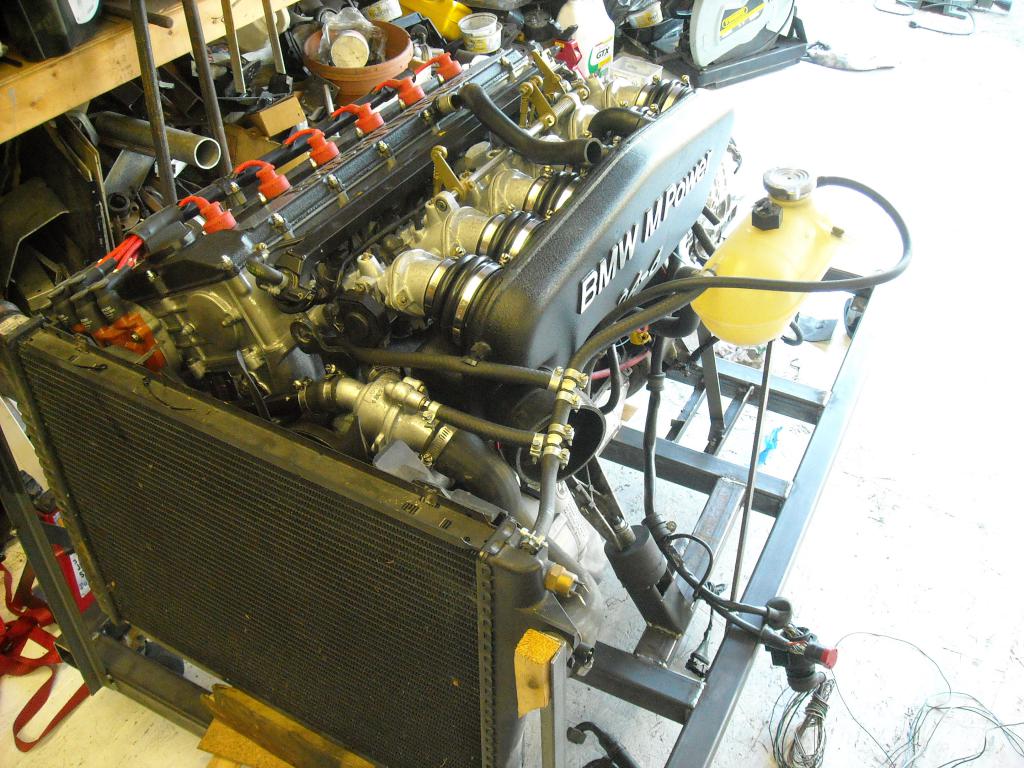
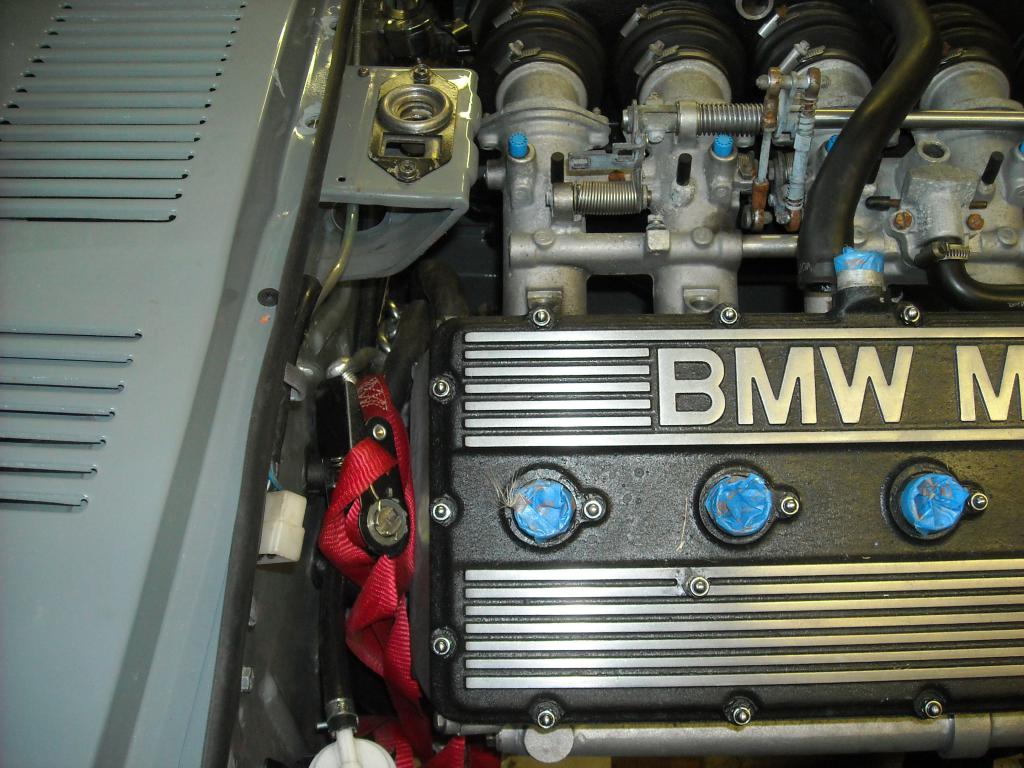
I got the engine turning over and figured out that a lost burglar alarm wire was preventing power from getting to the main relay but now the fuel pump relay is being difficult, I have pwr on #30 and pwr on #86 but not #87, I can jumper between #86 and #87 and the pump works fine, I have tried 4 known working relays with the same result, I'm shaking my head. The last pic is the diagram of the bmw wires coming into the 240Z, now I'm thinking maybe that #3 Injection signal is connected to the fuel relay some how. I don't have the bmw instrument cluster anymore so I not really sure why the injection signal in needed inside the cab. I know it looks like a rats nest of wires but they are all secure and wrapped. The fire extinguisher canister is actually a pressurized pre-oiler.
-
Thanks guys, you know even with the everything exposed on the test rig with easy access to every part and wire it's still a feat of patience and concentration to run through every wiring path and system. I think it would have a been a bit of a nightmare to have just dropped the engine in and then try and figure it all out. I think I may be able to start the engine up by the weekend, just have to wire the gauges in now .
-
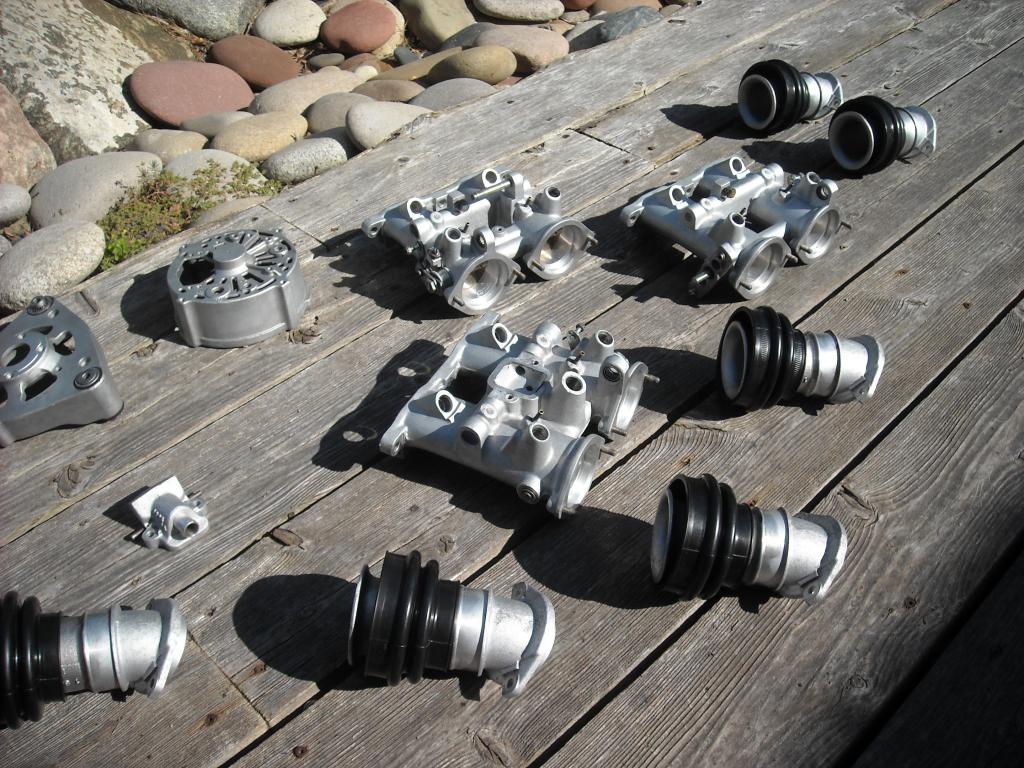
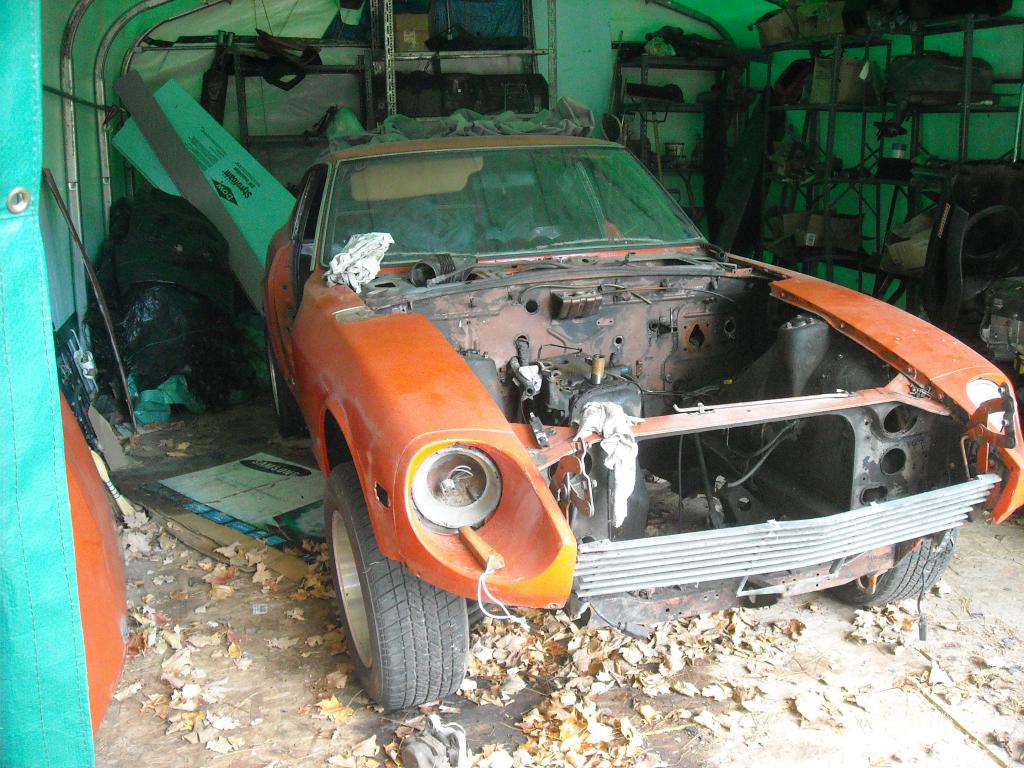
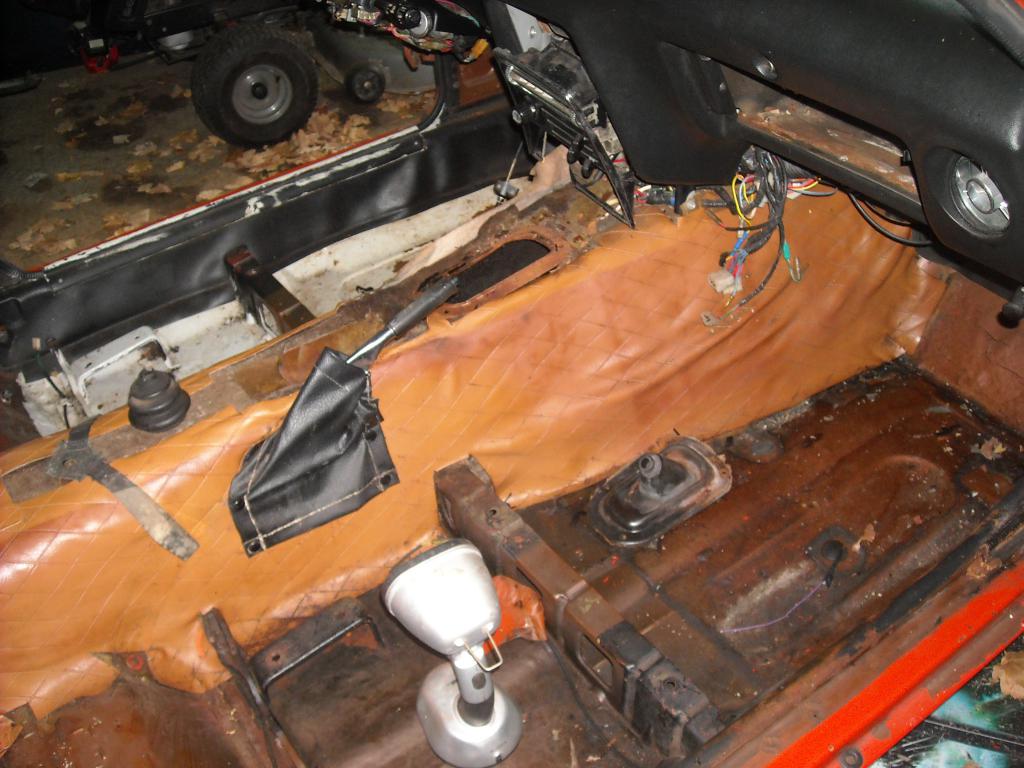
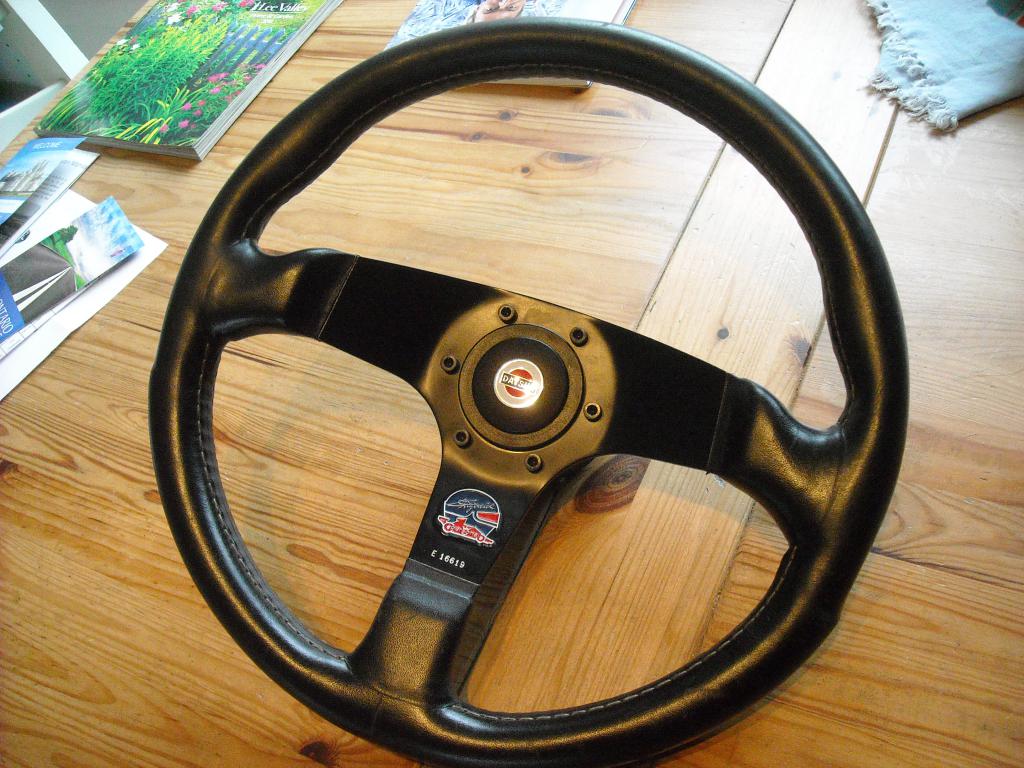
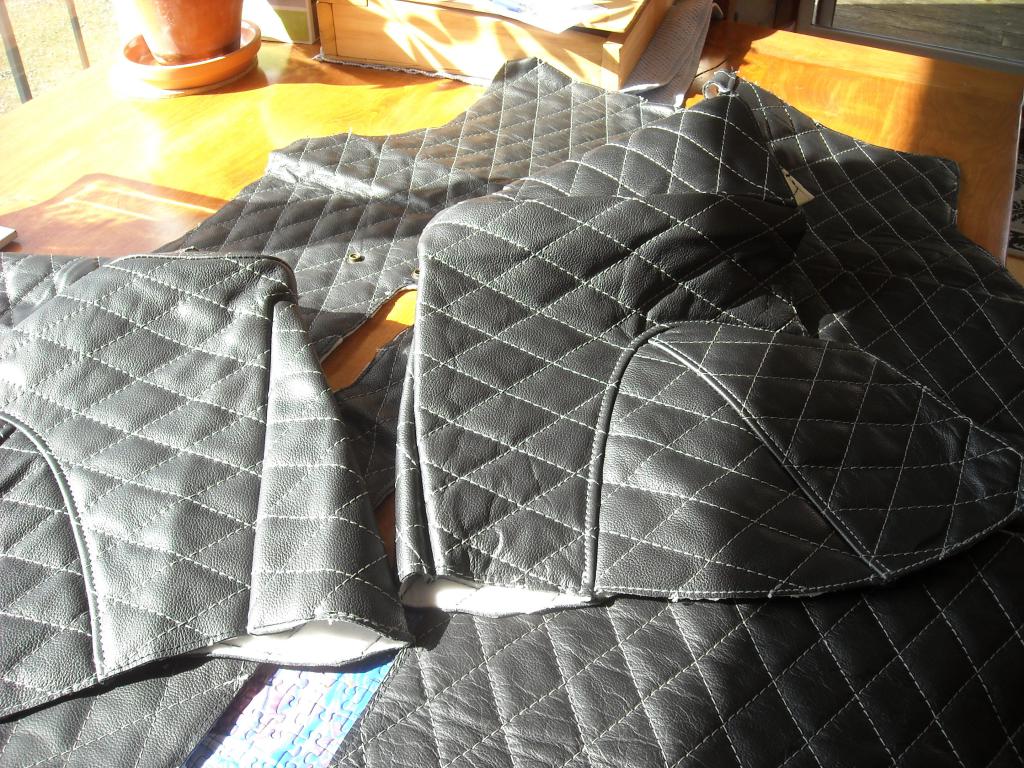
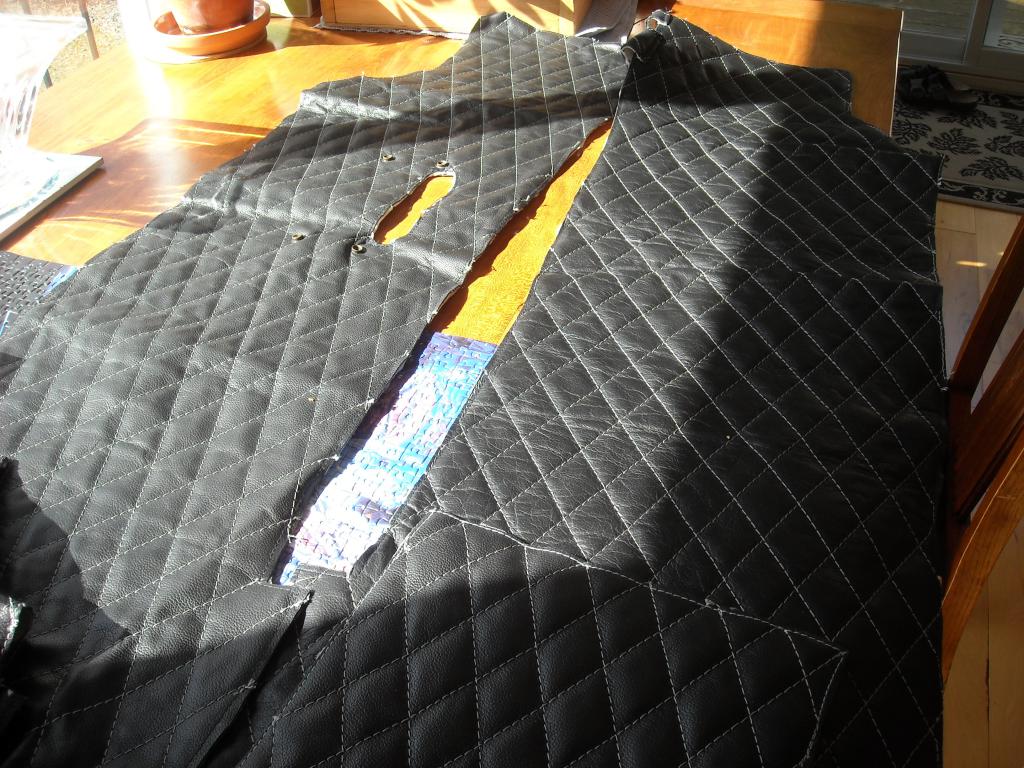
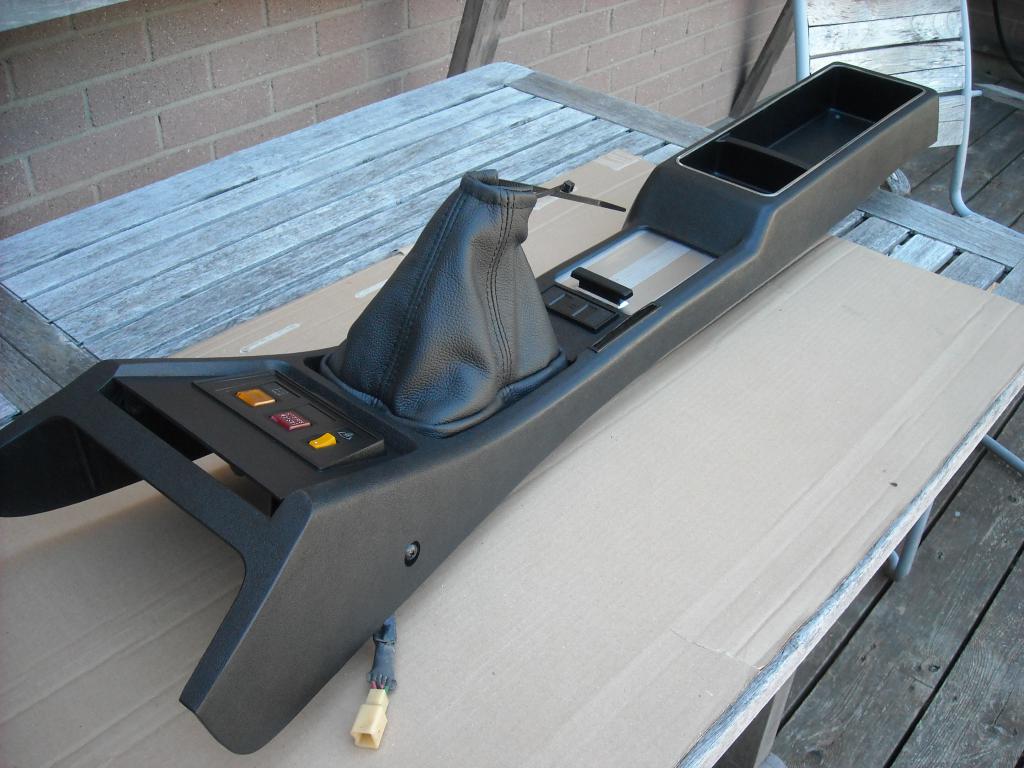
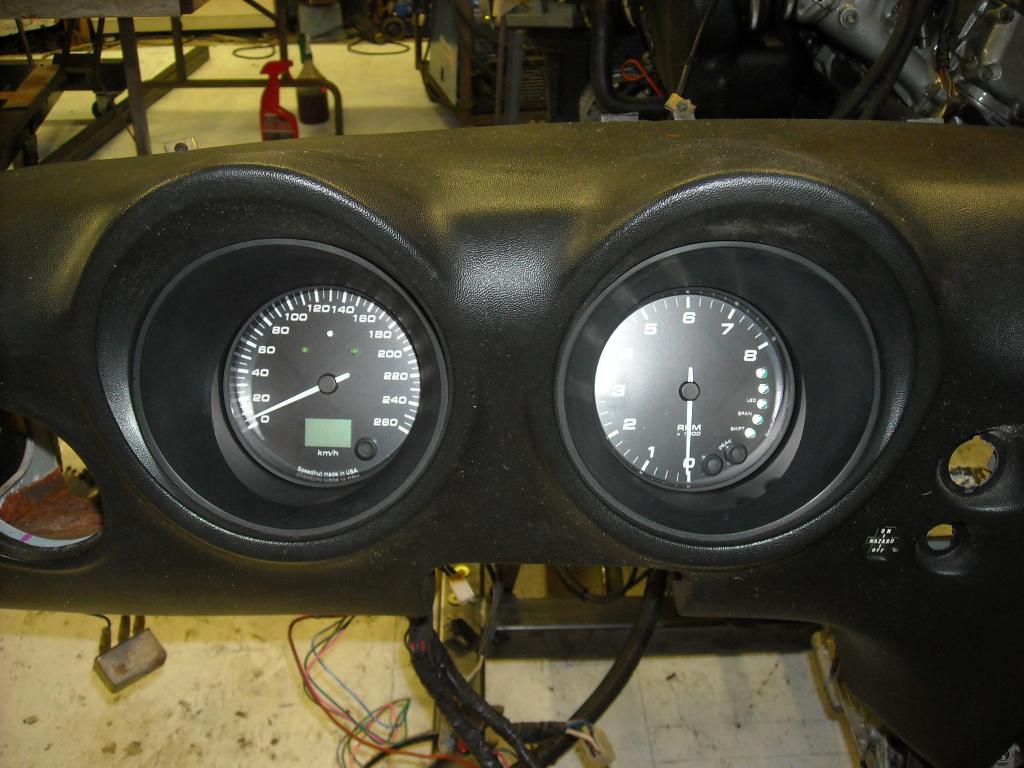
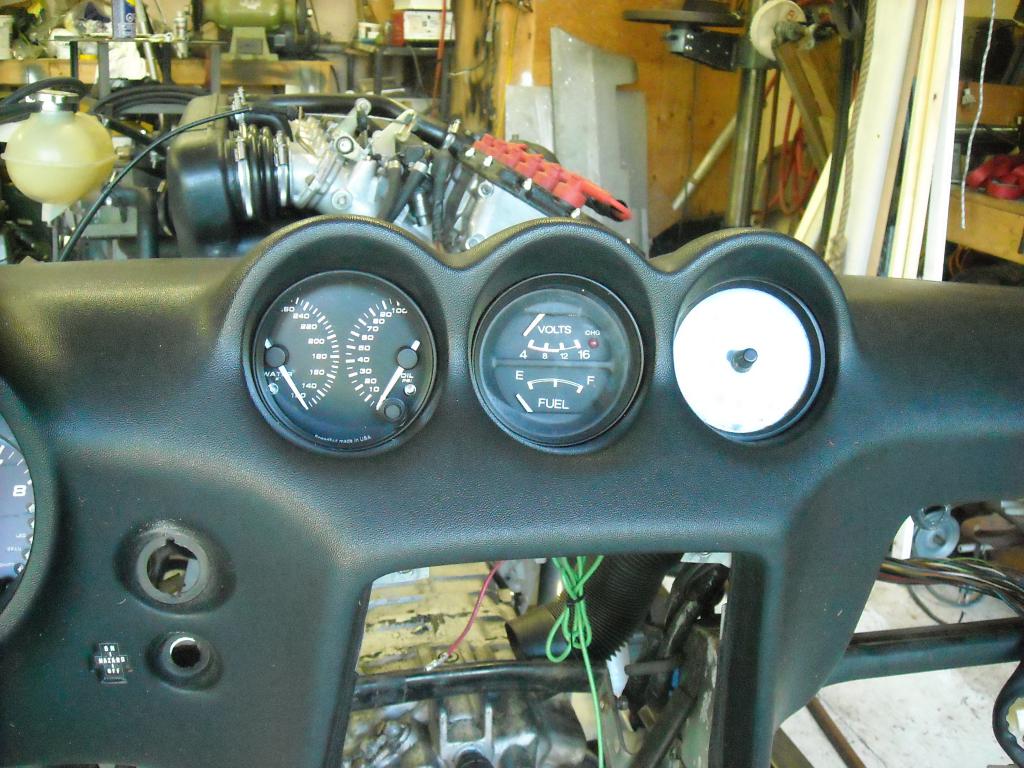
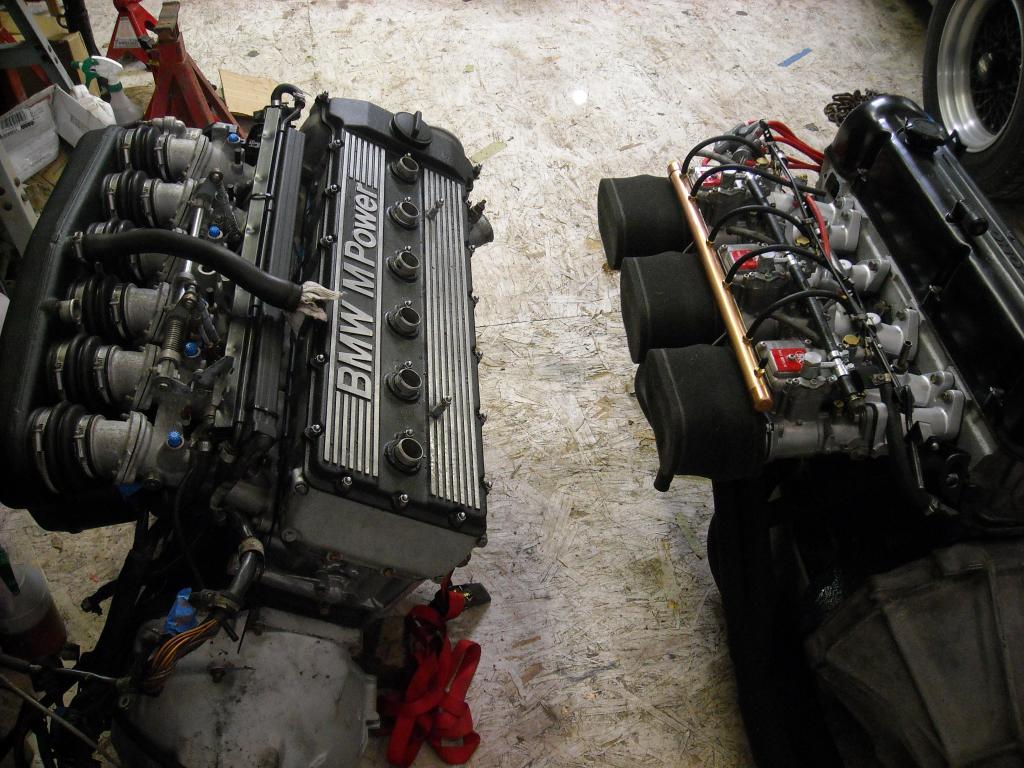
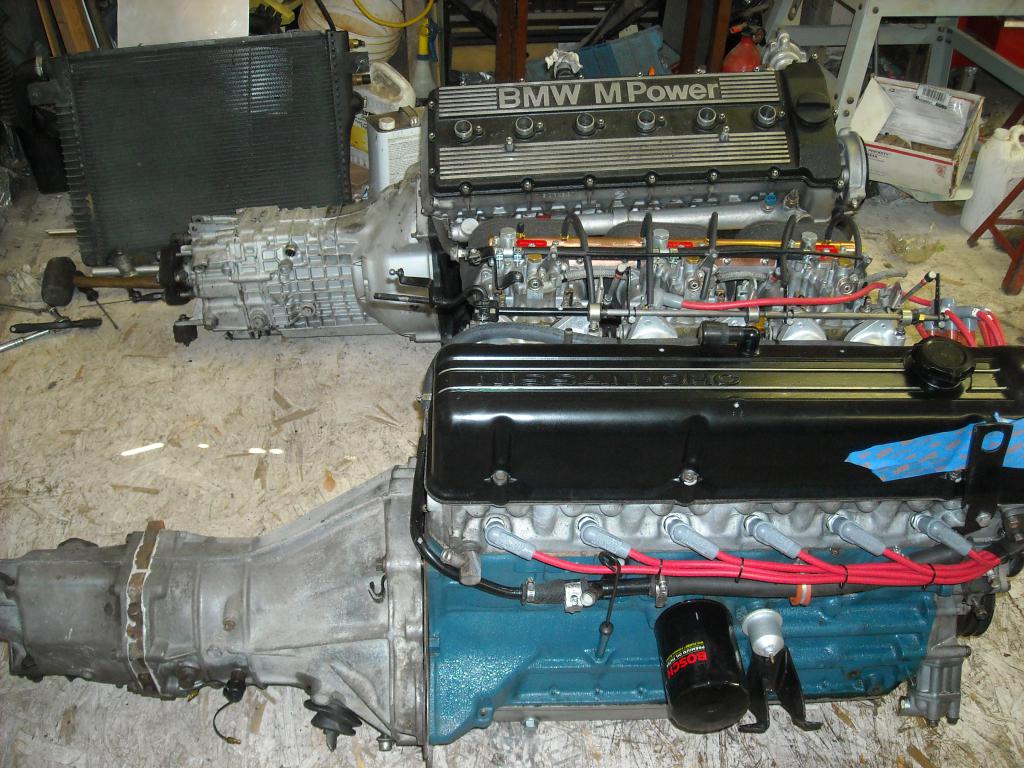
Been a while since I updated this, I sold the early Z so all my attention is back on the MZ now. I got the throttle bodies torn down, cleaned and coated with Por15 Glisten, very tough stuff. Here is the 1972 Z that will be the MZ, later after I get the the driveline fitted I'll be taking the shell down to the chemical strippers to have it dipped, that will save me months of cleaning and stripping and hopefully will get the smell of mouse piss out of the car. Found a 1981 MOMO steering wheel at a swapmeet, it will go well with the 350Z seats and leather interior. I got the engine test rig built and have almost finished the wiring to get the engine running then I'll need to integrate the Datsun harness so the two work together. The Speedhut gauges arrived and they fit perfectly into the gutted housings of the gauges I am replacing.
-
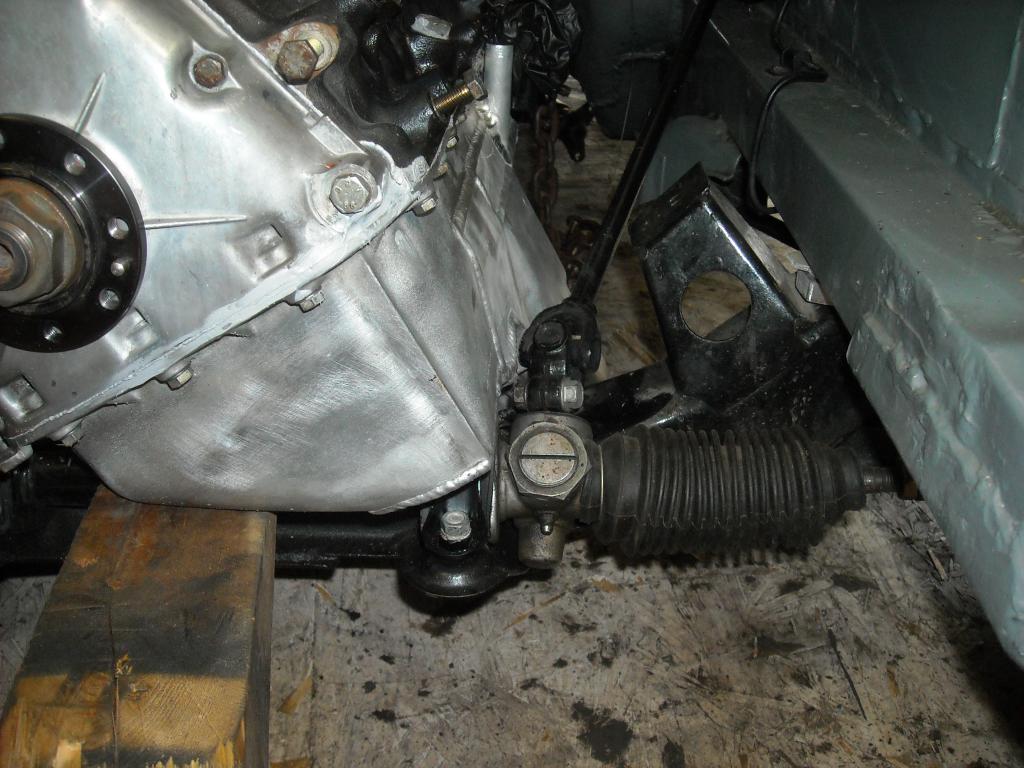
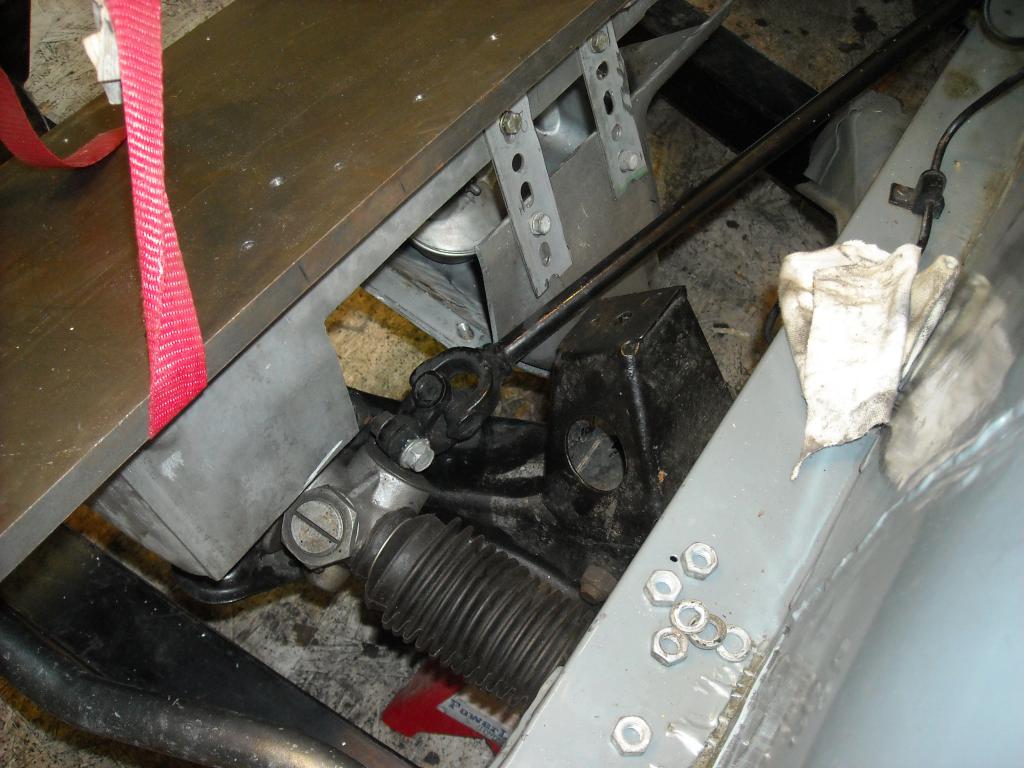
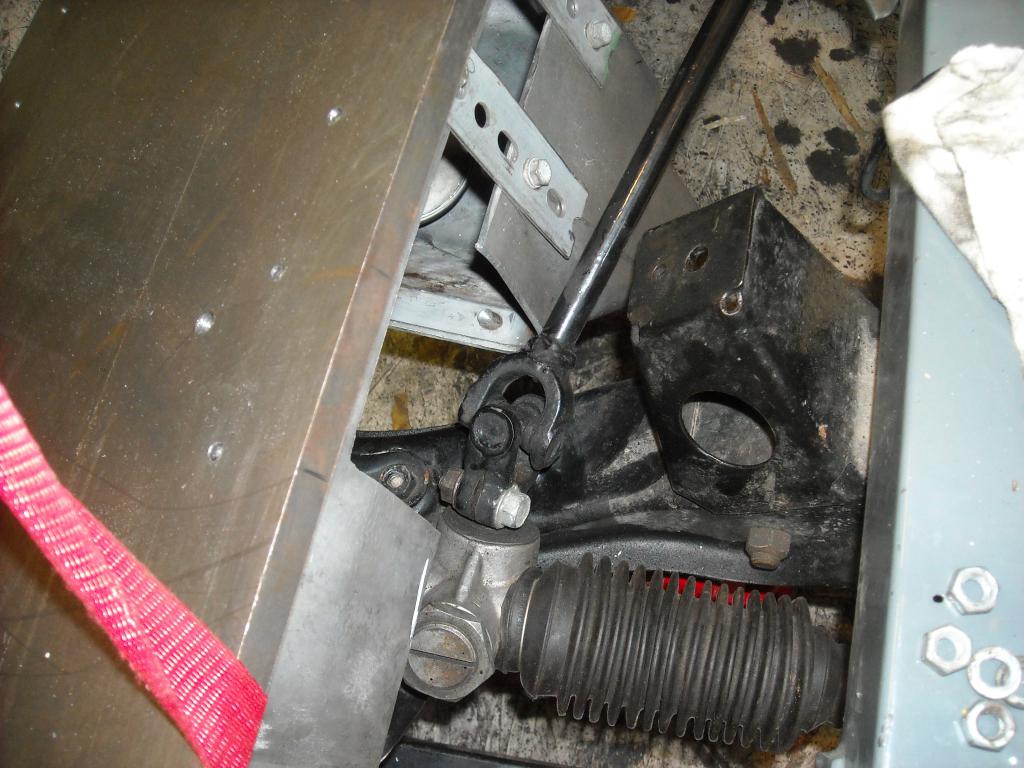
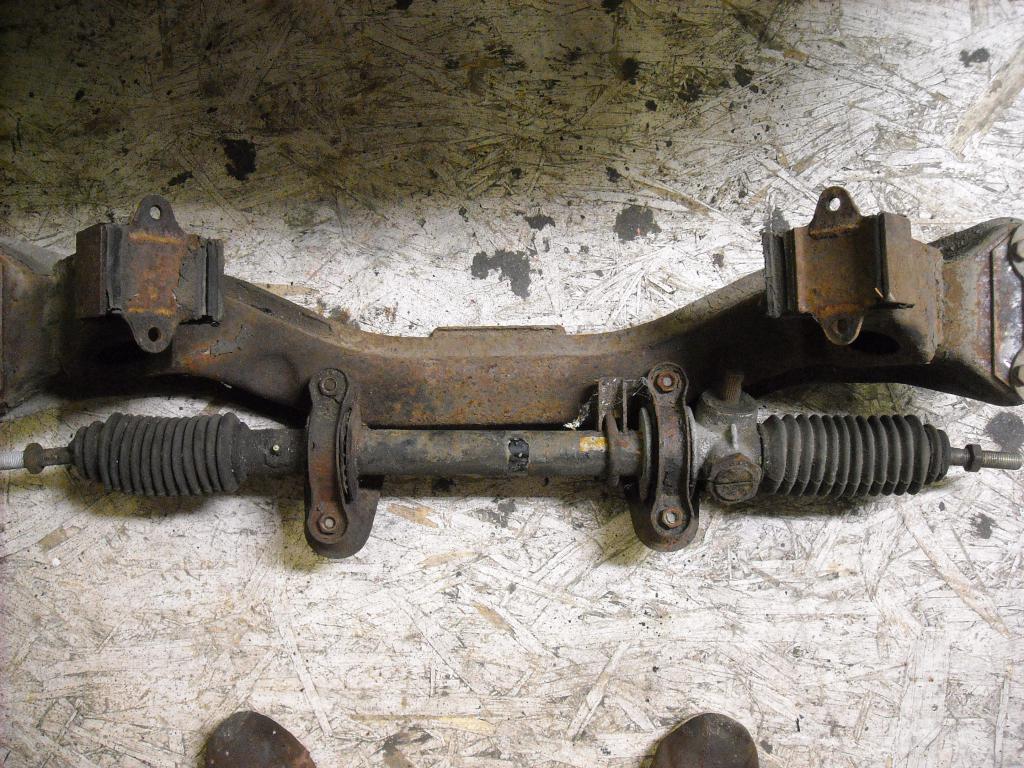
I have lowered the just the steering rack 7/8" which will solve a couple of problems, give me more room to match up the drive shaft angle and I won't have to notch out the P/S floor pan now. The steering tie rods will be pushing/pulling almost parallel to the rack, not sure yet how that is going to affect handling. Any advise ?
-
I would just cut each side out one at a time and install new pre-made pans,http://www.datsunzparts.com/products.html Charlie's pans are fantastic and cheap for what they are. Patching is good for a few rust spots, yours will look like a quilt by the time you're finished. Good luck, Chris
-
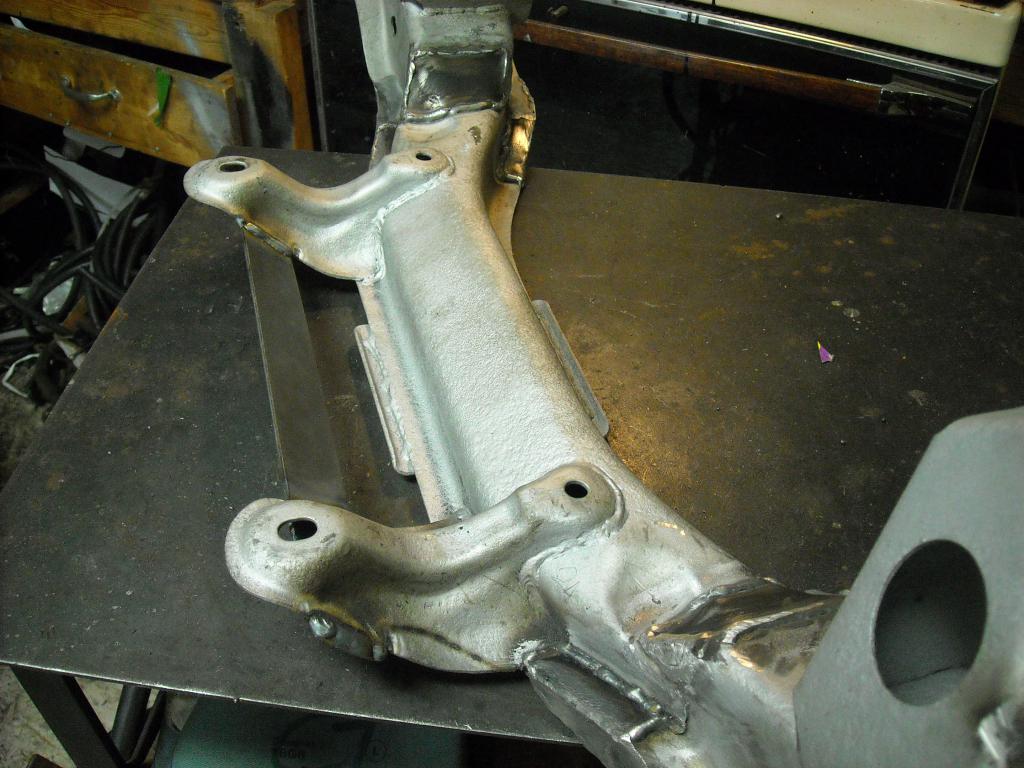
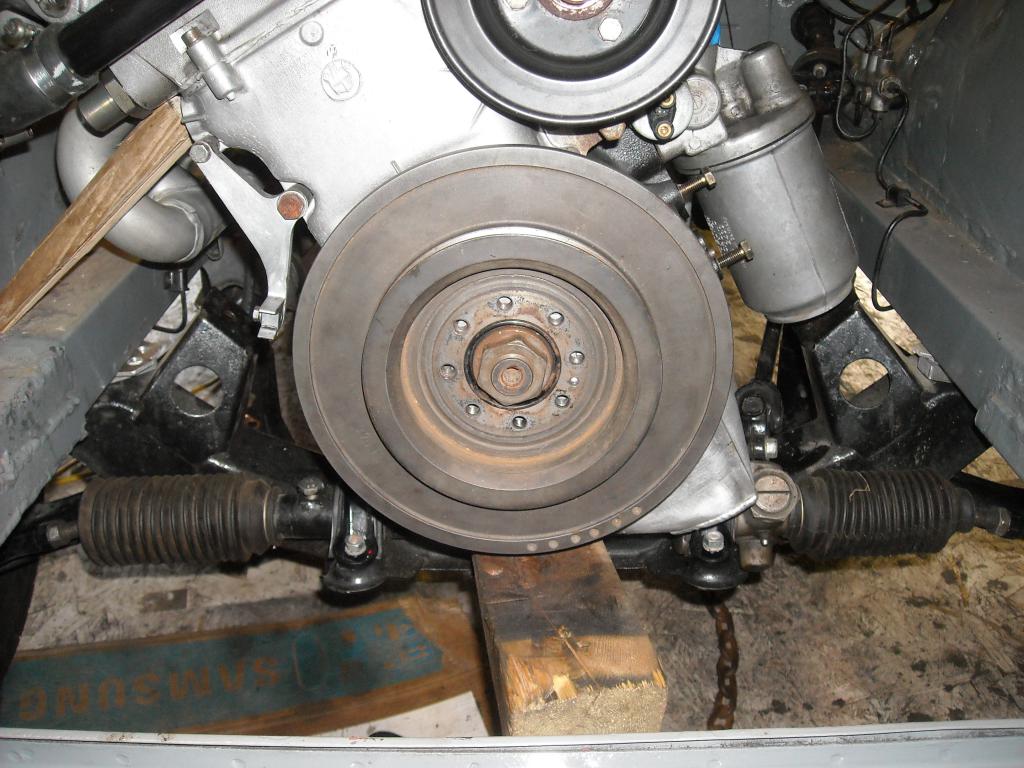
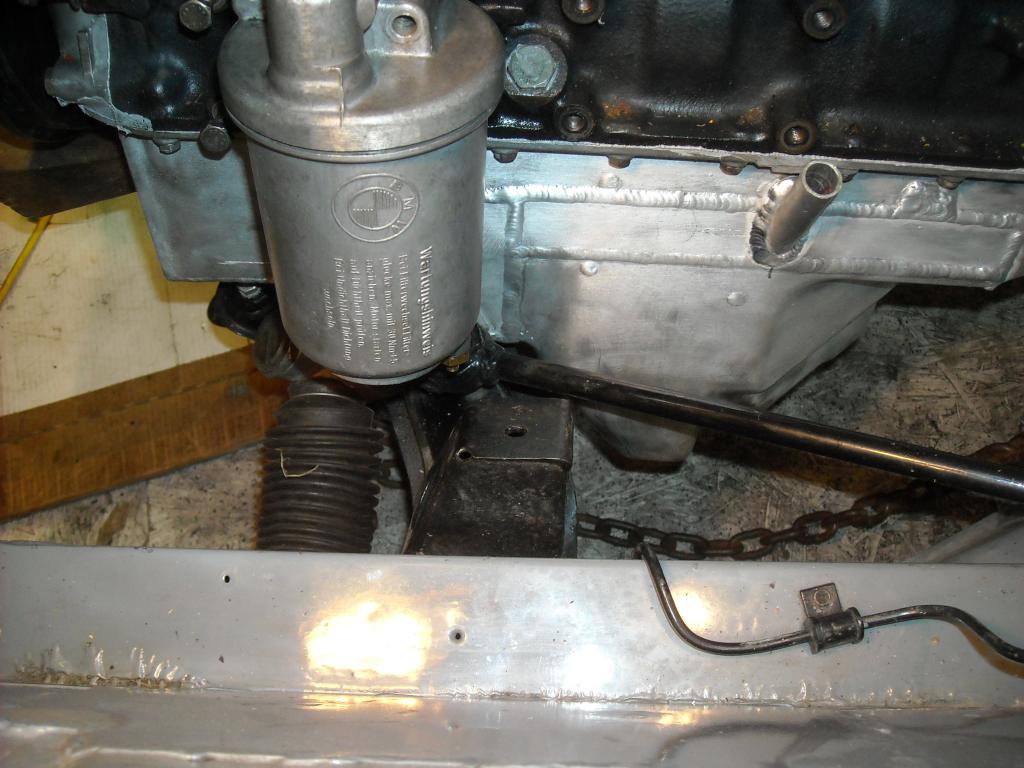
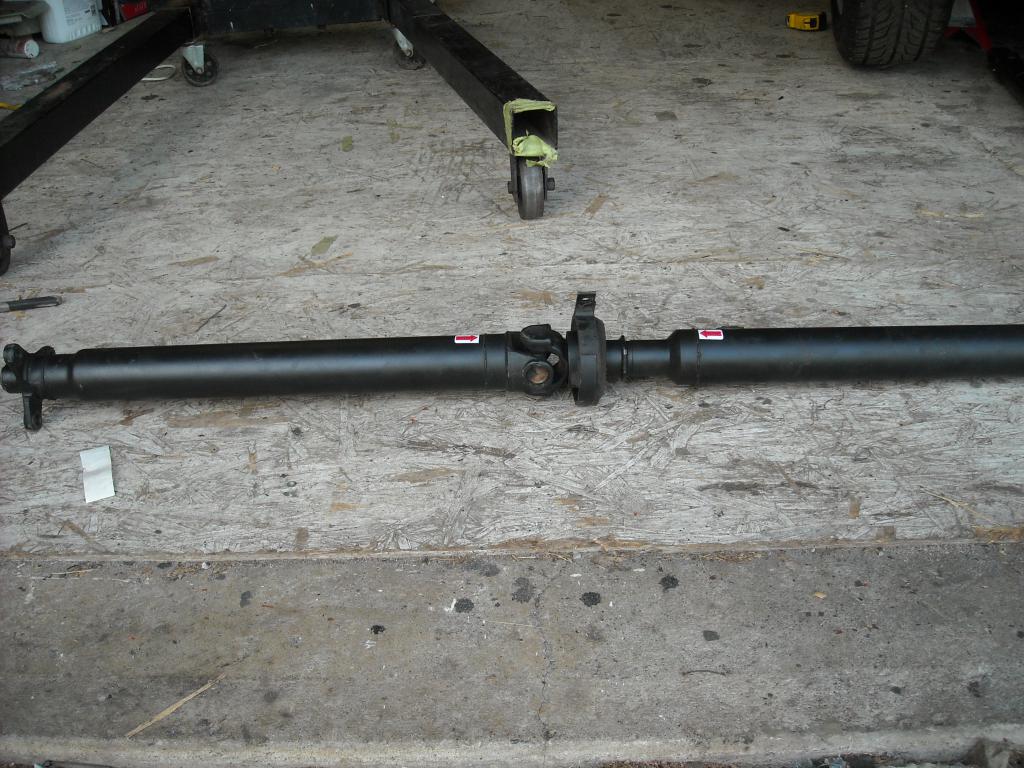
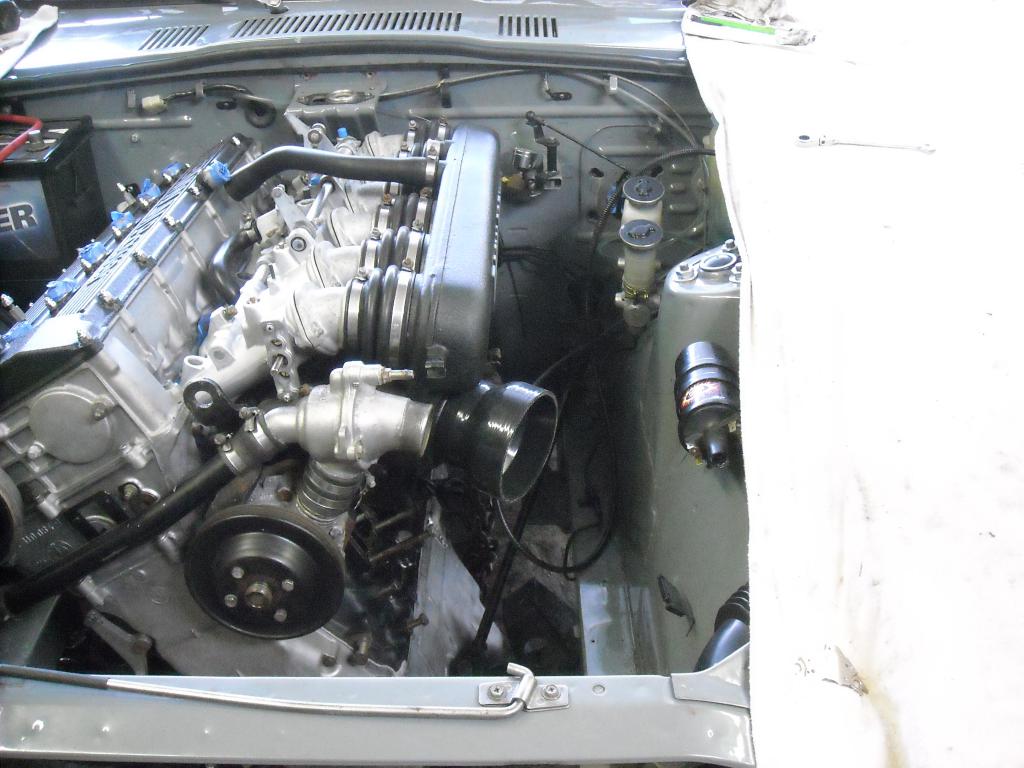
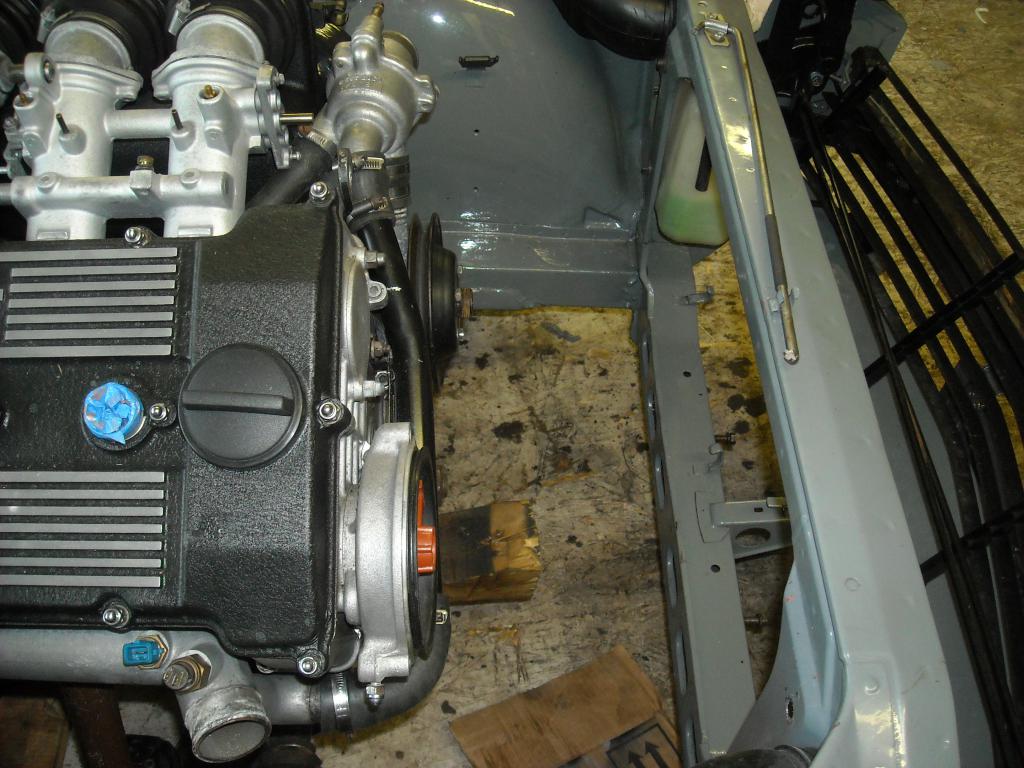
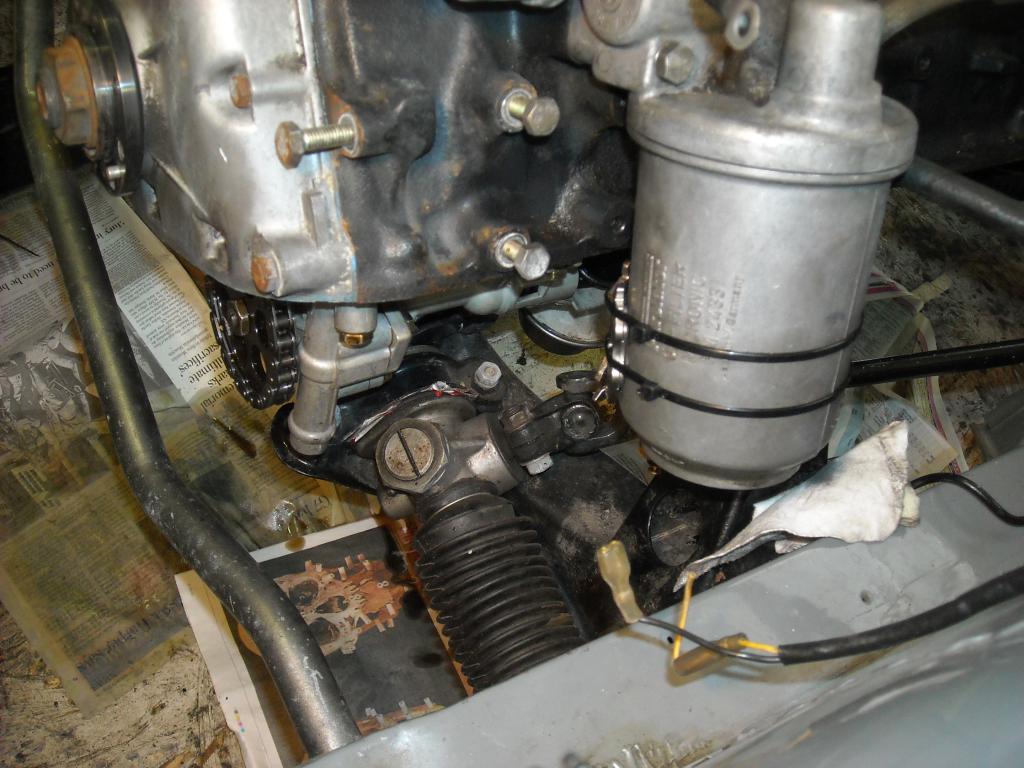
I thought I would be taking measurements for the engine mounts but I'm a long way from that, there are a few of interferences that I'll have to get rid of first. The sway bar will be easy, just drop it down 1/2" with spacers, I'll have to shave a bit off the side of the D/S engine mount to clear the oil filter, the P/S floor pan will have to be notched out to clear the exhaust pipes and a heat shield of some kind will be needed to protect the P/S engine bay and wiring harness. The driveshaft angle looks like it might cause some headaches but atleast I have three u joints to spread out the differences. There are definitely easier bmw engines to swap in than this one and if I run into too many more issues I may have to re-think things. I don't want to compromise the Z or driveability, but I am a long way from giving up. Chris
-
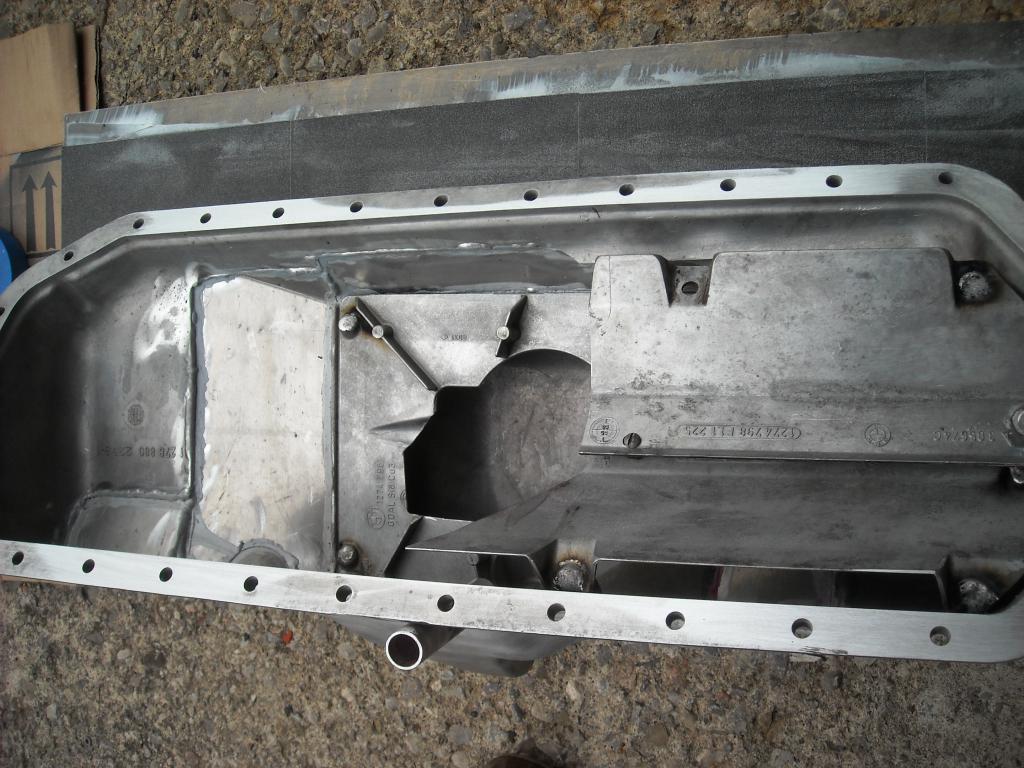
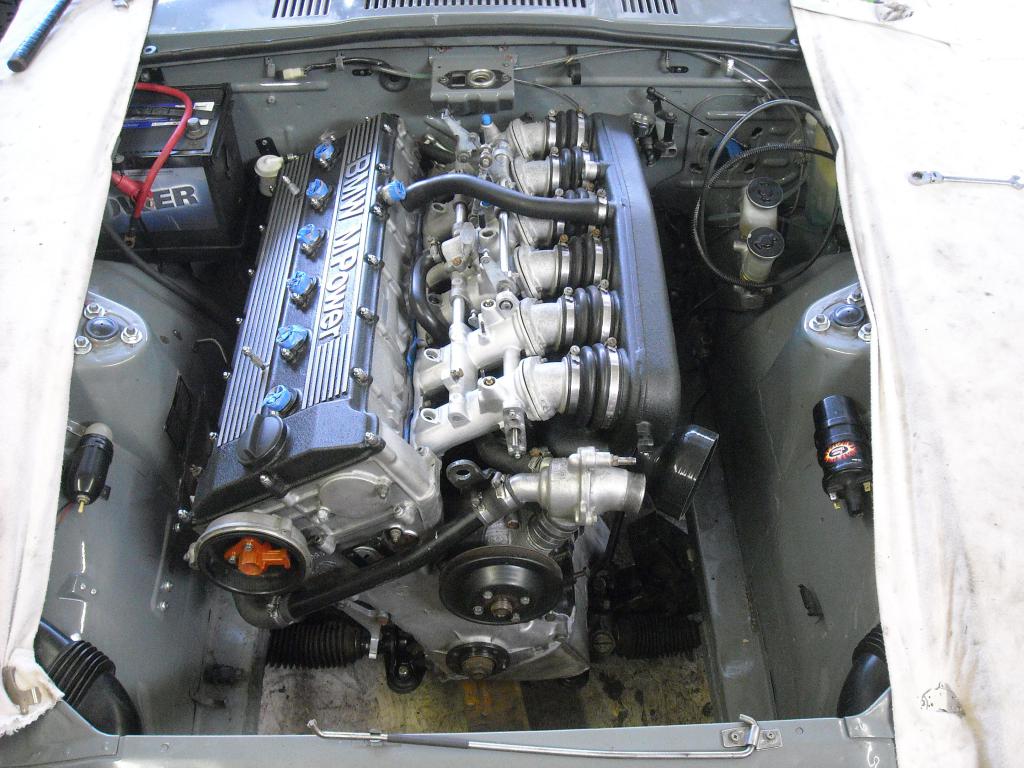
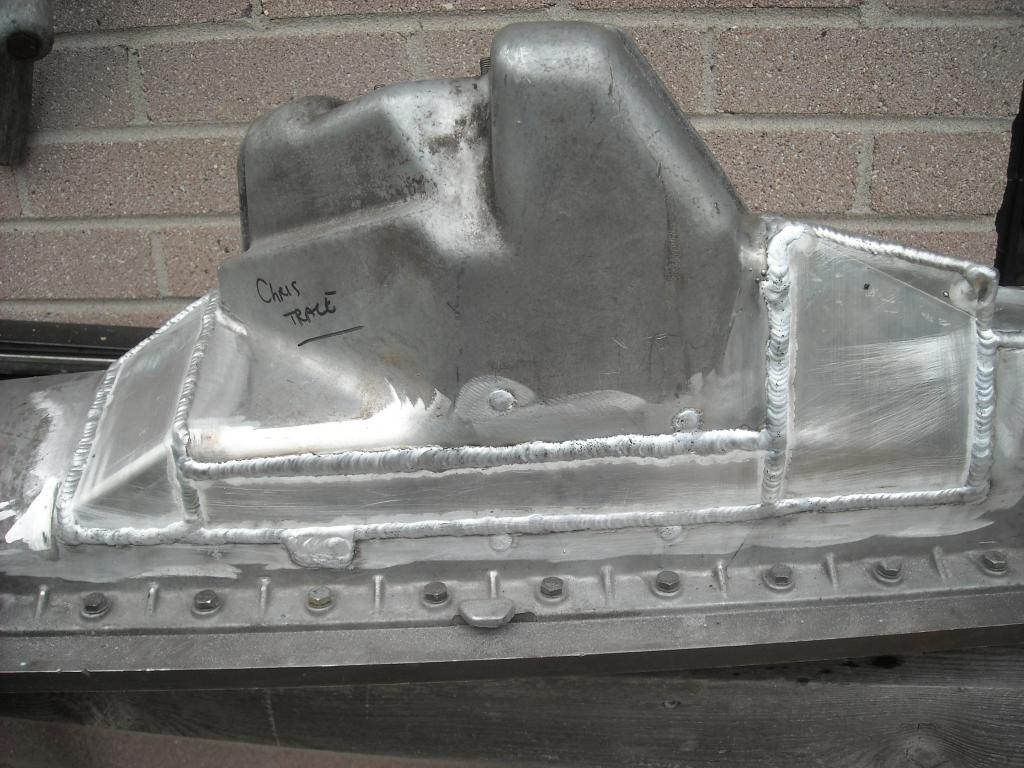
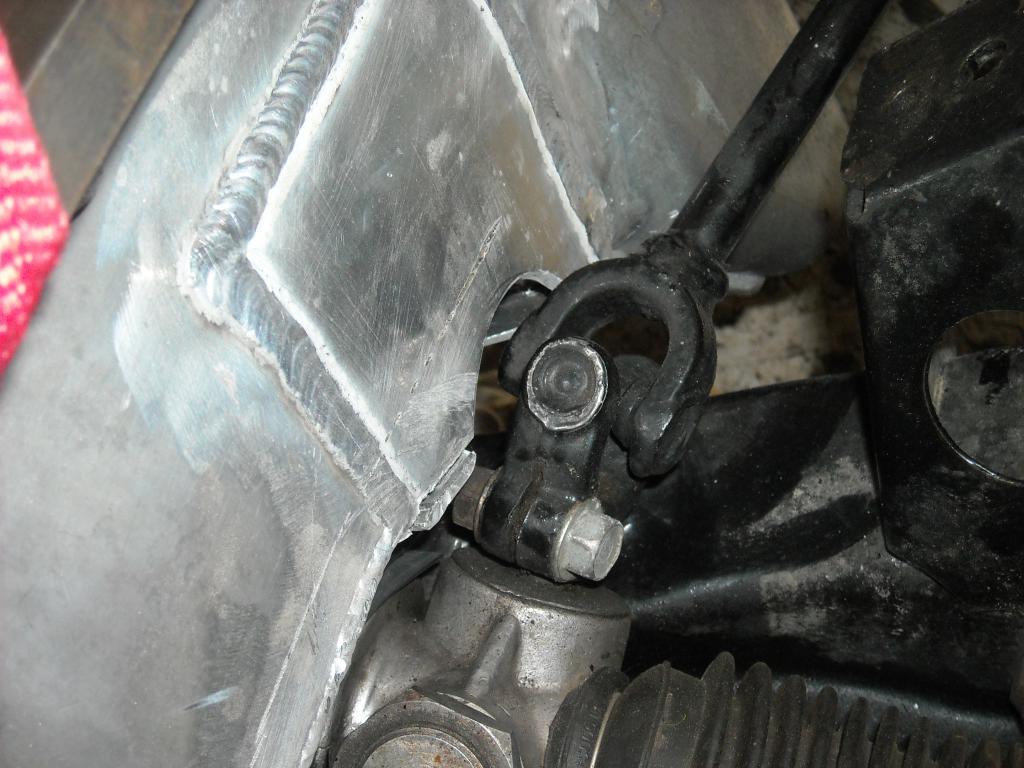
The pan is finally done, dip stick holder welded in and I did grind it flat with the steel plate and emery cloth. These are some test fit pics with the modified oil pan installed, everything fits under the hood but it's still little tight around the steering rack. I may still have to cut up the crossmember and drop the steering rack down 3/4".
-
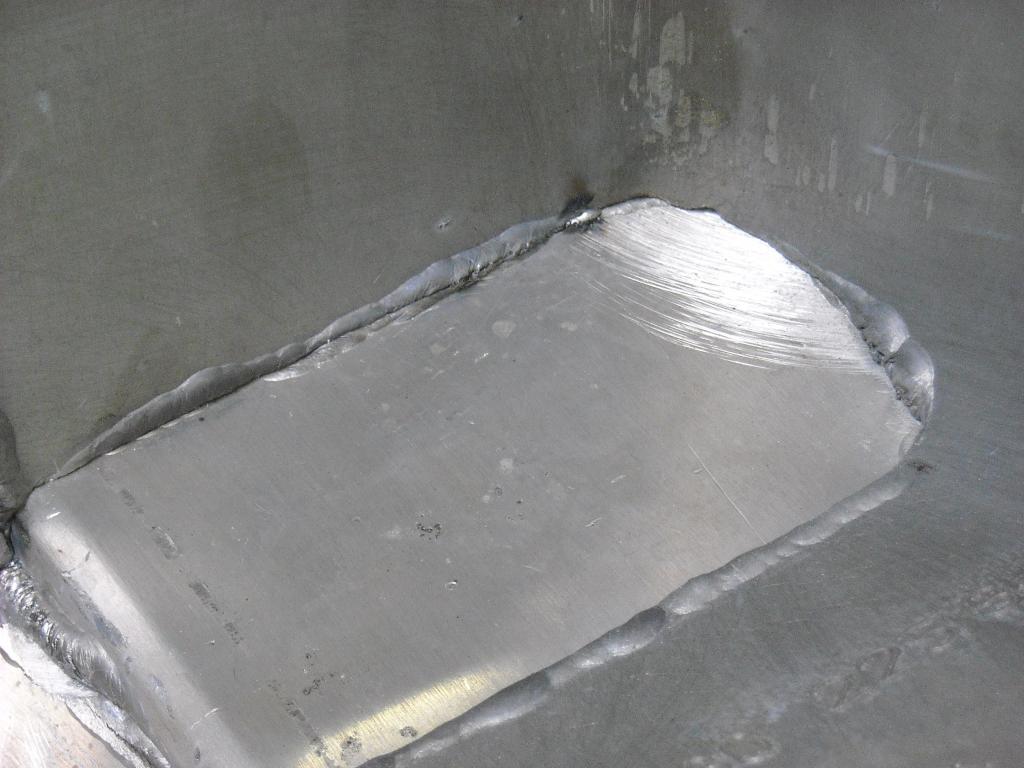
Need some opinions about these welds
grannyknot replied to grannyknot's topic in Fabrication / Welding
TimZ, that's a great idea, exactly what Glyptal designed to do. Thanks -
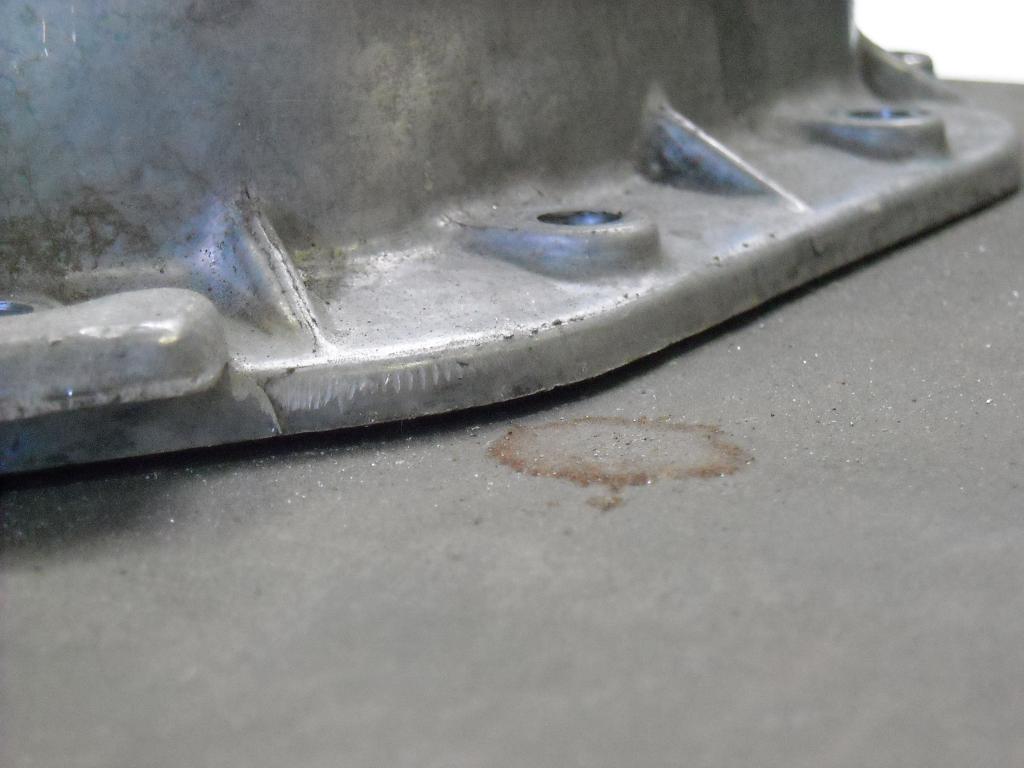
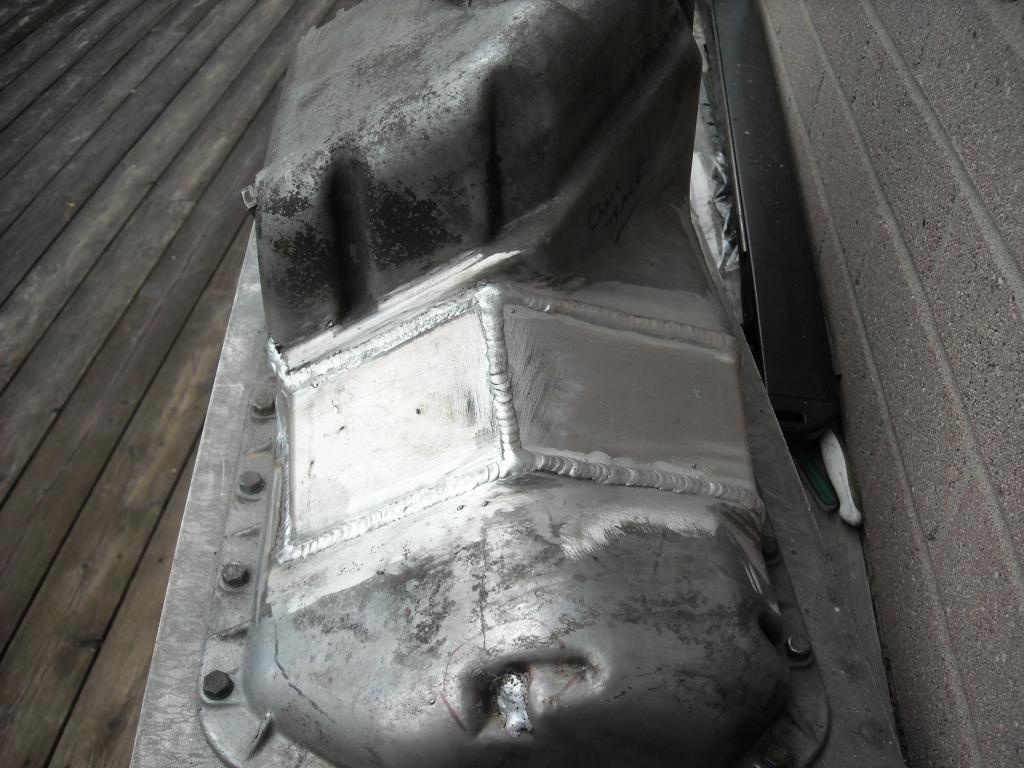
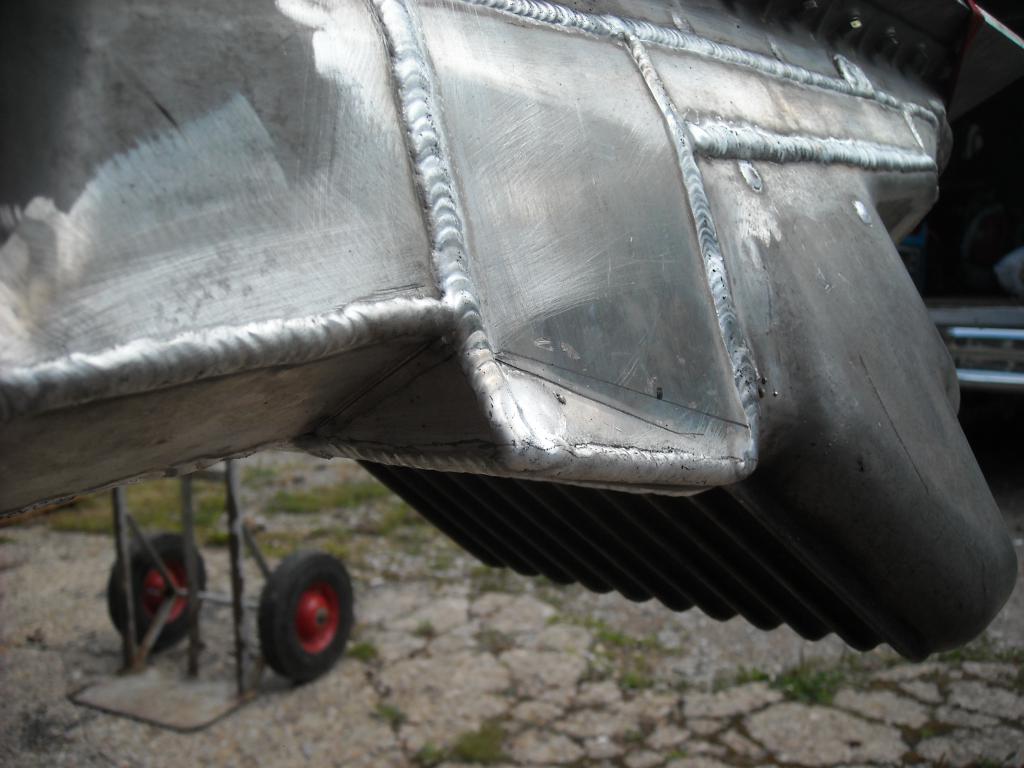
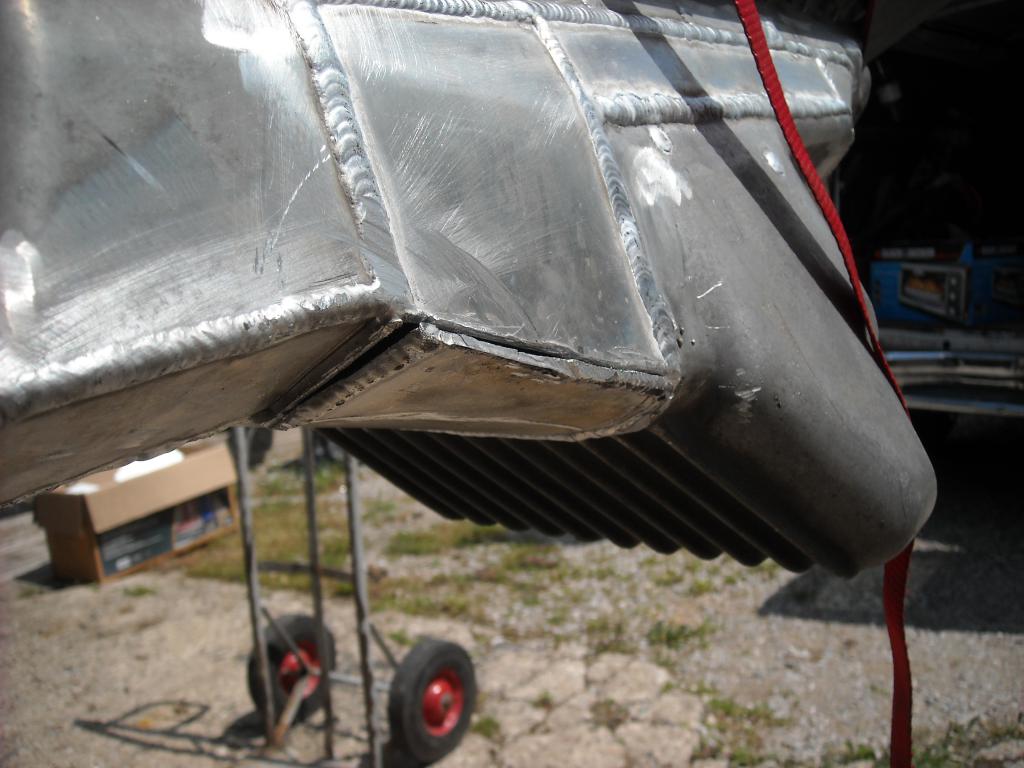
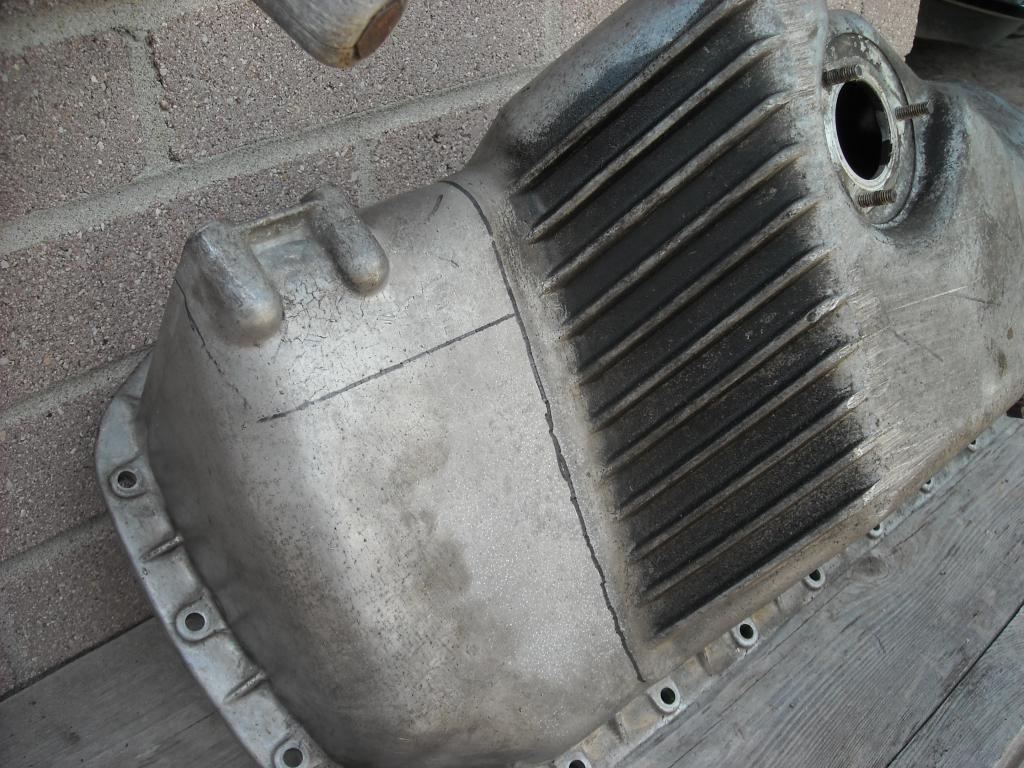
Finally got the pan back from the Powder Coaters, he wasn't coating it though. I had him take the pan up to 650*F for a couple of hrs and then turn off the oven and let it cool slowly over a 14 hr period. Now I don't for sure that helped ease any stress in the aluminum but when I unbolted the pan from the steel plate there was only about 1 mm difference from one end to the other, I'm pretty happy about that! I did the test with methyl hydrate and also with hot water, no leaks of any kind I'm tempted to cover the steel plate I was using with emery cloth and work the pan back and forth until it is truly flat again. Both pics are with no bolts holding the pan down.
-
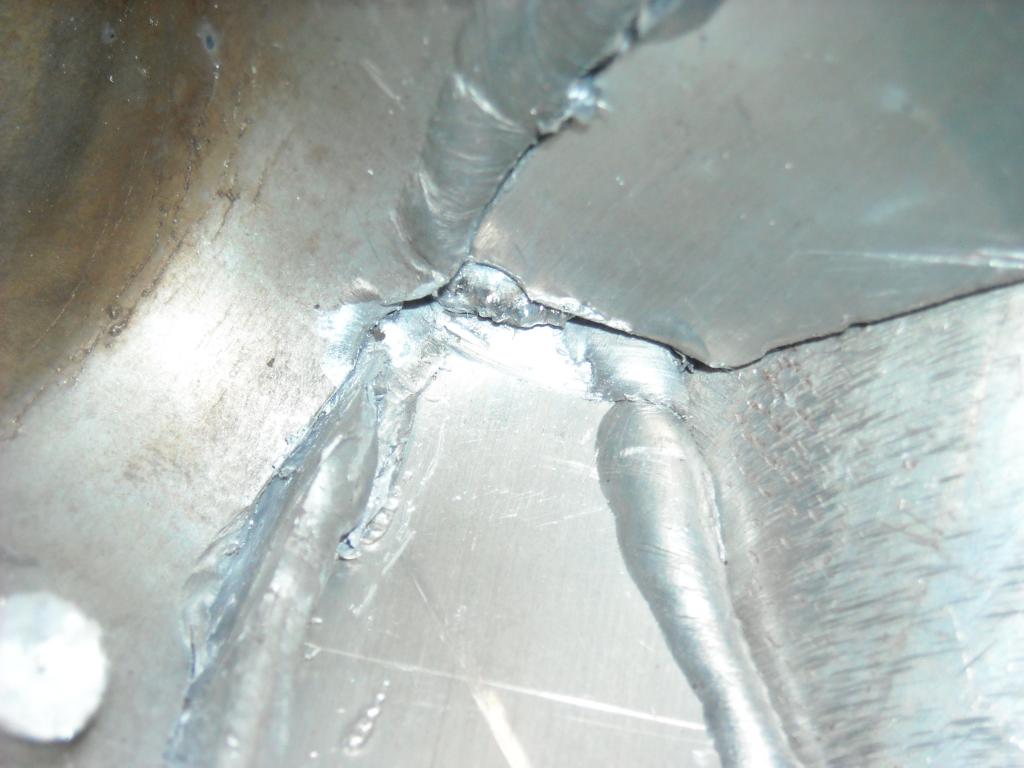
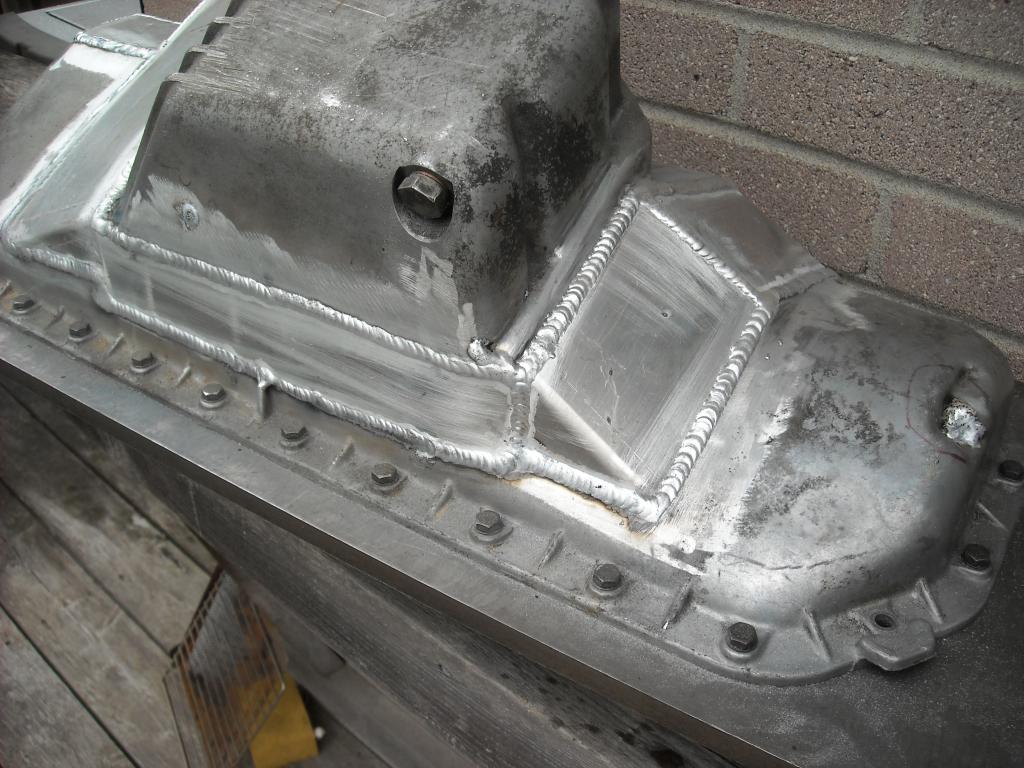
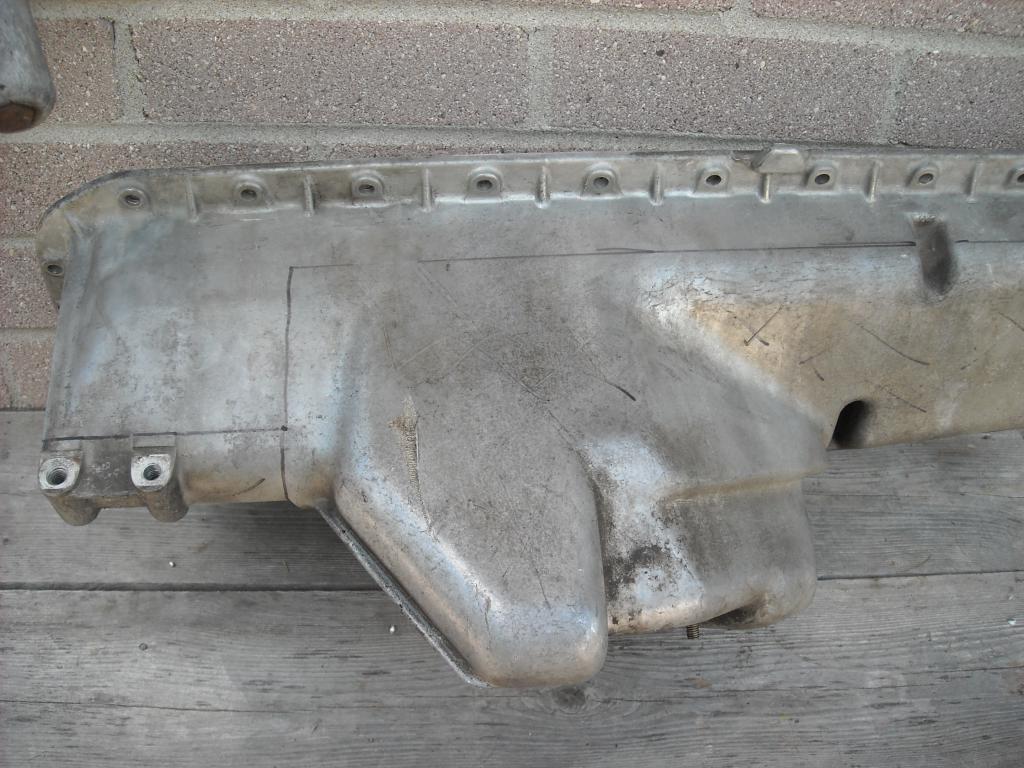
I just had a cast aluminum oil pan welded up with the modifications I need for a new build, as you can see he has done nice work, the welds don't leak with pan holding methyl hydrate or hot water. All welds were done on the outside of the pan with a 1/2" steel plate bolted to the pan to keep it flat. What I'm concerned about is the inside of the pan or the other side of the welds. I can't have the inside seams of the pan welded with out the risk of twisting the pan so I'm wondering if I should fill those seams with a flexible sealer like Three Bond or Permatex. Or maybe I'm over thinking it...
-
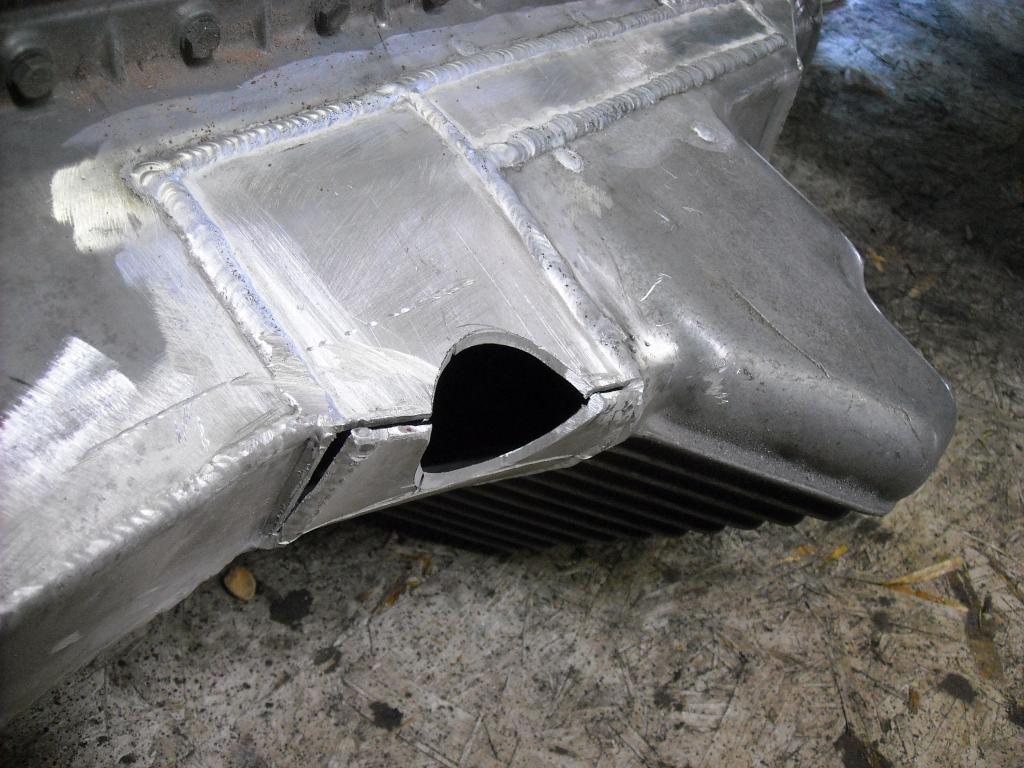
Got the oil pan back today, very nice work! This guy makes it look so easy. I did a bit more modifying of the pan and notched out the recess for the steering rod u joint, I'll take it back to Ben again and have him patch it up.
-
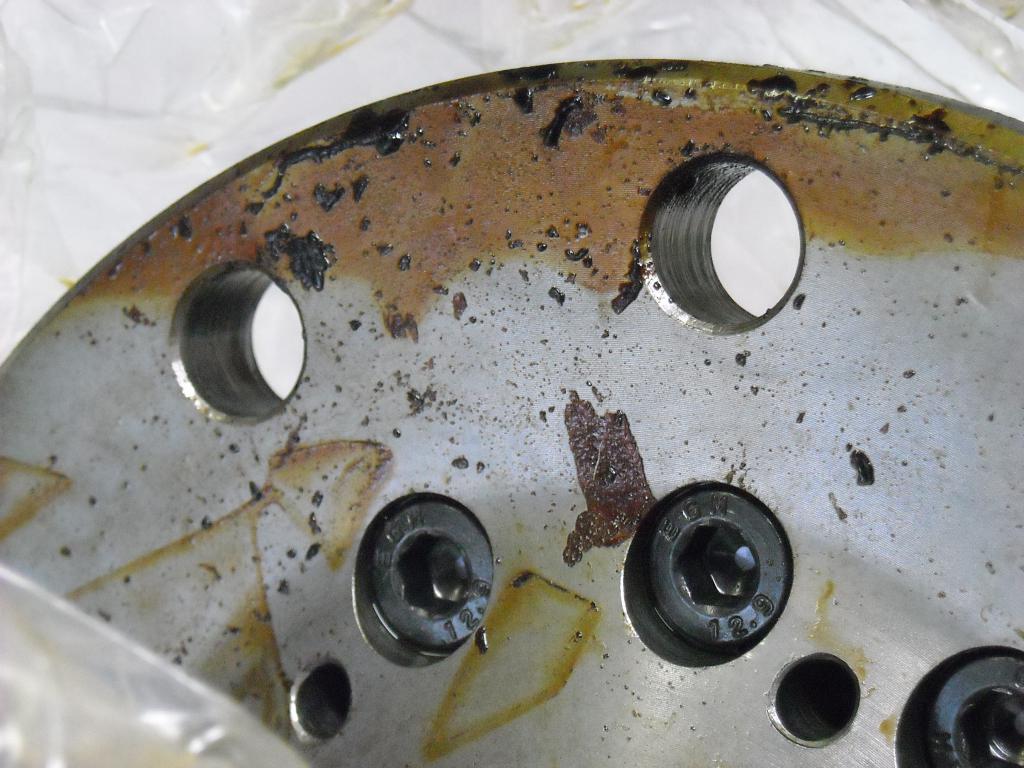
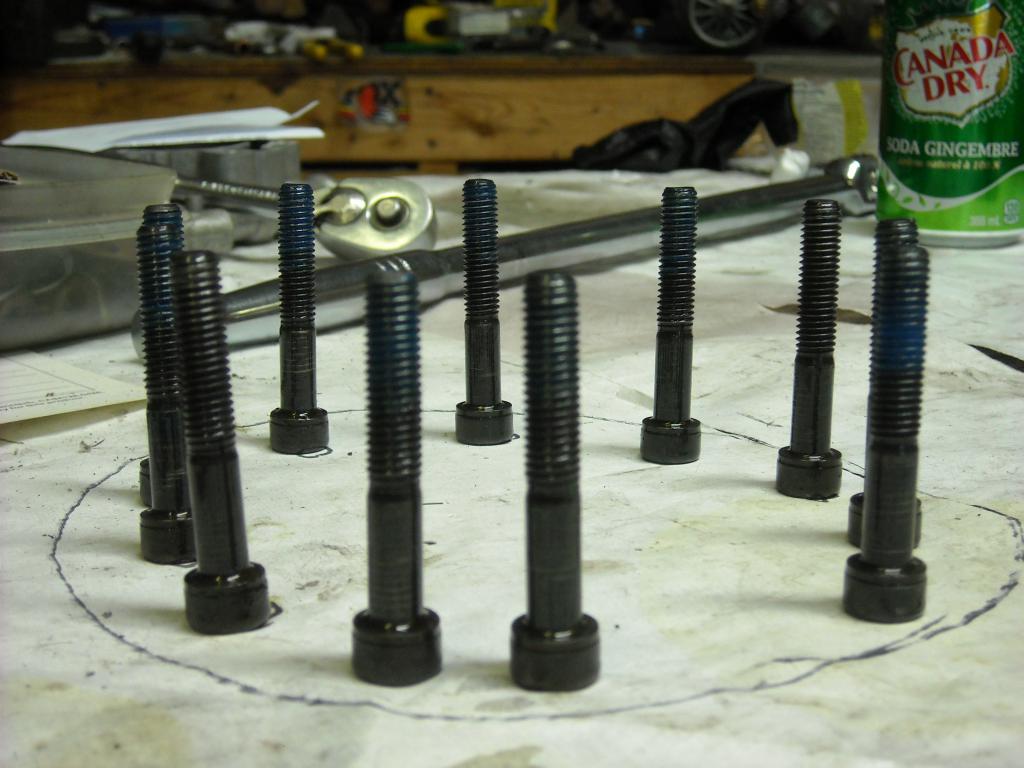
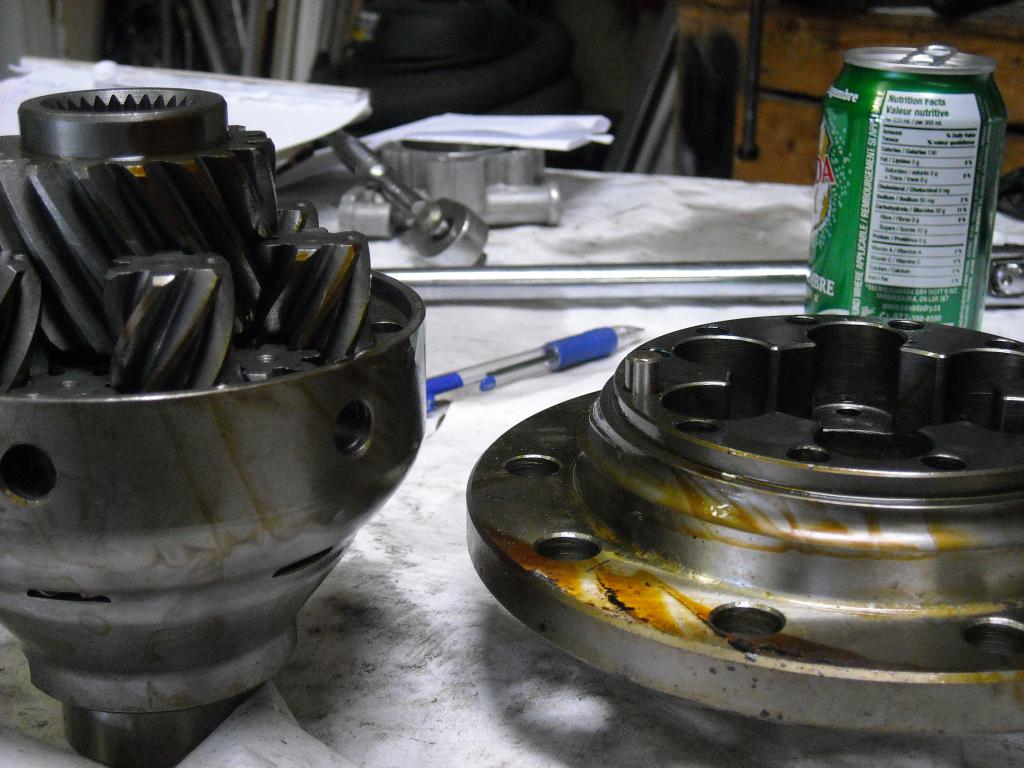
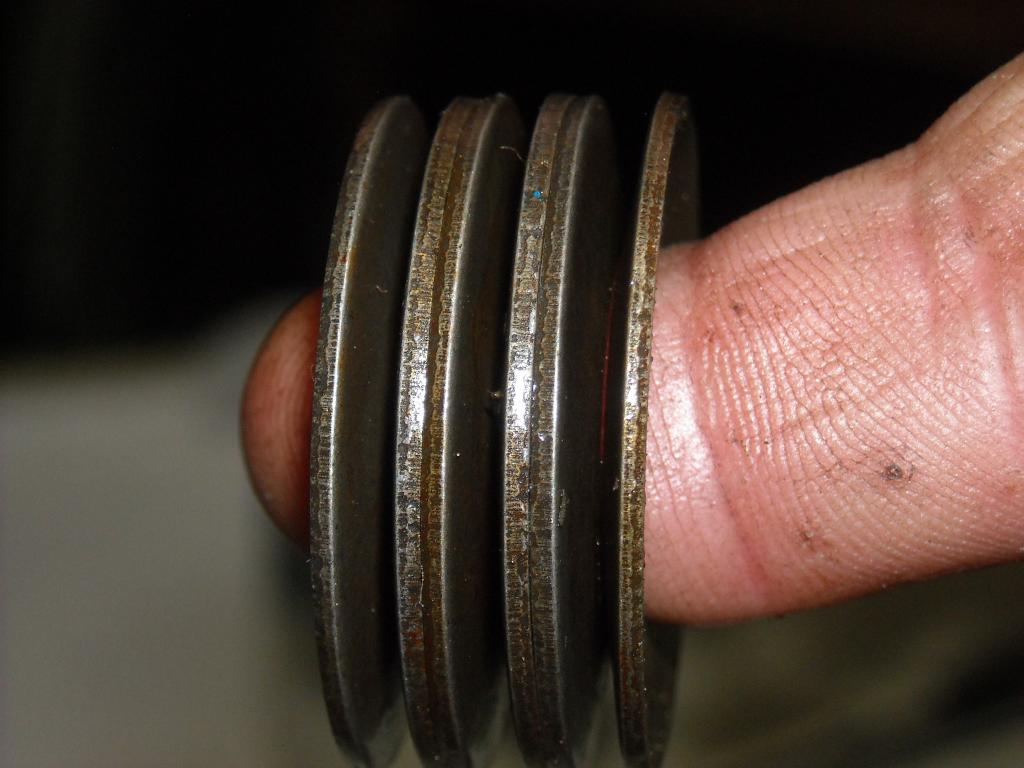
Just got my OBX from racingparstdepot for $405. Nice and clean in that factory. The gears were reversed so flipped them, only 9 of the 11 bolts had loctite on them. Installed Rich Bryant's fix kit.
-
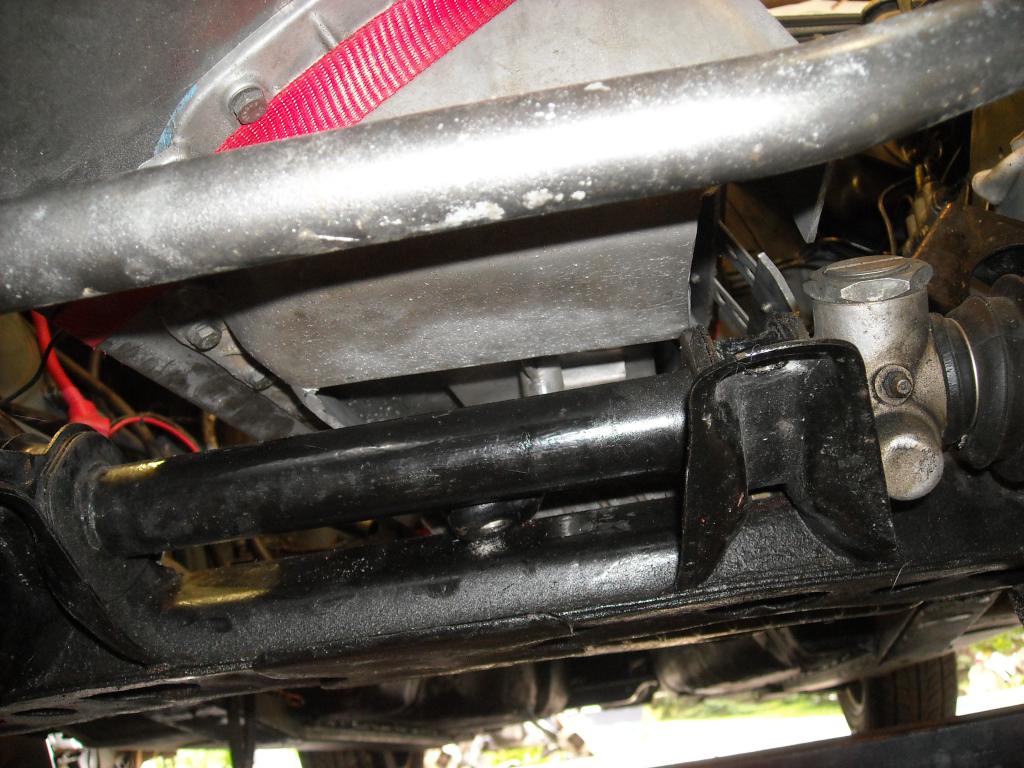
I took the mock up oil pan to my aluminum welding guy today and he said "no problem" so that is a big relief. I should have it back in 2 weeks so that gives lots of time to catch up on stuff I have been neglecting. The first pics are the mock up pan and then the test fitting in the engine bay, there may still be an interference with the steering rod u joint but it will be much easier to repair a notch that needs cutting out then it would be to try and build the notch in.
-
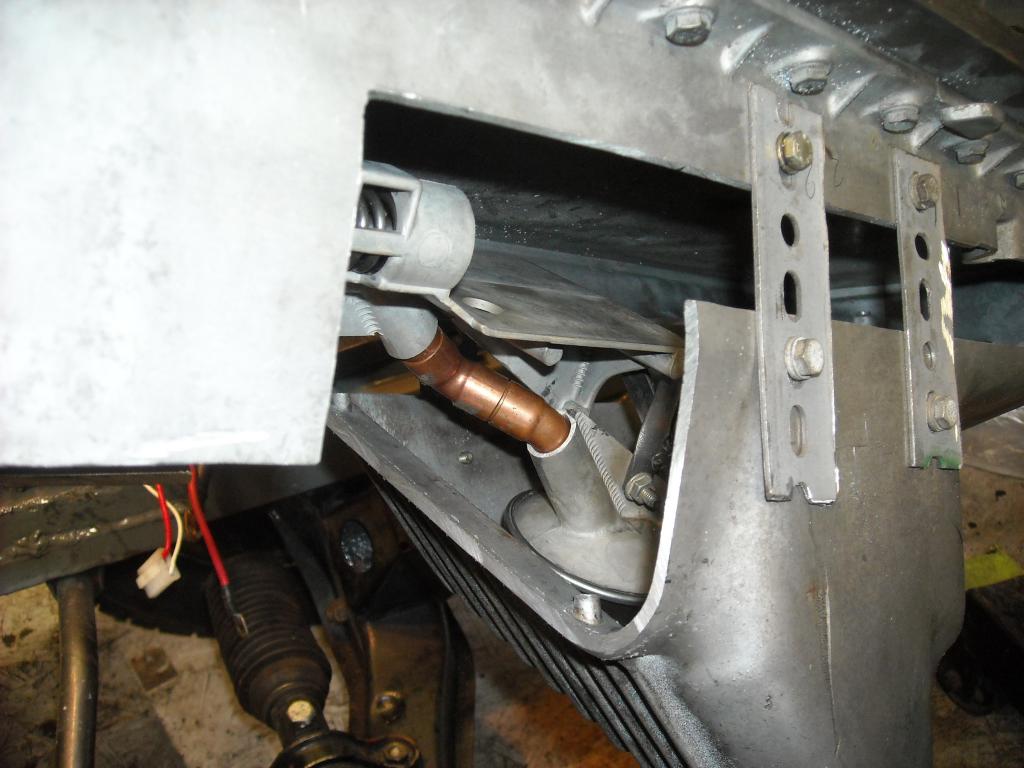
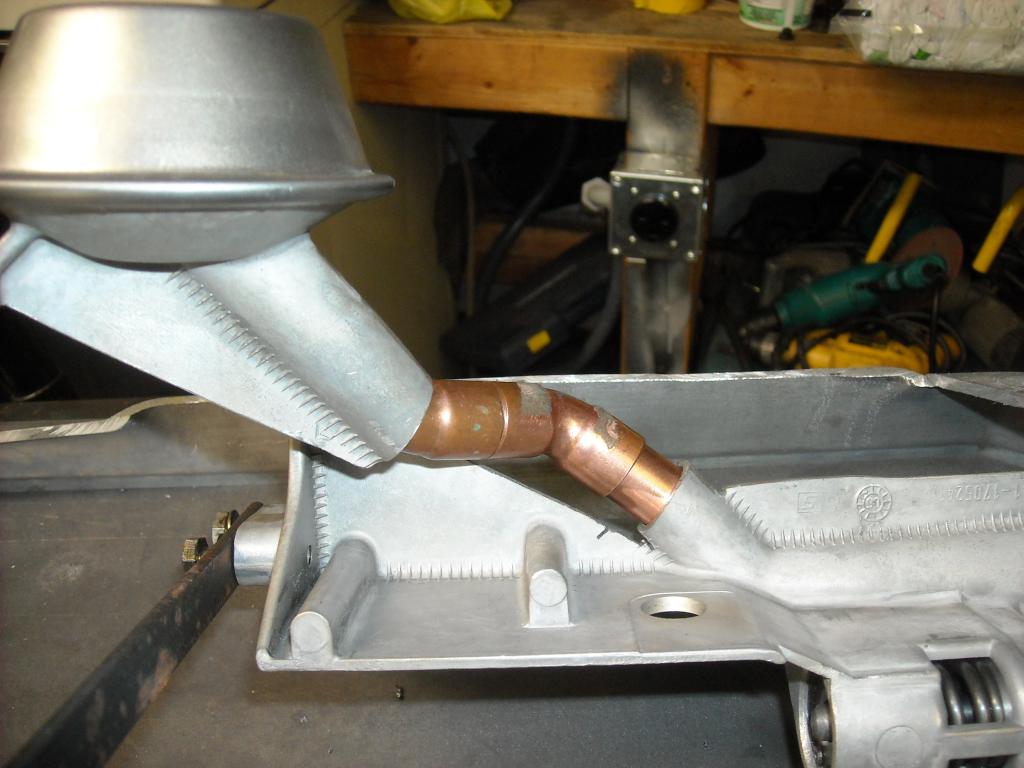
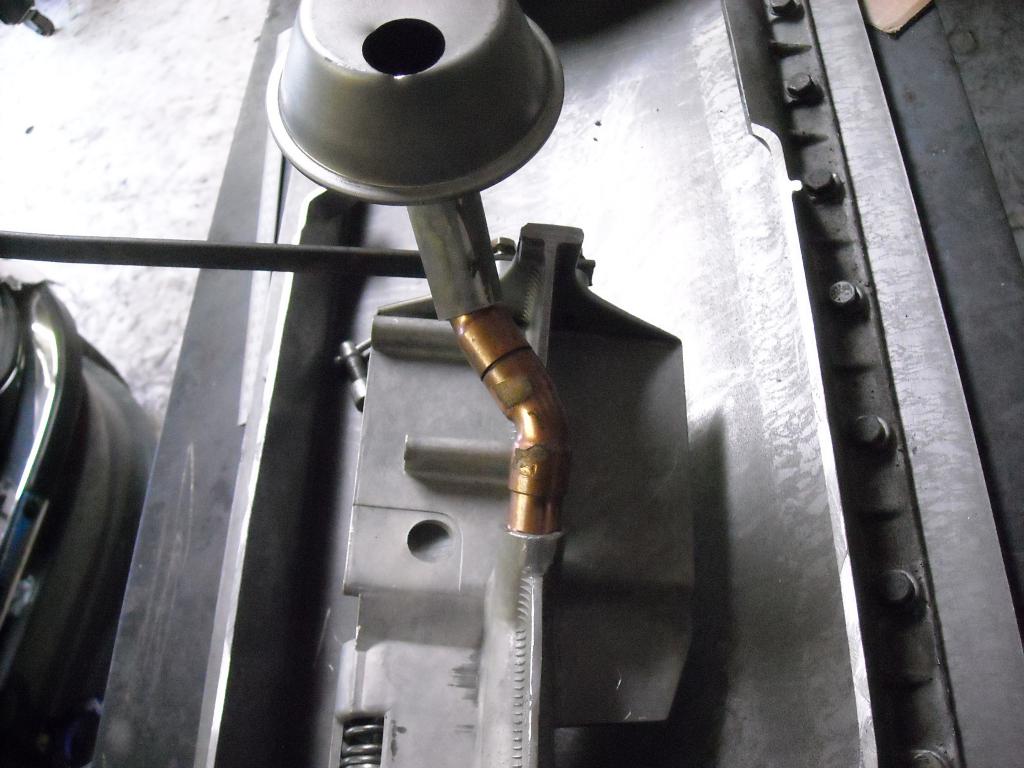
My oil pump pick up tube is made of cast aluminum and I need to extend it to change the pick up point for an engine swap I'm doing. The pics are just a mock up for distance and configuration, I can use a combination of brazing and/or soldering and mechanical bracing to hold the pick up where I want it but my question is, Is there anything in hot oil that will attack copper, brazing or solder? The dissimilar metals solder I will be using is good up to 350* F. Thanks, Chris
-
I hope I haven't just ruined a perfectly good oil pan.
-
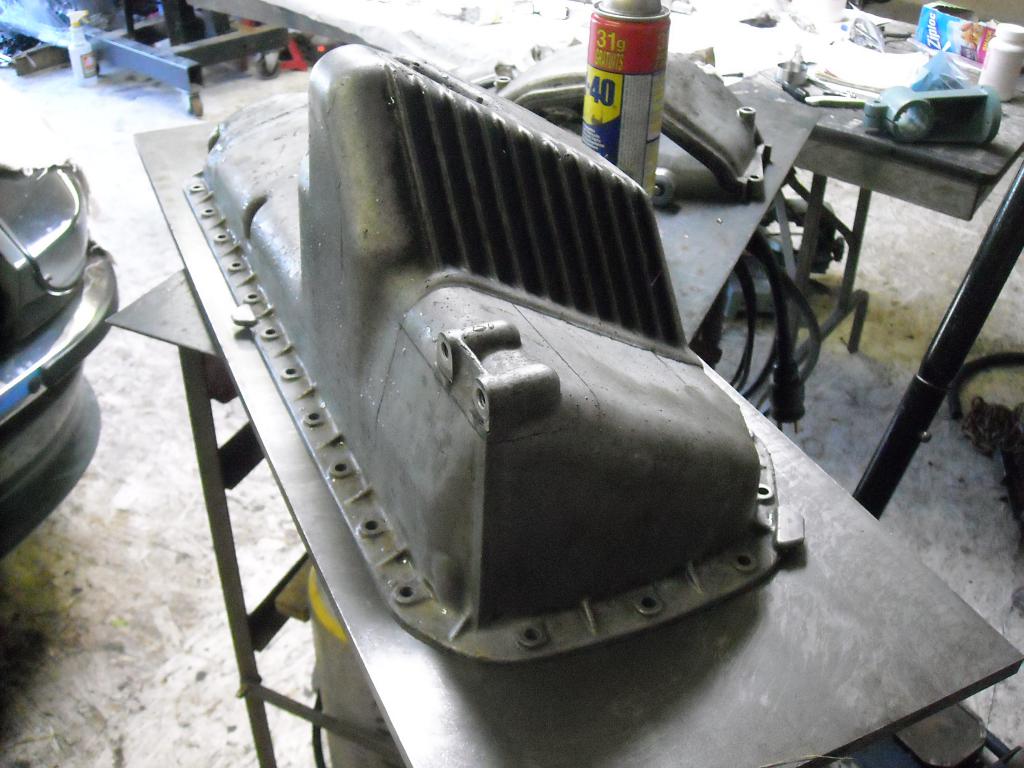
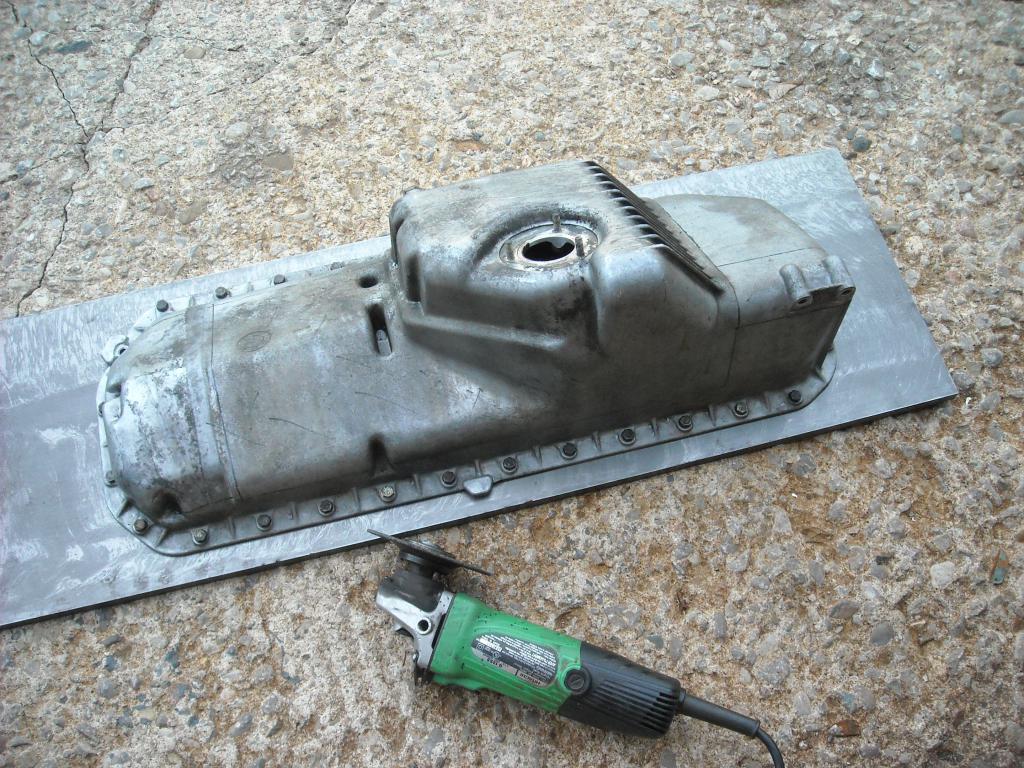
Six Shooter, If I have to cut a hole in the hood an and fab up a "speed bump" to cover it I will, but that is months from now. Can't cut into the fire wall as I would lose the wiper motor to the back of the throttle bodies and air box. The M6 that the engine came from has it's crossmember 12" farther back then the Z. z-ya, Teeum, Ron's s52 engine had some other options for oil pans, my s38 has only one pan so I'm just going to have to cut it up and rebuild it to fit. I have picked up a slab of plate steel 12" x 30" and will drill, tap and mount the oil pan on it before cutting out the offending bits then build a mock up of the pan I need out of cardboard and take that to my aluminum welding guy. After the outside of the pan is finished I'll pop it into an oven at, say 400F for a couple of hours and then let it cool off slowly in the oven overnight. Hopefully that will lessen the stress and strain so when I un-bolt it from the steel plate it will still be flat. I'm just starting to learn aluminum welding and it will be a while before I can handle a project like this so I'm going to let a Pro take this job.
-
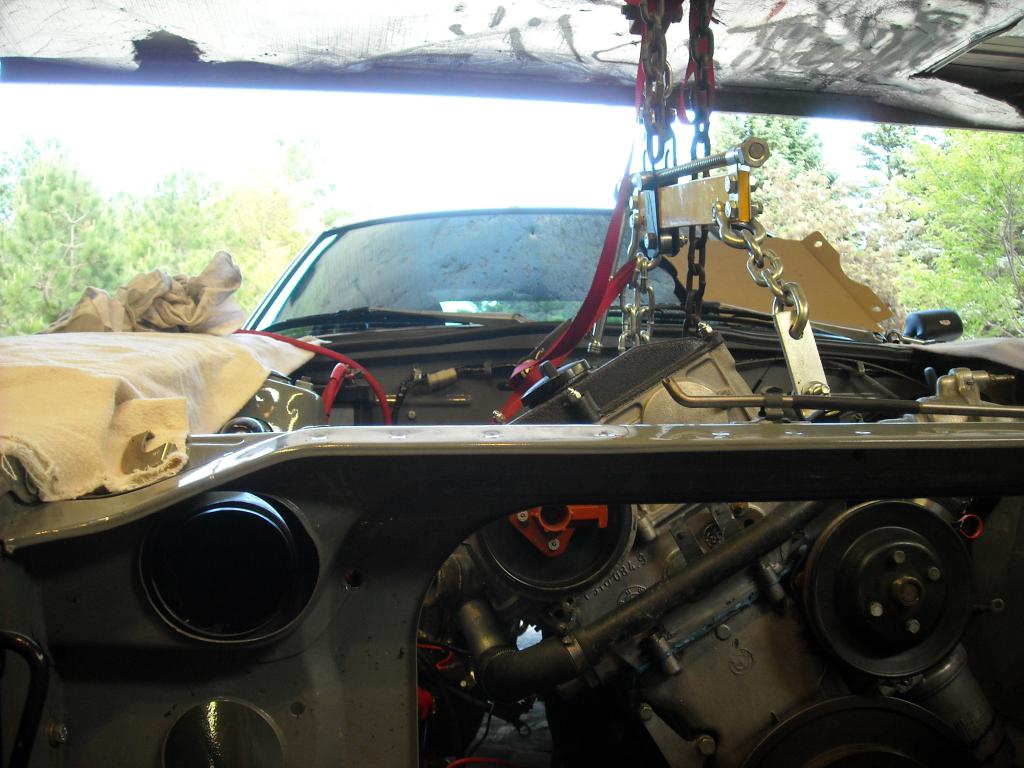
I think I'm going to have to delete the stock oil pump, make a new, front shallow/ rear deep sump oil pan and do a remote wet sump oil pump arrangement like the diagram. Can anyone see any possible problems with this idea? The first pic is from the front of the car, does it look like the hood will clear the new engine? The rest are pics of the engine in a lower position that I'm hoping for, Pluming of remote filter - Wet sump.pdf
-
Moving the steering rack forward
grannyknot replied to grannyknot's topic in Brakes, Wheels, Suspension and Chassis
I think if I can drop the cross member 3/4" with spacers and go the dry sump route I should be alright. I would have to notch back into the firewall 5" and lose the heater blower... not prepared to do that just yet. Thanks, Chris Jon, I was just talking to one of the gurus on Bimmerforums and the rear sump oil pans for this block don't exist. -
Moving the steering rack forward
grannyknot posted a topic in Brakes, Wheels, Suspension and Chassis
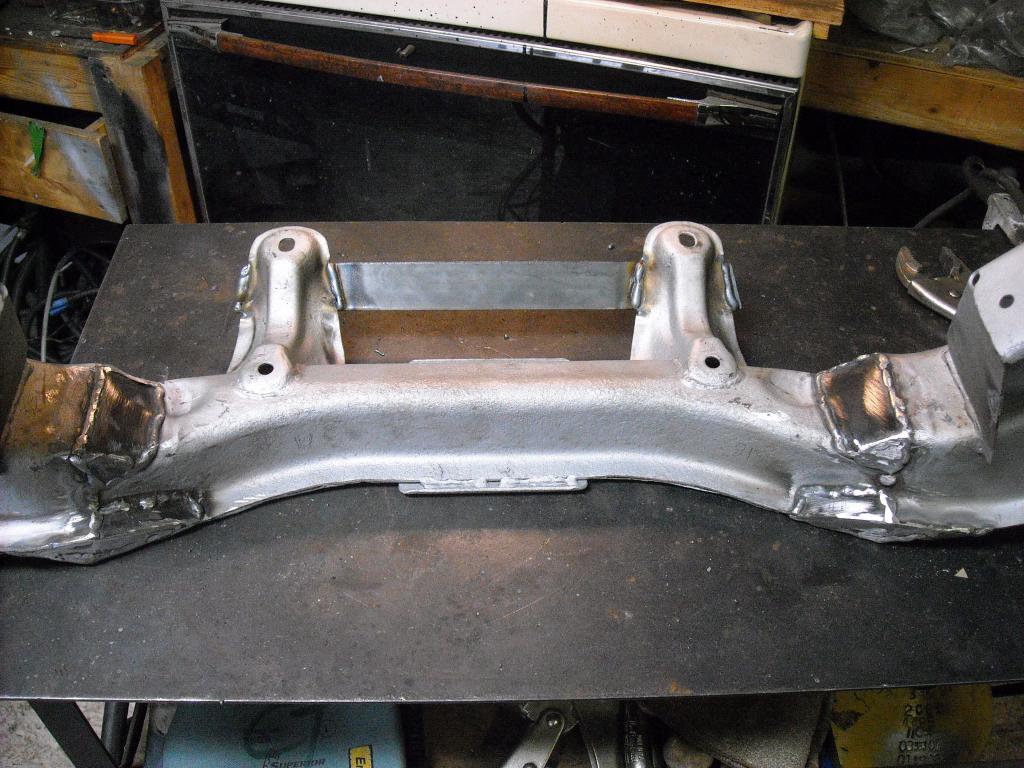
I have a build thread here,http://forums.hybridz.org/topic/122185-m-powered-z/ Trying to fit a BMW engine but the front of the oil pan, oil pump, sprocket and chain drive end up right where the cross member and steering rack are. I'm looking into removing the stock oil pump assembly and putting together some kind of wet/dry sump external pump oil but now I'm also wondering what problems there might be if instead of changing the engine, of moving the steering rack down 3/4" and forward 4-5"? The cross member could be notched forward to clear the oil pan and with longer custom tie rods to connect with the steering knuckles. So instead of the steering rack pushing/pulling side to side parallel to the cross member it would be pushing/pulling with the tie rods swept back like this,
-
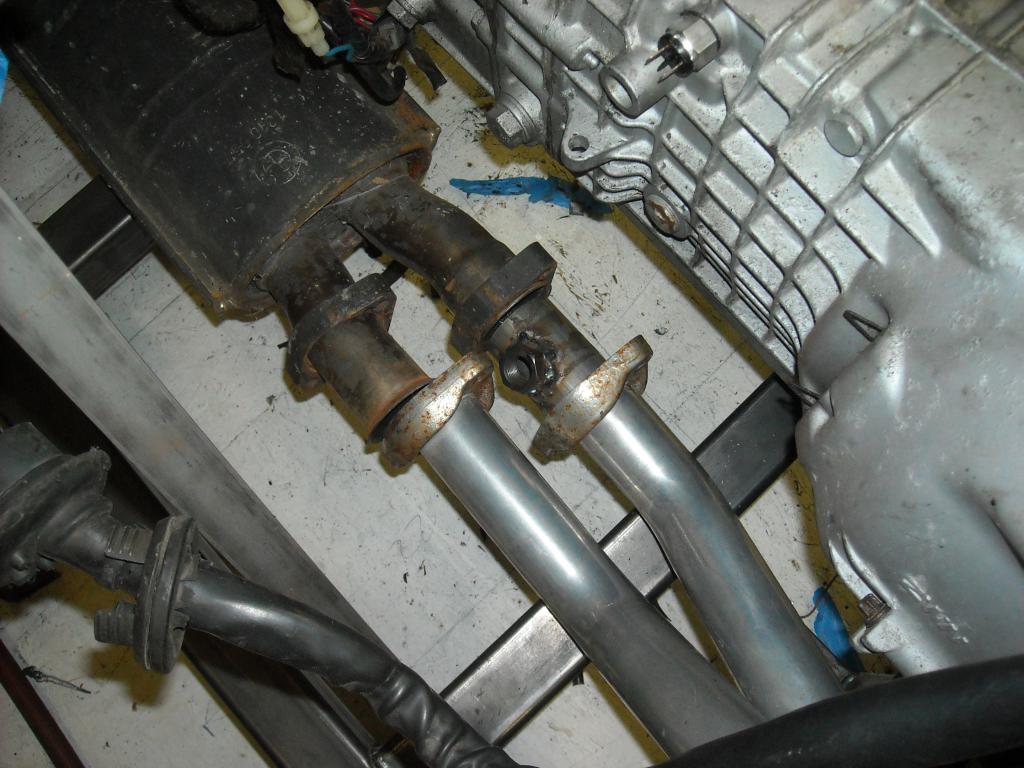
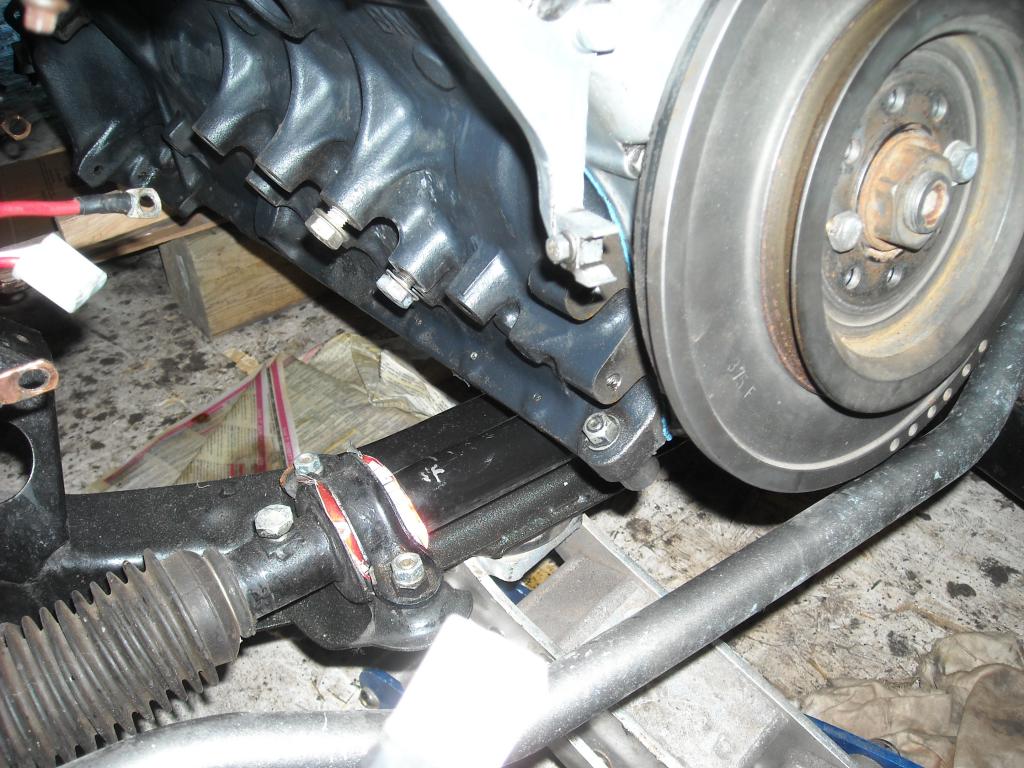
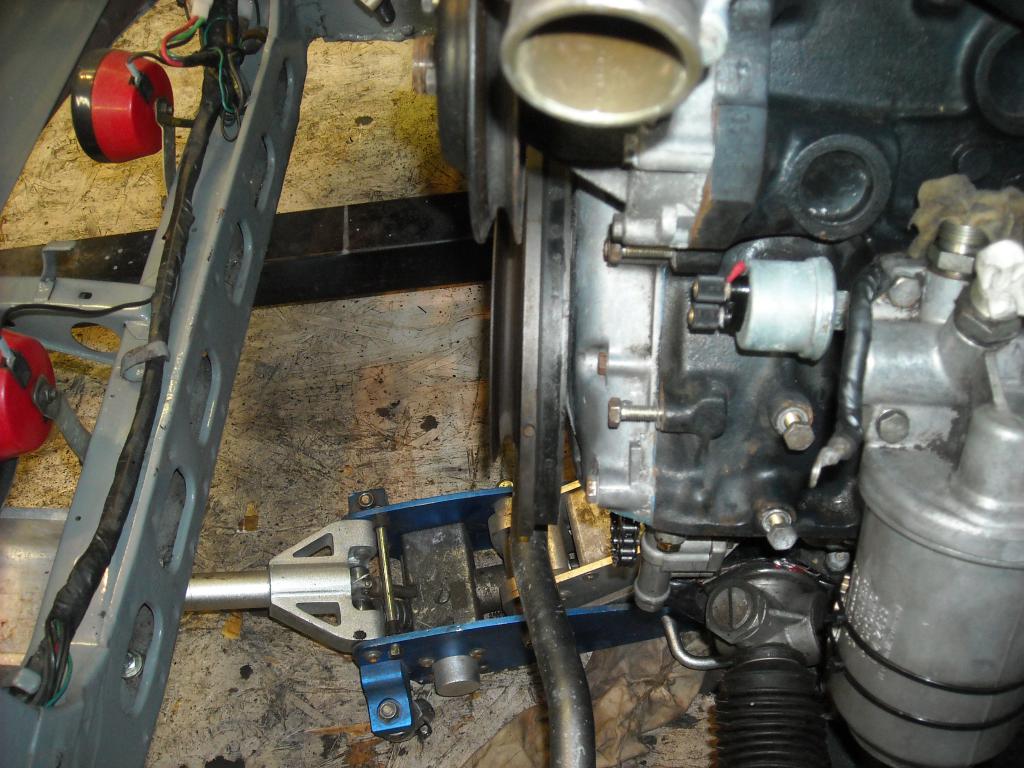
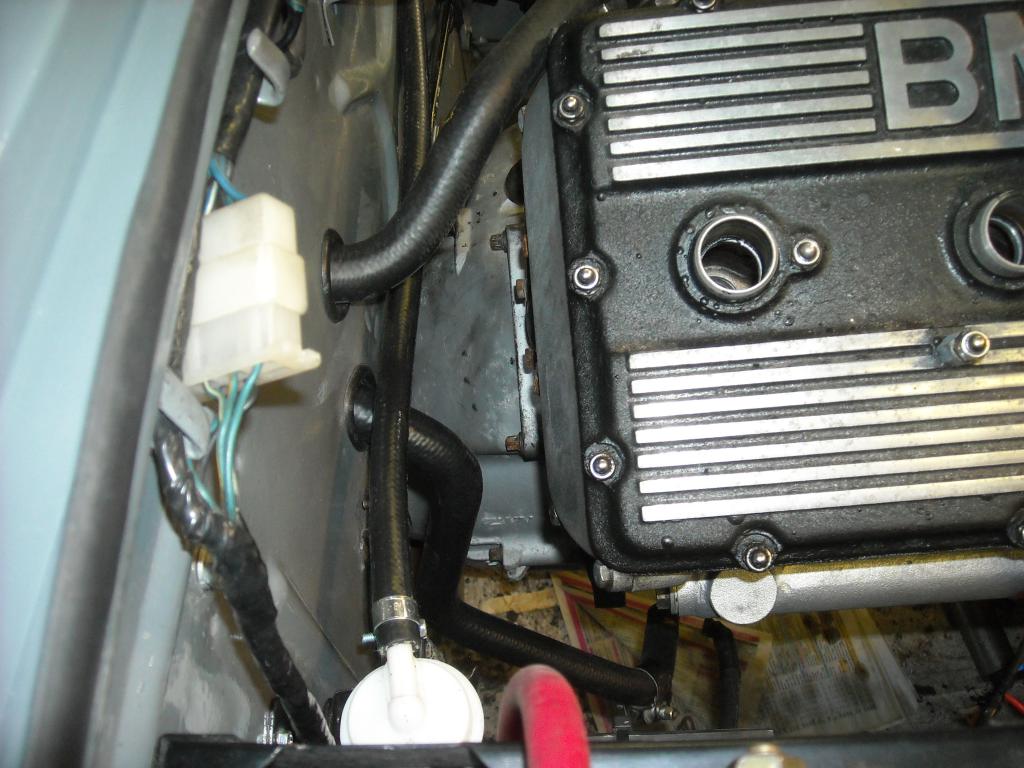
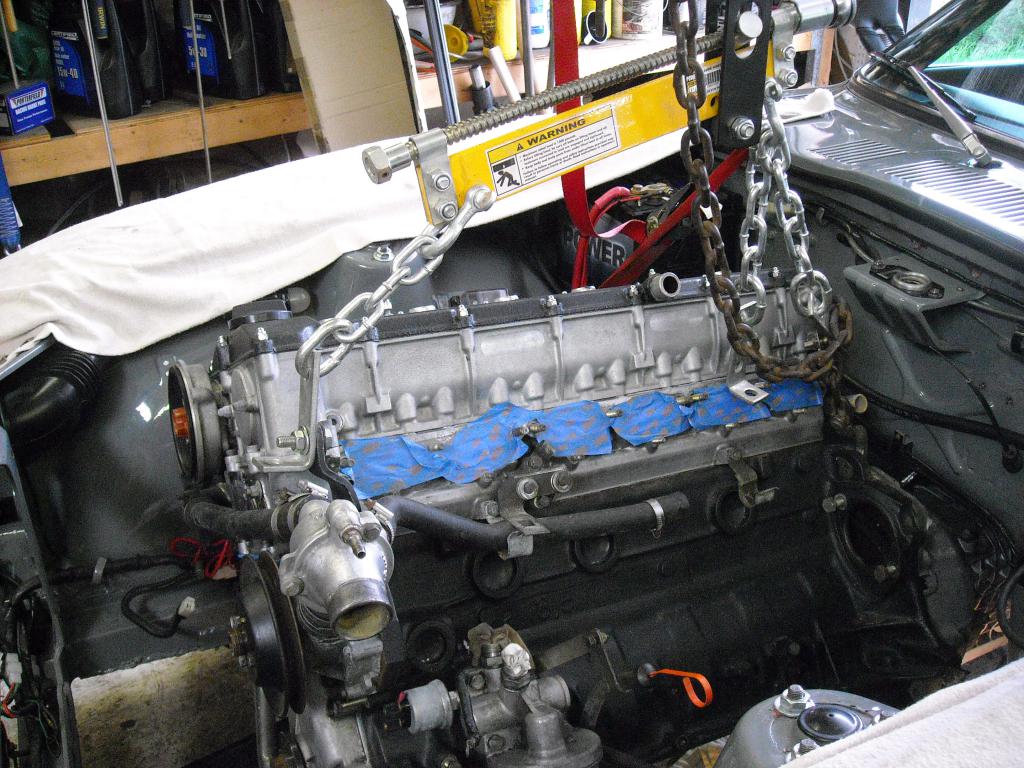
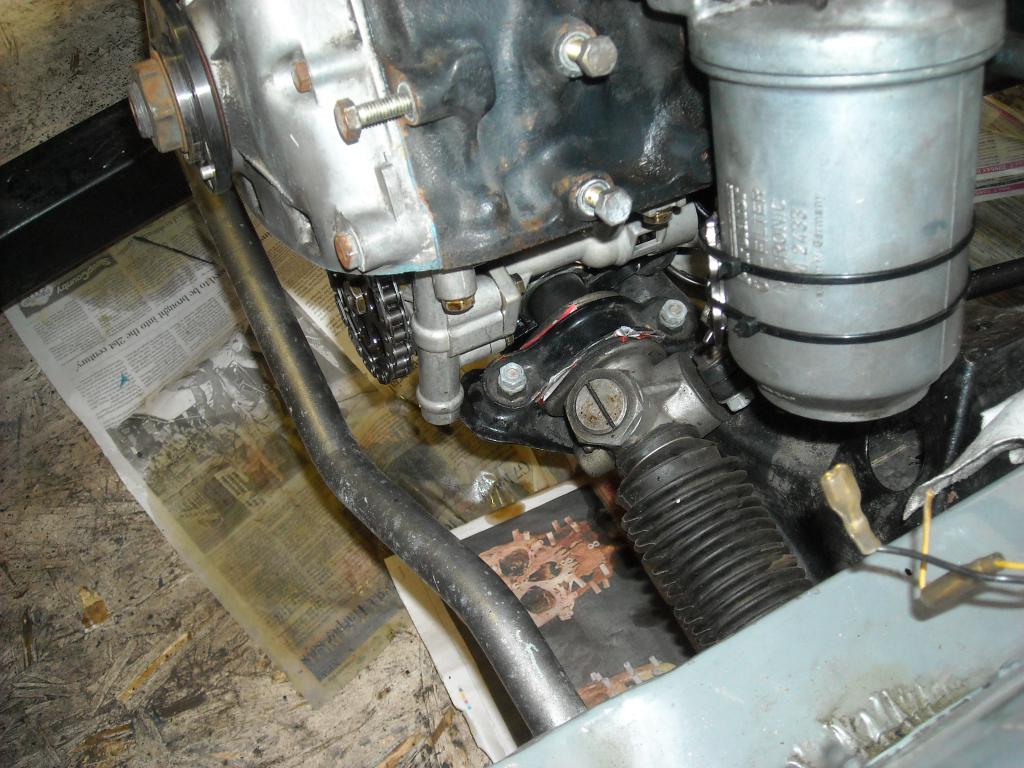
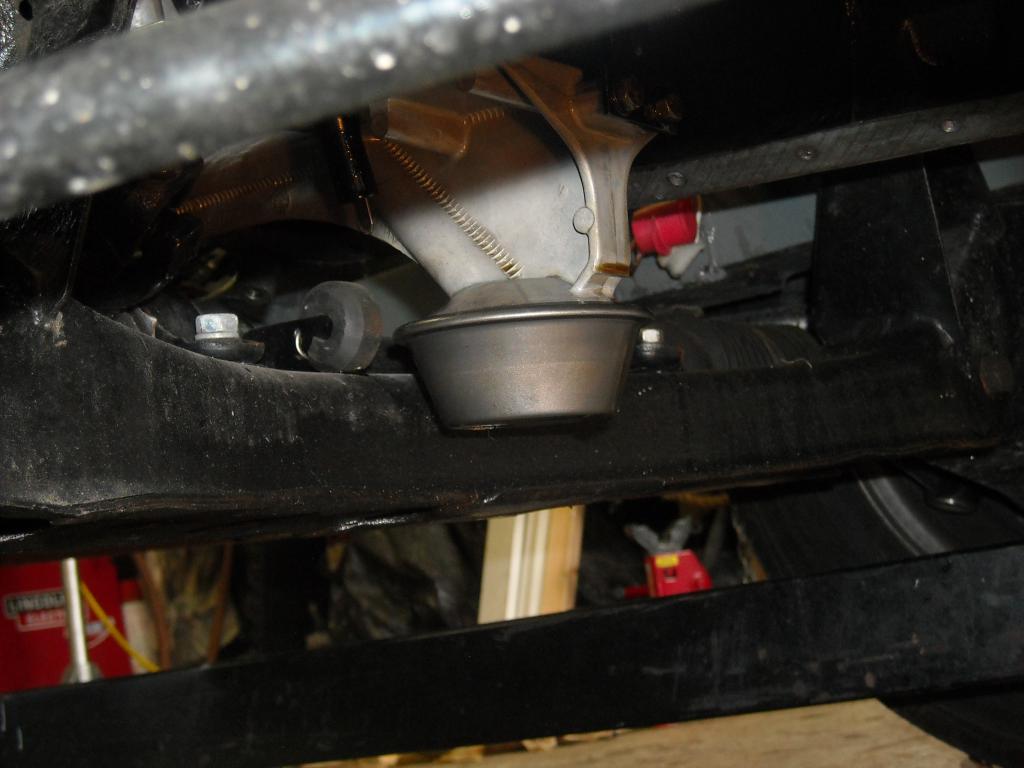
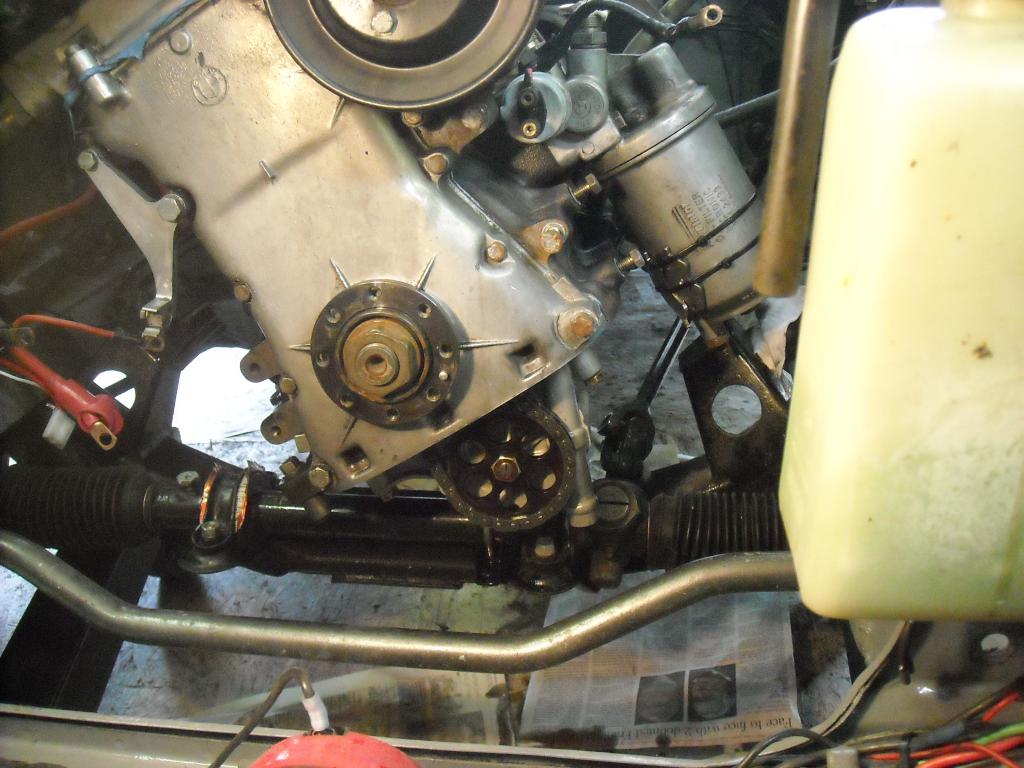
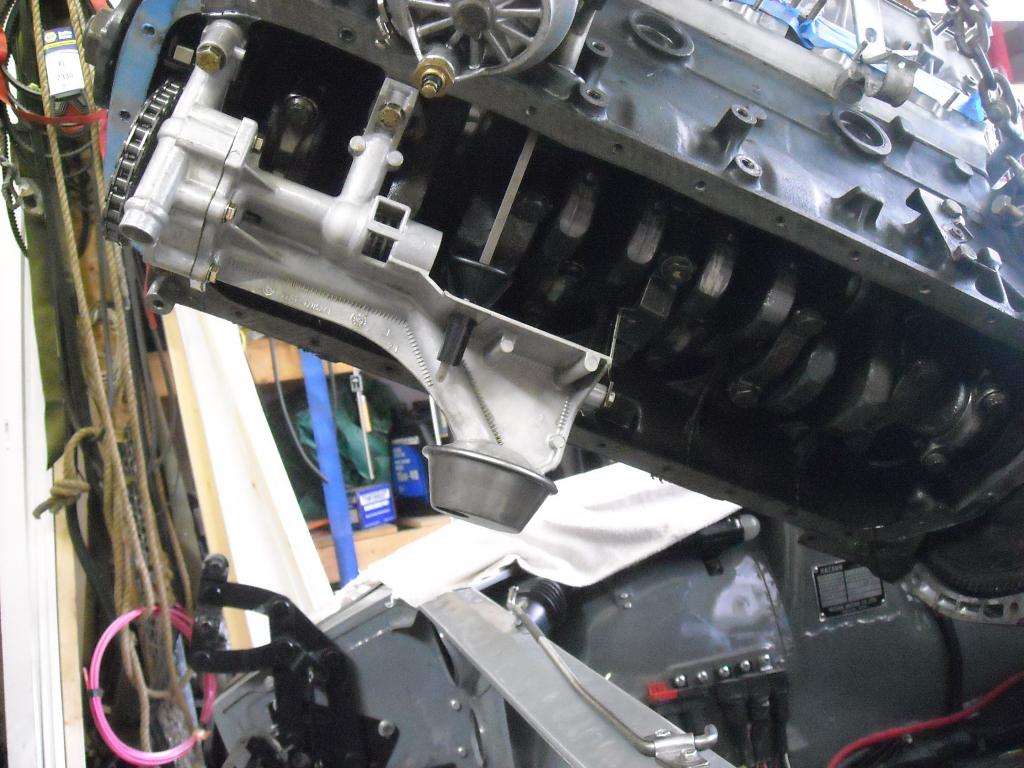
A big set back, the oil pump pick up, oil pump and chain drive are all in the way. Even if I can find an M30 with rear sump and oil p/u I still have the pump itself, sprocket and chain in the way. Anyone with experience in dry sump or electric oil pumps, please jump in here! I can use spacers like Ron did in his build, http://forums.hybridz.org/topic/79806-rt260-bmw-m-powered/ to lower the main crossmember and steering rack but probably no more than 3/4". It would be easy enough to remove the entire oil pump & p/u and fabricate an oil pan that gives the clearance i need but I have zero experience with alternate oil pumps. Every other aspect is a go, it fits very well, some pics of todays work,