
Tony D
-
Posts
9963 -
Joined
-
Last visited
-
Days Won
74
Content Type
Profiles
Forums
Blogs
Events
Gallery
Downloads
Store
Posts posted by Tony D
-
-
Welding the BOV on at the front of the plenum above the inlet piping, parallell to it should give you plenty of area to play with, especially if you angle it toward where the distributor 'was'....
-
That's a good film. Anybody remember pencils? LOL
Seriously, though, I hope those who told me I was wrong about water pump damage from cavitation see this film and pay particular attention to the discussion about 7 and 17 minutes into the playing. That is exactly what happens in high temperatures within the water pump, especially if the pressure cap is somewhat defficient. And that results in not only pumping loss, but errosion of the impeller and casing.
Very good film! Thanks for finding that! Cool!
-
Plenty of engine strut ties you can use.
MONZTER made a nice set of engine mounts using Moustache Bar urethane mountings.
Many use a tie to the upper starter bolt and make a reinforcement to the fram rail where you place the bracket.
Others simply put a lock-bolt through the engine mount so it can not fail and catastrophically separate.
The tie bars link the engine's torque to the chassis so your throttle inputs are more immediate from what I have felt. On and off throttle response becomes more pronounced so a smooth driving style is rewarded.
I have even seen heim jointed linkages to the K-Member (crossmember) from the engine mounting brackets, keeping the stock rubber mounts. This keeps the isolation and vibration down, and still ties the engine to the chassis more positively with no give/compliance windup on/off throttle.
Note on the ZX's they have 'snubbers' on the engine mounts as well? That engine moves axially within the chassis under some conditions...just something to keep in mind!
FWIW, if you aren't in it all that much, solid mounts do solve it. But you get a lot of vibration and bolt checking becomes critical from the increased vibration transferred to the chassis.
-
Riiiiight. Ambiguous use of the 'F' word - would that jut be a serious LOL, or is a friend required? (No reply expected).
The acronym was "ROMAFLOL"
Not
"ROMA,F,LOL"
That would require a partner or friend of some sort....

-
My VW golf diesel 150hp 270ft/lb will return 60mpg on long trips and 45mpg around town.
Oy! I went to Essing Diesel Tuning with Frank 280ZX and watched them tweak his M3 to 188HP and 325ft-lbs (2L Turbodiesel) and that thing got BETTER fuel economy on the way back to Utrecht that we did going out. Something in excess of 40mpg as I could best figure. The BMW has a little 'fuel economy' meter that displays the fuel consumption rate, and at 253 kph it was registering something equivalent to roughly 36.4mpg! I took a snappy while hurtling along at over 2X the maximum speed limit here stateside thinkging "he's getting great gas mileage for cutting the travel time in half" and realizing if I could do it in the USA my travel time cross country would be cut massively! And so would my fuel consumption!
"But diesels are bad" in CA...so is speed....
I digress...
-
ROMAFLOL
As opposed to ROMFAFLOL
Rolling on my A$$ F-ing Laughing Out Loud.
Rolling on my Fat A$$ F-ing Laughing Out Loud.
Not standard acronymisims, but you get the idea, eh?
-
In my knockoff plenum, I used a simple flat deflector that was bent over at the bottom with holes is it to further 'diffuse' and 'break up' the airflow. It came into the plenum, hit the diffuser and had to go down towards the bottom of the plenum, through the holes before entering the bigger area.
In retrospect, my design thoughts on my knockoff almost exactly replicated what SK did in their turbo plenums, which is similar to what you propose Tim. SK's plenum had a vertical plate diffuser plate which the incoming air hit, then was forced around all four sides to enter the larger portion of the plenum to the rear of the box nearer the ITB inlets.
SK's is a 2mm thick plate of steel bolted to standoffs cast into the rear of the plenum. Mine was bolted to the roof of the plenum. Both had removable fronts.
My 'holes' were 2X the area of the pipe feeding the plenum IF I recall correctly (this was 1985/86 after all...)
-
Both the HKS and SK have their BOV mounted to the front portion of their plenum. Both HKS versions have the plenum blowing off at the front portion...on Jeff's it would be above his inlet pipe, where the pressure looks to be relatively low. I'd not put it at back simply due to packaging issues.
Ideally you're venting the plenum first, but tapping the manifold downstream of the ITB's is going to give a vacuum signal to pop it open relatively quickly anyway (it does on my HKS!) on any sort of lift-throttle. That negative pressure bias on the diaphragm / spring balance will make it relieve quickly. I'm figuring the distributor won't be in the way, so putting it toward the front of the plenum and letting it occupy the former position of the distributor might make a lot of sense. (Jeff P was looking at his setup on Thursday and said similar things, as he now has no dizzy there, and his blowoff is soooo close to there already...only minor piping and it opens up more real estate underneath!)
The Wiggins Clamps will expand slightly,you can always use limiting straps, but I don't think you will need to do it---some nice bails and snick snick snick and the plenum is ready to come off. I like it!
As for mounting of the BOV, the SK plenum mounts the BOV similarly to the HKS, and to describe it roughly: Take the bottom half of your BOV in the above photos, and incorporate the entire lower body into the plenum. The SK uses the valve seat which is integral to the plenum, the HKS has a flat flange that the BOV sliding valve seals against, with the body bolting directly to the plenum. Integrate the lower valve seat into the plenum, and those vents, and you seriously reduce the mounting area you end up needing. Curiously, the SK valve looks almost identical to the one they used on their EFI conversions...on that one they had a cast J-Pipe, with the lower seat integrated into it. When I built my original HKS "Knockoff" box, I used one of the SK BOV's mounted directly to a machined flat spot on my plenum box. Towards the front face, near the distributor...
-
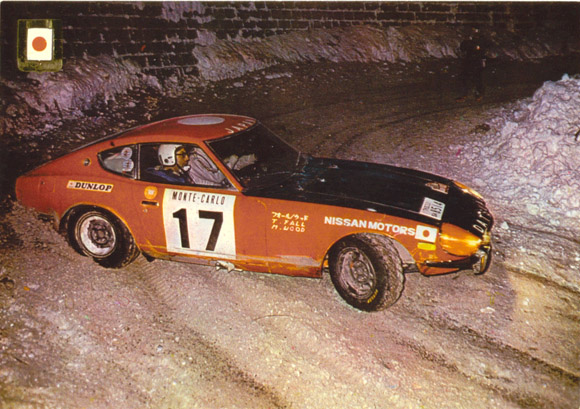
Might ask Tony Fall...I'm sure they have driving a Datsun in the Snow down!
Now, just a bit of history: What you see in the above photo is what Datsun's Documentary Film on the Monte Carlo Rally described as "a display of Dynamic Cornering".
Dynamic Cornering.
1970, 71, 72....et al
Today the 'newest thing on the block of motorsports' is "Drifting"...
Not that Rally Car Driver's haven't been doing it since the beginning of time. Watch these old films and see them twitch that car sideways well before the corner for exit setup.
But I digress...
-
I have to go with Dragonfly on this one: Adding Length. (Though a 250 ft-lb 1/2" drive Torque Wrench is a kind of standard.)
If you use a "Crowsfoot" and are simply setting your torque on the wrench to specification, you are overtorquing your fastener! The difference between the crowsfoot drive center, and the effective center of the fastener is an increase in torque-arm length and will skew the torquewrench high in comparison to the set reading (it will click at the setting applied to the crowsfoot, but in reality is applying that to the lever arm of the crowsfoot to bolt centerline---in some cases 1/2")
This is common application in larger fasteners: a speciality wrench or 'extender' with a socket on one end, and a finite 6" distance between that socket centerline and the drive centerline. Many times it's simply a piece of 1/2" plate with a drive hole broached out and a socket welded on---this will give you a longer effective arm, and you must decrease the setting on the torquewrench accordingly or you will overtorque your fastener.
Same goes for a crowsfoot. Spending time working on Aerospace Structures and you realize how you grip your wrench and what you put on the end of the wrench makes a difference in the torque applied to the fastener!
There are crowsfeet wrenches made (like shown in the Nissan FSM for tightening the L-Head Ballstuds) that place the open-end directly under the square drive of the tool, and they don't require the torque arm recalculation. But standard crowsfeet do! 1%? Start checking what even 1/2" of center distance will do to your readings!
A prime example of 'get length' is the tool made for VW Axle nuts. They need 280 to 340 ft-lbs of torque. But EVERYBODY has a 250 ft-lb 1/2" drive wrench. You don't want to go out to buy a 3/4" drive just for the nuts. So they make a tool that is cut out of 3/8" plate, kind of 'egg shaped' with a 1 7/16" hex on one end, and a 1/2" drive square drive on the other end. Center to center distance on the holes is some predetermined distance...what it is allows you to set your torque wrench to 250 ft-lbs, but in reality you are actually applying 280 (or 340) ft-lbs on the fastener through the action of the legnthened torque arm. Cheaper than buying the new wrench! And on large fasteners this is very common.
Not everybody wants to buck up for the 3/4" drive 600 ft-lb Snap-On Torque Monster.
Now, anybody want to play with planetary gear driven reaction bar torque multipliers? 4:1 is good enough eh? 200 ft-lbs in, 800 ft-lbs out. Makes for airfreight of your tools much easier! LOL
-
Dalton or "Darton"?
-
Our Mileage Competition VW Ghia got 52mpg. The Corvair was in the high 40's...
I wasn't being sarcastic, I was curious what it was on the dash...it looked like it may have been the Megaview Electronic Dashoboard and the display was unfamiliar to me, so I thought it may have been a new format I was unfamiliar with (and which I wanted!)
So it's a different gadget altogether. Hmmm, something else to investigate. LOL
Ask anybody here.../sarcasam on/ I'm never sarcastic! /sarcasam off/ LOL
At least not in this instance!
ROMAFLOL
"I digress..."
-
"I've known plenty of YOUNG people able to make well over 70k here in CA with nothing more than a high school diploma, it's about finding the right company to hire you, and working your way up."
Commission Based Sales.
Fine if you can keep up that pace. I know plenty of line mechanics at dealerships in LA that make six figures, too!
But it's line work, flatrated, plus parts commission. When you get to your 30's and your hands need to be soaked in icewater due to repetitive stress injuries, you reconsider your six figure salary and the toll it takes on your body. Sometimes it isn't all about the money. When you're young it's one thing.
Sales takes it's toll in other ways, and education is always attractive. One thing I ALWAYS bargian for in lieu of salary is 'time off and paid schooling'...basically flex schedule to allow you to take continuing education and get your degree. It benefits both you and your employer to get more education, and when they are PAYING for it, it makes it a no-brainer for both entities.
And later, when you jump ship for the next company offerring a 35% pay increase (I forecast in about 5 years...) you will have schooling to justify an even more exorbitant pay bump. And that degree? That will get you more.
In technical trades, it can mean easily 30-40K per year more in base salary. You read it right. You are considering moving for a job that pays $40K...where likely if you had a Degree down the road, the difference in what you are paid will be $40K.
Those high-school educated youngsters making $70K annually think they are doing well, and they are. But their counterparts with a degree in many cases are making $120K. It's just the way it is, not for everything but it is for many things...
Just keep that in mind. Education pays in more ways than one!
-
You guys are comparing and contrasting a cam grind that is direct acting to one that is run through a ratio-rocer setup.
See if you can find some of the grind profiles for VW Cams (or possibly Chevy Cams) where they are ground for 1.7 Ratio Rockers as compared to stock 1.25 or 1.5's.
The ramp angles on ratio rocker cams are MUCH less agressive as the ratio rocker will increase valve acceleration by a factor. The grind on a cam with 310 duration and 620 lift for a 1.7 rocker will look MUCH LESS AGRESSIVE than one that is ground to the same specification if using 1.25 ratio rocker arms.
When the cam is direct acting on a bucket, and the bucket on the valve the ram can 'look' agressive as hell, but in reality is very slow to open and close because you are not using a rocker to intensify both lift and duration.
To try to explain this, think of an L-Cam with the same duration and lift. The nose on a direct acting cam would be 1.5X NARROWER and the ramp rates less steep by roughly the same ammount to get the same action as you would have on the L-Cam Grind.
I have seen L-Cams with lobes that look like your finger bent over, big flat nose. Comparably specifications for a Toyota 18RG-R engine with similar .050" duration (around 304-310) looked positively 'peaked' by comparison.
I hope what I'm saying makes sense. I have seen the different grinds on VW's and some Chevy cams, and when they are sitting right in front of you it all makes sense.
One of the things in the VW world you never want to do is put the big rockers like 1.5 or 1.7 onto a HOT cam that was ground for 1.24 rockers. The acceleration on the valve and accompanying stresses will bend pushrods, make the valves float way early, etc.
When you are direct acting, the width of the bucket also comes into play, as how wide a swath the thing is rubbing will increase with a longer duration (maybe this makes more sense, explaining it this way)---when your stock cam is wiping the bucket, you will have a wipe pattern say, .250" wide. THIS is your actual 'at full lift duration'. On the peaked cam you will have, you will find that your wipe pattern likely will be considerably WIDER, meaning more lift because of the difference in base circle, but also more duration because of the steeper angles on the sides of the cam. Look at the arc the 'peak' will have to travel as it wipes the head of your bucket, and you will see the narrower peak and steeper ramps actually contact the bucket longer in the 'full lift' position that it does stock with that 'rounded nose'.
Additionally, when you indicate off the bucket with a dial gauge, you will be able to see this phenomenon directly, and it should make a lot more sense than my palaver here.
From my experience with TRD cams for the 18RG and 2TG's of the 70's with 12mm lift and 310 duration (at 1mm lift) your cam looks about right.
Hope this makes sense Bryan (all).
Let us know how it indicates with a degree wheel on it, that will be your final test of wether someone screwed it up.
Direct-Acting Cams are a different animal than Rocker-Actuated Systems, don't apply the looks of one to the other, it will get you in trouble.
-
Xander, Nice Shed!
Megasquirt is a proven driver for most of the GM EFI setups, TBI or TPI, and they fit on the SBC with plenty of cheap aftermarkt parts availability...
My bud is putting an LT1 into his 74 Camaro and tells me there is a program that allows standalone-like reprogramming of the GM ECU via laptop, which seems intriguing as well. He got a deal where a new (18 miles) GM Targetmaster Replacement LT1, and new (18 miles) Goodwrench Trans along with all harnesses and computers out of a Z28 Convertible for $1800. For that price, I'd be interested in SBC as well. Seems the Camaro owner got new engine/trans work done, took it out for it's maiden voyage, and promptly sideswiped a tree 18 miles from the dealer. Had it flatbedded back, and insurance totaled it out. Terrible (he he he).
Like Xander said, you can use almost any carb as your air-door initially, and some newer Edlebrock Manifolds come 'pre cast' to drill for injectors in the ports. E-Bay is your friend.
Back to my buddy with the 74 Camaro. He ended up picking up the LT1 because it was cheaper than the 383 Chevy buildup he had in progress, and since the 383 was probably going to be too hot for daily driving activities (more for Atco) he started thinking 'man, this car would be nice to drive around daily for stuff, and I want it to act like every other car I own.' Hence jumping on the LT. He would not take my bait and do the LT1 383 like in my Father-in-Law's 92 Camaro. My devilspeak had no effect on him...
-
1962 VW Deluxe Microbus.
In daily driving of 26,000 miles per year between Corona and Brea in 91 HELLISH daily traffic, and then every-other-day blasts up to Duarte at 75+, as well as weekend chores, it costs me $345 a year in annual maintenance costs, amortized over the lifetime of the Van as I've owned it. That includes Purchase price of the van, as well as a brandy-new engine from "Strictly Foreign" (who is now up in Oregon).
If it stays at 55-60mph I get 27mpg on a 1641CC DUAL CARB (Baby Dells) setup with Engle 110 Cam and 1/25 Ratio Rockers. I can bury the speedo easily (not a feat on something that stops at 80), and driving on the freeway at 75mph just cruising along with traffic I will get 25. I have had the same sparkplugs in it as when the engine was rebuilt....over 65K miles and counting now! And people say unleaded gas is trash...
I often get people asking why I don't get something more recent. For $14K+ I will get something with A/C.........and that's about it. Some wouldsay 'safety is greater' but with your legs in front of the axle, you learn to leave driving space and not do stupid things. But the costs for one major service on a recent ANYTHING is more than I will spend on Tires and Engine Overhauls amortized over three to five years. I put a set of tires on it annually due to the mileage, I buy cheap Ohtsus that are rated at 30K miles, and cost $30 a tire (used later wheels that are 14", so the old Ohtsu Skins I take off can be used as "Storage and Roller Tires" on the Z's... 185/70-14.)
The thing on an Air Cooled VW is to do things RIGHT the first time, knuckle under and pay the $3500 (or whatever) for the good rebuild and not some econo builder operating out of his garage this week. My Hotted-Up Strictly Foreign engine at $1750 longblock was a FAR better deal than the $725 stocker I got back home, built for 'cheap'...
I prefer the 6V models that have been properly converted to 12V, simply because the wires are huge and they carry all sorts of current. Nice Bright Lights with an Alternator Upgrade (ditch the generator).
I ramble....
Problem is a 62 Microbus is not cheap. Truthfully the 68-72 models that have the Type-1 Engine can still be had relatively cheap and they do have some advantages over the earlier Split-Windows.
You may get waves, but driving the split is like therapy. Everybody waves, gives you thumbs up, honks and waves...they all want to be the 'Fat Bearded Dude in the VW Bus'...LOL
"The Dude Abides!"
on an aside, the later models were available overseas with diesel engines, so a lot of parts exist for a conversion to water-cooled Baywindow vans. I missed an opportunity for a 'gimmie' 78 Stationwagon (VW Bus) without an engine. I was ready to put in a wrecked Jetta TDI engine and be ready for 30+ mpg and PLENTY of power.
Handling? You need to do a serious life priority evaluation. If you are buying a bus for surfing, it's not for Mullohlland Drive. They will get you to seriously gnarly beaches, and up and down grades you thought mountian goats fell off. They just don't do it particularly fast.
You need to realize something, if you buy a bus, you are not in a hurry. If you're in a hurry, sell the surfboard. Like I said, driving the van is like therapy for me. I MAKES me slow down. I WANT to slow down. I ENJOY driving it. It's not an experience I want to be over.
It is the ONLY car I've owned that my wife REFUSES to let me sell (not that I ever would)...and it was the only one last year that she did't get upset over showing up 'double' overnight...(got a deal on a 66, and picked it up) her only comment was: is that one mine?
Also, Turbo Subie conversions are VERY popular if you are pulling loads. Look for vehicles on-sale here:
-
Would be nice if it was actually a "Fairlady Z"....which it is not!
"Fairlady"? Sure, but definately not a "Fairlady Z"!
-
Check to see that your drive tang is at that funky 11:25 position.
If it's not, you either skipped a tooth going in, or your gear has spun on the shaft, in which case all bets are off, and you have to 'align it without the marks'...
JeffP pins his gears with a 3mm hardened roll pin after we witnessed his distributor drive spindle gear spin almost a full 180 degrees while on the dyno!
-
That's why you just cut it up & piece it together all JDM like
That's round tubing they do that to...and unless you are VERY good at sizing, those kind of bends almost always flow poorly due to a reduction in cross section somewhere (usually multiple places) along the "bend".
It's a function of the culture as well. You got straight tubing, and a chop saw, you can make a bend.
If you have access to mandrel bends for anything, you are better off cutting them and piecing it together as you will have a better 'bend' than making a bend out of angle and wedge-cut straight tubing.
I dropped 1psi of restriction going from my 'JDM' IC Piping to a mandrel-bent set. And that was on tubing that was properly deburred on each weld before going to the next piewedge...
-
Any unusual waveform from a failing sensor can easily net you piston meeting valve in the setup being discussed here.
Loss of signal is a 'failsafe' mode for the DEVAS system, and the engine shuts down.
The processors are two 140mhz CPUs and one 'abnormal' waveform would not do it. It would have to be a sensor that came loose or slipped position. It checks and crosschecks the relative positions of each sensor so quickly that any abnormality will cause a 'safe mode' operation, or valve shutdown.
Remember that these valves are not MECHANICALLY opened, so an impact of a piston to valve would likely 'bounce' the valve off the head, as oppose to 'squash' it between two immovable, mechanical items.
The dominant paradigm will get you in trouble when you apply your thinking to how the system operates. The hydraulic system only needs enough pressure in it to open the valve, a simply relief valve will allow this 'bounce' by immediately bleeding off hydraulic pressure should impact occur....
This is not your typical 100+ year old "Cam and Tappet" arrangement.
If F1 can use Desmodromic Valves (same technology, different actuation motive force) without incident, I'm thinking DEVAS is not as susceptible to 'abnormal waveforms' as you may think...
-
Solve the problem and do what I did: Next time the float chargers go on sale at Harbor Freight, BUY SEVERAL.
They are not 'chargers' per-se but keep the battery electrically 'topped off' from the normal discharge through the plates over months of sitting.
I put one on my forklift almost a year ago. WONDERFUL RESULTS. I recently bought half a dozen more to permanently install under the batteries of the Z-Cars and the Bus so I can leave them plugged in so they fire up right away...even after sitting for months unattended.
My red-top is now dead, after letting it go flat (before I bought the battery maintainers) I tried jumping and slow charging it, to no avail. For a battery that is only 2 years old pretty sad. If I'd paid money for it, I'd be more annoyed. But as a freebie, I can't complain. It still looks nice in the Red Car (LOL)
But those Harbor Freight Float Chargers are really da shizz for stuff that sits for long periods between startups. I think I average anywhere between 4 to 6 months before startups on the forklift, and it's always gone stone dead in that period before. Unless I run it every week, the battery goes dead in about two months. For the price, saving a battery that costs 10X the cost, it's worth it!
-
If you do a 'straight chop' on the roof, all you need to do is alter the side channel and leave the glass partially rolled down anyway.
I have always made polycarbonate side windows as screwing with trying to cut glass (by whatever means) can be more trouble than it's worth. Maybe the 'little cubes' guy has it, but errosion of the glass done with a sandblaster is particularly gentle in the way it 'cuts', and I have never done it from only one side. I have always cut front and back with double masks.
I have broken more windows turning them over and dropping them than shattering them during the sandblasting process. Leaving vicegrips on the masks is not a particularly good idea, either.
Think 'spotblaster with rubber nozzle' for the 'cutting' implement.
-
My Roll Hoop was an over-the-counter JDM bolt-in item, and is not NHRA legal by any stretch of the imagination.
I'm getting closer to pulling it out of the rafters guys...really I am! The last three months have been unbelievably busy for me with work. Dammit.
The big thing about my roll hoop is it makes a nice template.
Bryan, if you want John to make up some prebent stuff, I might be able to tow my 2/2 over to his shop and let him notch and pre-assemble something, and then just ups the parts to you for final assembly.
The Hoop is the pain to bend, after that, straight tubing and notching is usually all that is required.
I agree, read the rule book, it answers a lot of questions.
And "normalizing" is not due to the welding process (TIG) it's due to the metals being used. Cr.Moly is specific in the way it likes it's structure aligned for maximum strength and impact resistance. Normalizing is kind of like 'heat treating'---it usually means heating the joint to relieve stresses and then letting it air cool. Annealling is 'the same but different' and usually occurs at a lower temperature. If you don't normalize a Cr Moly weld, the chances of it failing at the HAZ or in the weld itself is significantly higher than after normalizing.
Mild steel does not usually require normalizing, due to it's structure, but following the normalizing procedure would not cause any harm. That's why most home cages are best built from heavier mild steel tubing, no special procedures are required. Make a clean weld with proper fitup and move to the next joint.
Anybody remember Oxy-Acetylene Welding the "Three Sticks" in Cr.Moly tubing? Anybody have one of their's mounted as a trophy? LOL
-
A big question you want to ask is do you want the foam in there after the glasswork is done? If you don't, then using standard styrofoam is preferable, you can get it close, cover it with several layers of latex house paint, then lay your glass over it. Then pour in a solvent and dissolve out the foam afterwards.
There are places where having the foam in there may be advantageous, like a nose extension or lower spoiler. And if your flares are as big as mine, flotation in a water incident may come into play! LOL
But yeah, moulding in bolts is not that difficult, tacking them to a thin strip of sheetmetal and glassing over them is relatively easy, as is stuffing them through a balsawood stringer (which will add stiffness as well).
The Original G-Noses have mounting hardware in the nacelles (as did the early 240Z's) so blots in the glass is not a hard thing to do.
Just make sure you stiffen/strengthen the area you will be using as a 'clamping area' and beware when you bnmp against things as you will usually have a strongly adhered section, and the rest off somewhere else...
I ran my RR Flare onto a curb one day, and realized a pegleg car sucked...
I had em made strong (and heavy!)


Head cooling on cylinder #5 - solutions?
in L-Series
Posted
I downloaded it pretty quickly, the film is 32 minutes long. Think back (if you are old enough) to school when guys in Horn Rimmed Glasses with white short-sleeved shirts sporting the latest in pocket protection and a sliderule lectured you on the way the natural world was! LOL