Fauxre
-
Posts
315 -
Joined
-
Last visited
-
Days Won
5
Content Type
Profiles
Forums
Blogs
Events
Gallery
Downloads
Store
Everything posted by Fauxre
-
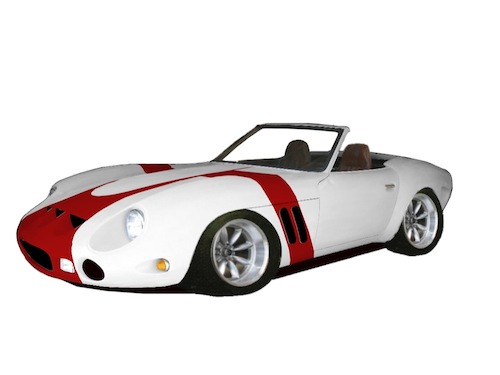
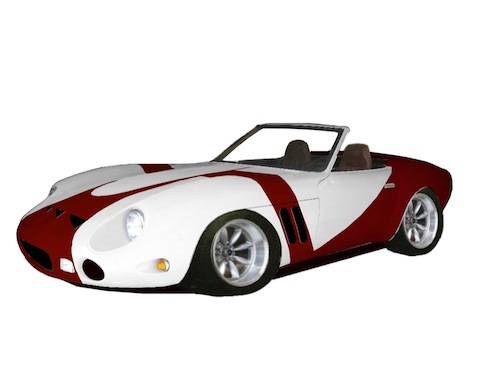
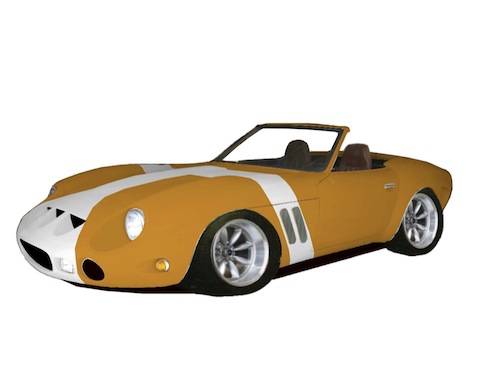
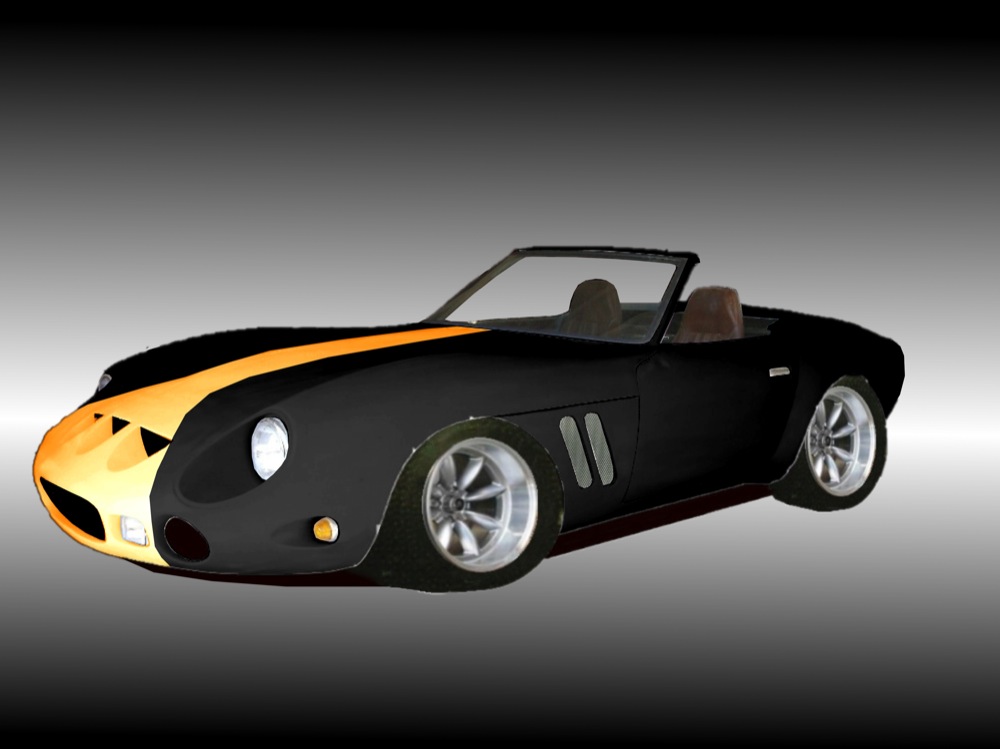
I've been playing with paint schemes for my my Velo Rossa while I'm waiting for parts. I posted a few pics in my build thread, but it was suggested that I might want to post here as well. So, here are a few thoughts for a custom paint job... from mild... to wild.

-
Three more paint schemes (of 87 I have saved), I like.
-
This is what happens when I have too much free time. An not enough parts.
-
Windows are in, but the regulators are worn and operation is sloppy. Especially on the drivers side. Considering power options. Anyone installed after market power windows in the S30 doors? Forum search time.
-
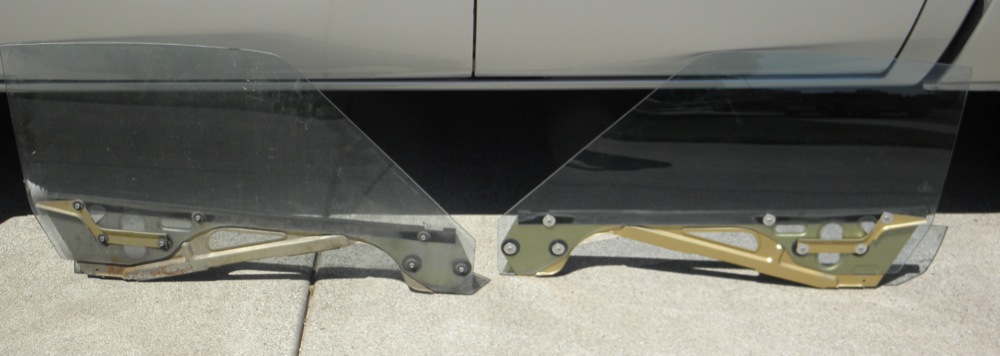
With no new parts coming my way in the next month (keeping a cash cushion for our son's up coming wedding) I've decided to get going on fitment and clean up on some interior parts. Started with the seats. The reclining release mechanisms rub on the reinforcement used to strengthen the unibody after the top was chopped. Simple fix. I swapped the seats from side to side, putting the release handles next to the tunnel, where there's plenty of room. Todays job was refurbishing the door glass. A little steel wool, some elbow grease and a coat of paint for the metal pieces, brings back the original shine. I'll start in on the tracks tomorrow.
-
Adding material and reshaping the fuel pocket for a tighter fit.
-
Wrapping up a closet remodel before getting back to the VR. So much for getting it running this summer.
-
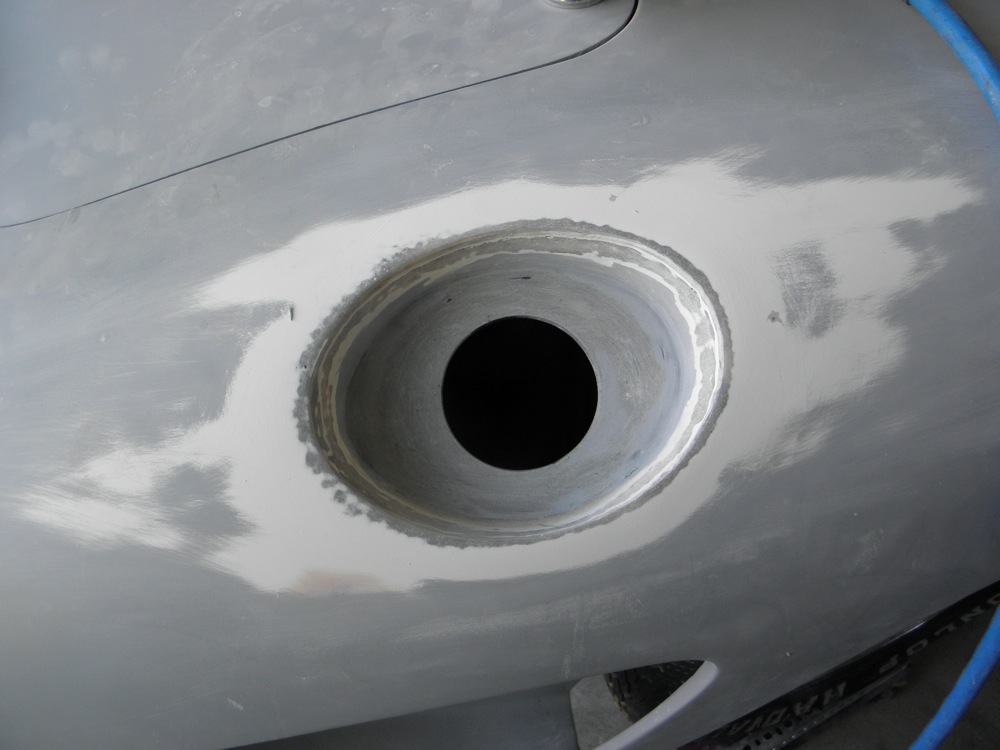
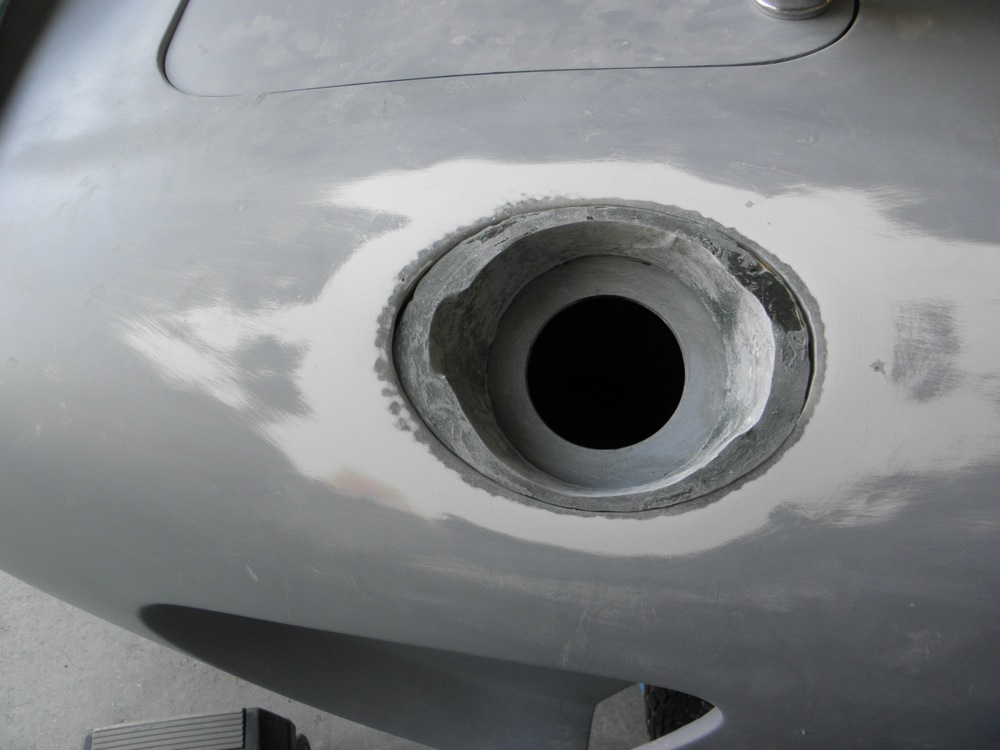
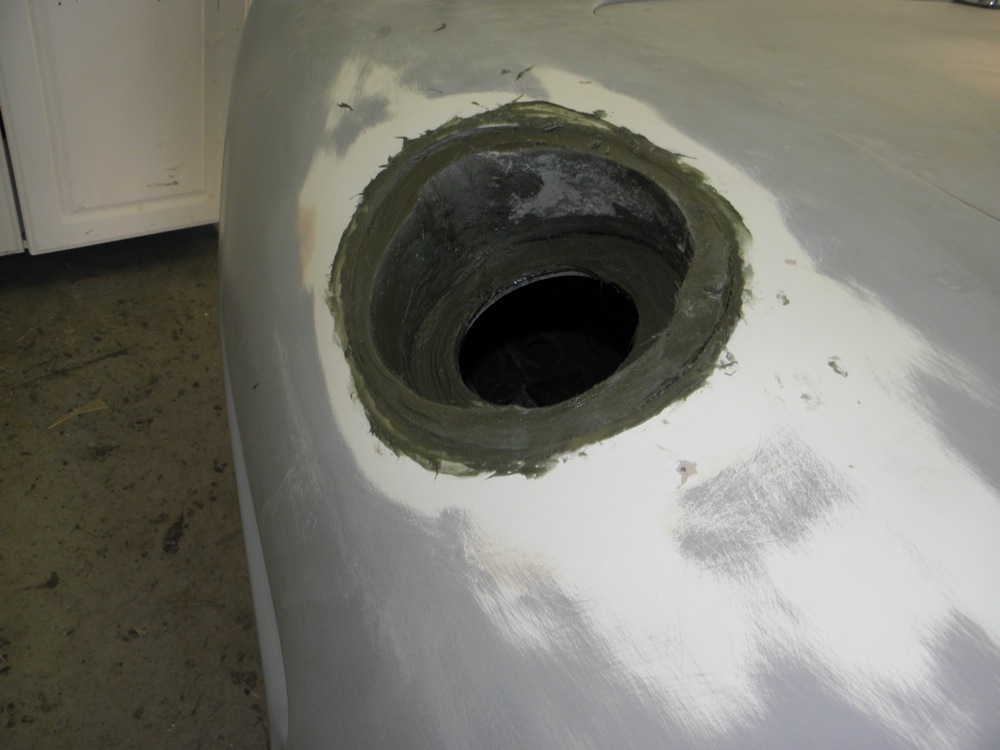
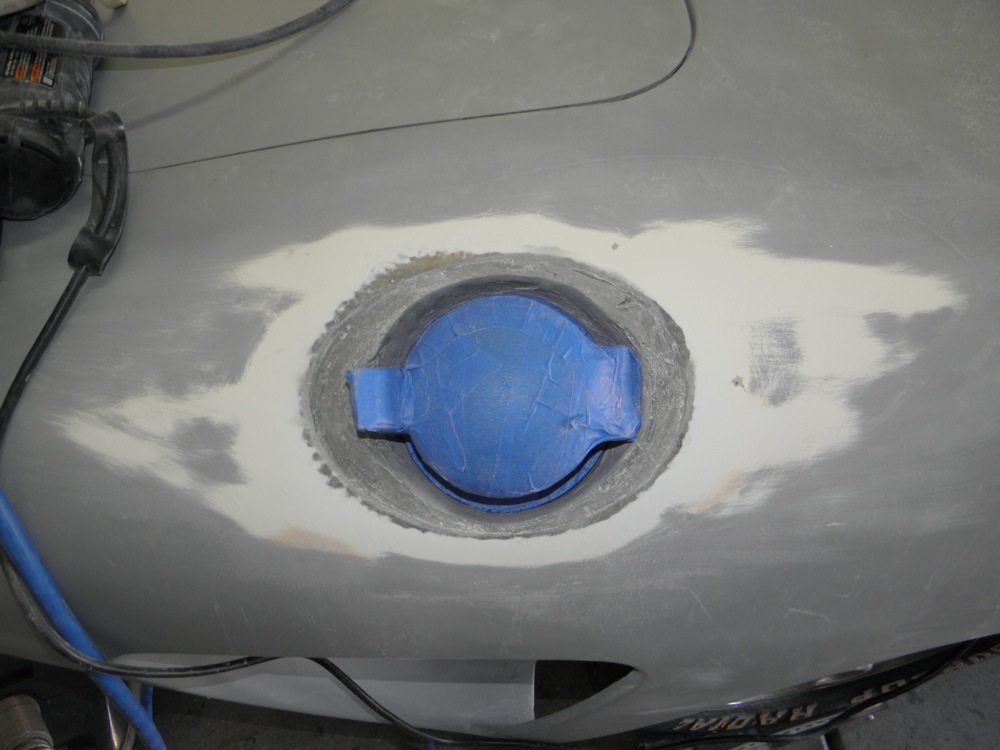
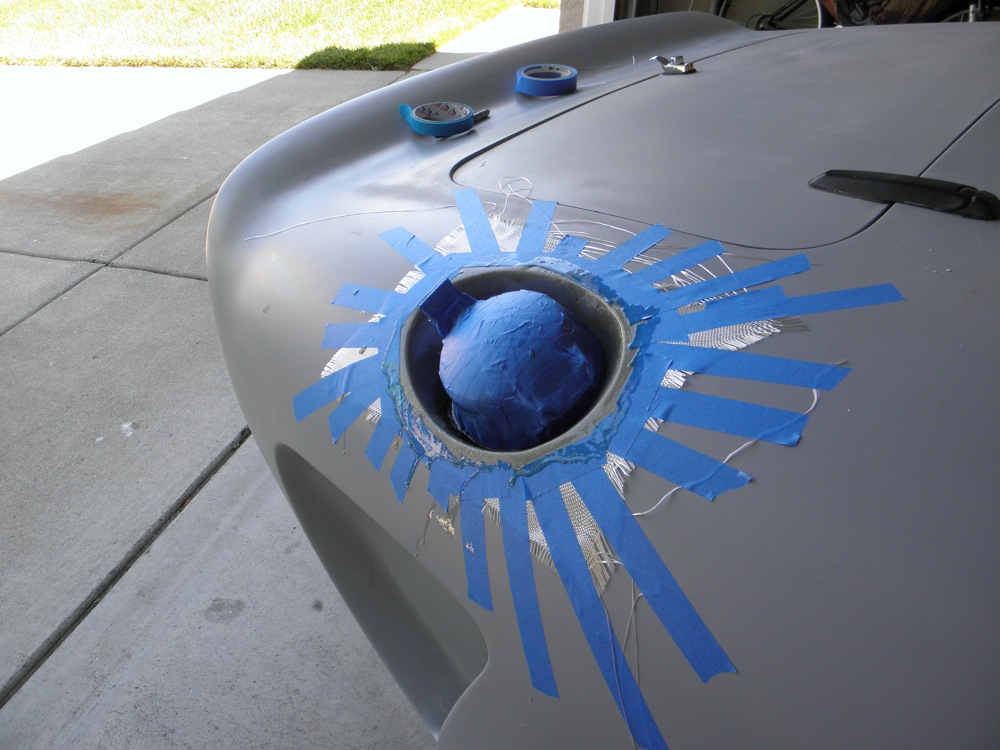
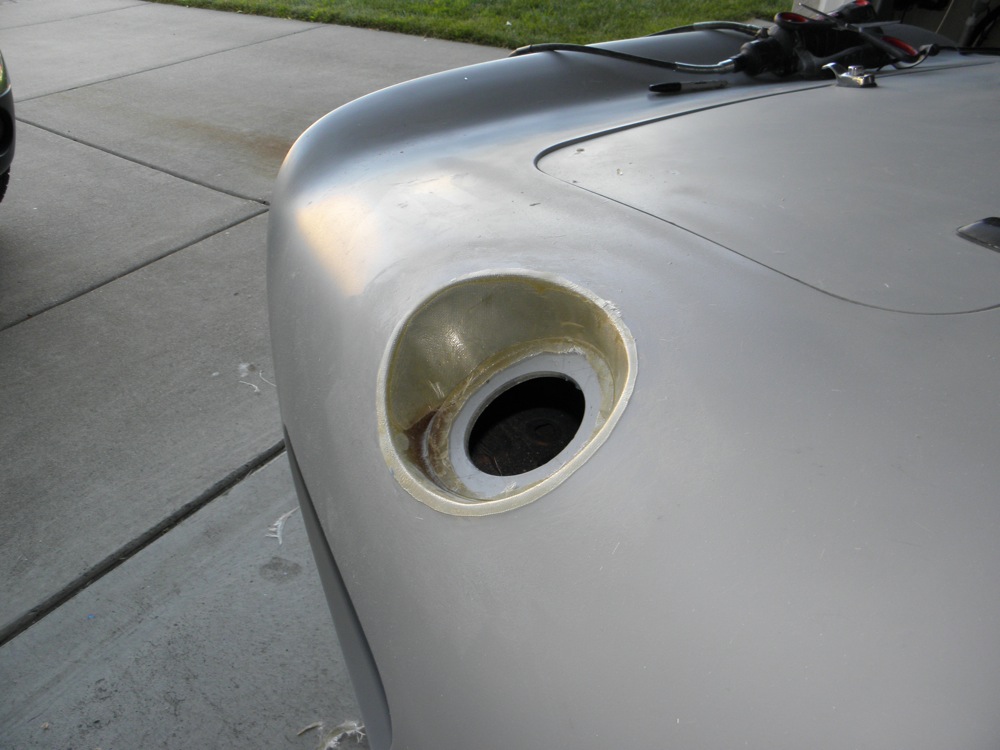
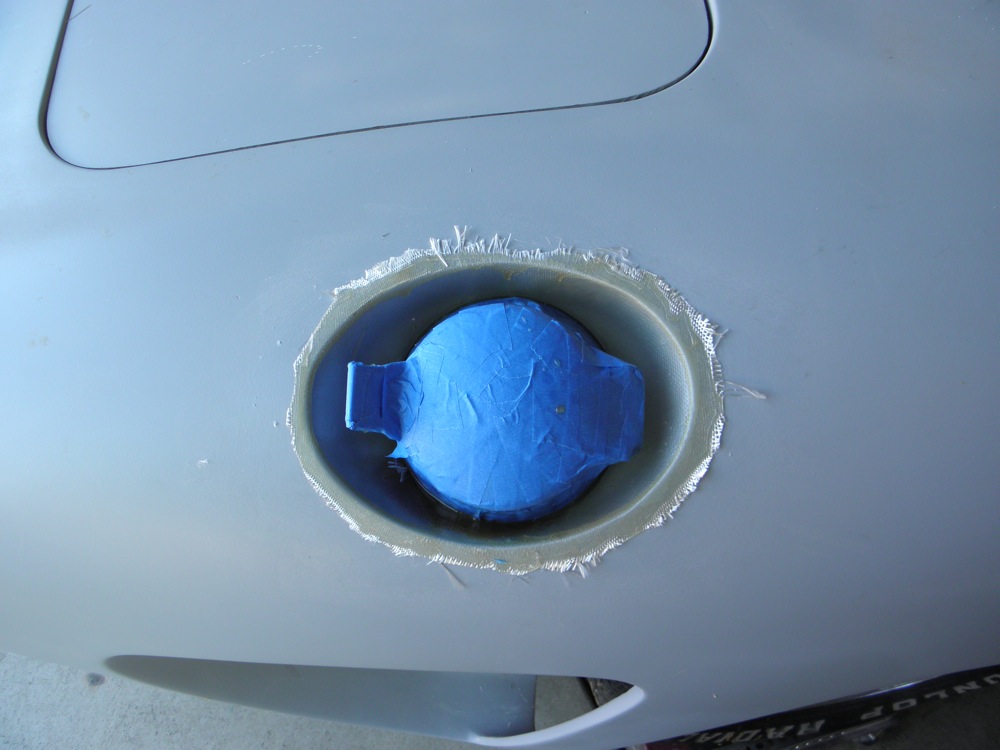
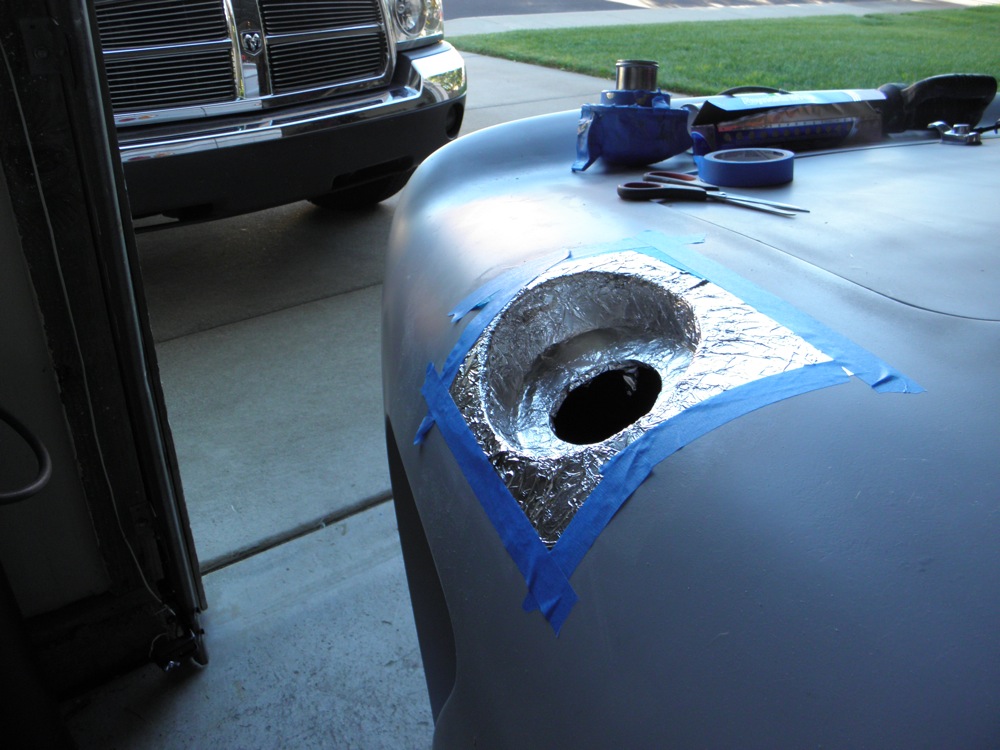
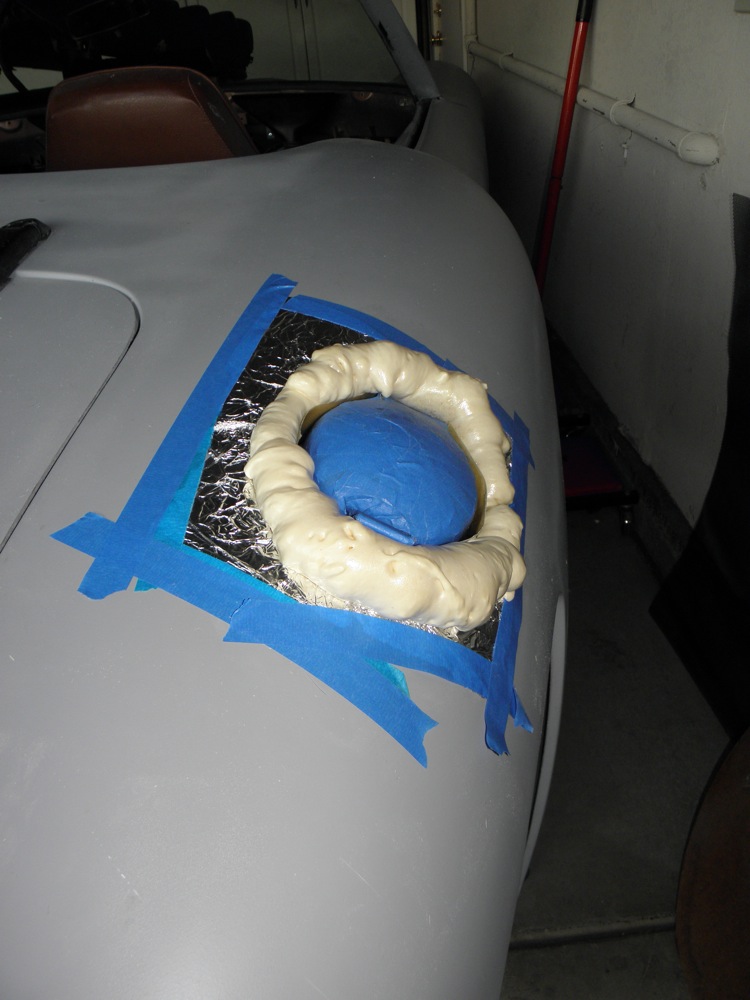
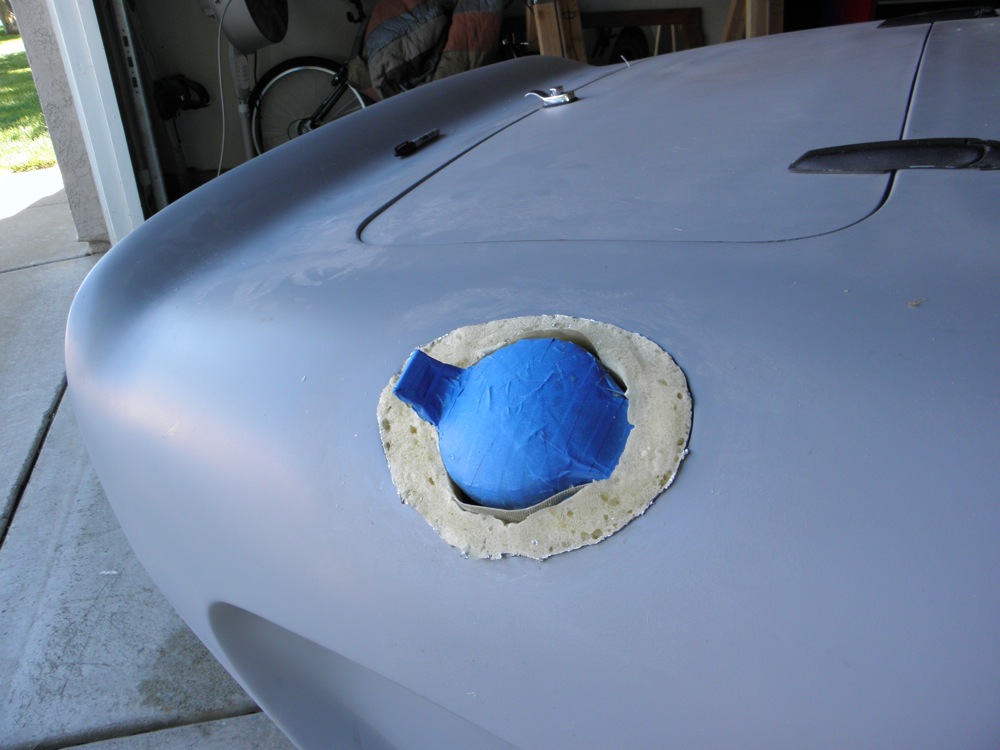
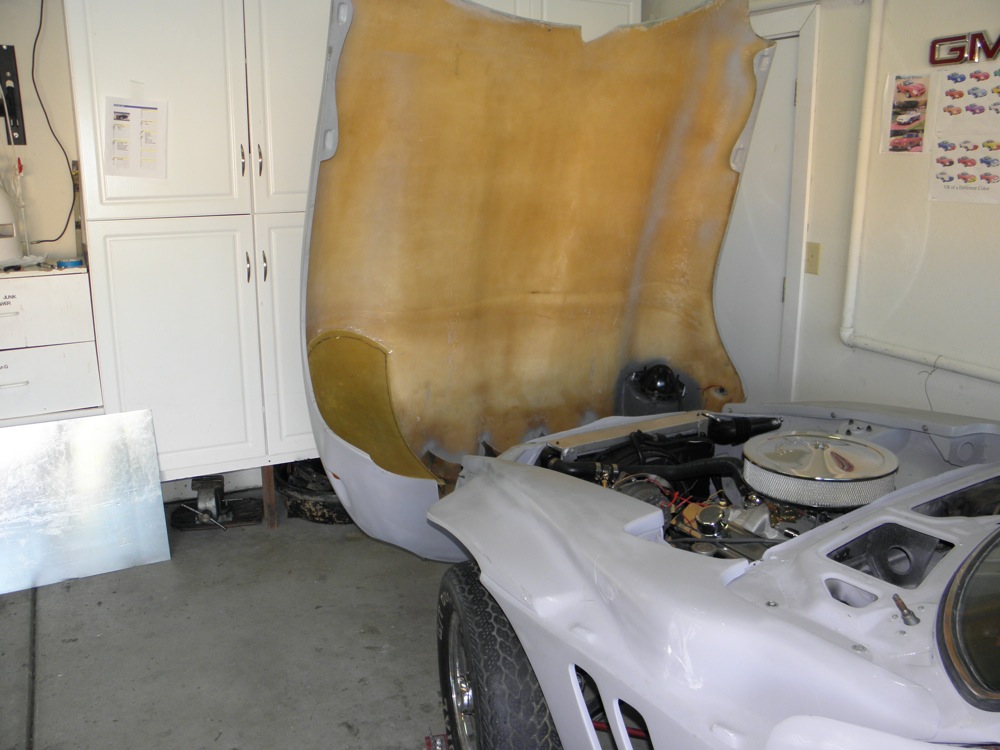
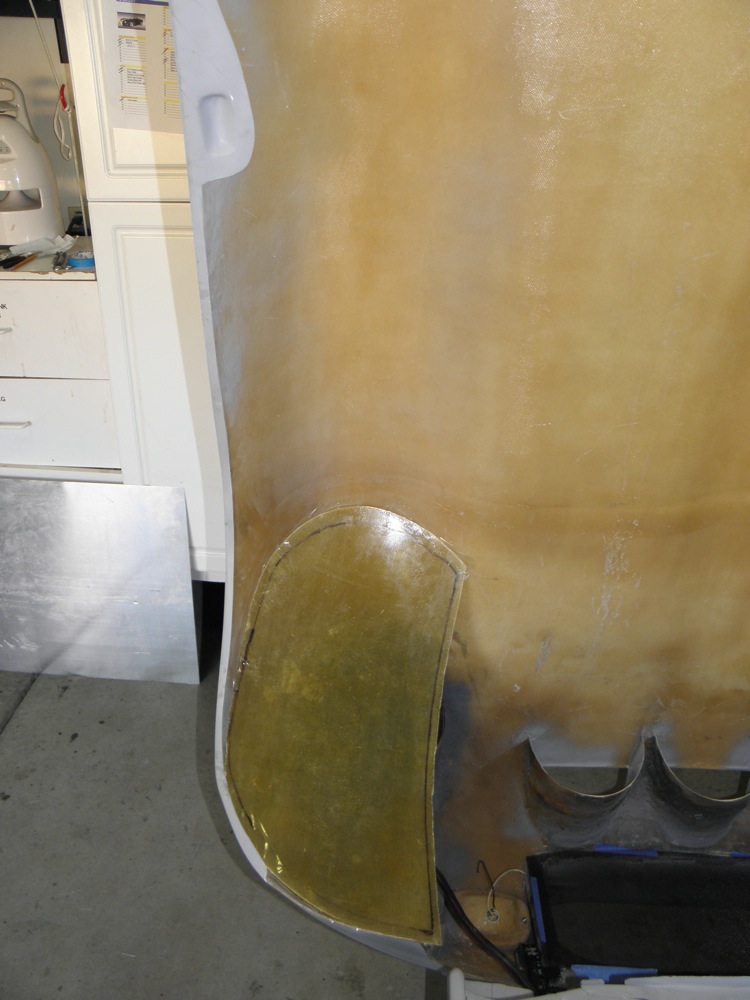
Working on the fuel pocket today. It's too big for my taste, so I'm trying a couple different looks. The walls are set at right angles to the bottom... ...I created sloping walls, by stretching fiberglass cloth from the center hole to the pocket edges and securing it with tape. The resulting insert... ... makes for a more appealing pocket. But I still think it's too big. To get the pocket tighter to the gas cap, I lined the pocket with foil... ...inserted the gas cap... ...and filled the gap with expanding foam. A little trimming and carving... Some more carving and I think I'll have something I'll like. I'll use the foam plug to make a piece that can be permanently glassed to the body.
-
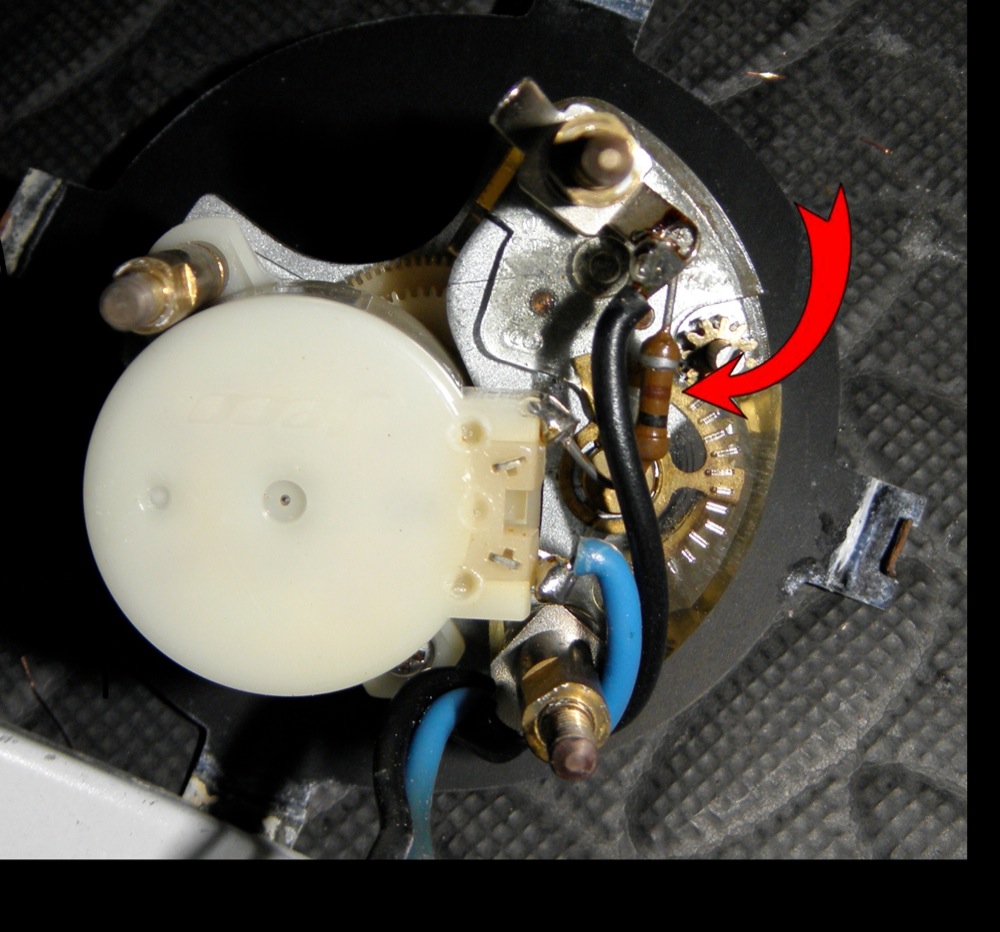
Thanks Jasper, The resister seems to be all that's keeping it from running.
-
Tried the link, but got clasiczcars error message. Is this the capacitor? If so, does anyone know the specs for it? My clock runs when I bypass this. Don't know if it's accurate, but the gears spin.
-
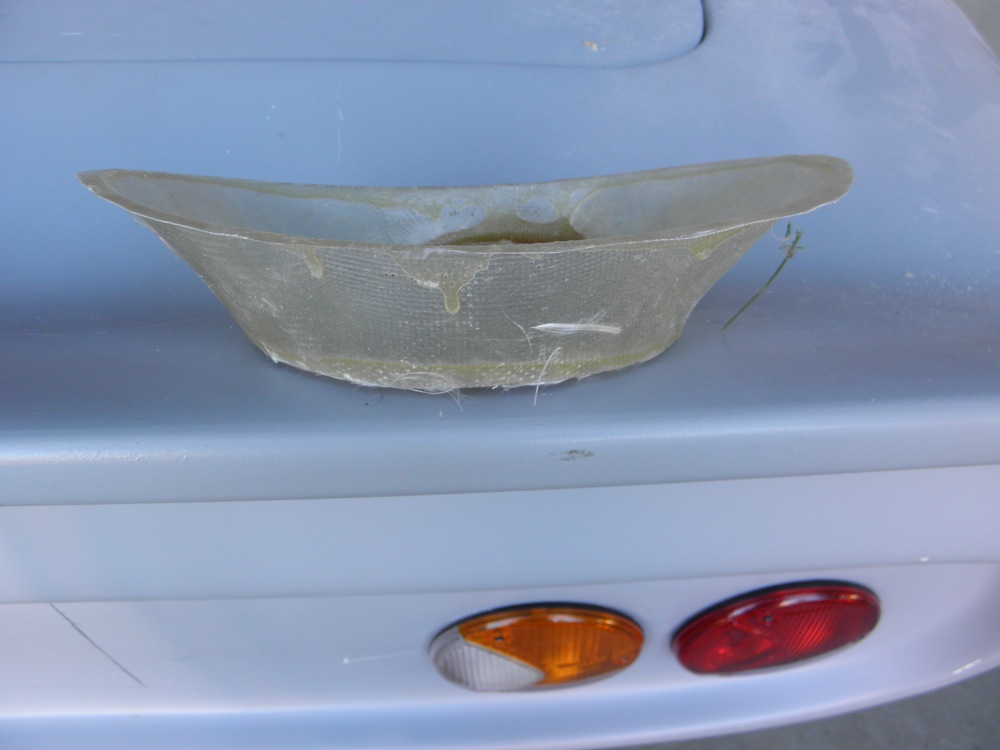
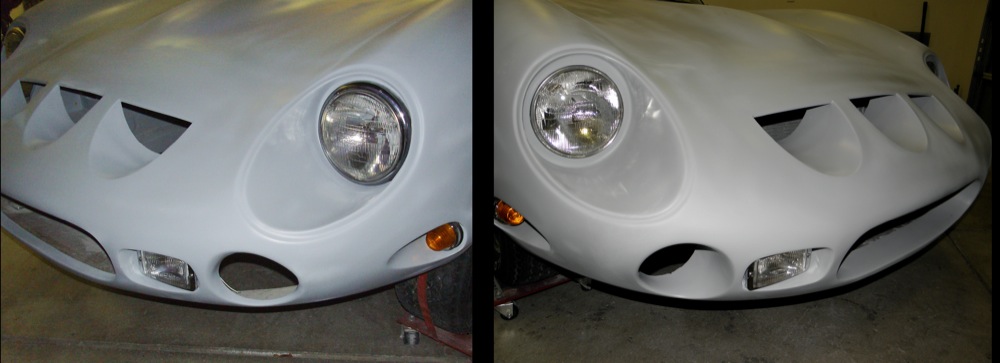
Here's what I'm trying now. A removable fiberglass inner fender ... ...that will block off and protect the light assemblies from road debris and finish off the wheel well when the bonnet is down.
-
Thanks Kito. I agree. The VR body is sleek, elegant and unique. I know it's not the popular view, but I like the look of this roadster much more than the original fastback Ferrari 250 GTO. If you'e truly considering this re-body, just remember that it's not a bolt on affair. You'll have, in my opinion, triple the amount of work over your engine/tranny swap. I thought I was through with mods a couple months ago, but I keep finding areas that just don't feel finished. For instance, I spent some time today trying to make an inner fender for the front end. The headlights, turn signals and front vents are visible through the front wheel openings. Here's my current solution. Sorry pics won't load. I'll try a new post.
-
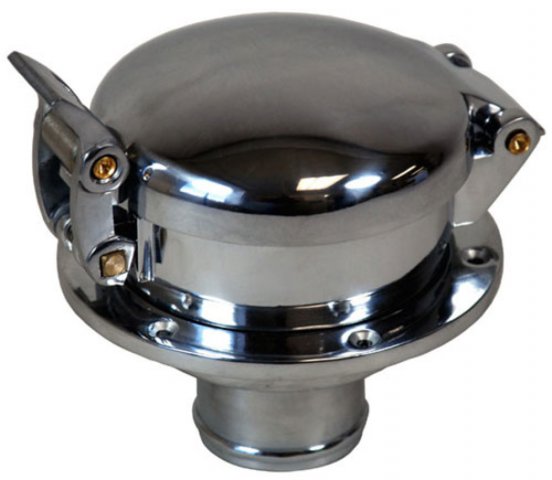
l'll be mounting a tank in the same location, to allow for dual exhaust and mufflers. An inexpensive '55 Chevy tank has the dimensions I'm looking for, with a filler neck and sending unit mount conveniently located. Just ordered my LeMans style gas cap a couple of days ago. I've never been to the Concours d'Elegance and I'll miss it again this August. But I'll be there two weeks later... our son is getting married on the beach in Carmel, about three miles away.
-
Ordered the Factory Five Racing Le Mans style gas cap yesterday. Still playing with wheels. And with the assistance of my wife, bled both the brake and clutch systems. Good news... NO LEAKS!!!!!
-
I didn't cry... but depression did set in for several days. I'm at just under $10K and no where near even firing the engine. Some very ambitious mods to those doors. I spent a lot of time and energy doing my front end mods, and the results aren't nearly as dramatic as yours. $37K is a lot of money, but clearly the quality of the final product will be superior. Love the custom gas tank. Is it a replica of the original GTO tank?
-
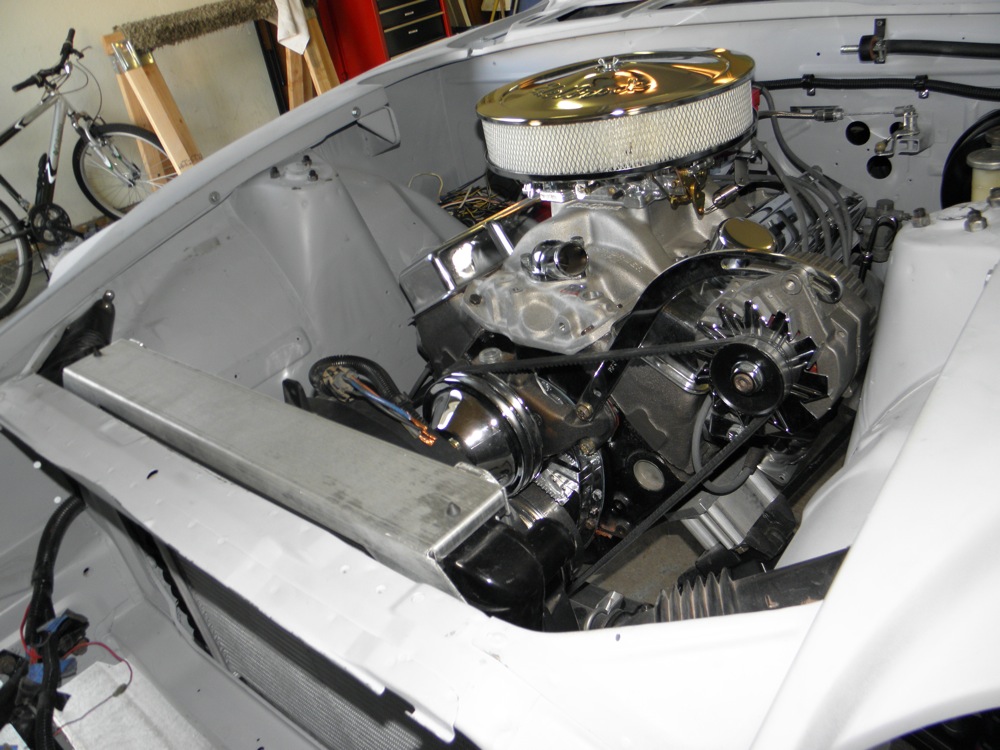
Old school SBC 350 in my 260Z based Velo Rossa project.
-
Stumbled on to this one for sale today. http://www.datsuncla...-in-maine/cat/1 Nice starting point for someone who doesn't want to go through the full body and engine swap routine.
-
 I think this is the best custom Z I'e ever seen. Outstanding concept... combining the best lines of several great cars. If my Velo Rossa turns out half as nice, I'll be thrilled.
 -
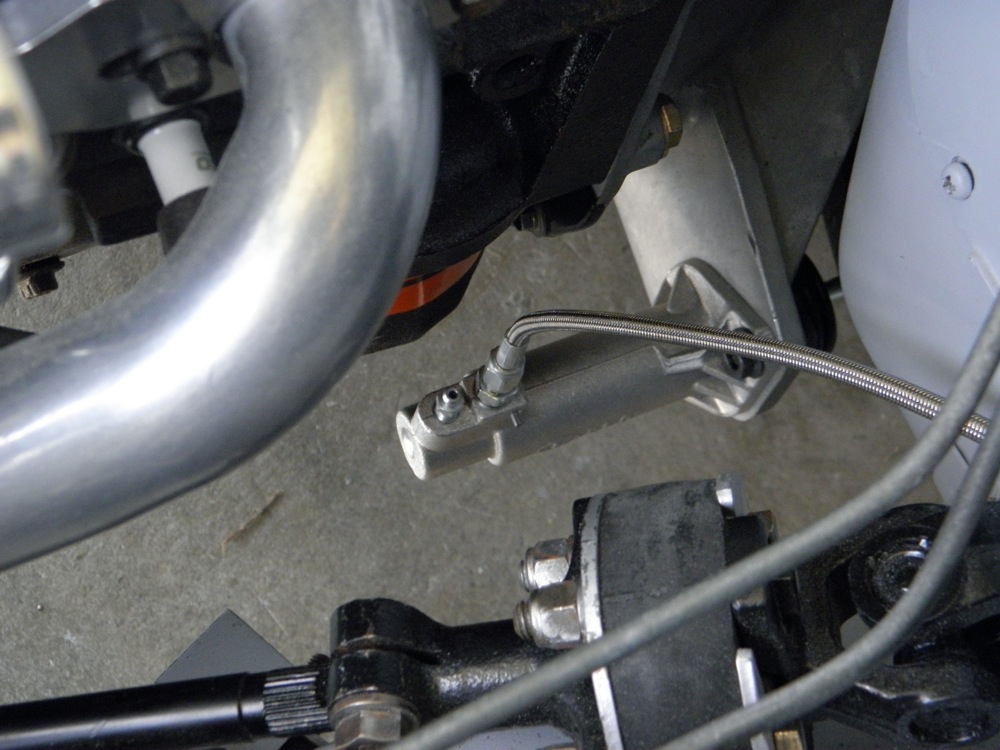
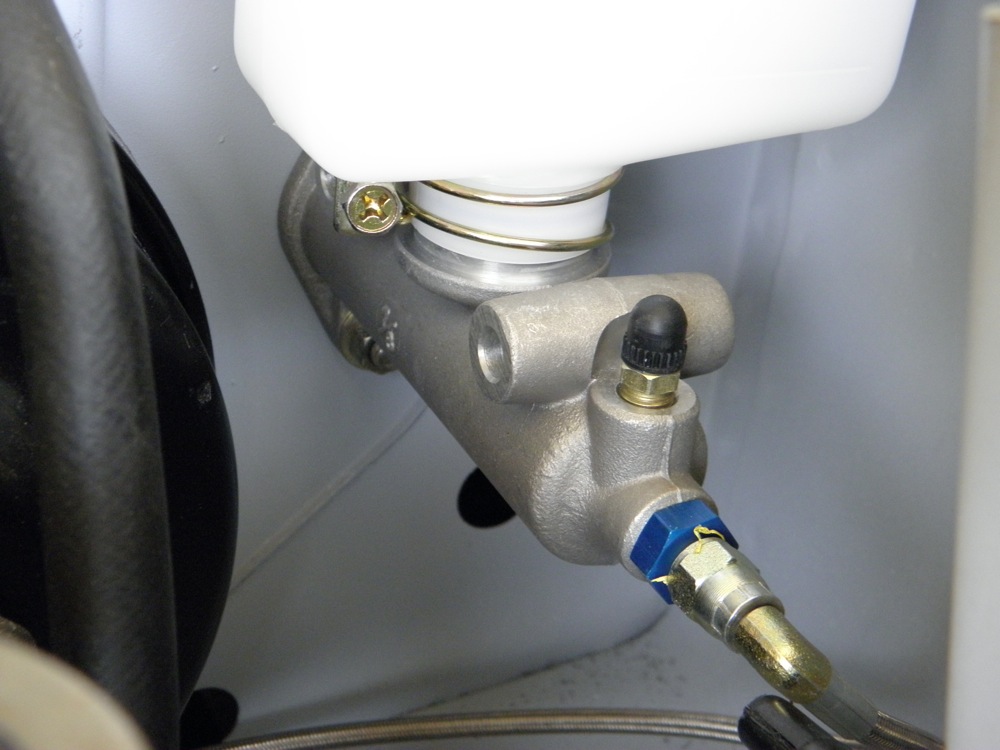
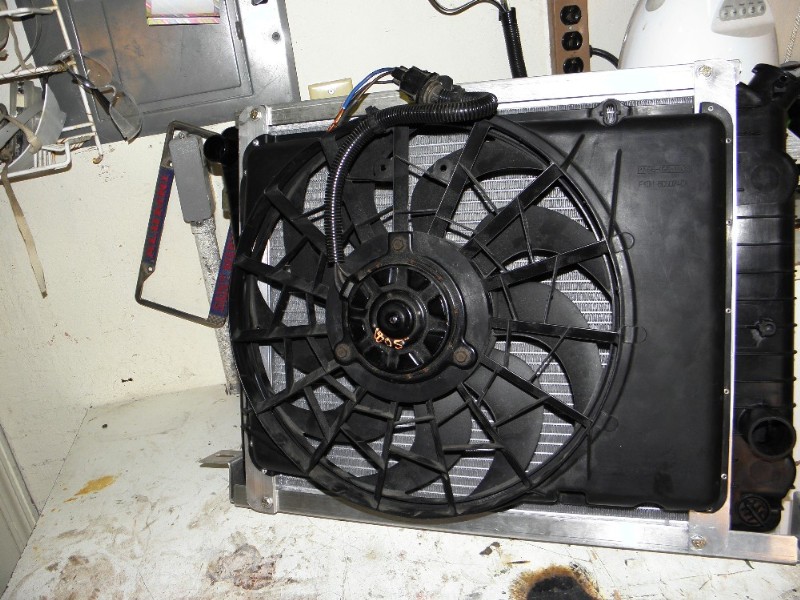
Progress on several fronts over the last couple of weeks. First I wired up the dual speed radiator cooling fan with the help of this thread... http://forums.hybrid...__1#entry921201 ...and it's associated links. I got all of my parts at the local Pick N Pull. Dual Speed Taurus Fan $35 Volvo Fan Relay w/plugs $10 BMW Temp. Switch w/plug $ 7 Total $52 Next I went to work on the hydraulic clutch system. The Tilton .850 master cylinder, ($85 from Summit Racing)... ...connects to the Camaro slave cylinder ($35 at O Reilly Auto) with a blue -3 an coupler ($2.45 Summit), a 32" -3 an 90 degree hose ($17 Summit) and a 'GM clutch cylinder to -3 an' adapter ($32 Summit). Total cost about $90. Very clean when installed.
-
Hey Guys, Any updates on the dashes? How did the plasti-dip work out SunnyZ? Anyone have pics?
-
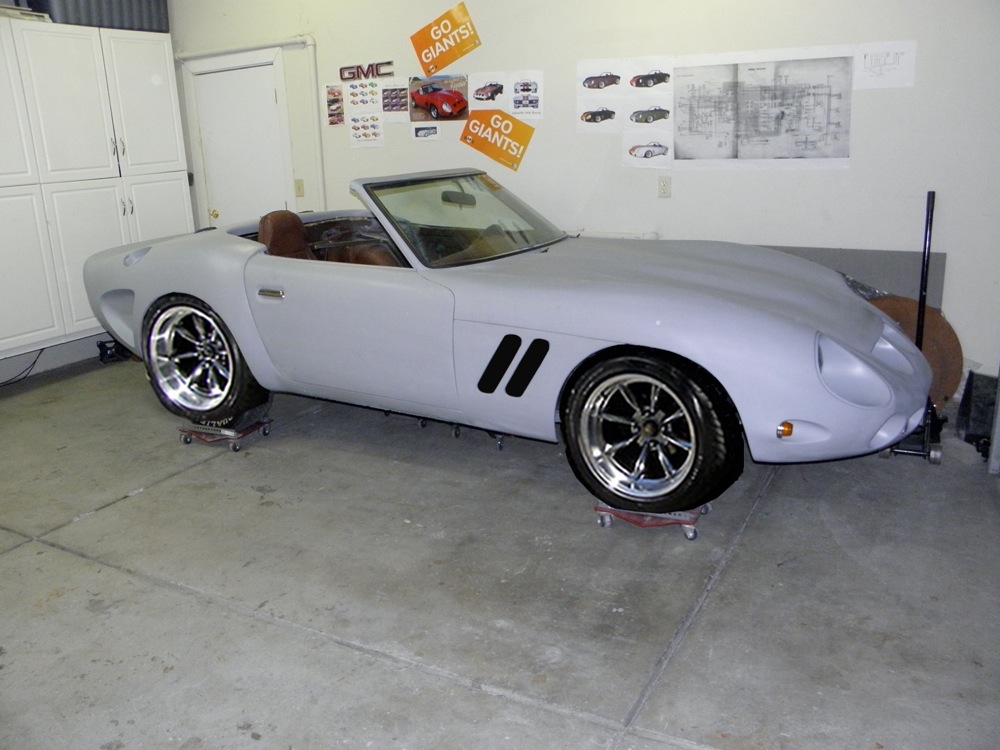
Finally finished the bonnet mods. A lot of work for some subtle changes. Hopefully these will make it stand out from the other VR's.
-
Just a thought...
-
Mounted my Taurus fan to the radiator. I considered several different options after looking at many pics here at HybridZ. I eventually settled on what turned out to be a pretty simple solution. I attached the vertical plastic edge flange on each side of the shroud to 1 1/2" x 1/4" aluminum bar using stainless steel rivets.. The bar width is enough to extend to the existing mounting bolts for the threaded 3/4" aluminum bar that came on the JTR/Stealth radiator brackets. I simply drilled holes in the new bars at those locations and used the same bolts to reattach everything. I think it looks pretty clean.
-
Working on mounts for the Taurus fan. Think I've finally decided on which way to go. Pics when I'm done.
-

Newbie trying to plan first build
Fauxre replied to SonewSodumb's topic in Gen I & II Chevy V8 Tech Board
Welcome to the information highway for the V8Z, Like you, I'm doing my first major car project. It's a Velo Rossa body kit with a JTR 350 swap. Vacaville Velo Rossa thread ( http://forums.hybrid...__1#entry813716 ) if you're interested. And I too want to do as much of the work as I possibly can. I've found the threads here cover just about every problem you could come across... a little searching goes a long way. As for books, these are the ones I have been using with excellent success: How to Rebuild Your Small-Block Chevy, by David Vivard HPBooks How to Restore Your Datsun Z-Car, by Wick Humble, California Bills Automotive Handbooks Datsun 240Z,260Z & 280 Repair Manual, Haynes Publishing Datsun Z V8 Conversion Manual, JTR Publishing You should probably decide on which engine to use first, as JTR has a separate manual for fuel injected engine swaps. Or I suppose you could get both manuals and then decide which is more to your liking. As for avoiding pitfalls and frustration...? The nature of this kind of endeavor won't allow it. Taking the first step is the hardest part. Wes