Fauxre
-
Posts
315 -
Joined
-
Last visited
-
Days Won
5
Content Type
Profiles
Forums
Blogs
Events
Gallery
Downloads
Store
Everything posted by Fauxre
-
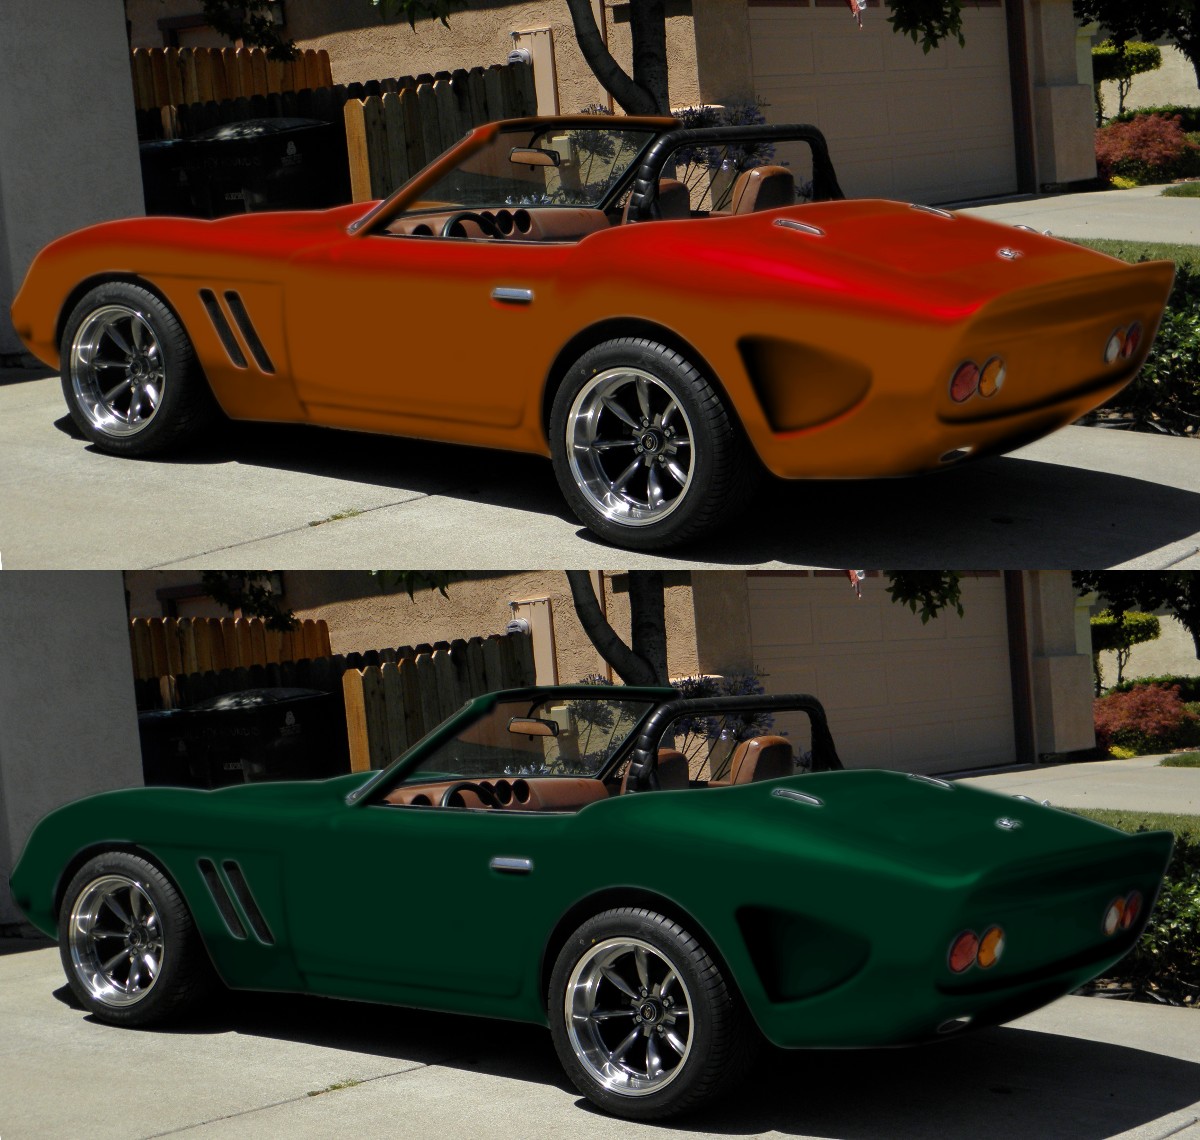
Googled for the dark green, but didn't find it. I did find this light green Ferrari 250 GTO originally built for British racing legend Sterling Moss, which sold at auction recently for $35 million!!! Maybe it 's worth so much because it's unique, in that it's not the usual Ferrari red.

-
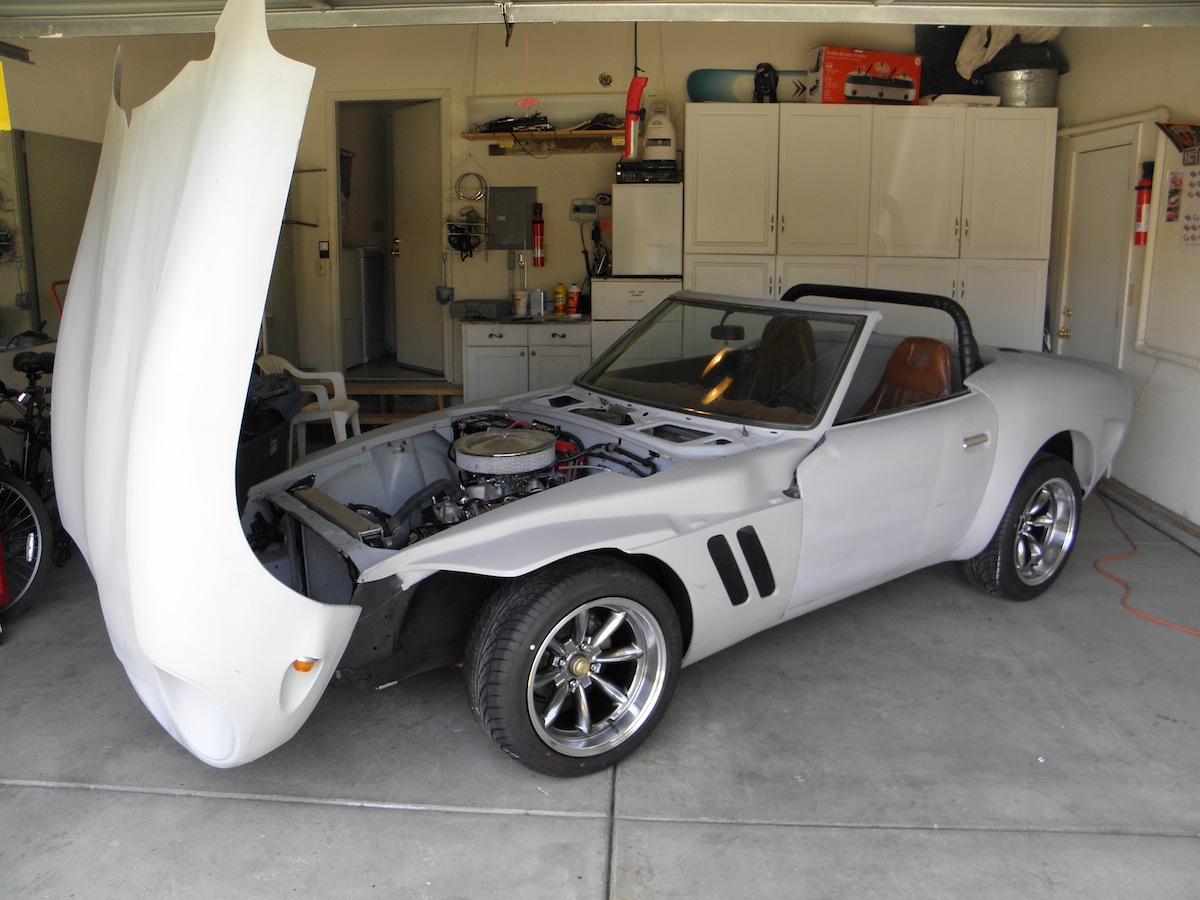
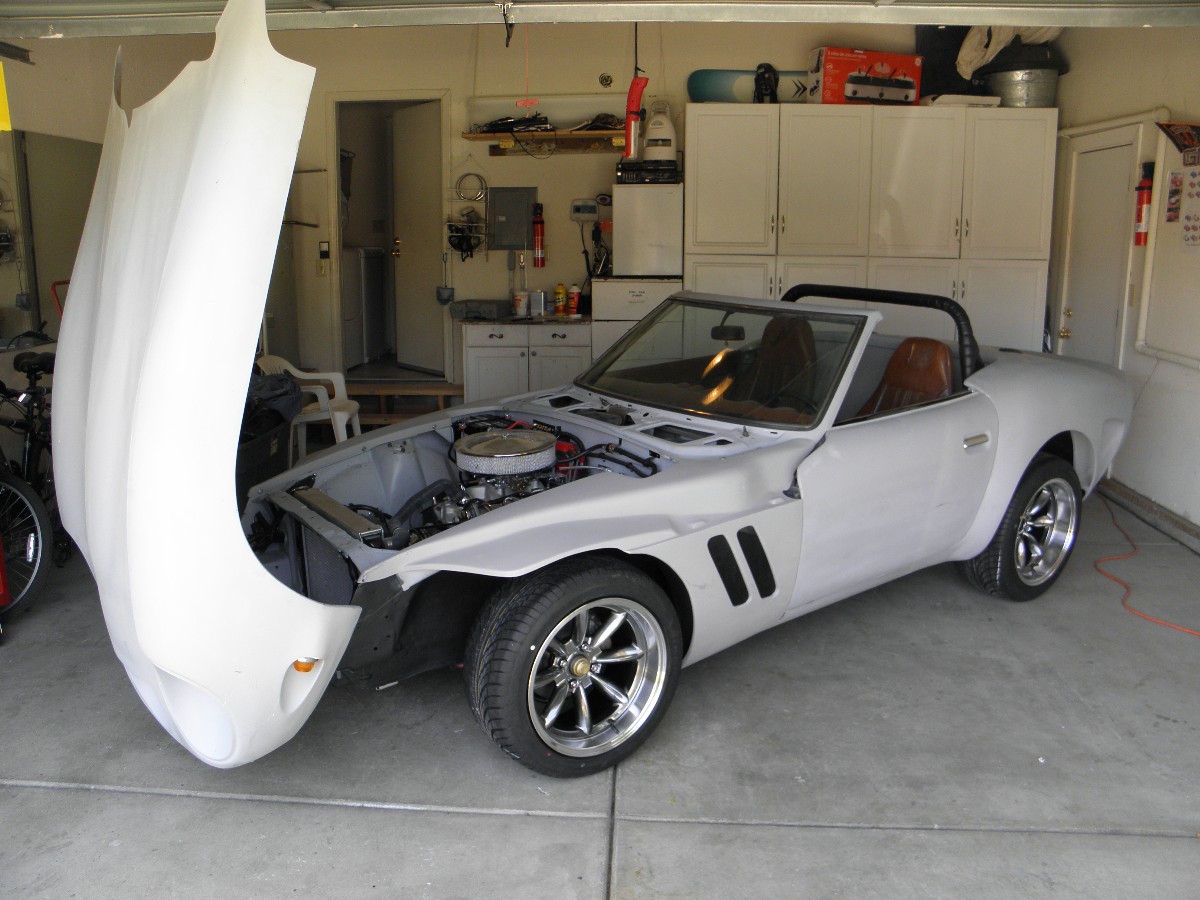
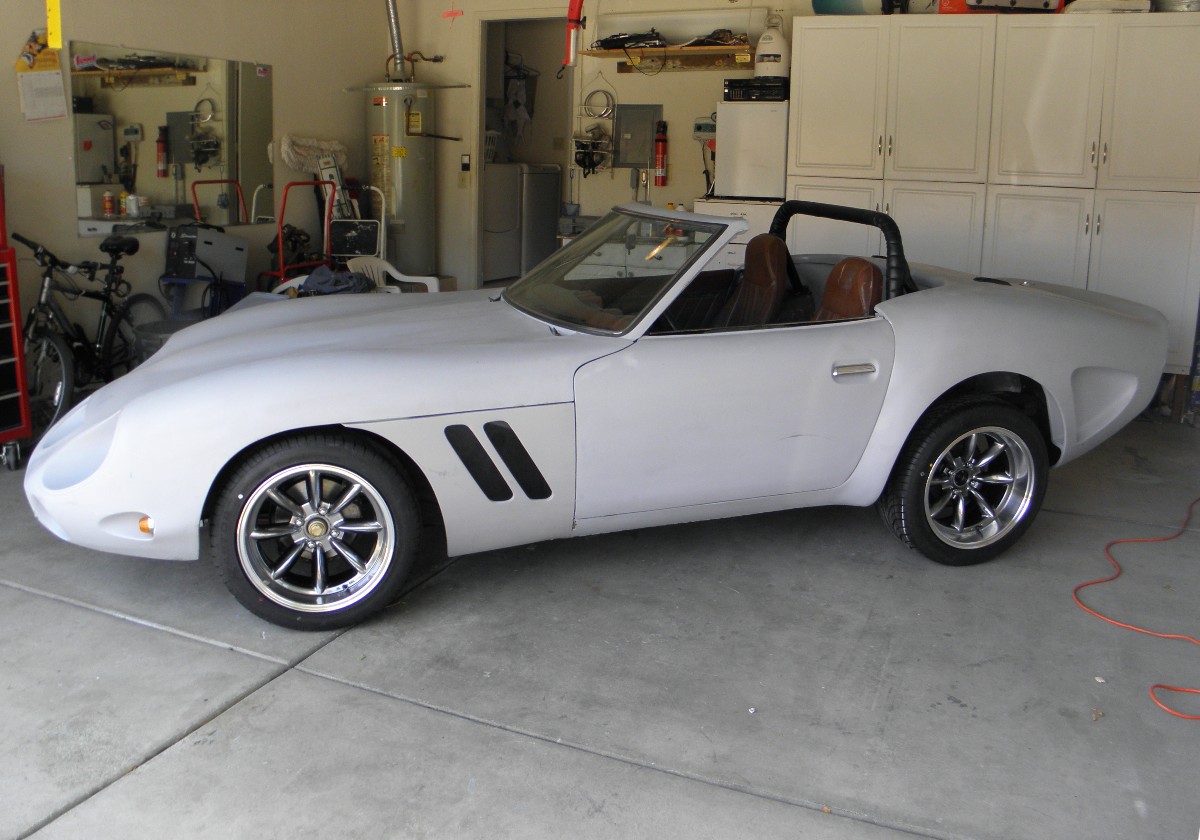
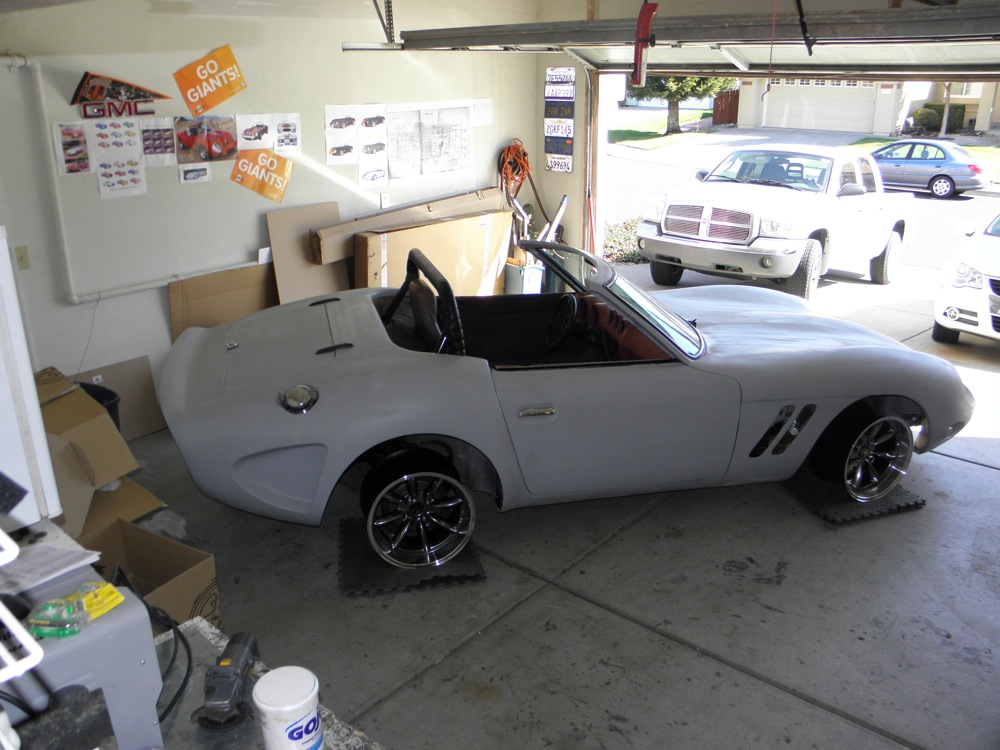
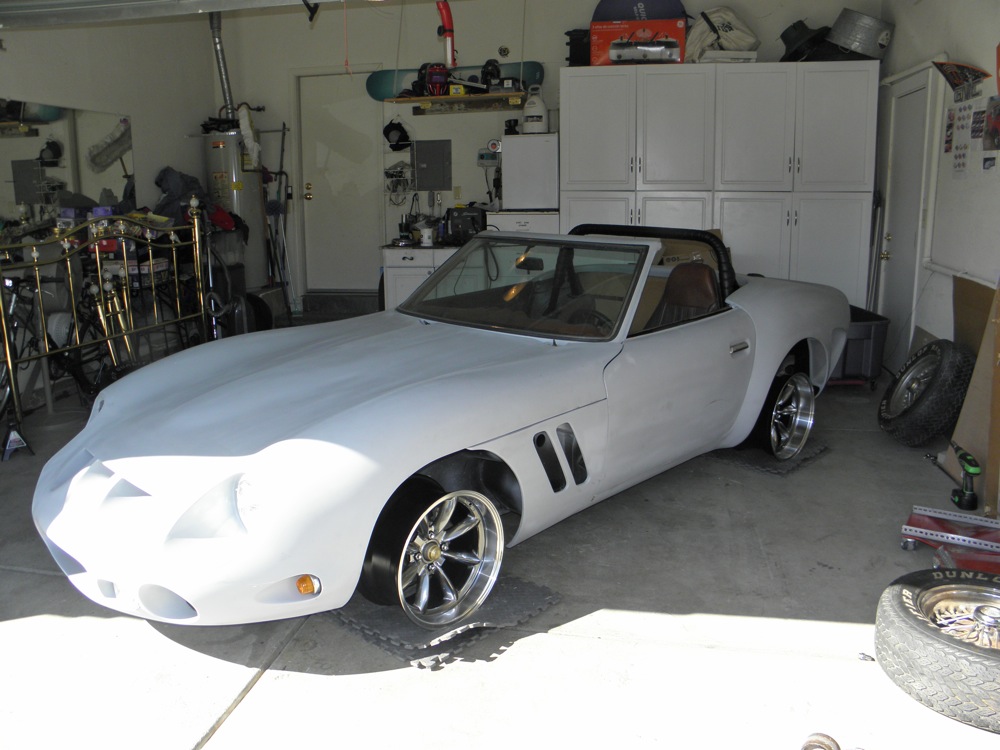
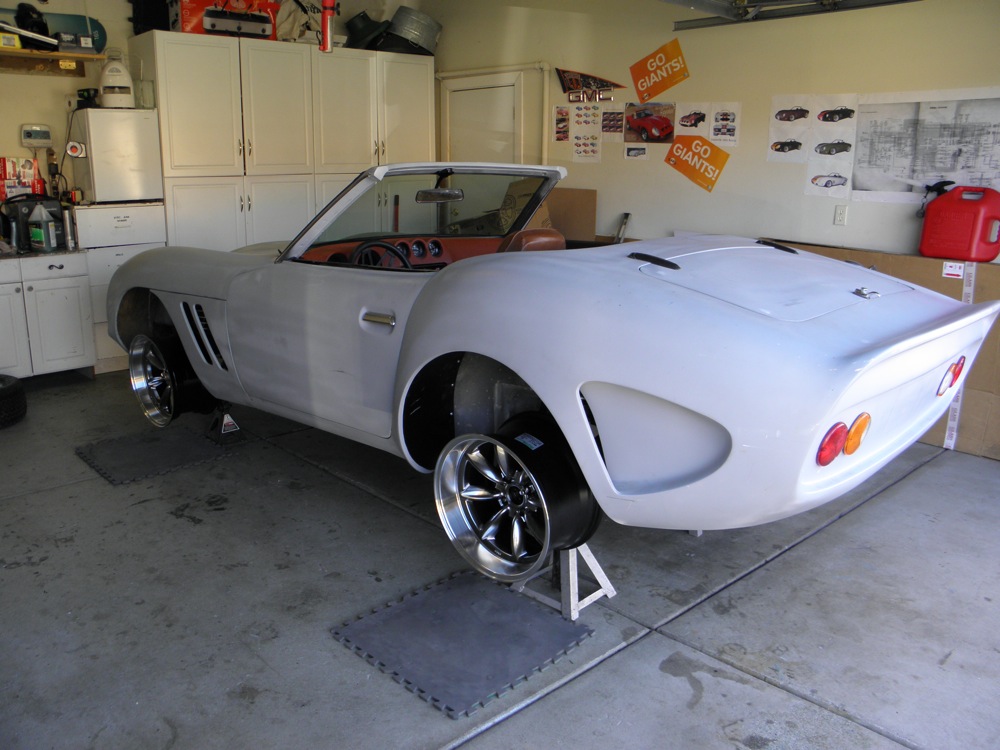
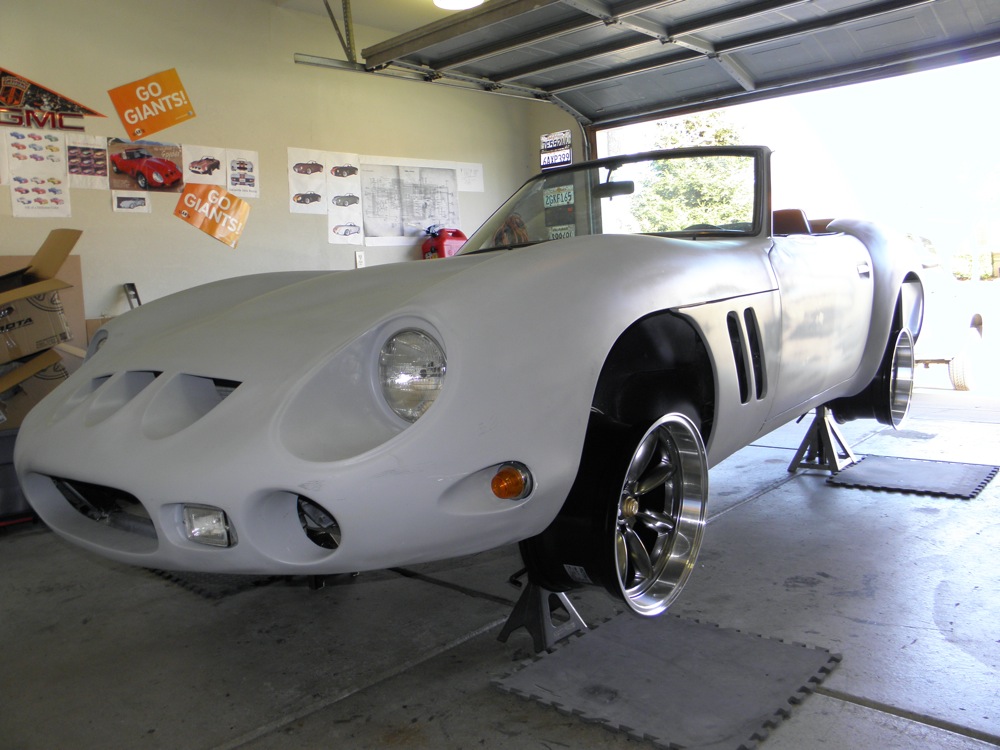
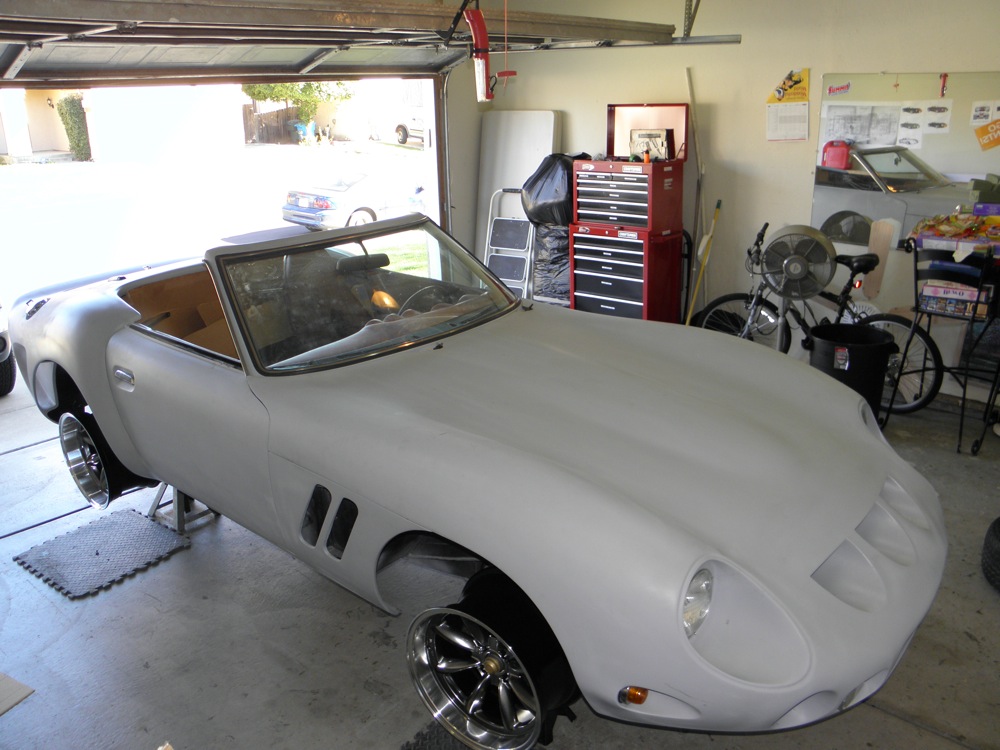
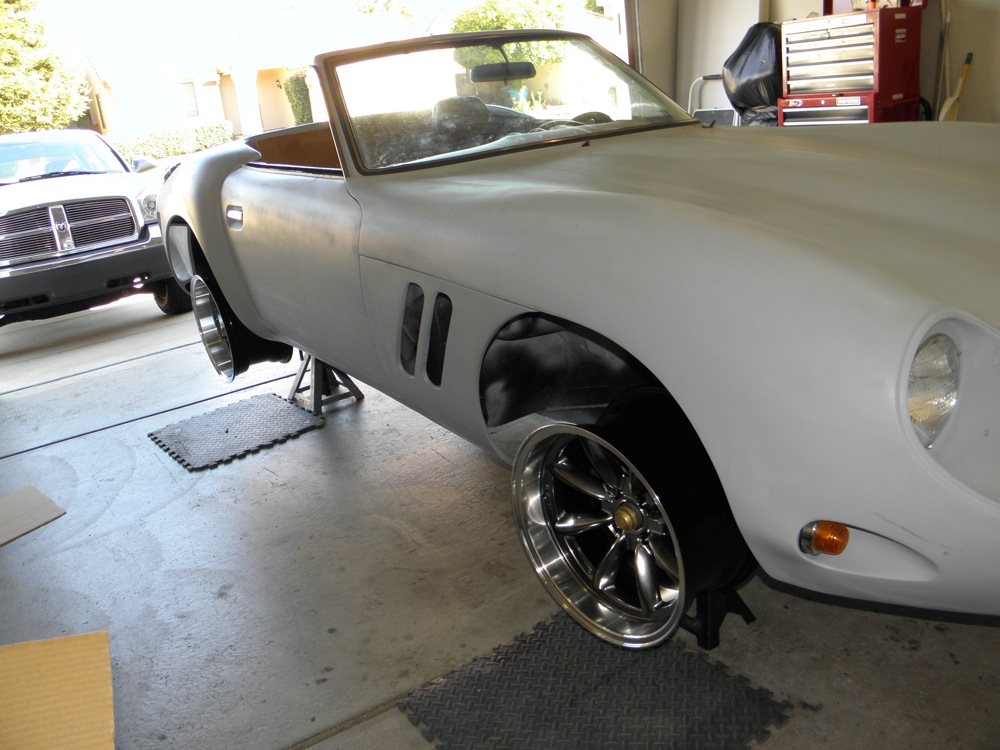
The VR left the garage today under it's own power since... well, ever! I spent the last couple of weeks working out the ride height and desired spacing of the wheels within the tire wells. The front wheels got 1" spacers which lets me use the Rota center caps, avoiding the ugly dust caps protruding through the center holes. The rears needed 2" spacers to allow the tires to fill out the wells. I really like the stance. Unfortunately, pushing the wheels out created a couple of clearance issues with the body, when turning. Easy fix. A little trimming to the corners of the tilt bonnet and to the edge of the inner blockoffs I made for the fenders, and everything is in the clear. I'm still waiting to install pipes and mufflers, but I just couldn't wait to see if she'd actually drive. So, with more than a little apprehension , I fired her up and backed her down the driveway into the street. I took a couple of laps around the court and to the corner and back. And although the total distance travelled was probably less than 1K feet, it was exhilarating. There were no loud bangs, no rubbing noises, no strange vibrations and none of those tell tale smells indicating a major problem. Once back in the garage, I did find two small leaks. Fuel, from a fitting not completely tight and oil, from the pan-to-timing cover seal. I was feeling so good, that I took a few pics to commemorate her first day in the sun. And with the bright light, I was even able to approximate a metallic paint finish. All in all... one great 'feel good' day.
-
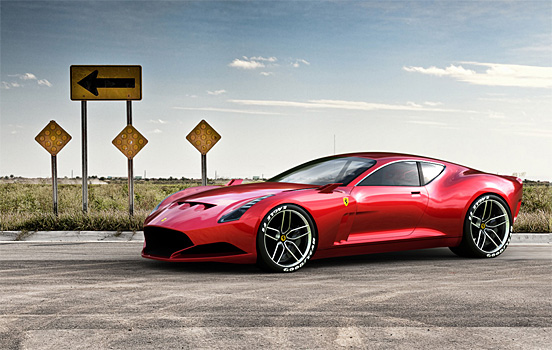
My favorite GTO concept.
-

Wheel Show! Post your pics of you wheels
Fauxre replied to k3werra's topic in Brakes, Wheels, Suspension and Chassis
Finally got around to wrapping the Rota's. 245 45 17's front 275 40 17's rear Still working on ride hieght.
-
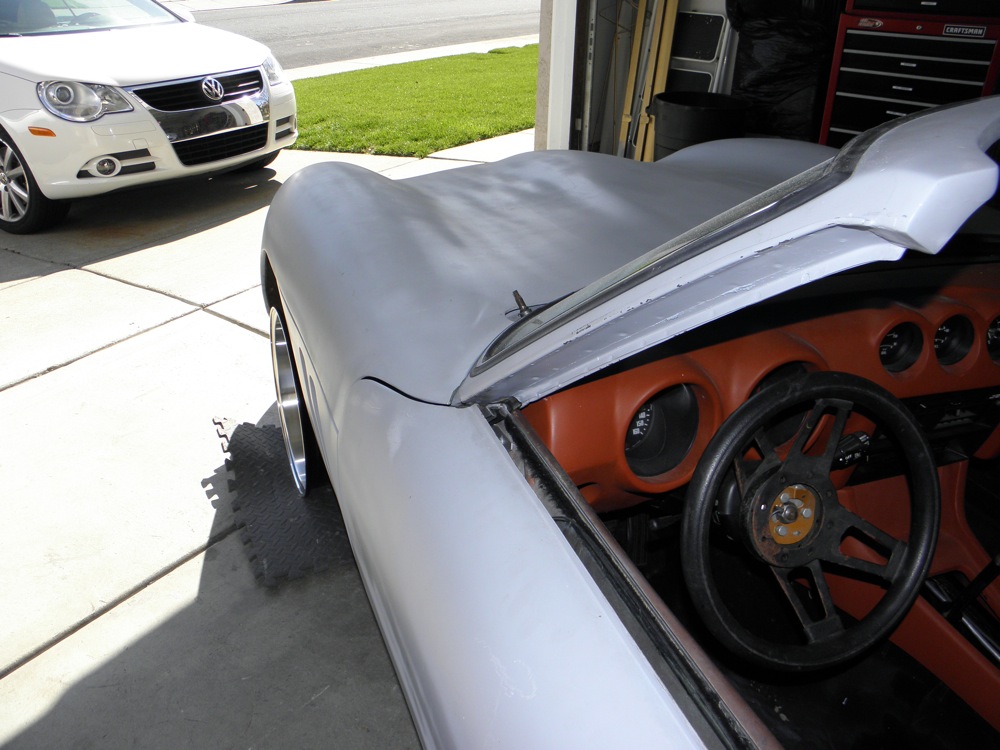
More progress... Got some color on the rear panel and started to bend up some sheet metal to direct air to the radiator. Finally got around to wrapping the Rotas in new rubber. I'm liking the new look... Somehow, it feels more like a real car now than ever before.
-
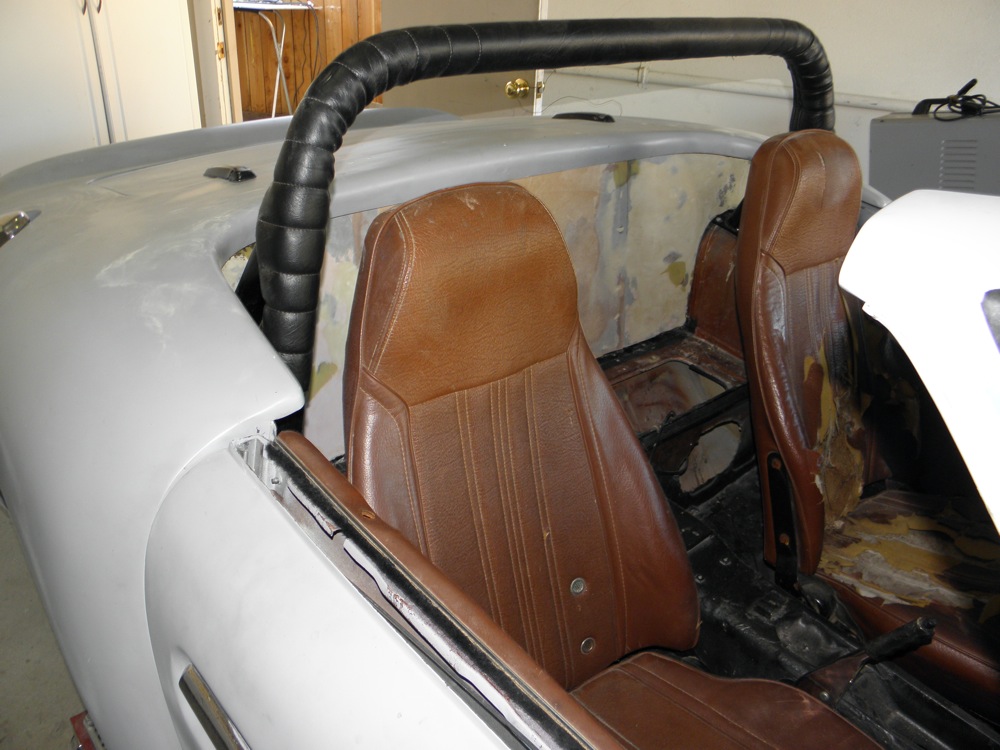
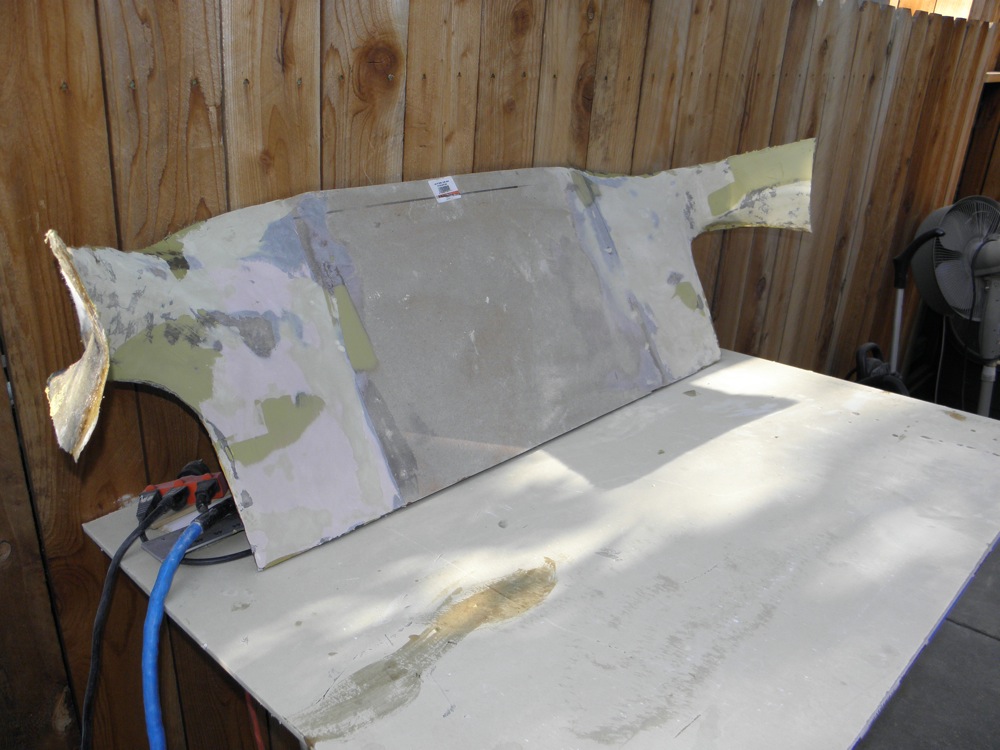
Well... the fleece and resin didn't turn out as well as I had hoped. I misjudged the amount of hardener to use based on the temperature outside. The resin started to harden before it saturated the fleece. The result was a very bumpy and floppy panel. I wasn't thrilled with the amount of work it would take to cover the whole thing with glass matte, to make it rigid, and then filling and sanding to smooth it all out. Instead, I replaced the center section with hardboard. It's already rigid and requires no sanding to get a smooth surface. I did glass the ends... then filled and smoothed. A little trimming and some more filler... and the panel fits snugly around the roll bar mounting points. A little more sanding and it will be smooth enough to cover. Interior is starting to shape up.
-
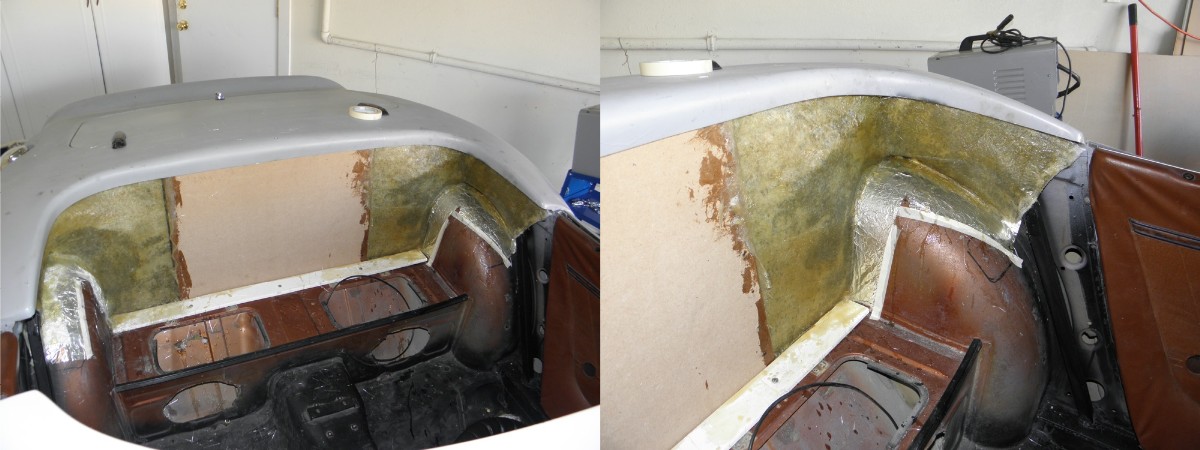
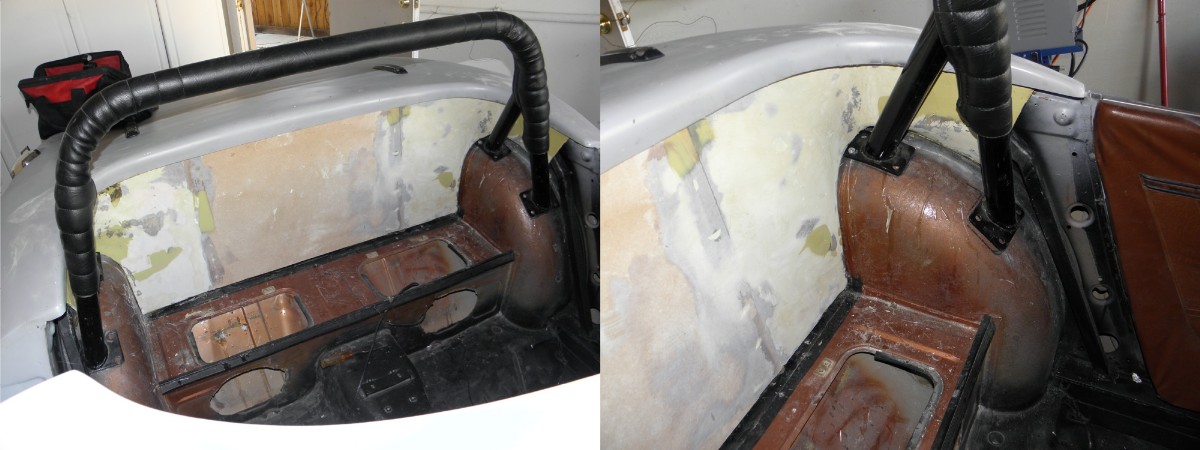
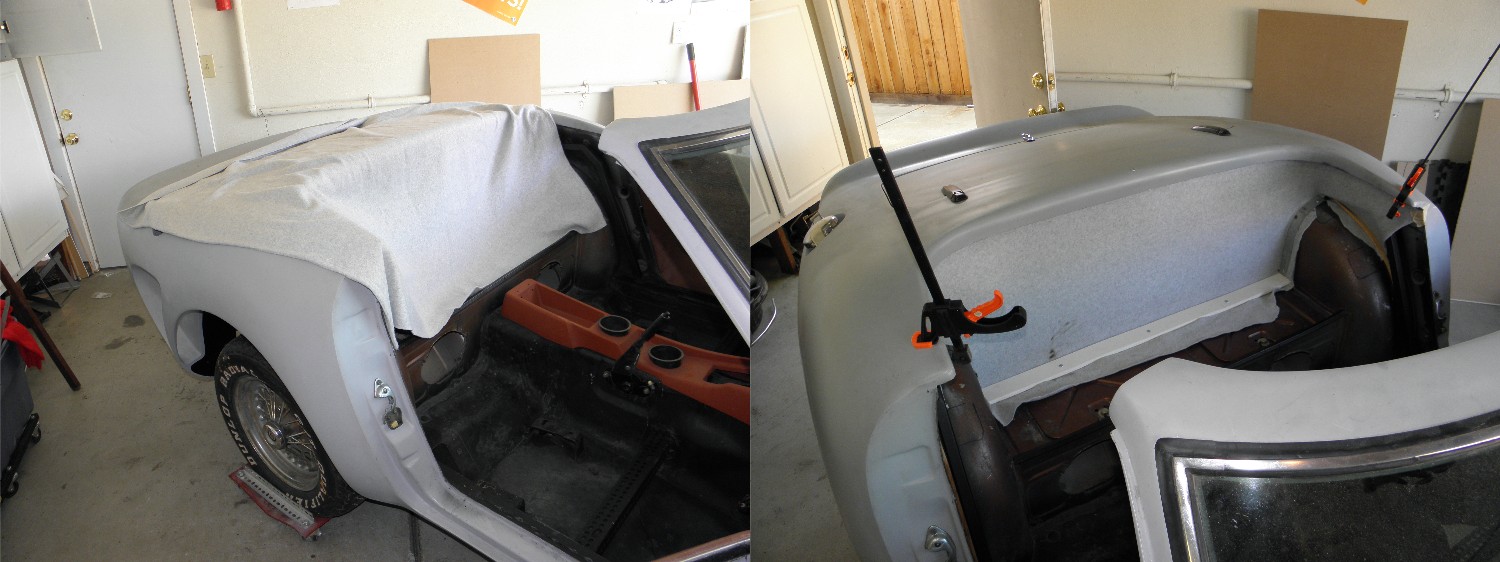
Had some time this weekend, so I started some of the interior work. I need to create new panels to separate the trunk from the passenger compartment and cover the added reinforcing steel. I made several attempts to generate patterns out of cardboard. I thought that would be simplest route. Wrong! A total waist of time. Too many square corners. Stretching fleece over such a large area seemed like the best way to go, but I wasn't sure how to secure the material under the lip of the rear tub while applying resin. Here's what I've done . Laid out the fleece and trimmed it . I cut 1/2" pvc pipe to length (about 72") and sliced numerous grooves in the areas where it needed to make tight bends. I then attached the top edge of the fleece with a little trim adhesive. The pipe bends easily and holds itself tight to the unibody at the door jams. It kept drooping in the center, so I pulled the pvc up tight to the fiberglass with small screw. I used an old gas tank strap to get it tight around the wheel wells and an old wooden trim molding keeps the fleece tight to the wall under the reinforcement. I need the area on top of the wheel wells accessible in order to mount the roll bar. After it dries, we'll see how easy it is to get out.
-
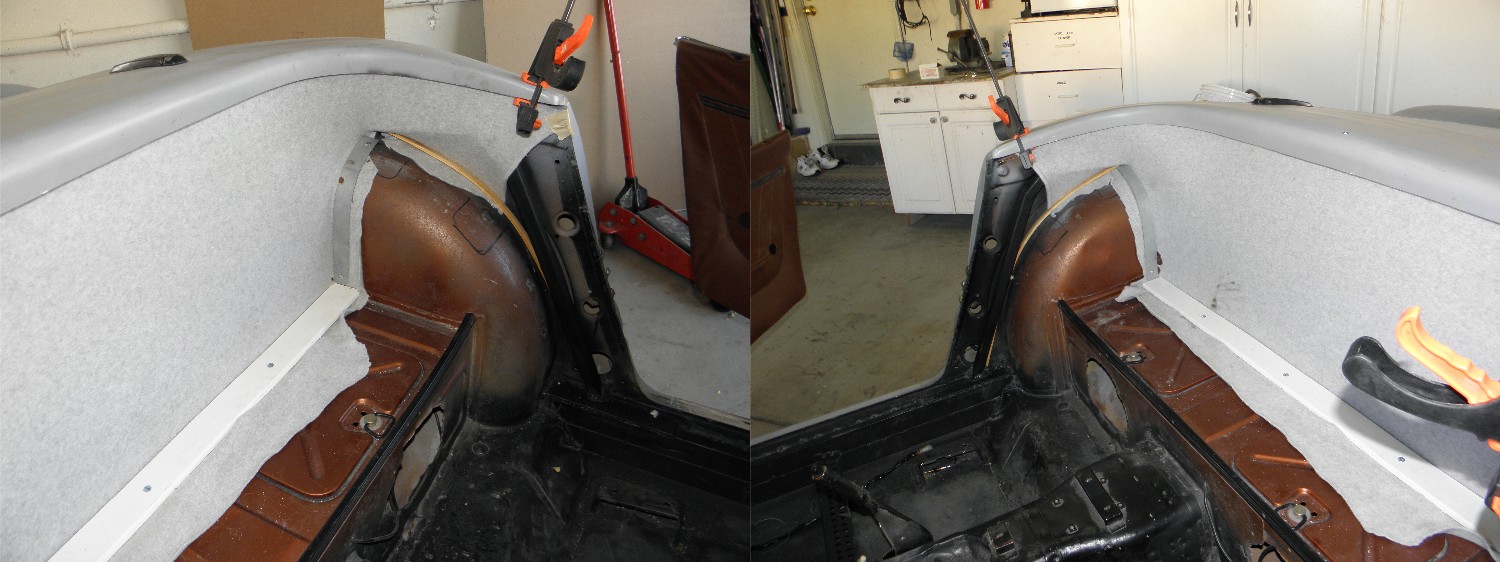
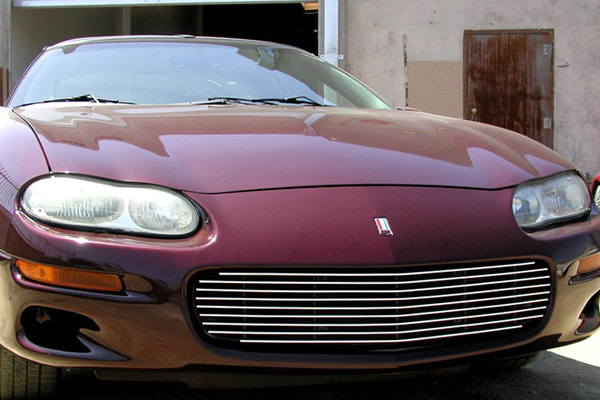
Thanks guys!! The driver side was much simpler, and cleaner, since I was able to make a cardboard pattern from the passenger side. I left the screen on one side black and painted the other silver for comparison. It's interesting how much easier it is to see through the black screen. With both cheek panels reinstalled the exterior feels almost complete. Thinking about a billet style grill for the front. Something like this Camaro maybe.
-
Primed gray and black... ready to go back on for trial period before final paint. Now all I have to do is make one for the driver side.
-
Almost there.
-
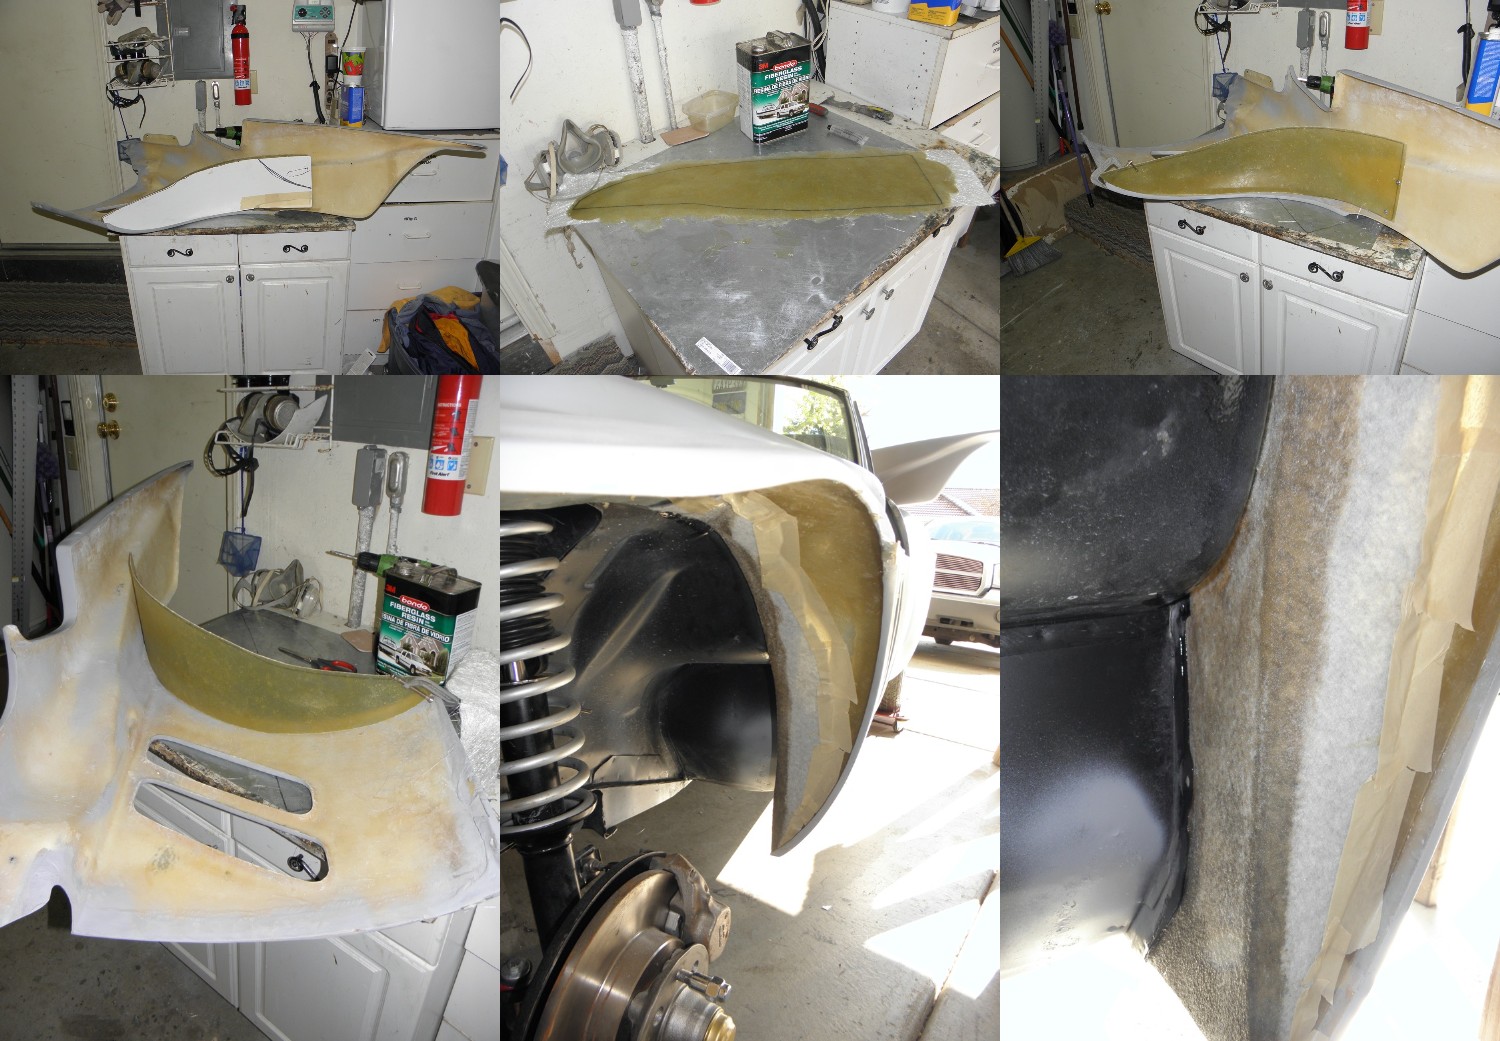
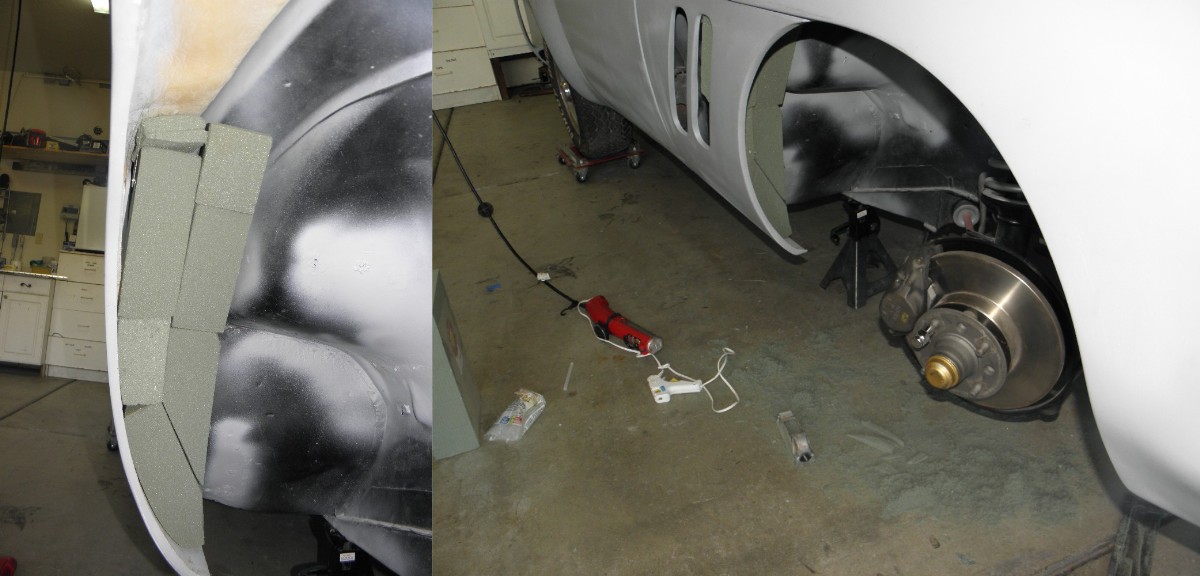
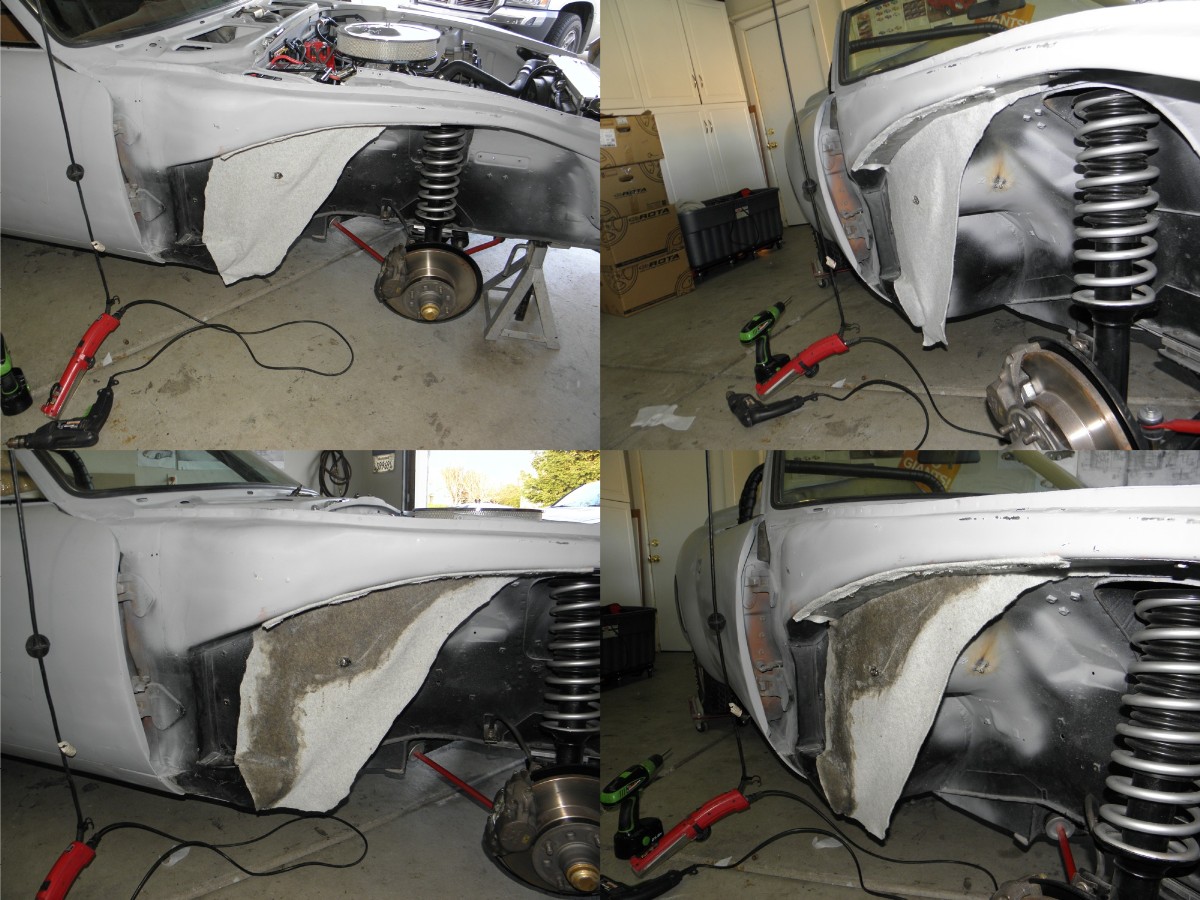
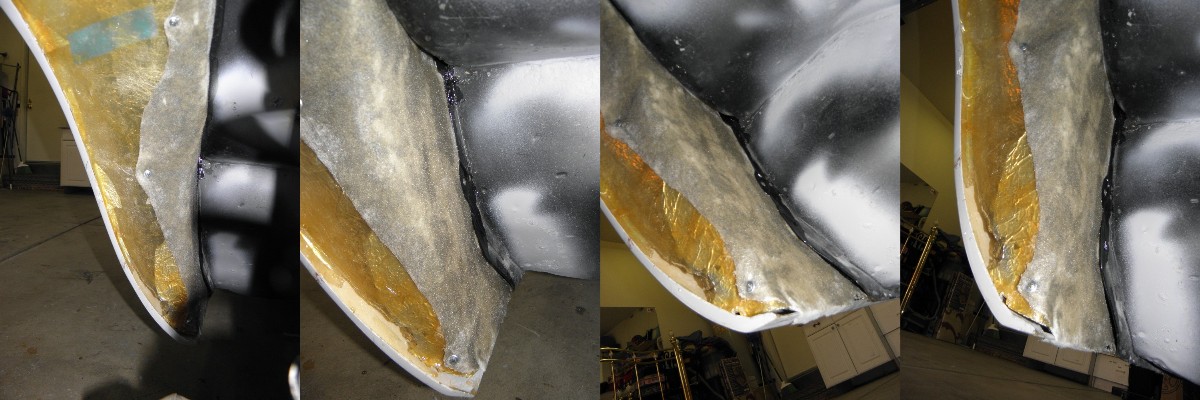
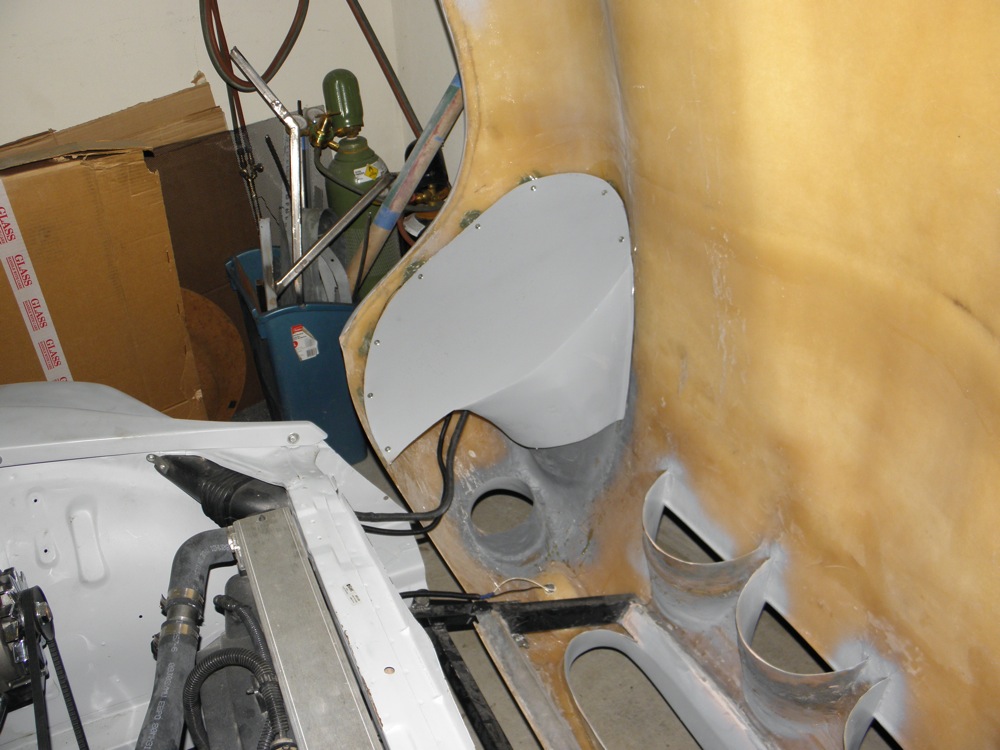
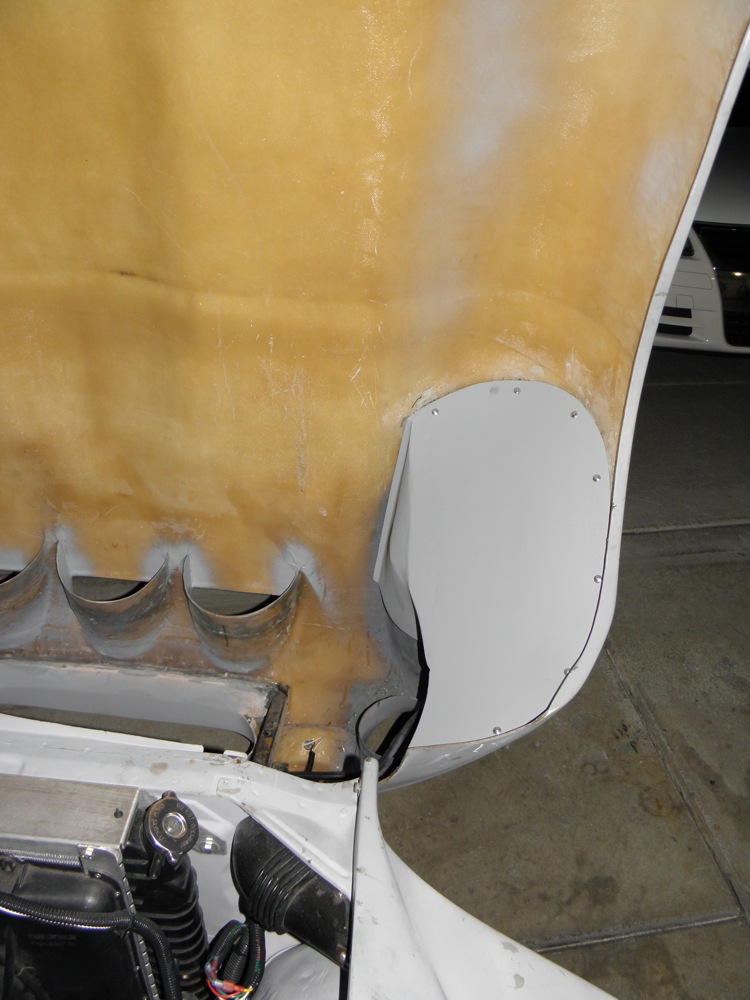
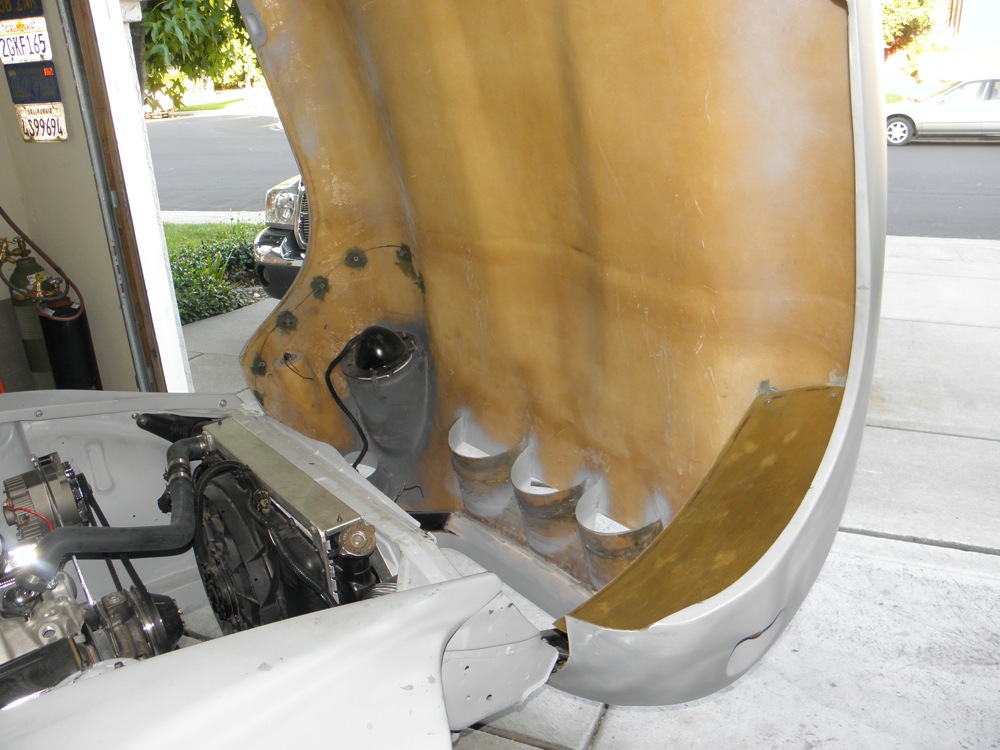
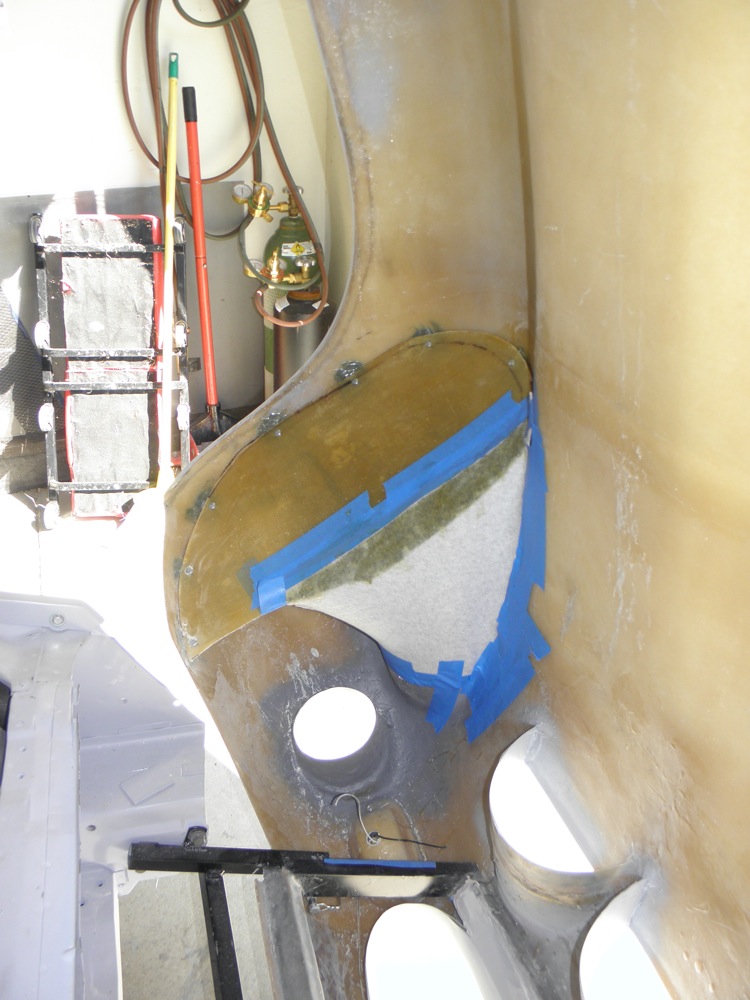
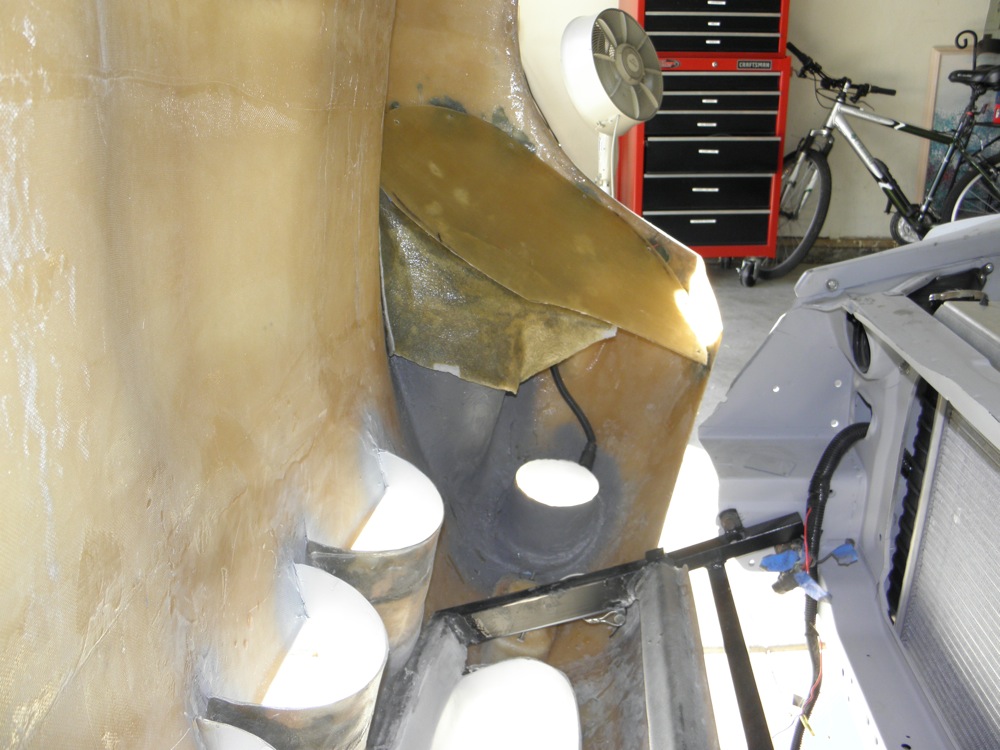
Still working under the front fenders. Quite a while ago, I started making a block off panel behind the front tires. It'll keep crud thrown up by the front tires from getting to the door hinges and side vents. I hot glued floral blocks to the under side of the cheek panel and shaped them until I got a curvature I liked. I removed the assembly, covered the blocks with foil and coated them with a layer of fiberglass cloth. After removing the blocks, the new piece fits nicely between the cheek panel and unibody. But there is still a gap I'll have to close. Using some sheet metal, I attached a sheet of fleece to the bottom of the upper frame rail. A little resin and it conforms to, and holds the shape of, the old body. I reattached the cheek panel with the new block off and wrapped the fleece around the edges, pulling everything good and tight. More resin... ... and it all comes off as one piece. All three pieces are tacked together only where there was actual contact with the wet resin. I reinforced all joints and filled any voids with fiberglass matting and filler. After some trimming and sanding, it's still pretty rough, but it'll get a lot more attention before finished.
-
Wheel Show! Post your pics of you wheels
Fauxre replied to k3werra's topic in Brakes, Wheels, Suspension and Chassis
By my scale, 19.5 lbs. front, 20.5 lbs. rear. -
Wheel Show! Post your pics of you wheels
Fauxre replied to k3werra's topic in Brakes, Wheels, Suspension and Chassis
I picked mine up at RacingLab's store in Hayward, Ca., so I can't speak about shipping. Owner was very helpful and seemed genuinely interested in providing good fast service. My RB's are 17x9 up front and 17x9.5 rear... both with 4.5" backspace ( My Stagger Package link). They cleared the stock 260 suspension both front and rear... before and after I sectioned the front struts. -
Wheel Show! Post your pics of you wheels
Fauxre replied to k3werra's topic in Brakes, Wheels, Suspension and Chassis
BozeForged.com will any of their wheels to your specs. Too expensive for me right now. Quoted $2200 for a set. They can do custom logos too. It's pretty cool. Maybe my next set. No trouble getting my Rotas from RacingLab.com. Hope this helps. -
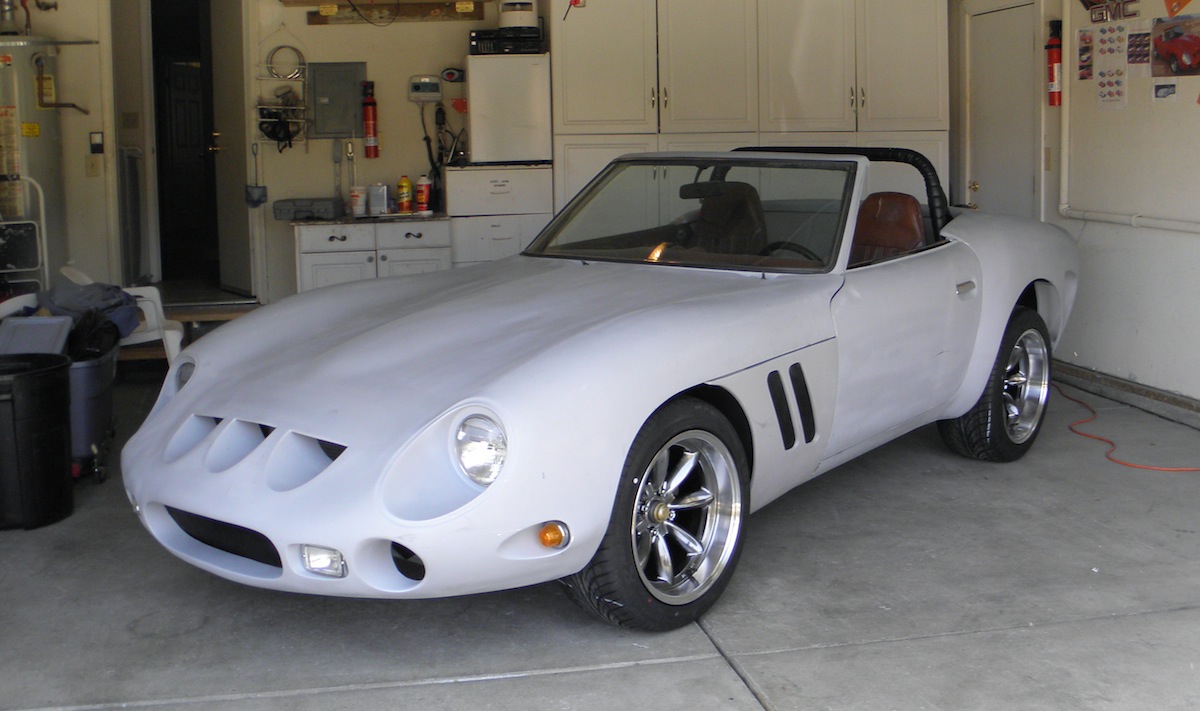
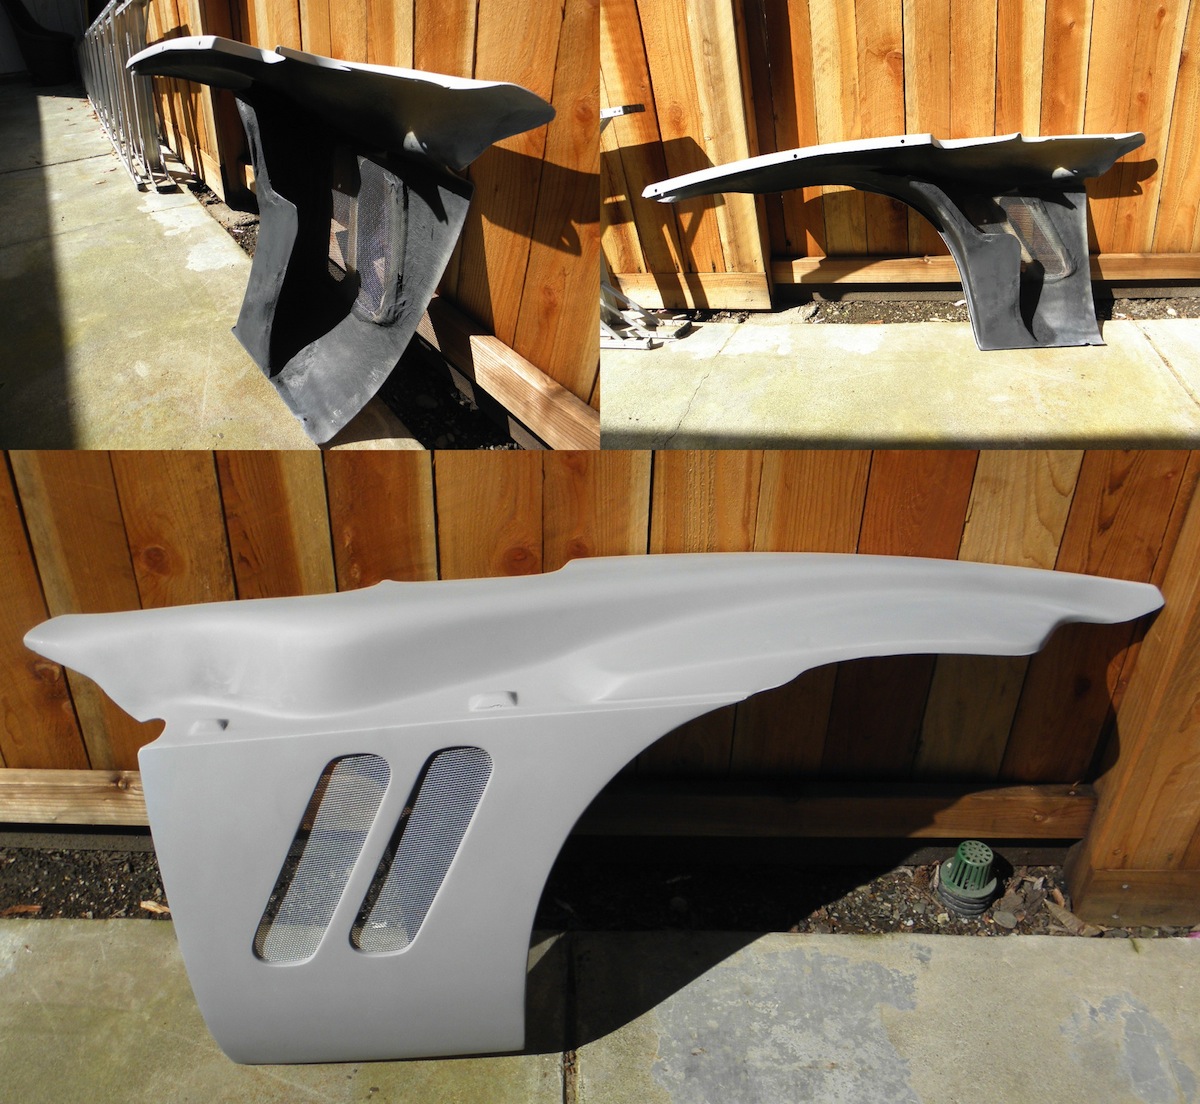
Been dealing with a sore throat and sinus infection for the last week. Was feeling much better today, so I decided that my compromised respiratory system needed a good dose of fiberglass/bond dust to make my recovery move right along. Got around to finishing the front inner fender/headlight covers. Spent most of the day filling and sanding and I'm pleased with final result. I was going to finish them with undercoating, but it's been suggested that spray truck bed liner might be better.
-
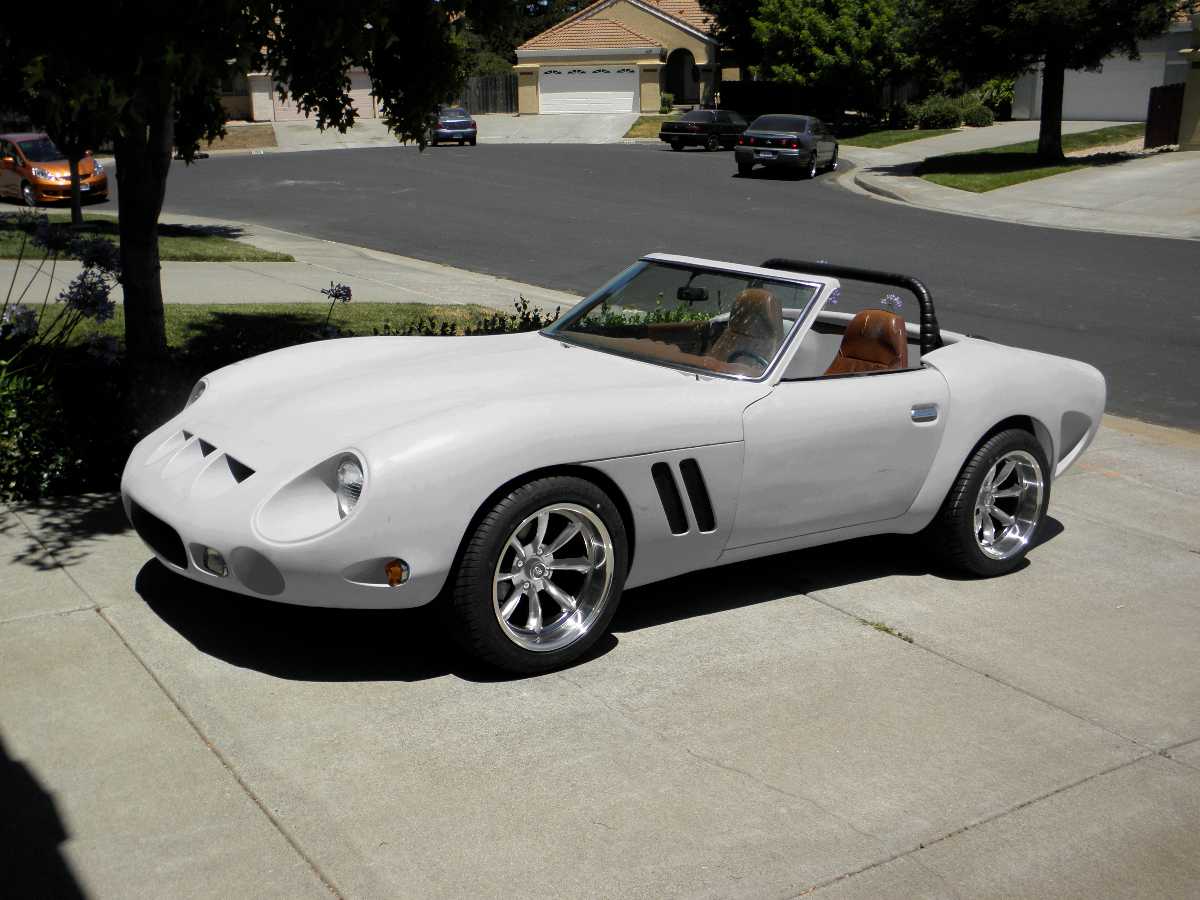
Current state of my build. Almost road worthy
-
Thanks.... maybe the word you're looking for is 'anal'. You wouldn't believe how many people feel that a wire wheel is the only way to go because of the Italian body style and '60s era lines. But I'm not building a replica... it's my one of a kind custom. Thanks for the support guys!!!
-
Wheel Show! Post your pics of you wheels
Fauxre replied to k3werra's topic in Brakes, Wheels, Suspension and Chassis
I was afraid you'd say that. -
Wheel Show! Post your pics of you wheels
Fauxre replied to k3werra's topic in Brakes, Wheels, Suspension and Chassis
Been watching this thread for a long time now, just waiting for my project to get to the wheel stage. Running the Rota RB Stagger Package in Hyper Black. 17x9 -13mm front, 17x9.5 -19mm rear. The Velo Rossa body sits on a '74 260Z unibody and suspension with a SBC 350 and T-5 trans. I've seen a lot of these wheels in this thread. Some have the plastic center hub cover on the front... some don't. The dust cover protrudes too far for my center cap to seat and it seems that the OEM hub is too wide to allow the plastic cap to snap into the wheel even if it were long enough. Question: Has anyone who is using the original Z hubs found a way to make the Rota plastic center cap fit?
-
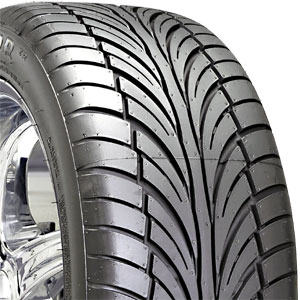
This is the tread pattern.. and specs of the tires I'll be mounting. A little over 4 1/4" sidewall. I'd like a little more, but, once again, the price is right on these.
-
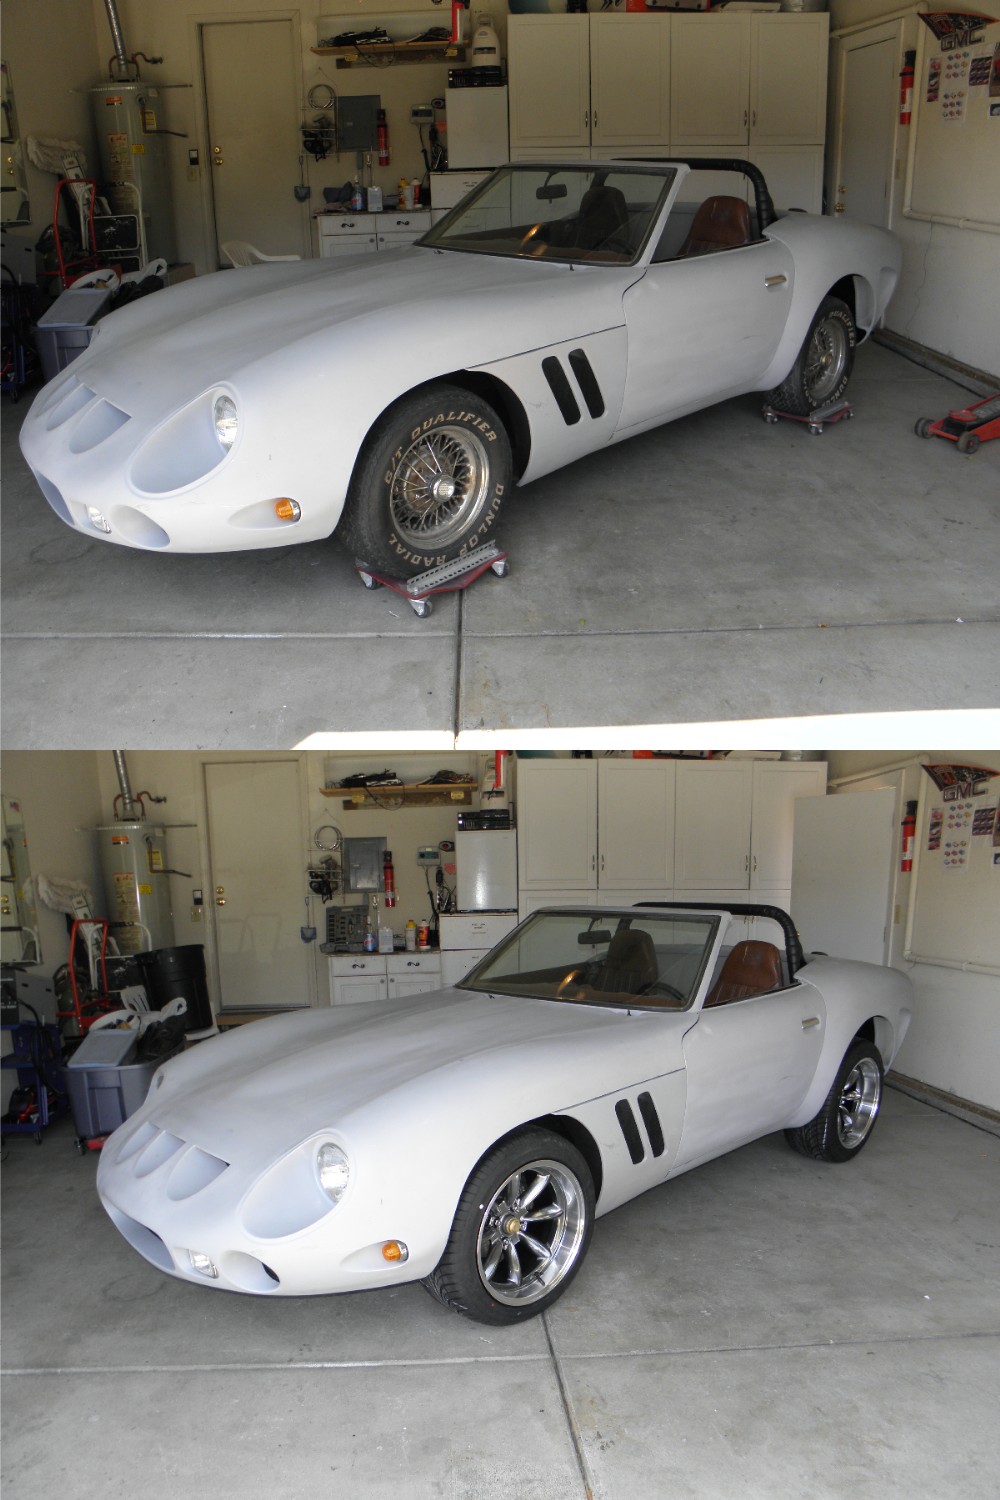
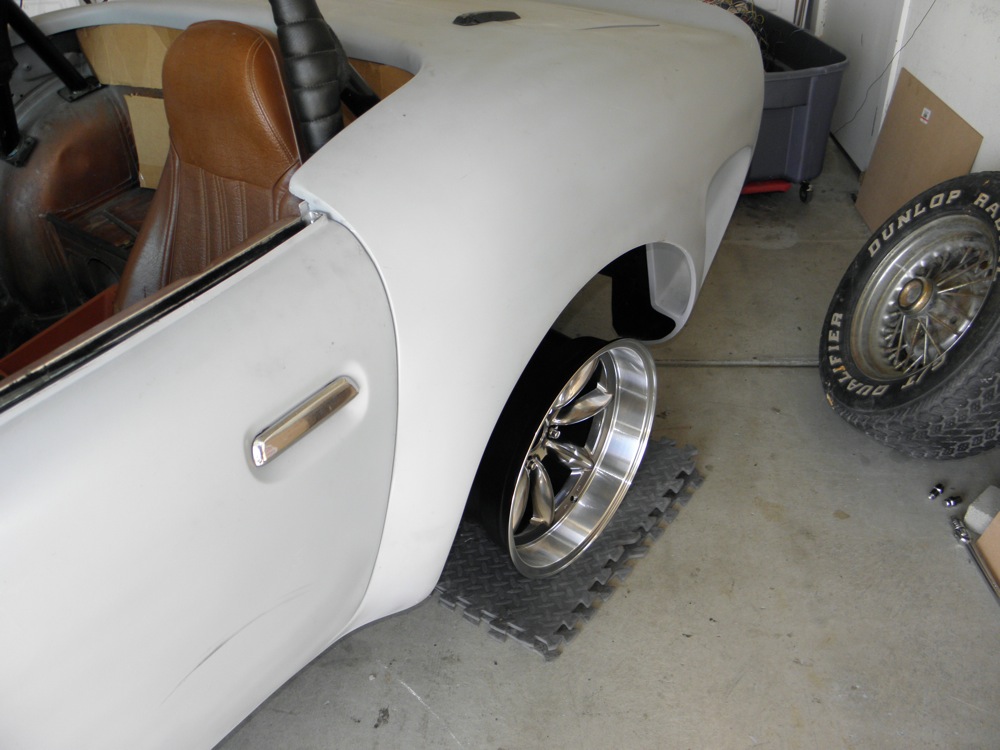
Couldn't wait for new rubber. Adjusted springs and test fit rims... again. Lovin' the new stance
-
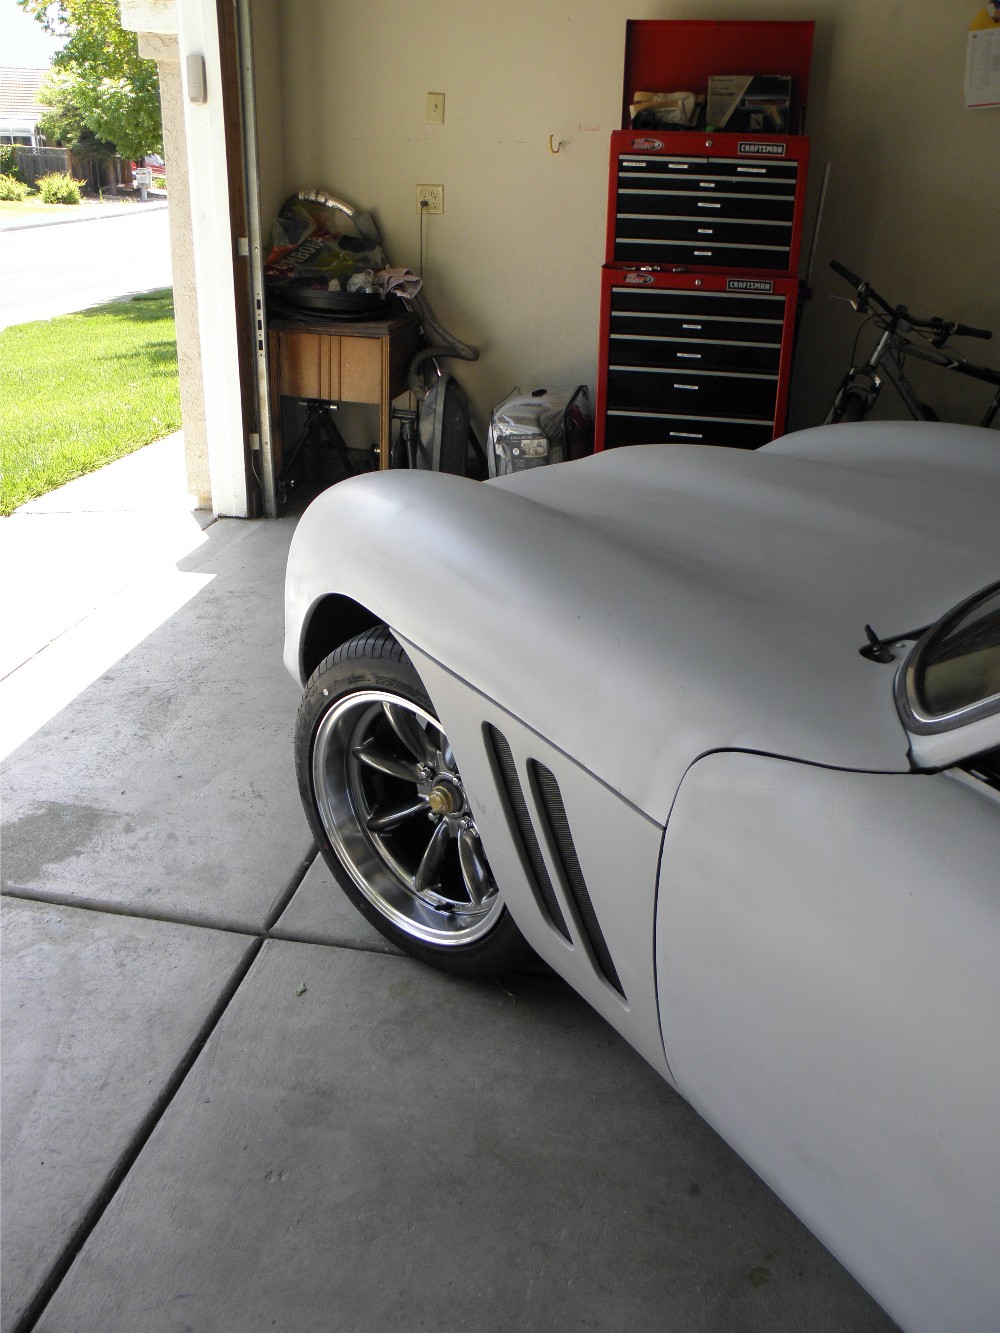
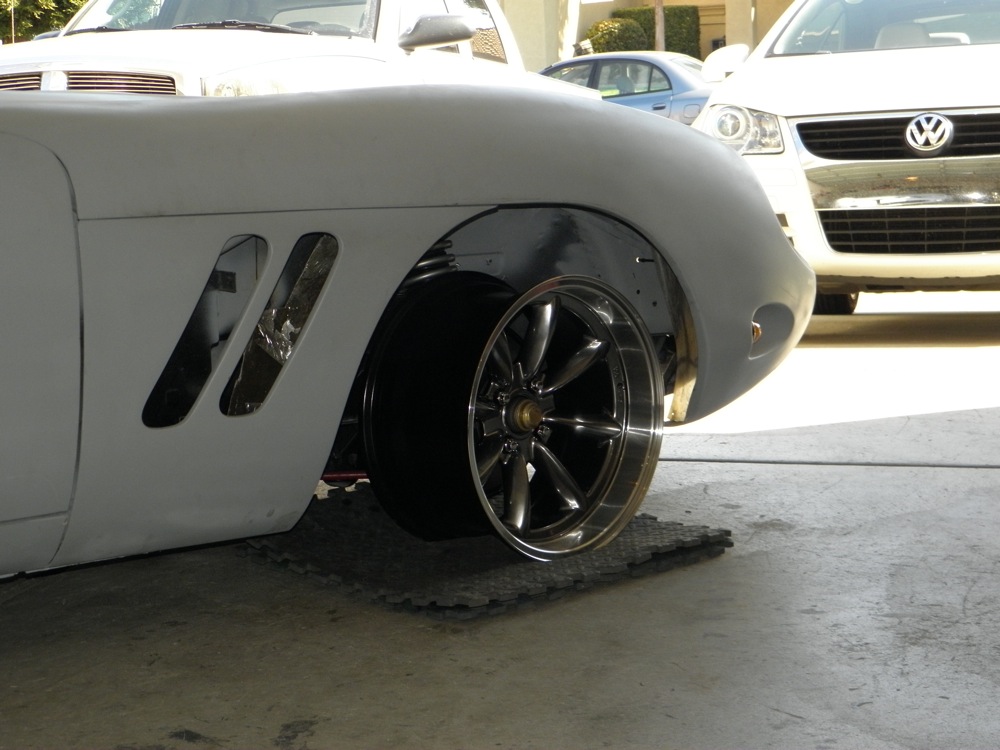
After three days of conflicts, I was finally able to pick up my new wheels. I spent no time getting them on and checking for clearance issues. The fronts are pretty tight, and depending on tire width, may need a small spacer to keep from rubbing against the spring. Even if no spacer is required, I may opt for a small flare to the front fender openings to get that hunkered down, slightly wider look, that I've seen on some of the Porsche Speedster replicas. Looks like the rears will need an adapter to push them out around an inch (again depending on tire width) to fill the tub completely. I anticipated this. Rota RB Royal Hyper Black Front: 17x9 -13mm Rear: 17x9.5 -19mm While I wouldn't describe these as "top of the line", I do feel they are a great value. For me, they are a good compromise between the styling I want and cost. I get a deep dish,slightly muscle car look, and save some cash by utilizing the stock suspension / brakes, etc. Custom wheels made to the specs I need are three times as expensive. Who knows, I might even placate some of the Ferrari guys who feel that wire wheels are the only way to go on these cars. Eight spokes with that Torque Thrust look?? Not enough spokes? Oh well, I like them. I tried to get the suspension to approximate ride hight, by supporting the car on its suspension as close to the outside as possible. But as one can see, it didn't work out that well. Can't wait to get them wrapped in rubber and finalize the stance. Alas, it won't be soon. But there is some light at the end of the tunnel.
-
Been green lighted by the Mrs. to purchase wheels. The little shop that imports them wasn't answering the phone today, and their voice mailbox was full. Closed for the holiday I guess. Hopefully I can get a set of these tomorrow.
-
Well it actually happened! She fired up on the first try. Check it out! It Lives Sounds pretty good even without an exhaust system.