Fauxre
-
Posts
315 -
Joined
-
Last visited
-
Days Won
5
Content Type
Profiles
Forums
Blogs
Events
Gallery
Downloads
Store
Everything posted by Fauxre
-
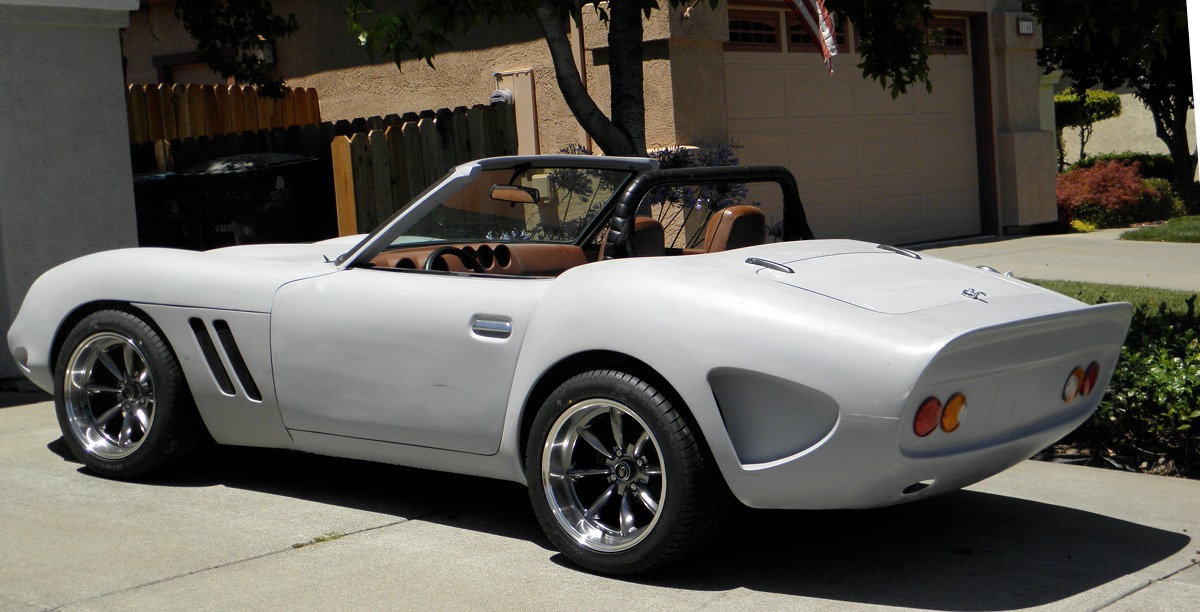
Takes some muscle to turn at rest. Still feels heavy underway... I wouldn't describe it as 'nimble', by any stretch.
-
Wheels are Roto RB's 17x9 up front, 17x9.5 rear. Tires are Riken Raptor ZR 245/45/ZR17 front, 275/40/ZR17 rear

-
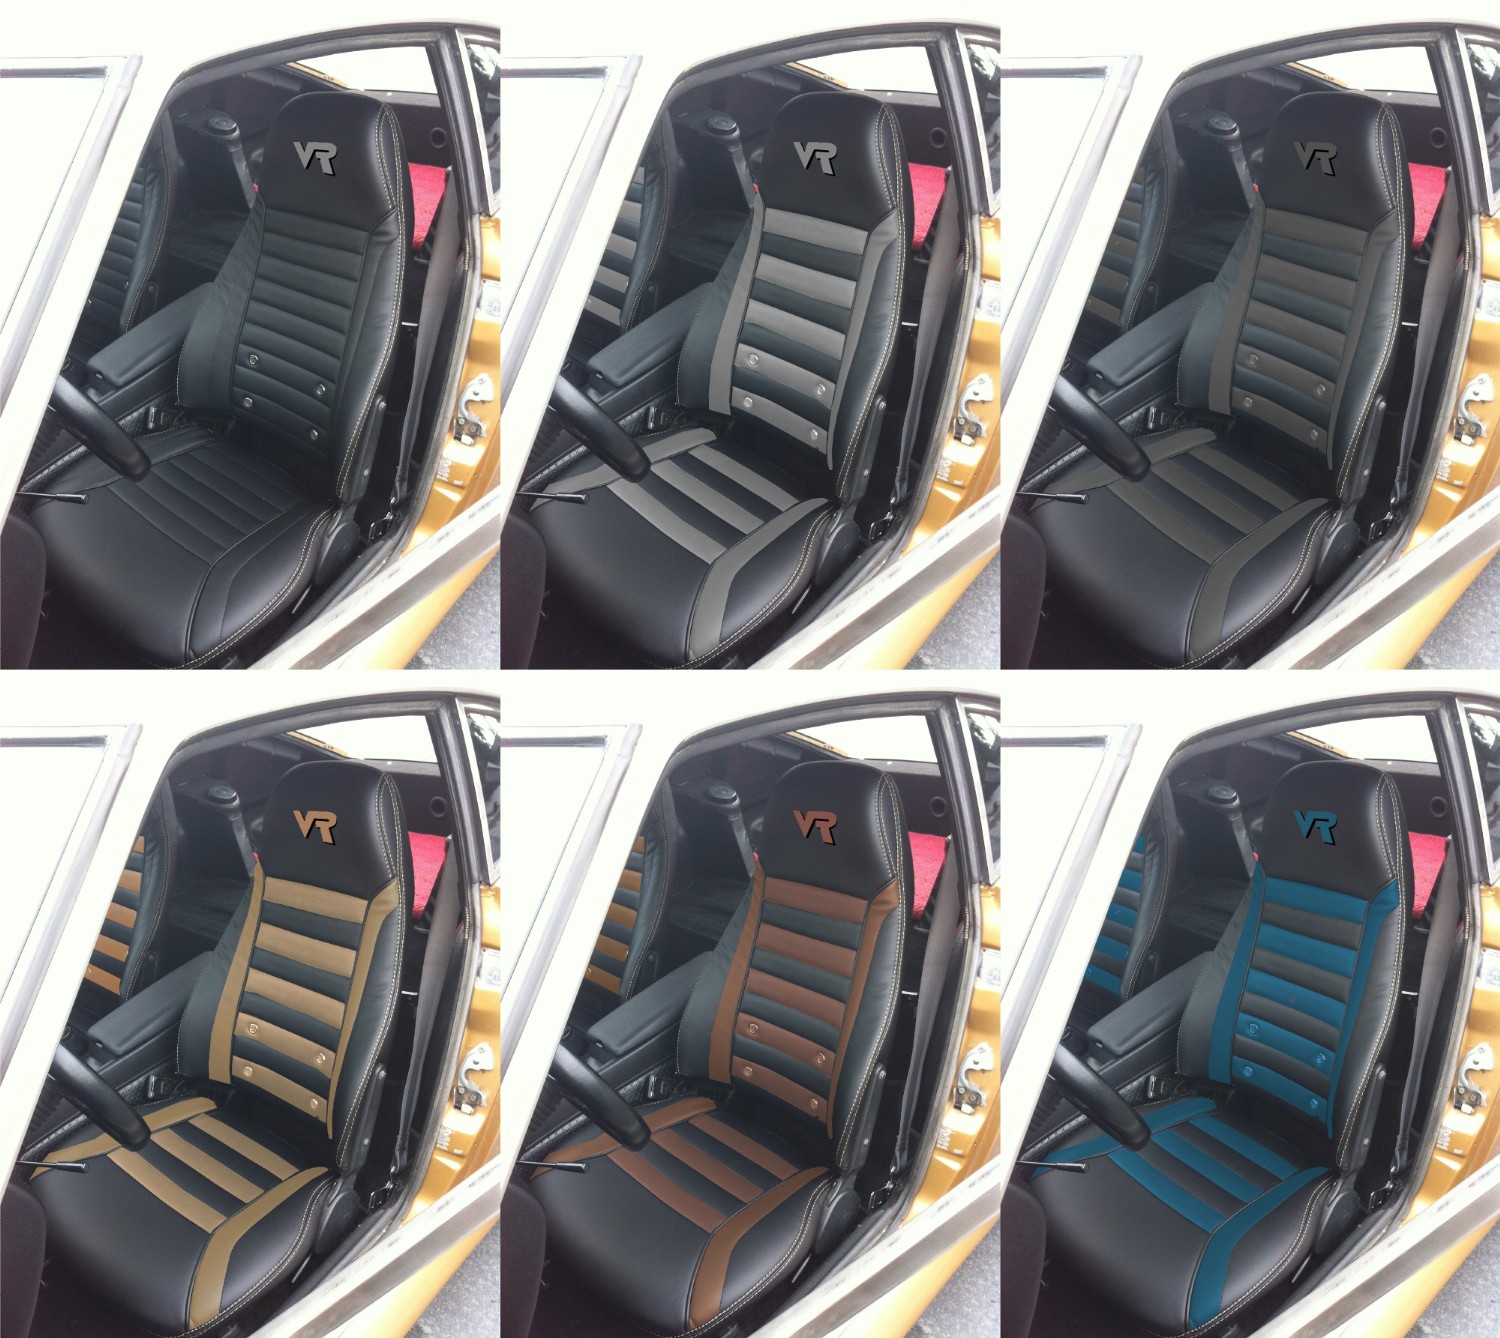
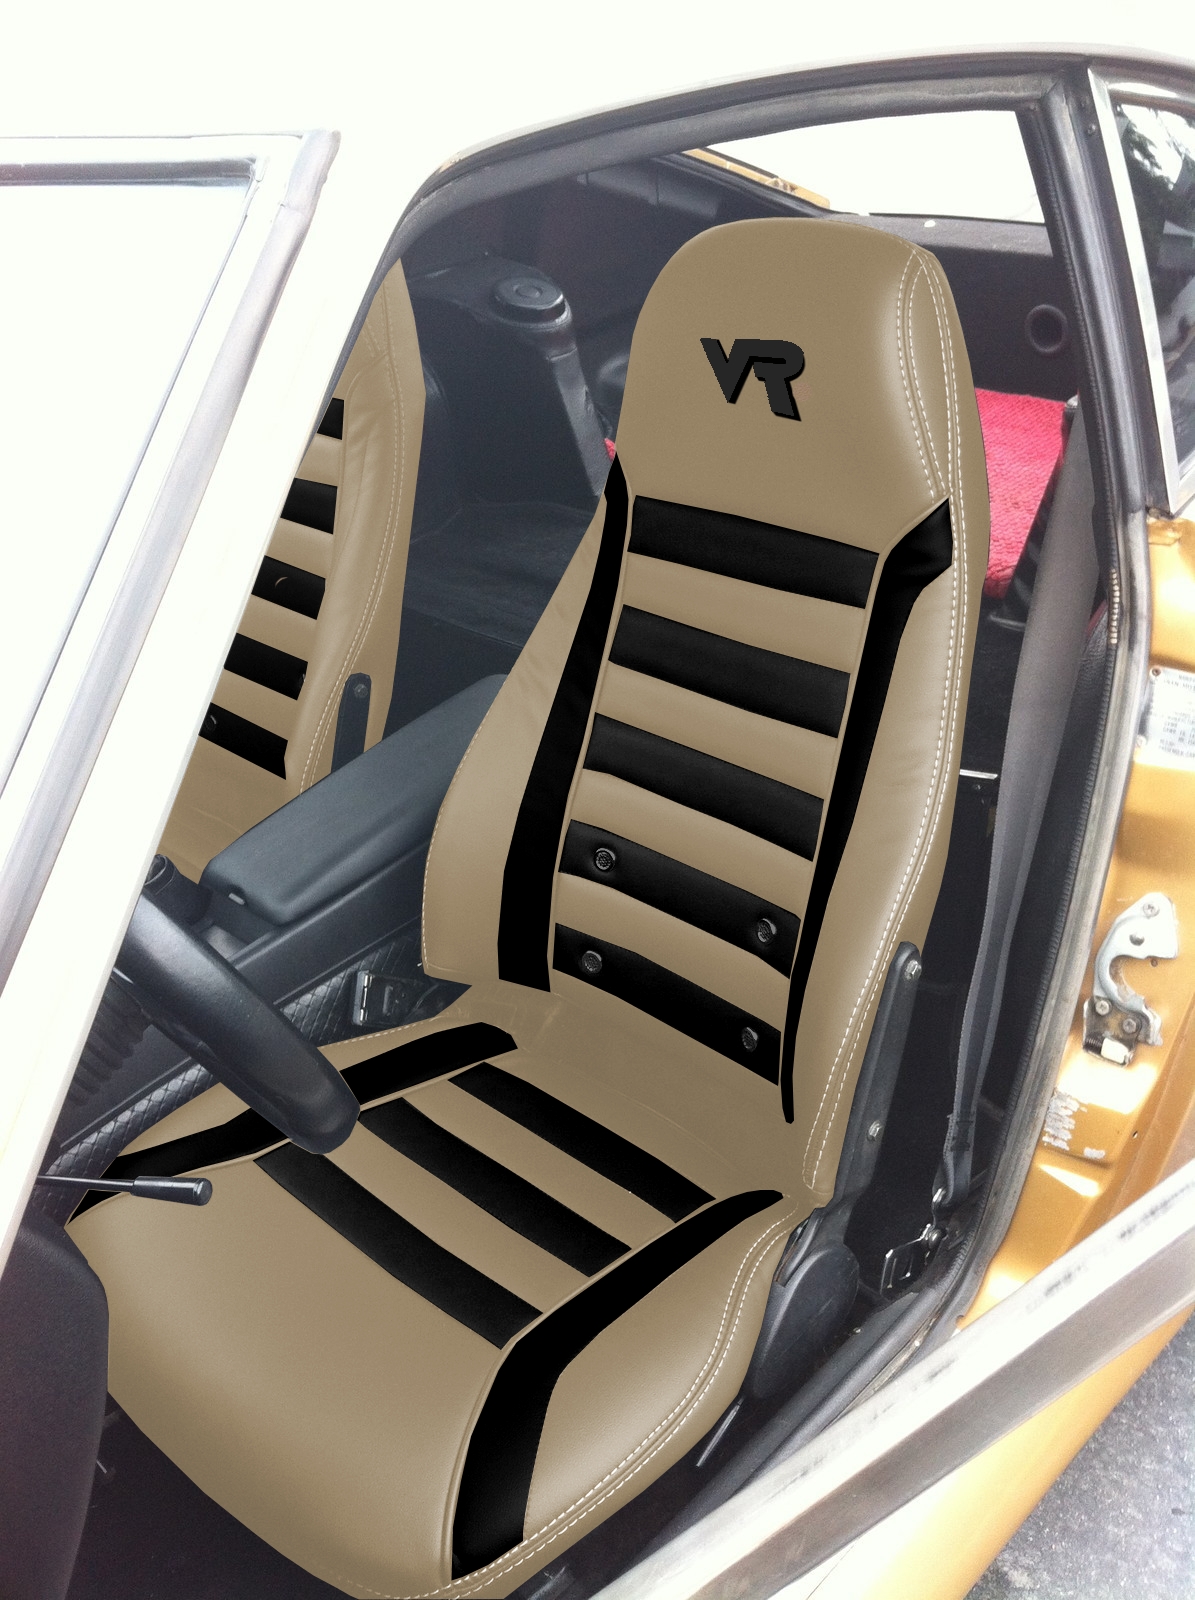
Exciting news today. I can get new synthetic leather seat covers with a custom VR logo from the guys at Interior-innovations! for a great price. Just gotta decide on colors. Some photoshop magic using a couple of their sample colors. I like the high back Z seats with the two tone european style... or something like this maybe...
-
I upload mine directly from my computer... don't know how the other options work.
-
Hi Ken. Glad to see you're posting. Can't wait for pics. Nuts???? Nah........ambitious!
-
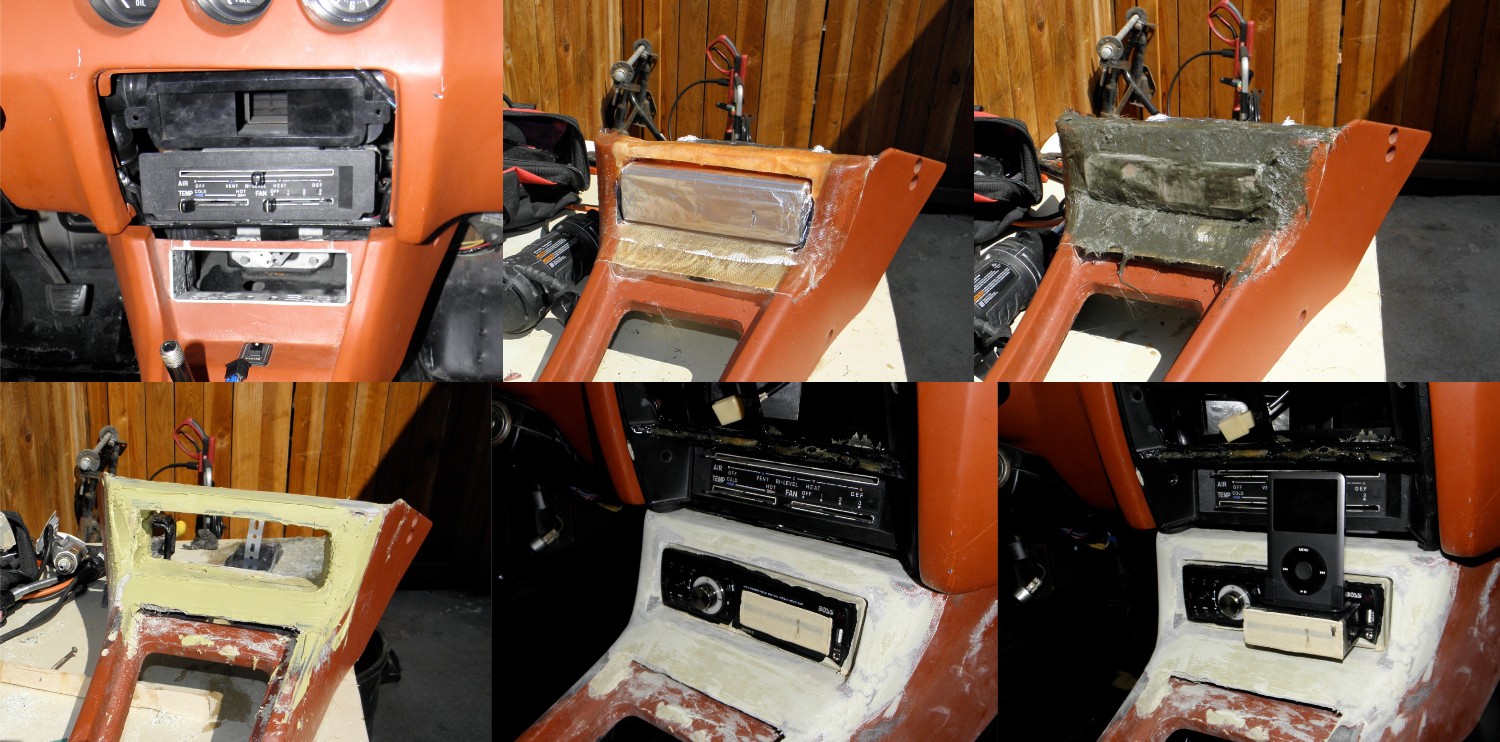
I decided on an inexpensive stereo for the time being. Basically all I need is a radio for a ball game and a way to play my ipod music. I chose an inexpensive Boss unit with a pop-out ipod dock... no CD/DVD player. Once it arrived, I immediately saw that in the stock mounting configuration, my ipod would hit the plastic heater surround. I modified both the console and the surround to move the stereo forward. It will even take an iPhone now.
-
Here's the exhaust. Pretty simple. Unbolt at the collectors and one more at each muffler, and the whole thing drops straight out. And everything tucks nicely in the center tunnel with no ground clearance issues. The pipes extending through the valance are just wedged into the muffler outlets, so I can play with some tips. But now that engine noise is low, the fuel pump noise is very loud. I'll need to deal with that at some point.
-
It's not 'just you'. The Datsun based kits look much taller than the original GTOs. And that's just fine with me, since my intent was to make my own custom car... not a replica. The Velo Rossa is really just inspired by the curvaceous Ferrari. Boy from Oz is doing a 250 GTO that is much truer to the originals. Here are a couple of his pics from the GTO Owners thread that depict the different profiles and some of BfO's work to create a true replica. His attention to detail is amazing. post-308-083302200 1293146985.jpg post-1266-096696300 1304416891.jpg post-1266-085465500 1304416919.jpg I don't know much about the original 250 GTOs, but it's my understanding that they were all hand built, giving them each their own unique set of dimensions anyway. No two alike. I don't even know if they all had the same wheelbase. Dropped mine off at the muffler shop today... she'll be purrin' by Wednesday.
-
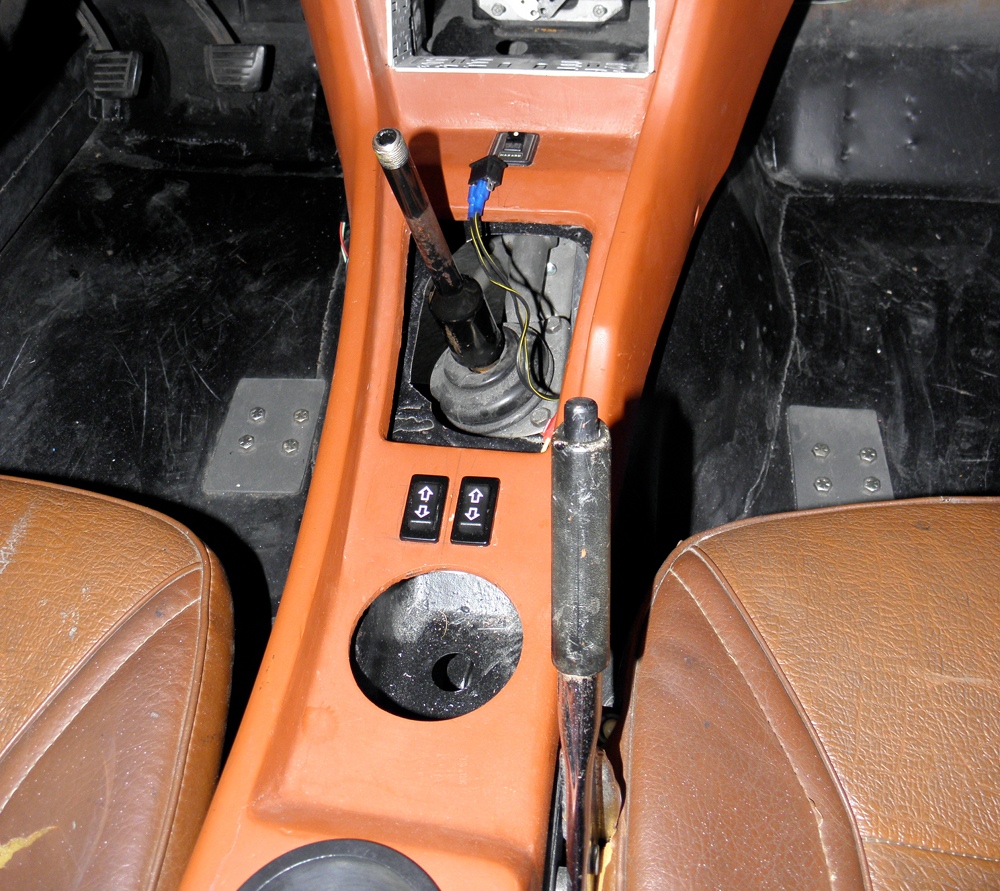
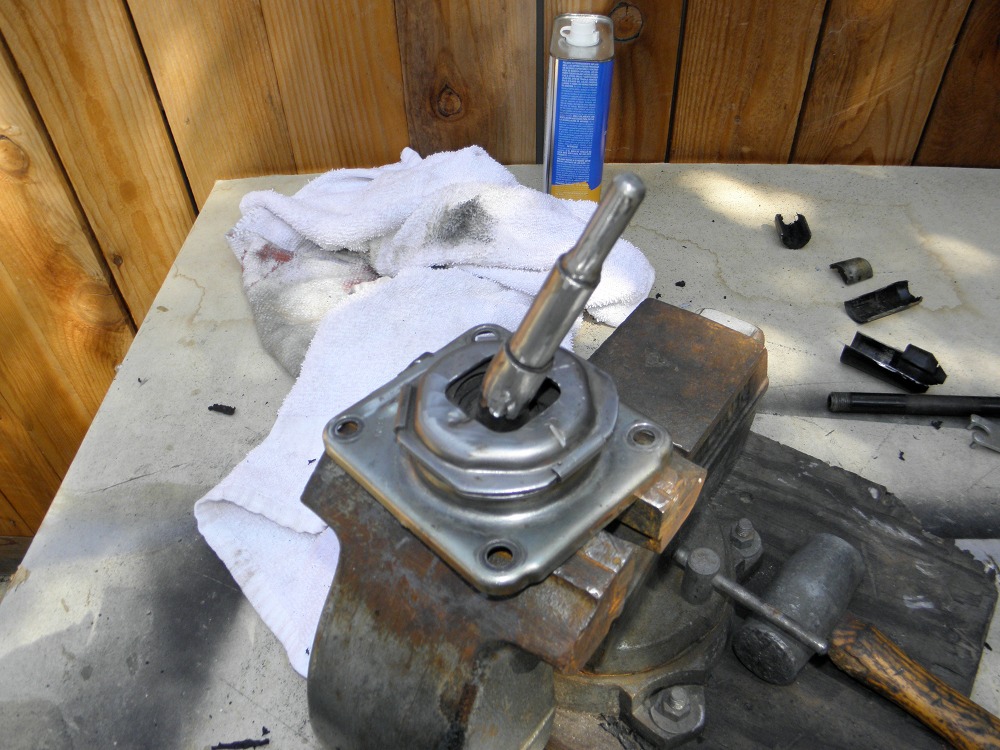
After hours of trial and error, the gear shift lever is in it's final position. A small metal plate is welded to the shortened shift post. The gear shift lever (from a Datsun 510) is bolted to the plate. The lever has flat sides from the bottom threads to just below the bend. If it starts to spin in the bolt hole, I'll add some flat stock on top of the plate to keep it straight. It looks pretty simple, but it took forever to get the plate angled just right. Too much twist one direction and the lever was hitting the console in 1st,3rd and 5th gears. Too much in the other direction and I'm knocking my drink out of the cup holder in 2nd, 4th and reverse.
-
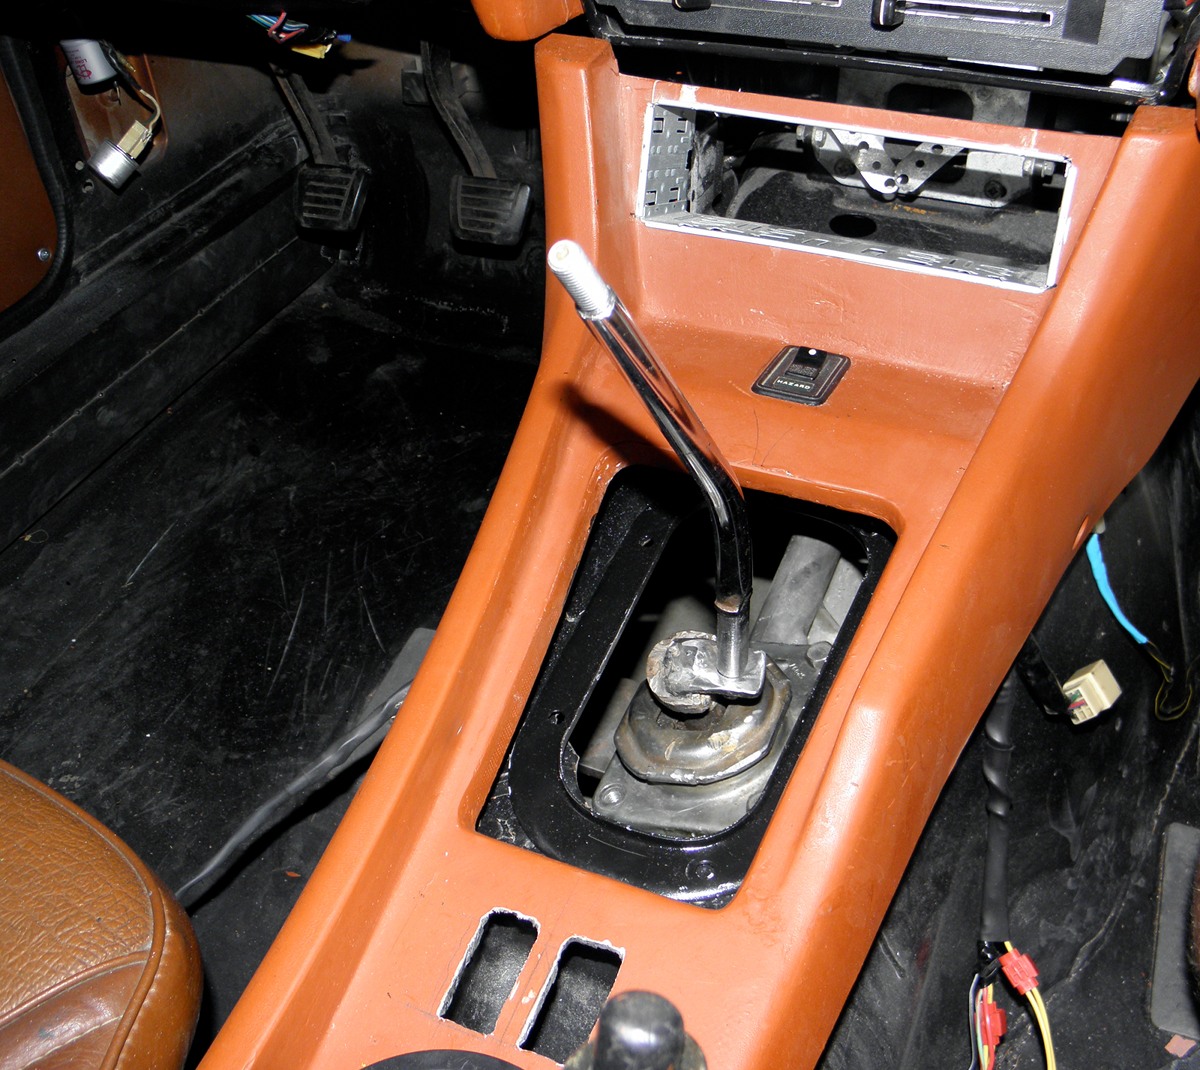
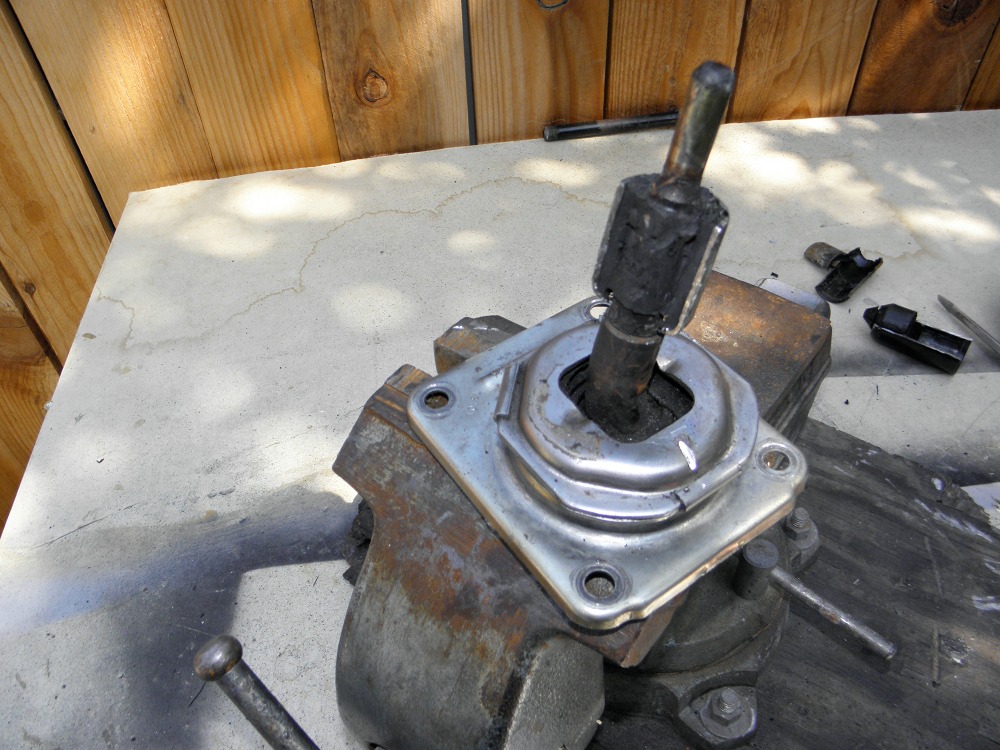
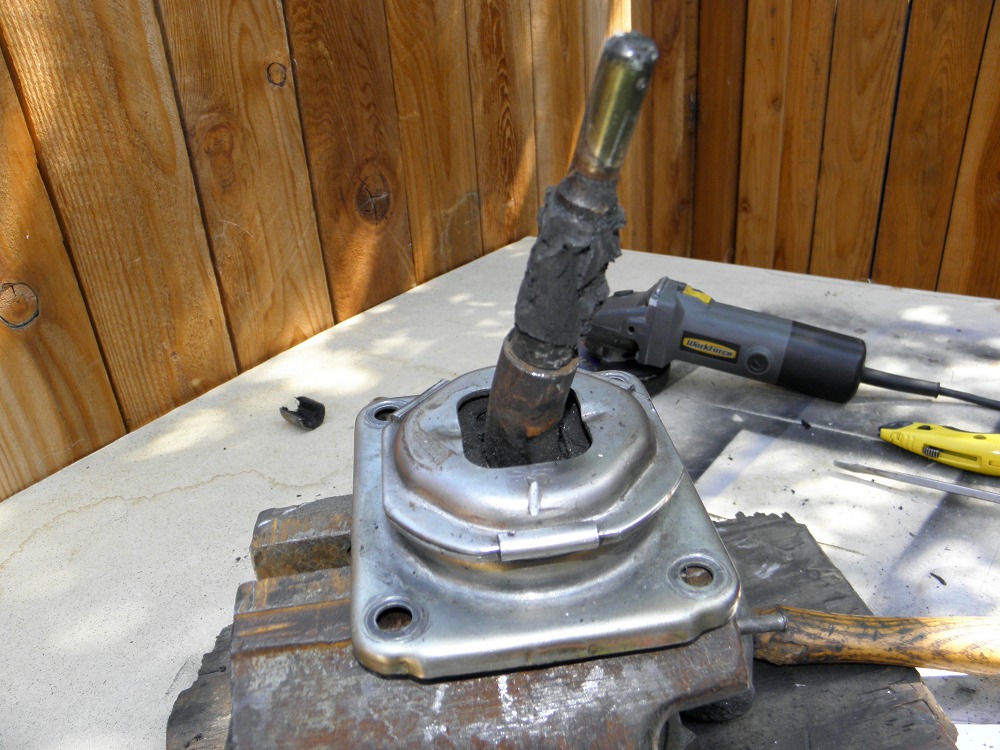
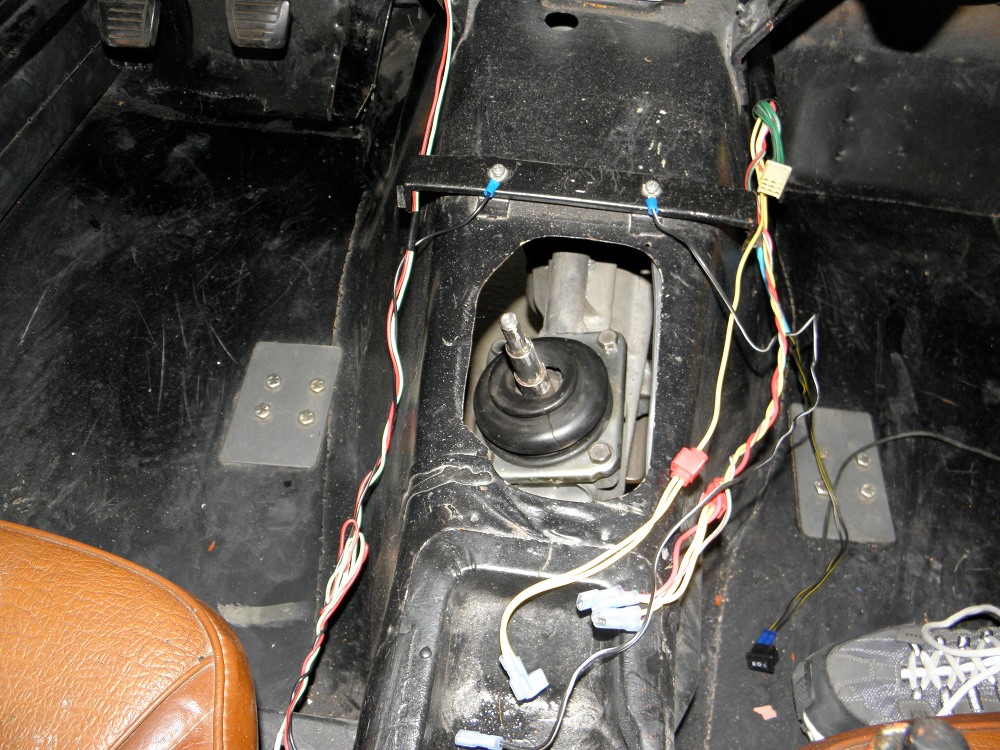
Started to move the gear shift lever to the center of the console opening today. The old lever is made up of an outer hollow tube attached by rubber to an inner solid steel post. Using my small grinder with a cut off wheel, I cut off the upper portion of the tube just above the rubber, split the lower portion and rubber down to the post and peeled each section off with a screwdriver. Scraped most of the remaining rubber off with a utility knife... and ground the post clean with the grinder and a 3M flappy pad. Back in the car, I'll do some eyeballing to get the right angle before welding an adapter plate to the post.
-
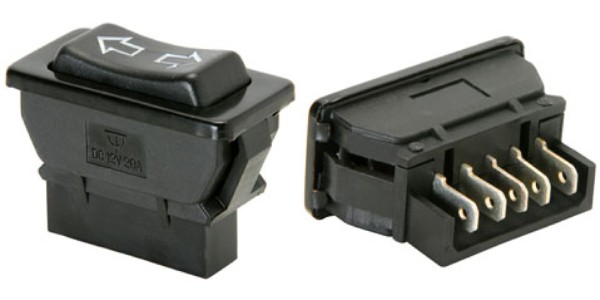
More minor progress. Found these generic power window switches here, Express Parts. They were cheap, easy to wire and fit nicely in the center console. Gathered together all the seat belt pieces for reinstallation. Problem!! The unibody reinforcement interferes with the original mounting locations on the door side. Not confident that I can make modifications to the original units, so I guess I'll be looking for after market solutions.
-
-
-

From the album: SIG PICS
-

From the album: SIG PICS
-
Hey Pete, I'm gearing up to order a set of panels, probably in a few weeks. If I read this thread correctly, you're in San Jose? I'm about an hour and a half away. Just curious... how much lead time would you need to make a set, if I were to pick them up. Wes
-
I believe I've experienced all of these situations. But my favorite is the ratio of hours I spend contemplating how to do something ... compared to the minutes it takes to actually do it!
-
Started and finished the passenger side today. It was quite a bit easier than the driver side. Adjustments went much faster since I already had fairly accurate starting points. Operates even smoother than the driver side.
-
One day install for the passenger side. Operates even smoother than the driver side.
-
Grand Theft Auto.....!!!!!!!
-
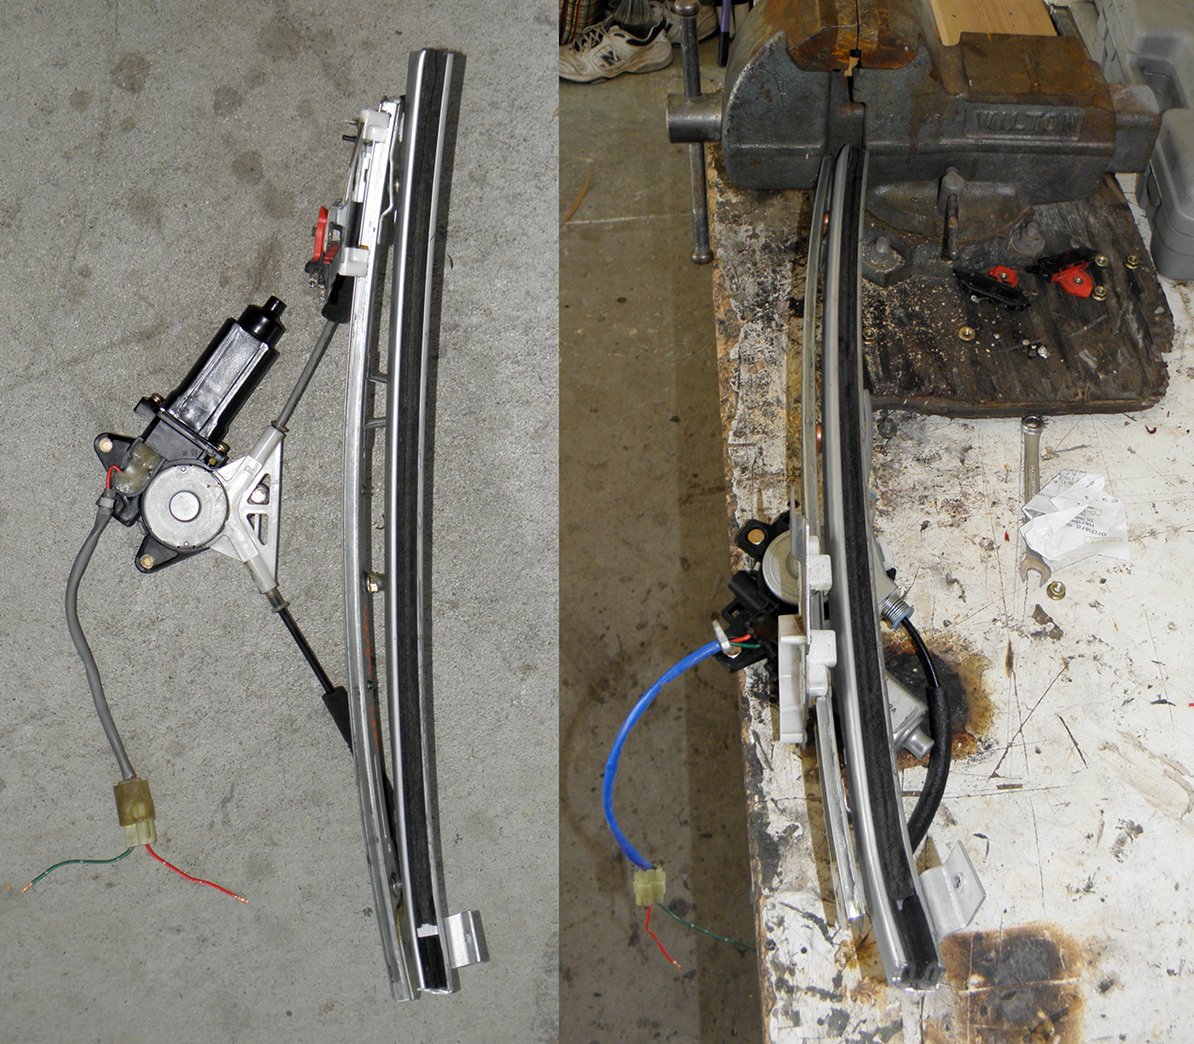
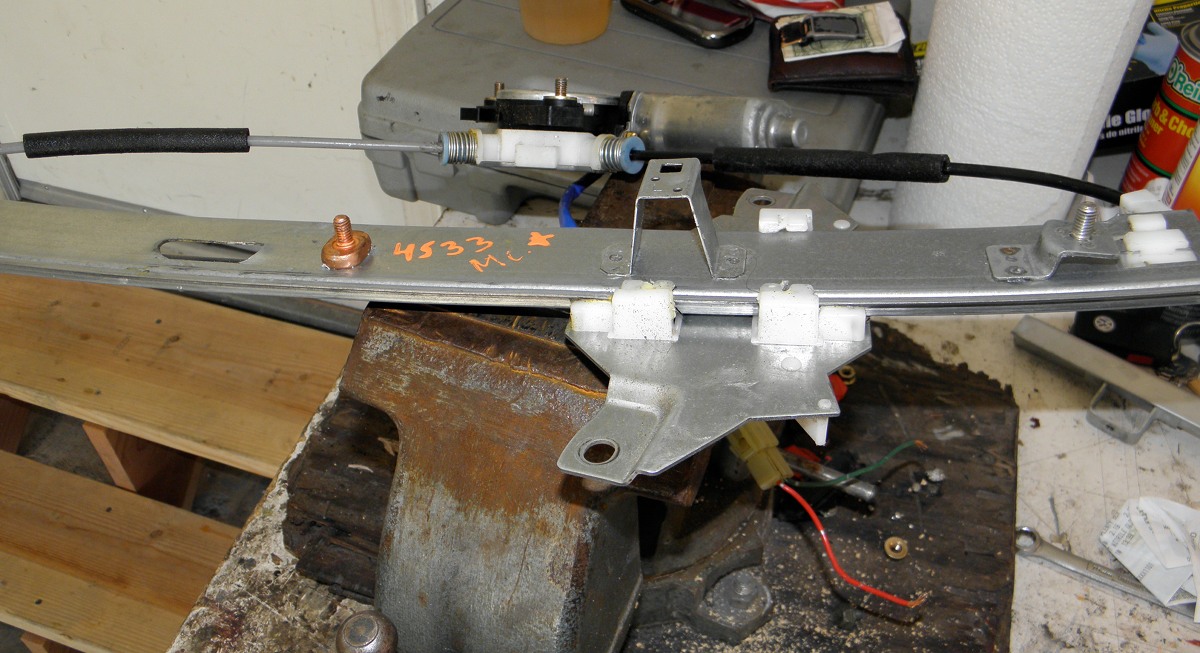
My passenger side regulator is not as beefy as the driver side. Track is narrower and the motor is thinner. Gets less use I guess.
-
Driver side window operational. Some details posted here: http://forums.hybridz.org/index.php/topic/58752-great-doner-parts-cars-for-z-mods/page__st__40
-
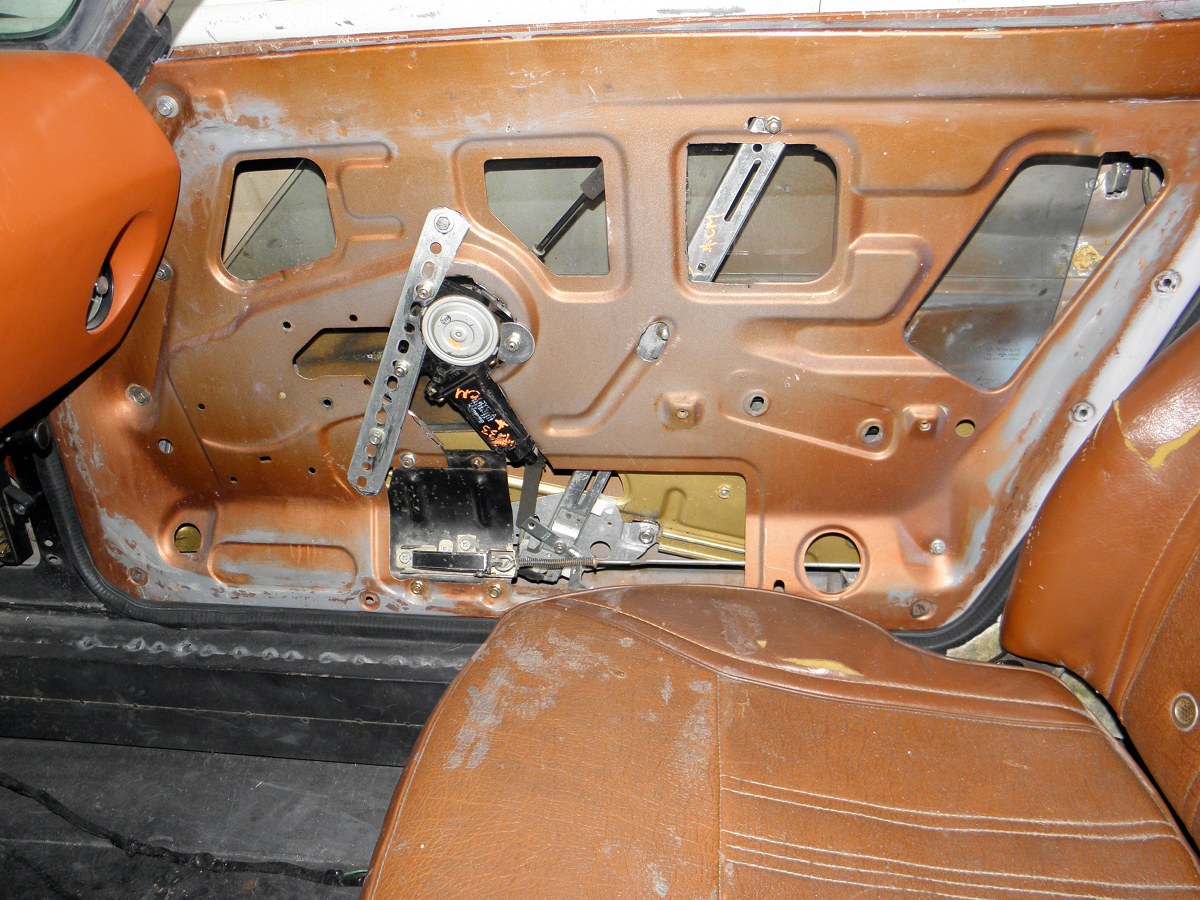
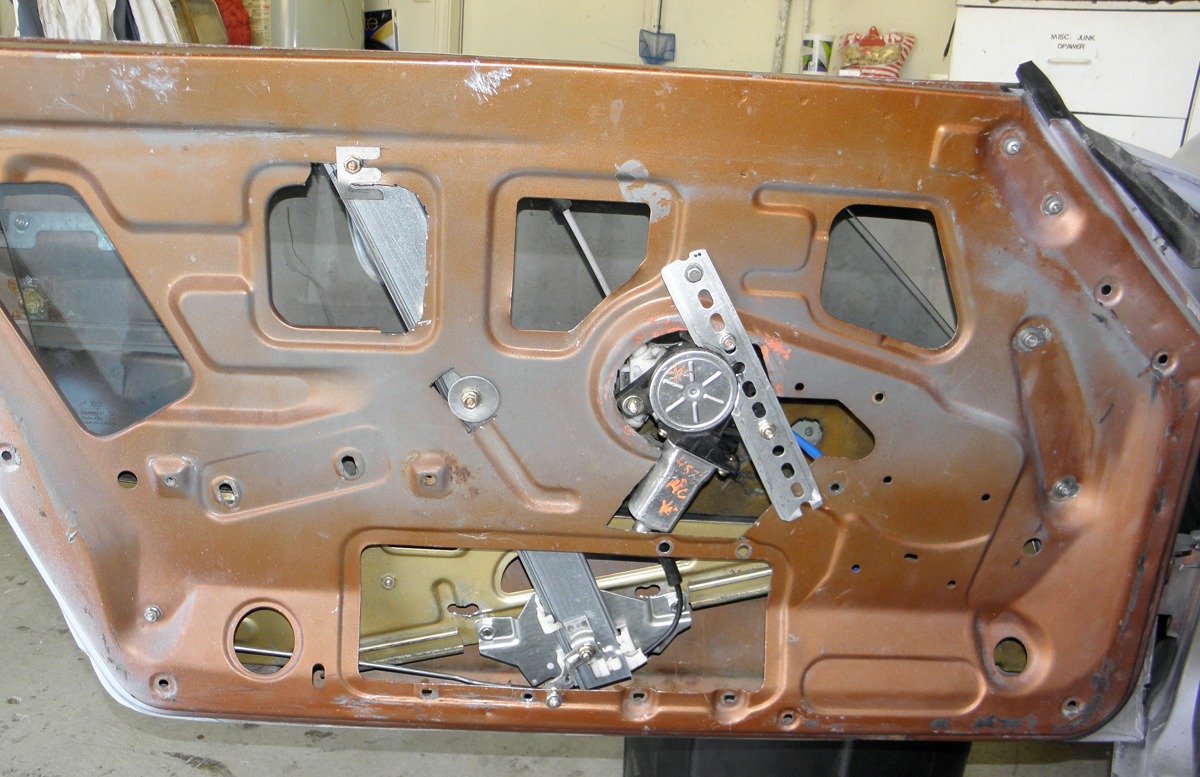
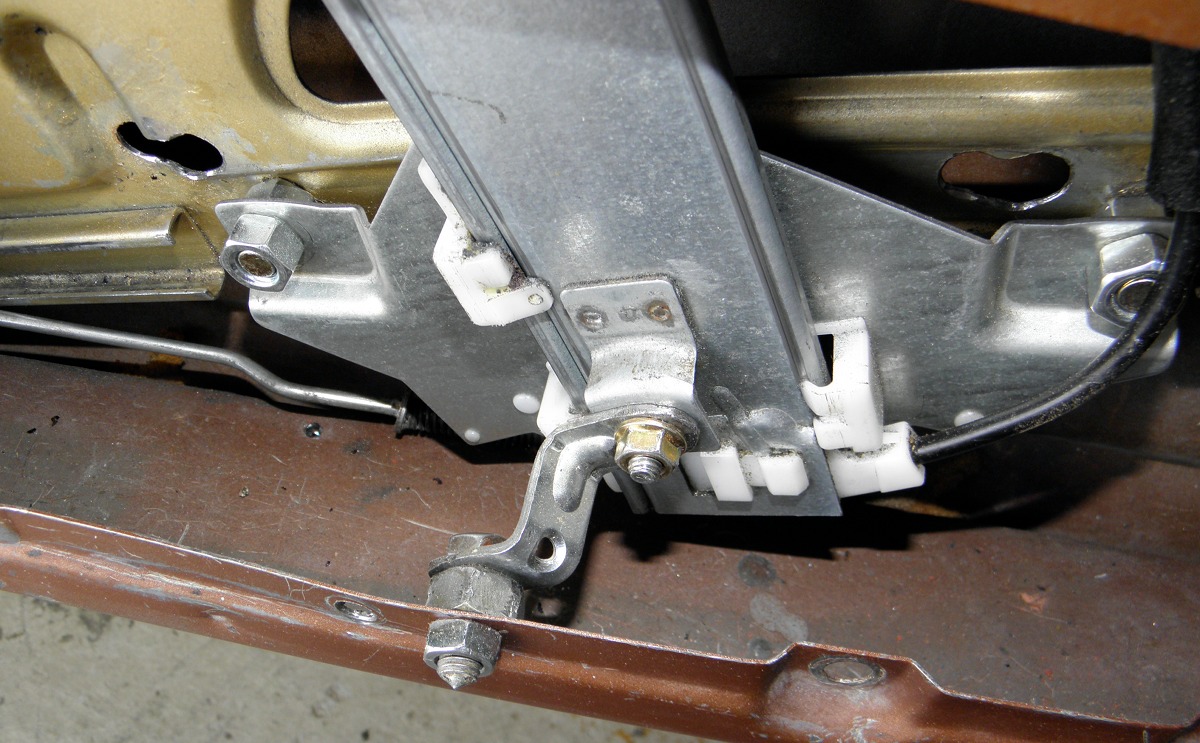
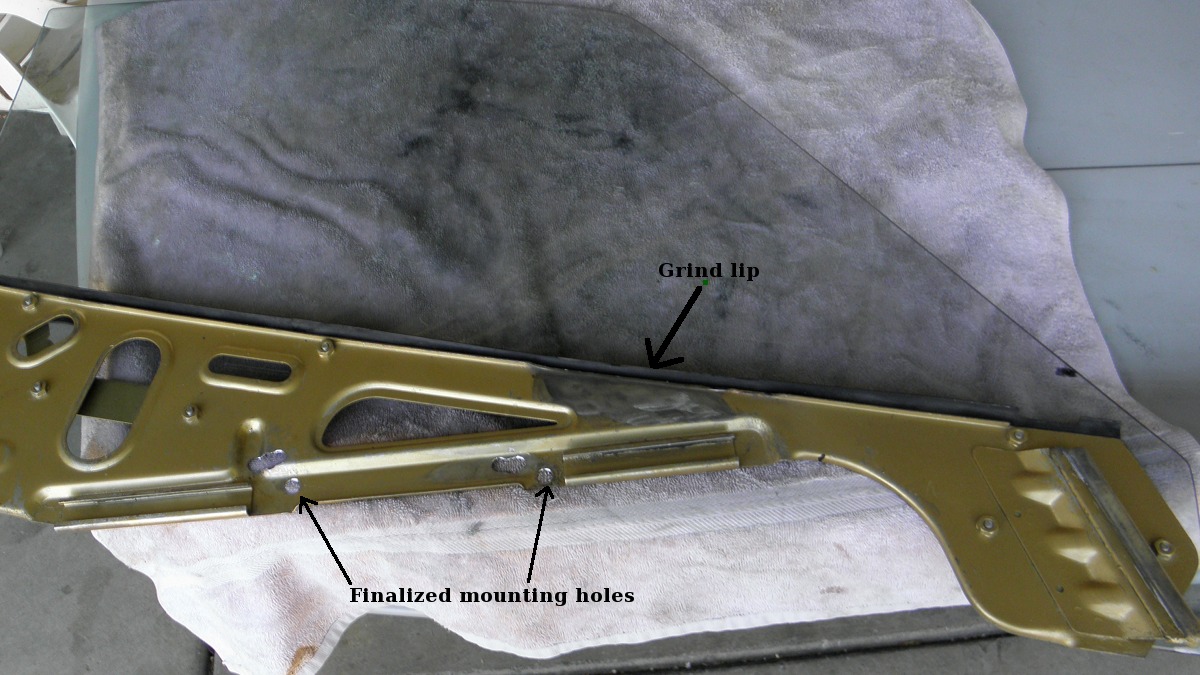
Okay. So, after what amounts to three full days using the "trial and error" technic, I've finally installed the drivers side regulator. Rather than explain what I actually did during this arduous process, I think it would be better just to post pics of the final result, with a little commentary. As they say, a picture is worth a thousand words. I compared the curved path of the Camry actuator track with the door's outer guide track. It doesn't take much force to bend the actuator track to match the guide track. In fact the actuator track is so thin it would be very easy to put a kink in it if pushed on too hard. Cut off the old mounting brace. It's unnecessary and won't allow the track to fit. Using the two videos of operating windows in this thread, I approximated the actuator tracks upper mounting point. Getting all three tracks (actuator, outer guide and inner guide) to line up took forever. Here's the final positioning. The window frame attached to the actuator. There's a nut spacer between the window frame and actuator. The Z bracket will be replaced with one that doesn't require a spacer. I cut too much sheet metal, and had to add the strap in order to mount the motor. I ground the lip down on the top of the window frame in order to clear the back of the motor during operation. I hope this helps. Here's how it turned out. Power Windows Hopefully the passenger side will be easier.
-
These are from the front doors. Haven't decided on switches yet.
-
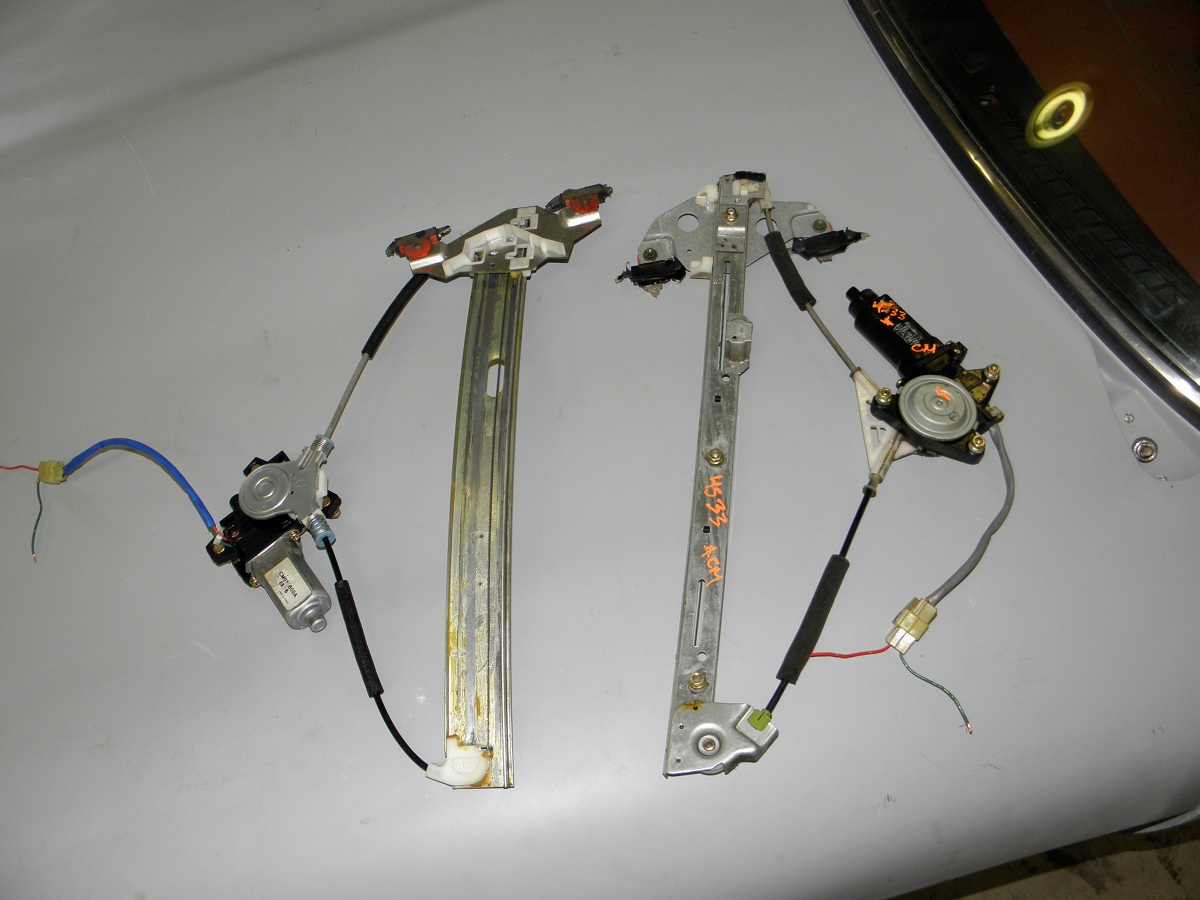
Starting power window conversion. "94 Camry regulators from PickNPull.
-
I know it's been a while since anyone has posted here, but I'm finally in a position to start this conversion on my 260Z based Velo Rossa project. I picked up '94 Camry regulators today at the local PickNPull. Under $80 with warranty. Bench tested... both work perfectly and seem very quiet. I don't have a time frame to complete this project, but will try to post any significant progress as I go.