Fauxre
-
Posts
315 -
Joined
-
Last visited
-
Days Won
5
Content Type
Profiles
Forums
Blogs
Events
Gallery
Downloads
Store
Everything posted by Fauxre
-
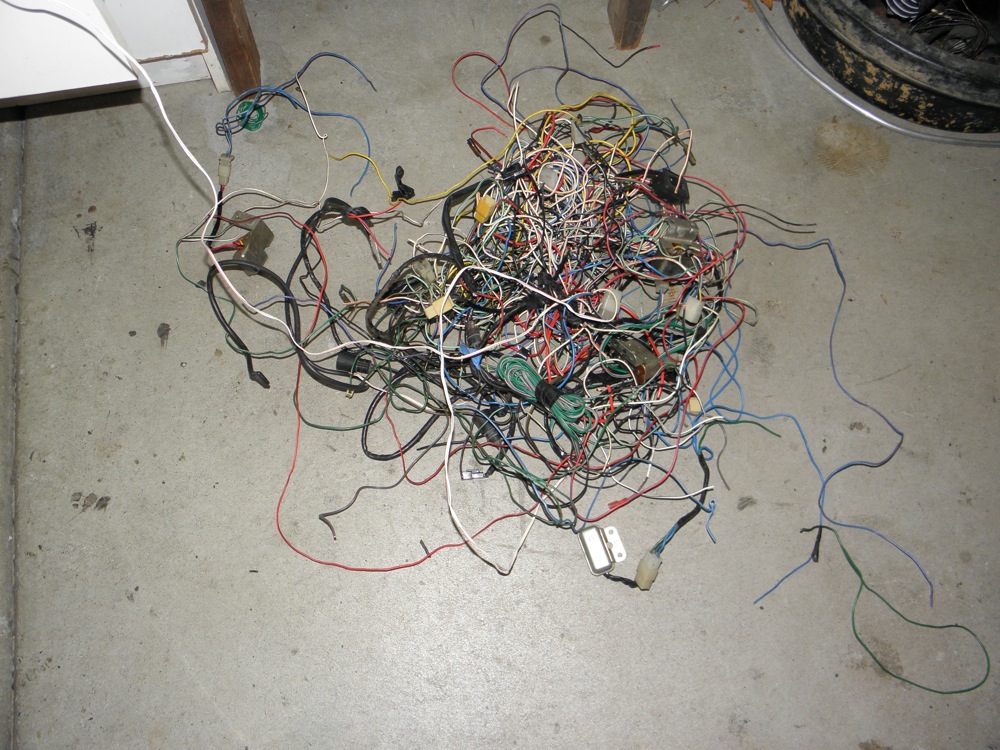
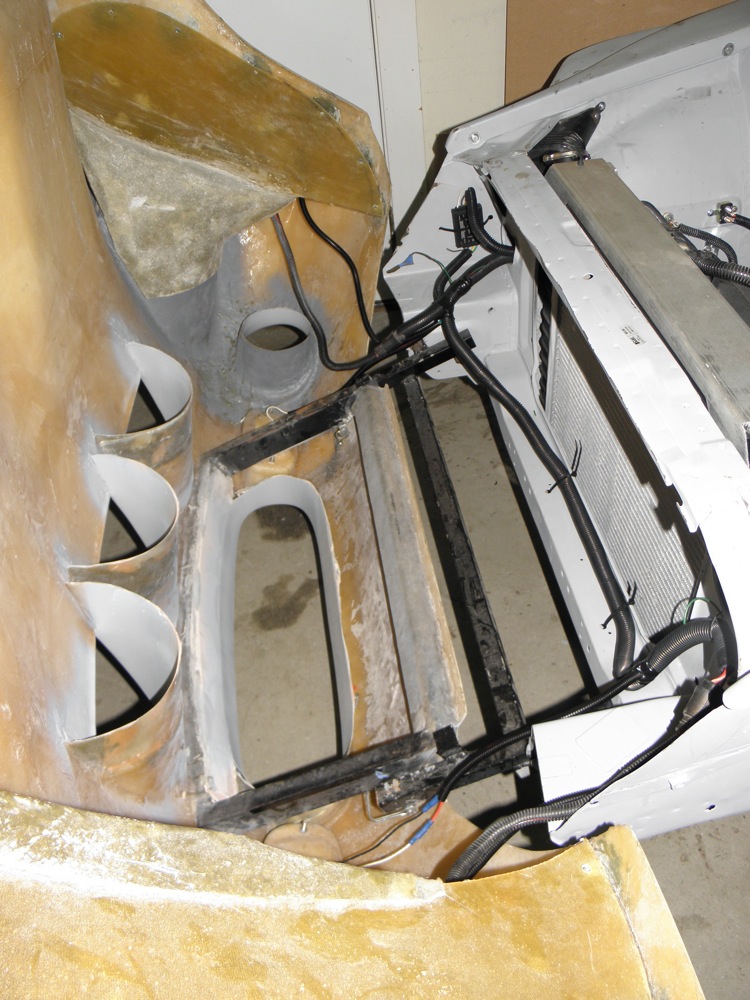
About half the wiring I removed. Not much left to do under the hood. Just heater hoses and a couple of covers for the exposed 12volt connections. Front end wiring harness

-
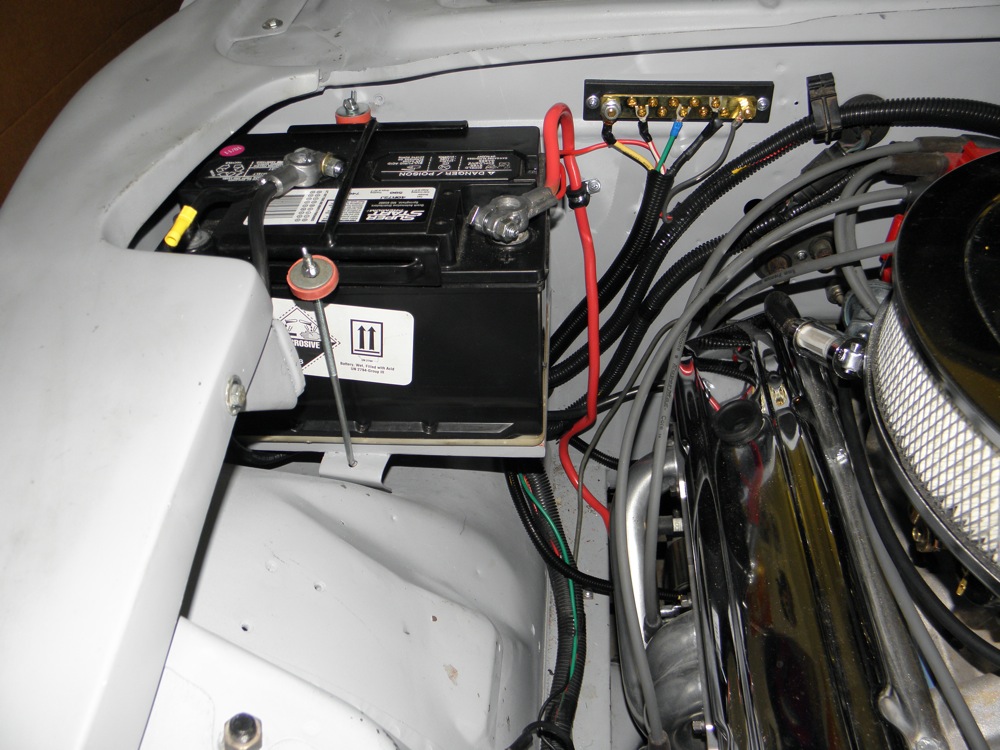
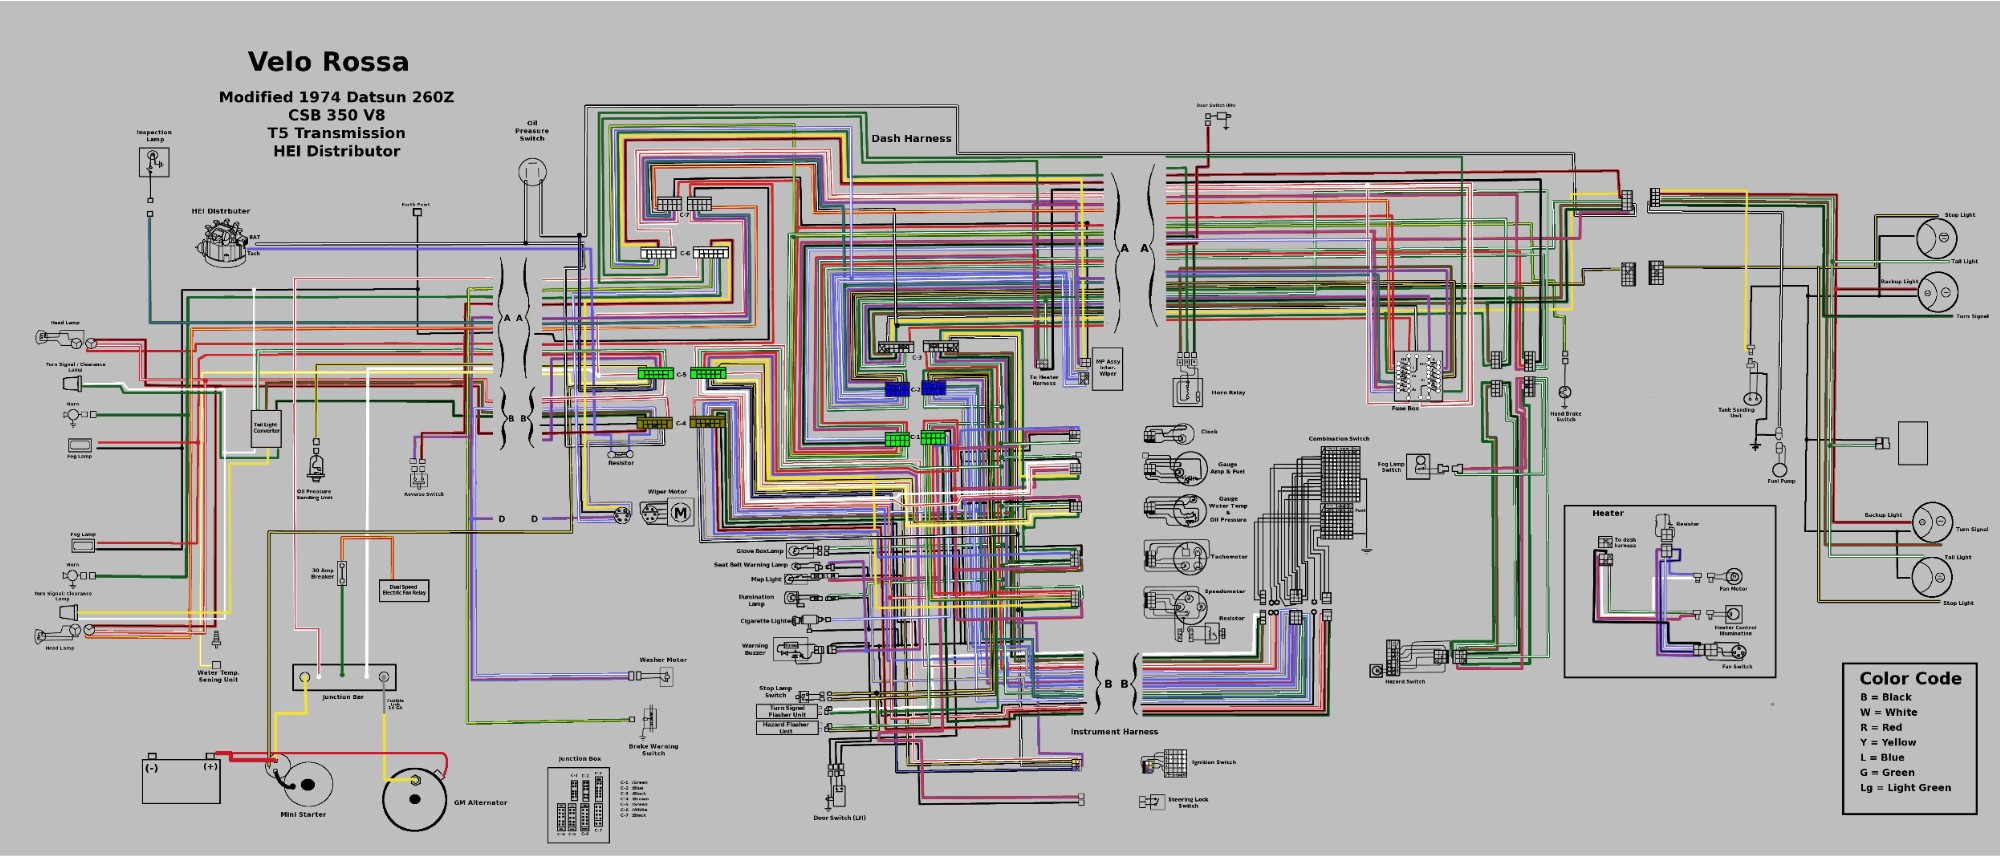
Well, after a month and a half, I've got the electrical figured out. I was having a lot of trouble following the wires on the schematic, even after Kinkos enlarged it to hang on the wall in the garage. All those little black lines running parallel... it was too easy to get them crossed. So, I spent a great deal of time with my favorite imaging program, and colored in all the wires I would be keeping. Working back and forth from computer to car, I added in the new GM components, a 12V junction bar and the newly routed wires. All the the current electrical systems are now operational. It's amazing that a simple flashing light could make me feel soooooo good. If all goes well, I may fire the engine for the first time this weekend.
-
I've started working on the wiring. The JTR manual had me totally confused at first, but I'm starting to get it. And instead of just bypassing the ignition interlock system, I'm going to remove it completely... along with a lot of wiring that I no longer need (i.e. dome light, rear window defogger, etc).
-
Thanks for forging ahead into the unknown on this. A picture says a thousand words... your video says ten times more. How does the wiring work? Is there some kind of controller or do the motors cycle themselves when you hit the switch?
-
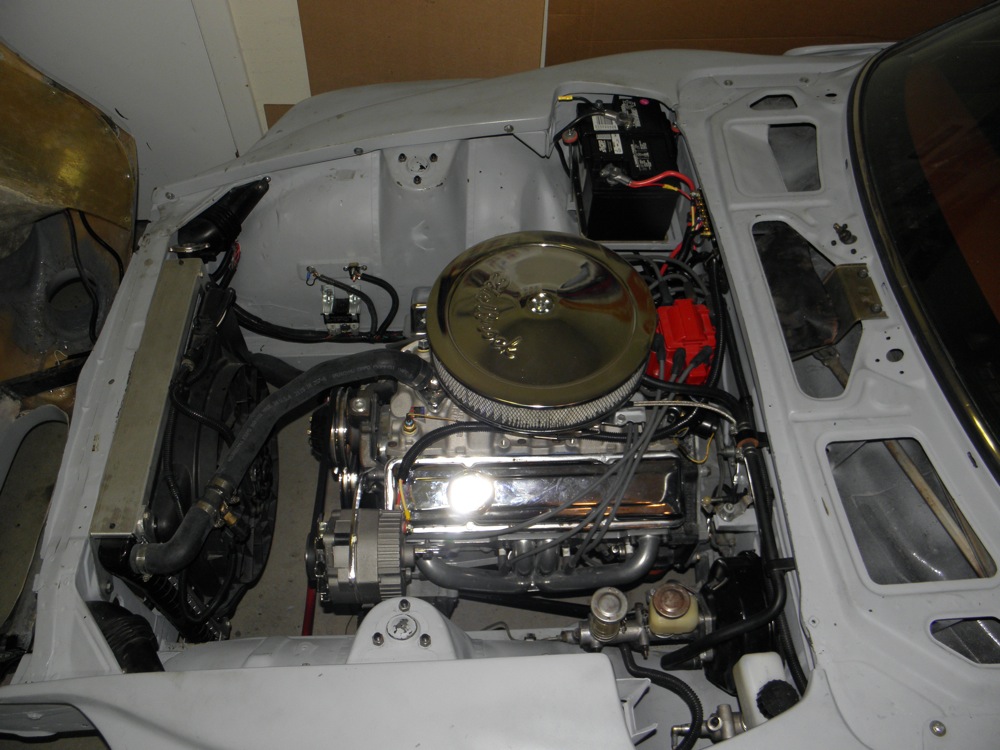
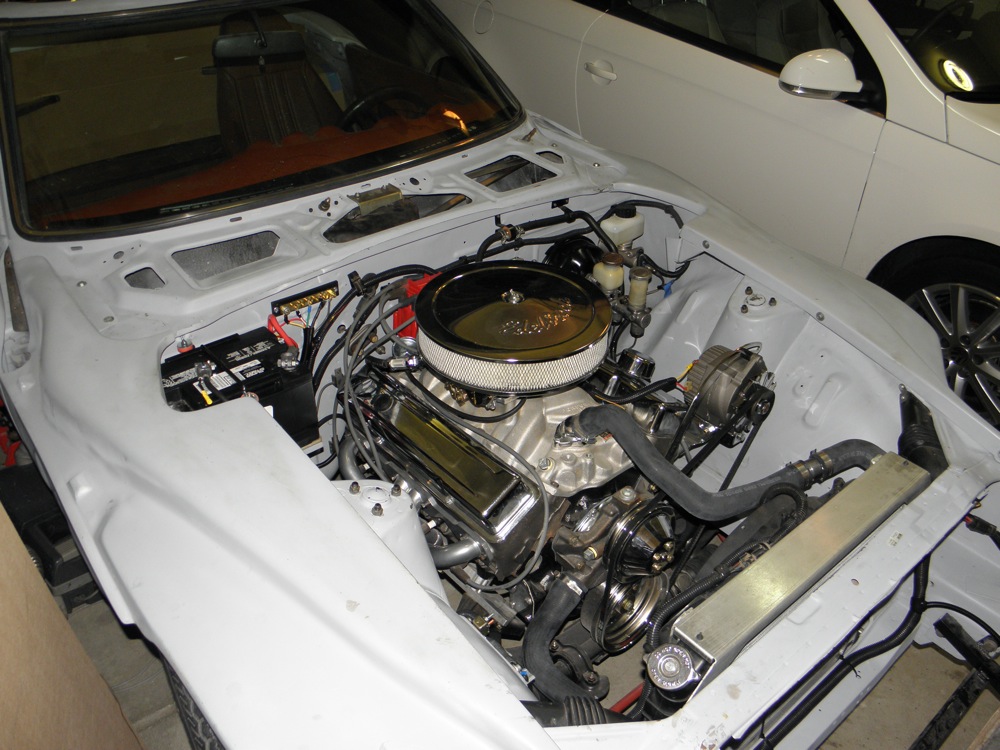
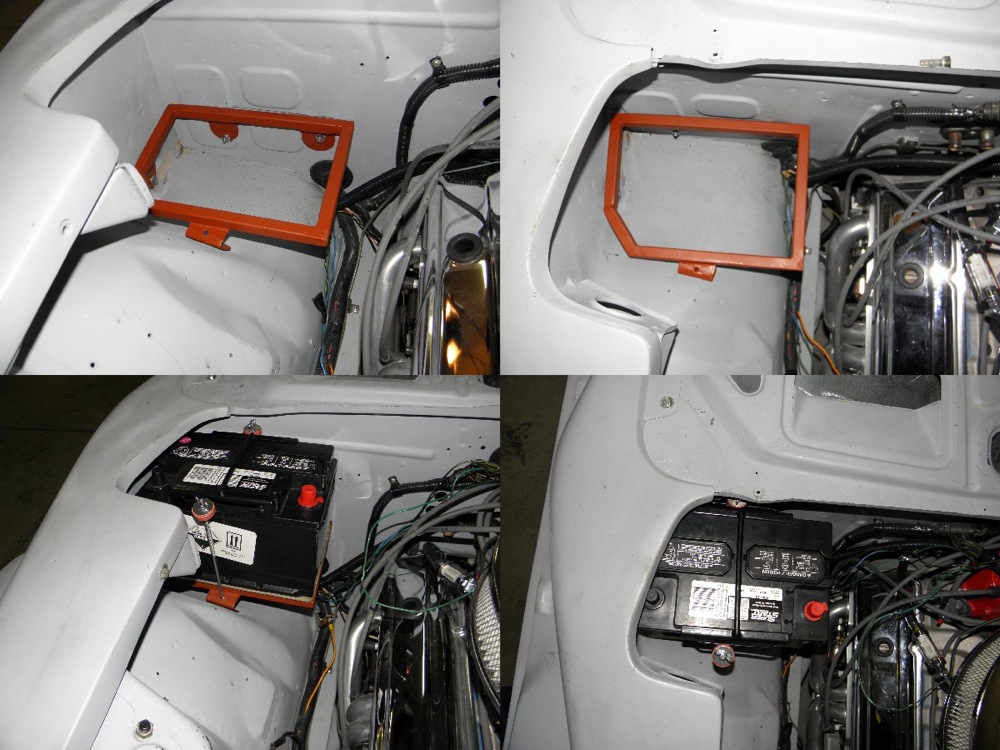
Thanks sq, I appreciate the encouragement. Yup. Been here 20 years now. If all goes well you might see it driving around town this spring. Meanwhile, back at the build... My original plan was to relocate the battery to the trunk. But, after making some temporary panels, it's clear to me that there just isn't enough space to hide a battery. So, it's back to the stock location in the engine compartment. There was a lot of corrosion on, and under the original battery tray, so years ago, I cut it out and treated the area. I fabbed up this new tray and bolted it to the fire wall and inner fender. It sits a little higher than stock, but with a a couple measurements, a suitable battery was easy to find at the local O'Reilly's. Up next is completing the wiring per the JTR V8 Conversion Manual.
-
I'm sorry to hear you're having so much trouble. I was looking forward to seeing the finalized procedure. Are the 240 windows a lot different than my 260? I am considering buying a couple of doors, along with the Camery regulators, at the local Pick N Pull, to chop up and experiment with. But I have a few higher priorities before I can start this.
-
I too was considering the Spal kit, but this sounds so much better. And the above video is encouraging. Looking forward to your write up.
-
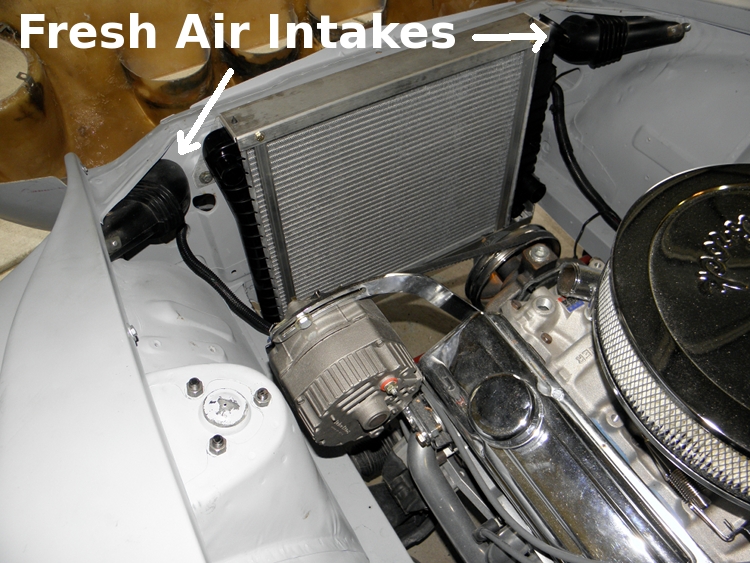
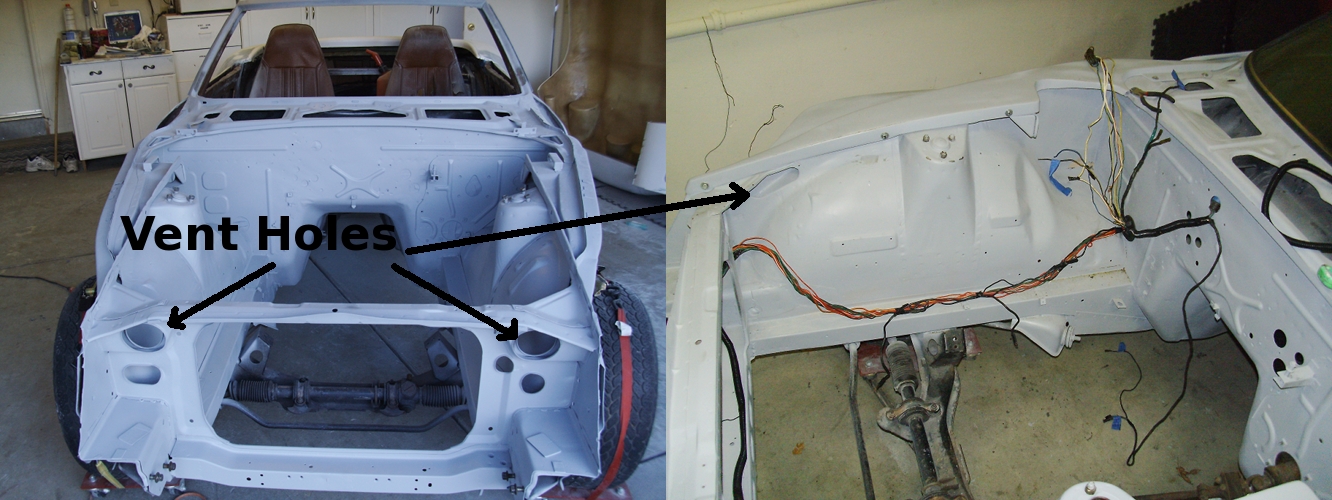
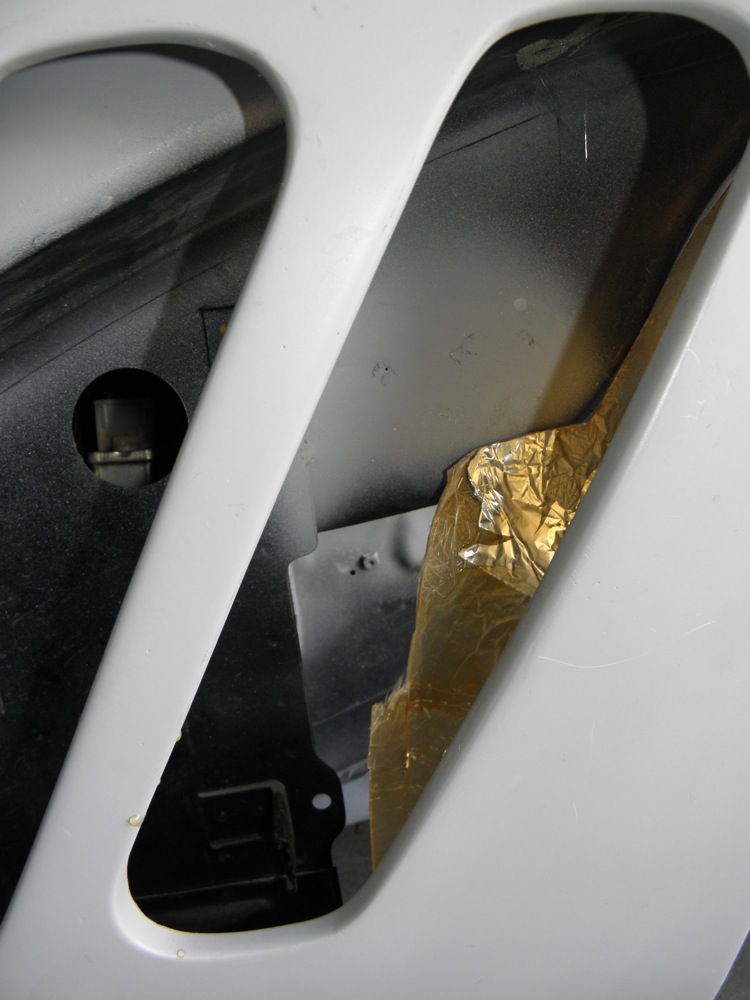
Did we discuss this when you were over? I seem to recall you saying that your car didn't have the the fresh air vents in this pic. If you have the factory holes in the radiator mount and inner fender, just get a pair of these plastic vents. Pricey, but a lot less work than cutting into your bonnet. That's all I'm going to use since I'll be using only the heater in my roadster. If not, maybe you could add them. Just a thought. Wes
-
Just stumbled over this thread today. Great concept and execution. And the pics are very instructional and inspiring. Seems though, that I'm finding a lot of threads with custom dash projects that have been started, but not completed. Any updates to this one?
-
Sorry about dredging up an old thread here, but does anyone know how this turned out? Did anybody get any pics of the finished piece? Maybe in another thread?
-
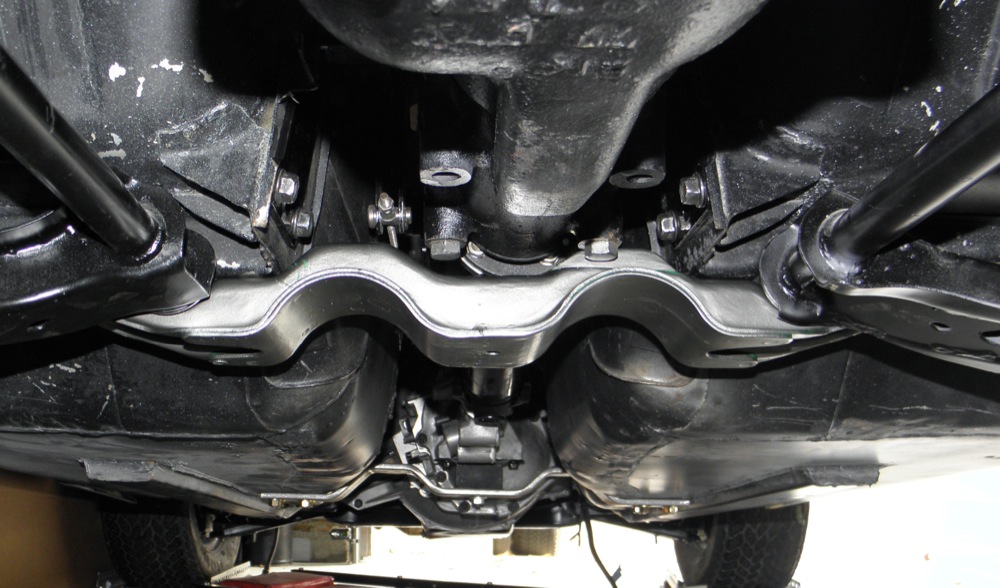
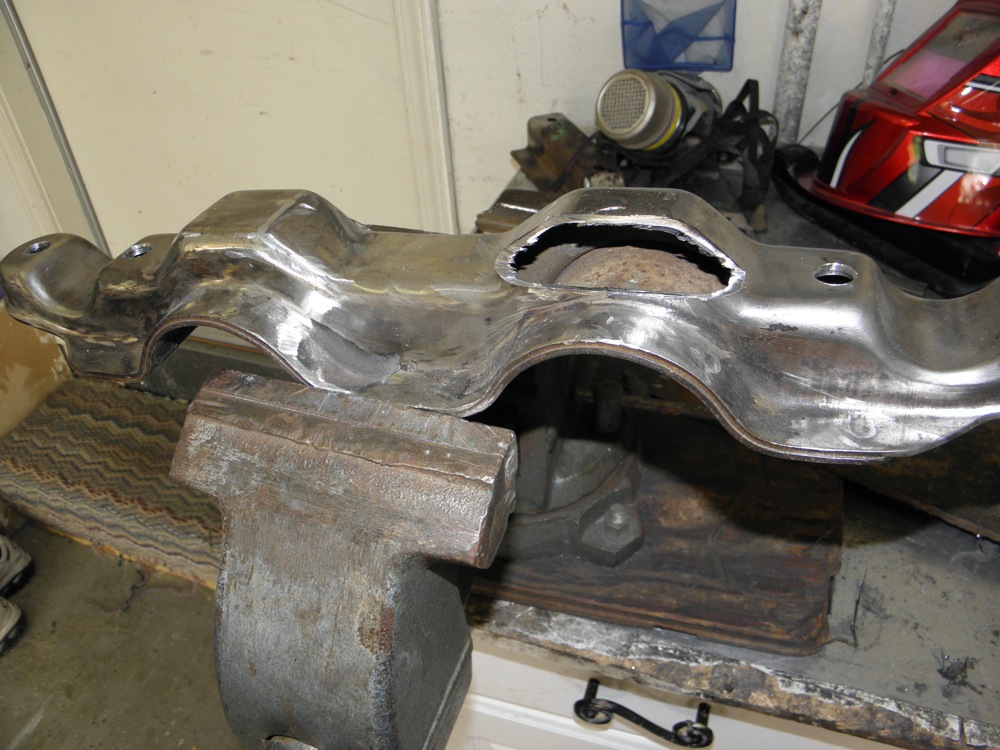
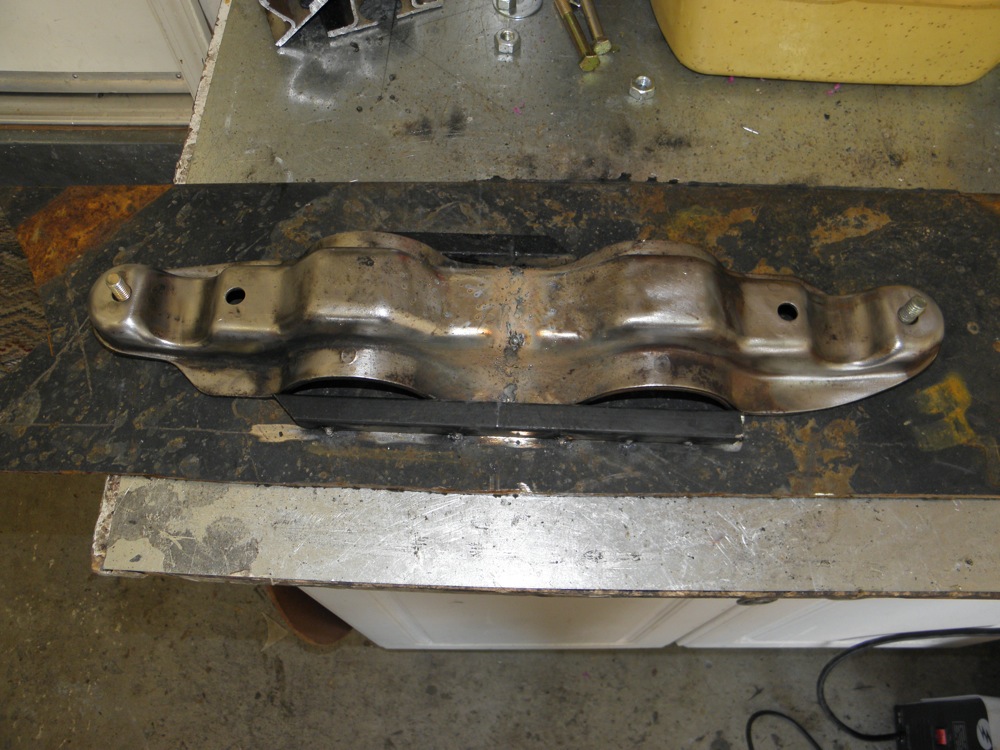
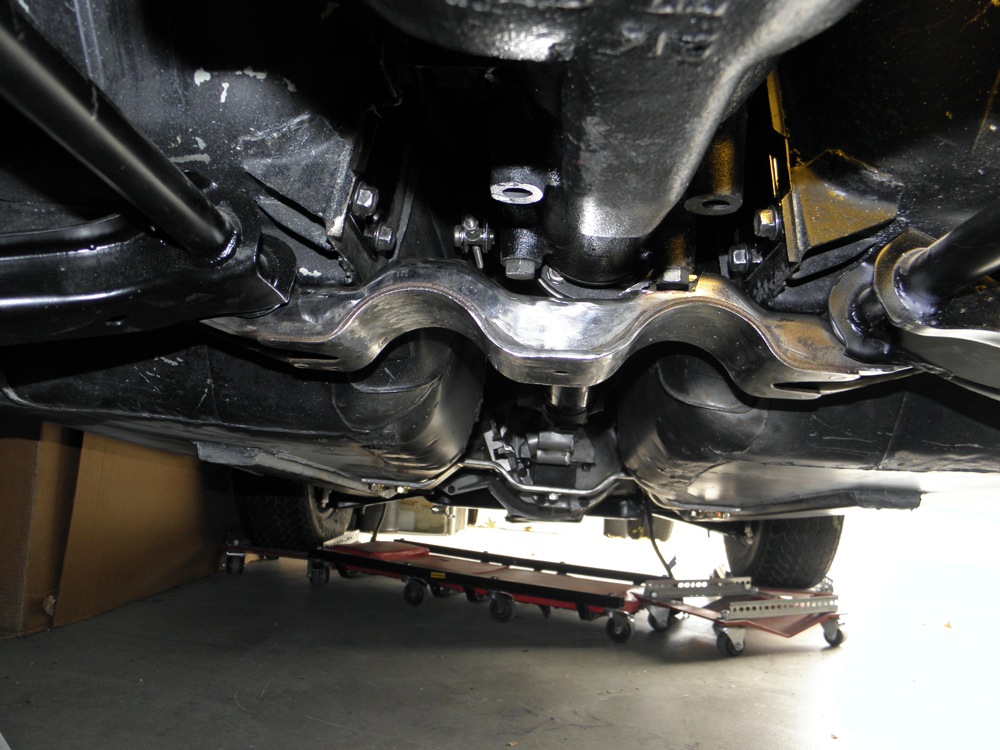
Modified differential crossmember painted and installed.
-
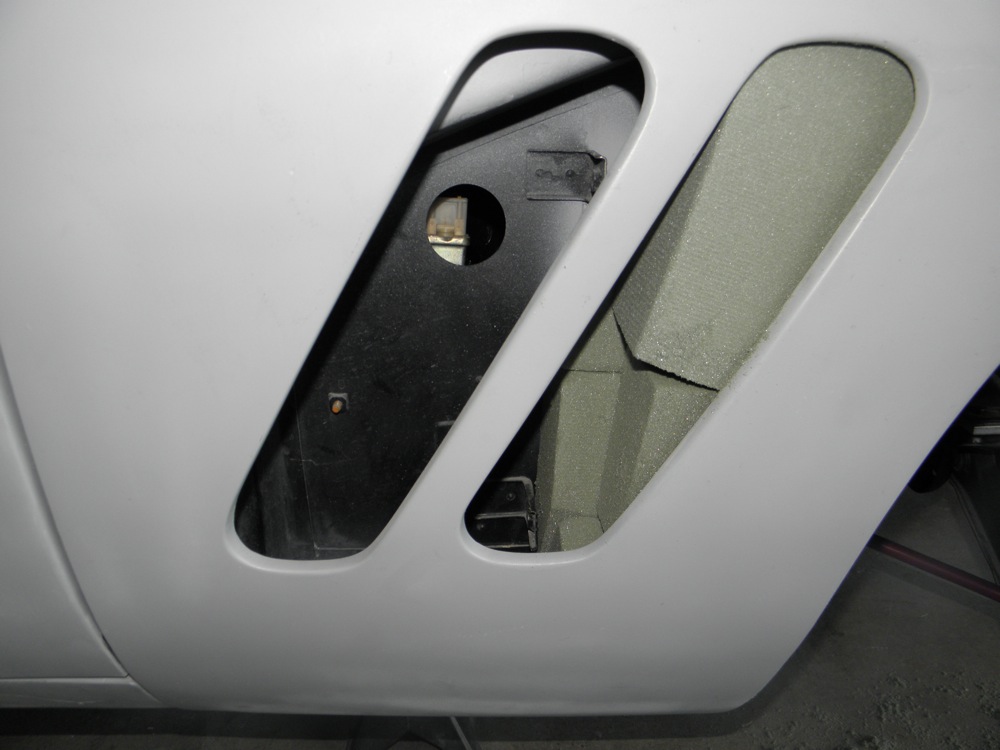
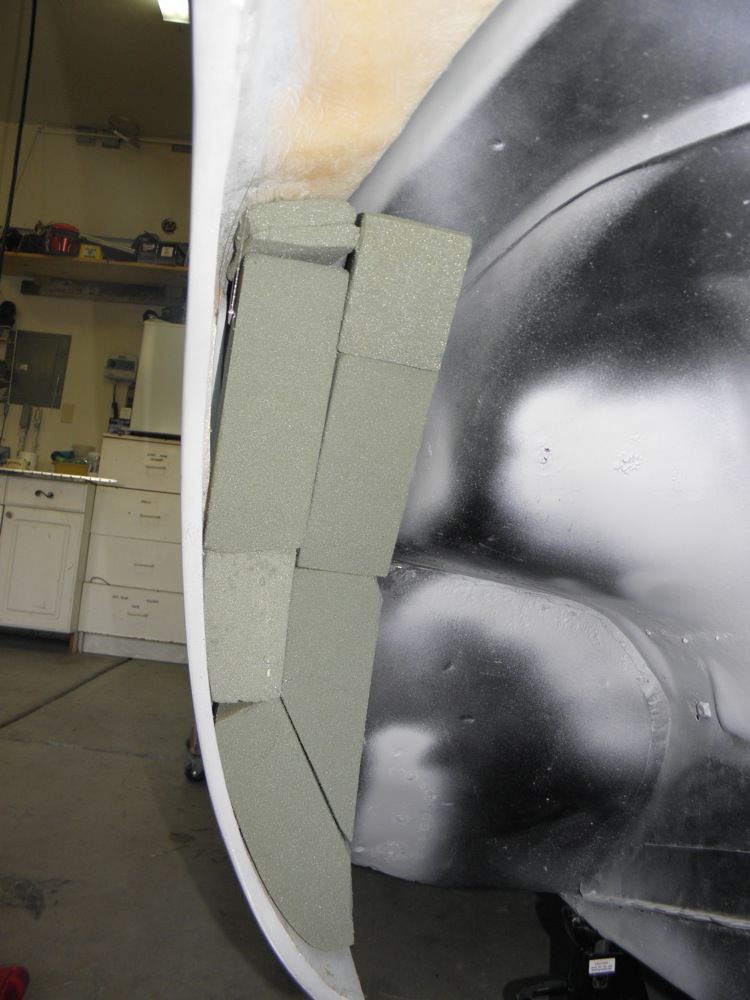
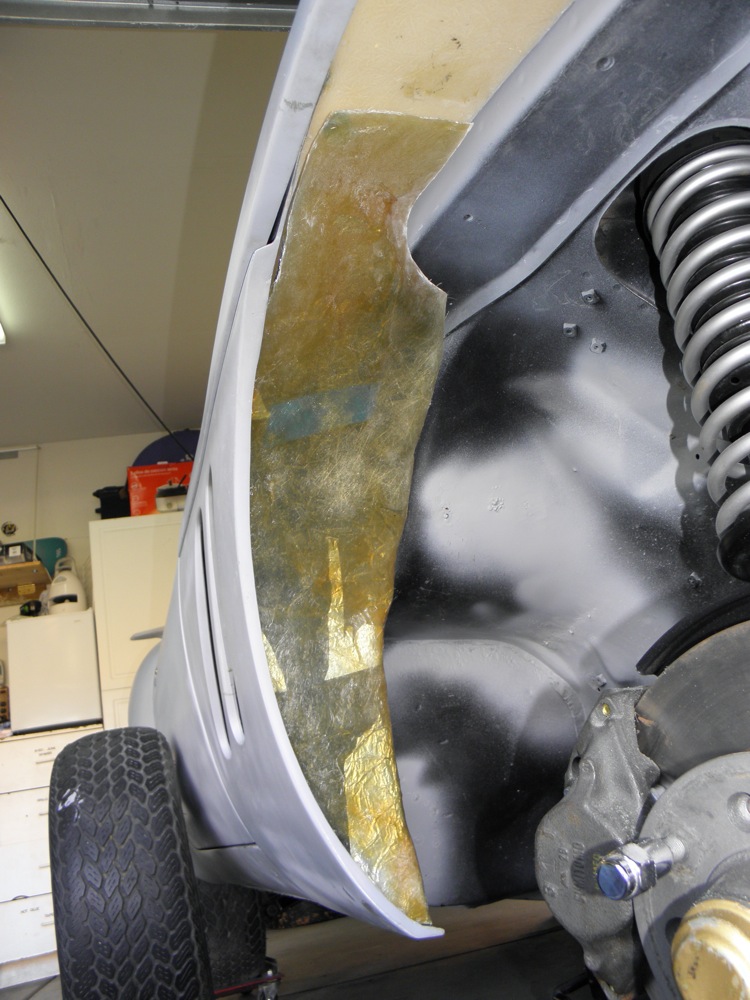
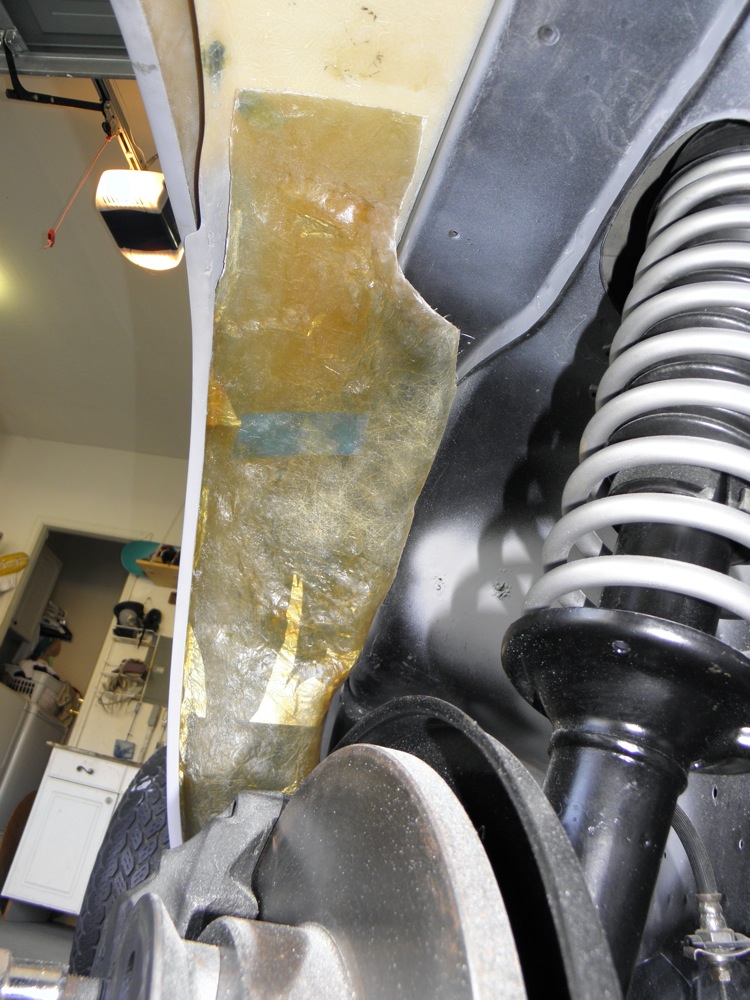
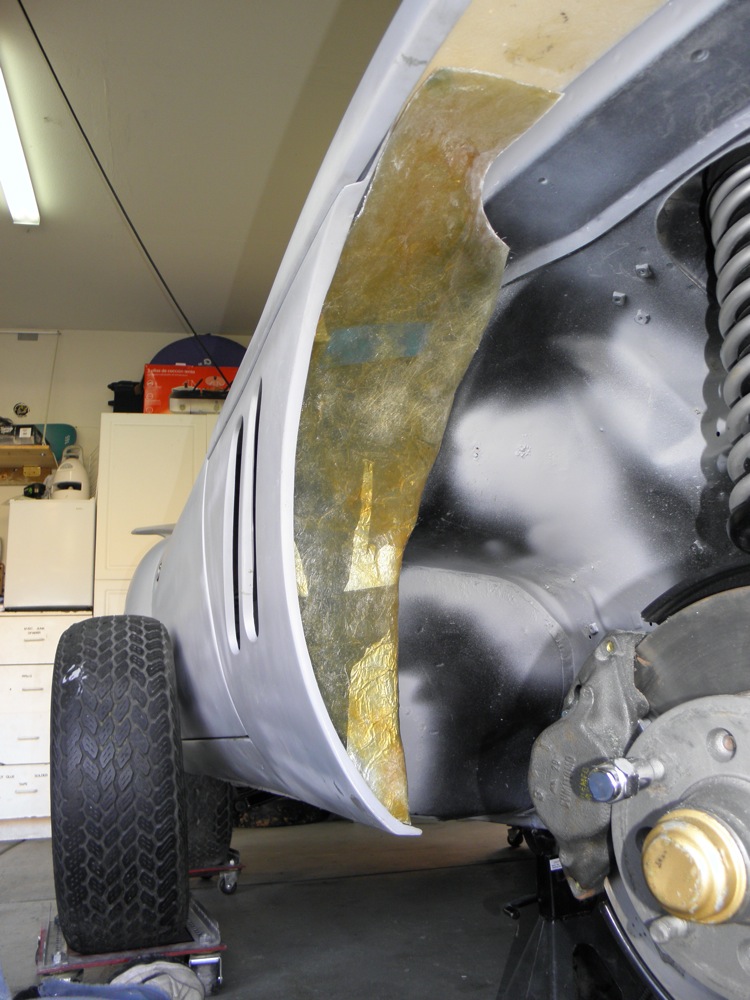
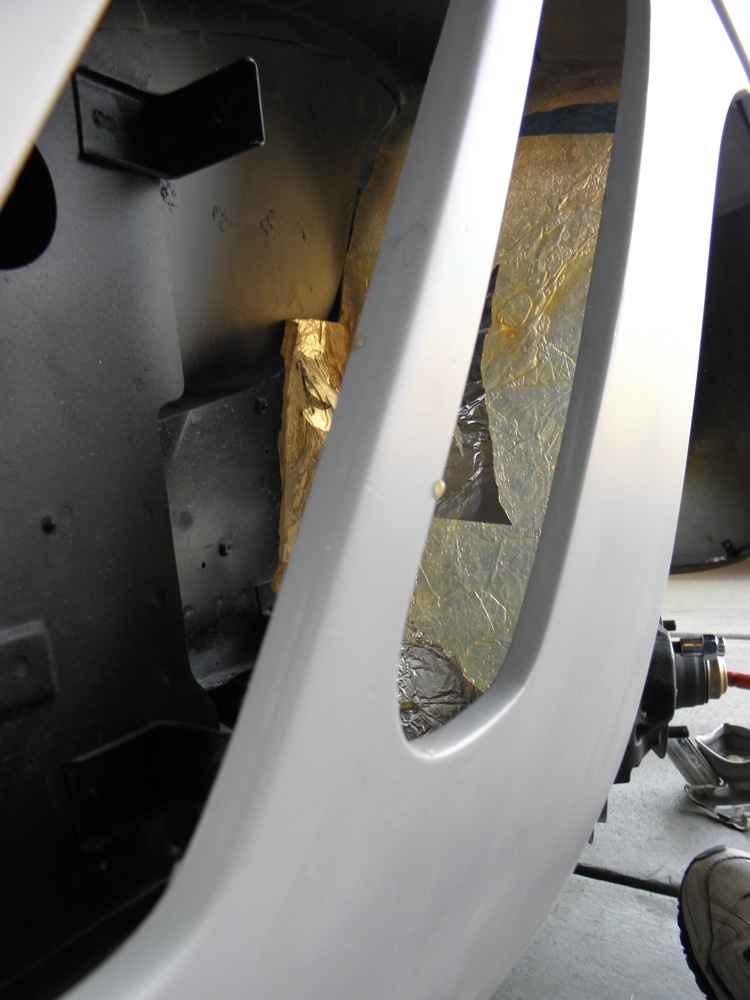
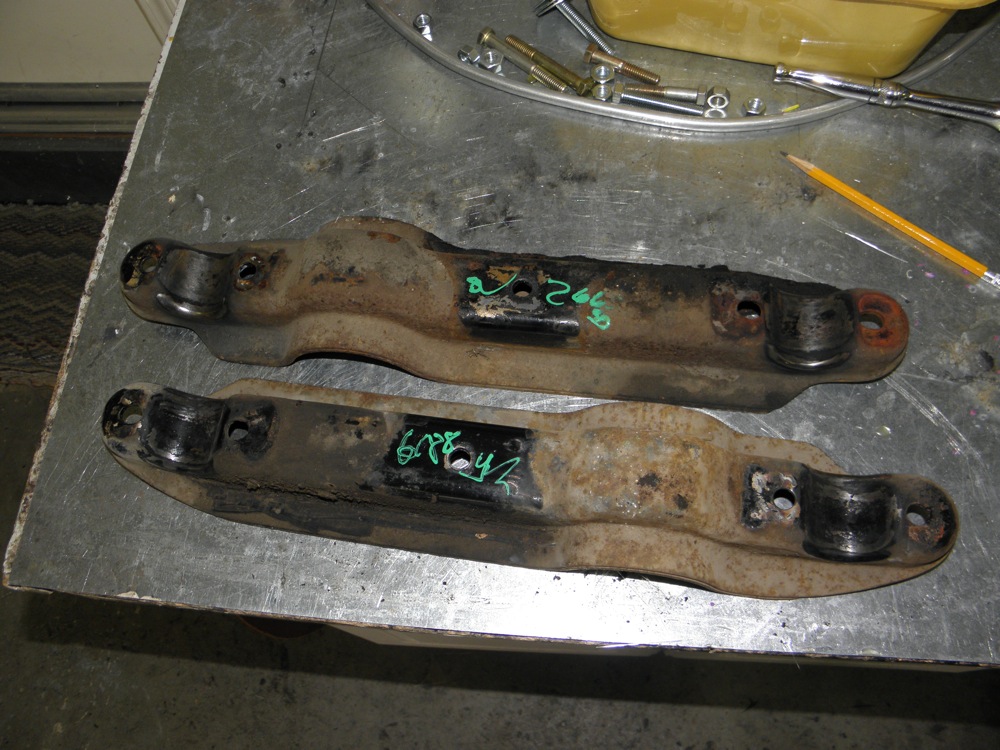
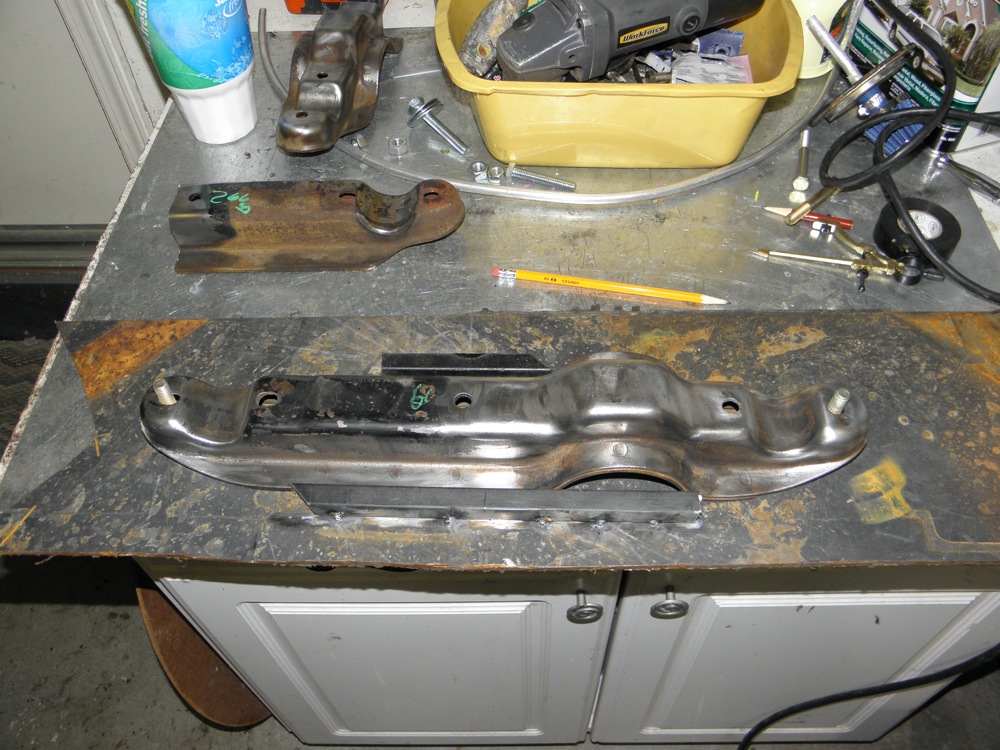
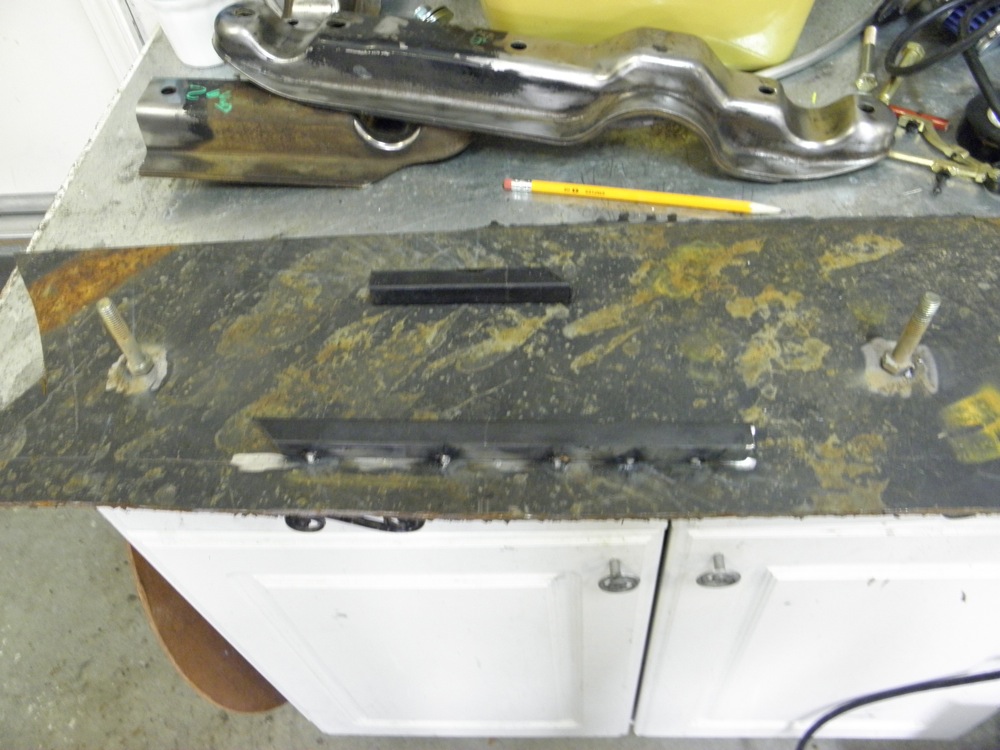
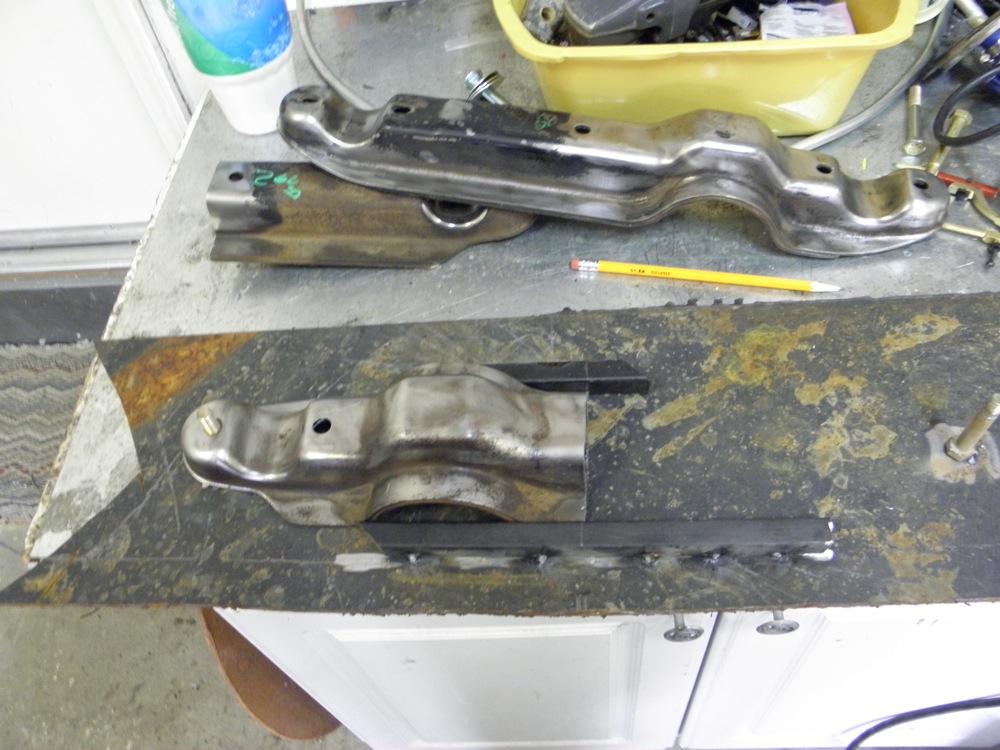
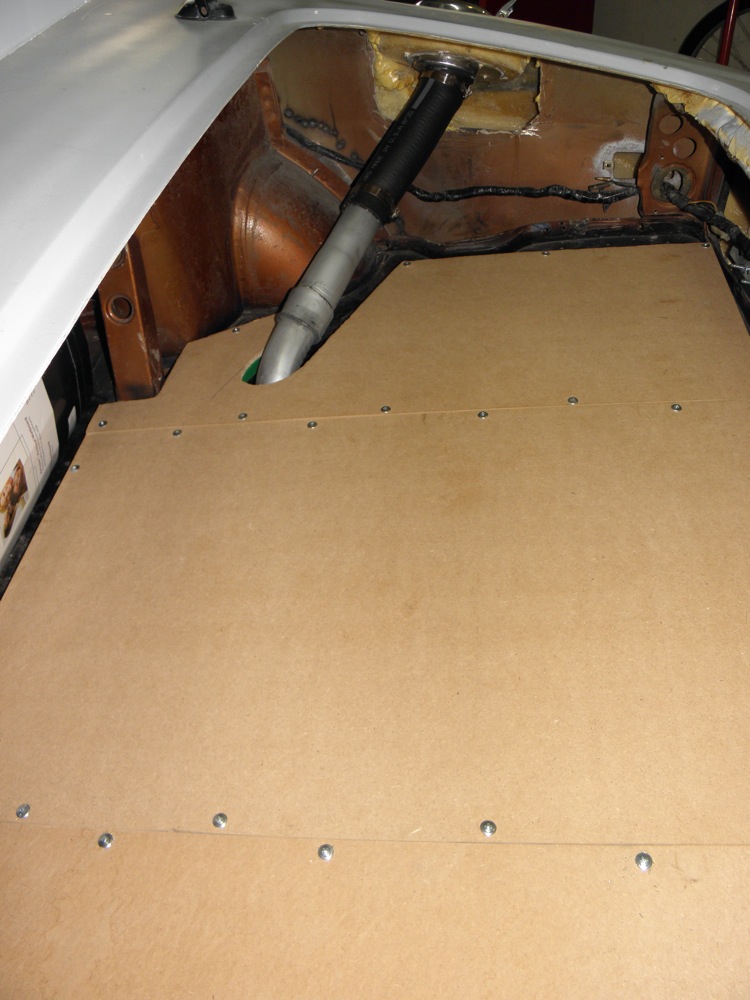
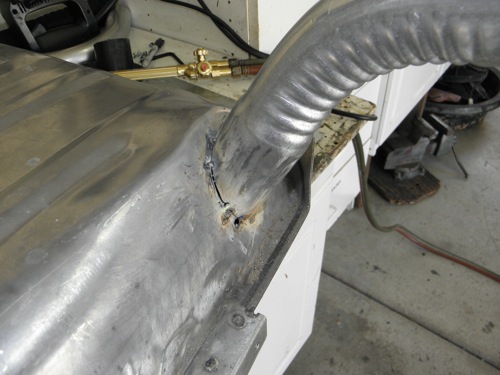
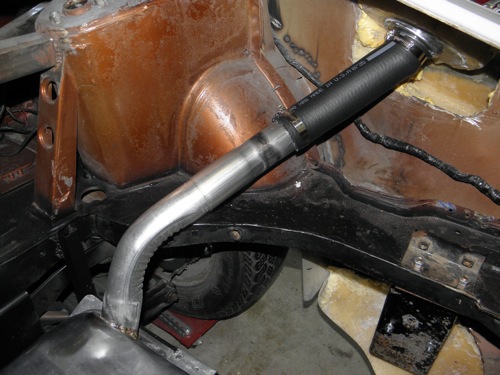
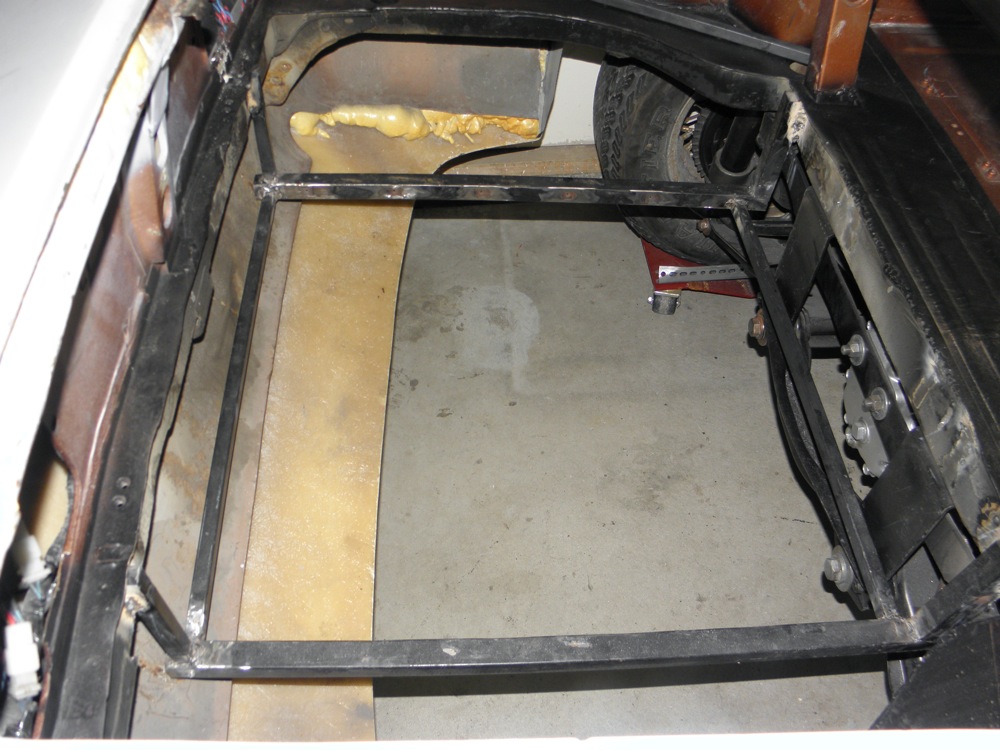
Latest progress: Completed the new fuel lines (3/8 solid aluminum) from tank to engine compartment. Still need to run flexible line to the carb. Sealed the hardboard trunk floor panels with fiberglass resin and coated the underside with a layer of matting for extra strength. Started making 'front fender well to door jam' block-off panels from fiberglass. I started by filling the gap between the unibody and cheek panel with floral foam blocks, and sculpting them to shape. I used a hot glue gun the attach each block to the inside of the cheek panel. After removing the cheek panel, I covered every thing with fiberglass matting. The resulting panel needs a lot of refining, as it came out very uneven and needs an extension to reach the old unibody. I'd prefer to make the block-off a permanent part of the cheek panel, but I'm not sure I can make it work with the way the panel rests on top of the old sheet metal. Needed a break from resin fumes, so I turned my attention to the differential mount and crossmember modifications. Originally I was going with the stock diff front mount setup, as my donor cars previous owner had provided me with all new parts at purchase. But, since I will be running duel exhaust, it became clear to me that the crossmember needed to be modified for better ground clearance. After exhaustive forum searches, it also became clear that it would be far better to convert to the RT mount, eliminating the problems of trying to retain a bottom mount location on a modified crossmember. Here's my solution: I purchased two crossmembers at Pick N Pull for $18 each. Using one crossmember, I made a welding jig from some scrap steel. I cut the crossmembers in half and welded the two pieces with exhaust recesses together. I notched the area that interferes with the diff mounting bolt and welded in angle stock. A little paint, and it's done.
-
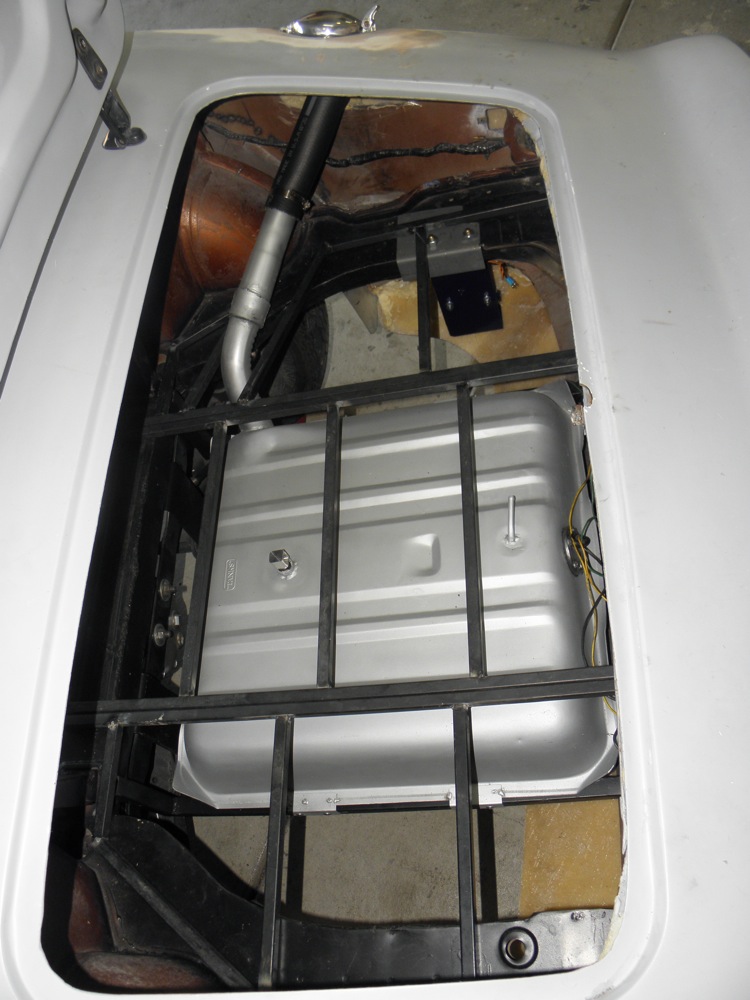
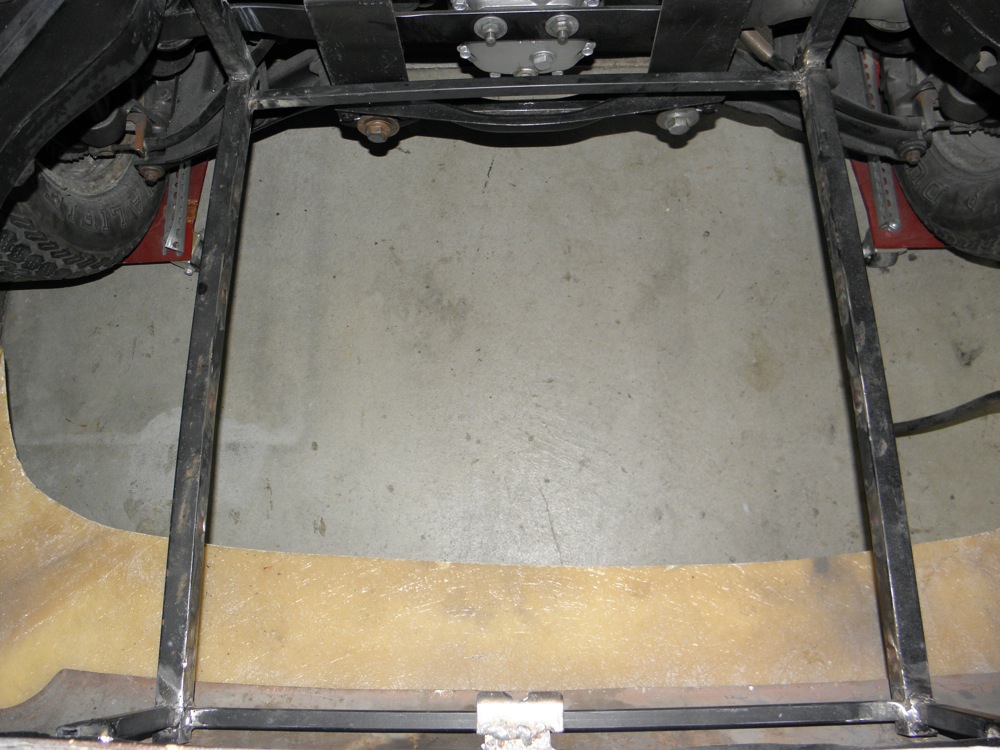
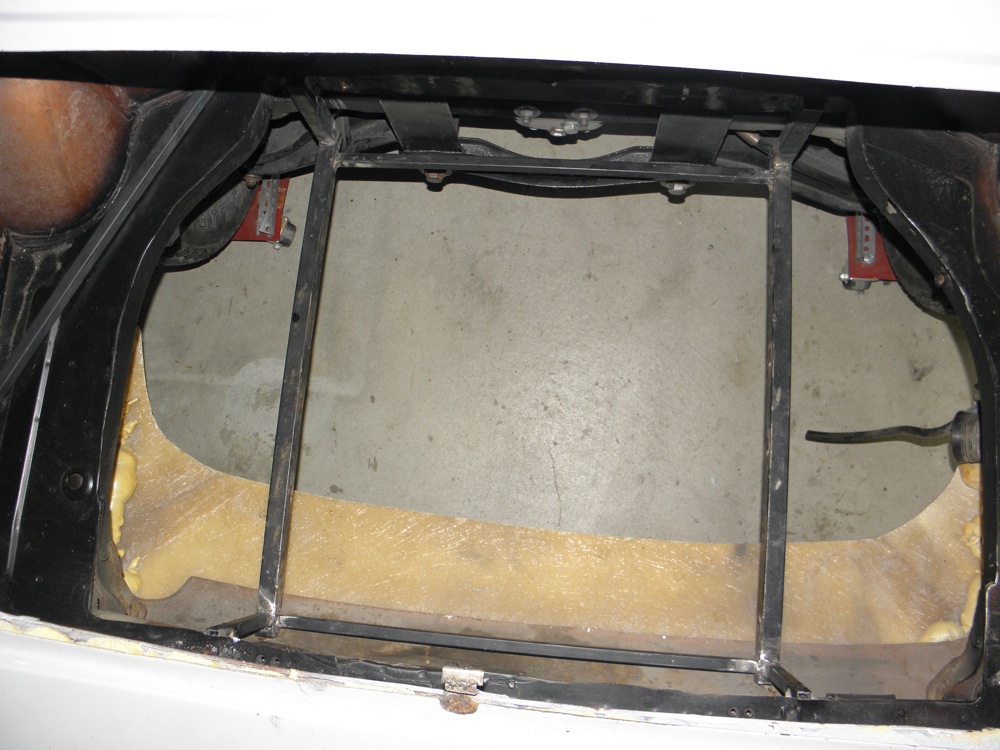
Added a vent tube and painted the tank with zinc coating from Eastwood. Welded up the trunk floor framing from more scrap square tubing. The trunk opening is to small to allow a single floor piece, so I made three sections. Looks good covered, but the hardboard concerns me. It'll need to be protected from moisture. So, I might use these panels as patterns for fiberglass replacements. Undecided.
-
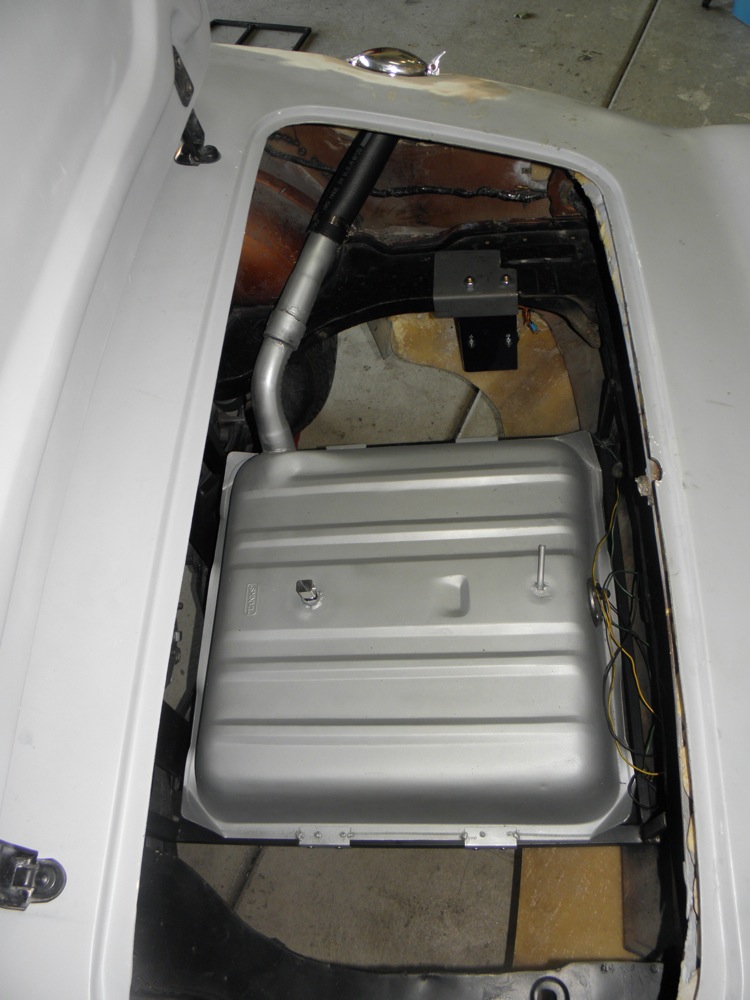
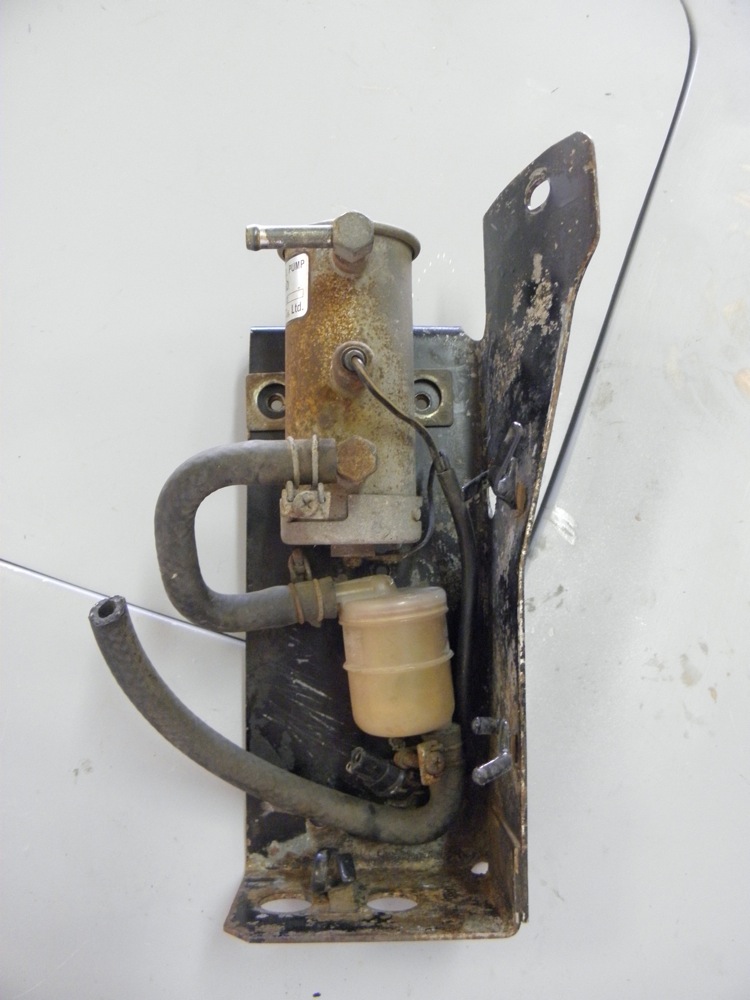
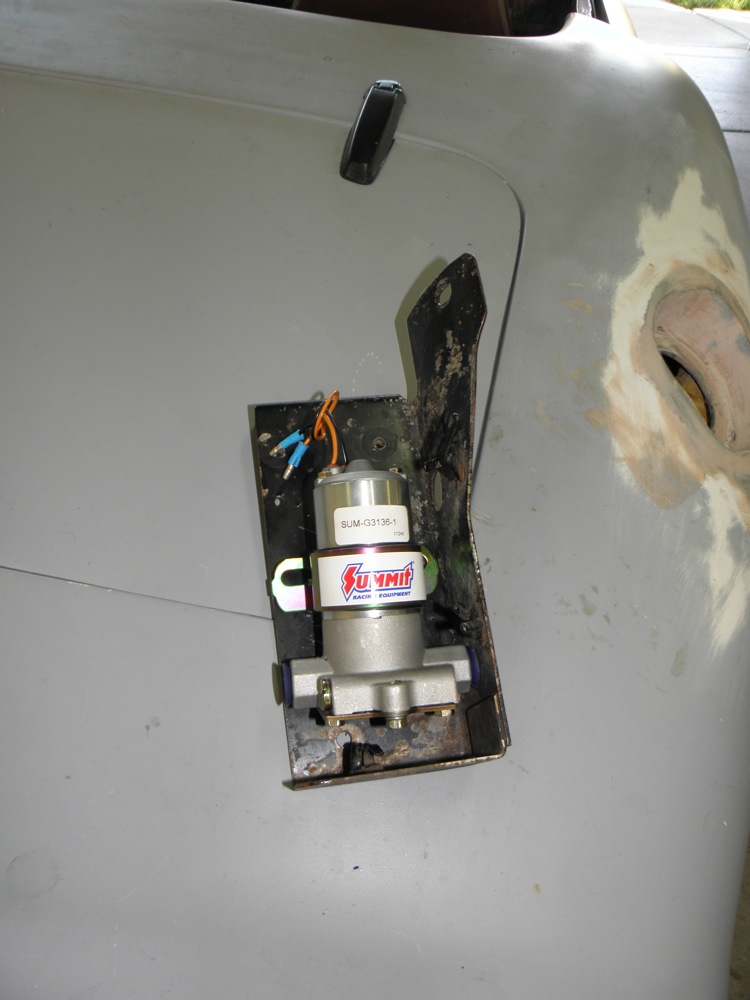
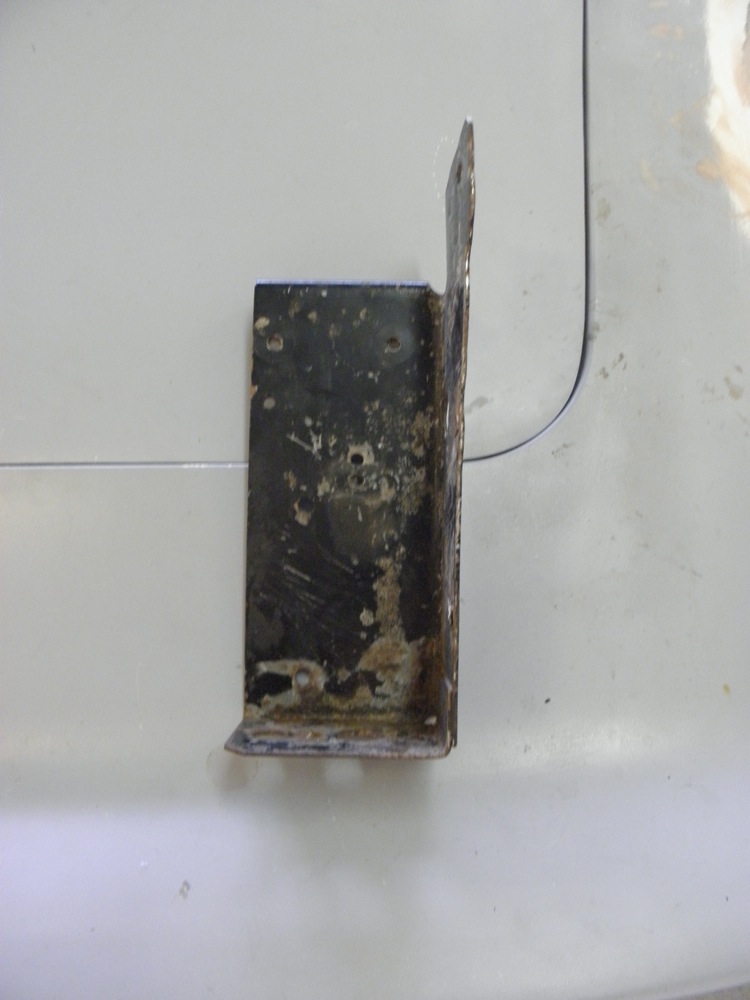
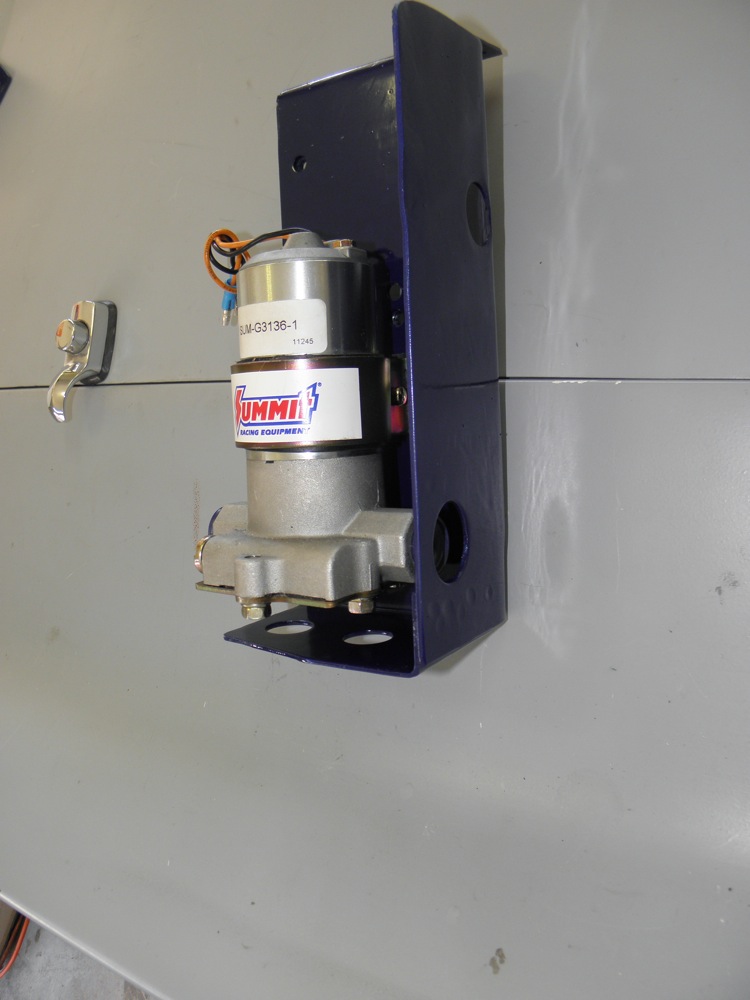
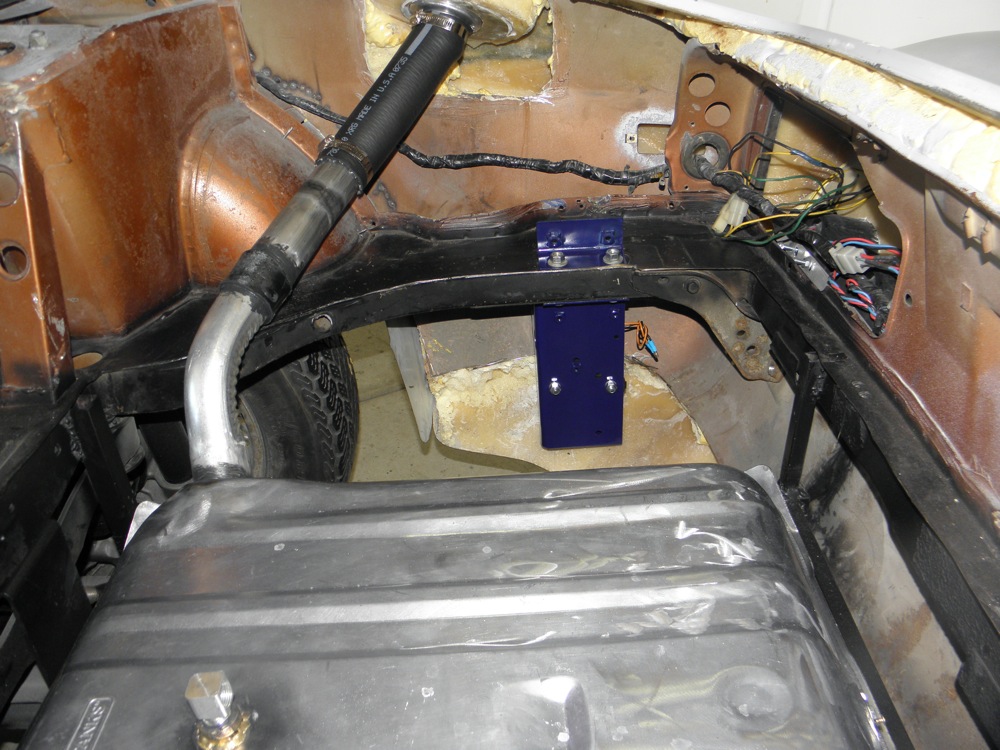
Time to mount the new fuel pump. The old pump and filter fit neatly in the heavy bracket. The new pump will fit nicely as well... Unfortunately the old mounting location is now occupied by one leg of the new fuel tank mount. I played around with the bracket and finally decided to try the mount on the passenger side as close to the rear valance as possible. The curved portion of the bracket is no longer required... ...so, I pounded it straight, cut it off even with the other side, sand blasted it clean, cut a new hole for the fuel line, painted it and attached the new pump. In its new location, the old bracket provides considerable protection from possible road debris and (I'm hoping) from exhaust heat since the muffler will run through the gap between the pump and fuel tank.
-
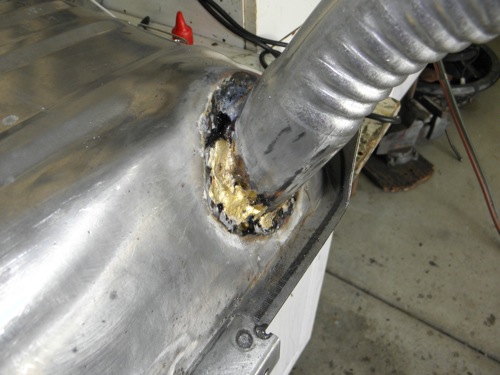
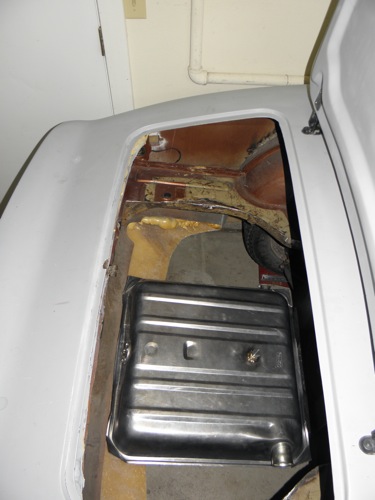
Now that the location of the fuel tank has been finalized, I've begun routing the filler neck to the gas cap. I bought this tank, in part, because the filler seemed to be in the best location for my project. It quickly became apparent that running the tube on the underside of the trunk to an existing hole, then up to the cap was going to be problematic. It required more complex bends than I anticipated and I'm concerned it will end up too close to the exhaust and muffler. My solution was to modify the inlet at the tank to come up through the trunk floor, then connect to the cap with a flexible connector. I'll lose some usable trunk space, but I like that better than the possibility of heating gas vapors.
-
A little paint on the framework... and four brackets secure the tank. I made this slideshow a couple of years ago... needs an update.
-
Here's the rack to hold the fuel tank. It's made from some scrap square tubing I had laying around the garage. Please... no snickering at my booger welds.
-
I used cut and pasted to make the last post, maybe that's why the pics aren't showing. Here they are again... uploaded this time.
-
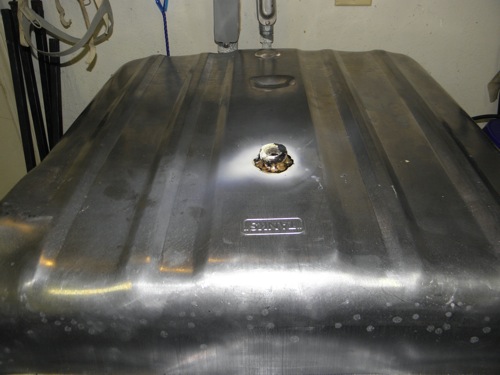
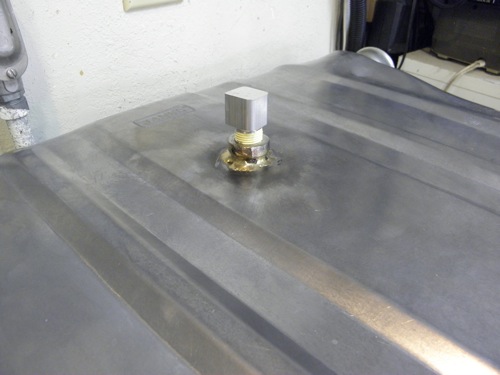
Cut out the rest of the trunk floor... Drilled hole for 3/8 pipe threaded bung... Brazed bung in... installed pick up tube... and positioned tank before starting to fab some mounts. Still need to figure out where to add a vent to the tank.
-
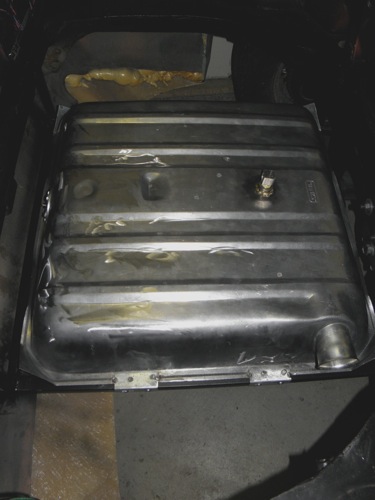
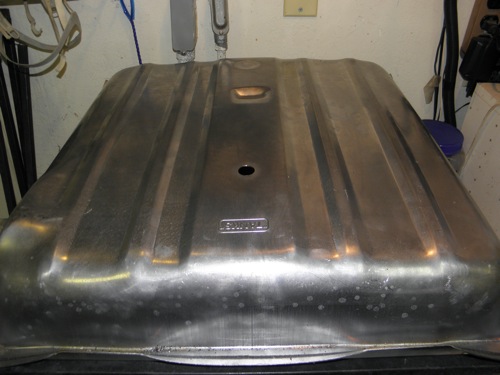
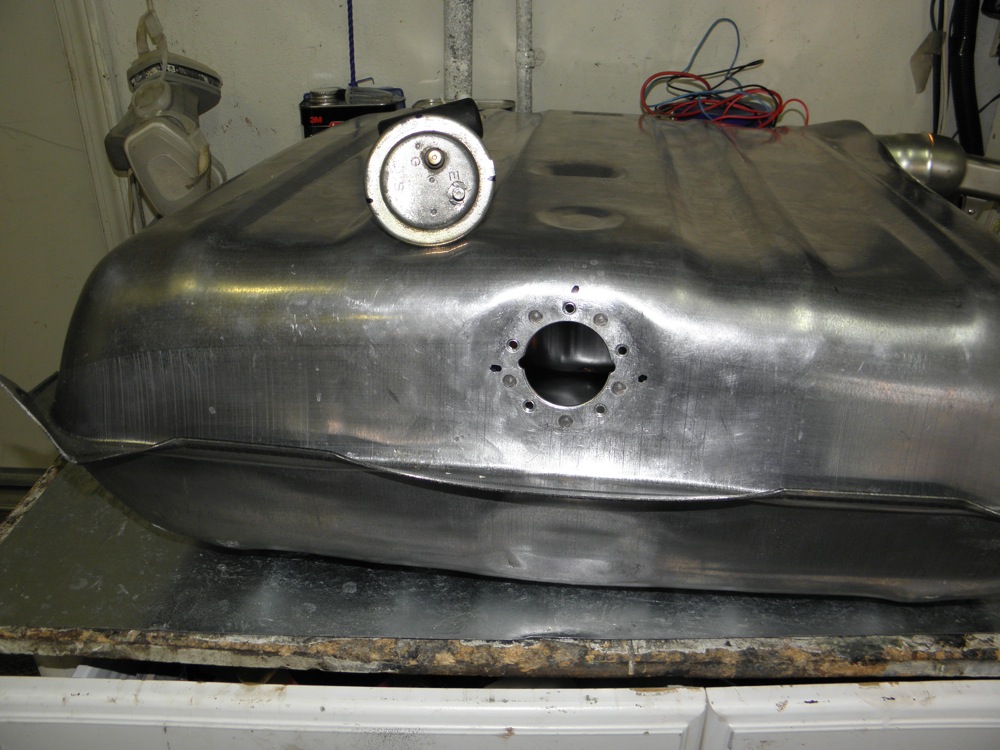
I'm adapting this '56 Chevy tank, http://www.tanksinc....prod/prd132.htm, from Tanksinc for my carbureted Velo Rossa project. I chose it because it's steel, has the sending unit mount on the side, filler neck on the right, holds more gas than the stock Z tank ( even holds more than Tanksinc universal tank which costs more), allows me to run duel exhaust out (not under) the rear valance and was cheap...$125 with or without a fuel injection tray. Mine has the tray incase I decide to upgrade to fuel injection later. I'm still working on mounts. I have a few pics of my progress here, http://forums.hybrid...sa/page__st__80
-
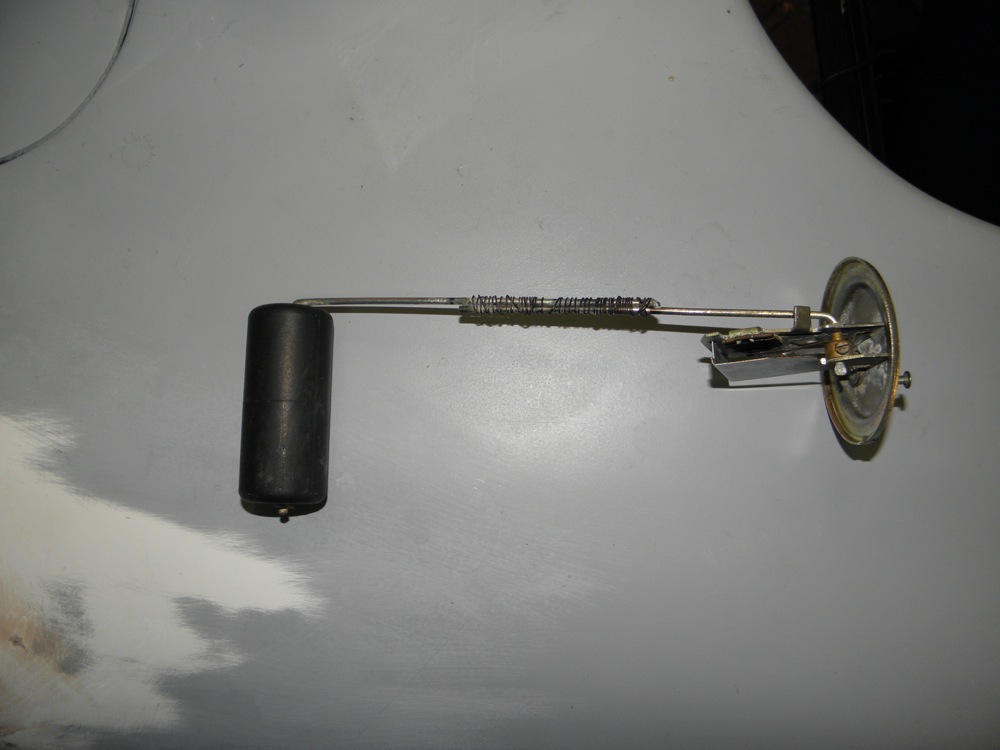
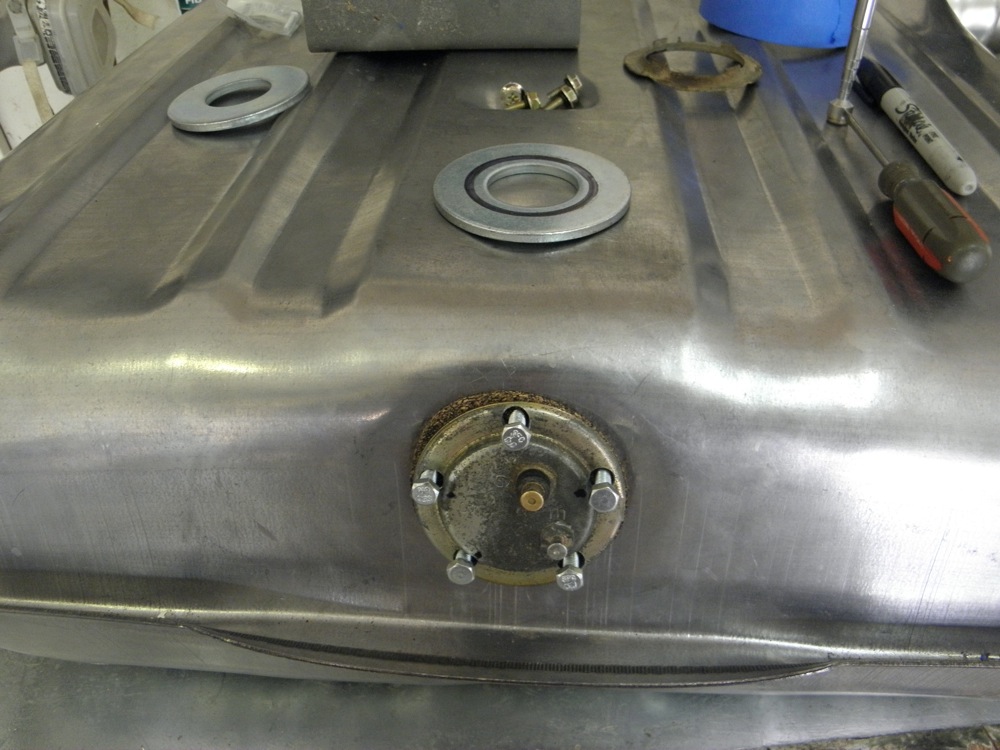
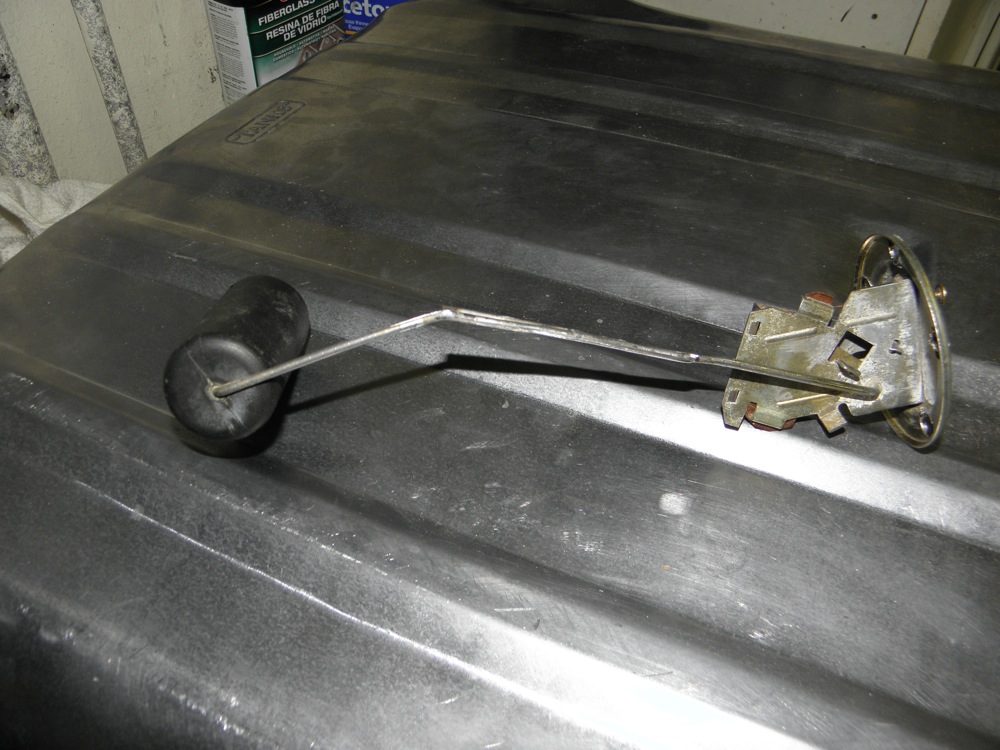
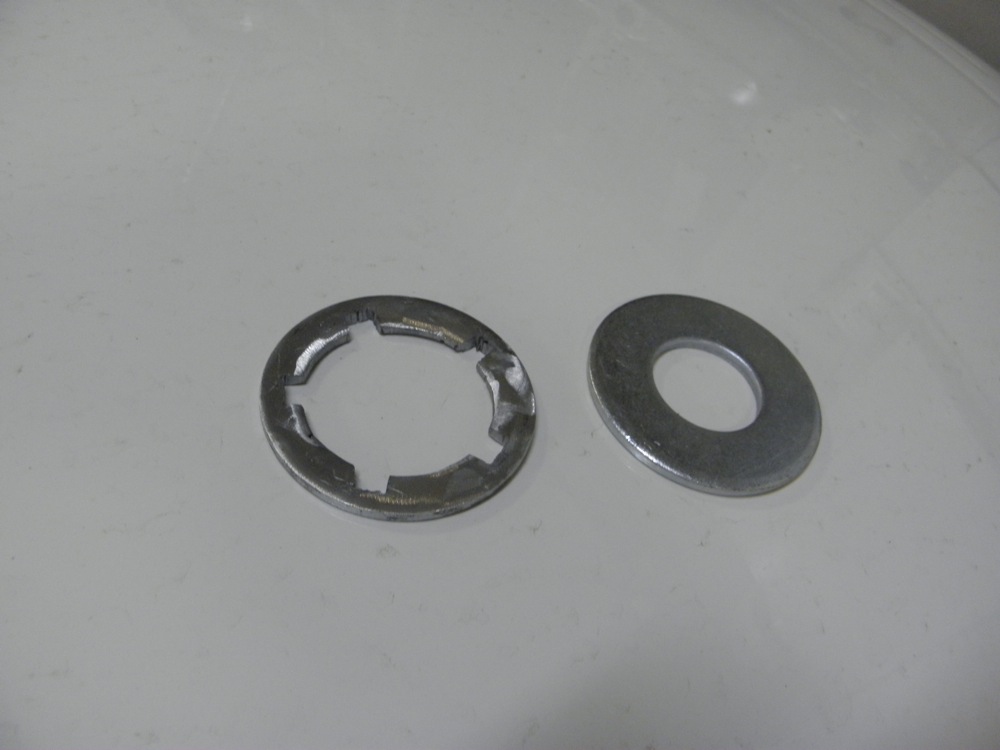
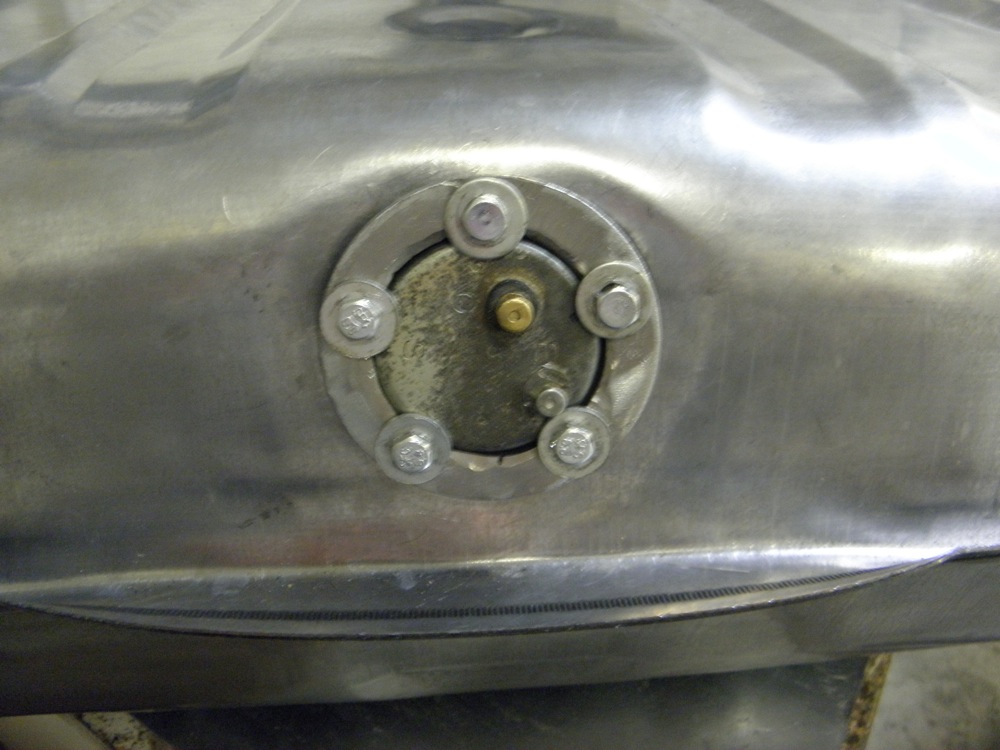
Started the fuel tank installation by adapting my Z fuel sending unit to my new '56 Chevy fuel tank. I chose to keep the five bolt mounting set up of the tank in case I later decide to switch to aftermarket gauges. The first step was to adjust the travel of the float. In the old Z tank, the float travels almost 11 inches in it's arc from empty to full. The new tank is only eight inches tall. I cut the float arm and adjusted the length until the float's arc was about 7 1/2 inches. I wrapped the float arm with a little wire to hold it together. I then hooked up test wires and checked the gauge readout. A little fine tuning, accomplished by bending the float arm, and it works perfectly. I then spot welded the two pieces of float arm and ground it smooth. I then drilled the five holes into the sending unit rim. The raised center portion of the unit won't allow the mounting bolts to lay flat, so I made a spacer out of a large washer. The spacer makes a nice retaining ring. I'll cut more of the trunk floor and finalize the position under the car, then fab some mounts, install the pick up tube and vent and make a new trunk floor.
-
Fuel tank arrived yesterday. I can finally stop playing with paint and start playing with wrenches again.
-
I don't know of anyone in the US that is producing a completed car. I think Thunder Ranch, http://www.thunderranch.com/, and Reaction Research, http://www.kitcarz.com/ , are the only ones making body kits. If the Michigan Alpha you mentioned is this one on Ebay, http://cgi.ebay.com/...T#ht_500wt_1182, I have to say I thought it was pretty good deal. I paid $4500 for my body panels alone. I spent a lot more than $500 in time and materials mounting and aligning.
-
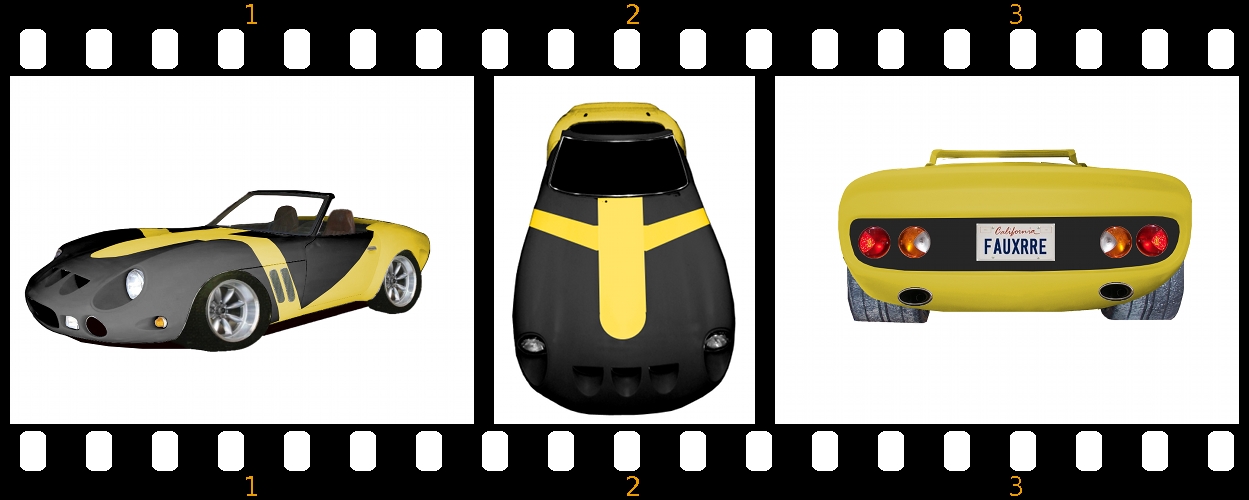
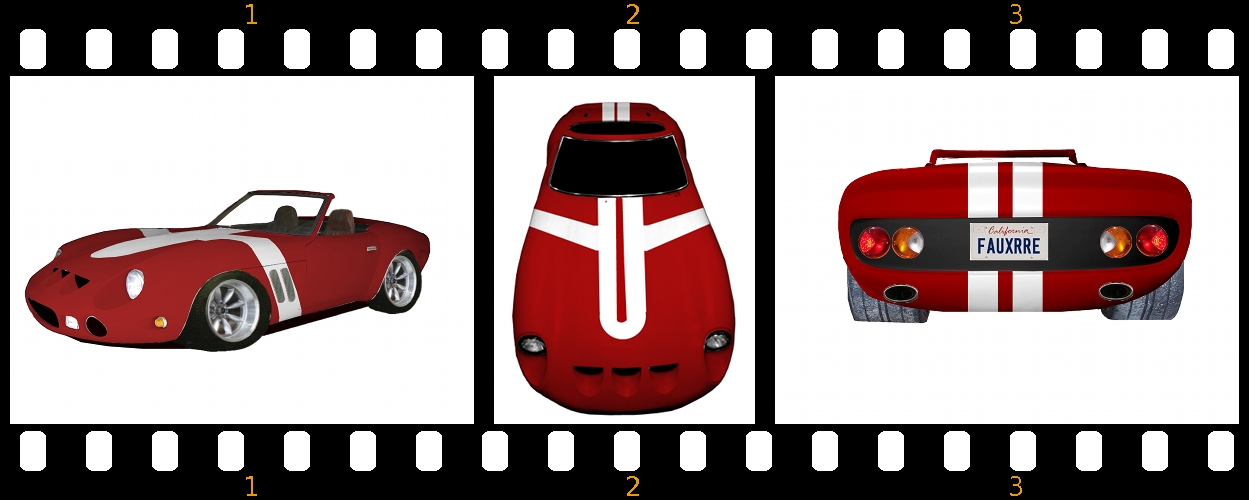
Tried some more original paint schemes... ...and adapted these tuner style vinyl graphics. With all the time I've spent at the computer, I'll probably end up painting it white.
-
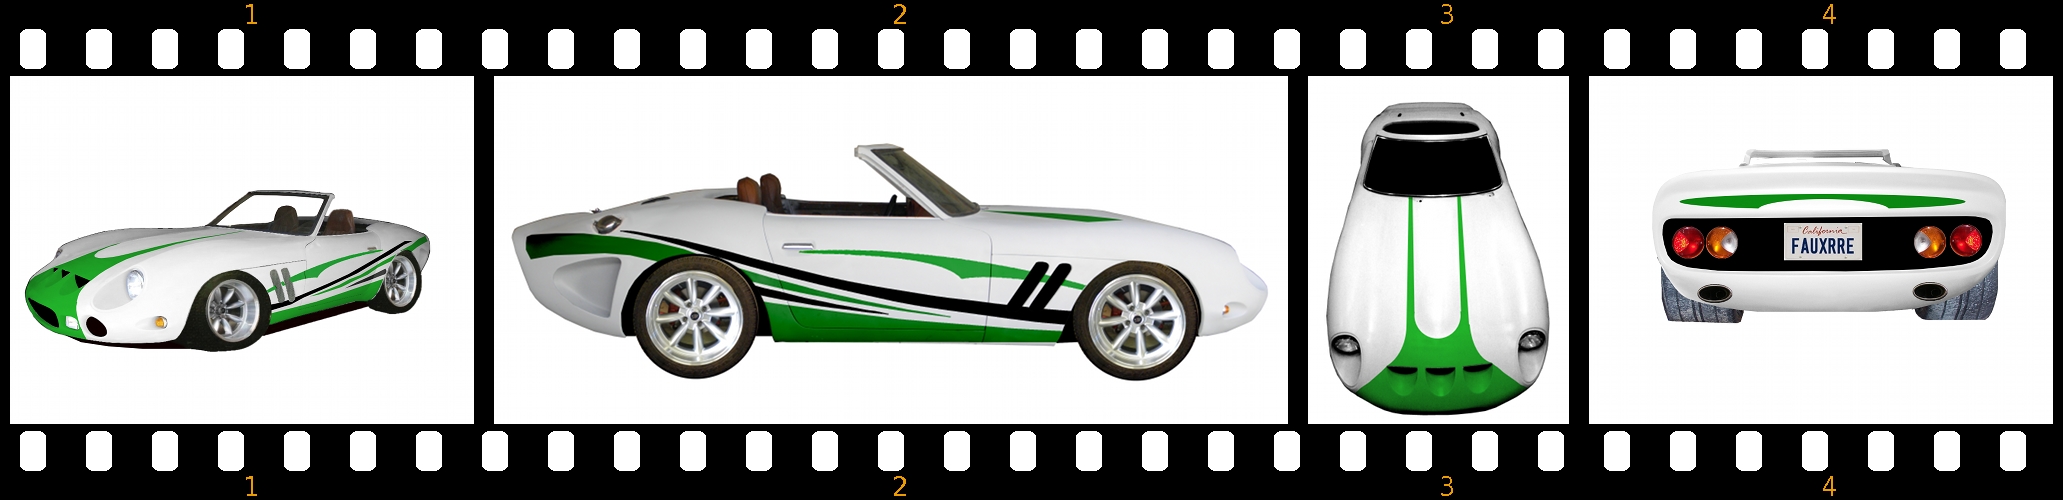
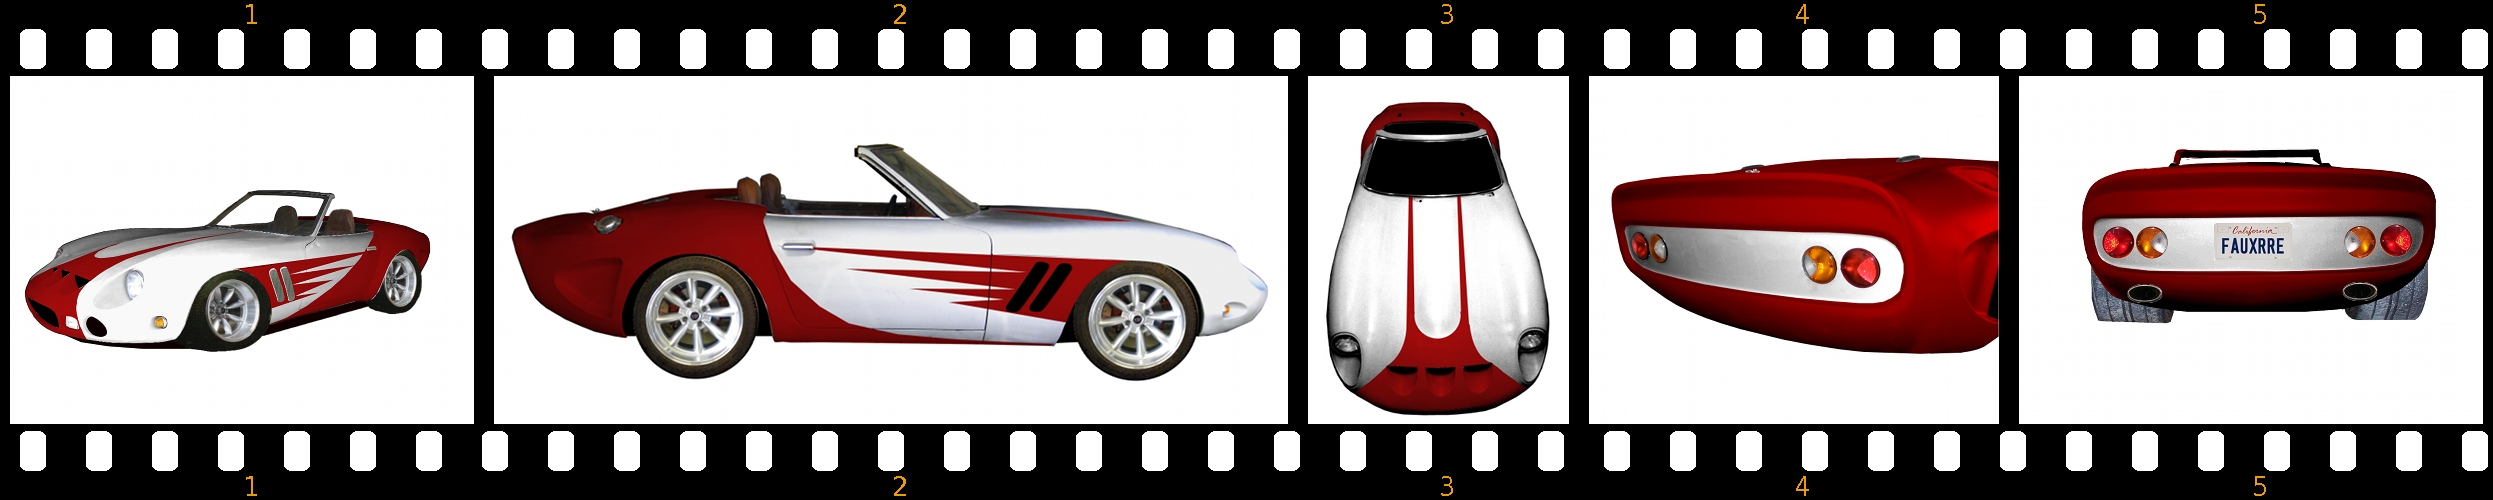
Trying to envision paint from all angles. For example: