inline6
-
Posts
483 -
Joined
-
Last visited
-
Days Won
7
Content Type
Profiles
Forums
Blogs
Events
Gallery
Downloads
Store
Everything posted by inline6
-
Very cool. I see you are in Paris, France. Can't help but think your 240z is extremely rare there. I bet you have some interesting stories to tell... about how you got possession/delivery of the car, about Parisians reaction to it, etc. Yes?
-
Thanks for the compliment. Almost every last bit of credit goes to Bryan, my engine builder. I do research... decide what I want, and then pay the bills. He has been the one to point out several of the mods and the one making everything fit together. From swapping around engine bearing shells to achieve optimal bearing clearances, to further machining the pistons to achieve the correct, desired compression ratio and to provide adequate PTV (taking into consideration the adjustment available via the adjustable cam gear), to determining how much the pistons stick up out of the bores when "rocking" them, and oil flow modifications, cooling flow modifications, the additional coolant holes above exhaust ports #5 and #6, machining the vent hole in the block for a fitting, etc. etc. etc. He is doing a stellar job. I wish I could have been present in his shop to learn even more than I have via phone calls from working with him.
-
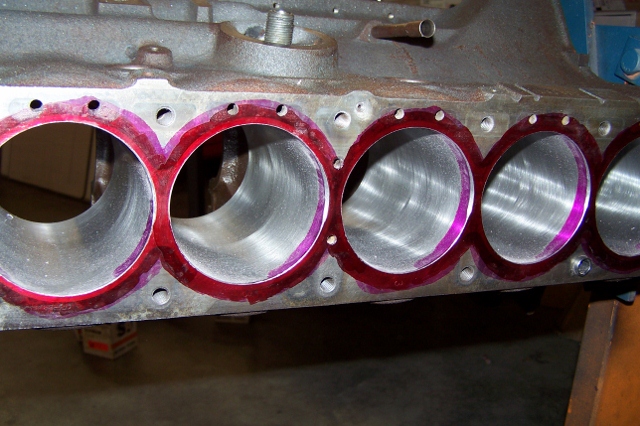
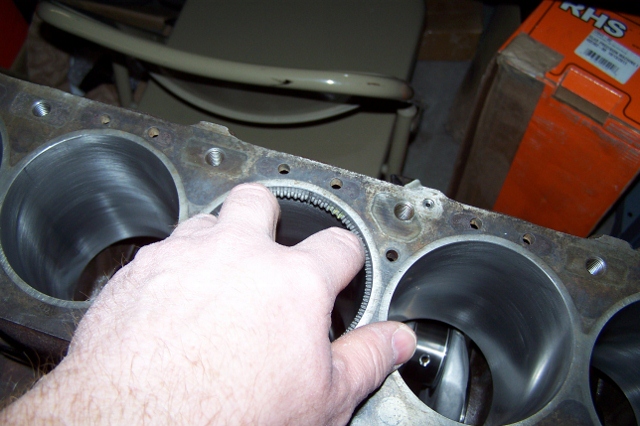
Some more progress to report... My head gasket has a 91mm bore on it if I recall correctly. The cylinder head mods I did brought the chamber edge to the bore edge of the gasket. However, the bore size ended up being 88mm instead of 89mm, as the sonic testing indicated we shouldn't go that big. So, here, the top edge of the bores is being modded to get rid of the "shelf" or lip that would otherwise be present and obstructing intake charge flow. As part of the documentation that came with the tensioner, they said that it could be modded to increase the mounting bolt size and get a bit more adjustment if desired. Doing that here. The holes in the head were drilled and tapped for 8mm bolts. And, some mods to the front cover to make the diesel water pump work well and to increase flow for both cooling and oil:

-
Kind of bizarre and interesting. An L-28 on an engine stand with various sections removed... you can see crank turning, cam turning, valves operating.
-
Yep, those are the ones I bought and they will be at the engine builder's tomorrow. They have to be turned in a lathe a touch for the springs I am using with the cam. Here's hoping that it all works and I get a bunch more hp than I otherwise would have as a result (of the light spring pressure).
-
Thanks John. I picked one up off of ebay. Appreciate your input. Garrett
-
Ancient thread... but I'm trying to track down titanium retainers for an L series. Can't find anything online about Dell Engineering... Are they defunct?
-
I've been researching through the forums and elsewhere and came across a post where someone said the Clifford Research header interferes with the Nissan Comp oil pan. If true, I'll need to find another header to use, because I plan on using the comp oil pan with my new motor. I'm not wanting to build myself one from a Stahl kit. So, I'm thinking about trying to track down a Nissan Motorsport header with 1.75 primaries. The application is an L28 bored to 88mm - 2.933L running 11.1 to 1 comp ratio. The cam is a Kinetic Sunbelt unit with the following specs: Intake Seat duration 320 degrees .050" duration 290 degrees Net valve lift .550" Exhaust Seat duration 315 degrees .050" duration 274.8 degrees Net valve lift =.550" Redline on the cam/valve train is 7700 RPM. I have a tripple Mikuni 44PHH set up with 37mm chokes in it right now, but will be switching over to a 45mm TWM fuel injection set-up a down the road a bit. The car is mainly a track day car at this point, but I still drive the car to and from - because I don't want to buy a truck and a trailer. I've been running the Clifford header and true dual 2" pipes for several years... I have 2 4" round Magnaflow's in the tunnel and two 5X7" oval Magnaflow's in the rear to keep things quiet. The main question is, are these primaries too big? If so, is what is my best header alternative?
-
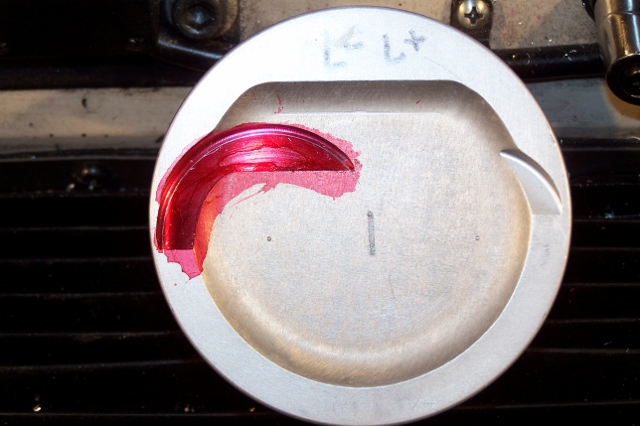
I got the cam from Kinetic Sunbelt in GA. With the springs they supplied (single - not double) they said not to run it higher than 7700 RPM, but that is close to 8k... The seat pressure (installed) was checked and found to be only 56 lbf. At ~.550" lift, the springs were only supplying 190 lbf. Because the spring pressure is so light, my engine builder is strongly recommending the use of titanium retainers. The receipts just keep adding up. Here are pictures of the work just now done to add PTV for the intake valves. Garrett
-
Let me know if you have 12 for sale (to fit L series) and the price. Thanks.
-
Ohhh... yeah, I could see that one tripping people up. Thanks for the head's up.
-
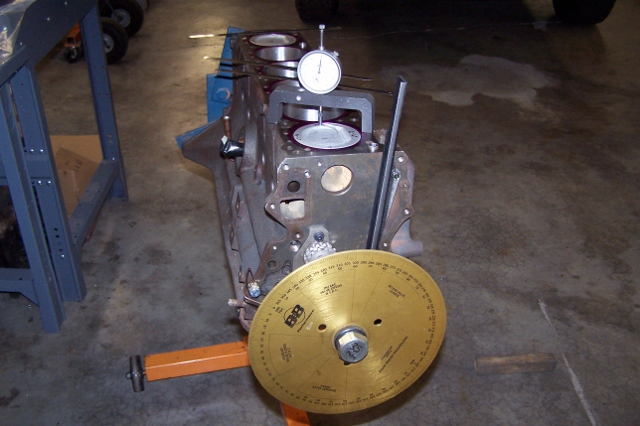
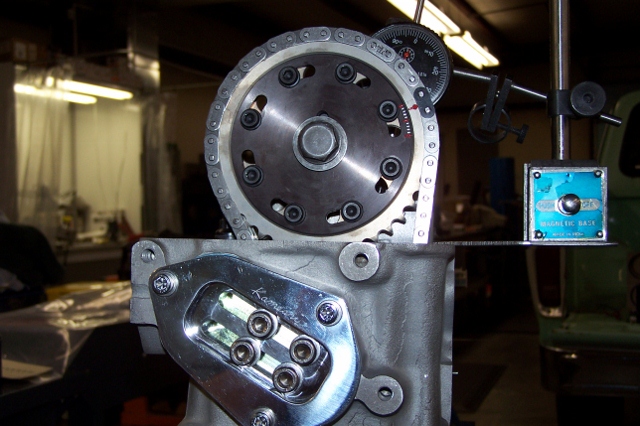
Another update... I am just about out of tensioner travel due to surfacing what I calculate to be .107" off of cylinder head since it was virgin. The bolt washers are hiding the remaining slot clearance - about .080" to .100". Also, I had to use up almost all cam gear adjustment to get the cam to 100.5 Intake Center Line. Cam degreed in/checked out as: Intake- 281* @ .050 valve lift (Cam/follower lash .010) .549 net lift at valve 100.5* Intake centerline Exhaust- 267* @.050 valve lift (Cam/follower lash .010) .542 net lift at valve 108.5* Exhaust centerline Cam measures 104.5* Lobe seperation. Cam is advanced 4* from "straight up". PTV on the exhaust is only .082"... and on the intake is only .002" More machining of pistons to add PTV is necessary!
-
Do you still need one? I have some extras. Question for you: What is the intended use, street or racing? The reason I ask is, I have one body that I had to remove some burrs from the bores... The previous owner managed to forceably shut the butterflies hard enough (beat on them?) so that the throttle plates dug into the aluminum bores and left some ridges. I carefully removed the ridges and then spun some fine sandpaper strip on a die grinder to polish the bores. Basically, the bores are probably a few thousands oversize right where the throttle plates shut. If racing - then you'll mainly be at full throttle operation, and I doubt seriously it a few thousandths bigger bore only where the plates are would matter one bit. For steet, achieving smooth idle adjustment could be an issue. If interested in that one, obviously it'd be cheap. If not, I could sell you one of the others. They are in great shape. Let me know.
-
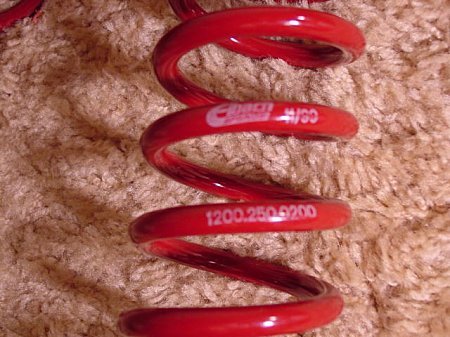
I have 4, 12" long, 2.5 ID Eibach springs in almost new condition. 2 are 200 lbs and the other 2 are 175 lbs. I don't recall what stock rates are, but these are a lot stiffer. I ran Suspension Techniques springs (popular kit from Motorsport Auto) back in the day for many years. These are stiffer than those too. Then, when I put in ground control coil over kits, I went to the 2.5 ID springs. I ran the 175, 200 combo for a short period of time, but that was when I was transitioning the car to mainly autocross and little street driving. So, I went even stiffer. I'm running 250 lbs front and 275 lbs rear. My car has pretty much been an autocross and track car for like 10 years now. PM me if interested in the springs.
-
Here are the pics. I do not know what it would cost to ship to you at the moment. If you aren't in a big hurry for this, I should be able to disassemble it and ship only the ring and pinion gears to you towards the end of May, as I am planning to be in VA for a few days then and I do have a hydraulic press. Or I could bring it back with me as you said. If you would rather get it now, then provide your zip code (maybe it is already in the thread?) and I'll see what kind of estimate I can get for you. G
-
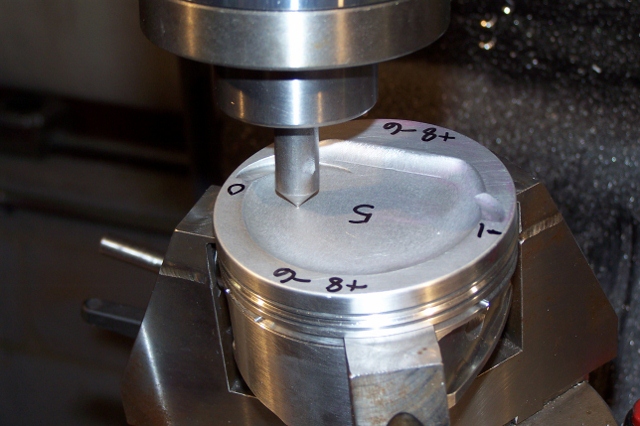
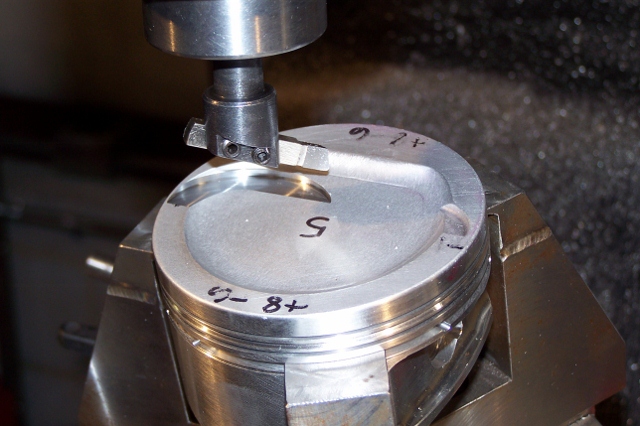
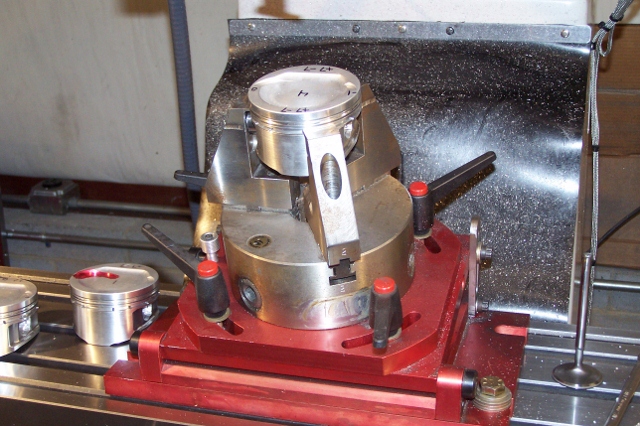
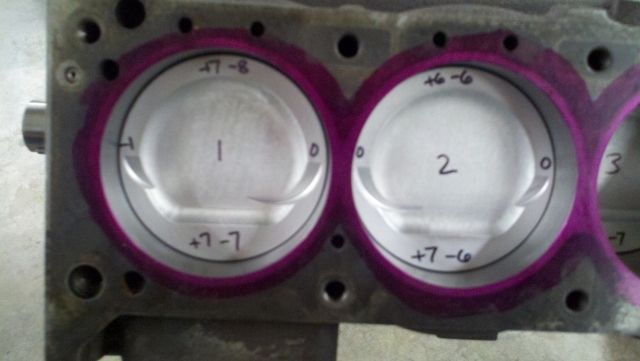
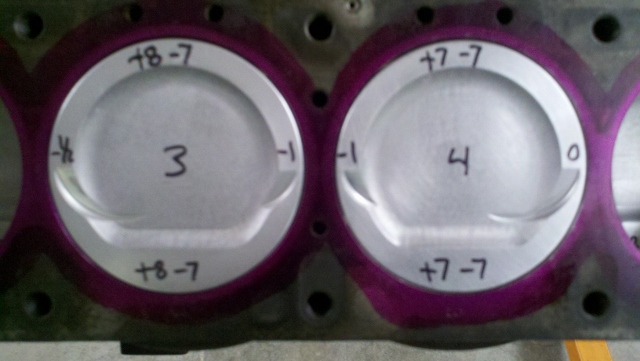
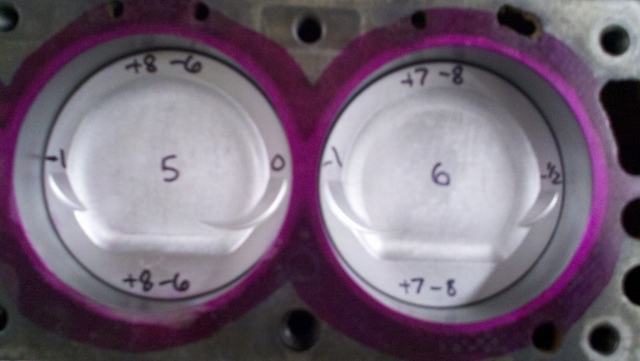
Just got some more photos from Bryan, my engine builder. The pistons have been put in the motor for the first time in order to see the relationship with the deck. Measurements are written on them. Along the pin axis, they are basically flat with the deck. One side verse the other, the variance is about one to two thousandths. The plus and minus numbers at the 6:00 and 12:00 positions are the measurements made when rocking the pistons. +7 for example is the amount that the edge of the piston rocks up and out of the cylinder bore. The Nismo gasket I am going to be using measures .025" in the non-ridged area (just the flat portion). It should not compress any during installation. Specs given by BRAAP and Brian (BandMZcars) in some posts say .022" is the minimum to run for piston to head clearance. I've not seen anything about compensating for piston rocking. So, hopefully, the .022" takes this factor into consideration. With + .000" on some of the pistons and the .025" gasket, I'll be at .025" "static" - if you will. Glad to see the pistons from JE came out to spec in this regard.
-
I talked to my Dad yesterday, and he hasn't had a chance to take the back cover off. He works at an accounting place, so they are slammed with tax preparation right now. He hopes to get to it this week. G
-
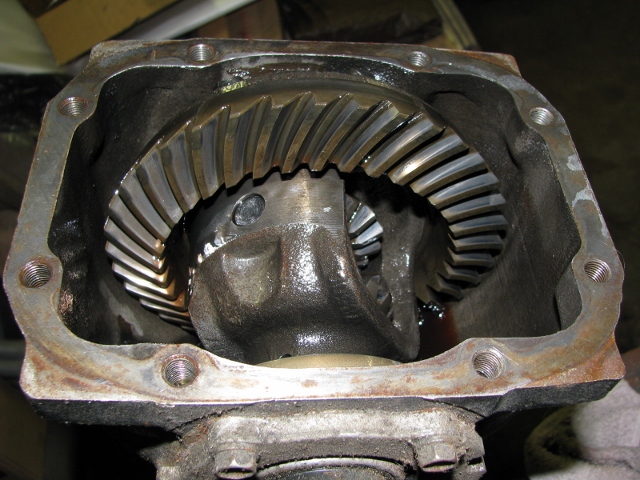
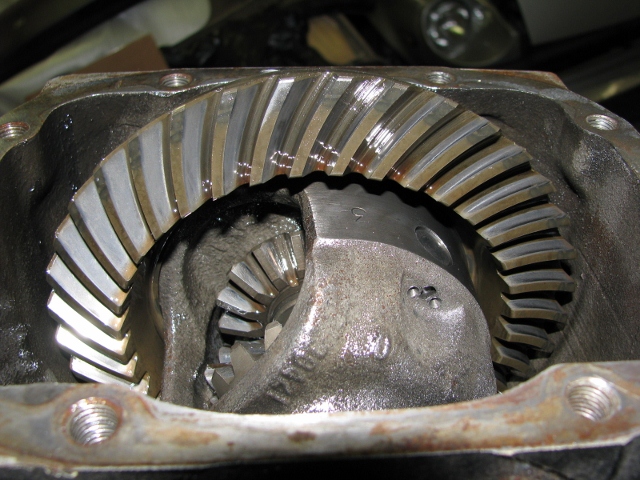
My dad stopped by the house last week and couldn't figure out which differential it was by my description. He took pics of them (I have several) and this is the one. Now he needs to go by and pull the cover off and take the pics... Sorry, this is the best I can do via long distance.
-
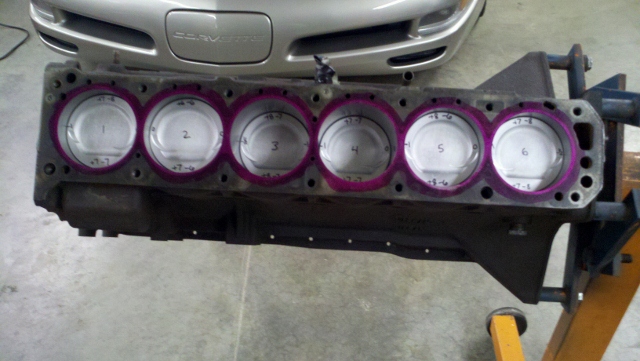
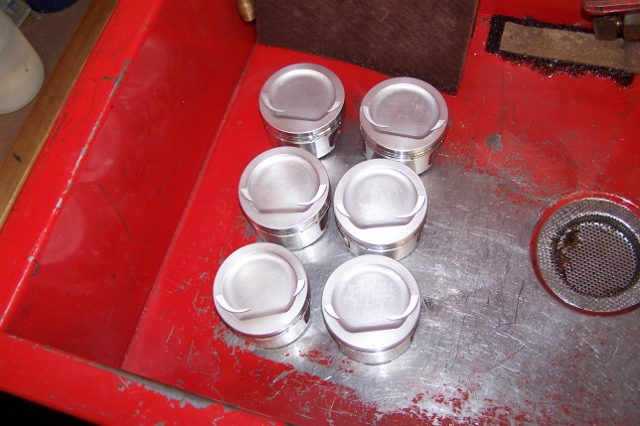
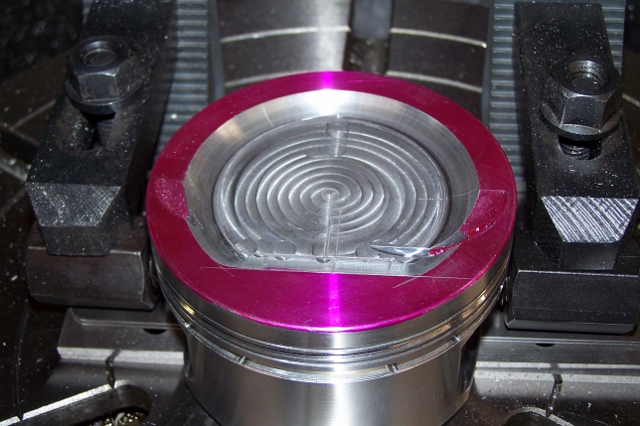
A few pics... Unfortunately JE did not cut the dishes in the pistons as we wished. The machinist had to remove some more material to get the piston dish cc where I wanted it. Now, they have 11cc volume including the valve reliefs. My calculations put the engine compression ratio at 11.15 to 1. Here, the pistons are all cleaned up: Bryan, my engine builder, has finished sizing the rings to the bores. The oil expander gap is too big with the expanders that came with the pistons. Bryan said they were producing only 4 lbs. of oil ring drag, so we have to go up one size. Those have been ordered. And lastly, the crank is sitting in the block for mock up. We need to put the rods and pistons in to see where the pistons are going to end up relative to the deck. Because I am trying to get as much quench as I can with my E88 head (milled lots!), I will be running piston to head clearance of the thickness of the Nismo head gasket - .6mm (.024").
-
I moved to GA 6 months ago, and the diff. is at my house in VA. I have family that can go by and put their hands on it - remove the rear cover and take pics... but not disassemble. Also, if it was me, I'd jump right on it for you, but since I am asking favors of them, I'd like to be kind enough to let them work it into their busy schedule. Might be able to have one of them do it one day this week. Again, would have to ship the whole thing... Let me know if you are still interested, and we'll get you some pics.
-
I've got a 3.7 that came from a 73 Fairlady brought to the states by someone in the military. I ran it for several years in my Z - probably from about 1994-97. Can't recall the details now, but I think the front seal started leaking... and when I replaced it, I didn't have a torque wrench that would go to the spec. Anyway, I think I torqued it on too light or too heavy because the front pinion bearing went out in short order. I didn't run it that way long because I needed a different ratio anyway. So, long story, but the diff is completely assembled and I'm sure it is a 3.7 - and 85% positive it is non "k" because it was came in the 73 Fairlady. It is in VA. Let me know if you are interested. I can't see using it again, as I now use a 4.11 lsd R200, and would like it to go to a good home. I'll refund the price of the diff if it is not useable. $100 plus shipping and it is yours. Garrett
-
So, the machinist is working hard on my project now. He torqued the head on - I'm using ARP studs, and then measured bore deflection. The worst place only measures a total of 4 tenths out... that is 4 ten thousandths of an inch. He measured in various places and most of the deformities were 2 tenths or less. And the worst was additive - 2 tenths one direction and 2 tenths in the other (or something like that). Guess what folks? That is pretty friggin' good. Combustion pressures are what? Hmmm. Over a 1000 psi, maybe? I'm guessing that the cylinder walls might deflect a tad with that kind of pressure? Anyway, I feel pretty ok about not using a torque plate for the final hone.
-
Some manifolds are cheap. If you have to take it off to repair, and the repair is going to cost more than getting another one (factor in your time), maybe another one is the way to go? What manifold is it? 240? 280? zx turbo? I've got a low mileage 280zx NA in excellent condition that has all the factory studs and nuts even. $20 plus shipping and its yours.
-
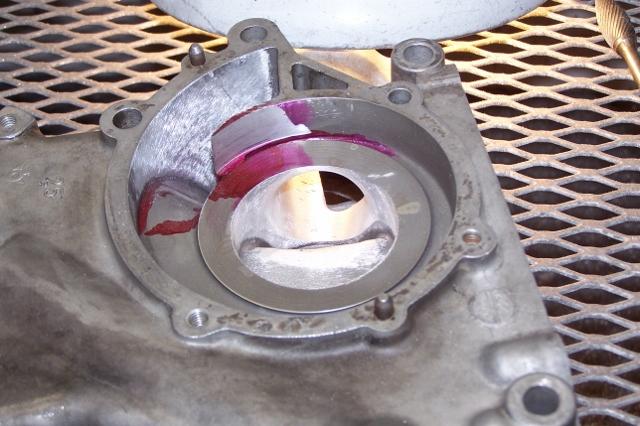
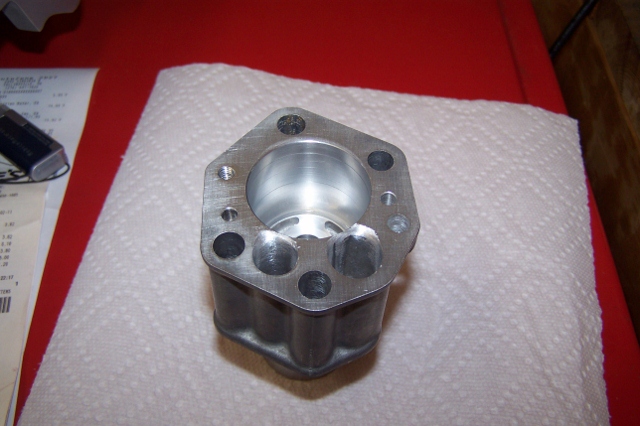
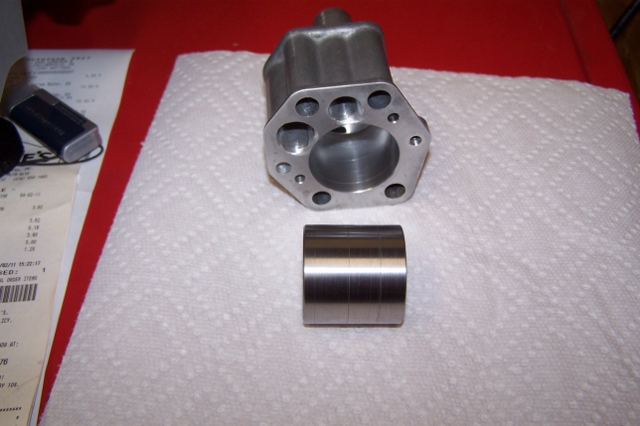
This is the high capacity pump that I am reusing. Looks like a few nice chunks of stuff have been through here. One of them was stuck in the soft aluminum housing... was able to pick it out Raised edges were removed. Rotor polished up in the process. Also modded the inlets and outlets for better flow. More exciting stuff coming before long.
-
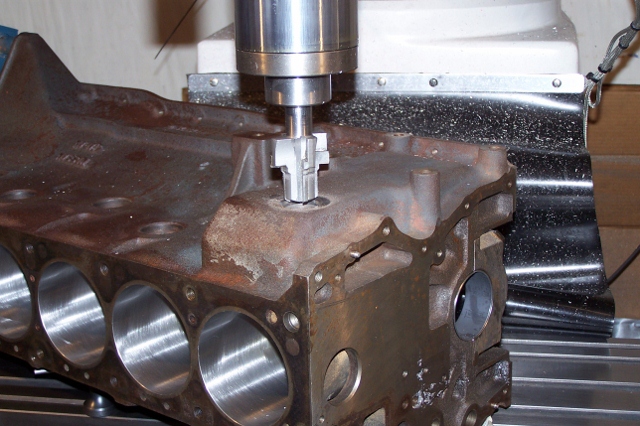
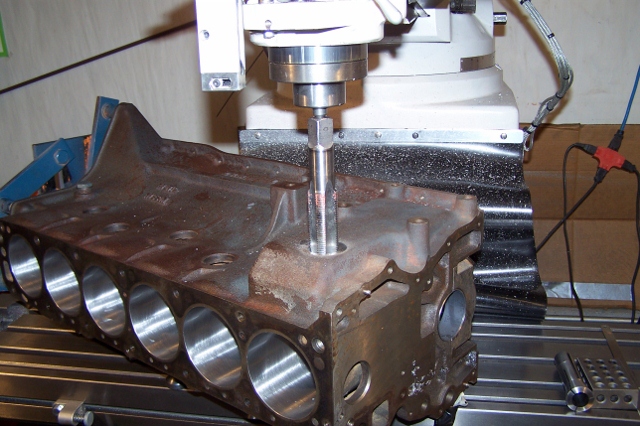
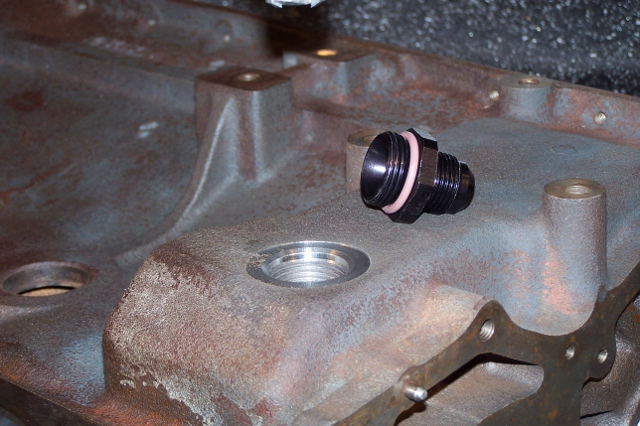
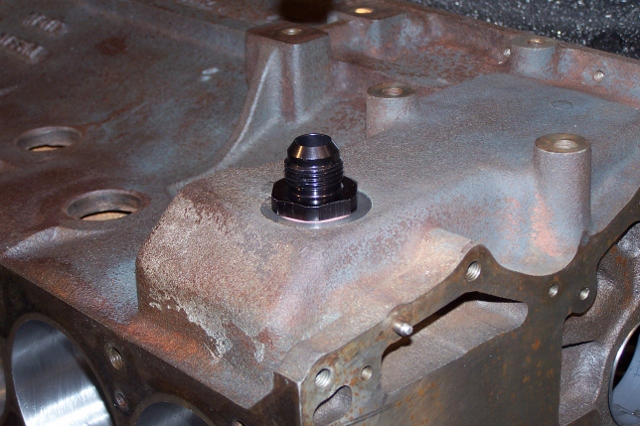
Some pics of crankcase vent mod - to install fitting with o-ring. I will run a hose from here and the valve cover vent into a catch tank.