Whitley_280z_2+2
-
Posts
124 -
Joined
-
Last visited
-
Days Won
2
Content Type
Profiles
Forums
Blogs
Events
Gallery
Downloads
Store
Everything posted by Whitley_280z_2+2
-
Do I Need Bump Stops With New KYB's?
Whitley_280z_2+2 replied to Mayolives's topic in Brakes, Wheels, Suspension and Chassis
Are they really? I have them in a 280Z but I don't think I've ever had the suspension compress enough to hit them. Just curios, what do you have to do to hit a bump stop on one of these cars? I've got Eibach lowering springs but its been a very smooth ride. -
280z 2+2 resto mod
Whitley_280z_2+2 replied to Whitley_280z_2+2's topic in S30 Series - 240z, 260z, 280z
Had low oil pressure recently. The engine was just sitting at around 20 PSI at idle and would only get up to about 40 PSI at WOT. Thought it might just be a result of of 100K+ mile engine, but changed the oil recently and found the side plug in the oil pan (plug for some sensor we don't use that was originally in the F-bodies) was not even finger tight. Little loctite action and we're back to 40-60 PSI. Also, developed some rear end clunk when shifting. Going to try and find an extra set of axles/diff to rebuild on the side and throw in eventually. The axles in there right now haven't been touched since 1977 so nothing unexpected here. I feel like a sorted OEM diff and axles are perfect for your common 300hp 2+2 LS swapped 280Z so no need to upgrade to something more modern. Does that sound right? -
280z 2+2 resto mod
Whitley_280z_2+2 replied to Whitley_280z_2+2's topic in S30 Series - 240z, 260z, 280z
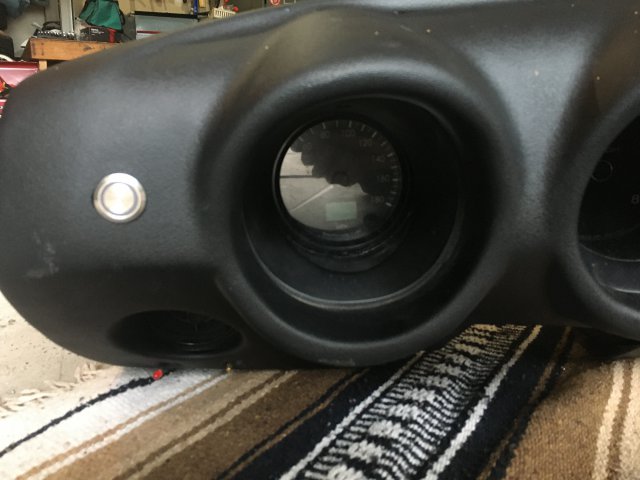
Not down for long! Also, got some new mirrors👍
-
280z 2+2 resto mod
Whitley_280z_2+2 replied to Whitley_280z_2+2's topic in S30 Series - 240z, 260z, 280z
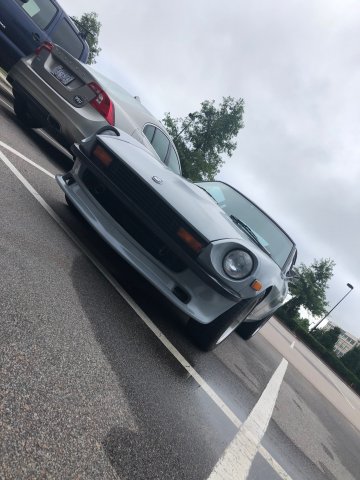
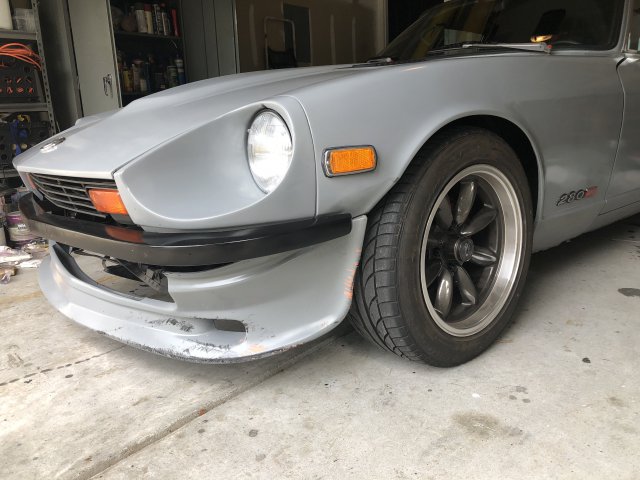
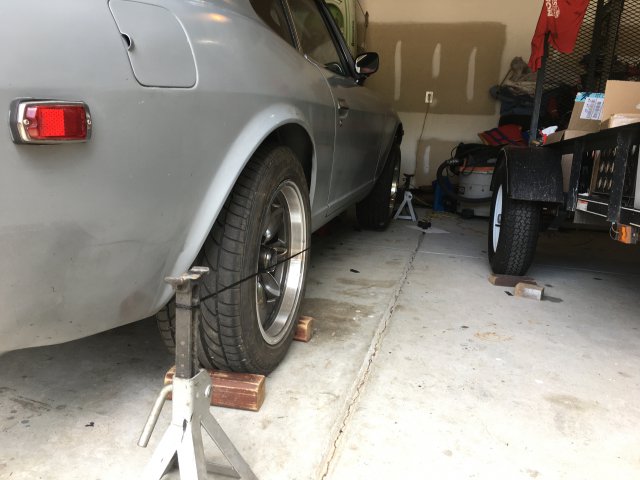
My Dad was driving the car on the highway and hit a big chuck of tire retread. Now it just looks like it’s been track driven really hard lol. Thankfully we have some left over paint should be able to fix her right up. It’s been driven about 1200 miles since completion. Gas mileage hasn’t been great but that’s just driving style 🤘
-
280z 2+2 resto mod
Whitley_280z_2+2 replied to Whitley_280z_2+2's topic in S30 Series - 240z, 260z, 280z
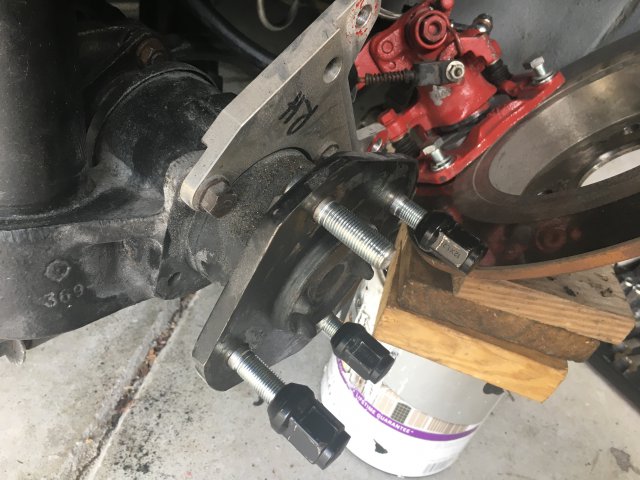
The Z is still running great. After the tune, it pulls much smoother which makes a huge difference in terms of acceleration. Had a couple issues with the lug nuts loosening especially in the front because the front studs are short relative to the rear ones. We run a 1/4 inch spacer so that makes things worse. Today I put in extended lugs all the way around to fix this issue. the rear lugs were easy because we got rid of the drums. I used a press with equal height sockets to press in the front studs. should make the car a little less sketchy
-
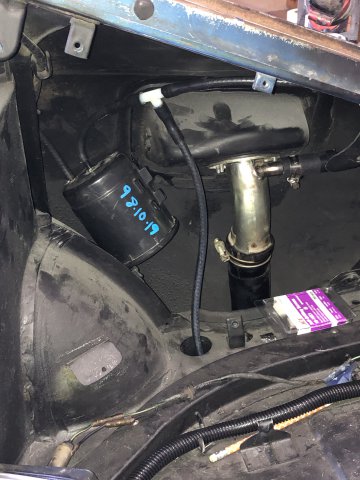
I followed @grannyknotsuggestion. Spent $10 on a canister from a Miata at a junkyard. It makes a huge difference with the fumes!
-
Relentless - 1977 280z LS (5.3l L59) swap
Whitley_280z_2+2 replied to Box5's topic in Gen III & IV Chevy V8Z Tech Board
Yeah I think it’s such a common problem because people don’t realize how easy it is to misplace the weights and they don’t check their work. I work at a GM plant where they mount their own tires and even though they have the wheels/tires balanced with a robot they still double check each wheel to make sure all is good. I'm sure you will figure it out! -
Relentless - 1977 280z LS (5.3l L59) swap
Whitley_280z_2+2 replied to Box5's topic in Gen III & IV Chevy V8Z Tech Board
I had a shimmy problem like you’re talking about real recently. Didn’t think it was the wheels because they were balance not too long ago but had them redone just in case. This didn’t fix the problem so we went over everything checking for wear and didn’t find anything. Took the wheels to a different place and explained the issue and after they balanced the wheels/tires the problem went away. I guess some shops just don’t know what they’re doing. Also, the car has the exact same wheels as yours which I thought was interesting. -
Yes! Got lucky and found a complete seat with the frame and everything on EBay.
-
280z 2+2 resto mod
Whitley_280z_2+2 replied to Whitley_280z_2+2's topic in S30 Series - 240z, 260z, 280z
Got the Z tuned today! Made 295 hp and 340 ft/lbs torque at the wheels on 87 octane. The tuner thinks he can get to about 350 hp on 93. edit: makes 305 on 93 - I guess the tuner overestimated his abilities Still, 305 at the wheels is plenty fun! -
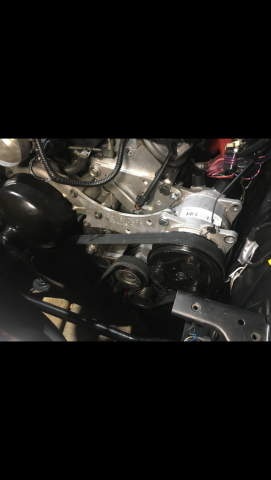
Johns Cars AC set up
Whitley_280z_2+2 replied to yiannit280z's topic in Gen III & IV Chevy V8Z Tech Board
We pretty much had to go vintage air because the original system was in very poor shape. The car had been sitting for 15-25 years I’m guessing, so it would have been a lot more work to bring the original system back from the dead. Also vintage air is a lot more DIY friendly if you aren’t familiar with A/C concepts. Hope that helps. -
Johns Cars AC set up
Whitley_280z_2+2 replied to yiannit280z's topic in Gen III & IV Chevy V8Z Tech Board
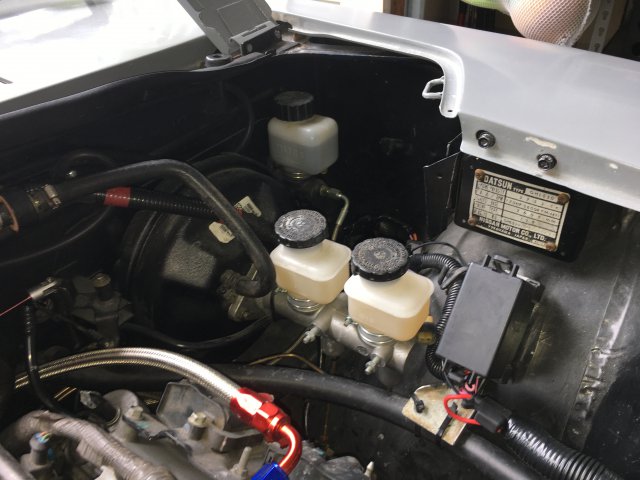
This is all I have. Hope it helps. The kit is pretty easy to install and it works well with the Vintage Air Gen II compact system. Other people on here probably have better pics but thought I would try to help out.
-
280z 2+2 resto mod
Whitley_280z_2+2 replied to Whitley_280z_2+2's topic in S30 Series - 240z, 260z, 280z
For anyone who might be interested, new O2 sensors fixed the random misfire issue. I think they went bad because of a completely blocked PCV system due to a kinked line (at least I hope there isn’t another issue). Edit: the issue reappeared within another 25 miles. Found two spark plug wires melted through - replaced with ceramic low clearance wires and now no misfire. -
280z 2+2 resto mod
Whitley_280z_2+2 replied to Whitley_280z_2+2's topic in S30 Series - 240z, 260z, 280z
The misfire code we were dealing with went away in open loop mode where the engine runs on speed density (I think). After talking to some people, it seems like there still might be an issue with the MAF sensor because we never got a genuine GM part. An AC Delco part is on its way and in the meantime I cleaned the fuel injectors, verified the fuel pressure (steady 60 psi), and replaced a PCV hose because it was kinked. Since we are just waiting on a MAF sensor, I made this to show the whole build process: -
280z 2+2 resto mod
Whitley_280z_2+2 replied to Whitley_280z_2+2's topic in S30 Series - 240z, 260z, 280z
Hey neat! Will try to have the car at a Triangle Z car club meet soon seems like that’s the most active group nearby. Would be neat to see your car. It’s crazy you know that Church... the road that turns off there I think it’s called Rock Spring Church Road is really fun to drive ; ). Thanks for commenting! -
280z 2+2 resto mod
Whitley_280z_2+2 replied to Whitley_280z_2+2's topic in S30 Series - 240z, 260z, 280z
Game over... misfire and the dreaded P0300 random/multiple misfire code. Plugged in the intake air temperature for the first time (forgot to do that earlier because the engine only just today threw that code) and thought that would clear up the issue but nope. Time for some serious troubleshooting. Already has all new plugs, plug wires, MAF, O2s so I’m thinking coil, injector, or burnt wire. -
Relentless - 1977 280z LS (5.3l L59) swap
Whitley_280z_2+2 replied to Box5's topic in Gen III & IV Chevy V8Z Tech Board
Any updates? How does it drive? -
280z 2+2 resto mod
Whitley_280z_2+2 replied to Whitley_280z_2+2's topic in S30 Series - 240z, 260z, 280z
Did some fun stuff today. First, took a shot at a DIY alignment using the string method to get a total of 1/8 inch toe in. I know it’s not the most precise but the car tracks straight so we will just have to see how the tires wear in. Gave it the first wash! And went for a drive:
-
280z 2+2 resto mod
Whitley_280z_2+2 replied to Whitley_280z_2+2's topic in S30 Series - 240z, 260z, 280z
I meant propellor shaft I guess... the one that goes from the transmission to the diff lol. I have a JCI driveshaft/propellor for the LS swap and the flange on it is way to thick for the original bolts otherwise I would definitely still use them. Thanks for the help anyways though! -
280z 2+2 resto mod
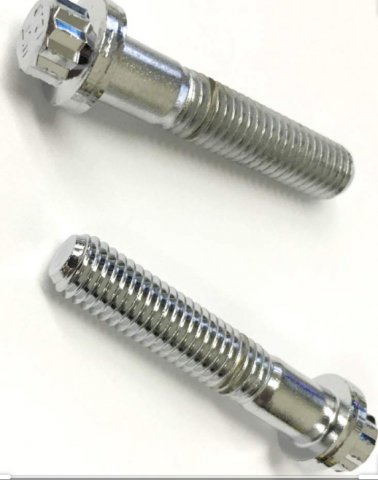
Whitley_280z_2+2 replied to Whitley_280z_2+2's topic in S30 Series - 240z, 260z, 280z
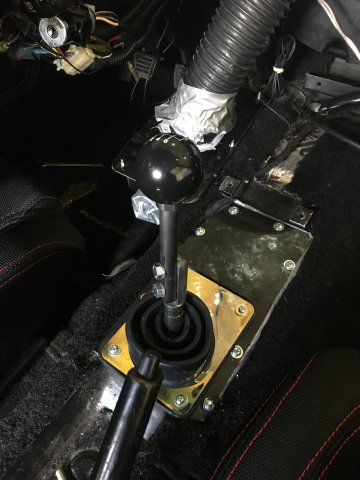
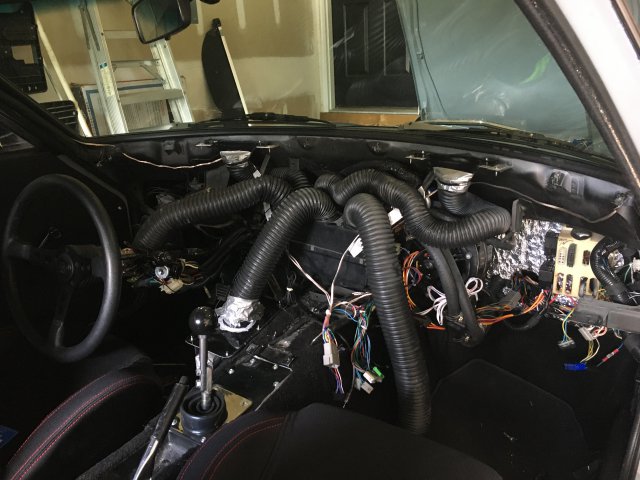
Found a driveshaft bolt in the driveway yesterday so that needed work. After further inspection, all the driveshaft bolts were loose. The bolts were a little short and had no lock tight. So, we replaced all the driveshaft bolts with these that have a shoulder and nylock nuts. The high beam switch on the turn signal lever has always been broken so we decided to install a button on the dash in its place. Took the dash out to put in a button that does the same thing. Forgot how complicated things were under the dash. Added a Deutsch connector to all the AC wires to make it cleaner. Also finally got an inner shift boot in, which should help a lot with noise and heat.
-
280z 2+2 resto mod
Whitley_280z_2+2 replied to Whitley_280z_2+2's topic in S30 Series - 240z, 260z, 280z
Nice! Yeah this is a great time to work on cars. -
280z 2+2 resto mod
Whitley_280z_2+2 replied to Whitley_280z_2+2's topic in S30 Series - 240z, 260z, 280z
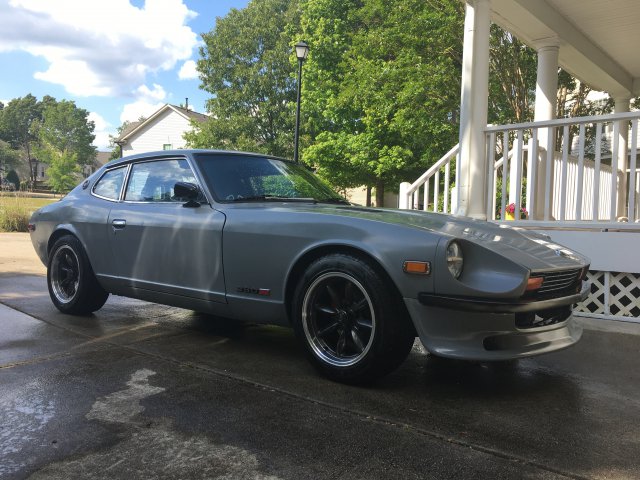
Thanks! Yeah the rear will probably stay the same but might add some tow hooks or something where some bolt holes are. I’m in Raleigh/Wake Forest area. I couldn’t find any pictures of your project...do you currently own a Z? Took the car for a quick spin today for the first time since putting in the new MAF sensor and it is noticeably smoother and faster! I guess the stories about cheap aftermarket parts being junk are true Hoping to get some drive by shots soon. -
280z 2+2 resto mod
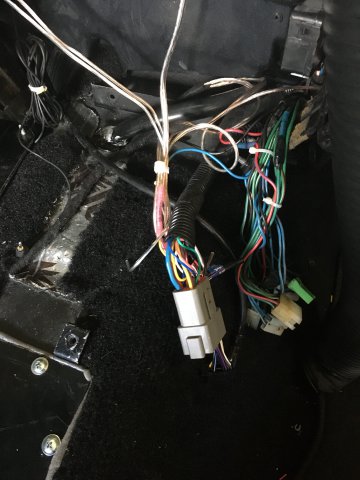
Whitley_280z_2+2 replied to Whitley_280z_2+2's topic in S30 Series - 240z, 260z, 280z
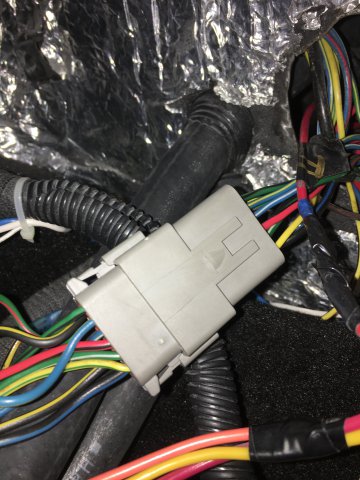
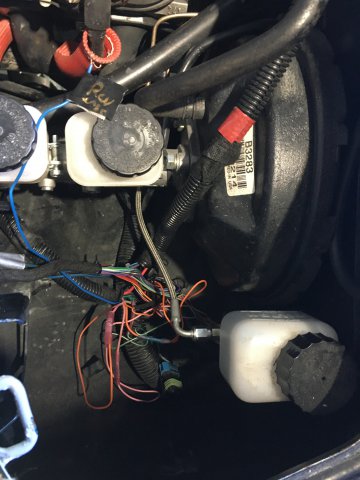
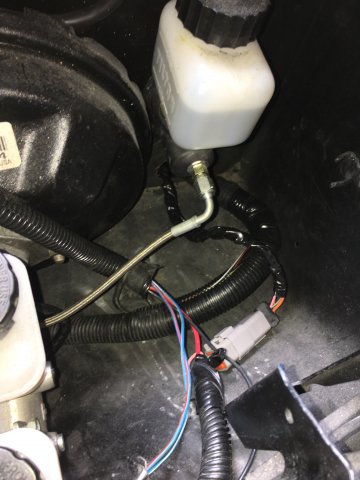
I replaced the three main wiring connectors in the passenger footwell with Deutsch weatherpack connectors. The original Z wiring connectors were very sketchy and led to things like lights and blinkers working sporadically. The new connectors fixed those issues. The connectors were not to bad to work with and the only hard part was trying to do all this with the harnesses still in the car. After doing all this wiring the engine ran poorly and then eventually got to where it would completely stall/quit on startup. It gave a bad MAF code so replaced that with a nicer unit and all is well. I never know whether this stuff is coincidence or not.
-
280z 2+2 resto mod
Whitley_280z_2+2 replied to Whitley_280z_2+2's topic in S30 Series - 240z, 260z, 280z
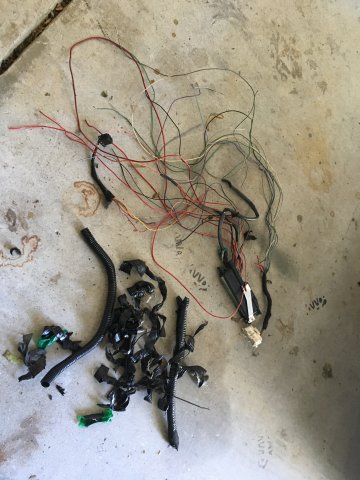
Spending some much needed time improving the engine wiring. We had left in all the wires we weren’t using from the LS1 harness and it was time to do it right by depinning the unused stuff from the ECU and removing the unused power wires. Before: After: This is what we got rid of... all about weight reduction when you have a 2+2 lol.
-
280z 2+2 resto mod
Whitley_280z_2+2 replied to Whitley_280z_2+2's topic in S30 Series - 240z, 260z, 280z
Oh LoL! $20 bucks a pack on Amazon. My only concern is that I don't think you can use anything bigger than 14 gauge with them but that should be OK for most of the connectors.