Whitley_280z_2+2
Members-
Posts
124 -
Joined
-
Last visited
-
Days Won
2
Content Type
Profiles
Forums
Blogs
Events
Gallery
Downloads
Store
Everything posted by Whitley_280z_2+2
-
Air Suspension
Whitley_280z_2+2 replied to FairladyGTR's topic in Brakes, Wheels, Suspension and Chassis
-
280z 2+2 resto mod
Whitley_280z_2+2 replied to Whitley_280z_2+2's topic in S30 Series - 240z, 260z, 280z
-
280z 2+2 resto mod
Whitley_280z_2+2 replied to Whitley_280z_2+2's topic in S30 Series - 240z, 260z, 280z
Thanks for the tip! -
Need Help with Driveshaft removal....
Whitley_280z_2+2 replied to FairladyGTR's topic in S30 Series - 240z, 260z, 280z
Are the rear wheels off the ground and the parking break released?. -
280z 2+2 resto mod
Whitley_280z_2+2 replied to Whitley_280z_2+2's topic in S30 Series - 240z, 260z, 280z
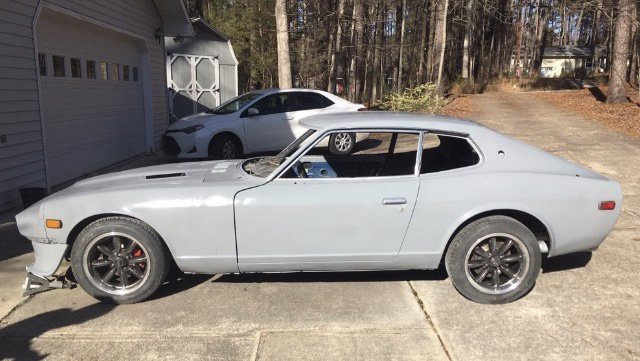
Just painted the car Dodge Destroyer Grey. Took many many hours (75+) and still haven't even cut and buffed it. Now working on the wipers. The arms under the cowl panel were completely rusted frozen and I broke one of the swivel platforms trying to press out one of the spindles. Also, the wiring is a nightmare . . .thought I had it working but now it doesn't. None of the grounds that trigger high and low speeds are connecting and I already loomed the wiring in the cab. I'm sure i'll figure it out eventually but I would much rather wire another whole engine swap or paint it again than figure out these rusted wipers. Fun stuff . . . I want to be done and just drive the thing -
This is awesome! Great to see someone take it all the way. The results can be amazing when you're willing to learn.
-
280z 2+2 resto mod
Whitley_280z_2+2 replied to Whitley_280z_2+2's topic in S30 Series - 240z, 260z, 280z
Car is at the exhaust shop right now. New wheels (Rota RB 16x8 +4 with 4 mm spacer), Achilles tires (ATR sport 2's), Rolled Fenders, Vintage Air A/C + heat, Electrical system finished, New steering wheel, Next up paint! I'll probably post details at some point... but here's a video about how it's running. Apparently, the exhaust shop couldn't have the car parked outside because to many people kept stopping by asking about it and they couldn't get any work done -
280z 2+2 resto mod
Whitley_280z_2+2 replied to Whitley_280z_2+2's topic in S30 Series - 240z, 260z, 280z
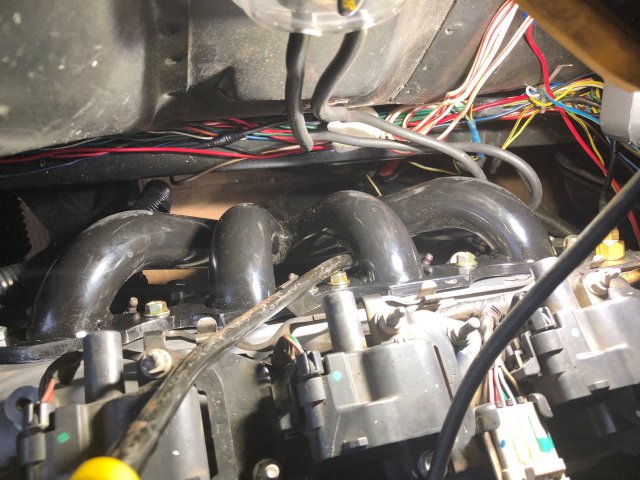
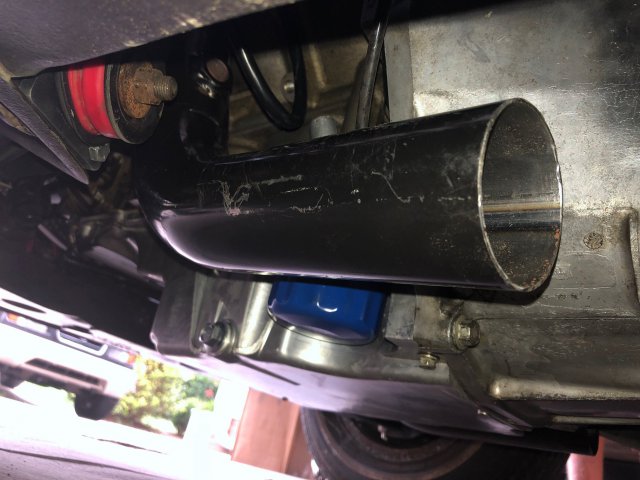
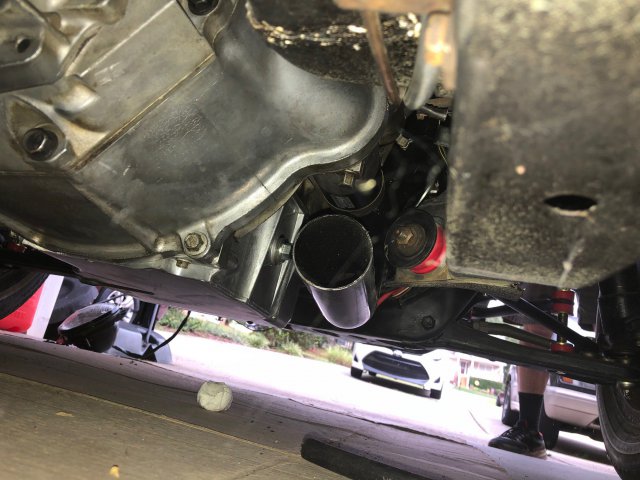
Finally, to finish off the update here's the throttle cable and exhaust. To use the original Datsun pedal I fabricated a bracket to house a lokar universal throttle cable. I used a piece from the original throttle arm to get the correct firewall bolt pattern: Installed with cable shortened to correct length. I just drilled out this rotating arm: For exhaust headers we used JCI's new 1 3/4" headers which fit great! We were apparently the first customers to get this new design. One of the center spark plug wires is difficult to install on each side but still manageable. The engine sounds great and seems healthy! the next steps are to install the A/C system and finish up wiring. Then we can get the interior in and focus on paint and body work. -
280z 2+2 resto mod
Whitley_280z_2+2 replied to Whitley_280z_2+2's topic in S30 Series - 240z, 260z, 280z
We also finished the fuel tank filler tube. We just used the original filler tube and connected it to the tank with a piece of powder coated steel pipe that came with the tank. I also added hose clamps at all the joints -
280z 2+2 resto mod
Whitley_280z_2+2 replied to Whitley_280z_2+2's topic in S30 Series - 240z, 260z, 280z
Cooling update: First we found some radiator hoses off of this site that were super cheap on amazon. The upper hose with a T fitting for the steam vent. Next, we used a single 16 inch fan and the factory Datsun 280z fan shroud with some modifications. This fan fit perfectly in the radiator so we felt comfortable just mounting it with some radiator zip tie things: We also added a coolant overflow tank using the bracket from the original charcoal canister: Cold Air intake: -
280z 2+2 resto mod
Whitley_280z_2+2 replied to Whitley_280z_2+2's topic in S30 Series - 240z, 260z, 280z
Here's an electrical update first. I've spent a lot of time making sure the original Datsun wiring is good to go. The first issue was no dash lights. I found out that the dash lights were not getting any power and traced this back to the combination switch.There was a burnt out connecter here that wasn't making a solid connection. I punched that pin out and replaced it with a spare. The car also had an issue where it would blow a fuse when the washer fluid button was pressed. I found that somehow the wires were grounding out on the steering column so a quick piece of rubber fixed that. I found a few other shorts but they were all easy to fix.One issue I kept having during the trouble shooting process was intermittent grounding of all the interior circuits. Just to help other people out here, make sure the fuse block isn't just laying on the floor pan and grounding out all the circuits can be super frustrating. I also made sure the turn signals, headlights, and reverse lights work. I also cleaned up the wire management on the passenger side. I spent one solid day restoring all the lights. Before: After: Before on the taillights: Some plastic welding with a soldering iron: After: The Engine bay also got some attention to detail on the electronics. Adjustable fan controller: This probe goes into the coolant engine discharge line to get the temperature Also created a plastic battery tray... should prevent future rust Now I need to figure out how to route the wires in the engine bay away from the exhaust and then just A/C and sound system wiring. -
280z 2+2 resto mod
Whitley_280z_2+2 replied to Whitley_280z_2+2's topic in S30 Series - 240z, 260z, 280z
Big Update! Here's the first start: Started right up first try without any huge issues. It built oil pressure right away up to 35 psi at idle. The only problem is it started burning some wires but I had not even ziptied them out of the way or anything so this was honestly expected. I'll add another post with some details. -
Relentless - 1977 280z LS (5.3l L59) swap
Whitley_280z_2+2 replied to Box5's topic in Gen III & IV Chevy V8Z Tech Board
I'm waiting on the JCI headers also...hopefully they don't take him that much longer. This is a great resource for getting rid of the fuesible links: http://www.atlanticz.ca/zclub/techtips/fusiblelinks/index.html Nice build! -
280z 2+2 resto mod
Whitley_280z_2+2 replied to Whitley_280z_2+2's topic in S30 Series - 240z, 260z, 280z
More Z progress! Mounted Tilton 7/8 master cylinder and bled the clutch. The remote bleeder made this job super easy! We just used the original Datsun clutch rod / fork in the new master to avoid welding on a new SAE nut or something. Installed an oil pressure sender for the autometer gauge. We decided to mount this in the original oil pressure sensor location so it wouldn't be down by the exhaust. With this intake most people use an AN line with a bunch of adapter but we just made an extended 1/8 npt tube and bent it on the press to give enough clearance. I also spent some more time making the electrical system a little safer. I added a big rubber washer to the alternator to avoid shorts. Ground the engine to the frame: Finally, I also started researching windshield wiper options. The delay relay units for intermittent wipers didn't come with the car so I'll probably just bypass those. It looks like most people use a honda motor but I found this over on classiczcar and I think I'll give it a try. -
280z 2+2 resto mod
Whitley_280z_2+2 replied to Whitley_280z_2+2's topic in S30 Series - 240z, 260z, 280z
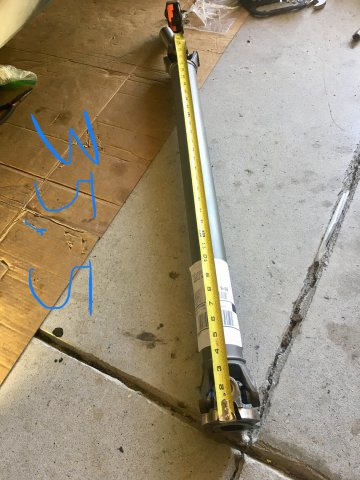
Nice! Yeah the 2+2 models don't get a lot of attention but I think they look almost as cool as the coupe. Gas Monkey Garage built a nice 2+2 but it burned to the ground. This is our first major car project so we didn't want to get stuck doing major frame reinforcements. I also still weld terribly but that's partly due to a harbor freight flux core machine. So I think it will be great to do those reinforcements if you can, but I've also seen a lot of people run similar setups on a stock frame. Our frame rails were in great shape but I can see upgrading rails and adding more bracing down the road. So, all that to say I'm a little concerned about what the added power will do to the unibody but I want to get the car running and driving before putting more money into it. I could be wrong but I think the $115 kit also includes the relays and fuses for fans and A/C. Because the GTO engine is a little weird in that the ECU does not originally control both Fans or the A/C request I thought it would be easier to separate these two systems. The $75 kit made more sense for the GTO computer and engine wiring. I will just have a separate relay location for an adjustable thermometer controlled fan and the A/C compressor power. The plan is to run A/C independent of the engine with a Binary pressure switch from Vintage Air to protect the compressor. I measured 36 and 11/16 inches for the drive shaft length from the seal on the T56's output shaft to the face of the input shaft flange on the Datsun differential. I just received the part from JCI and it fits great! I also measured 35.5" from the face that attaches to the datsun diff to the beginning of the slip yoke. Good luck! -
280z 2+2 resto mod
Whitley_280z_2+2 replied to Whitley_280z_2+2's topic in S30 Series - 240z, 260z, 280z
We are currently waiting on headers from JCI before firing this thing up. They are redesigning the headers so it may be another week or so. I've started putting a list together in my head of what is left before the first start / test drive: + Install Battery + Connect Radiator hoses + install clutch master + Connecte gas tank filler hose + Connect all the chassis electrical grounds + Connect engine ground to chassis ground + Test all the wiring and then connect everything + Mount the Radiator using rubber washers + Ground fuel tank + Wire exterior lights + Install speedometer + Fill fluids (differential, transmission, engine) + Install headers + Install dash + Install driveshaft + Bolt check + Wrap / loom wiring I think that is everything needed for at least a test drive. I think the plan is to make sure the car functions at the base level then install A/C (vintage air / JCI), work on the interior, and finish body work / paint. It will be a great milestone once we hear this engine! -
280z 2+2 resto mod
Whitley_280z_2+2 replied to Whitley_280z_2+2's topic in S30 Series - 240z, 260z, 280z
Update time! The build has come a long way in the last few weeks. The engine is in, wired up, and almost ready to start. First, we had to separate the transmission from the engine to install a clutch line and remote bleeder. We also installed a new throwout bearing and made sure to check for the correct dimensions. When things were separate I took the opportunity to clean the different parts. Used a nail with the end cut off to punch out the roll pin on the new throwout bearing. Installed: Next, we had to swap to an F-Body oil pan because the GTO oil pan has a front sump and hits the Datsun crossmember. With the oil pan off we got to inspect the engine internals and it looks clean! Installed (new oil pan and F-body drivers side motor mount): Now I have an 04 GTO oil pan to sell is anybody wants it Prior to permanently installing the engine and trans we had to do a few more necessary mods. We cut off the original transmission mount ears and made the necessary dents in the transmission tunnel: Also made a plug out of the old skip shift solenoid (cut it flush, take out the coil, and fill with RTV): Now engine mounting time: The engine wouldn't slide into the mounts at first and we determined it was hitting the positive post on the alternator. We trimmed this bolt and took off some of the extra washers and it seemed to fit... NOT After this modification, the engine bolted in and we moved onto the transmission mount. The trans mount was pretty difficult because of the nutserts but it's in. Looks pretty in there! Now on to wiring and exhaust. I bought a DIY fuse/relay block kit for LS engine for $75. This made it super easy to connect the right wires and make the standalone engine harness. It even came with OBD2. I understand the basics of wiring and I enjoyed learning everything about engine harnesses and even the original Datsun wiring, I downloaded a color coded Datsun wiring diagram and that has been a life saver. ] With the GTO wiring layout, it made sense to mount the ECU near the factory Datsun ECU mounting location. I originally just created an aluminum mount but then revisited this part of the design to ensure the computer wouldn't ground itself on anything. first mock up Plastic isolator made out of a front mount license plate holder (it's ugly but it works). I drilled a hole in the firewall: I should have just gotten a hole saw Next I used a stinger fuse block for power distribution through Maxi fuses. Cutout the old alternator wiring and fix the factory splices: Mocked up in the car: At this point I was ready to start creating the engine fuse block. I decided I would work on the starter first. I did a continuity test on the positive post of the starter and signal wire and found they were connected. At first I thought the starter solenoid was somehow fried but I took the starter out of the car, hooked it up to power, and it ran fine. Then, I did a continuity check on the + and - battery cables and found they were connected. Long story short the alternator was hitting on the Datsun crossmember and shorting out the GTO electrical system. I'm glad I found this issue before connecting power. With some more modifications to the alternator positive post it fits fine now. All of the GTO electrical connections are on body connecters C206 and C101 Mounted the fuse block near the brake Master cylinder. Connect everything up: Connected the backup lights to the Datsun wires: Fuel tank wiring: Everything tucks up nicely on the drivers side wall: We also finished the brake system. It was pretty easy to bleed the calipers and masters once we tightened up a ton of loose connections in the lines... That moment when your master cylinder won't bleed and then you look down and see this: Now the pedal feels nice and strong! E-Brake with the connections drilled out so the maxima bracket fits the Datsun cable: I also fabricated a Ron tyler mount: We also sent measurements to JCI for a 2+2 sized driveshaft. The Junkyard that sold us the engine had just cut the driveshaft off near the base making it hard to remove. We just attached a slide hammer and it came out after about 20 hits. Splines look great New Champion radiator: For cooling fans we are going to use a single 16" 3000 CFM thermometer controlled fan in the factory shroud. Pulled the dash out and prepared it for a Dash Cap. It looks so nasty I don't think its worth trying the restore the factory finish with filler and everything. For gauges we will be using the stock tachometer and volt/fuel, a speedhut programmable speedometer, and autometer oil pressure and coolant temperature. Testing the volt gauge with a 9V battery: The autometer gauges actually fit in the stock housings if you get creative: Added a pullup resistor to the Tach to ensure the pulses are above the threshold for the factory unit. We will also have the computer retuned to output for a 6 cyl tach. Temperature sender: I redesigned the hood release because of the ECU placement and also wired up OBD2. Not the actual location for the OBD2 port... it will get mounted to the underside of the dash. OBD2 ground: All the wiring looks really messy right now but I have everything documented and it should clean up nicely. I also made a new, modern "ignition relay" which gives power to the Datsun fuse block. 2 SPDT 40 Amp Relays connected to a common ground: Designed a spot for the check engine light. I cut off the end of the original trip reset knob and drilled it out to fit and LED: Heated it up to narrow the end for a tight fit. Soldered on a resistor fitted in the dash wired up Since the GTO ECU sends a ground signal to the check engine light, I connected the LED positive to a common power source and gave the ground a separate spade connecter so it can be easily disconnected. Hopefully we don't see this that often. I think it looks good next to the rheostat control (which is still integrated into the new gauges). I know this was a really long post with not a lot of details. I am just trying to keep all the pictures here so I can look back over the build. If anyone has any questions I'll try to help... I don't really know what I'm doing but I compensate that with a huge amount of research. -
Richard Oben LS1 series 1 240Z build
Whitley_280z_2+2 replied to Richard Oben's topic in Gen III & IV Chevy V8Z Tech Board
Thanks! I think I'm starting to understand how it works. On the 04 GTO pinouts there is no A/C request pin... if you look at pin #17 it is empty. I'll talk to the guy who programs my computer and see if he can enable that function. Without that I don't see how the ECU would know to give power to things, adjust idle, etc. I might consider running A/C independent of the GTO ECU if things get overly complicated. I also like the idea of a single large fan. -
Richard Oben LS1 series 1 240Z build
Whitley_280z_2+2 replied to Richard Oben's topic in Gen III & IV Chevy V8Z Tech Board
Nice build! Definitely an inspiration for my build. I have a couple of GTO related questions if you don't mind. I saw you installed an A/C compressor... how did you get the A/C system to work since the GTO ECU doesn't have a request A/C pin? Also, what did you do for cooling fan control? Since the GTO computer only has the high speed cooling fan control, i am trying to decide if it is worth reprogramming the computer again to enable the low speed fan or if I should just use a thermometer controlled fan. Thanks for the help! -
Hi all, I am almost ready to start up the LS1 in my 280z for the first time but I need exhaust headers first. I used the mounting kit from JCI but they are out of headers right now and it could be a month until they build some more. I know this is a long shot but does anyone have a pair of JCI exhaust headers they would like to sell? Thanks!
-
280z 2+2 resto mod
Whitley_280z_2+2 replied to Whitley_280z_2+2's topic in S30 Series - 240z, 260z, 280z
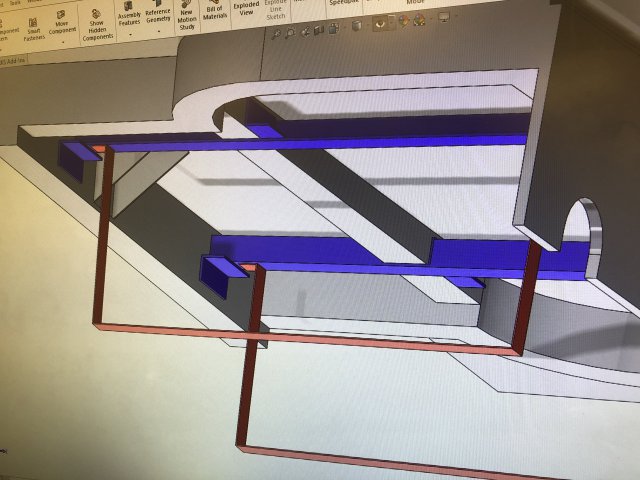
Here are the details of the fuel system. It started with a SolidWorks design. The late model 280z's are different in that they have braces going to the spare tire well so we had to work around that. We made the mounts out of aluminum angle pieces (including the brackets). These were installed with self-tapping screws into the frame rail. I know it is better to have the rails running from side to side instead of front to back but hopefully the screws will be the weak point in an accident. Passenger side: '' Driver side: Next, we installed the pump and sending unit into the tank. We then glued rubber pieces (from the stock 280z tank) onto the top surface. Now, we used a jack to hold the tank in the correct position to fabricate straps. (look at how good the filler neck lines up) Strap material is included with this tank from Tanksinc. We first stacked some washers on one end of the strap so it would tighten up nicely after being cut and measured. Then, we just had to bend up the strap to fit the tank and drill holes in the aluminum frame. Then, we added rubber to the straps at all the contact points. Now for fuel lines. We used steel braided lines to run from the tank to the filter/regulator and an aluminum hard line to run up to the firewall/engine bay. A steel braided line will then connect the hard line to the engine. I found the best way to cut these braided lines without fraying was using a hose clamp. We used a tube bending spring kit to avoid kinking the aluminum tubing. I highly recommend something like this! -
280z 2+2 resto mod
Whitley_280z_2+2 replied to Whitley_280z_2+2's topic in S30 Series - 240z, 260z, 280z
Thanks for the help here! Yeah the Camaro LS3 pan is way too deep for a Datsun. Ended up going with a regular rear sump LS1 oil pan because of a good deal. -
280z 2+2 resto mod
Whitley_280z_2+2 replied to Whitley_280z_2+2's topic in S30 Series - 240z, 260z, 280z
Over the past few months, we have made significant progress on the 280z. First, most of the bodywork has been completed. The old rust spots with new patch panels were given a coat of Bondo to smooth them out. hatch: Fender: Rear Quarter Panels: Roof Pillar: The Bumper area was also completely smoothed to get the classic 240z look: +++++++++++++++++++++++++++++++++++++++++++++++++++++++++++++++++++++++++++++++++++++++++++++++++++= We also started installing all the things that make the car stop. We had to paint the calipers red: Created Firewall insulation before installing the pedal box. We just cut up some generic insulation from Amazon to make this work. Pedal Box and steering column: Booster and Master Cylinder: Hard Lines for the brakes: ++++++++++++++++++++++++++++++++++++++++++++++++++++++++++++++++++++++++++++++++++++++++++++++++++++ We also picked up an aluminum 5.7L LS1 from a 2004 Pontiac GTO! We found the engine in a junkyard from a side impact GTO and it has about 100K miles but seems to be in decent condition. The engine will be installed using the JCI kit including the transmission cross member. First up, all the wiring connectors were labeled and we had the computer reprogrammed to remove VATS and other unnecessary parameters. This white body connector plug for the GTO LS1's has most of the wires that will run to the fuse block and relays. Two of the exhaust bolt were snapped off flush with the block. We were told this might be a result of the exhaust manifolds warping from the heat. I tried to weld a nut onto the bolt to get them out. I couldn't get enough penetration to make this work so we ended up using an extractor. Unfortunately, this didn't work either and we ended up having to drill out the bolts and re-tap the threads. The engine was cleaned with the famous Chrisfix degreaser (soapy water ), wire brushes, and Scotch-Brite pads. The biggest concern here was making sure all bolt holes were thoroughly clean so the aluminum won't crack. This basically just took a lot of time and scrubbing. Now, we need to order/install a fuse block and relays, mount the engine in the car, and see if it will run. It's that easy right! +++++++++++++++++++++++++++++++++++++++++++++++++++++++++++++++++++++++++++++++++++++++++++++++++++++++++++++ To feed this engine we need a dialed fuel system. Although the stock tank can be used with an external pump, we decided to go a different route because our tank was way too rusty and replacements are hard to find at a decent price. Also, an in-tank pump is better for noise levels and consistency. This meant the spare tire well had to go. Ready: Set: Gone: So much room for activities now! We went with an 18-gallon universal tank from Tanksinc that is internally baffled for an in-tank Walbro pump. The filler neck lines up pretty good and will just need some custom rubber hose that we can probably find at AutoZone. The only real fabrication necessary is the create some solid straps to hold the tank in place. This is being mocked up in Solidworks right now and the tank will hopefully be installed soon. More on this to come. Sorry for the long post but that brings the build up to date. It still has a ways to go but things are coming together. -
280z 2+2 resto mod
Whitley_280z_2+2 replied to Whitley_280z_2+2's topic in S30 Series - 240z, 260z, 280z
Thank you for the help! I think I found a complete LS3 oil pan kit (pan, pickup, and windage tray) on craigslist for $100 so that's probably the way to go.
