A to Z
-
Posts
1167 -
Joined
-
Last visited
-
Days Won
53
Content Type
Profiles
Forums
Blogs
Events
Gallery
Downloads
Store
Everything posted by A to Z
-
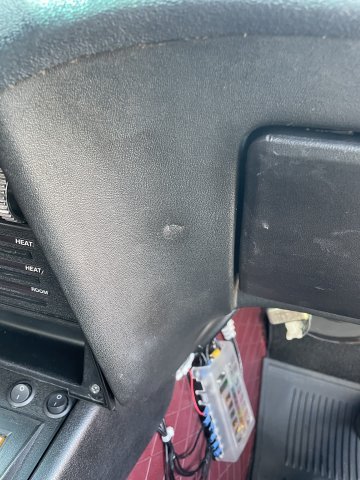
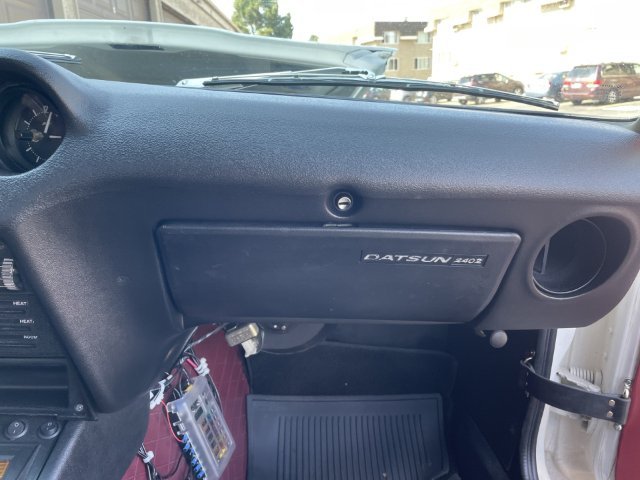
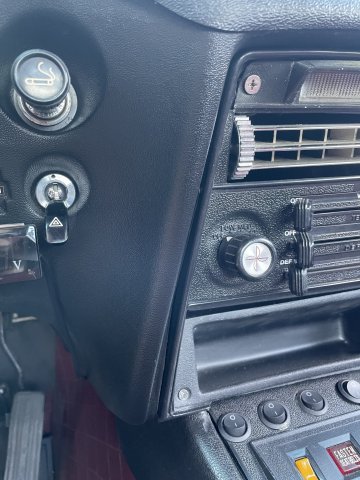
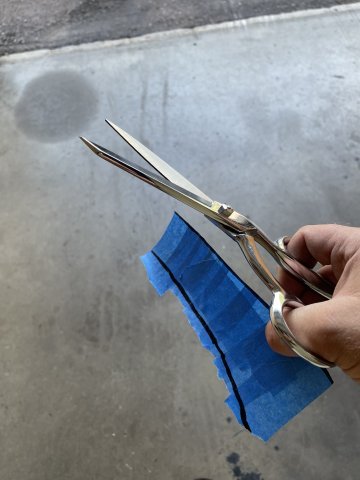
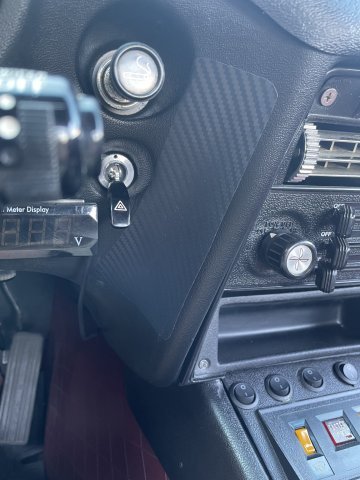
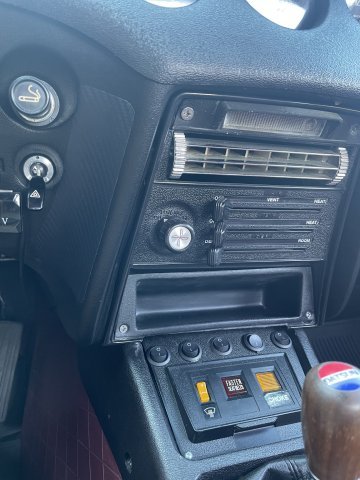
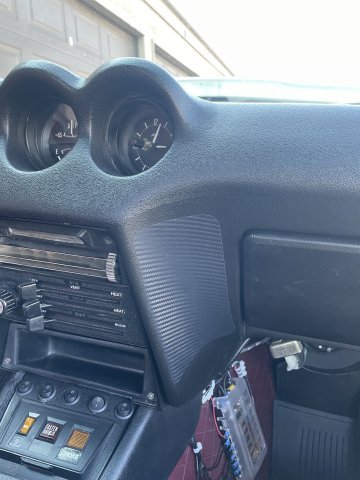
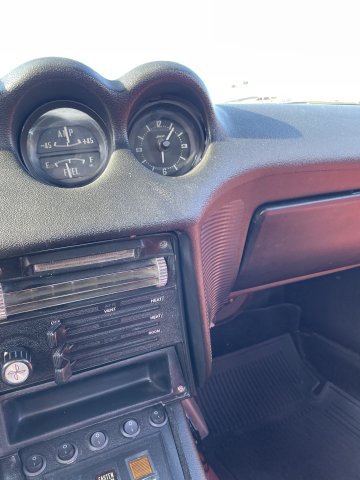
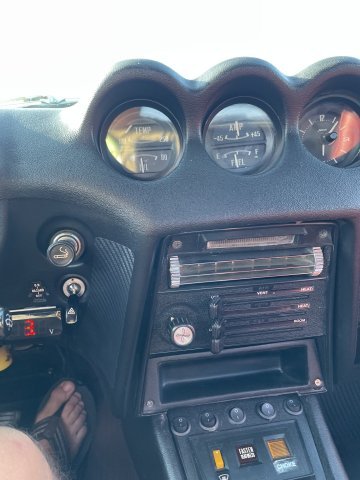
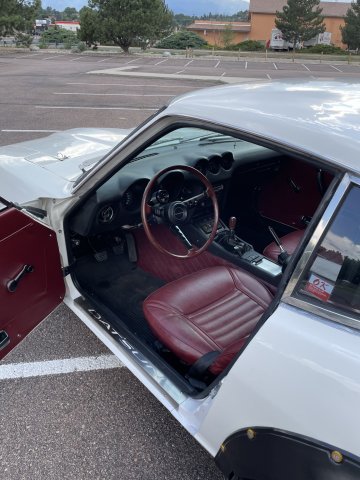
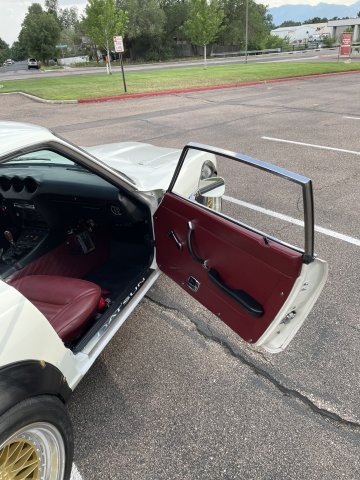
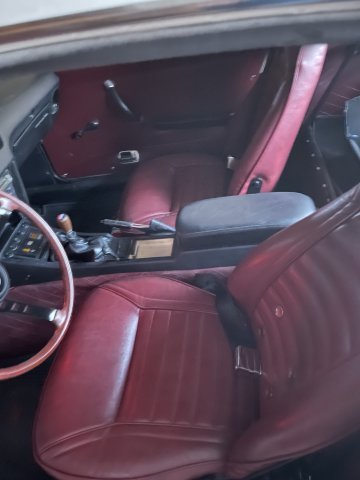
I have ignored the lower part of my dash basically since I have had my 240Z, and I have one small circle crack, just a bit smaller than a dime, and so in thinking of ways to deal with that, I came up with this. I went online and bought a small roll of carbon fiber looking vinyl on Amazon, I figured I will make 2 panels for each side of the lower dash. I started with a tape off and a couple thin coats of SEM Laundau BLack to get the color back, then I made the patterns by taping the area, drawing out each panel and carefully taking the tape off and then sticking each piece to the vinyl and cutting them out and then installed them. This opens up a wide range of idea for you guys, and you could easily use leather and other fabrics. See pics below:

-
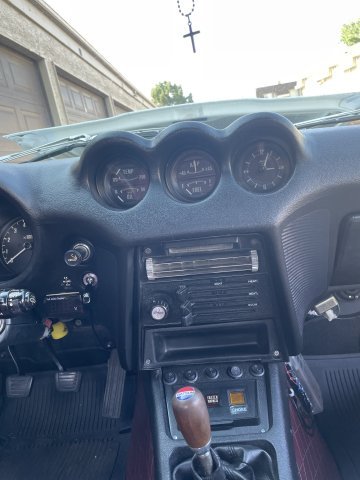
 Hard to believe it is done. If any of you have any questions, feel free to ask.~Joe
 -
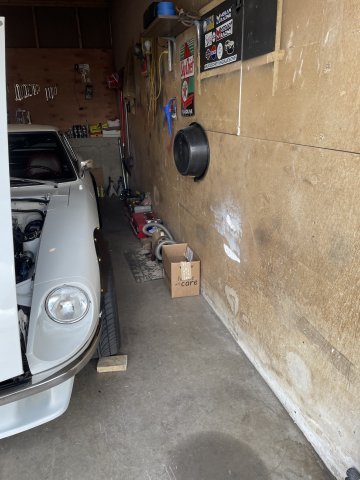
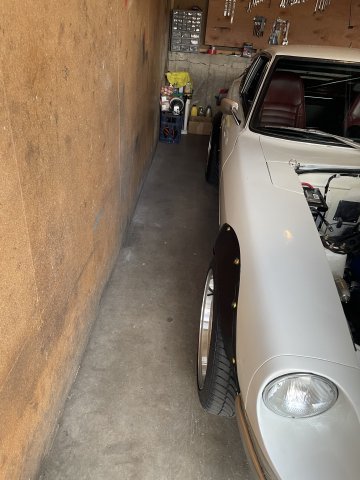
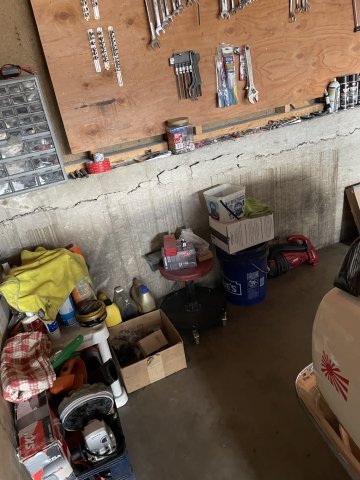
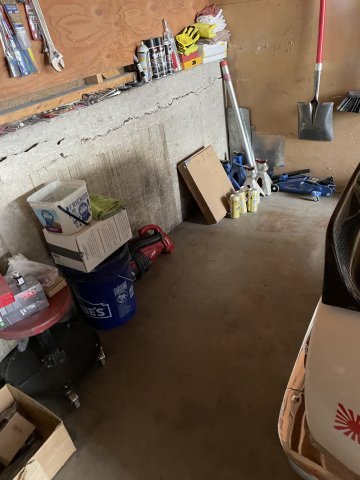
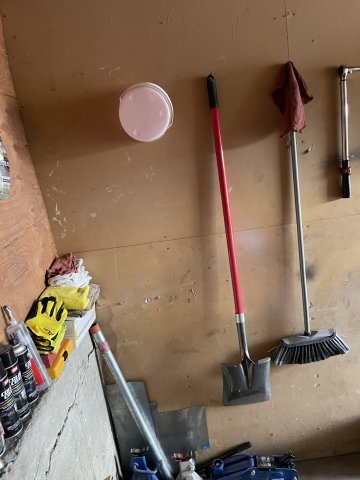
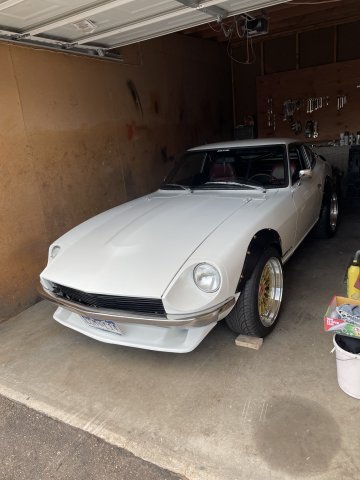
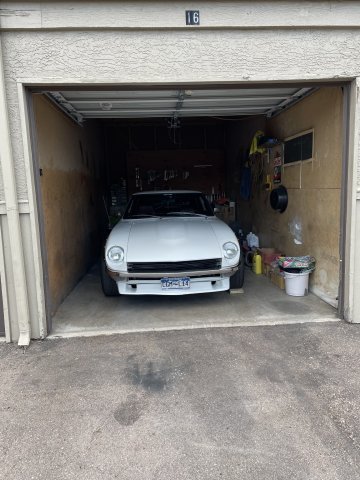
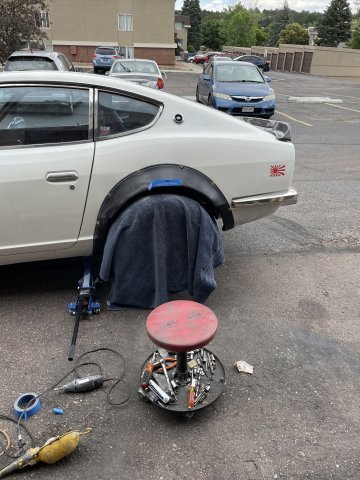
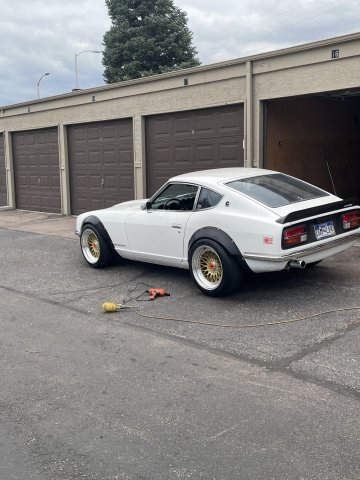
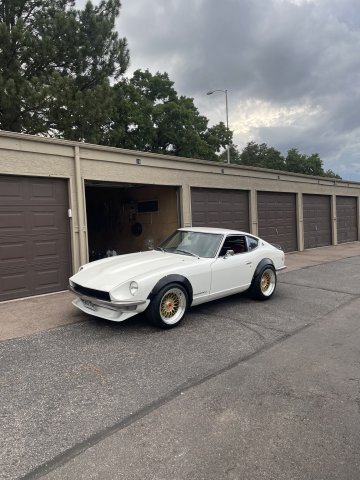
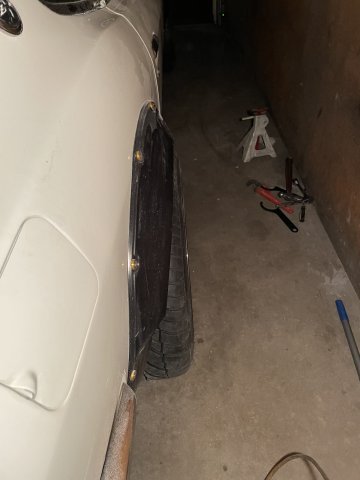
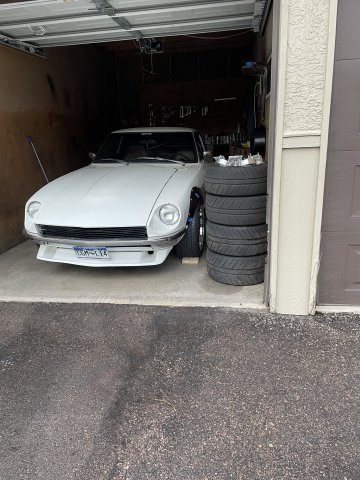
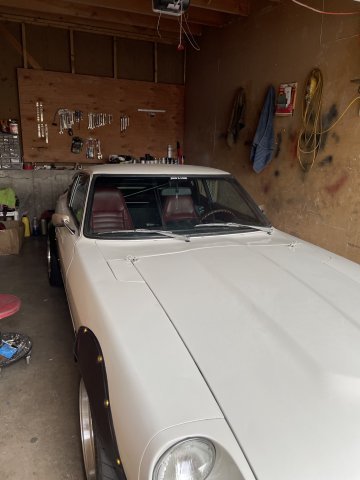
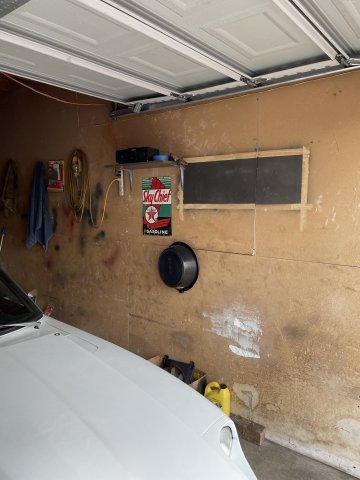
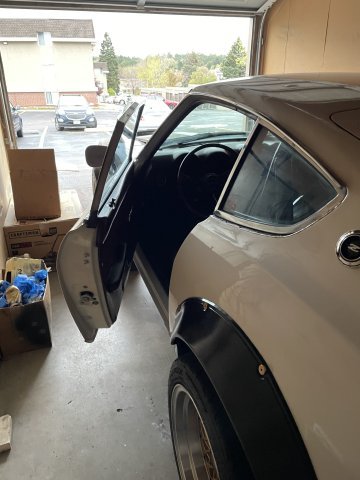
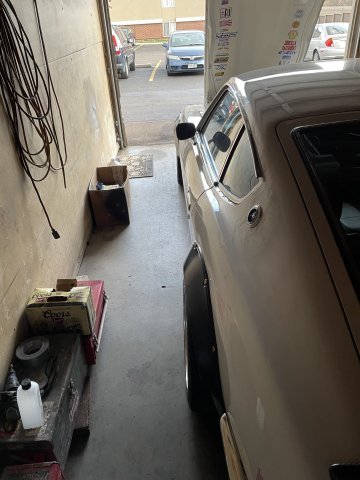
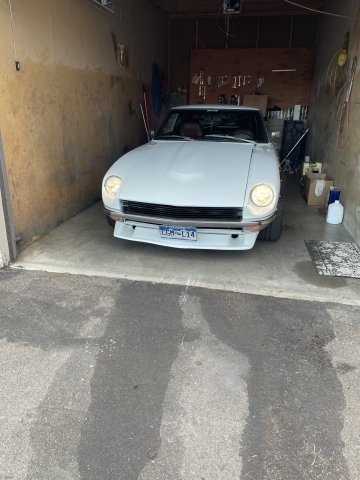
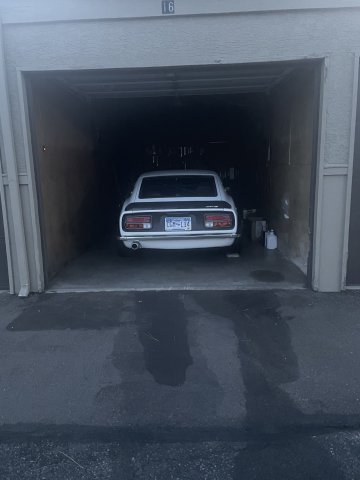
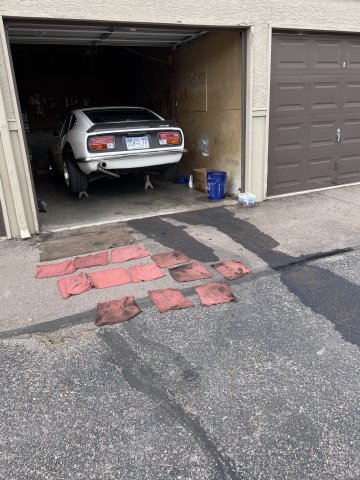
Not really Datsun related, but for those who have watched my Z car build, the one car garage I used was never REALLY cleaned up. Today was the day I fixed that. I almost have room all the way around the car!
-
Walk around vid to go with pics above. As stated she is all done. Garage cleaned up and move forward with life now. click below for video: V1.MOV
-
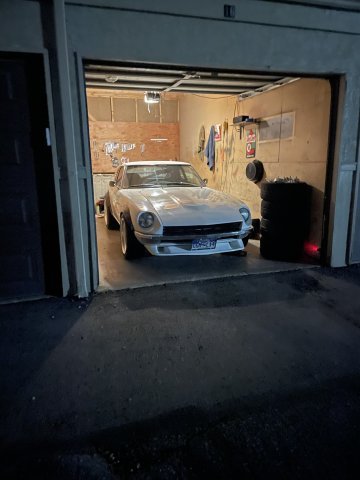
Completion pictures taken for insurance. Posting on here as a record. Pic heavy. V2.MOV
-
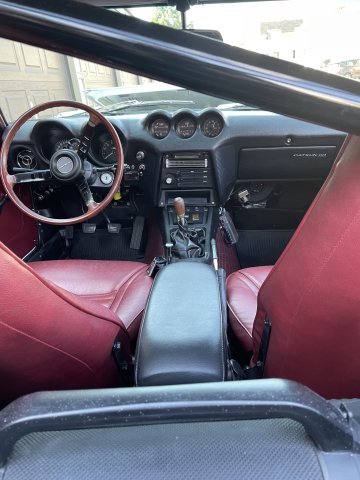
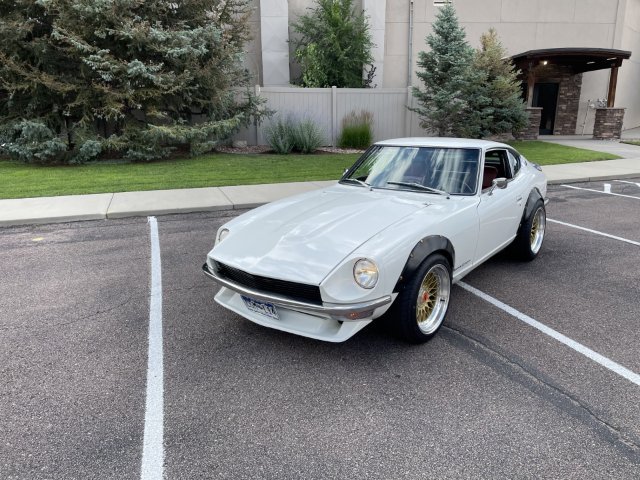
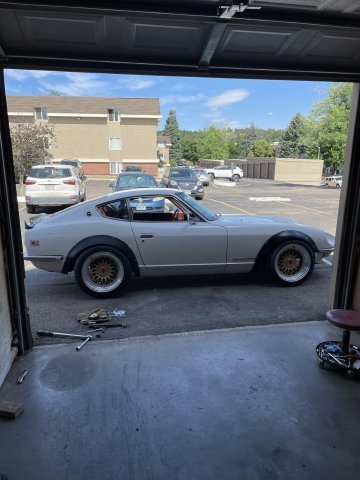
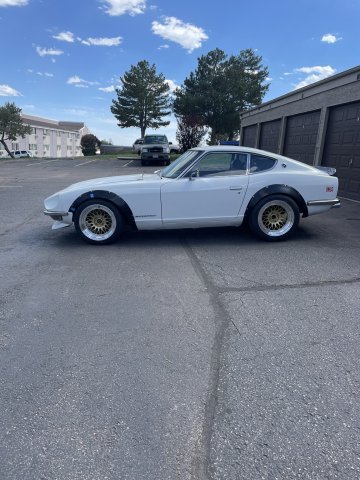
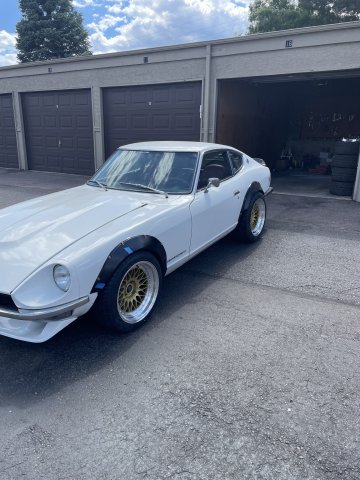
END OF THREAD. Z CAR COMPLETED. ANOTHER ONE SAVED AND ON THE ROAD.
-
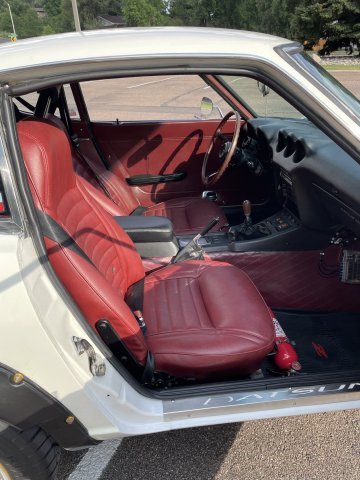
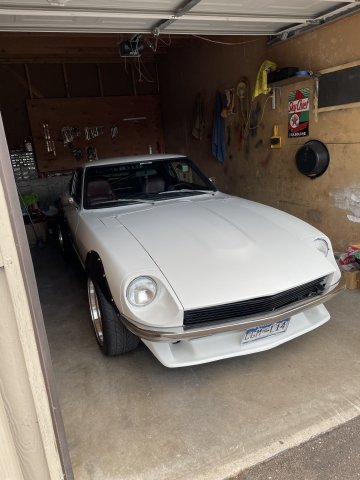
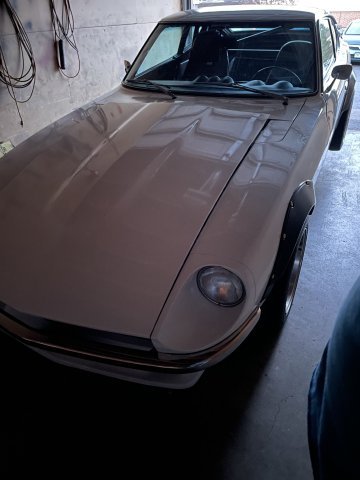
Today was completion day! 3 years and 27 days of "restoration". It AGED me. I worked through the winters with little to no heat, bundled up choking on body filler dust, changing out the roof skin to eliminate the sunroof, to replacing interior, to complete custom big bore stroker engine building, swap from auto to manual trans, 4:11 K case rear end, you name it. Wouldn't do it again.....plowed through just so I could have an OLD one, a '72 240Z instead of a 280Z. Whew. this is a walk around in the one car garage I built it in, with one 120V electrical socket. It proves you CAN do it if you just jump in and go! Enjoy! click below to watch video: V1.MOV
-
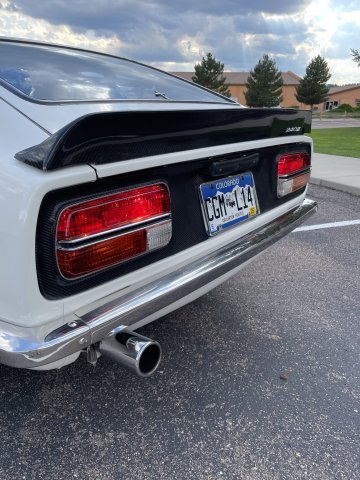
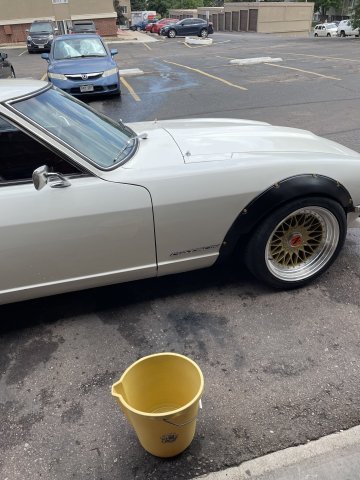
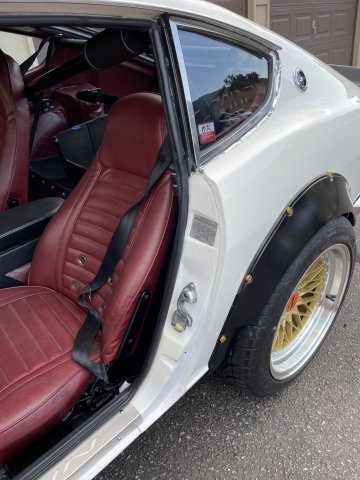
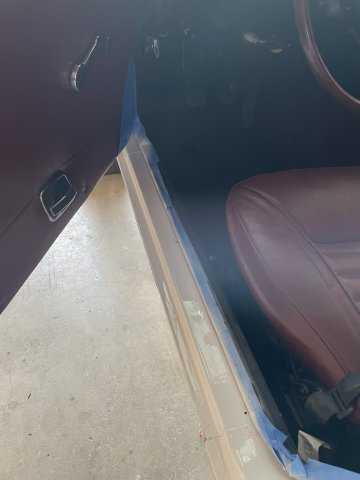
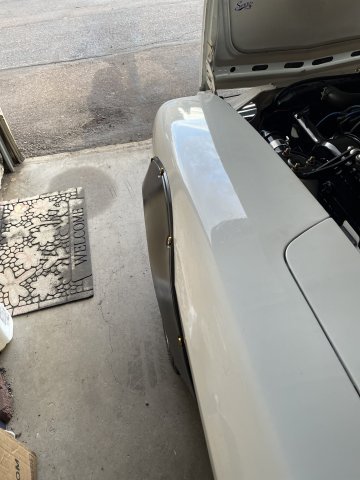
07-13-2024 UPDATE PROJECT COMPLETE 16 June 2021 to 13 July 2024, that is 3 years and 27 days. Today was wash and cleanup day. I finished all that was on the punch list. With the flares being FRP (fiberglass reinforced plastic) I tried, and found out that caranauba wax works even better than Armor All on the flares. Nice and shiny. The big one was the door jambs. As the pics show, it's now good to go. I can't believe she is really done. Took a few pics of the day, but this is it as far as the build. She's done.
-
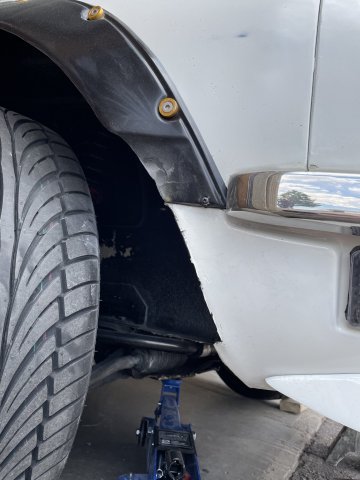
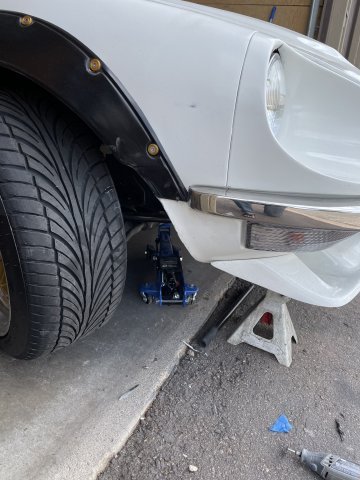
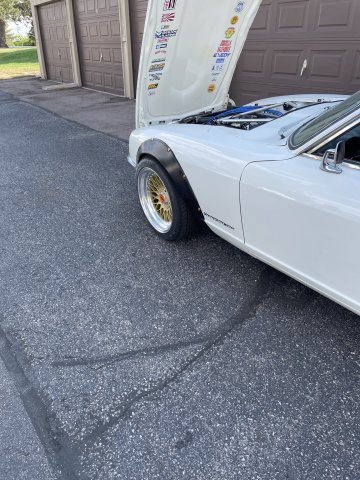
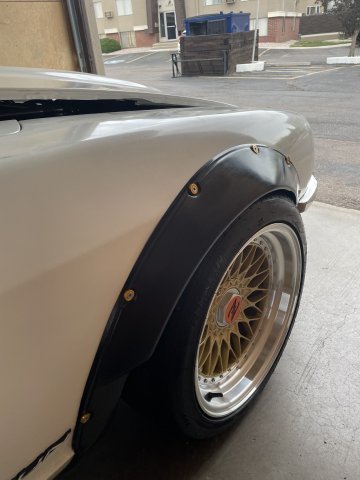
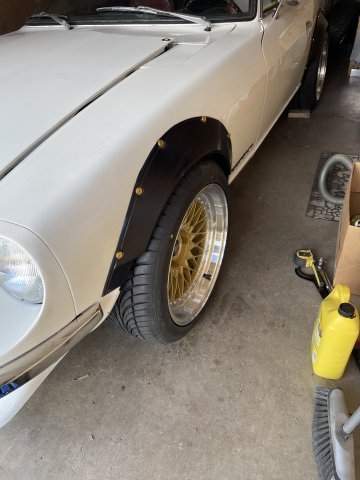
07-06-2024 UPDATE. More flare fitting. I ended up having to trim the front lower valence on the ends.....taking them in 3/8 to 1/2 inches, and then cleanup to make them look nice. I also had one rear tire that was dragging really good on it's flare that I had to work on. Success is finishing it, with no rubbing going on, and everything looking good. I also interior painted a spot that was in need of it. The list of to do's is getting very short now. PICS.
-
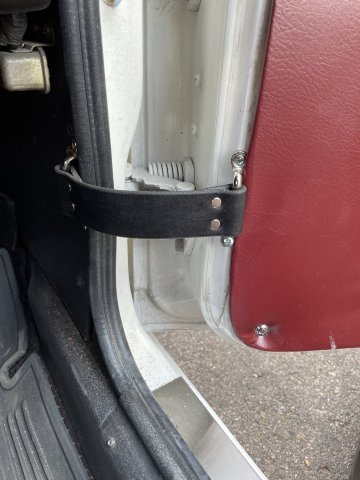
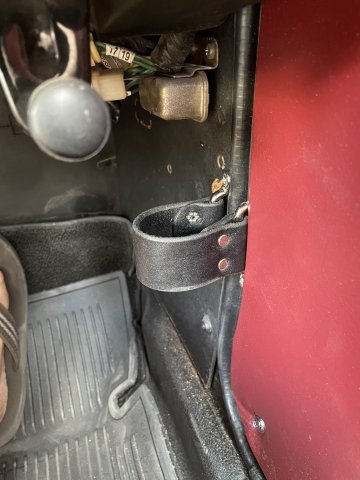
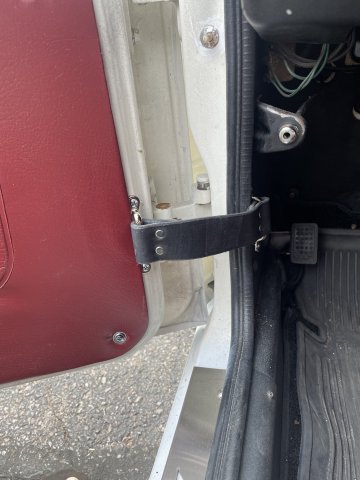
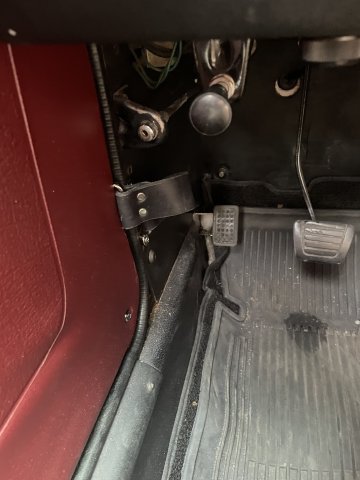
06-29-2024 UPDATE: Today I finished getting the wheels on, with the center caps installed.....I had to drill a small hole in the front wheels , tap the holes, and use 8/32 screws to ensure the covers don't come off of the front wheels. Then I armor alled and dressed them up and went for a drive, and heard a lot of grinding, so there will be further adjustments made on the flares. Becasue my driver's side door stop on the hinge broke, I added door stops. These are leather ones with chrome brackets I found online which are made for a 1936 chevy pickup! see attached pics, they work well! This post is pic heavy. But, pics are attached.
-
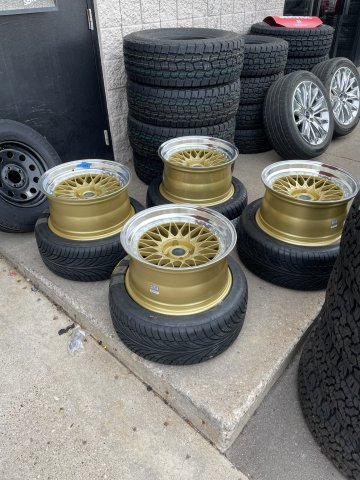
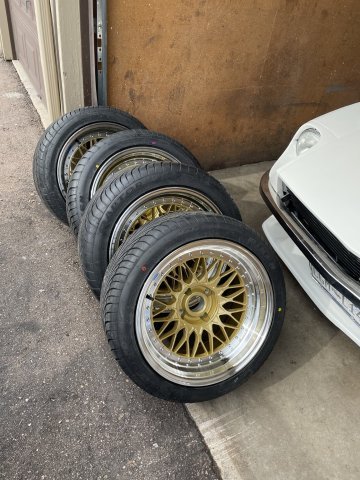
6-23-2024 UPDATE. Wheels are still in the process of final fitment and center caps aren't on, but wanted to take a few pics of the wheels.
-
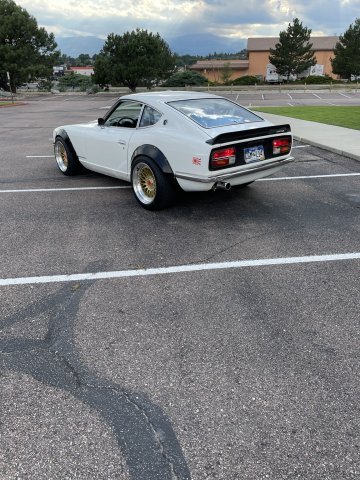
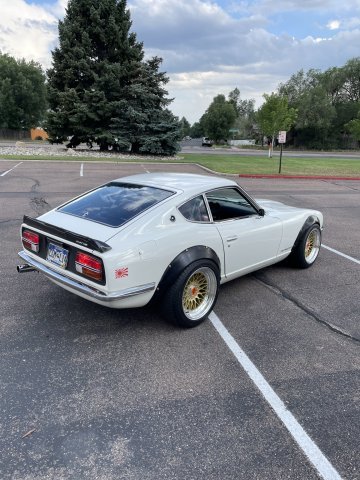
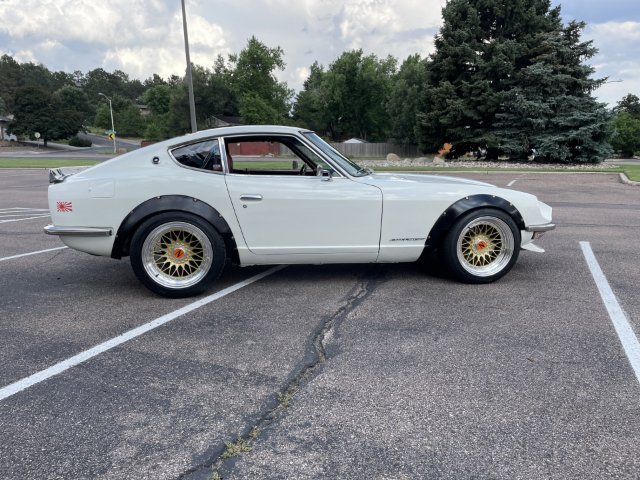
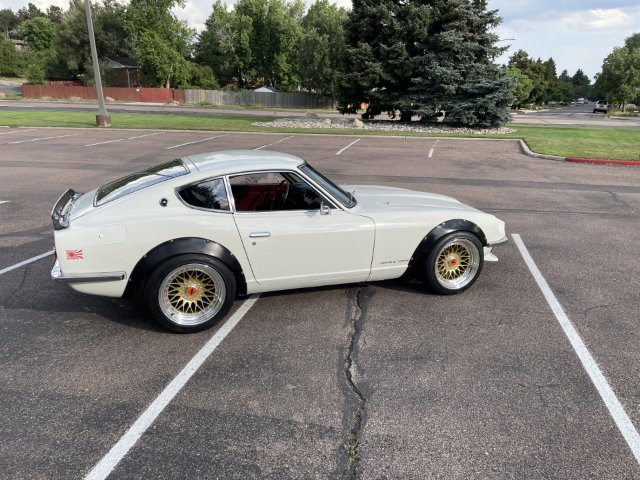
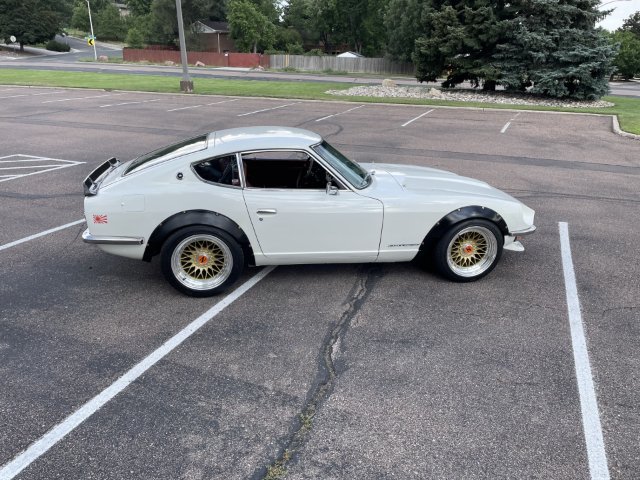
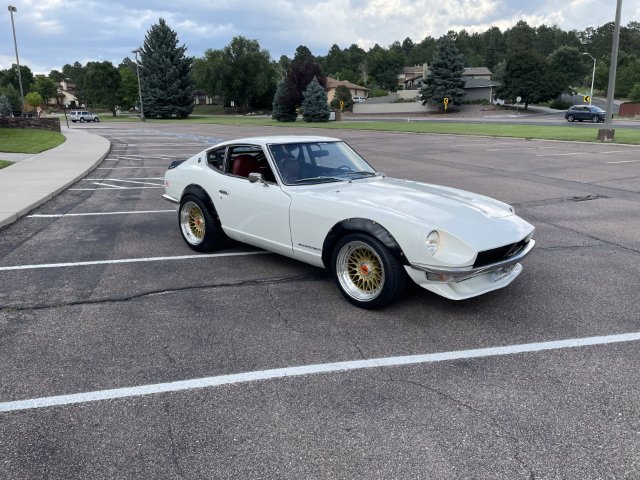
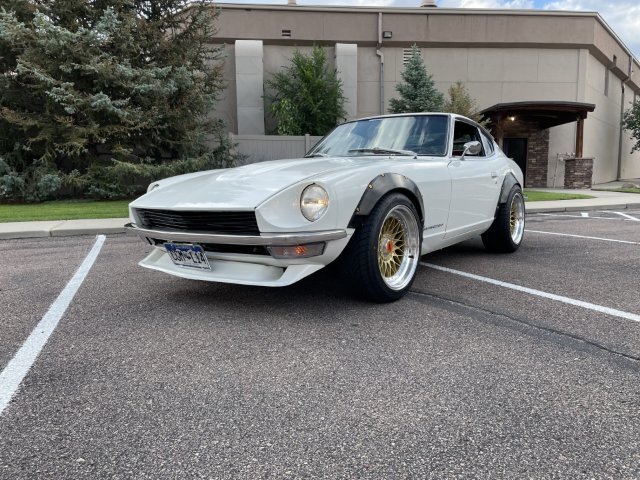
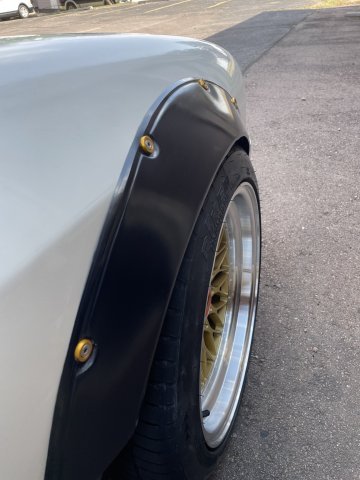
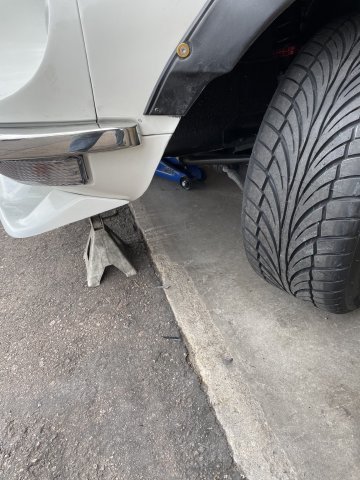
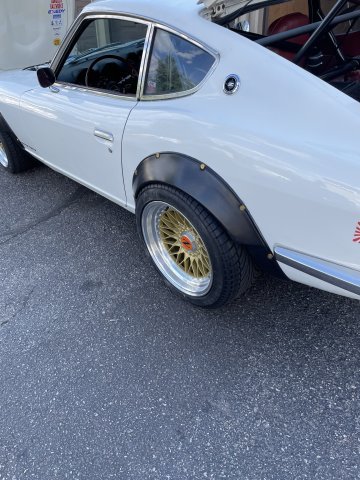
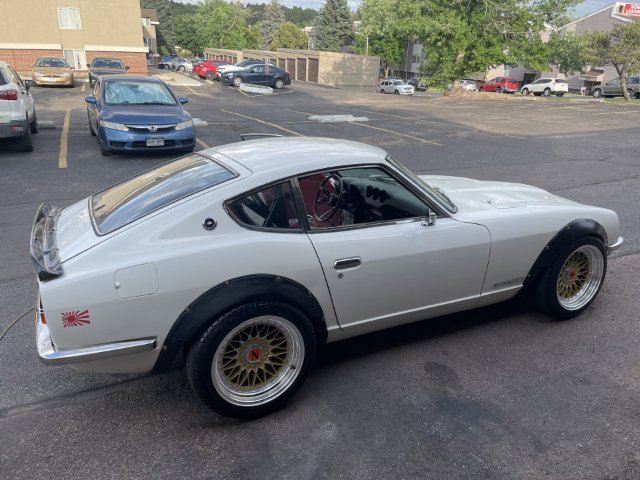
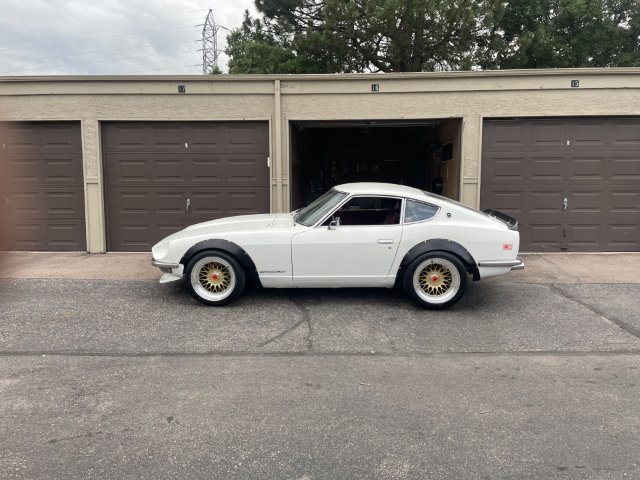
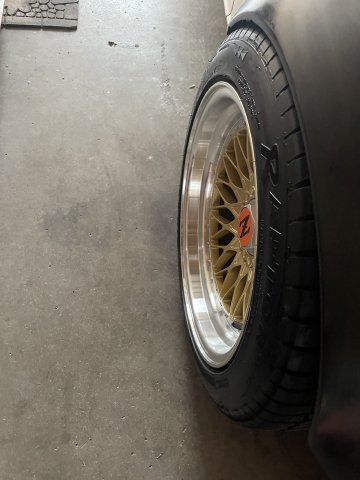
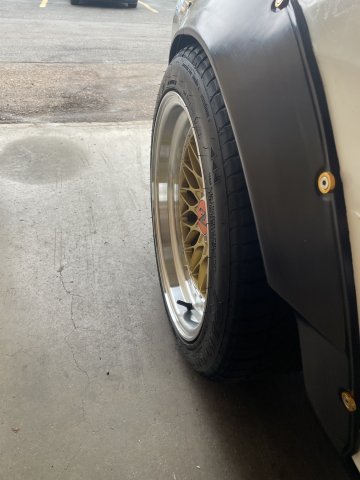
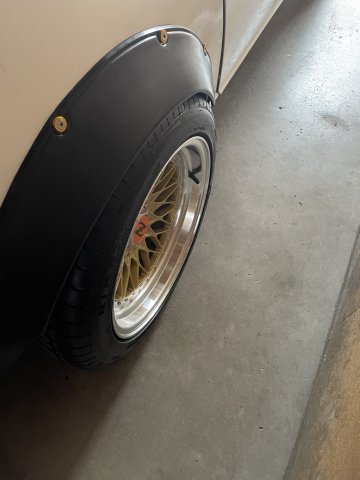
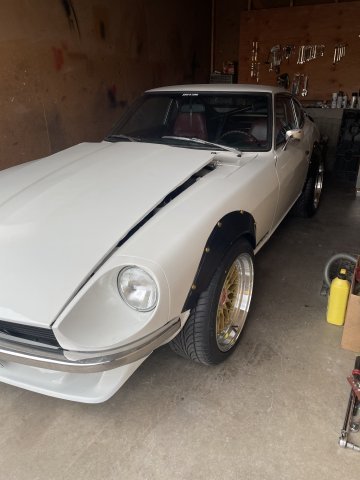
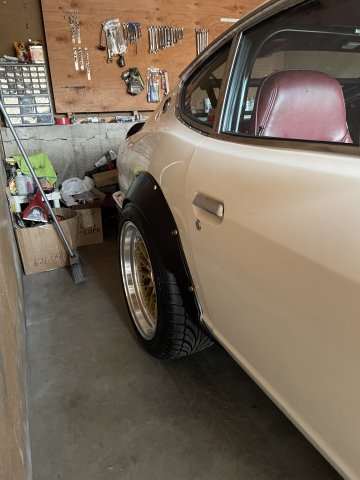
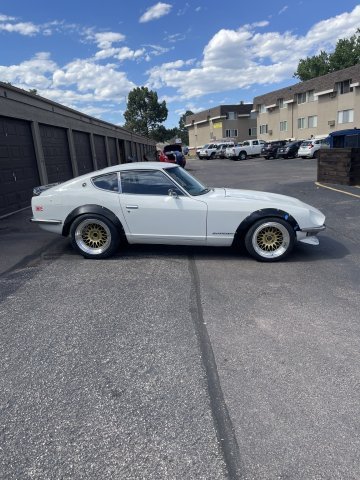
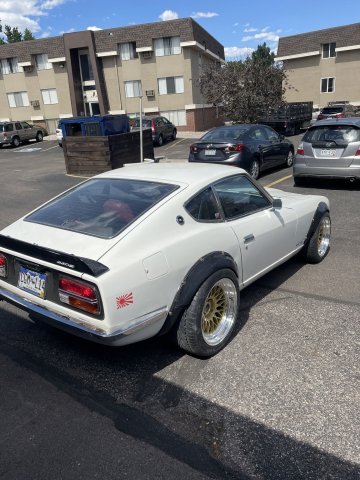
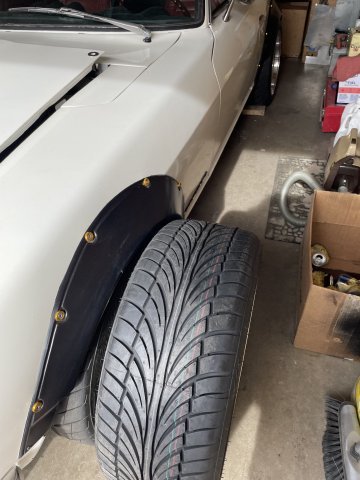
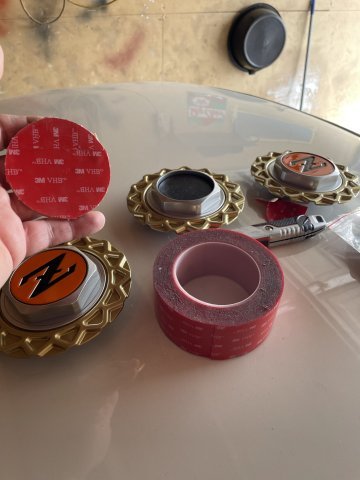
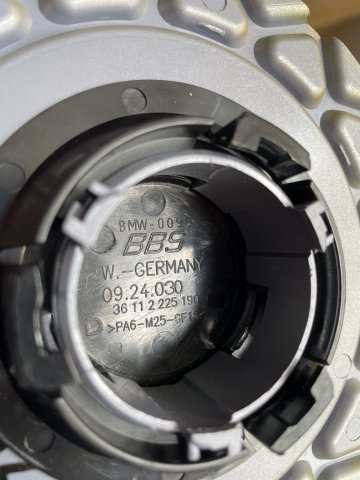
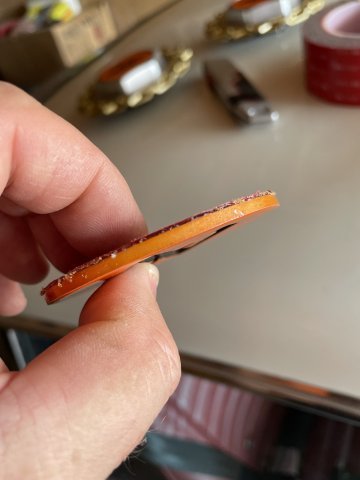
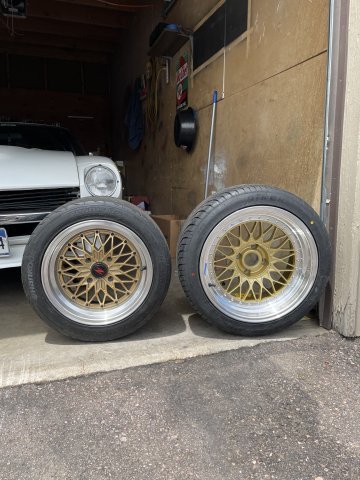
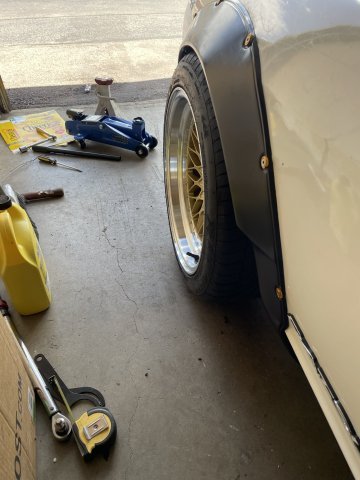
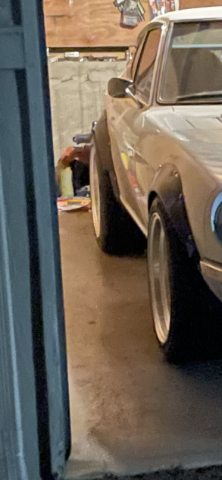
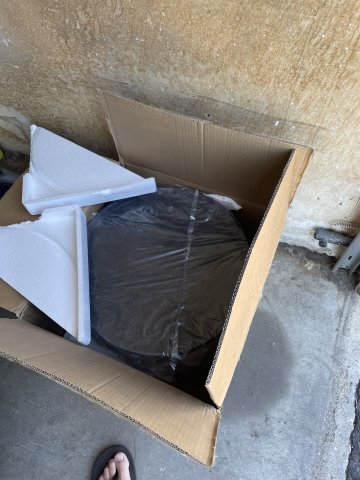
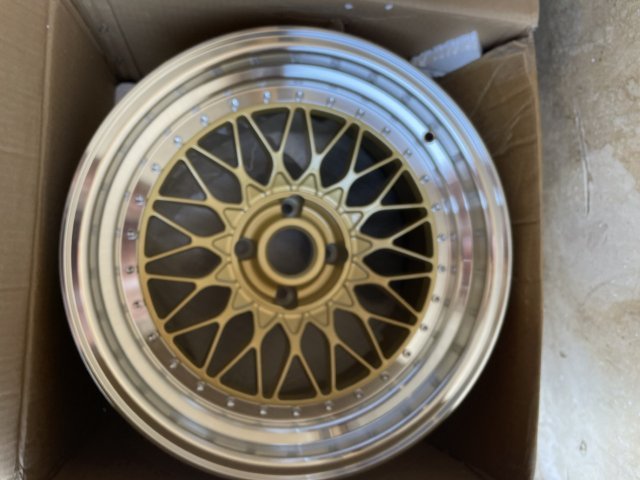
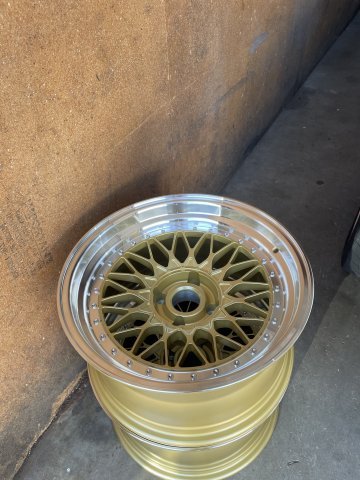
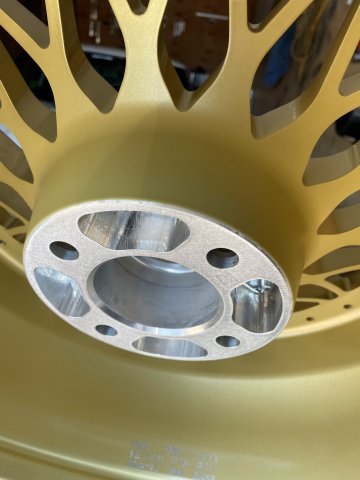
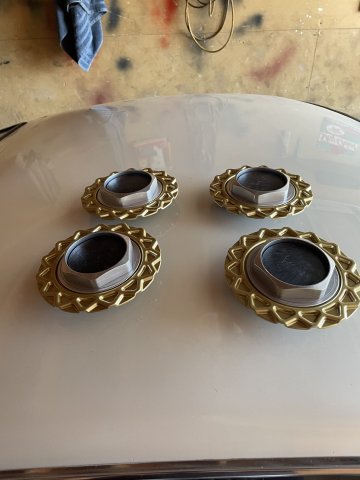
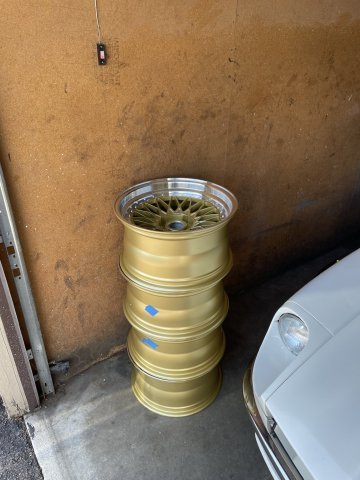
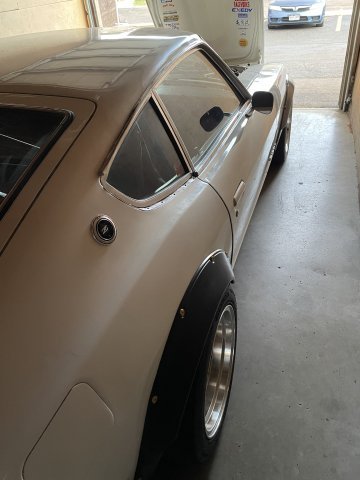
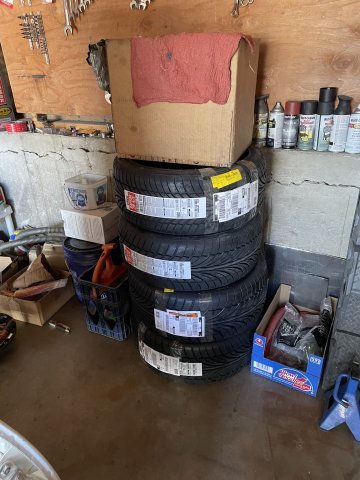
06-22-2024 UPDATE. Long and Busy day! This morning I took my wheels down to Big O Tires, on Austin Bluffs here in colorado springs, and got the tires mounted and balanced, I then got them home and the very long and tedious process of getting the wheels swapped out, to include ride height adjustments and some flare modifications so that the car doesn't look like it is sitting on top of the wheels, but that the wheels are tucked in looking proper. I managed to get all the wheels on, however, there will be a tad bit of work on the front flares in a spot where the tire wants to rub on turning, but otherwise it is complete! The center caps had no way of sticking to hte centers, So I used good 3M VHB tape and got them installed. I noticed that upon closer inspection the center cap paltess are held on by an actual BBS device! In the pictures you can see the roughly 2 inch higher profile the new 17" wheels have, so yep....every side had to be raised and then adjusted backand forth to get it right. Along with flare modifications to let the car sit down on the wheels. TIRED! See attachment pics!
-
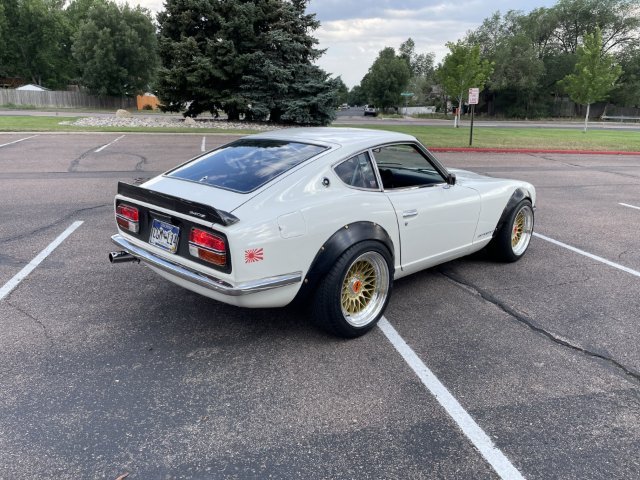
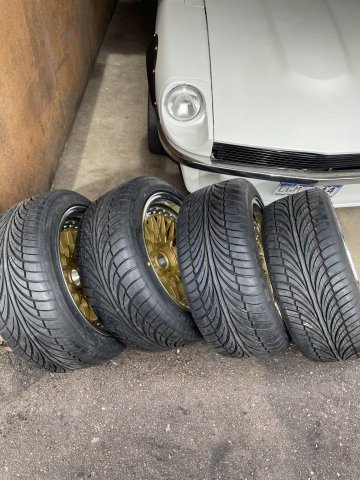
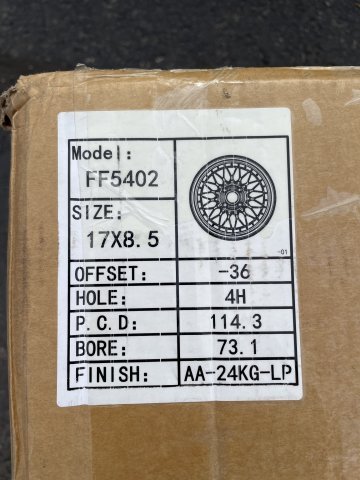
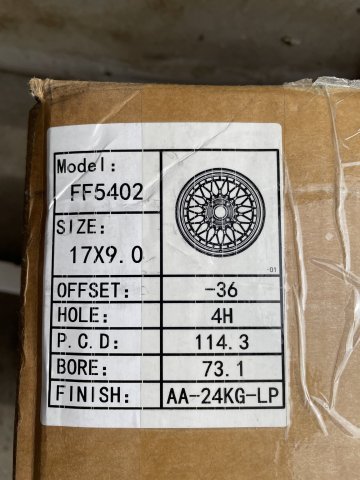
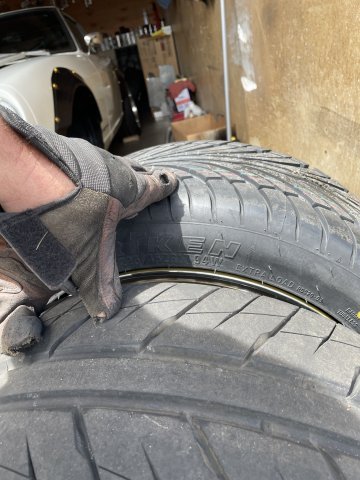
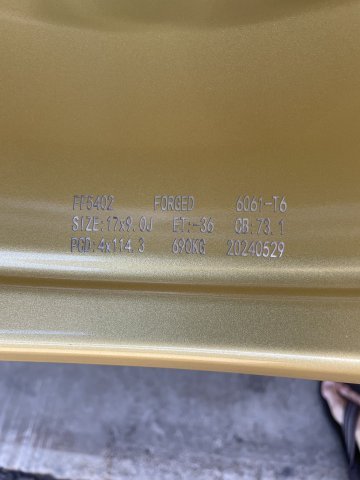
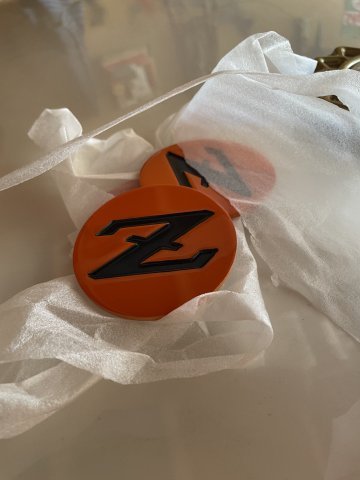
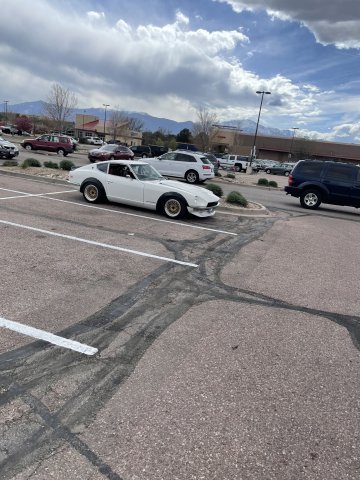
Well, my 17" wheels arrived today. (2) 17X8.5, (2) 17x9; -36 offset. Tires are Riken 225/245 45ZR17. Center caps are about 1/8" thick, like a poker chip with the "Z" etched in and painted. As I have mentioned before, I bought these from a company in China, had them custom made....these are Forged. Can't beat the price, quality is VERY good.
-
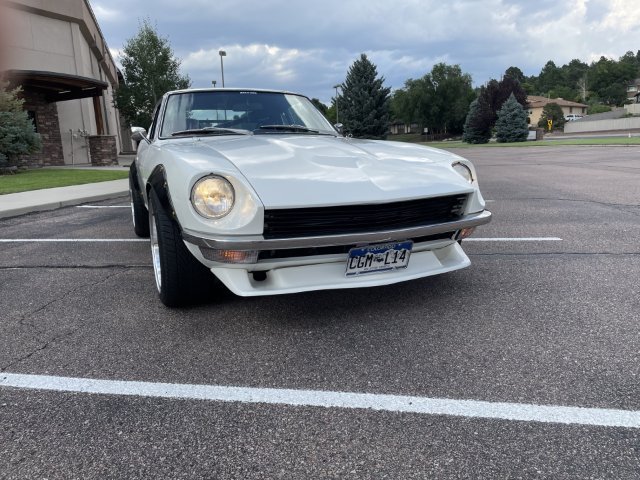
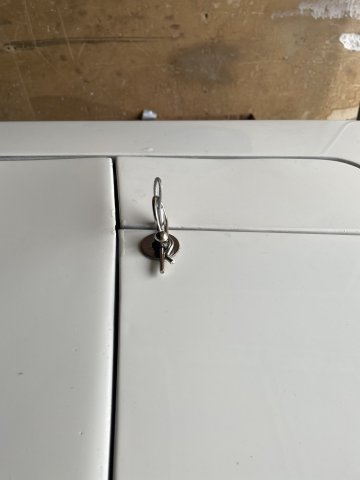
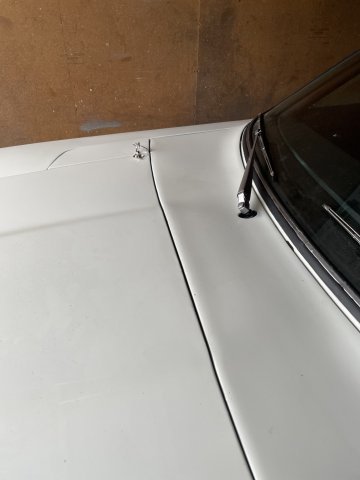
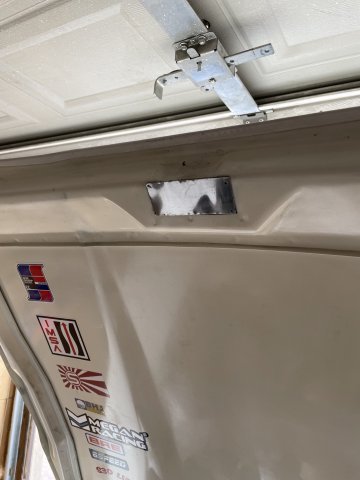
06-14-2024 UPDATE: Hood pins are done. I wet sanded the touch up areas with 2000 grit sandpaper and got them to where they are smooth and decent, then polished it by hand with Meguires 205 and then a coat of Mcguires Gold paste wax (pure caranauba wax) I took several pictuers to show that the hood pins are not obtrusive at all and blend in nicely with the whole thing. See attached pics. Cheers!
-
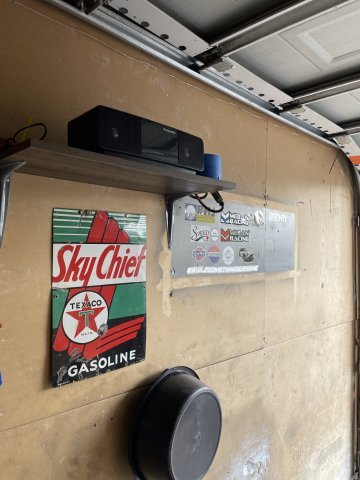
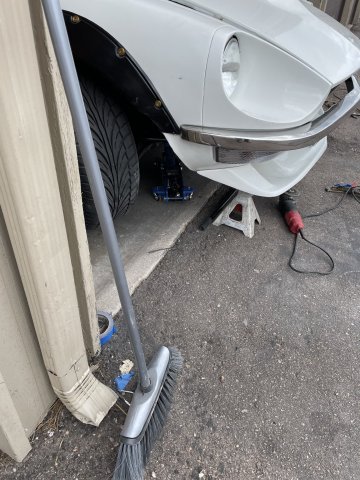
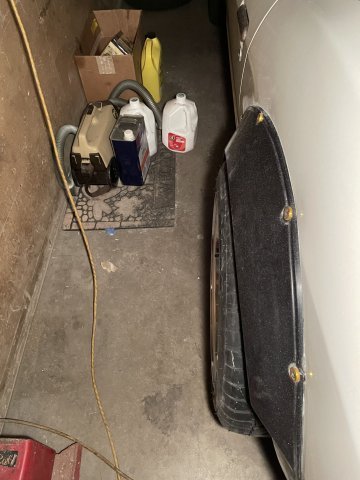
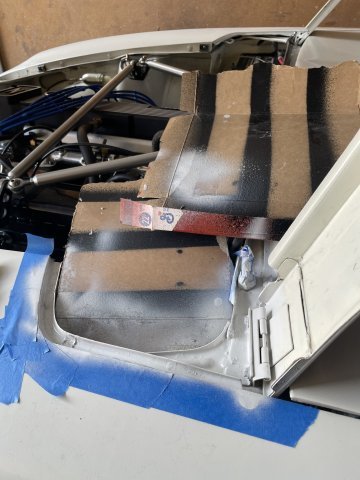
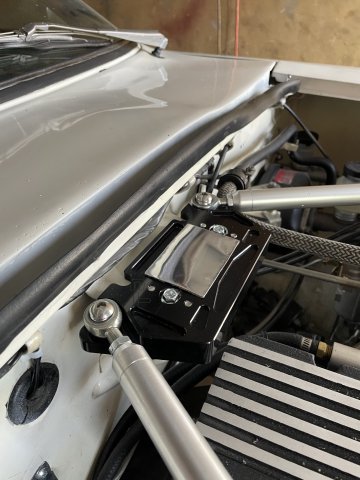
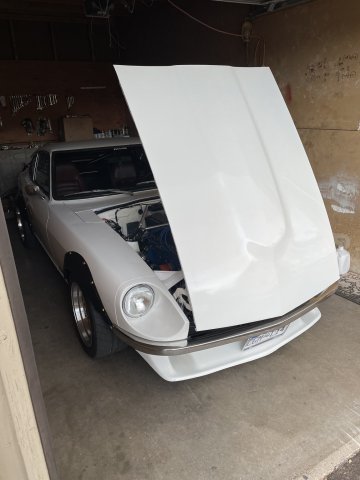
06-08-2024 UPDATE: Well, i finished up my hood pins. The reason I did this, was becasue the Tri-Bar setup from Techno Toy Tuning was making it impossible for the hood to latch, every option possible to loosen things up to get it to latch, then tighten, etc. wasn't working.....then the thing I never wanted to happen occurred, the hood release cable broke. I was able to get the hood open, and it was then that I decided to remove that horror from ever happening again, so here we are. I bought the kit on Amazon for under 10 bucks, but instead of using the large diameter scuff paltes, I used Stainless Steel Washers. I then bonded them on to the hood, and then after painting underneath, used some silicone adhesive and smoothed it out with my finger, and once dry looks great! So anyway, after finishing that, there are a lot of chips in my paint....My el-cheapo paint job seems to be very susceptible to chips. So I had to go over and over each chip several times to fill the chips in and then get it higher than the surface.....once dry and hard, I can wet sand with 1500 grit wet sandpaper smooth and then hand buff out and they will be all gone. I then pulled the Z out and cleaned and re-organized the mess formerly known as the single car garage...being a rental, no money is spent on the garage, save a few bucks today to have a spot to plug in my Mom's old stereo and I then also moved everything over to that wall and did a bit of cleanup of the area. Then took a few pics of the Z in it's cleaned up abode. Took it for a ride, about 20 or so miles, everything is still getting better and better as everything continues to seat in together. Pics attached. Cheers!
-
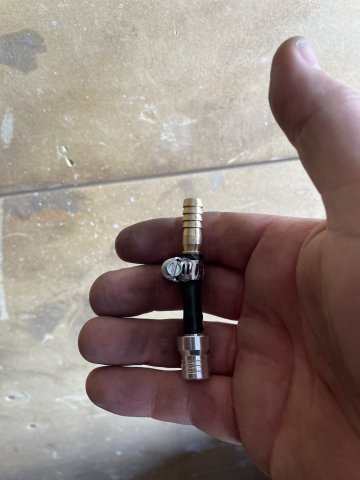
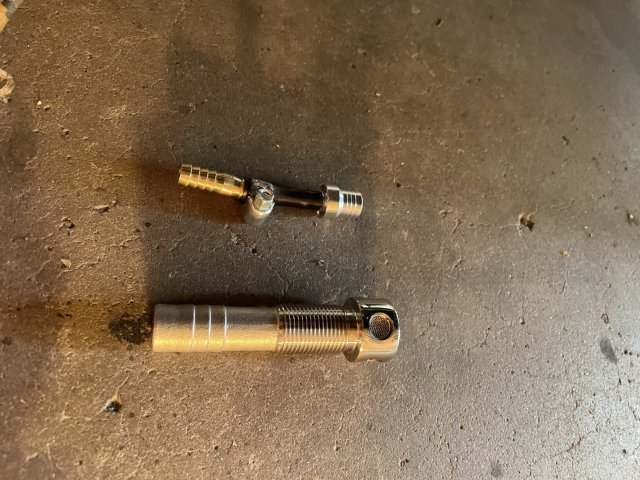
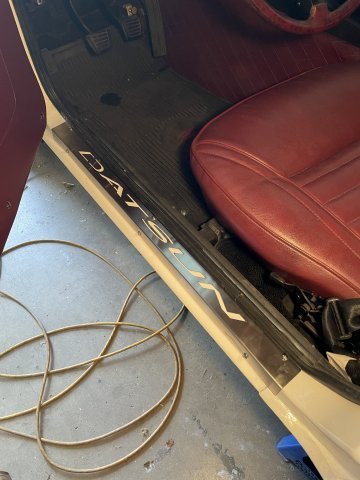
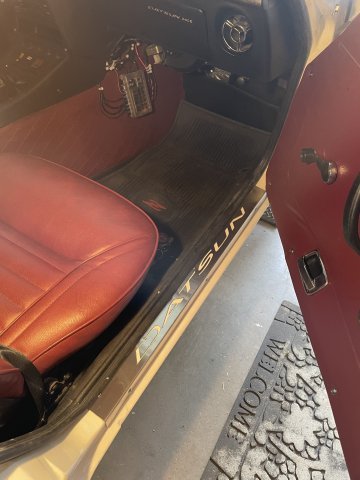
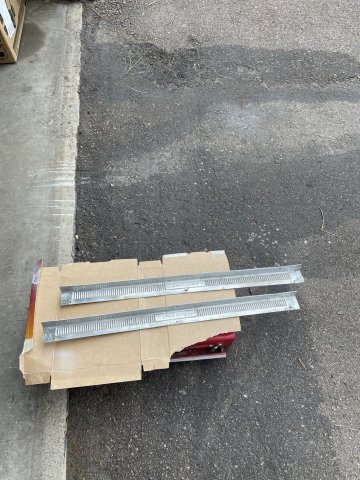
05-25-2024 UPDATE: I went ahead and prepped and installed some fuel hose breathers. When I open the gaarage I can smell fuel, so it obviously is coming from the vents. I was able to get both off to Amazon. My door sill plates from Skillard came in, and I put them on, and I managed to notice 2 little dimples I have on my hood h Techno Toy Tuning strut bar and tri bar setup. I guess it clearanced itself! Not supposed to do that, but it's already done. I tried the push button hood pins, over and over again and I just couldn't get it right, so I am going to switch and go to the old school pin and clip type. Oh! I polished the aluminum block off plates for the hood and old hood latch areas and installed. Then I started her up, she started right up and purred like a kitten. Good day! See the pics!
-
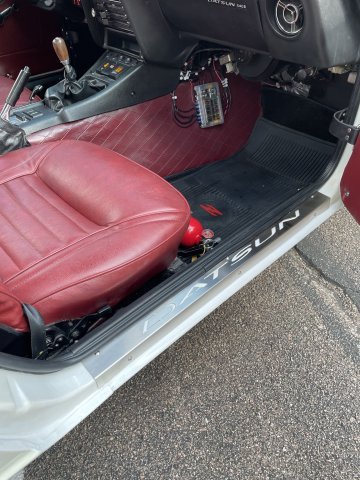
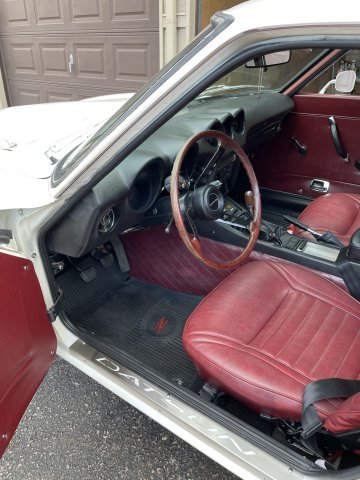
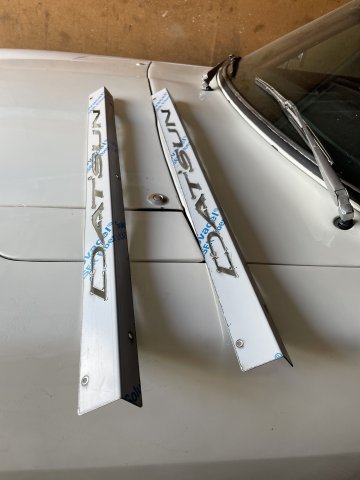
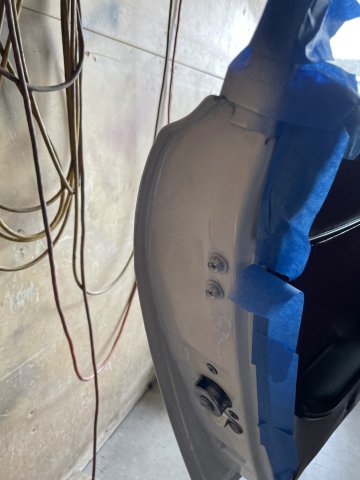
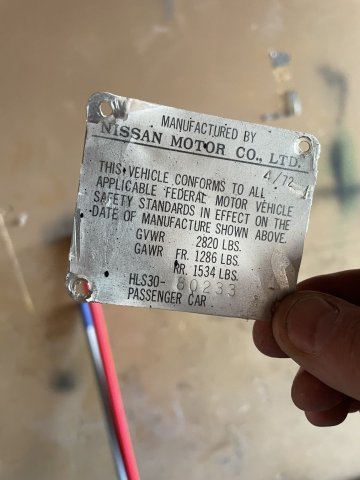
05-16-2024 UPDATE: I re-installed the door latches after a cleanup and clear coating. New mounting bolts for them as well as matching washers. I also ordered from Skillard the door sill plates in brushed stainless with "DATSUN" cut out of both. They are enroute. Couple pics, you can see I put on the new data plate I ordered off of eBay Motors. Very nice piece. I have a couple of runs I need to sand out once the paint is hard. Cheers.
-
Thanks!
-
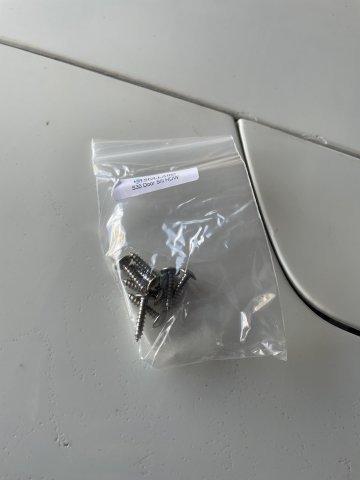
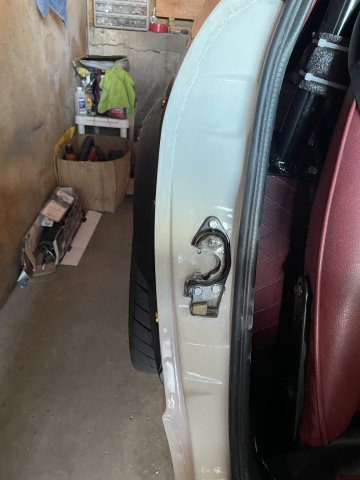
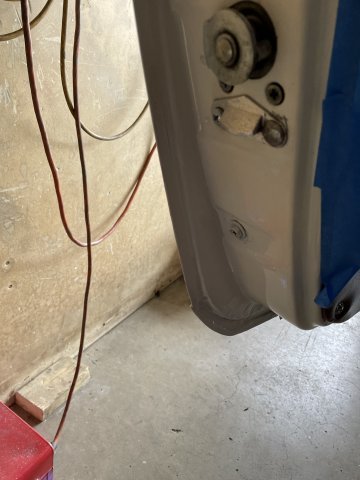
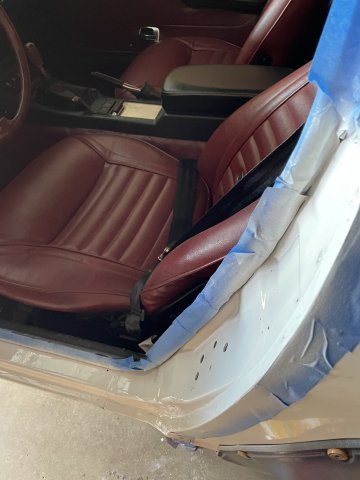
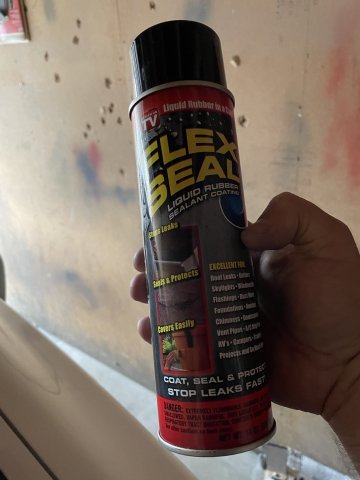
05-11-2024 UPDATE: One of the last things on the punch list is to get the door jambs cleaned up, so I did that today. I also drained out the transmission oil as it is GLP-5 and is bad for brass syncros. I then refilled it with RedLine MT-90, which is of course synthetic, and is GL-4 rated....safe for brass internals. I also went ahead and undercoated the bottoms of my door sill plates. I will take them down to J&S Polishing to see if they can be polished, as you know they are very thin, we'll see! Pics:
-
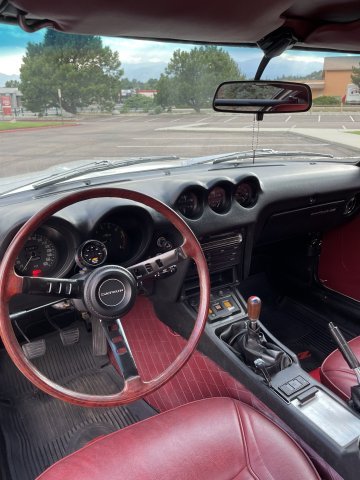
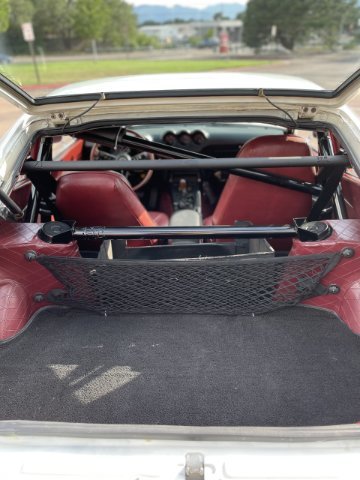
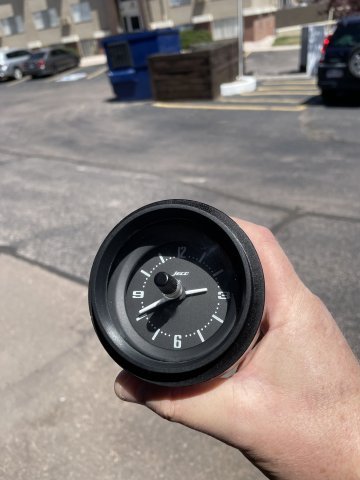
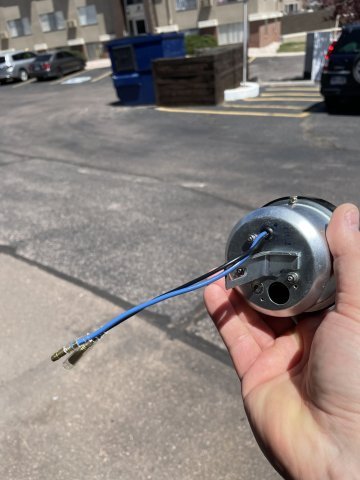
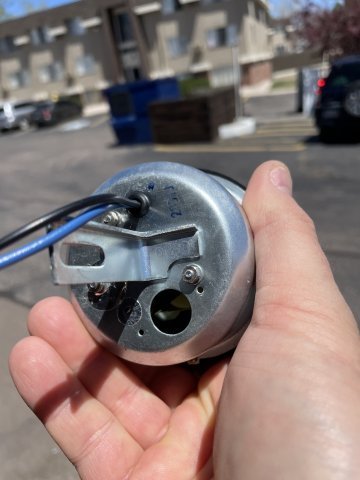
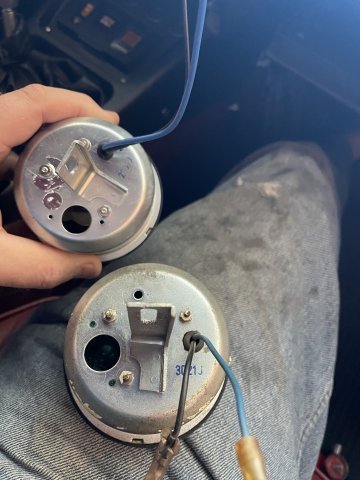
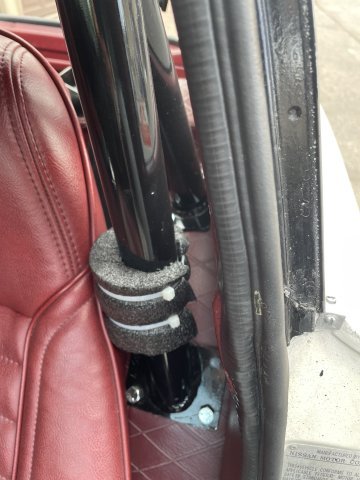
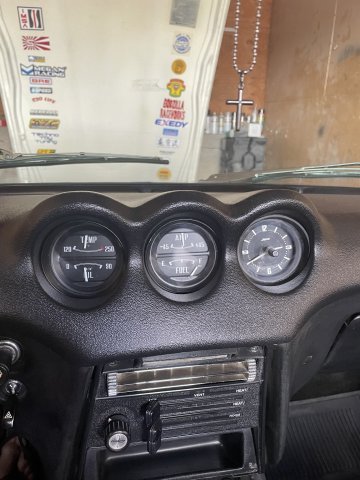
05-01-2024 UPDATE. I recevied my "new" clock from Ron at Zclocks.com. I paid extra for a quartz movement instead of the old stuff, and I had him remove the green light filter, since my gauges are all lit with a white LED setup. Anyway, I installed it today and then covered the 2 spots on the rollbar with rollbar foam where I had removed a rear brace. I then took it for a short drive, and then went about more little this and that finishing things up. I pulled the door data plate off and the "big" job left is to restore the door jambs on both sides, so I have that to look forward to. Aside from the 17" wheels arriving and setting the suspension height for them, the car is basically done. As usual, I took a few extra pics, just to look at stuff from different angles. Cheers!
-
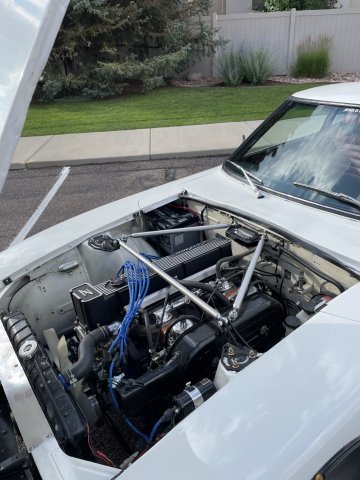
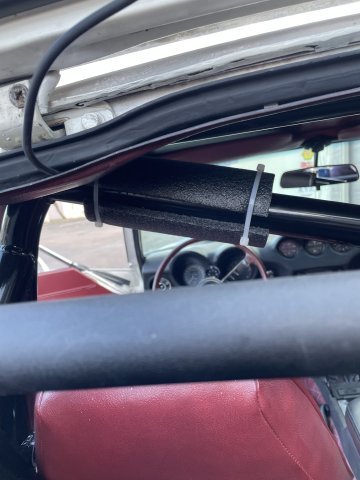
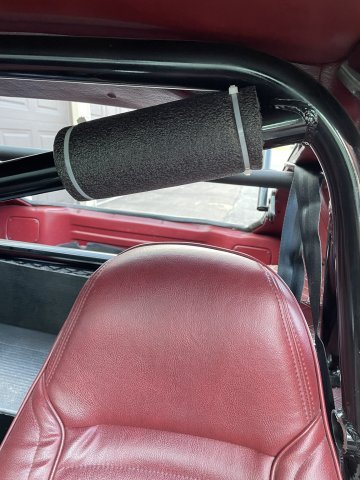
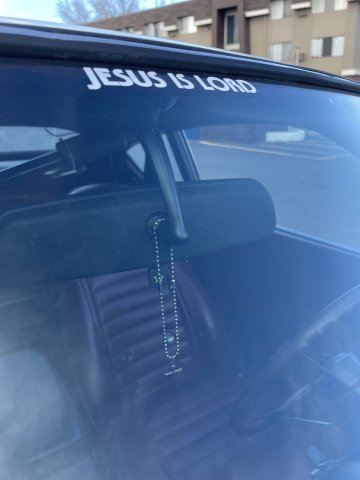
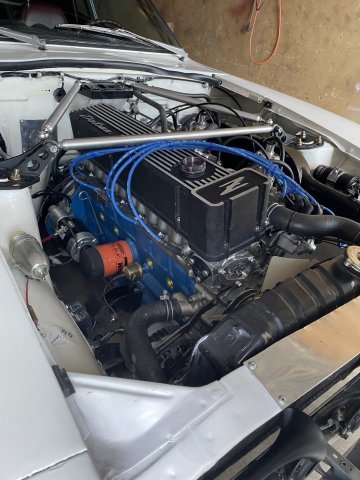
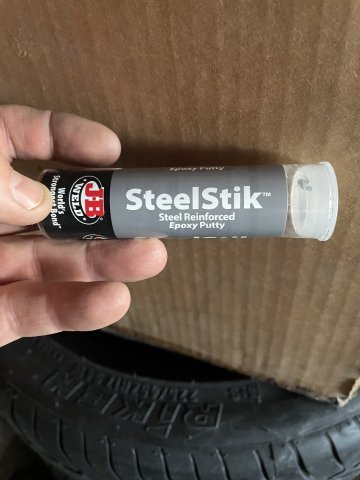
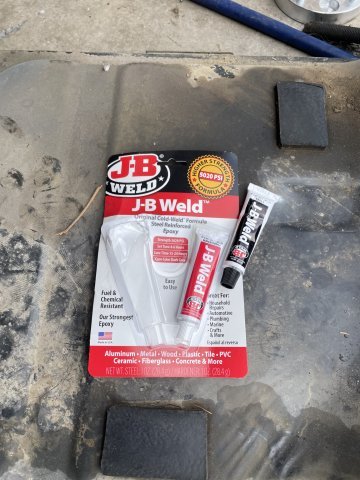
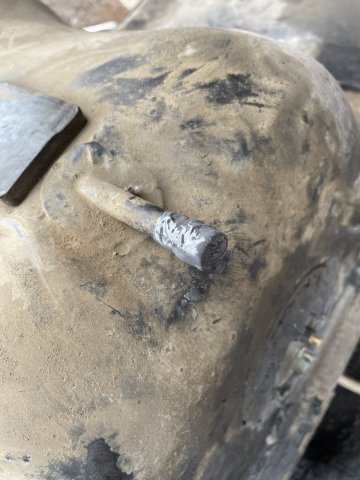
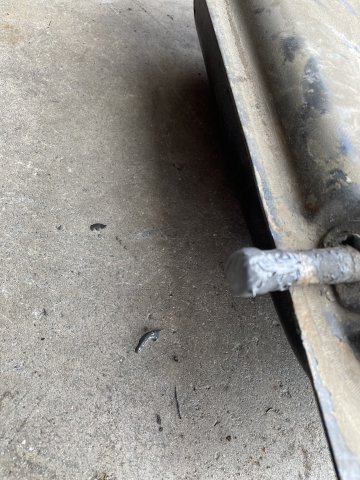
04-24-2024 UPDATE: Ok, so I went out to tighten up the valves, get rid of the looseness and get things "right" in the engine. Mission accomplished! The crows foot wrenches I bought do not work with the torque wrench, there isn't enough room, so I decided to tighten them by the Armstrong, "oougha dooga" method. Engine started up and runs great, purrs like a kitten! I then decided to Leak Test my gas tank, 99% good, the seam on the tank stated leaking...I got some JB Weld Steel-Stick and put it on the seam to stop the leak. I may have to put just a bit more on there, but the majority of the leak is gone. Thank goodness! I added some roll bar foam to the rollbar where my head rests, and I also have the crucifix I bought on my deployment to Afghanistan back in 2009 hanging from the rear view mirror now also. I also got it out and drove it just a little bit, it's so nice to have it running better and better every day. The rear drums are working well, but the e brake has to be pulled up high to work, so it's either adjust the handle form underneath, or replace the cable as it is stretched. 2 Videos are available to watch if you desire. Click on "facebook" below for each video. Cheers! To watch videos, click on Facbook below for each video. (7) Facebook (7) Facebook
-
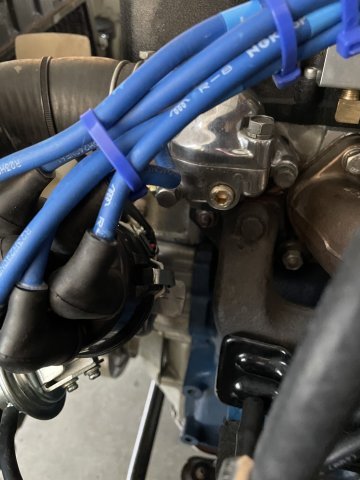
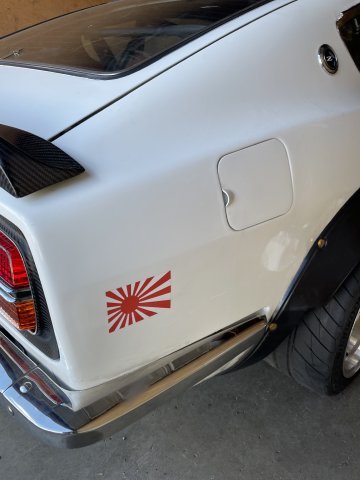
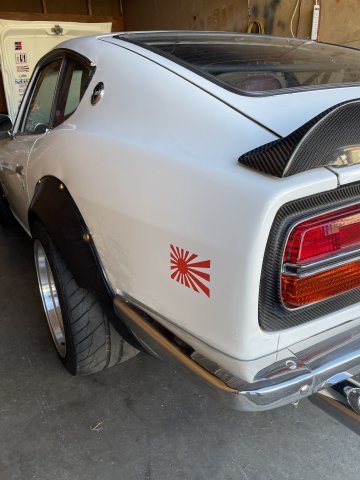
04-16-2024 UPDATE: Took the day and started with getting the Water Temp gauge working.......great feeling, had to dig back though the wiring to find the right wire and test it....really glad it's fixed.....I am noticing since I fixed my gas tank, that it is reading full when I poured 1/2 tank back in it.....and when I turn it off, the gauge doesn't fall completely back to E. I hope it will striaghten itself out once I get it out driving it around and fill it up for another leak test. I repalced the in tank sensor and it was worrking great....hmmmm. I ordered a repalcement clock from Ron at ZClocks. Upgraded to the Quartz and I am having him remove the green light filter, as I am using white LED bulbs. I also received the tires for my new 17" rims that are coming. I went with the Riken Raptor tires 225/245 45ZR17 size. They were on sale at Tire Rack, and they are a ZR rated all season.....I only drive on nice sunny days, but they will work. Less than $100/tire! Free shipping too! I jumped on my rear drum brakes, adjusted them to where the tire spins 1/2 turn or a bit less.....so they're right on, and so far, parking brake looks to be good as well. STRONG pedal feel. I rebuilt them completely a while back, but never did the adjustment...no wonder they didn't work! Torqued the wheels back on and then I noticed all of a sudden a really loud clacking sound while idling. Turns out 2 valves worked loose! All better now. Added some of my Walmart oil.....this is really good oil! Also finally got my Rising Sun stickers, put them right where I want them. Here are some pics. To view Video, click on "Facebook" below and scroll to the end of the pictures. (4) Facebook V1.MOV
-
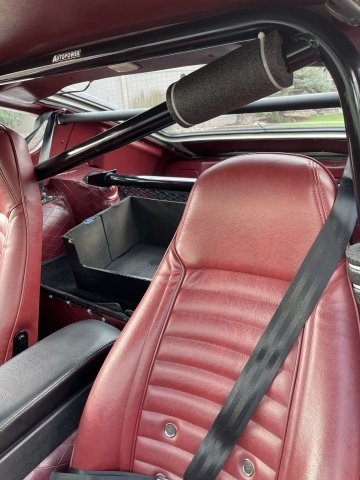
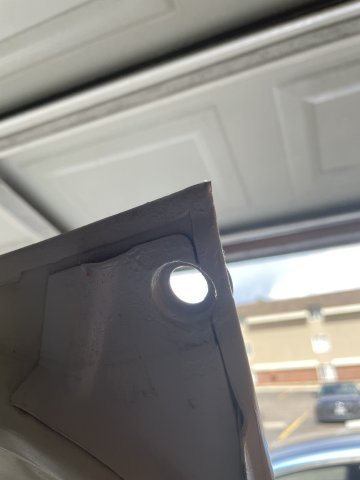
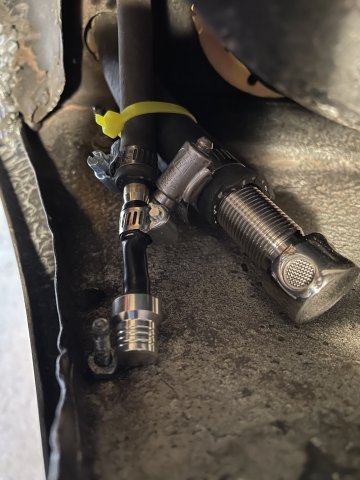
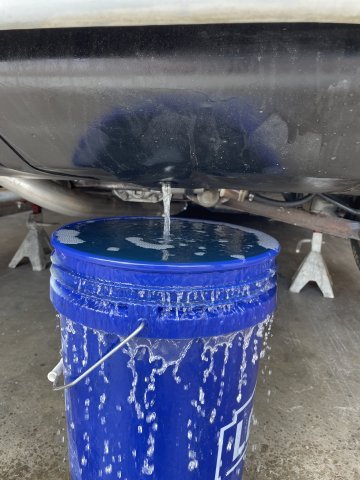
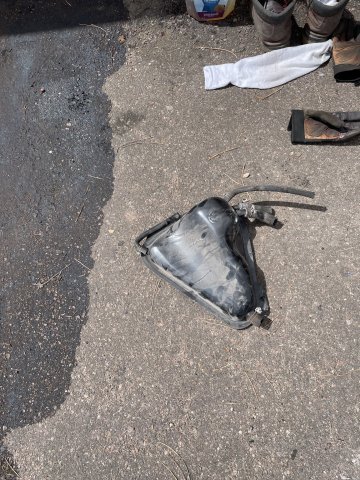
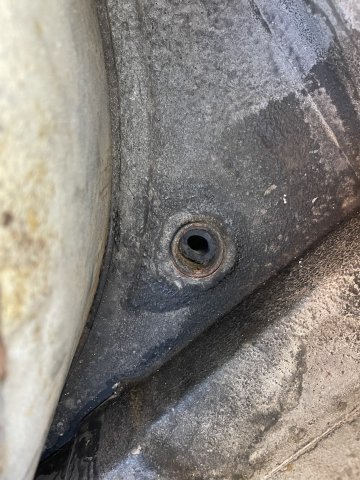
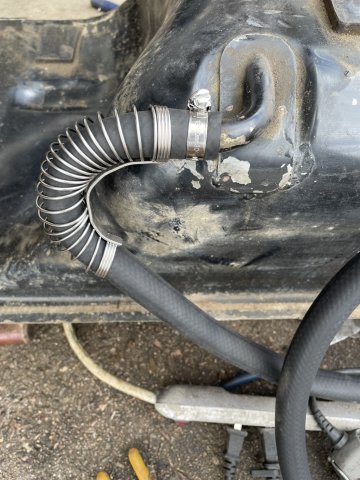
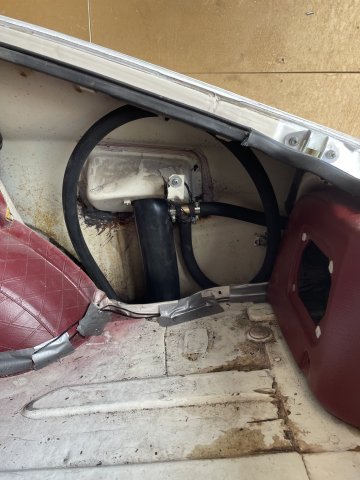
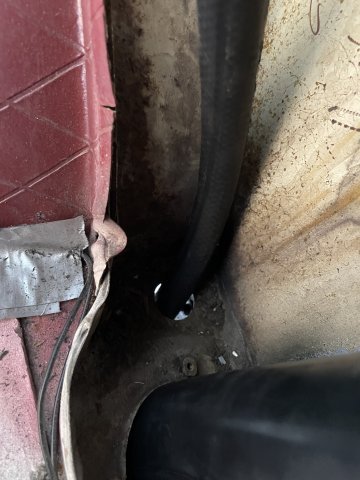
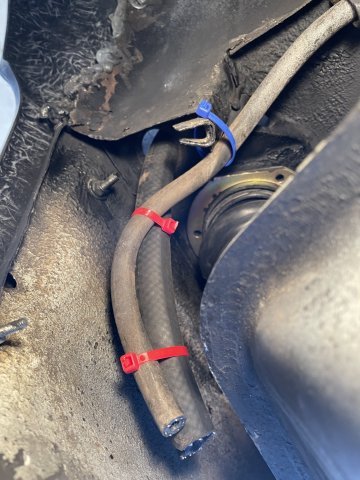
04-13-2024 UPDATE: So ordered the parts I needed to redo the hoses on the gas tank as well as a new filler neck, and decided to just get it over with and do it today. Very straight forward, but yes it is messy, and when I was letting the fuel drain, I walked away for a bit and came back to my 5 gal bucket overflowing! I blocked off the small port above the lines that feed and return from the carbs, and the driver's side port with copper plumbing caps....3/8 and 1/4. They did NOT fit right on, I had to use the dremel and open them up and then hammer them on. I then used the JB Weld to totally encapsulate them so I will NEVER have to do this again! I removed the carbon canister EPA "bag" and then removed all the hoses attached to it. I referred myself to the Z car Page that explained how to do that and used that as a guide (https://l.facebook.com/l.php?u=https%3A%2F%2Fzhome.com%2FRacing%2FFuelTankVaporLineMod%2FFuelTankVaporMod.htm%3Ffbclid%3DIwAR1CRB-K9MEA7BV-iDKRUhF4DIav92s3URvoLfdtm9JEXMoIZa1B12t_VUQ_aem_AYERpFuuWLmDxBWQcg6kDWB5XCyqV31fHhOPXT6lckUUhZyFHzoDsib2tLU11S3eWpEyR8tA5bH2sI_tP6vtGH7N&h=AT1WDx-JsAgk_WyvqIG7dCggOKAEPMcOvU_rP9QO-rEmKJK2ttY50DvJ6-PCI_GWdrjapjaidJhw8LLWxfHl0wpTPLTBeSv8v9P16mBjFCk_W4FHKLVVYJ9ZWtcunQHfdAsA&__tn__=-UK-R&c[0]=AT3tY1wiGHPTWcClhUVohf1JdT9khcNxdIdrsxpRoIL3t22WbWZubTvra0juI7yEygG6OuLpD2kD9_E58MH_ZoetYU0UwBJvIya4nNlS8FwJWwdzxBT8iXdGx4suCF0u1kPcBtxCaurzIpo_D2feerY8kllMHgmoV9WhYbKD6GQMLnrAhny1OPM_UQ24ffyXHQZUxL-GAzQkhUn1euANohA ). I got everything hooked up as instructed and closed it all up. I then poured the gas back in and no problems. Started the Z and let it run for a bit, and again, no leaks. It will now sit and let the fittings, or rather the BJ weld on the fittings dry up. After this, I decided to fix my seating situation in the car once and for all. I have thought of all the different things I could do to give me more room, and finally decided to cut out the lower cross bar on the rollbar. It is for looks anyway, and although I didn't want to do it, I decided that it IS my car after all, and I mod everything anyway, so I modded the rollbar. Cut and vacuumed it up and now the seat position is GREAT, but I need some foam on the rollbar angled bar as my head is against it. I have provided some pics and 2 video's at the end of the pictures. Click on Facebook below "videos" below and go to the end of those pics to see the videos. Cheers! For videos click on "facebook" below and go to the end of the pics, 2 videos in all. Facebook Facebook
-
And now I wonder......how does a guy get to a point where he is bored with his Z car and wants to sell it?
-
As I have fixed little things here and there, small adjustments have had a BIG effect. a tad high idle....I corrected it, and the car came alive even more! As Boston George said....as it runs more and more and all of these changed parts "seat together" it will smooth out, he is right....it is becoming better and better. I now can say it is the car I wanted it to be 3 years ago when I started.....well 2 months shy of 3 years. The stroker is SO strong in the mid range, real street RPM's.....and the brakes are now ON, and the suspension is ON. Really nice to see it come together. Only thing left really is a cleanup on both door sills, rear drums and e brake, and fuel tank fix. It gets quite a bit of attention!