RB30X
-
Posts
150 -
Joined
-
Last visited
-
Days Won
2
Content Type
Profiles
Forums
Blogs
Events
Gallery
Downloads
Store
Everything posted by RB30X
-
Or it would sit in the intercooler. Its not an auto is it??
-
LS1 Alternator Bolts to Belt Clearance Issues
RB30X replied to SUNNY Z's topic in Gen III & IV Chevy V8Z Tech Board
Thanks mate, I did it yesterday. Resessed about 5mm in and ground the lip of the bolt head. Fitted it today and there was heaps of clearance. You two have fun at your sleep over -
LS1 Alternator Bolts to Belt Clearance Issues
RB30X replied to SUNNY Z's topic in Gen III & IV Chevy V8Z Tech Board
Exceptional idea mate. I just removed mine to do the same thing. Two questions, why did you machine new bushes. Couldnt you just machine the original bushes shorter as well?? And did you need to shorten the bolts, you're only talking a few mm longer after the mod to the bracket arent you? cheers -
The Drivers side mount inside the tunnel was there but unused and the passenger side one got ground away a bit to fit the fatty boomba T56. My 'new and improved' cross member has spread the load over more of the floor and also uses the original drivers mount inside the tunnel. Plus I get more clearance for the exhaust.
-
I would have thought the engine and driveline would twist across rather than tilting back, so the LH side of the cross member is trying to flex the floor into the cabin where as the RH side is trying to pull the floor downwards. I'm pretty sure the PO already removed at least one of the original posts to fit the T56. I'm thinking I might remove the gearbox cross member and weld some pieces onto it to spread the load over the floor more. Something like the attached pic. Ideally it would be nice to encorporate it into some new chassis rails.

-
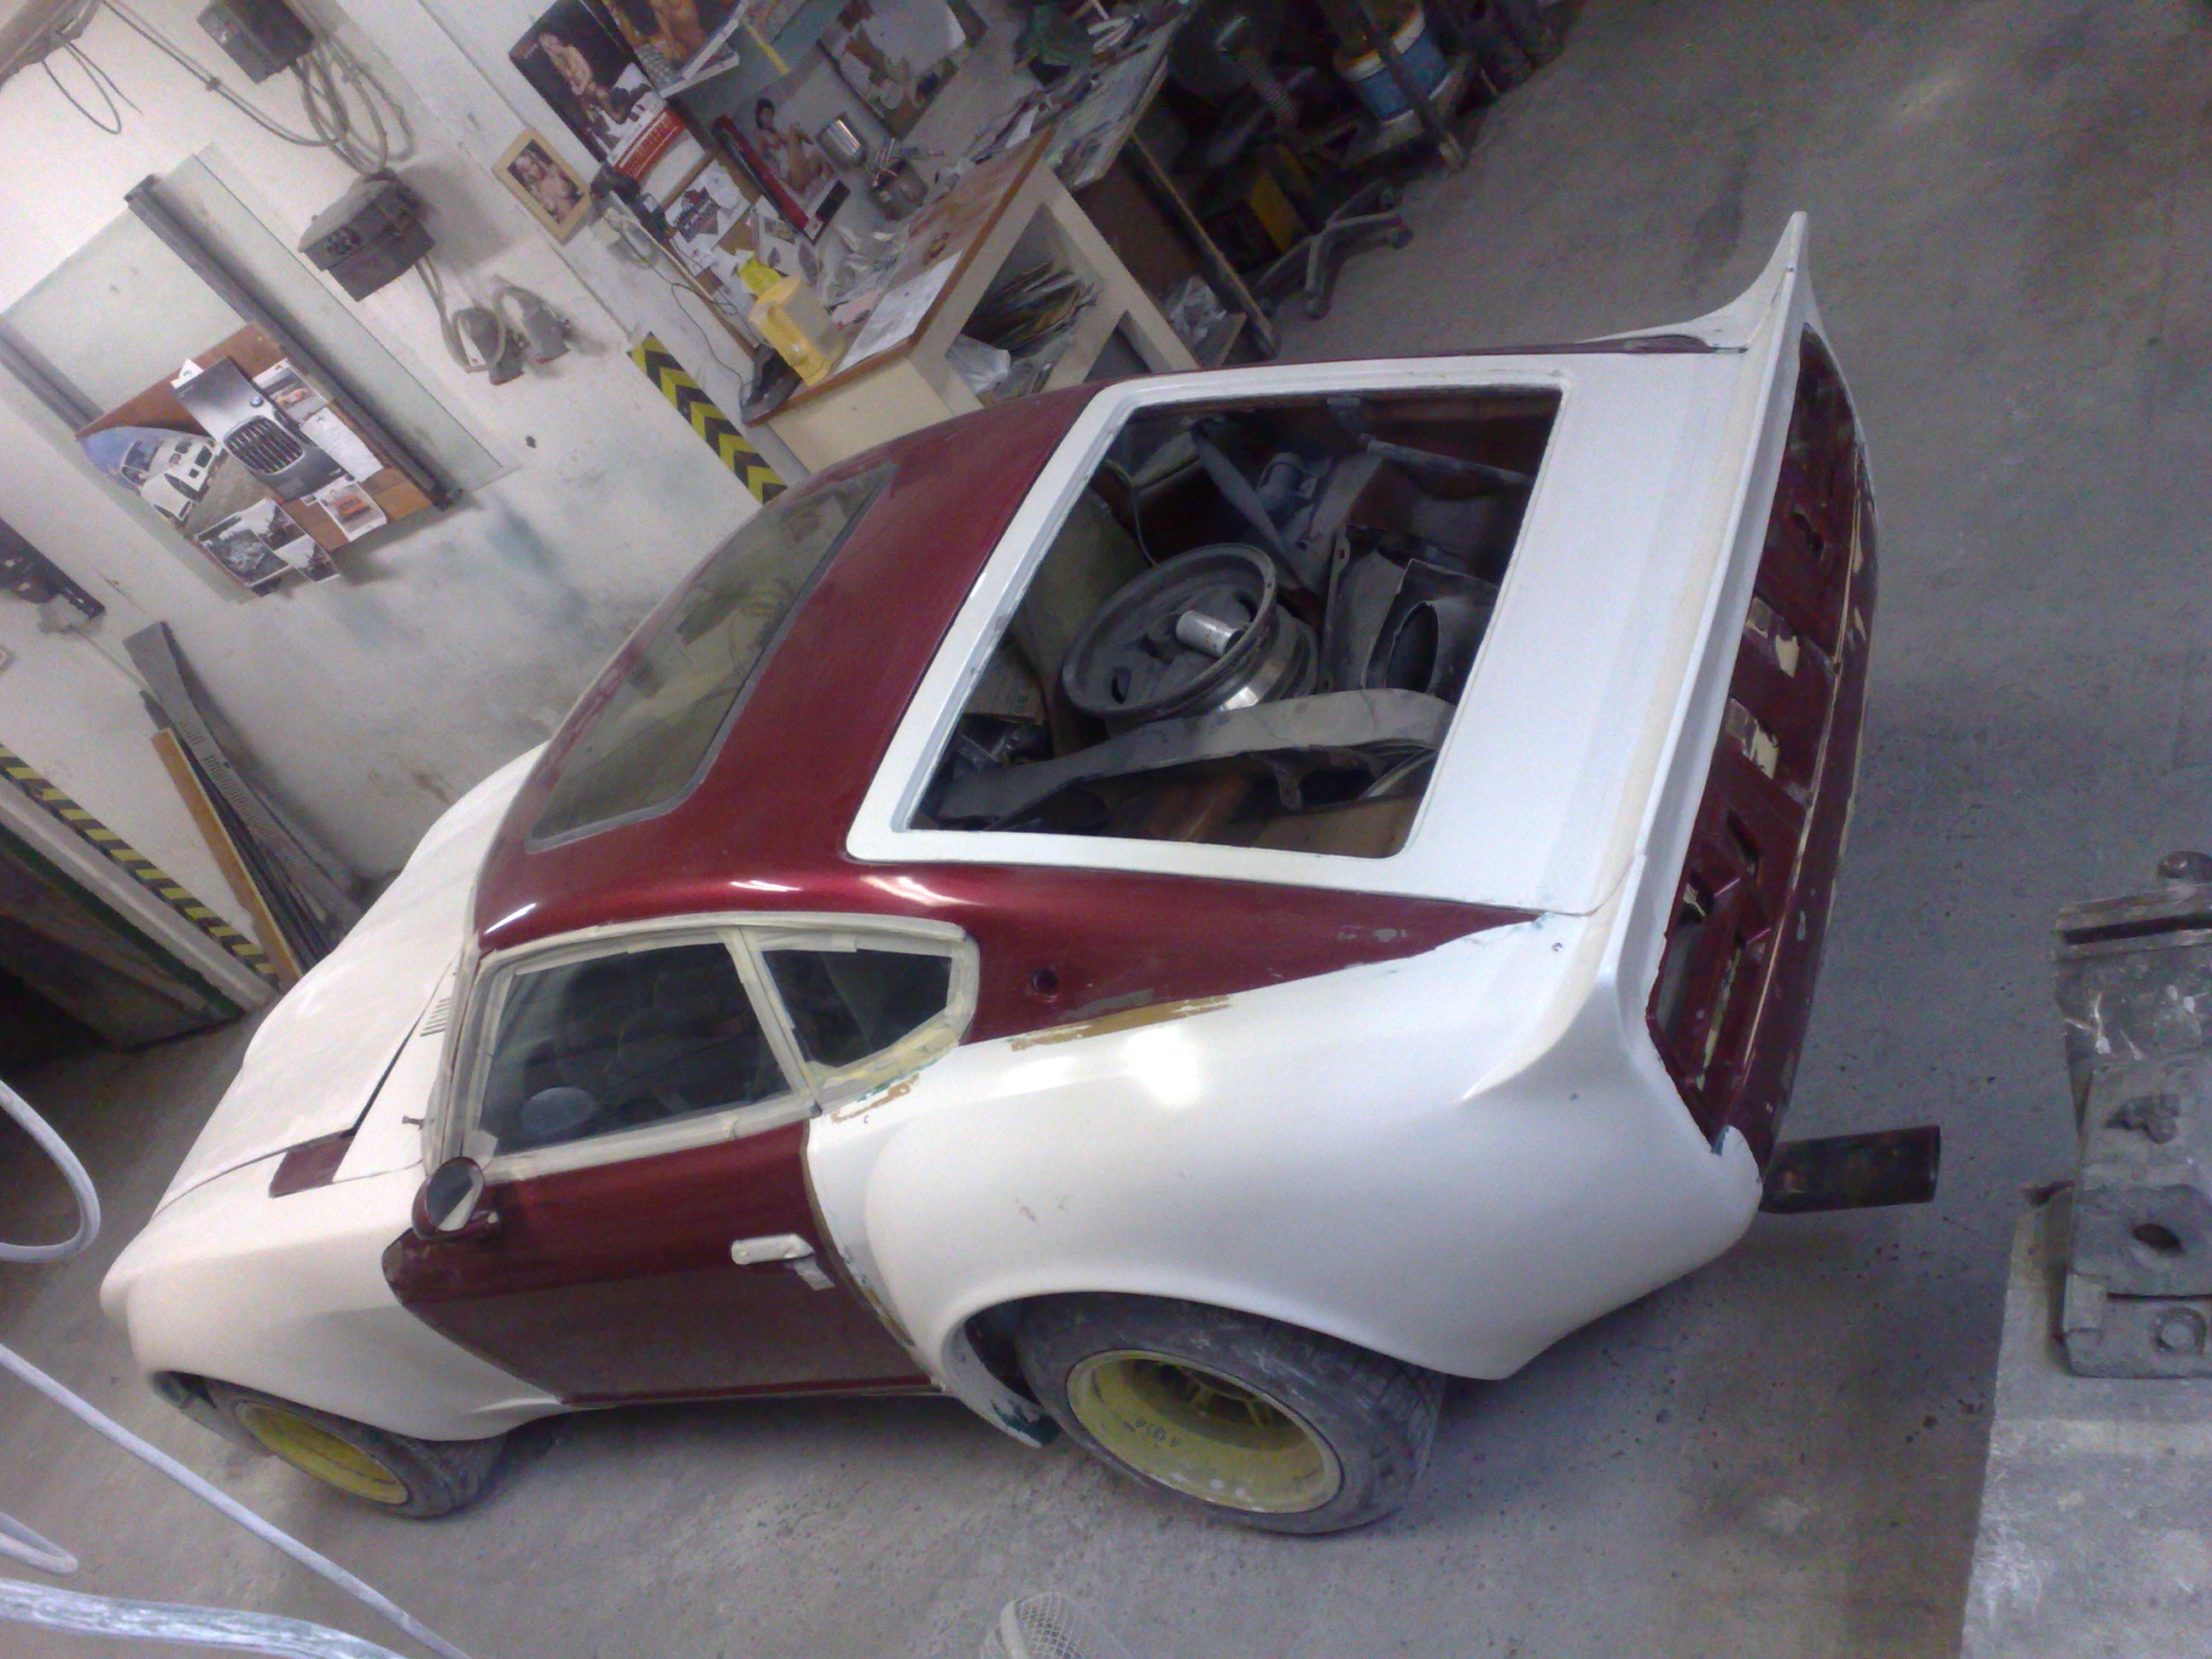
I took my LS1 240Z out to mine and its first track day recently (its actually a large go kart track so its tight and you dont go very fast) and I had a camera record in car footage from the rear strut brace. I noticed something scary after viewing the footage about how much my passenger seat was flexing around during acceleration. Watch the video below and look at how the passenger moves against the LH quarter glass. I spoke to a racing guru and he referred to it as 'oil caning' where the floor is flexing around where the gearbox is mounted due to the torque that these brilliant engine put out. Now my car has coil overs with stiff springs and I run the stickiest street tyres available. The only real chassis strengthening I have done is the rear strut brace. I do have an old front strut brace which I have to modify to fit over the LS inlet manifold. My mate recommends strengthening using an X type pattern across the floor, with braces across the trans tunnel to keep the floor ridgid. I would encorporate the transmission mount into these braces but I'd have to work the exhaust around all this and I already think it hangs too low. I may even put some supports inside the cabin and foot well, along the floor around where the seat rails are. I'd like to see what others have done to strengthen the undersides of their cars to prevent the floor flexing around as mine does. Below is pics of how my trans mount bolts to the floor.
-
Are they still your 16" rota's Stivva or did you photoshop them bigger??
-
Hi Rb30x
I would like to know if one of these kits will work in a vl commodorer,it has a 4 speed jatco in it,and how much do they cost.
thanx sharpy.
-
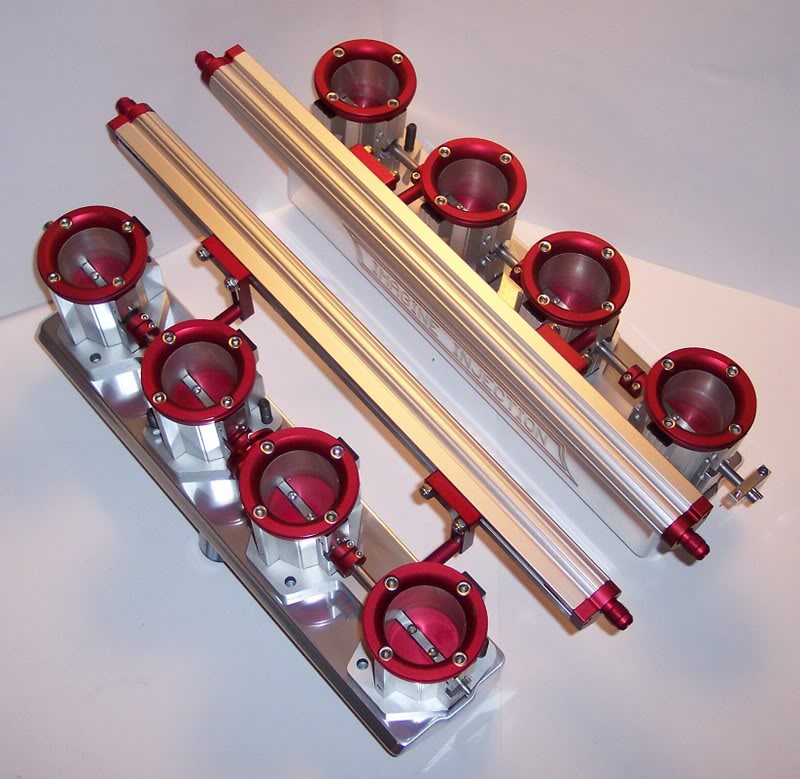
Alloy LS1 intake manifold flange availability
RB30X replied to RB30X's topic in Gen III & IV Chevy V8Z Tech Board
Well looking at their site, their LS1 kit with the lot is $3900 and the manifold alone is $1650. Thats a lot for two pieces of aluminium. -
Does anyone know where or if I can purchase just the flange seen below which seems to comes as a kit with the throttle bodies. I'm making my own LS1 ITB project with motorcycle throttle bodies and just need the cathedral port to circle shaped flange. Thanks
-
So does it smoke now with the auto gone? It sounds like your vacuum modulator diaphram split and let auto fluid suck into your inlet manifold during idle. This problem should be gone with the manual in.
-
Nice project mate. I'd love to see some more pics of those itb's. Also, cant those poor girls on your wall afford to buy any clothes???
-
Hi do you still have those Jatco 4N71B shift kits available, and do you have instructions on how to manualize one. It's in an off road buggy. Regards James james@jtpmachinery.com
-
Ceramic coating would be the best option but I went with the wrap which was cheaper. It apparently helps your headers to rust a little quicker because it traps moisture but I think that is if you don't use it much and let it sit. I ended up using some thermal insulation that goes inside dry walls and cut that out and layed it down under the carpet in the foot wells and trans tunnel and it worked sweet. The stuff is like a plastic for sale sign or election campain sign but not as rigid and with foil coating on both sides.
-
-
DIY Stage III Shift Kit Installation for S30 and S130 Jatco Autos
RB30X replied to RB30X's topic in Drivetrain
Thanks, either way the shift kit still decreases shift times and increases pressure. The 4N71B's over here are electronic and they work fine. cheers -
Yes insulation is a good point. I do have some old stuff under my carpet but it is very thin. I will replace that with some thicker carpet underlay. The engine doesn't really run hot, i've set the thermo's to kick in at 190-200 deg F and they only turn on after it sits for a while at the lights or in traffic. Since I've wrapped the headers I guess the heat is just transfered further along the exhaust so more heat will come through the floor now than the firewall
-
Hi guys, I've got an LS1 in my 240Z and being summer over here where it gets hot, I have noticed the radiant heat coming through the firewall. I was able to remove the LH side headers (non drivers side for me in Australia) and wrap them in fibreglass heat wrap but not the RH side. There was a huge difference between the heat coming through where the passenger could feel it all coming into their side from the 'non-wrapped' header side. I have since been able to remove the LH side header by jacking the engine off its mounts and wrap that one as well but I'd like to hear how you guys have overcome similar heat issues after cramming a big engine in that little space. I heard a story where someone hole-sawed lots of holes to let engine bay air into the section below the windsheild where the wiper motor sits to get sucked out by air passing over the existing vents. cheers
-
Another LS1 Swap (Idle Vid)
RB30X replied to Meaty69Maro's topic in Gen III & IV Chevy V8Z Tech Board
Just a quick question. How do you go about reducing engine bay temps? I've got an LS1 as well and I've noticed a big difference after wrapping the headers with fiberglass heat wrap. Nice car. -
Another LS1 Swap (Idle Vid)
RB30X replied to Meaty69Maro's topic in Gen III & IV Chevy V8Z Tech Board
Cam? -
Diff oil.
-
I recently bought some cheap fuel rails off eBay. The reason they were cheap I’m guessing is because they were pink ……..or purple. Not that there is anything wrong with that. The worst part about owning purple fuel rails is telling your parents you’re ***. I’m just joking. One thing you may notice is I use the correct spelling of Aluminium because I am from Australia and all you guys spell it wrong My plan was to strip the anodizing off the rails after being inspired by a recent article in a local magazine. How hard can it be? Grab some Draino or Drain Clean or something containing Sodium Hydroxide. Oven cleaner spray works as well, but is an aerosol and the application would be different. I sprinkled about half of the little tube on the side of the Drain Clean bottle worth of crystals into an old oven tray. I then poured enough boiling water into the tray to completely submerge a fuel rail. If you’re only doing a few fittings you could use an old cut down soft drink bottle or something that wont melt with the hot water. Now be careful, this stuff is very dangerous and by heating it up with boiling water it is extremely bad if you get it on you or in your eyes. I performed this outside with a fan blowing any fumes away from the house. Give the crystals in the hot water a stir to help them dissolve. Throw a pair of gloves on, grab one fuel rail and lay it in the solution. Make sure you keep an eye on what happens next as the stripping rate will depend on the concentration of sodium hydroxide in your solution. The photos were taken during the stripping of the second fuel rail, and the results were much slower than when the initial solution was fresh and hot. After you really start noticing that most of the anodizing has gone you may wish to drop it in a bucket of water. The reason for this is the surface gets a slippery soapy coating on it from the reaction and it slows the process down. Once in the bucket of water, rub this stuff off the surface with your gloved hands and dunk it back in the tray to finish off the rest. Once fully stripped, give it a wash in the water again, rubbing the surface as before but this time let it sit in the water to release all of the chemical. Once the anodized surface has been stripped, the aluminium is prone to oxidation like any other bare metal surface. I plan on giving my rails a coating of an aluminium de-oxidiser just before I polish them using an aluminium polish. The finish below is straight out of the bucket of water (pre-polish) so you can see it doesn't look too bad already.
-
Bumpsteer spacers - specs or drawings?
RB30X replied to RB30X's topic in Brakes, Wheels, Suspension and Chassis
Anyone?