-
Posts
5399 -
Joined
-
Last visited
-
Days Won
58
Content Type
Profiles
Forums
Blogs
Events
Gallery
Downloads
Store
Everything posted by RebekahsZ
-

Adjustable front control arm options
RebekahsZ replied to wheelman's topic in Brakes, Wheels, Suspension and Chassis
I just bought a pair of TechnoToys LCAs in order to have a bearing that would allow for caster increases. Which hole does the swaybar mount to? Inner or outer? -I might go ahead and put the swaybar link on before I mount the LCA on the car. I have a pretty standard looking swaybar-nothing too fancy. -

LS/T56/240z Project Mentor Wanted
RebekahsZ replied to RebekahsZ's topic in S30 Series - 240z, 260z, 280z
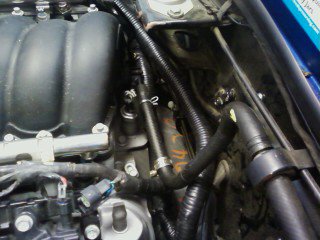
Boy from Oz-I noticed that you took faux intake pic off of thread...where did it go? I have often wondered why nobody makes faux intakes for the LSx motors. It should be cheap and easy with high profit potential. Have you seen any others? I've wondered if this is something to be pattented. What do you think? Send more pictures of your coil relocation - I really like the tubes you are using or wire looms. I have been thinking of Edelbrock coil covers for simplicity, but I really like what you have done. -
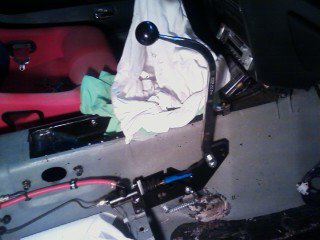
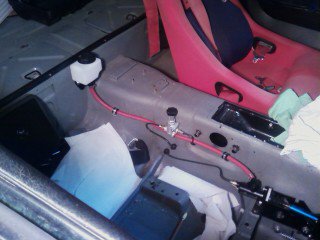
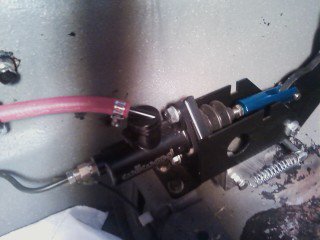
Here are some pictures of the hydraulic handbrake system I'm building. The red line connects a remote reservoir to the master cylinder. The proportion valve is not part of the hydraulic hand brake system, the red line just passes under it along its route. The proportion valve is for the standard foot brake system. The remote reservoir is needed for seat clearance. Someday I will find a straight handle instead of the curved one.
-

LS/T56/240z Project Mentor Wanted
RebekahsZ replied to RebekahsZ's topic in S30 Series - 240z, 260z, 280z
-

LS/T56/240z Project Mentor Wanted
RebekahsZ replied to RebekahsZ's topic in S30 Series - 240z, 260z, 280z
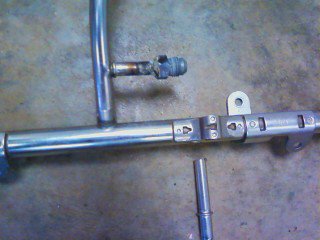
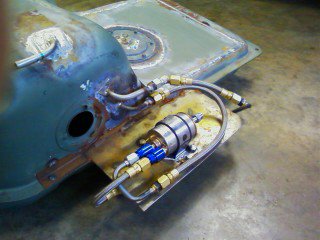
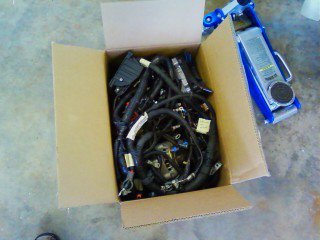
Making slow progress. Have a few more hours on brake lines (argh). Then ANOTHER test fit of engine/trans to make sure nothing conflicts. Then last(?) test fit of fuel tank, then solid 3/8 fuel line goes off to have AN fittings welded onto each end. Once all this plumbing is done things should start moving along a lot faster. Harness sent to wait4meperformance.com. I'm having a lot of trouble deciding where to terminate the remote bleeder for the clutch slave-any suggestions? -
I've seen two types of RT mount on the forums, single bolt and dual bolt. The one I bought is single bolt. How do I put some torque on the bolt without the whole thing twisting? What torque setting should I go for on that single bolt going into the poly mount? Torque setting for bolts into the floor pan? I'm thinking about drilling a second hole and running 2 bolts into the poly mount just to stop the twisting while tightening, but that seems like a lot of work. Any ideas?
-
GOTHALOSISM-I wouldn't give you a discount just for showing a picture with a block in front of your back tire! However, it IS the BEST rear brake system-it is cheap, light, works every time, and easy to transfer from one vehicle to another, with quick, hassle-free install. Of all the answers I've recieved, you silent testamonial has been best!
-

Wheel Show! Post your pics of you wheels
RebekahsZ replied to k3werra's topic in Brakes, Wheels, Suspension and Chassis
RBR Gun Metal 16X8. Stock fenders - unrolled. Have EMI camber plates in front giving plenty of room. Need to install EMI-style camber plates in rear to allow clearance at full bump. If anybody has a tip to allow the center caps to fit on the front - I'm listening-PM me. Please resize pics. 3900x2600 is too large -
How much driveshaft, diff and axle carnage have you had along the way to getting to this point? Please list current driveline setup, gearing, wheels and tires.
-

How much did everyone spend on their V8 Conversion?
RebekahsZ replied to a topic in Gen I & II Chevy V8 Tech Board
Build the 280z. I'm working on a 240z LS2 swap and soooooo many of the changes I'm having to make ae particular to a carbureted car. A fuel injected car (280z) would have saved a LOT of what I'm having to do. -
After all this discussion, I am ordering the brake kit from the supplier in Las Vegas. Shaun Schlappi is his name at ohsofast@hotmail.com; he advertises his kit on craigslist. His kit is a Maxima caliper kit similar to the Motorsport Auto kit, but his price is $400+shipping ($37 for me), while theirs is $785+shipping. The only difference I can see between the kits is that he uses rubber flex lines and they have metal. Also, his bracket is a 4-bolt bracket and theirs is a 3-bolt bracket - I'll cut a chunk of it out to avoid removing my axle stub. I called Porterfield (racing brake pad supplier) and they can supply pads for a Maxima in the R4S and R4 compounds for $79 total. If this kit clears my Wolf Racing CV joint half-shafts, I will order another kit from him minus rotors and try to come up with a modified bracket to accommodate a second caliper on each wheel. Full report to follow in a couple of weeks.
-
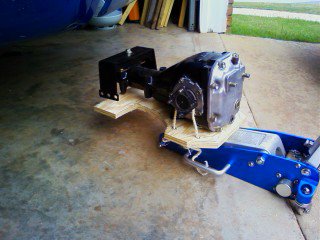
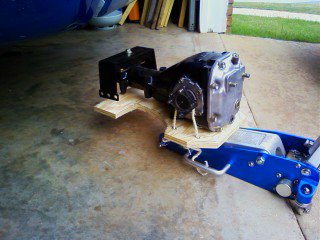
I dropped my R180 onto my head one too many times this weekend and came up with an idea of how to make diff install much easier. I'm putting in an LS2, but I'm going to break my WRx diff before getting anything stronger, then i have access to lots of worn-out R200s that I will try to have welded and then break a few of them before paying thru the nose for a CLSD R200 or even yet a R230 install. Anyway, start with a $59 Harbor Freight lightweigh aluminum jack. Drill two holes in the lifting pad. Cut out a sillouette of the diff from 3/4" plywood and drill some holes in it and bolt it to the jack. Put two ropes thru it to tie around the output flanges so the diff doesn't fall off and break off a half-shaft bolt, and there you have it-a homebuilt diff jack. Makes install a dream!
-
Thanks for the LasVegas brake kit supplier-he is 1/2 the price of the others. Will order a pair from him and see how it goes and provde feedback. I suck at bleeding brakes, but I don't understand why the orientation of the caliper matters, so please help me understand, I'm not trying to sound like a smartie...do we force the air out of the system, or does it rise to the top? I've had to bleed brakes lots of times and the only thing that I have really learned is not to have my wife help me, my daughter does MUCH better and doesn't scream, rip my head off, pinch my fingers or squirt brake fluid all over me. i'm thinking of getting a vacuum bleeder, would that make bleeding the maxima-based system easier? From talking to Silvermine, Modern Motorsports, and AZ Z-car, all of those "big" kits require at least a 16 inch wheel to be confident that the calipers will clear, although AZ z-car says a Konig Rewind 15" will clear. I have 3 sets of 15 inch wheels and swap back and forth a lot, so I really can't use a kit that requires a big wheel. The other issue I may face is clearance of the p-brake mechanism and my CV axles.
-
rally- that looks the same as the motorsport auto kit. Anybody got experience with the motor sport auto "z-store" kit? I'd love somebody to write a camparison article comparing the problems/issues that one has with each of the different calipers: 280zx, maxima, and 240sx. Seems every kit uses one of these as its basis.
-

LSx s30 Longtube group buy thread
RebekahsZ replied to 1 tuff z's topic in Gen III & IV Chevy V8Z Tech Board
That looks great! Where is your starter? Can you remove it without taking off the header? Have there been any changes to the driver side header to try to equalize length of primries? -

LSx s30 Longtube group buy thread
RebekahsZ replied to 1 tuff z's topic in Gen III & IV Chevy V8Z Tech Board
Boy from Oz headers look amazing. Copy as much as possible (LHD/RHD permitting)! -
For those who have actually gone thru an early z-car rear disk brake converstion, which kit is "best?" I'm looking for ease of install, completeness of kit, least amount of modification to kit needed, most hardware provided, e-brake compatability, etc. My plan is to install 2 calipers on each rear wheel, 1 for regular brakes and a second for a hydraulic drifting brake. I expect that I will need to buy 2 kits and have the caliper bracket modified, or a new once made up using one that works as a template. Please tell me your successes and your woes. I'd like to buy a kit and limit fabrication on my end.
-

LSx s30 Longtube group buy thread
RebekahsZ replied to 1 tuff z's topic in Gen III & IV Chevy V8Z Tech Board
Are these supposed to be "equal length" headers? -

Line-lock / Roll-control
RebekahsZ replied to RebekahsZ's topic in Brakes, Wheels, Suspension and Chassis
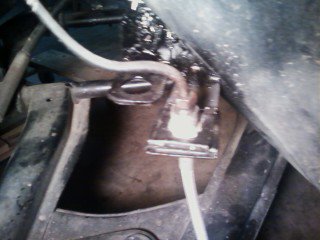
I have relocated solenoid onto firewall while I was doing my LS2 conversion. Turns out I had incorrect nuts on the end of my brake lines. The Hurst solenoid body uses 1/8" NPT, while the SAE nut (red in my pics) is a SAE 3/16 line nut (I think the SAE thread pitch is 3/8X24); the metric line nut is 10mmX1.0 thread pitch. I did not have any leakage in 1 year of use, but I contacted the Hurst website. Proper plumbing is with an adapter 1/8" NPT male to female SAE line nut. I have tried both the SAE line nut and the metric nut: they fit the same with smooth thread engagement and an equal amount of play as you screw them in, so I used the NPT to SAE adapter with metric nuts and 3/16" line with double female flare. -

LS/T56/240z Project Mentor Wanted
RebekahsZ replied to RebekahsZ's topic in S30 Series - 240z, 260z, 280z
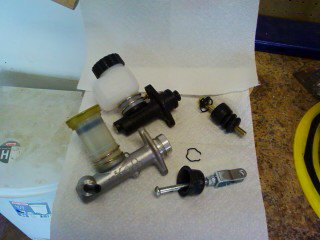
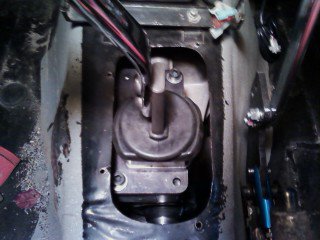
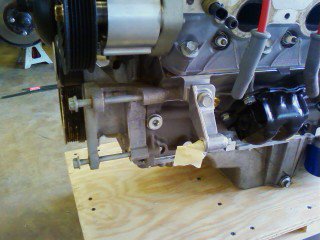
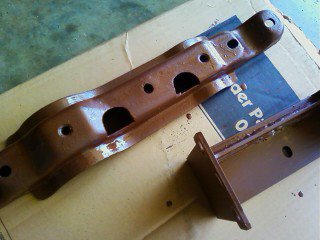
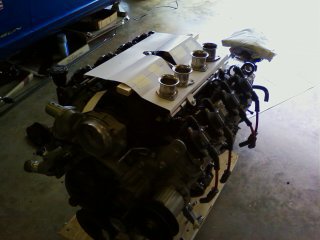
Worked all night Saturday; literally all night and I'm pooped. Finished driveshaft bolts (see that thread) and found another area on the RT diff mount (rubber portion) that needed clearnancing to avoid contacting the diff input flange. Painted and mocked up adjustable technotoys.com LCAs and adjustable zcc.com TC rods (to eliminate rubber bushings by headers and to get caster John Coffey recommends). Removed brakes idiot light manifold from inner fender. Moved line-lock solenoid from inner fender to firewall to make brake line lay out easier. Removed old throttle pedal and linkeage spindle from firewall with angle grinder. Clutch master cyl installed with 240z push rod and adjusted, but no line yet. Then hours of agony bending and fitting, bending and fitting, flaring etc to make all new brake lines to clear exhaust and allow an independed rear system for a hydraulic drifting hand brake. I probably have one more hard day/night to get the rest of the brake plumbing and my 3/8 hard fuel line installed up in the trans tunnel. This car will have a pretty neat braking system with front wheel line lock for dragging and a drifting rear hand brake for drifting. I have plumbed in an adjustable proportion valve, have removed the stock proportion valve and will eventually have two caliper disk brakes in the rear; although I am not changing to disks until engine is done. My hands hurt and I feel like the second day of boot camp. This is one problem with the 240z/LS swap (vs) a 280z/LS swap. With the 280z you can use stock fuel tank and lines. After I get done with plumbing, will go back to prepping motor. Anybody got a recommendation on the easiest place to separate engine from trans (at engine block/bellhousing or at bellhousing/gearbox?) to do mods to the clutch slave cyl (for flex line and remote bleeder hose)? I don't want to get into a can of worms with the clutch/pressure plate. -

Drive shaft bolts for JCI driveshaft
RebekahsZ replied to RebekahsZ's topic in Gen III & IV Chevy V8Z Tech Board
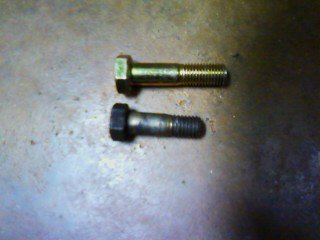
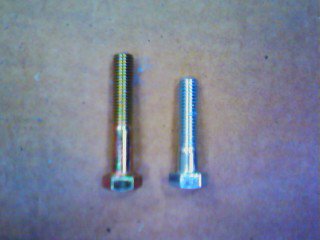
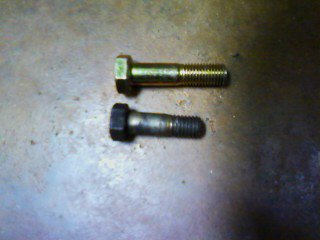
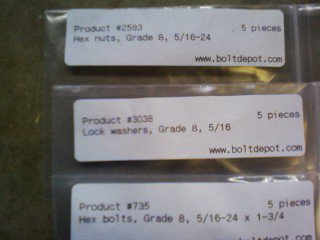
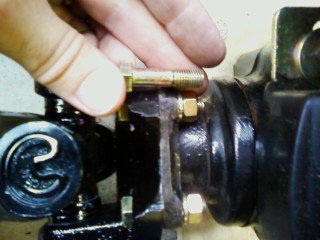
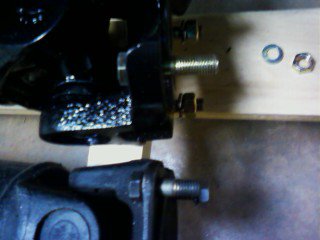
This part of my install is done. See pics. 8mm is essentially same size as 5/16. Sourced some grade 8 size 5/16X1.75 inch bolts from bolt depot. This gave me the shank length I needed to ensure full sized bolt at the junction between both flanges. Shorted bolts had insufficient "shank" or "shoulder". Had to cut off 3/8 inches of threads with dremmel tool with cut-off wheel. Remember to put on a nut before cutting to allow you the clean threads as bolt is removed. One pic shows the shorter bolt that another forum member recommended in a metric 8mm 10.9 spec; the length is good but the shank is too short. Next is comparison between stock Datsun bolt and the modified grade 8 bolt. Then part numbers from boltdepot.com. Next shows how grade 8 bolt shank spans junction of the two flanges. Last shows difference between stock flange (bottom) and JCI flange. Anybody know correct torque setting for 5/16" grade 8 driveshaft bolts (if I can get a torque wrench under car with crows foot socket)? -

LS/T56/240z Project Mentor Wanted
RebekahsZ replied to RebekahsZ's topic in S30 Series - 240z, 260z, 280z
You are right. I was just embarrassed that I asked a redundant question. I really try to search the forums well, but it is funny how I can miss something right under my nose. Admins, please keep thread alive. I'll try to figure out how to make a link to the other thread. -

LS/T56/240z Project Mentor Wanted
RebekahsZ replied to RebekahsZ's topic in S30 Series - 240z, 260z, 280z
Found earlier thread. Administrators, feel free to delete this thread altogether. -

LS/T56/240z Project Mentor Wanted
RebekahsZ replied to RebekahsZ's topic in S30 Series - 240z, 260z, 280z
Yeah, somebody sent me a laundry list of the things to remove, but I can't seem to find it. Spent several hours on search function last night and couldn't find the old thread...

