RebekahsZ
-
Posts
5399 -
Joined
-
Last visited
-
Days Won
58
Content Type
Profiles
Forums
Blogs
Events
Gallery
Downloads
Store
Everything posted by RebekahsZ
-

where to buy L inner tie rod ?
RebekahsZ replied to Fernandoz's topic in Brakes, Wheels, Suspension and Chassis
Wow-a thank you note on this forum! Thank you in return. I hope it works. I think the rack has right hand threads on both sides where the inner tie rod end screws into it. If I remember correctly, when you install the outer control arm, the grease zerk may be on the opposite side depending on the brand of tie rod ed, and there is a little bend to the outer tie rod that will look a little funny going the wrong way, but it doesn't affect performance. Will you please post your results and try to get the administrators to make a sticky note from it? We all have to deal with this supply problem and with my crazy tires and alignment, I kind of eat front end parts. Keith. -
Light-how bad are the cockpit fumes? I like it. I wish we had better options for getting around the differential.
-
Bolt on camber/caster adjustment
RebekahsZ replied to RebekahsZ's topic in Brakes, Wheels, Suspension and Chassis
See bjhines recent build in fabrication thread. He has EMI camber plates and has trimmed his front airdam and has flared fenders. The photos are excellent. From the quality of his build, I would do well to copy anything bjhines does. -
Wheel Show! Post your pics of you wheels
RebekahsZ replied to k3werra's topic in Brakes, Wheels, Suspension and Chassis
I like those XXR 531s, all my wheels have extra holes, and they've got me thingking-the price is great-I don't think I'm thread-jacking. Does 4.5 backspacing match with zero offset? I have some 81 280ZXT 15" swashticas and I just measured the backspacing and it is 4". I'm of the impression that the ZXT wheel were zero offset (?). Then 7" zero offset should have 4.5 backspacing, and 8" zero offset should have 5", right? If my assumptions are right (and I'm asking for advice here), these are going to need some flares or at least a rolled fender. 15X7 is pretty forgiving, but 15X8 seems like a tough fit. I really like these wheels...I'd be running 225/50/15s and have no interest in going bigger. Any advice? PM me if you want to go off this thread. -
LSx s30 Longtube group buy thread
RebekahsZ replied to 1 tuff z's topic in Gen III & IV Chevy V8Z Tech Board
Certified check for $970 cut today, in envelope with a note and a stamp; leaves in the mail tomorrow a.m. -
Bolt on camber/caster adjustment
RebekahsZ replied to RebekahsZ's topic in Brakes, Wheels, Suspension and Chassis
No binding in rear, since you can't adjust caster and don't need to, the rear wheels don't steer. You can adjust camber with aluminum offset bushings, but they transfer a lot of rattling noise into the cabin area-I thought my car was falling apart! I had some and removed them and gave them away. It is funny, as you lower the z, the front loses negative camber and the rear gains some. You get some rear increased neg camber just by lowering. You can use camber plates if you need more than that gained by lowering. I recommend getting your front end sorted out then go race. If you find that you are spinning the car out all the time, then work or rear. The most benefit is gained from fixing up the front end. It might be worthwhile to do something to be able to adjust toe-in in the rear, but it looks like a lot of work. I'm constantly dropping my rear suspension for this or that-I'm chosing to blow off any worry about toe adjustment back there. Last year, the front camber plates made such an improvement, the rear felt twitchy and I had to baby it a lot coming out of turns, but overall the car was much faster and more competitive. -
Bolt on camber/caster adjustment
RebekahsZ replied to RebekahsZ's topic in Brakes, Wheels, Suspension and Chassis
Yes, that's right. I only went with adjustable LCAs for the spherical bearing. I plan to keep them stock length. The camber shots were taken on opposite sides of the car, so that may be confusing. If you look at the white scribed lines, you will see that I lost about a 1/4" of "push in" at the camber plate in order to gain 1/4" of "push back". The EMI and DP plates have bolt holes pre-drilled in them. If you push them in straight you get just camber adjustment, but if you rotate them, allowing one bolt to be in hole number 4 and one to the be bolt hole #3, it rotates the upper mount back a bit. Really, I don't know if 1/4" is even significant. Drive over from Atlanta some weekend and have a look. I'd put you up and feed you. -
I just put 3/8 hard line in my 240z in the stock holders inside the transmission tunnel. It was a major PITA and I would do all flex line for my next car. That gives you less connections as connections are usually where any leaks occur. On straightening the line from a coil: just take your time and straighten it by hand little by little. Your hands will be sore the next day, but it is the simplest way to do it. I got down on the floor with it and wrestled it like a snake at times. Get a case of beer and call some friends over and make a party of it. Better yet, hire a stripper to help you with it. That would be better use of $200.
-
where to buy L inner tie rod ?
RebekahsZ replied to Fernandoz's topic in Brakes, Wheels, Suspension and Chassis
Check with some other people to verify this, but I think you can put a right inner tie rod end on the left side then use a right outer tie rod on both sides. Not positive on this one. I've had my car so long that I'm losing track of the things I've done to survive parts non-availability. I wound up buying a whole rack. Seems like the rack rebuilders can get a left inner tie rod, but the general public can't????? -
Aftermarket Control Arm Failure
RebekahsZ replied to z-ya's topic in Brakes, Wheels, Suspension and Chassis
My head hurts. Lots of good bench racing going on, but what are we to conclude? That the brand of LCA that was bent is crap? If any of us are running that brand, should we replace them before we DNF in the middle of rush hour traffic? I've got TechnoToys LCAs based on JohnC's recommendation and they look like they could survive a nuclear holocost. I've got zccjdm.com TC rods on his recommendation, and on closer inspection, the clevis bolt is bigger than I thought. I'm gonna stick with what I've got. I've been 100% very happy with everything that JohnC has recommended for my car, and he ain't selfish: he often recommends products that he doesn't supply himself. Glad I'm in this club. -
This must be a late 260 that is more similar to a 280z? I have a 240z. You can install it anywhere between the master cylinder and whatever type of fitting splits to the Left and right front wheels. I assume you are trying to lock the front wheels? The pressure sensing switch has only the purpose of lighting the idiot light on your dash if one reservoir loses pressure, so you can bypass or eliminate that, I've never had mine light in 40 years. The proportion valve is on the firewall for 280zs and will have no bearing on the roll control install. Trace your lines and make sure you are looking at lines for the front brakes and not the back brakes. On some master cylinders, the front reservoir is for the front brakes, but for others it is backwards and the front reservoir is for the back brakes. Put tape labels on all your lines to help you map it out.
-
LSx s30 Longtube group buy thread
RebekahsZ replied to 1 tuff z's topic in Gen III & IV Chevy V8Z Tech Board
Sent email to Blake for shipping quote to my zip code. -
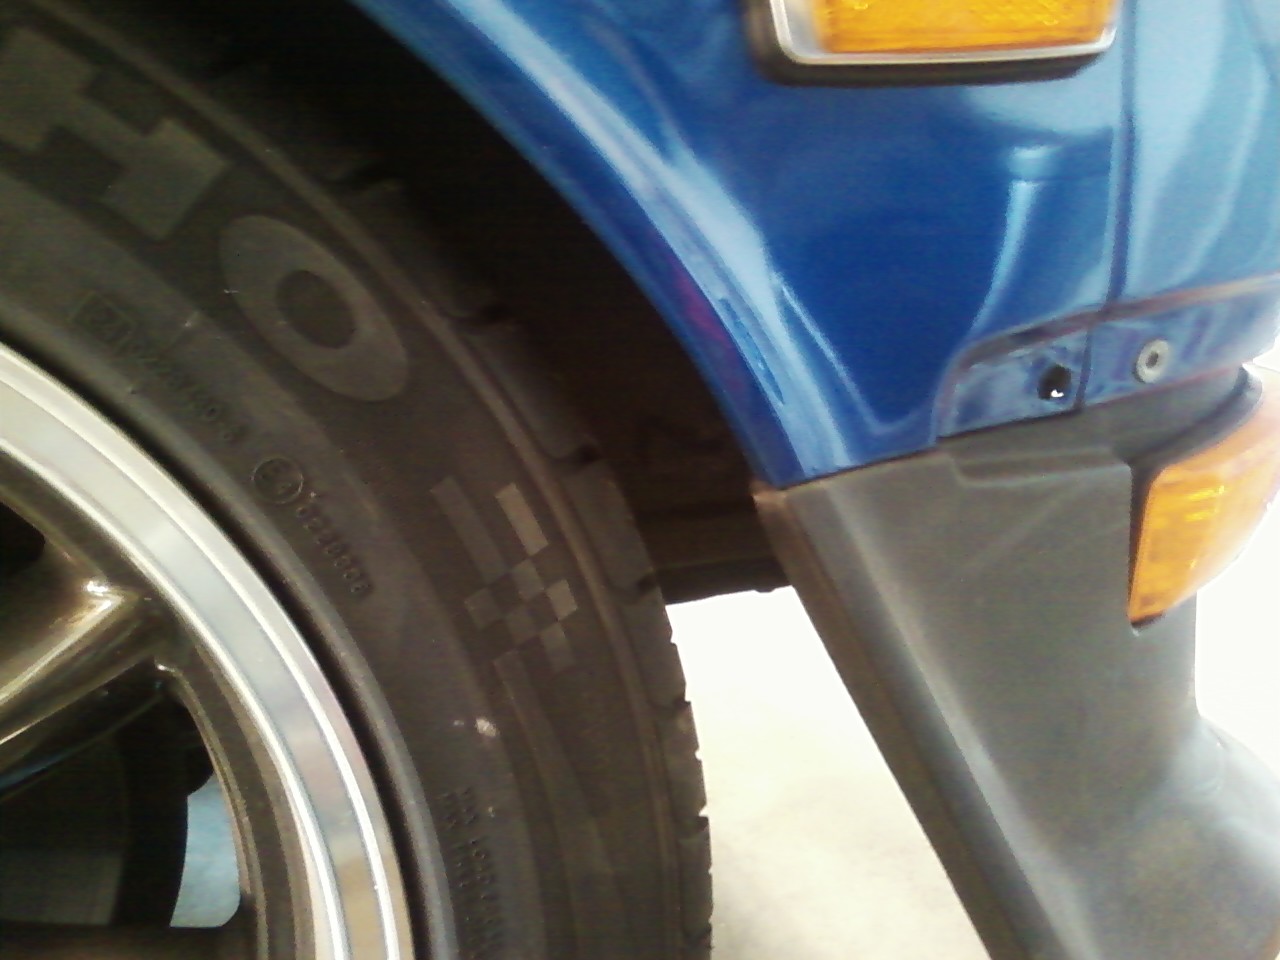
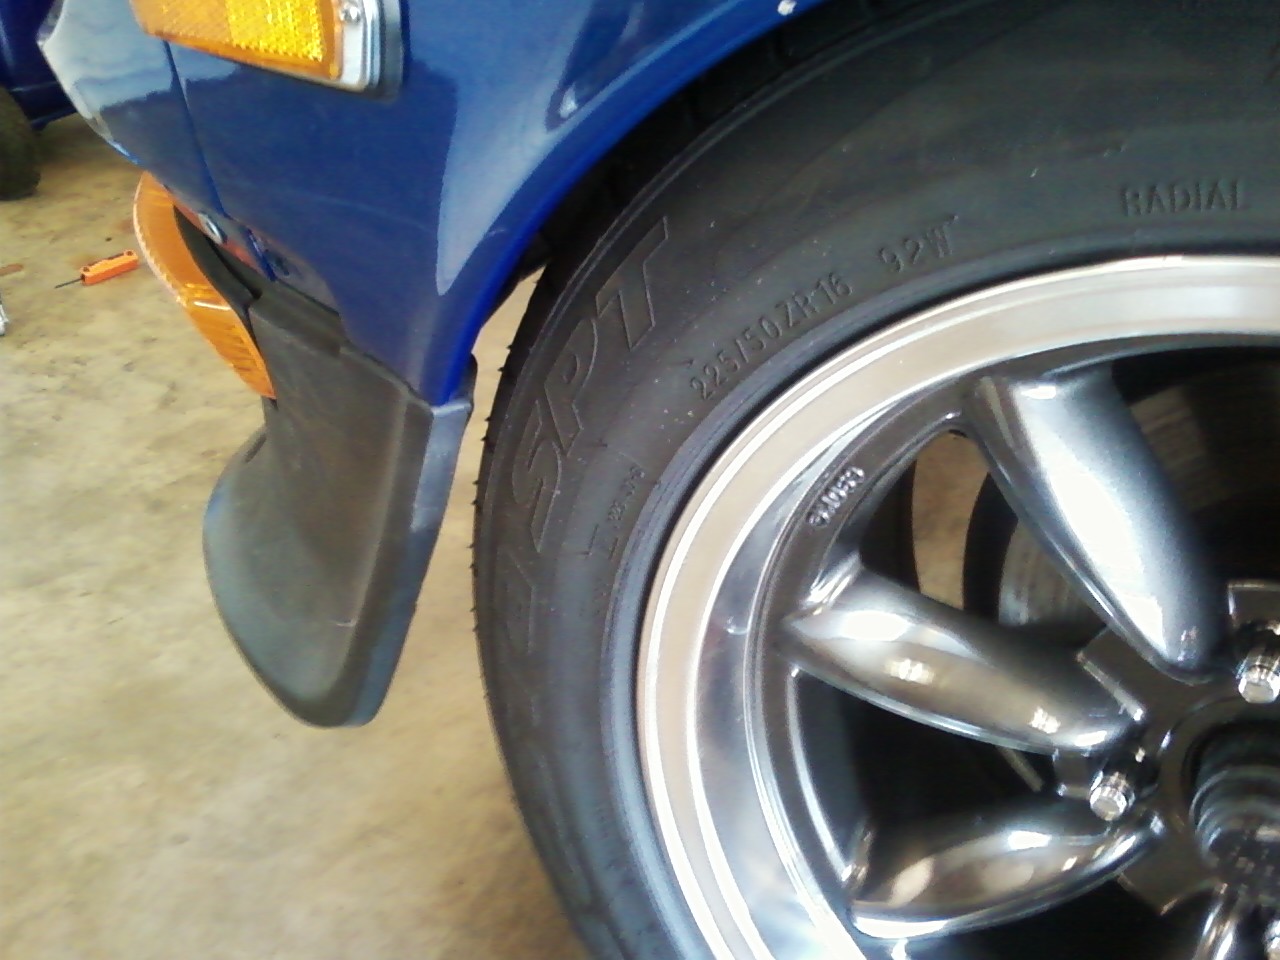
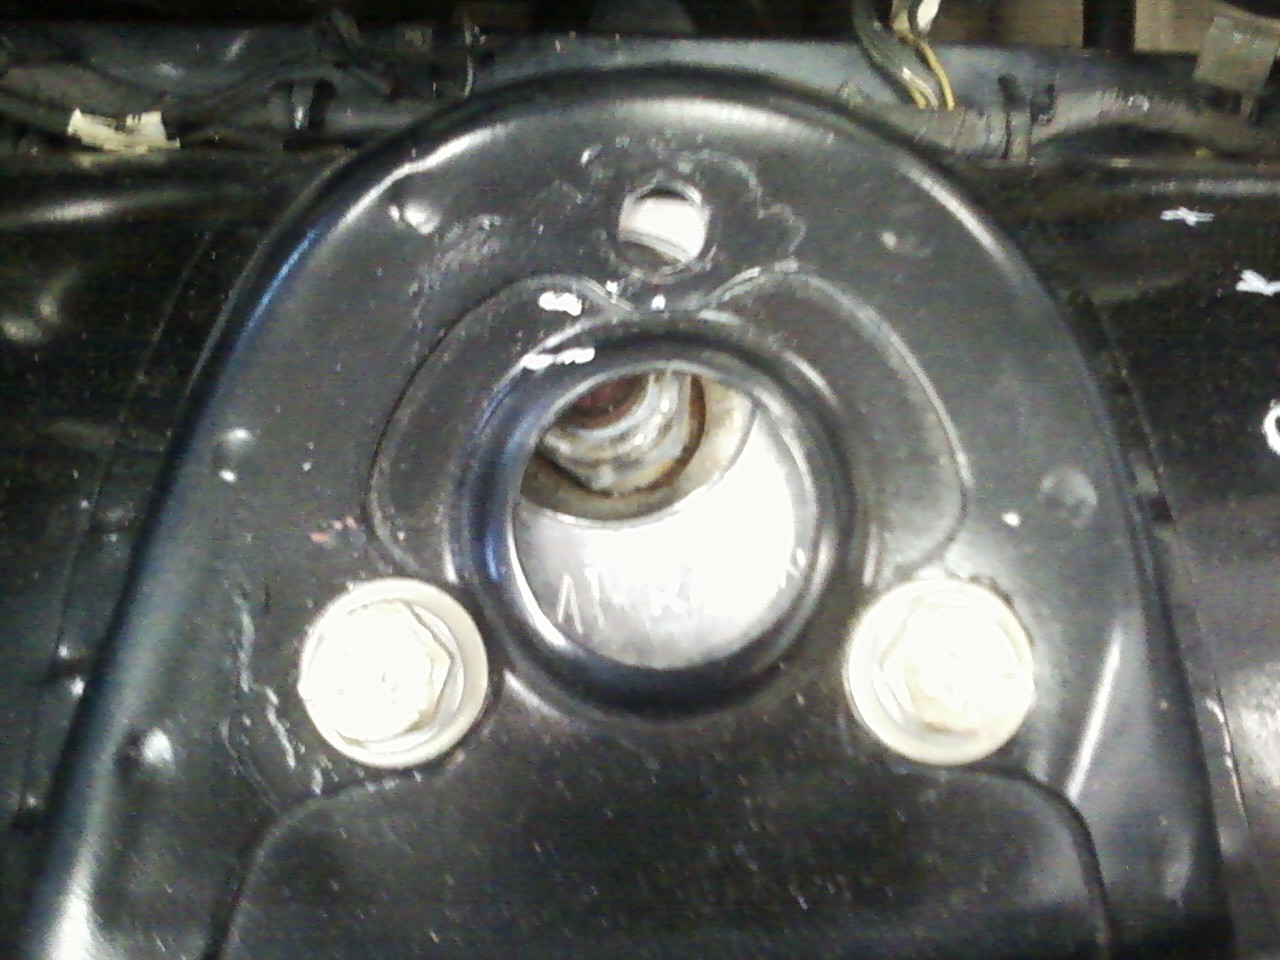
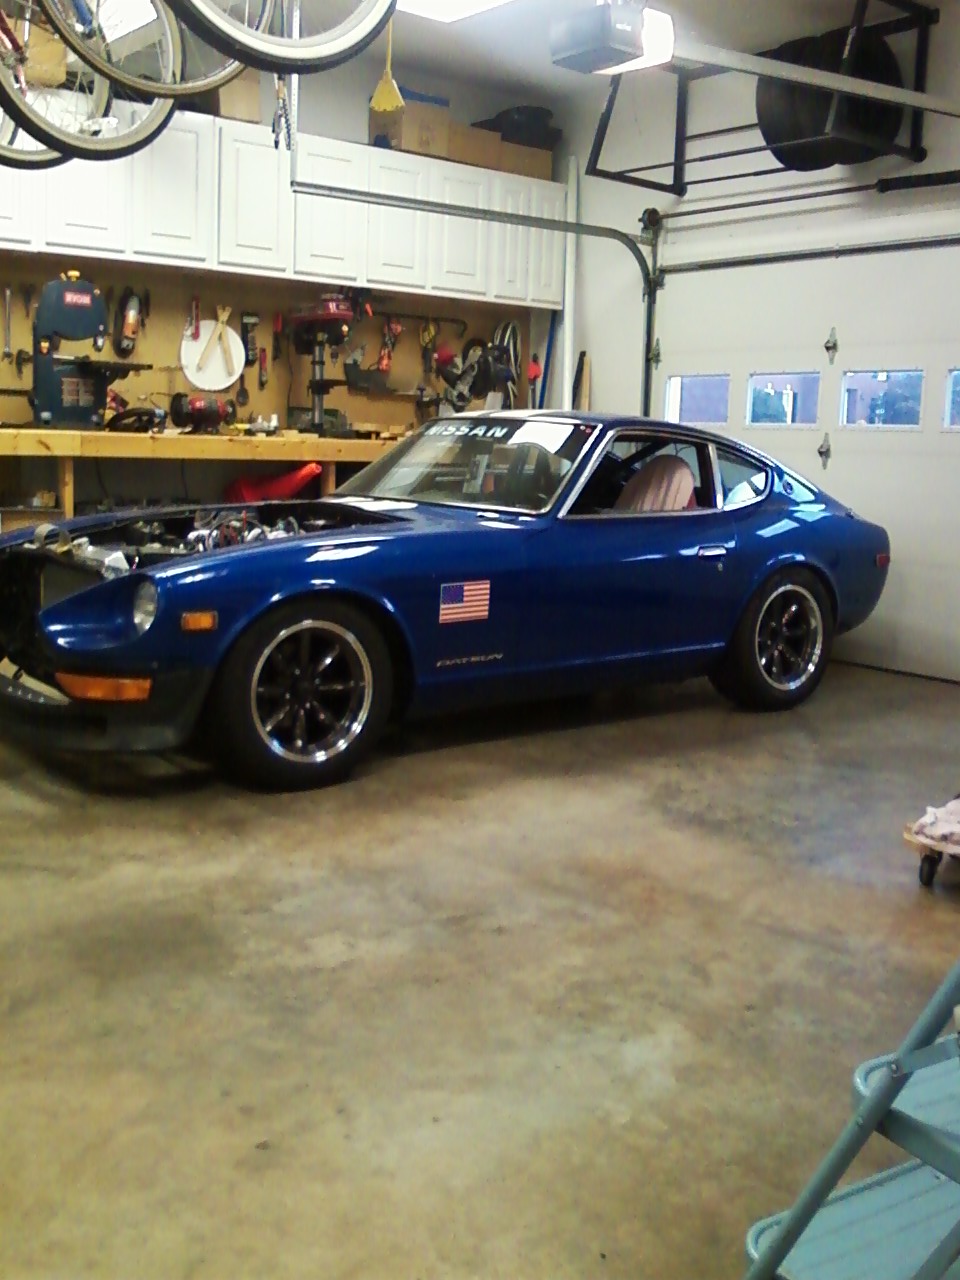
Overview of my experiences with adjustable bolt-on front suspension. I did a coilover conversion 10 years ago, but never worked on camber/caster. I had fixed top-hats that were in the stock location for mounting the upper spring perch. Finally got tired of understeer. Installed EMI camber plates last year and love them. As part of my Ls2 swap, I thought I would try to get increased caster. On JohnC's recommendation, installed zccjdm.com RACE-spec TC rods and Techno Toys' adjustable LCAs in order to have spherical-type LCA bearing to avoid bushing bind. Installed RACE-spec TC rods adjusted as short as possible and wheel was in total contact with front fender and airdam. Unstated in John's recommended alignment specs is the understanding that the front fender and airdam will have to be cut (clearanced). Well, I didn't want to do any cutting-so I decided to compromise and just GET AS MUCH CAMBER AND CASTER AS POSSIBLE WITHOUT CUTTING. So, I got zccjdm.com to sell me just the STREET-spec TC rods. They are 2-inches shorter than the RACE-spec rods. Mocked it all up, and put front tires on ramps. Set ride heigth with coilovers, then started pushing front wheels forward until they were as close as I thought reasonable. Turned steering wheel and found angle of tires where clearance was minimal, then readjusted to ensure clearance. Bounced up and down on fender to ensure clearance, then moved jacks to each corner to ensure clearance throughout range of suspension travel. Set second TC rod to same specs. I have street, drag, autox and drift wheel/tire combos - used widest/largest diameter tires when mocking up to avoid having to go thru this again after a tire change. Rotated EMI camber plate bolt holes to trade a little camber in favor of caster (I had 3.5 degrees of camber)-see white lines on photos to judge effect. I think I'm done with front end until I take it to the alignment shop. Photo key: 1-zccjdm.com adjustable TC rods, 2-fender gap w/ stock TC rods, 3-gap w/ RACE TC rods, 4-gap w/ STREET TC rods after adjustment, 5-comparison of STREET and RACE TC rod length, 6-change in camber w/ EMI camber plate with front bolt in max camber hole and back bolt one hole less, 7-change in caster adjustment at camber plate by rotating camber plate, 8-suspension completed and on the ground.

-
LS/T56/240z Project Mentor Wanted
RebekahsZ replied to RebekahsZ's topic in S30 Series - 240z, 260z, 280z
Got some work done today. Loaded up old L24 and delivered it to a friend. I have room to work. Connected and adjusted e-brake handle (cable e-brake on Maxima Disc conversion works great!). Changed zccjdm.com adjustable TC rods from RACE spec to STREET spec and rotated camber plates to get max reasonable caster and camber without cutting/rubbing front fender or airdam. Will see how much caster/camber it is when alignment is done. Front tires no longer rubbing. Mounted street wheels/tires and set ride height front and back. Everything seems to be clearing.
-
Is your brake system currently stock? If it is, go to brakes and suspension forum and search "line lock/roll control" and you will find my post with pictures. I can walk you thru it if you want. Installed Hurst Roll Control solenoid to front brakes last year. Fun, controlled burnouts. I think I got voltage for solenoid from unused wire where the winshield washer pump used to be.
-
Aftermarket Control Arm Failure
RebekahsZ replied to z-ya's topic in Brakes, Wheels, Suspension and Chassis
I'm with you 30ounce. All these TC rod kits use a single, tiny little bolt to connect the TC rod to the LCA. It looks scary frail and must see all that stress under braking/potholes. I'm interested in trying to find a good way to install a larger clevis and bolt. I have the zccjdm.com adjustable TC rods and TechnoToys LCAs. -
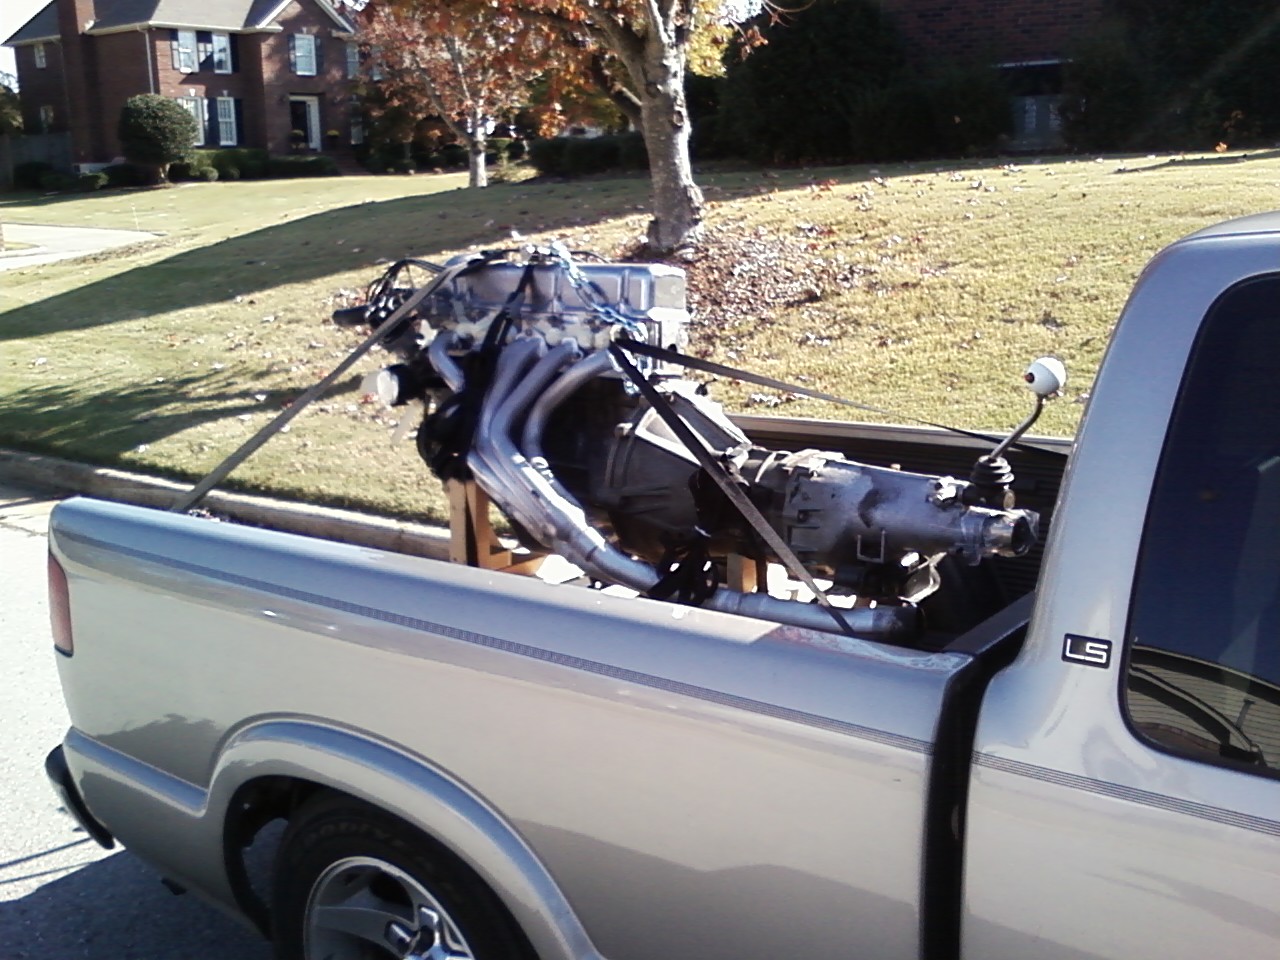
I loaded up my old L24 today and gave it to a friend. I re-built that engine 18 years ago (my first and only re-build), getting pointers from my dad, long-distance on the phone several states away. I've run out of room in the garage and I'm putting an LS2 in my Z, so the engine needed to go before dirt dobbers made nests in it. The engine will be put to good use in my friend's car and I will get to see it running down the road on a regular basis. But Dad is gone now and I'm really missing him today. Giving that engine away was like saying goodbye to a life-long friend; we had a lot of good times together...
-
Look for IceHound on the forum. His car has them. I'd like to exit in front of the rear wheels too, but I just can't see that there is enough room.
-
I've always felt that the Daytona Coupe was copied from the Z-car anyway-haha. So, you swapped a metal Z for a plastic Z. Not to mention that the Daytona is a WAY better investment. Planned power plant?
-
Nothing specific. I just like your cars and wanted to see more of them together. You do have a couple of nice historical pieces. No action required. Congrats!
-
You will be surprised how much crap is in your tank. I fought it for a year and was often stranded with no fuel pressure. I'm not sure if it is rust or if it is some form of fuel-loving algae, but it is orange in color and makes big flakes. Interestingly, when you scrape it off with a plastic spatula, the tank usually looks fine underneath it with OK galvanizing. I had mine cut apart and it was gross-even after I had wrinsed it myself on two separate occasions and even had a radiator shop clean it out. The baffle in the middle just keeps you from getting it clean. My recommendation is to find someone who will cut it apart, then clean it really well yourself before having them re-weld it. I had mine media blasted, but I'm kind of worried that I don't have 100% of the media out of it. Just clean it manually once you have a great big hole(s) cut in it. See my thread on the GenIII V8 section for pics of mods.
-
More pictures please!!!
-
Air bleeder in top radiatr hose
RebekahsZ replied to RebekahsZ's topic in Gen III & IV Chevy V8Z Tech Board
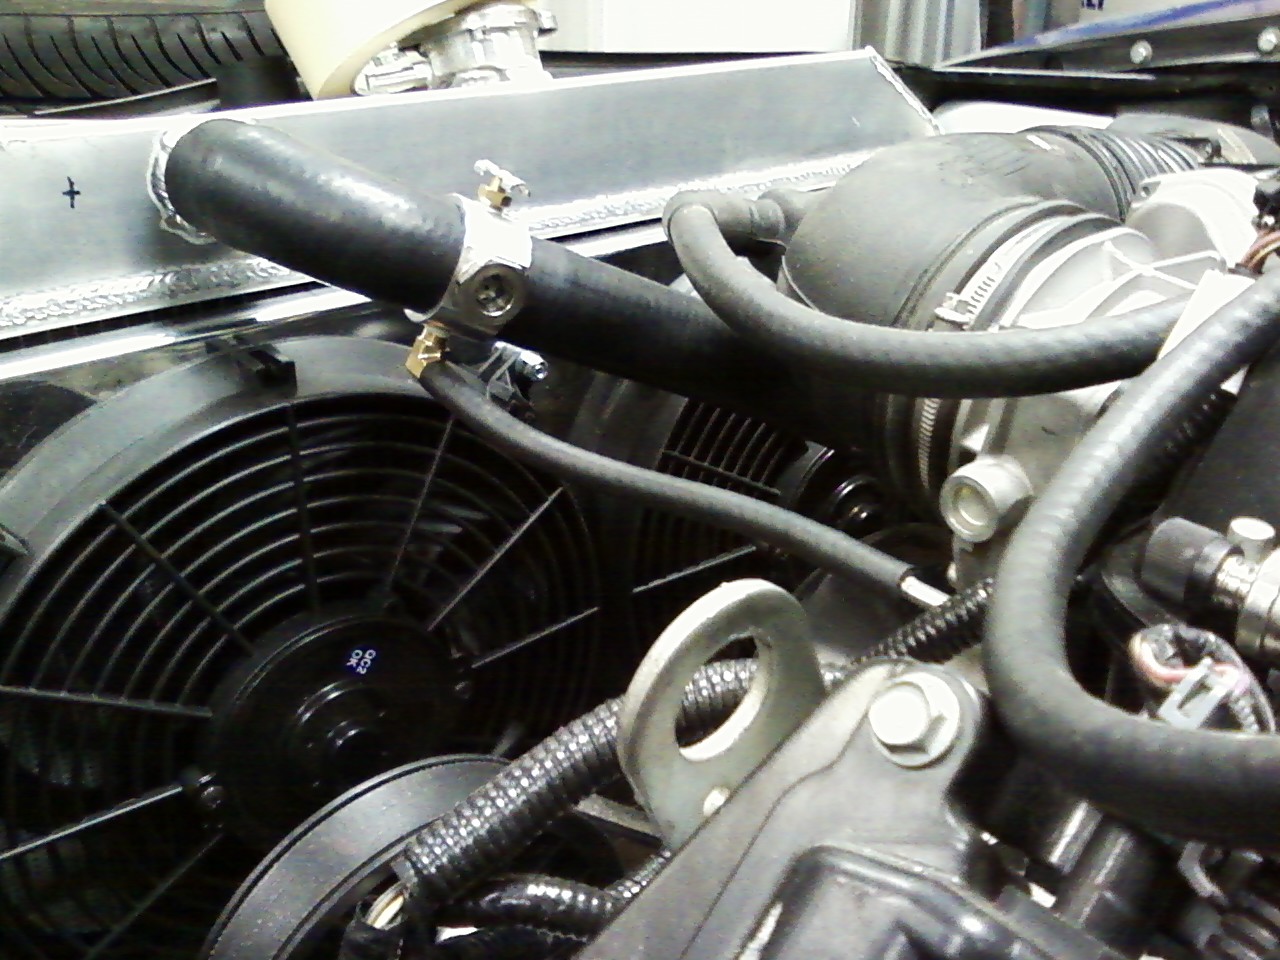
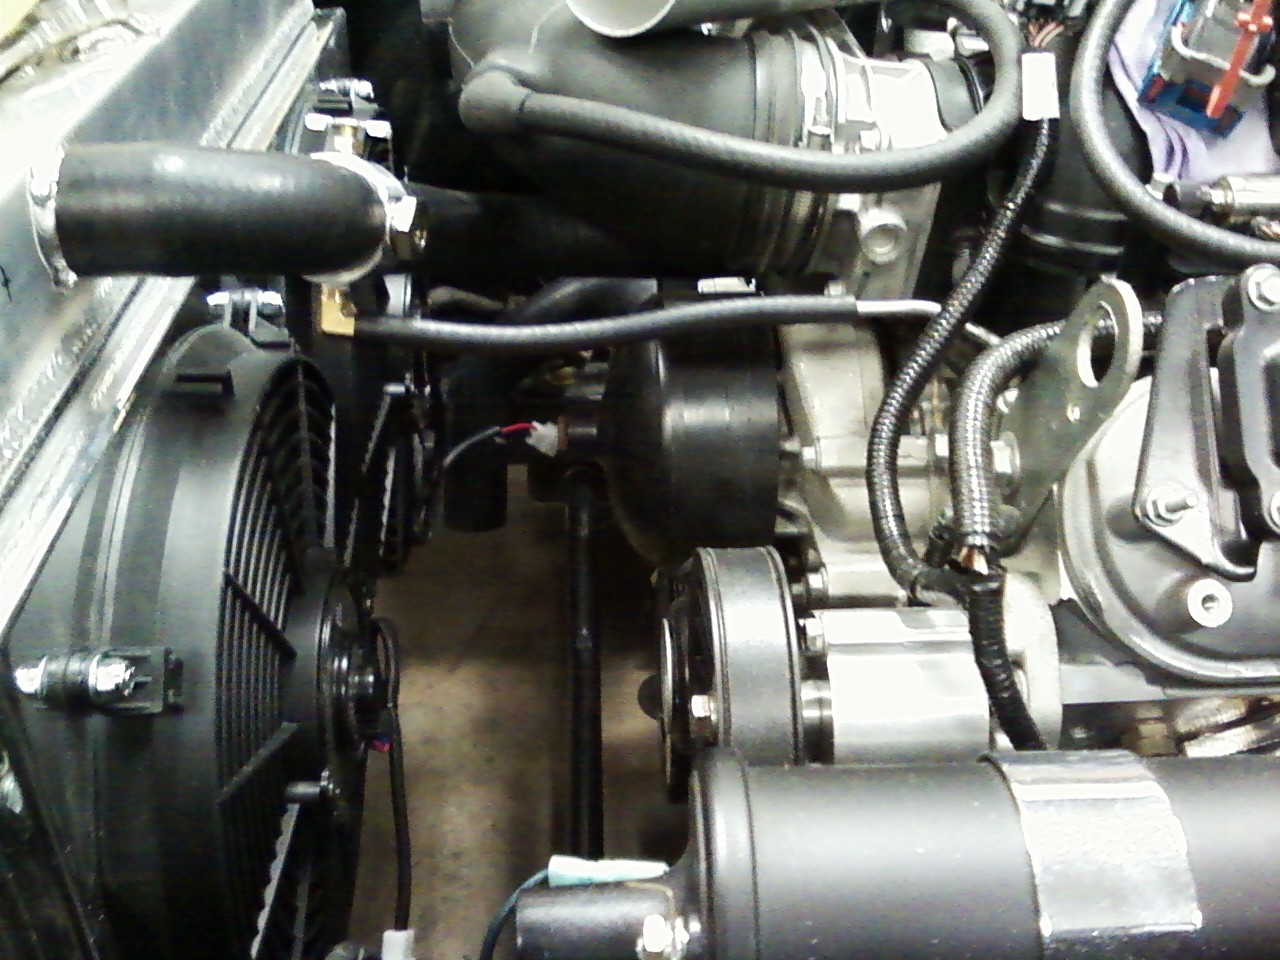
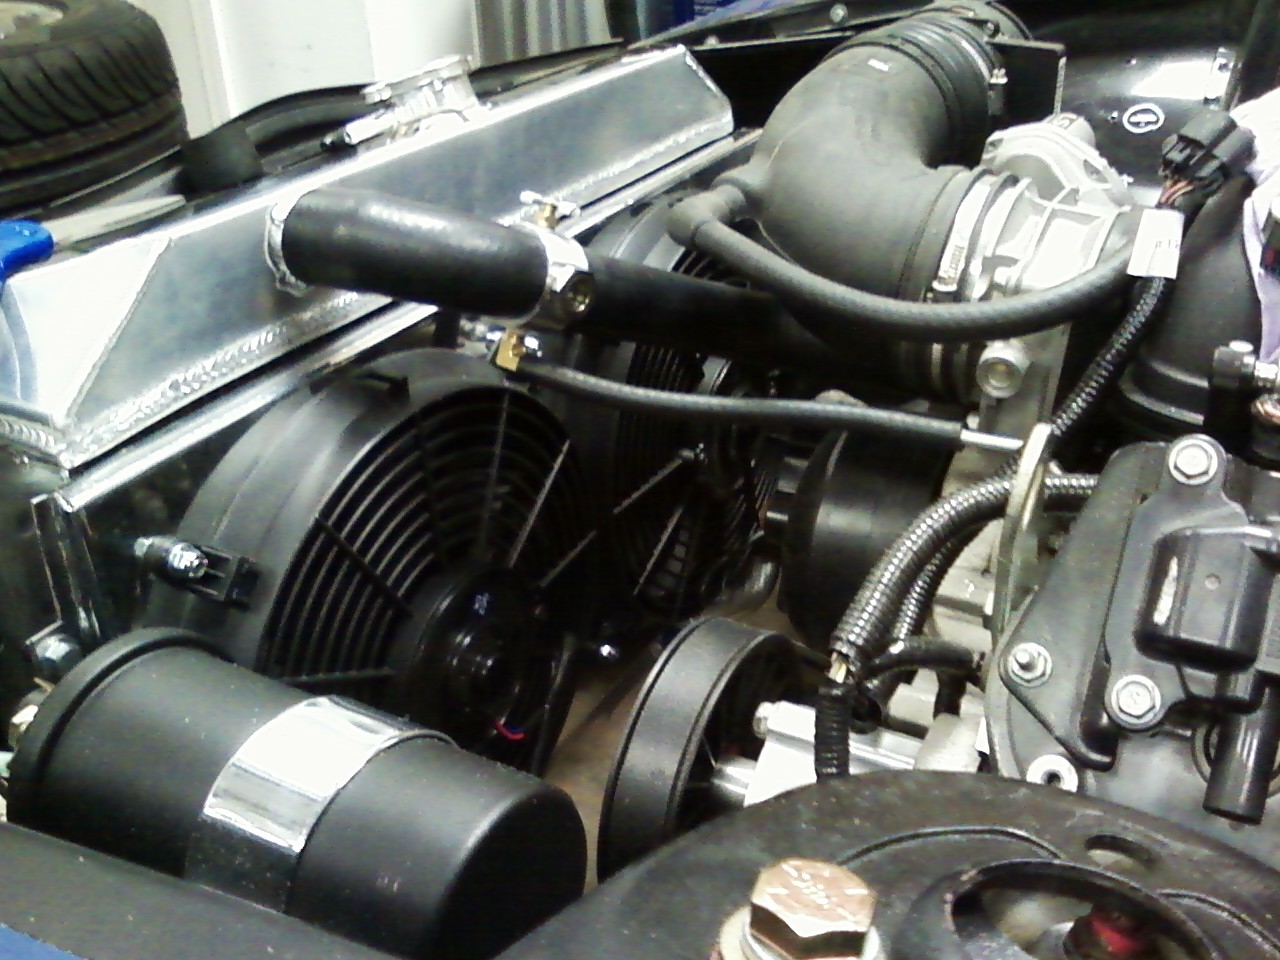
I have decided to put a fitting in the top tank of the radiator in the location of the black X in the picture in the above posting. That way steam ("steam vent") is venting up to an air chamber. After research here and on LS1tech, it looks like that is how the factory did it on a stock LS1 radiator. It shouldn't need a petcock because the top tank has some air in it anyway. Only difference then is that the top tank is at the pressure limited by the pressure spring in the radiator cap, while a petcock can be opened to atmospheric pressure. I plan to install an expansion tank for radiator in order to keep water off the ground at the track. Any input from the experts? -
Air bleeder in top radiatr hose
RebekahsZ replied to RebekahsZ's topic in Gen III & IV Chevy V8Z Tech Board
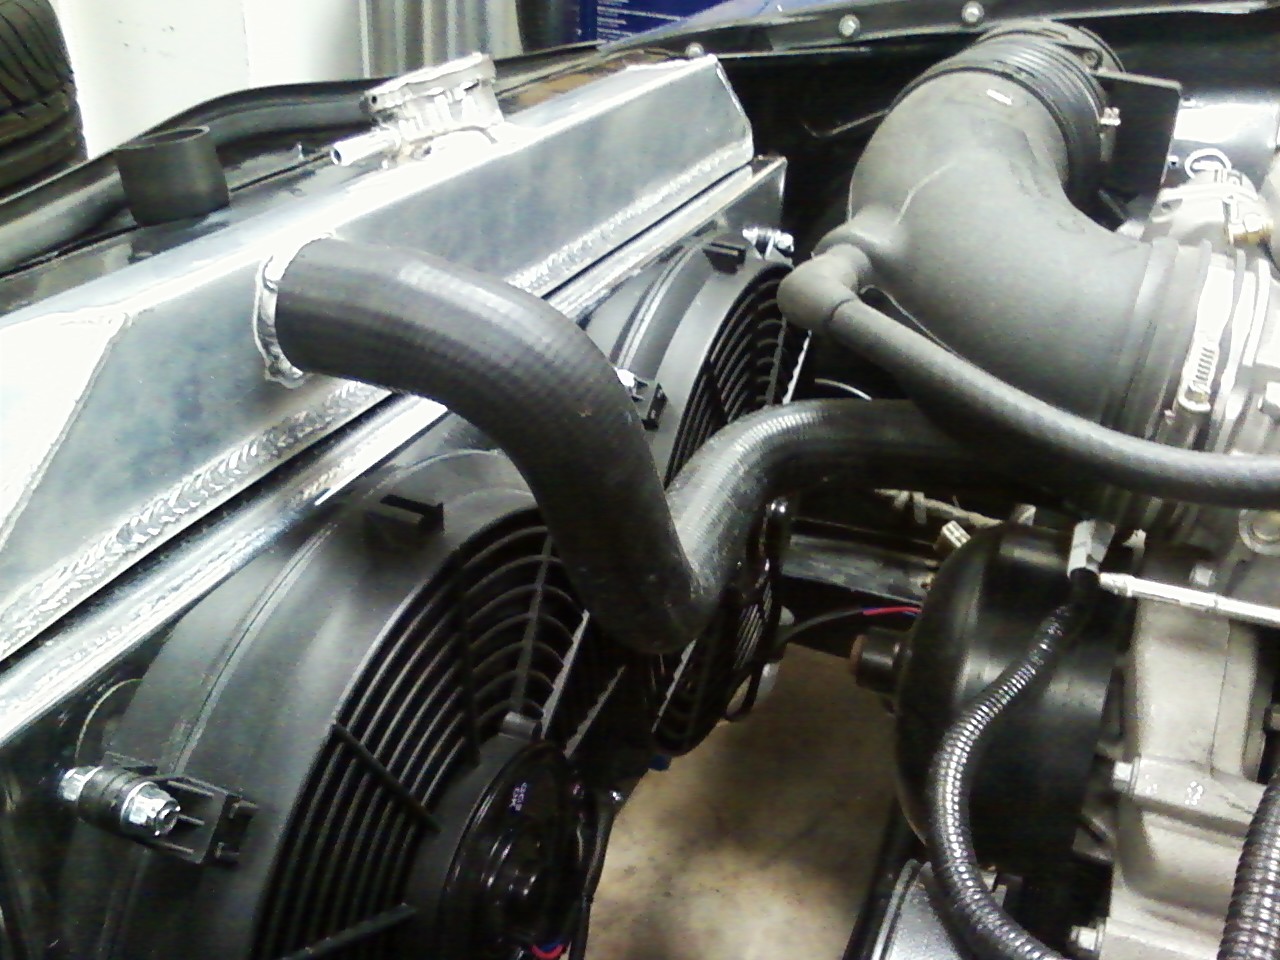
Here is what I've got so far. Is the t-fitting high enough above the cylinder head to do its job? Would I be better to have a fitting welded into the top tank of the radiator instead of the t-fitting in the top radiator hose?
-
I am mocking up my radiator and need advice on my hoses. Using the search funtion, I think I have found Gates part numbers for hoses to attach LS to stock radiator. I have purchased the JCI fluids set and it looks like the top hose JCI supplies is good. I have purchased the fancy tee fitting adapter with air bleeder petcock and sight glass from JTR. I understand that the tee fitting is needed to connect to the steam vent on the heads. My question is this: is the bleeder and sight glass really necessary? With the way the JCI top hose is contoured, I can't see why any air in that line wouldn't rise to the top tank of the radiator naturally. The only reason I can see that one would need a petcock to vent air is if the hose had a section that was higher up than the top tank of the radiator? Is that right? I am a neat freak and I don't want to have the sight glass and petcock if they serve no purpose. Thoughts, ideas??