Zinpieces
-
Posts
101 -
Joined
-
Last visited
-
Days Won
1
Content Type
Profiles
Forums
Blogs
Events
Gallery
Downloads
Store
Everything posted by Zinpieces
-
Which one do you need The pedal box for the older Z's have 4 bolt holes for the steering column and the newer 280 style have two holes. I have a later model 2 hole setup available. The pedal box also mounts the brake and clutch cylinders. I have everything.
-
Where in Jersey? I can show you how I built mine from two Harbor Freight engine stands. Here is a picture. Big thing is to tie the bottoms together and balance the car so it turns freely. I found that by using the rear bumper mounts and bolting two pieces of plywood into the radiator mounting holes I could achieve just about perfect balance. The car rolls with one hand. These pictures are old, but you get the idea

-
I doubt I'll even hear it, course I'm in New Jersey!
-
Make sure it's not an 80's smog low compression RV motor. They made some torque but no horsepower. Carb sounds too big. Get the casting numbers from the block and the heads. motor could just be a dog. Rear, trans, and tire combo sound reasonable. Good luck.
-
Part of the process of upgrading a front suspension (240Z) to coilovers is to remove the old strut inserts. The right side slid out nice as pie, the left side decided to put up a fight. I searched the internet for cures and found everything from a guy trying to pull the insert out with an engine hoist to a variety of heat it and beat it solutions. This is what worked for me. I put the disassembled strut tube in a vice and removed the gland nut, that did require a fair amount of heat, but once I got it red the gland nut broke free and spun out. Then I filled the tube with PB Blaster and let it soak down adding juice as it seeped through the rust. After several attempts to pull the cartridge out, without success, I reassembled the spring onto the strut. Then I laid it on it's side on the floor, stood on the strut tube and gave the bottom of the strut a couple of whacks with a 2 pound hammer. Nothing at first, but after a few whacks over a couple of hours the cartridge began to move. When about three inches of the cartridge was showing I removed the spring, put the end of the cartridge in the vice and gave the tube a twist by the spindle. The cartridge came right out and as you can see from the picture it was really rusty. Hope this helps somebody else it worked for me. Remember the spring is compressed and can release with a lot of force so use caution, I put some cardboard boxes in front of the strut to absorb and errant energy!
-
Let 'em total it and ask what the buy back value is for scrap. They probably will let you have it for a few hundred dollars. My kid totaled a car. The insurance paid 4.5K. I bought it back for 500. that netted me 4K and the car. I fixed it myself for 1K and we all lived happily ever after. The insurance will probably not give you collision coverage again unless you do a first class repair.
-
Does anybody make a ZG flare reversal kit?
Zinpieces replied to RebekahsZ's topic in Fabrication / Welding
I plan on putting ZG flares on my '71, but I'll probably keep the cut out portions just in case! -
Check out rotisserie ideas and designs here and on the internet. Total investment in mine is under $ 300.00. Assuming you can weld or have a buddy who can.
-
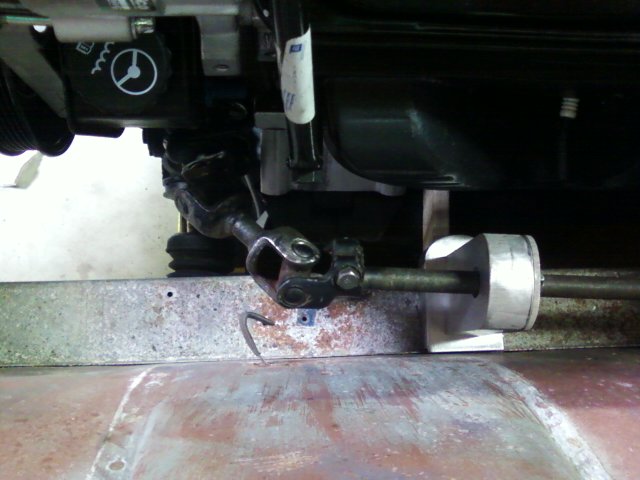
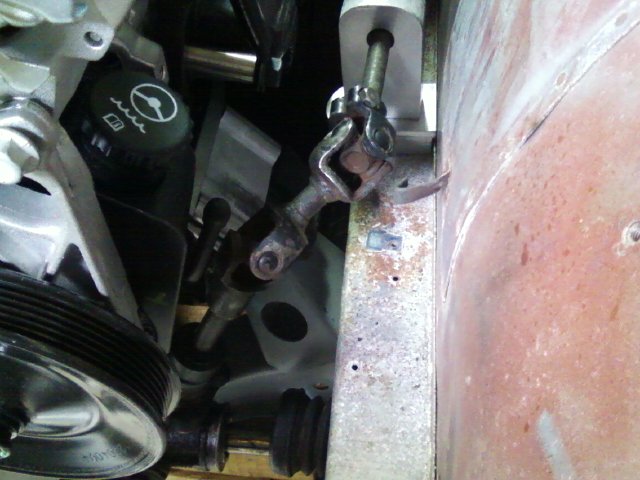
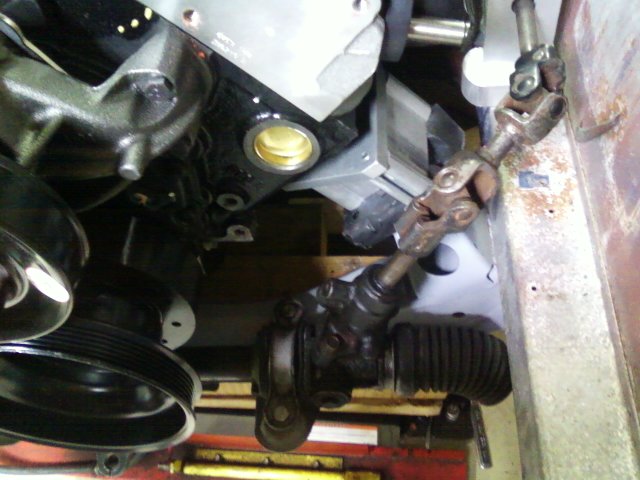
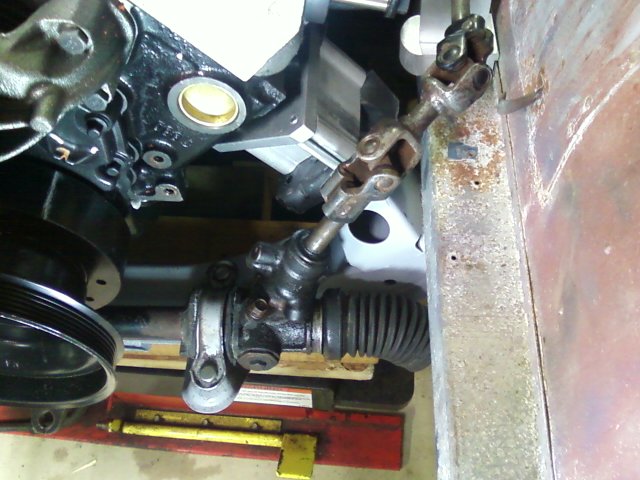
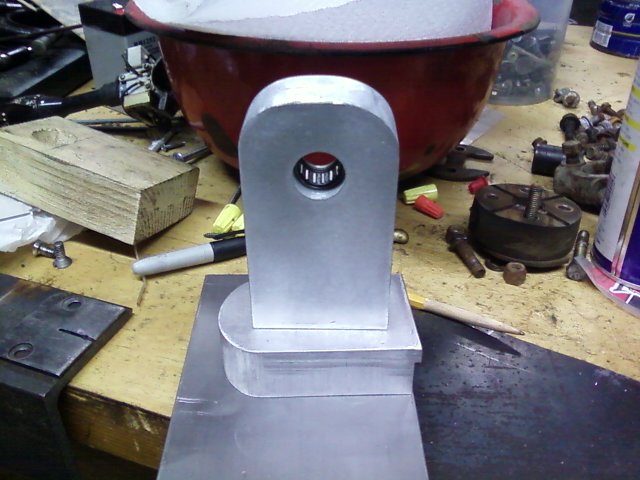
The next step in my process was to get the steering figured out. I searched every post and sticky I could find related to power steering. For a variety of reasons I was uncomfortable modifying the front cross member and motor mount as many people seem to do. It may be fine but not my cup of tea. I sourced a rack and double U-joint from a Subaru Legacy and started playing around with it. My solution seems to work. The pictures should explain everything. The shaft support is made from a piece of aluminum buss bar that was collecting dust. The bearing is a Chevrolet pilot bushing. I still need to sort out hoses and pin the Datsun shaft to the U-joint, but the hard part seems to be under control
-
I'm good for a couple
-
One of each please.
-
Does cutting fenders affect the cars value?
Zinpieces replied to Mr.Roboto's topic in Body Kits & Paint
Anyone can restore a car, it takes a real man to cut one up! -
Had the weekend to myself so I test fit the motor and transmission. Everything went smooth. I am using a stock GM shifter that has modified detents for 4 forward gears. I mounted the shifter to the underside of the tunnel and made a new floor plate to fill the original hole and reinforce the metal. Next I'll change the damper so I can fit a Subie rack.
-
Is my engine locked up?
Zinpieces replied to 240zwannabe's topic in Trouble Shooting / General Engine
OK, so what happens when the motor stops rotating? Are you able to rotate it again from the same spot or do you have to turn it backwards? If you rotate it backwards does it stop in the same spot? This all started with an ignition problem so pull the cap and make sure the rotor is turning. From there you have to inspect the valve train, make sure you didn't loose a valve spring or have a bent valve. My background is V-8's somebody who really knows these engines may be able to come up another idea -
Is my engine locked up?
Zinpieces replied to 240zwannabe's topic in Trouble Shooting / General Engine
First I'd put a breaker bar on the crank pulley and try to turn the motor. If it turns freely look into the electrical system. Make sure the ground connection is good and solid. If the motor is at all loose you might be able to turn it just by turning the fan. My money is on the electrical system. If you suspect the ground you can use a jumper cable from the block to the neg. post to create a good known ground. I've seen wires that looked good but were rotted inside so give things a good tug. hope this helps -
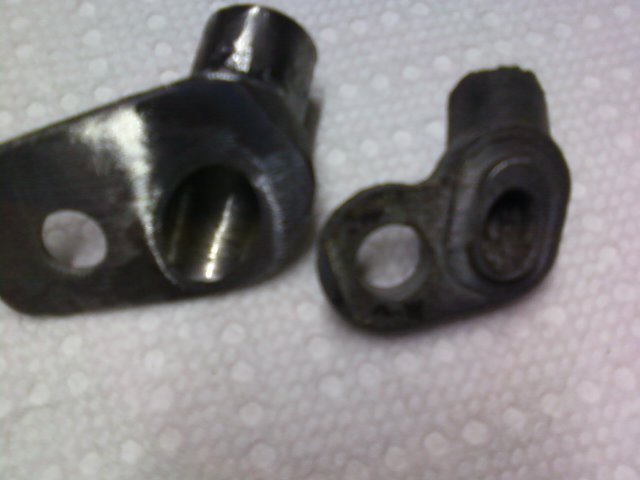
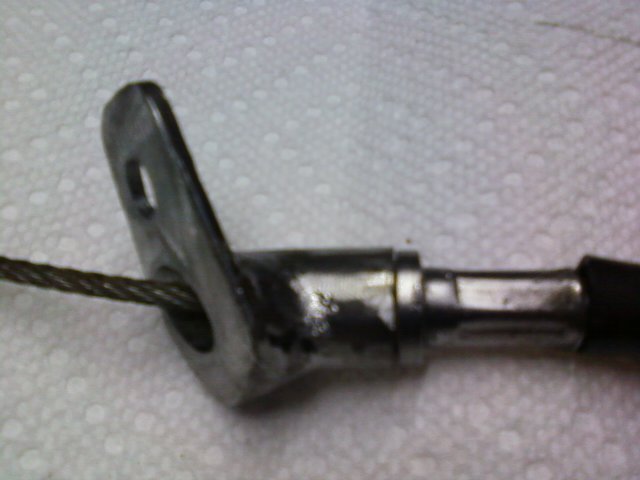
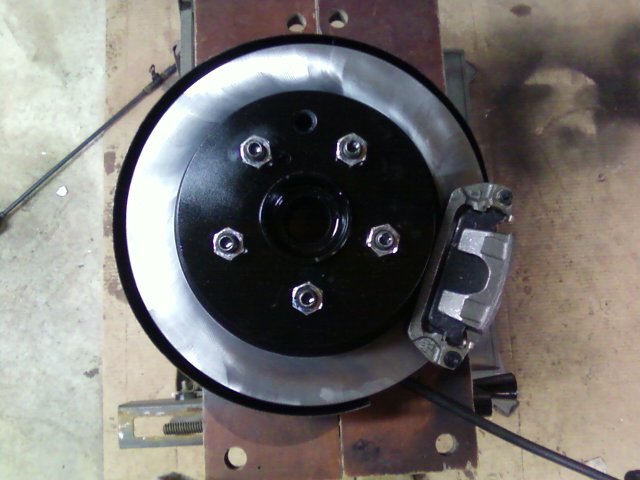
Using donor Infinity parts for my SBC Z was a good idea. Making the E-Brake cable connectors from Pot Metal not so good! Just about the time I was trying to connect the inboard end of the Q-45 cables to the stock 240Z setup one of the cheapo ends broke. Now to figure a way to use my perfectly good Datsun rear brake cables with the Q45 brakes. Turned out to be not so bad. The stock Z cables operate a lever with a pin and yoke connection, but the swedged end on the cable is the same as the Q-45. So off with the yoke and then fabricate a receiver for the smooth bore cable end that mimicked the Q-45. I used the Q-45 return springs that I wound onto the Z cables and fabricated the receiver from some tubing and a piece of flat stock. A couple of hours work but it really simplifies the other end. now that i have a pattern the other side should be easy!
-
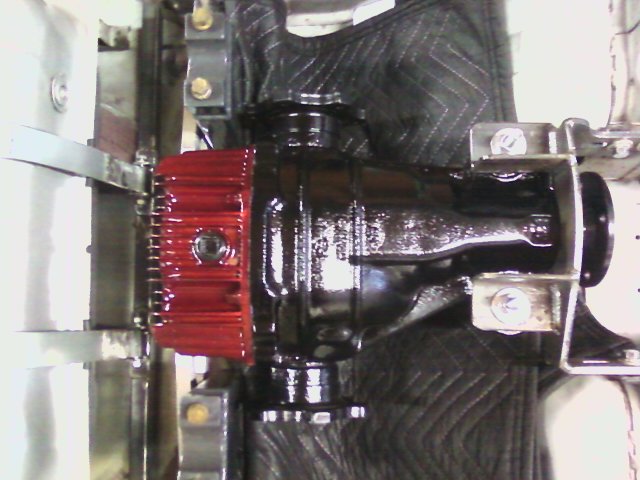
Figured I should mock up the diff and the rear suspension to see if I was going to have any problems. Aside from some minor hardware issues everything went together fine. I think I'll fab the rear section of the exhaust while the car is still upside down and finish off the E-Brake cable routing.
-
Figured I should mock up the diff and the rear suspension to see if I was going to have any problems. Aside from some minor hardware issues everything went together fine. I think I'll fab the rear section of the exhaust while the car is still upside down and finish off the E-Brake cable routing.
-
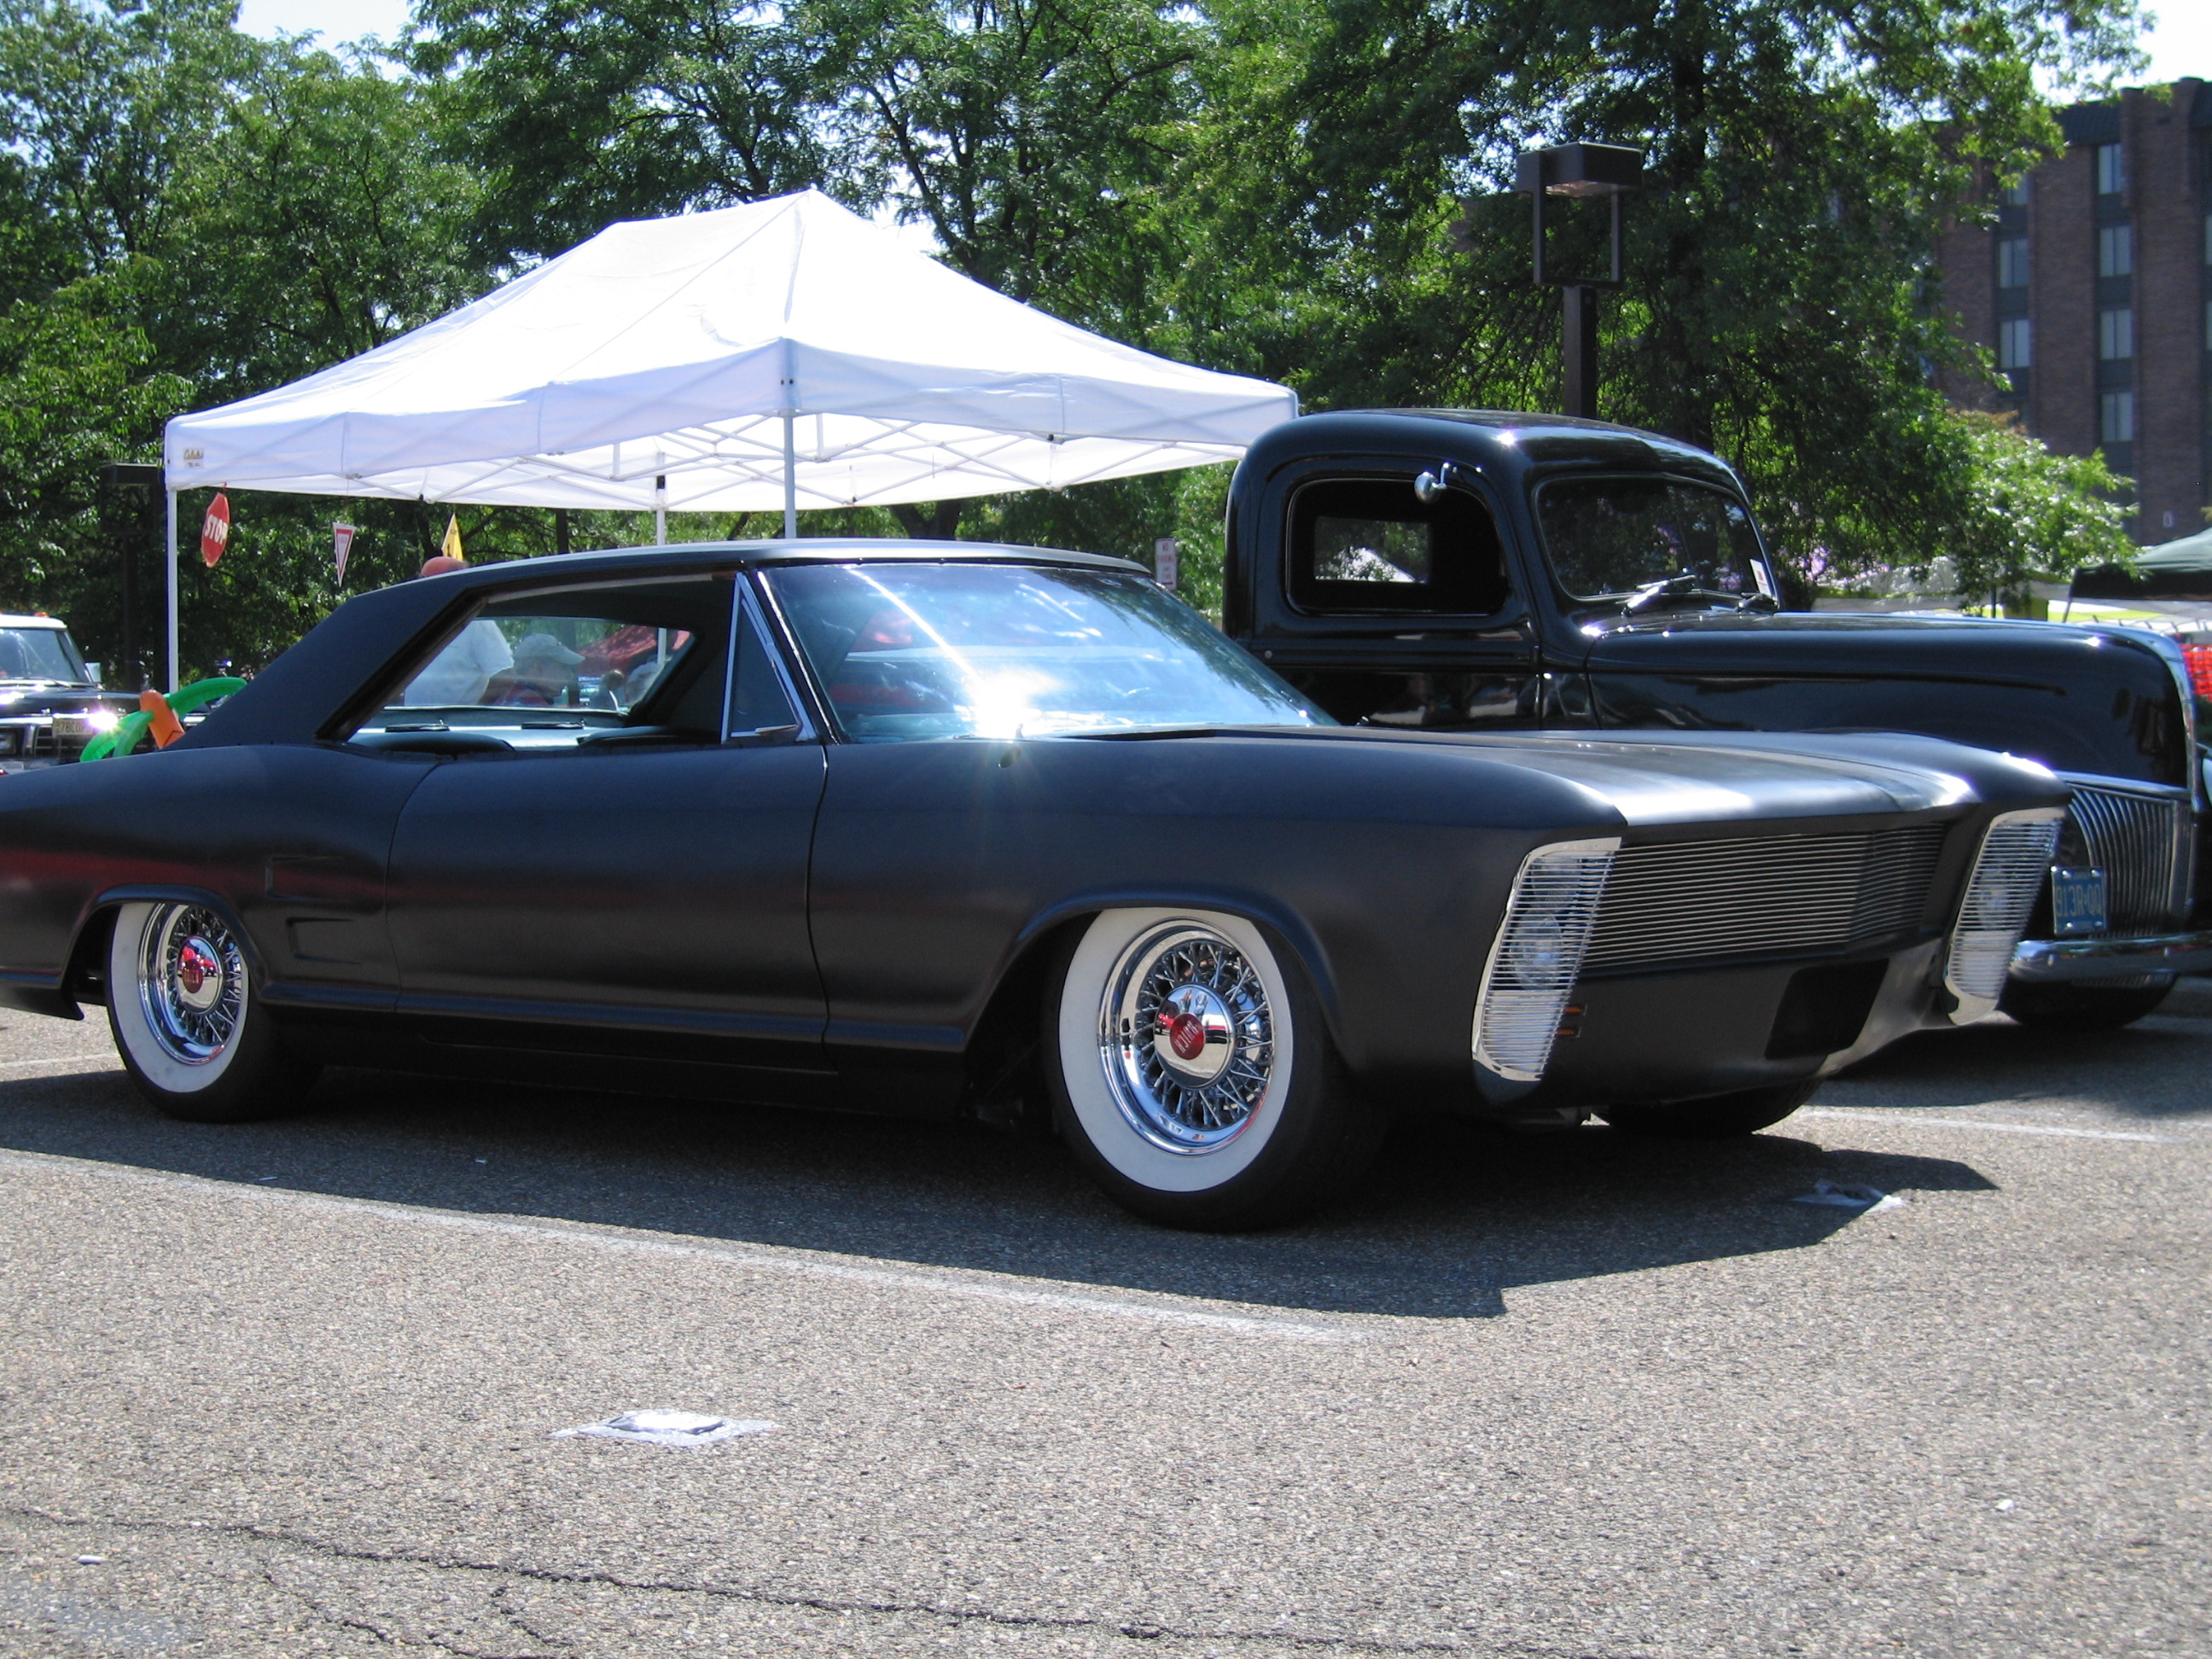
My Z is in pieces, but if you feel like doodling, this is my Buick
-
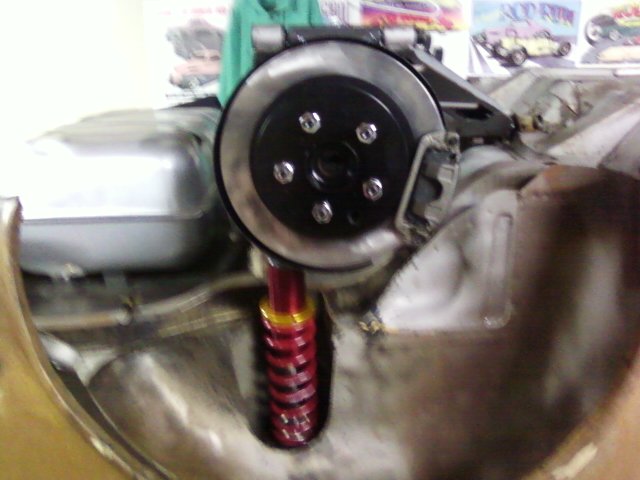
I know that there are several rear brake upgrades for a 240Z. After talking with Gabriel at TTT I decided since I had donor Q-45 parts that I'd use the rear brakes too. The entire rear brake assembly including the emergency brakes calipers and rotors are a direct bolt to TTT's backing plates. The only thing you need to do is swap the dust shields and E-Brake parts left for right and trim a small area on the dust shield. I know they are not 4 piston Wilwood's but they'll stop a 4000lb car. And they were basically free!
-
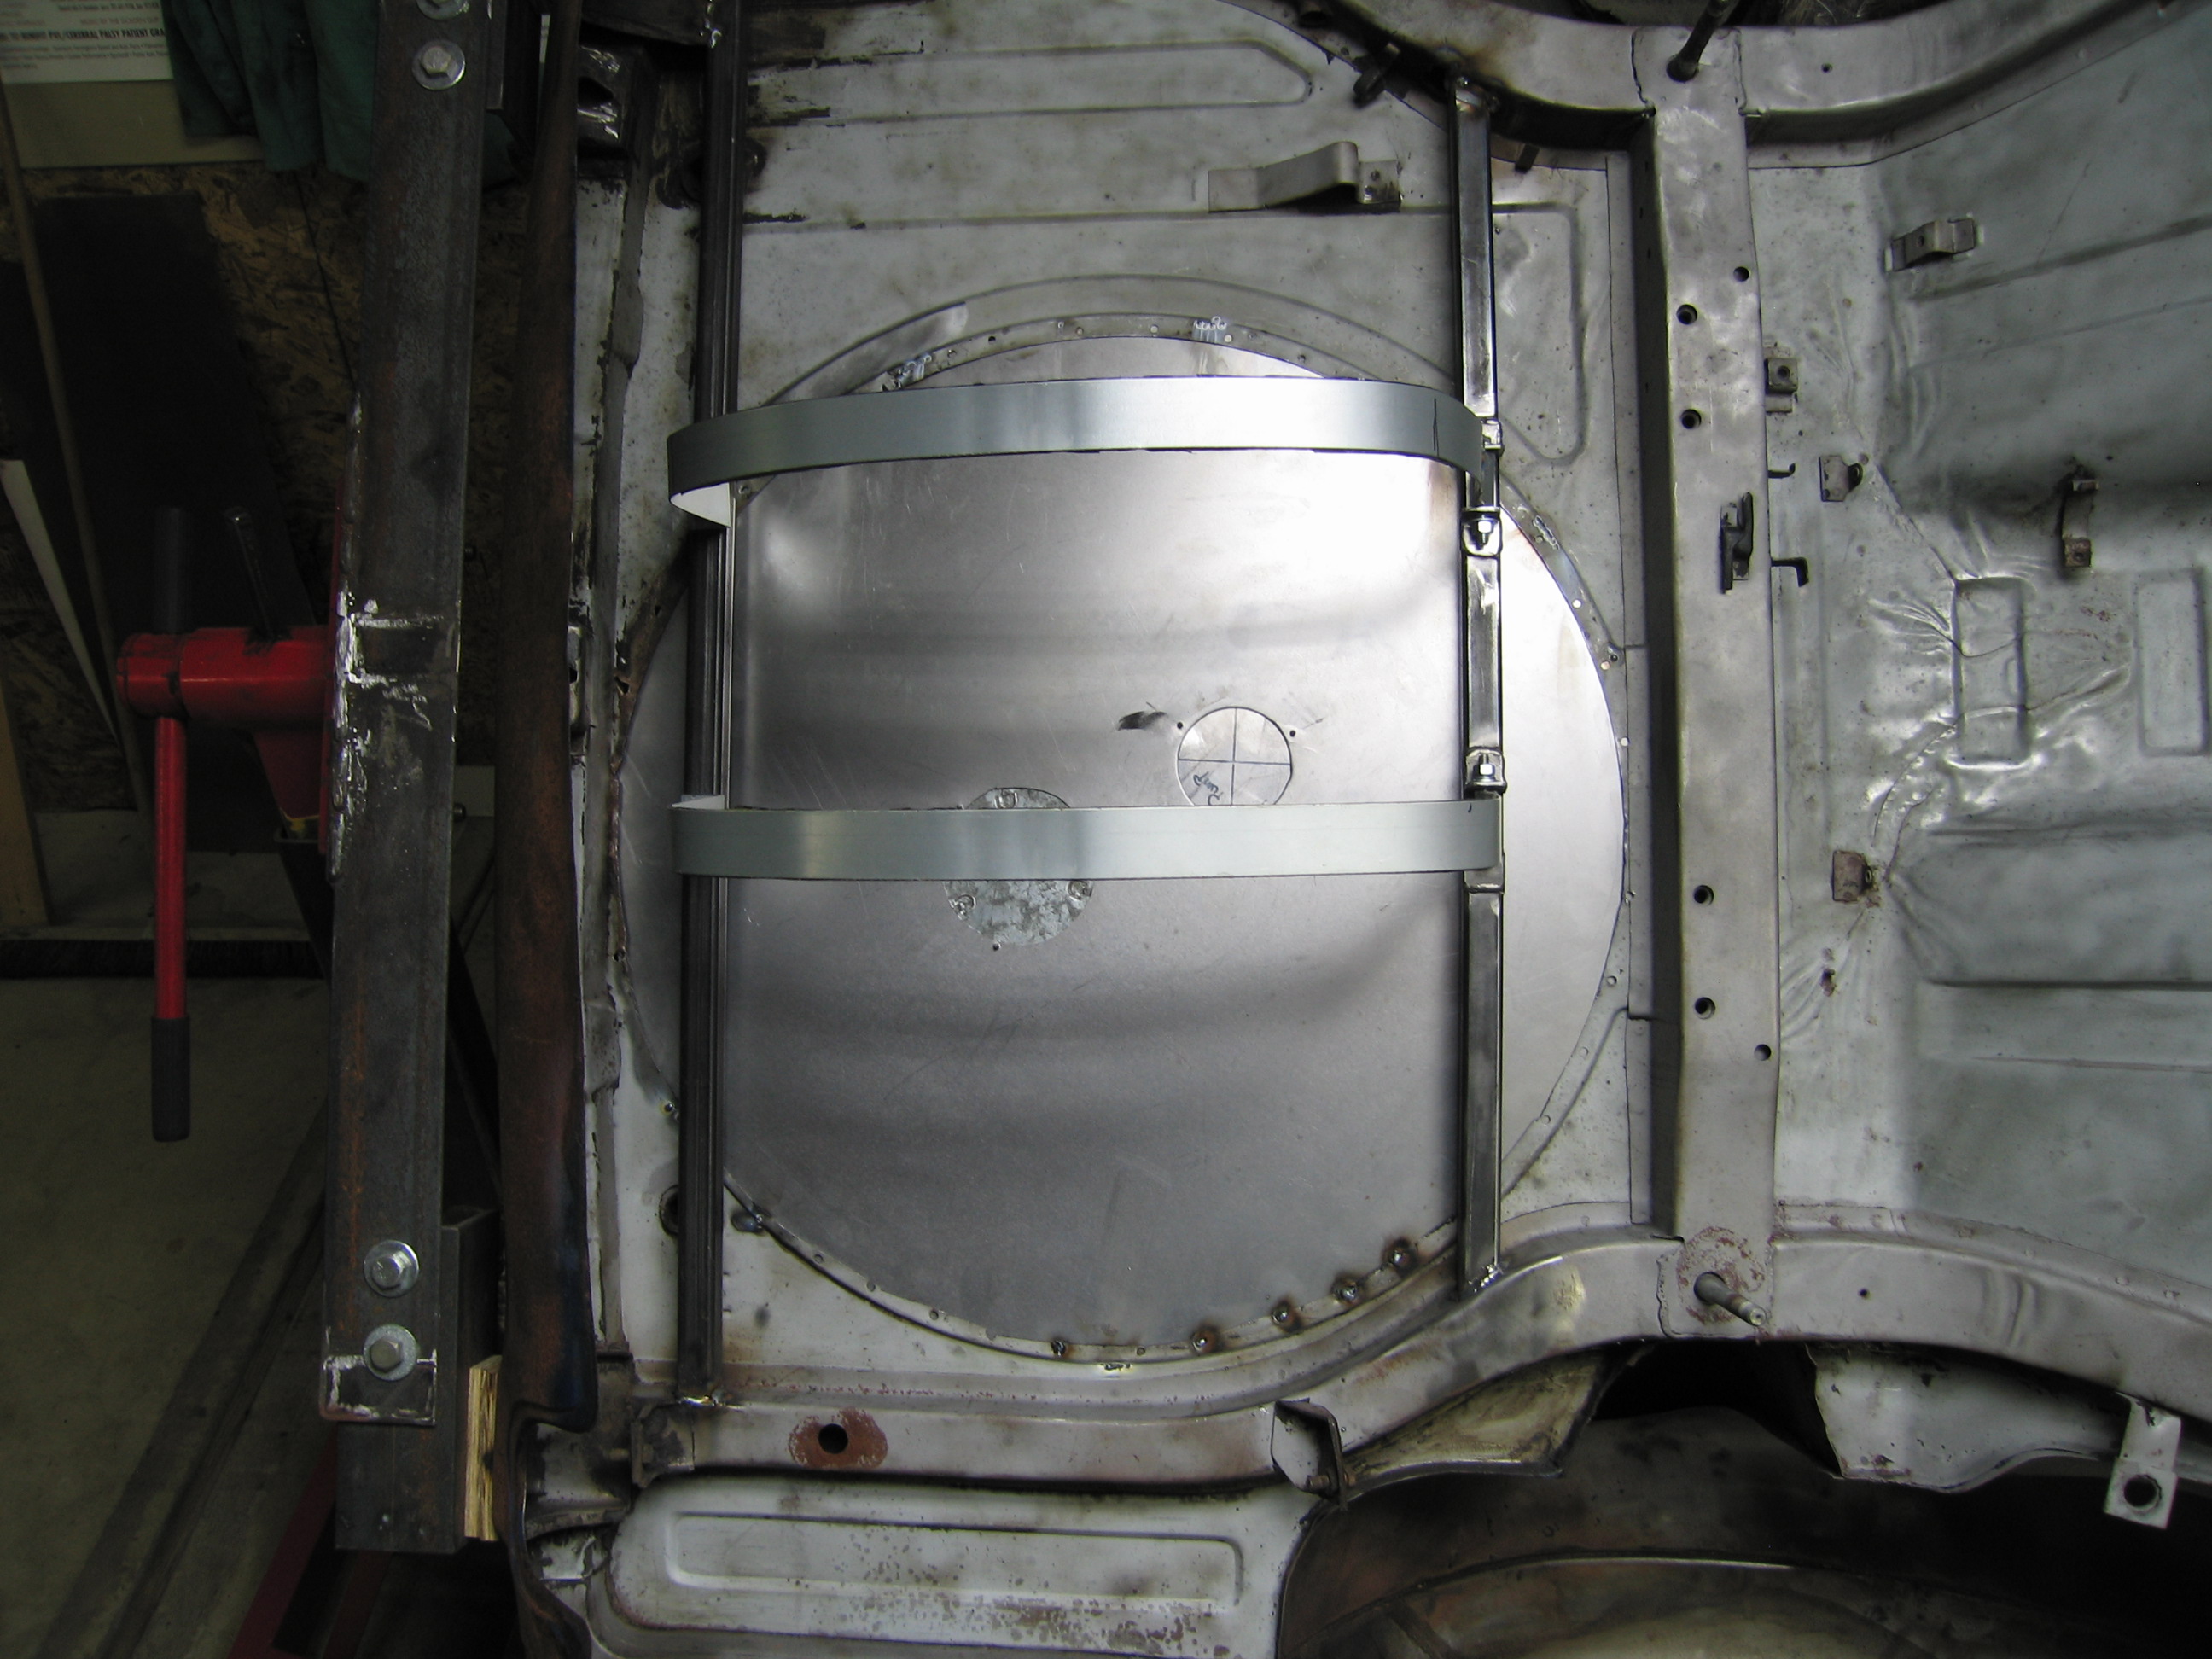
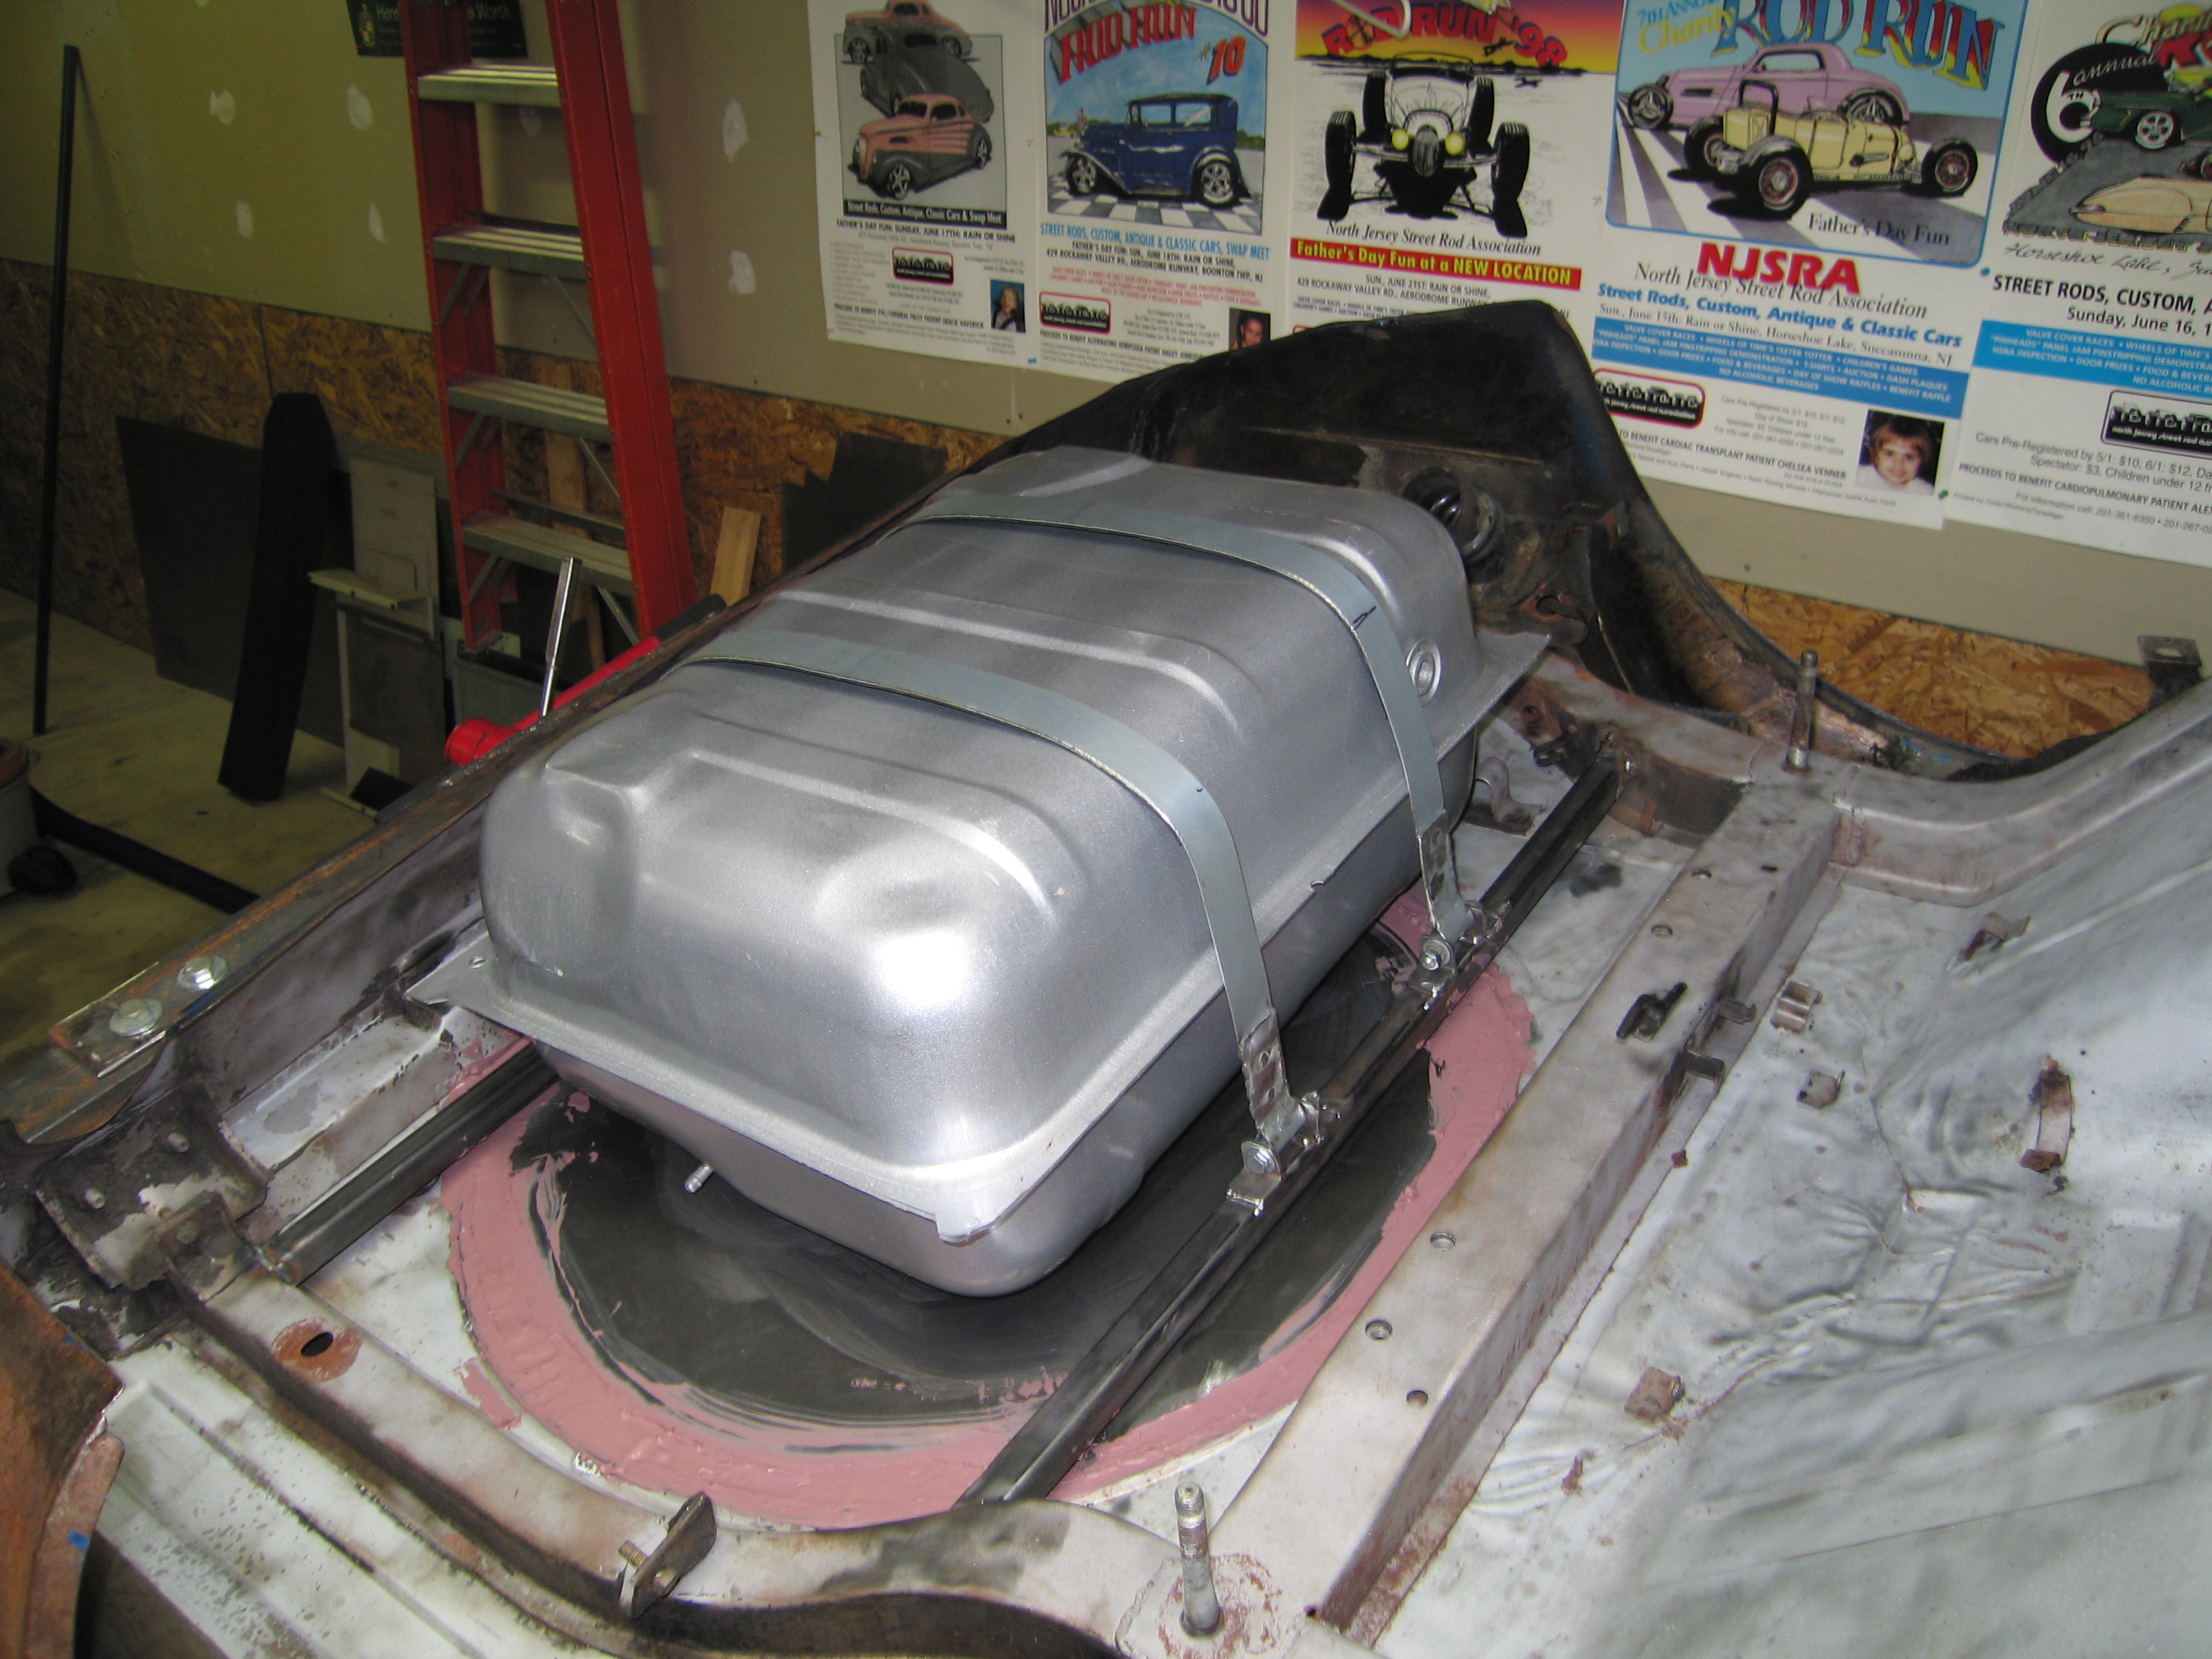
Finally got enough time to start the gas tank installation. After I finish the welding I'll paint the area and hang the tank. Tank in temporarily
-
72 240z rear brakes leaking
Zinpieces replied to bowl of seeds's topic in Brakes, Wheels, Suspension and Chassis
You just got this car and it has been sitting right? Well you probably have a buildup of rust in the wheel cylinder and when you stepped on the brake, the rubber cup ran over the rust. Presto-Leako! In the old days we would hone the wheel cylinder replace the cups and spring and have a nice day, today you will probably have to buy new wheel cylinders. You should inspect all the lines and hoses and at the very least flush fresh fluid through the system. -
Ditto
-
Wheel Show! Post your pics of you wheels
Zinpieces replied to k3werra's topic in Brakes, Wheels, Suspension and Chassis
I enjoy all the pictures, what I'd really like to see if anyone has them are pic's from back in the day. Anyone got a picture of a '70 -'75 taken then! -
The NJ Z Club is going to be in Somerville NJ guesting at the Cruise Night on August 12th. Their annual show is September 17th in Bridgewater. They also have a website. I am not a member but I have met some of their people and they are a great bunch. My Z is still in pieces But I will be there with my Buick checking out their cars. Freehold is local to both those venues so check them out.