-
Member Statistics
33090
Total Members2821
Most Online
All Activity
- Today
-

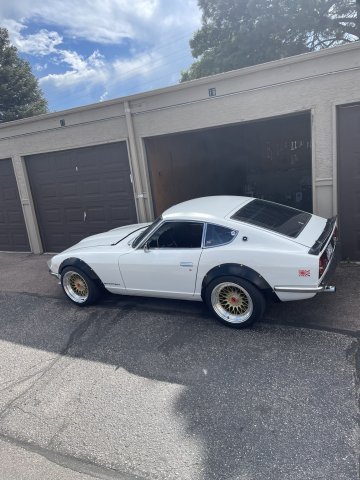
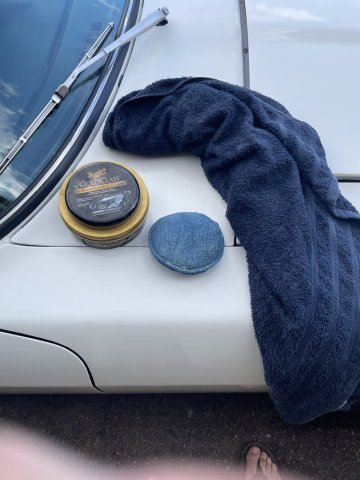
My Z car log....small jobs done and fun things
A to Z replied to A to Z's topic in S30 Series - 240z, 260z, 280z
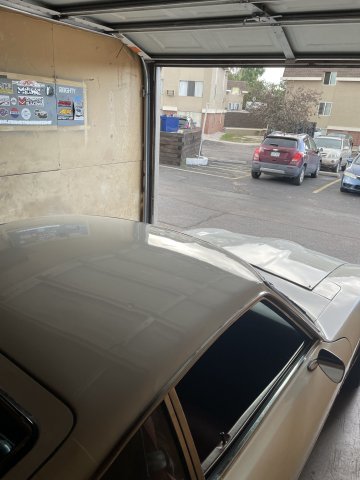
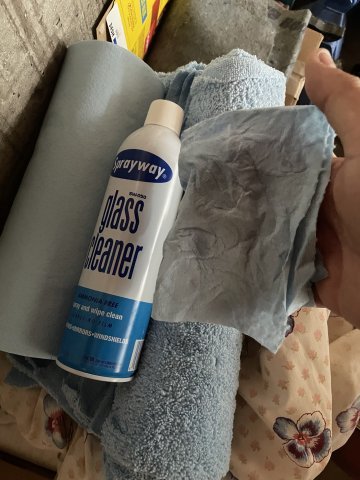
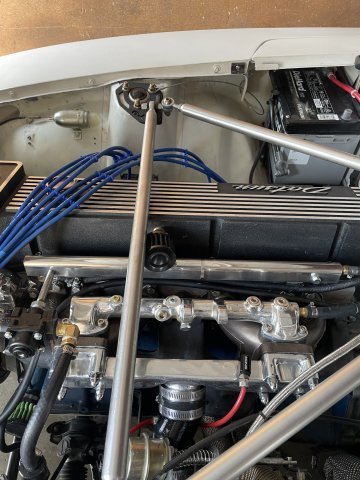
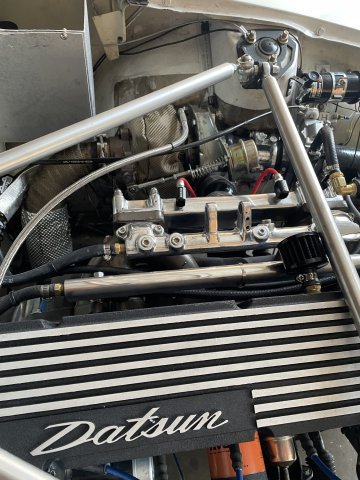
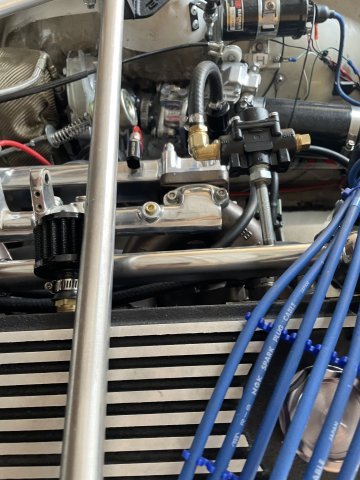
07-06-2025 polish day. Did some waxing. wipe down with a wet towel to get the dust off, and then a coat of pure caranauba wax from Mcquires (the Gold Class Caranauba Plus paste wax). My pallnet fuel rail has always been raw aluminum, but with some mothers mag wheel polish, a rag and elbow grease it turned out pretty good! I took a couple pics where you can see without and with polishing
-
Ok, after much tweaking and a little bending i arrived at this... workable?
- Yesterday
-
Part 2-More 240Z Restoration- Body Work is mostly done utilizing Oxygen Acetylene Gas Welding. This method of welding was mainly used to repair automotivembody repair. I learned this method when I was 15 years old and used it until the 1970s when Mig Wire Welding came in. The Mig Welding was a much productive method as it applied the heat faster and welding with less heat distortion to surrounding metal. I still use this method in certain applications to this day. Notice- Use a Small Flame and Thin 1/16" Brass Rod. More Bodywork to come-
-
Welcome to HybridZ, and thanks for your question. Please feel free to introduce yourself and your car on our "New Members Forum": https://forums.hybridz.org/forum/68-new-members-forum/ Are you looking for something like this? Note the exemption in the text "*Not for digital dash on 280ZX." -- don't know if that applies to your car. (I'm guessing not, since your current sensor is single wire.) https://zcardepot.com/products/coolant-temperature-sensor-one-piece-240z-260z-280z-280zx?variant=19278308016241¤cy=USD&utm_source=google&utm_medium=cpc&utm_campaign=google%2Bshopping&gad_source=1&gad_campaignid=17820837536&gclid=Cj0KCQjwvajDBhCNARIsAEE29WoDT0QZie4ihN9KbIOfGu197wEIp5SP7gYahzfJ4Ta0qhc9CthVys4aArmBEALw_wcB#
-
Cool thanks for fast response ... I was thinking about going with the extreme super 8.8 set up... but then i found a great deal on techno toys 4340 billet stub axils new at $600, and a perfect shape oem 300zxt cv axils $119 that i put new cv boots grease in them ,and painted them like new condition .. I think this Mfactory helical set up would strengthen up the open 280zxt 1982 354 r200 dif ,and cv axils thats been in my 1976 280z with 500hp sbc roller motor since 2012 ...
-
jetmail88 joined the community
-
Hi everyone. On my pride & joy, the 1983 280zx, the temp gauge does not come on or show in the dash. Once in awhile it comes on intermittently for a few seconds just enough for me to see the current temperature. Luckily it does shows normal level, about halfway. I've been living with this issue for several years but now the radiator electric fan does not come on during hot summer drives. I think the prob is with the temp sensor? Here's the pic of the one-wire type sensor that's bolt on at the bottom of thermostat housing. Can someone confirm that the elec fan problem is related ? or how can I check this? Also I'm having a real hard time finding a new one-wire sensor out there, could someone point me the right direction. Thanks in Advance !! https://mega.nz/file/hdJX0R4Q#Dp9e3XQXk3R-QTk62DGl_lRym2BkCtfVvfBay-Nqlsw
-
This 240z restoration in Japan demonstrates bodywork using basic methods and tools. These videos show restoration methods that most Do It Yourself people out there who do not access to more expensive body working equipment could still do the work. The restoration using these methods would take more time but have satisfying results. This Body Man does a lot of Vintage Cars Restoration in Japan. Race Cars are also done. Please give your comments so I can find more videos that will help you restore your Vintage 240Z or other car models. Toolman
-
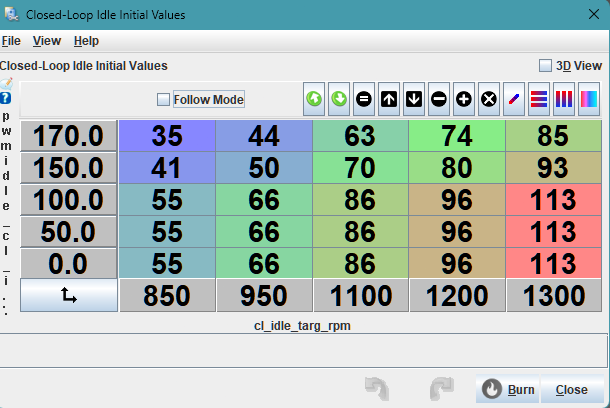
Update: Today I worked on correctly setting up the initial target RPM table. Took two readings per each rpm step, in my case, 850, 950, 1100, 1200 and 1300, when the car was semi-warm and hot. Then added another 10 percent per: https://www.diyautotune.com/support/closed-loop-idle-pwm/ Then from 100 to 170, interpolated vertically. Since I didn't know what steps would be at lower temps, left them the same at the bottom: I switched to using CLT table (not MAT) since I am still clueless where I can find it (unless TS uses the same table for both and it will be just different temp ranges there). I also noticed at hot restart, the AFRs are very lean, 15-16 range due to the injectors getting heat soaked. Searched on the msextra, found some posts about guys using a band-aid fix by adding ASE and taper at higher temperature. I experimented with mine and added some: It does help somewhat in the beginning. I added EGO correction of 8 percent above 800 rpms. This helps as well, and my AFRs get back to normal range. I am posting my updated tune, plus the idle log. I haven't taken the car for a test drive yet. 2025-07-06-v106.msq 2025-07-06_10.40.07.mlg
-
DJHsuperZ I will notify company on Monday of availability Thank you for the inquiry Chip JDMPowerhouse
-
Are these still available ?
-
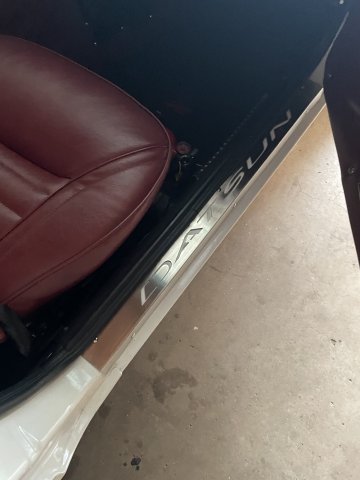
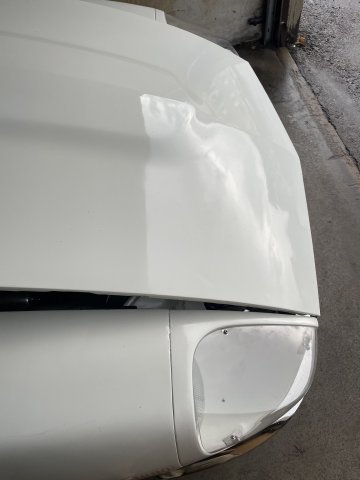
My Z car log....small jobs done and fun things
A to Z replied to A to Z's topic in S30 Series - 240z, 260z, 280z
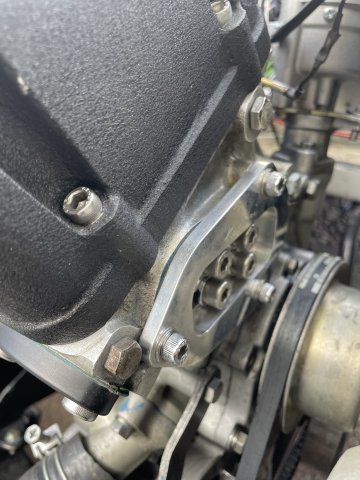
odds and ends pics from today:
-
My Z car log....small jobs done and fun things
A to Z replied to A to Z's topic in S30 Series - 240z, 260z, 280z
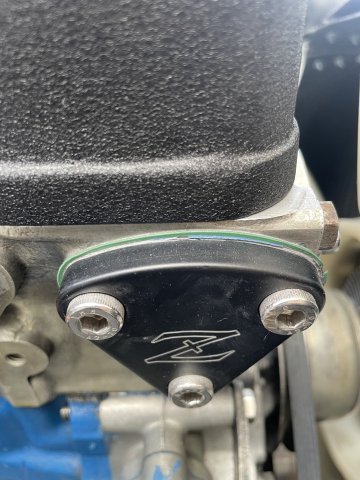
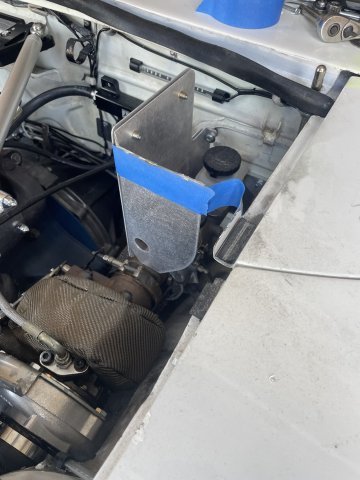
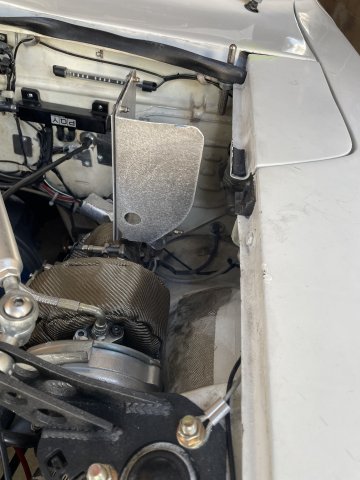
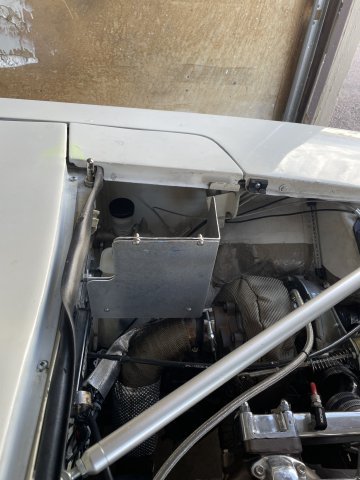
07-05-2025. Installed my Skillard brake master cylinder heat shield. I had to modify it quite extensively for my use.
- Last week
-
Hi Tom! 1. I ordered another TPS sensor (different vendor) to test. I also noticed that it is not 100 percent stable. I am using the sensor ground for it per microsquirt manual and the 5V feed. My throttle blade is completely closed, the spring is strong in this Protunerz' throttle body. I do have a throttle cable slack. 2. I think what is happening at 16.833, is that for -200 rpm correction per the 'Idle Adaptive Advance Timing' table, it will kick 6 degrees of timing. My running RPMs are 996, when the target is 1200. So the ECU is adding 6 degrees to raise the RPMs. When the RPM of 1200 is matched, for ex., at 27.366sec, the correction advance is almost at 0 degrees, 0.6 actually. 3. At 26 seconds, i was backing out of the garage in reverse, with almost no TPS input. No sure what is happening here either. I also see a -280 RPMdot that follows. 4. At 93sec, there is a TPSdot of 14, maybe this is why my AE is enabled? My target RPM is 1183, the running RPM is 972, I see the Idle Correction Advance is adding another 6 degrees. I am wondering if I should move from 6 to 3 degrees max for CLI control? It might be too much of a change to adjust the RPMs? I will try that and will make another log. Overall, the CLI is the most confusing part for me. When it finally started working (kind of), it surely made my day :-) Appreciate you taking your time checking out my progress! I do have a few questions for you - per your tune: a. you have Shift Settings -> Leave Valve Closed Above:(rps) - 7,000, For this number of seconds - 0. Basically, you don't want the IAC valve to close at all? Any benefit from this setting? b. you are using the table for CLT in the CLI Settings (Use CLT or MAT In Table Lookup). Do you have any heat soaking issues? I read some posts where it was advised to use the MAT table. Any other benefits? Should I use the CLT table as well? I asked the question on the msextra forum why the ECU still checks the CLT table, but no one has responded yet: https://www.msextra.com/forums/viewtopic.php?t=82151&sid=ccd10333b5cfba1911eaded17a655060 Thanks! Den
-
 Leo joined the community
 -
I have a 75 280z and I’m having issues where I have to turn my key ever so slightly so my car can turn on. I’m look to change the universal switch it has to the original switch it came with. Could some possible color coordinate these color wires from my ignition switch I don’t know which wire goes where. I have a Red/white wire, Blue w red stripe wire, black w blue stripe wire, black wire, and black wire with yellow stripe. Please anything helps 🙏
-
Den, I took a look at the log this morning. I have a couple observations vs. recommendations this time looking at the idle sections only. 1. The TPS varies from 0 to .5 and I think this is causing other issues. Do you think the throttle plate is hitting the throttle screw stop every time or the butterfly is not closing correctly every time? Could it be electrical noise. Does the throttle cable has slack in it? At the start of the log its .02 at the end its .05 one time. Looking at my setup it only varies .01 at idle and has a very stable TPS reading. 2. At 16.833s the timing jumps 6 degrees because of the Idle adaptive advance timing is firing off. Why I am not sure. 3. At 26.433s the Accel enrichment is firing off with a PW spike of 15.5 and then a Timing advancement, but I could NOT see why in the accel enrichment table. Now the timing advancement could be cause by the spike in fuel and then the dip in RPMs. I think this issue need looked into. This should not fire off at idle. 4. At 93.905s the Accel enrichment is firing off with a PW spike of 14.5 and then a Timing advancement, but I could NOT see why in the accel enrichment table. Now the timing advancement could be cause by the spike in fuel and then the dip in RPMs. Again, I think this issue need looked into. The idle controls are different on the Microsquirt vs. the Megasquirt so I don't understand all the settings, but I hope what I found gives you and area to look at.
-
 I plan to use a mobile welder/fabricator when the time comes. Might be worth a shot in a pinch.
 -
Cool Z car. And you have had it for so long....a lot of memories. I hope you are able to eventually get her back on the road.
-
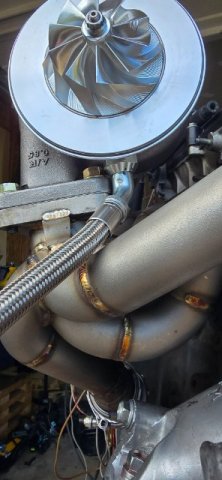
agreed, touching the header is a bad deal. If the header were at least wrapped and you put a loose fitting aluminum sheath over the hose that might save the hose. That drain hose in the pic looks VERY small. What happens if oil backs up is it will force oil into the turbo and you will get smoke as the pressurized oil is pushed past the seals, and if you have a catalytic converter, it could plug the converter and start a fire. It can also damage the turbo, as it is trying to spin with the friction of the oil hampering it. You can do a google search on all of this, but it can't be stated how important that drain hose is. I am getting by with a 5/8 drain hose and fittings. like I mentioned 3/4 is better. Ideal is no restriction at all .......the oil hits the drain and is gone.
-
yes, IF.....IF the diameter of the hose is large. 5/8 is acceptable, 3/4 is even better. The idea is to ensure that the oil can drain fast enough to not "back up".
-
Update: I figured out why my RPMs were so low and the IAC wasn't adjusting its steps. My TPS in the Closed-Loop Idle PID Activation Settings, was set at 0.8. The actual TPS was 1.1 that day which meant that the CLI would never kick in when I was sitting in the car at idle. I re-calibrated it and decided to play it safe and set at 1.5. Today the car's CLI worked as intended. I am still dealing with wonky IAC which can be at steps 90 and barely allowing any air in. Also, I noticed that even if I select the MAT table to be used for reference, the ECU was still looking up the CLT settings. I posted this question on the msextra site, maybe it is a code glitch or this is how they designed it or I am missing another table. I might just use the CLT reference table and call it a day. I am posting the updated tune and the drive log. 2025-07-03_12.14.29-drive.mlg 2025-07-03-v104.msq
-
My Z car log....small jobs done and fun things
A to Z replied to A to Z's topic in S30 Series - 240z, 260z, 280z
no exhaust, straight off the down pipe, now back on full exhaust. crappy video, but you can hear a bit of it. click this below: V3.MOV -
 sffan25 joined the community
 -
My Z car log....small jobs done and fun things
A to Z replied to A to Z's topic in S30 Series - 240z, 260z, 280z
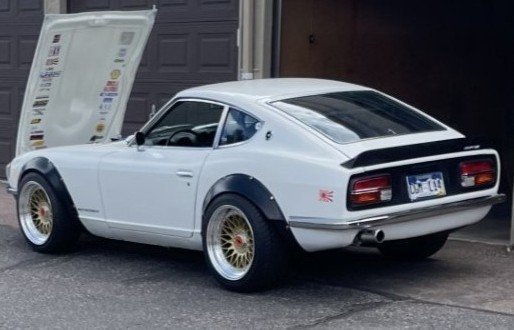
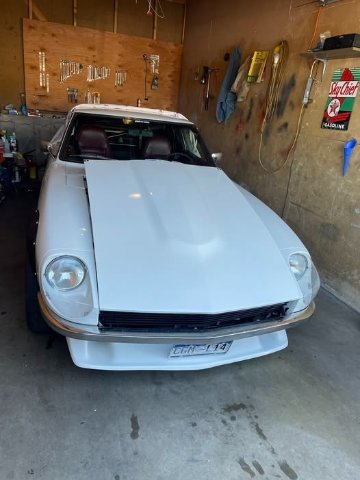
07-02-2025. Well my Z car is finally done......again. it was finished a year ago. But then I decided to turbocharge the engine and that involved redoing the braking. it's done. lightly turbocharged. It now has the one thing I felt it was missing. took 8 months and enormous amounts of patience and going back and forth jetting, etc. Powerwise? Who knows....at the rear wheel.....probably 200-210 max. that would be about 250 or so at the flywheel. it's just a cruiser and a real 10 footer. DONE. whew!
-
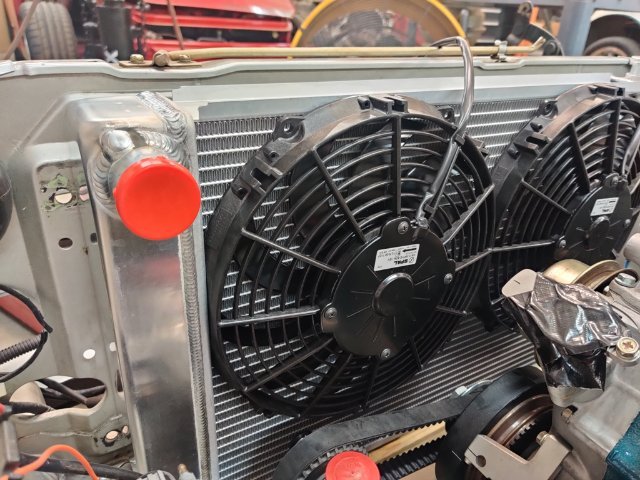
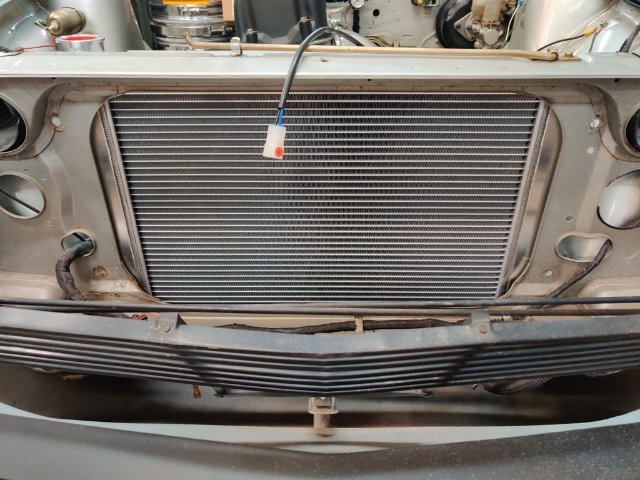
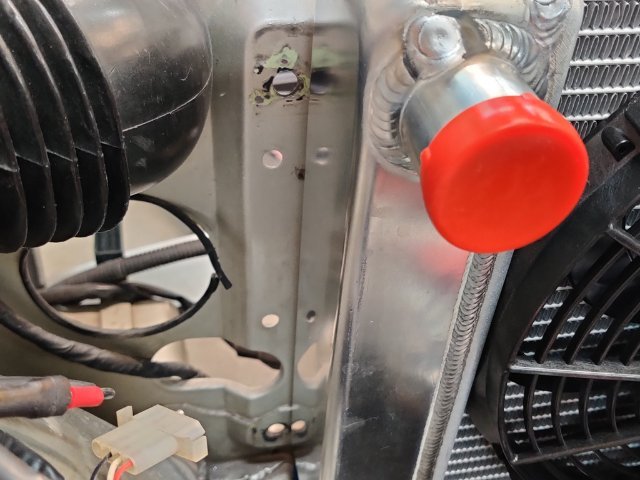
After lots of measuring and thinking, I ordered another Griffin radiator and two 10" Spal fans. This radiator is a bit wider and the same height as the other Griffin I bought years ago. However, the core has two 1" wide tubes instead of the two 1.25" wide tubes. Thus, the core is a bit thinner and that helps provide a bit more room for the fans. Being a bit wider, the two 10" fans fit better as well. Here are some pics: I will mount the fans at the top as shown. This will put the fans above the oil pump shaft and crankshaft dampener bolt. I will probably shorten the oil pump shaft, as the extra length is not needed for this application. The bottom edge of the radiator aligns with the bottom edge of this blue painter's tape. The side tanks fit just inside the stock radiator mount bolt locations: I am very pleased with this combination from a fit standpoint. Each fan is rated at 802 CFM. I repeatedly came across information where the CFM was higher when they were used in pairs in combination with shrouding. So, I plan to add some shrouding as well as some directing panels on the front to improve total CFM. I won't be able to measure it, but I think bumping the total up to 2000, an amount that should be good for a 6 cylinder engine, should be possible. Next, I will figure out how to mount the radiator, and wire up the fans.
-
Thanks for Repairing my PassWord Problem. Is there anything that I need to do prevent this problem from occurring again? Toolman
-
 TreadSlayer joined the community
 -
Love it Ben, great to see the car back on the road and being used as it should be!


-
Who's Online 1 Member, 0 Anonymous, 1018 Guests (See full list)