-
Member Statistics
33322
Total Members5167
Most Online
All Activity
- Today
-
 O.k., so I'm freaking ancient and don't spend any time here. I know that I'm listed as a "Newbie" but I joined on Feb 9, 2000 and have 5088 posts. I still have my 240Z, and I still pay to keep my website active AlteredZ.com I don't drive it - it's been off the road for some rewiring and to put a Holley HP ECU and Terminator TBI on it. But I watch a lot of youtube. (I haven't watched TV in 25 years). There's a channel I watch by a guy named Calvin, and he goes by "NIVLAC57" Really sharp guy that does a lot of tech. He just recently started doing YT full time. Anyway, I could have sworn he was a member long ago. I don't see "Nivlac" anywhere and no member with that name. Am I just ancient and confused? ~Pete Paraska
 - Yesterday
-

Fast Floridian's 240Z Track Build
FastFloridian replied to FastFloridian's topic in S30 Series - 240z, 260z, 280z

-
Fast Floridian's 240Z Track Build
FastFloridian replied to FastFloridian's topic in S30 Series - 240z, 260z, 280z
No, they look really good, have a little metal in it, and have some rtv type material around all jets, not paper. -

Fast Floridian's 240Z Track Build
74_5.0L_Z replied to FastFloridian's topic in S30 Series - 240z, 260z, 280z
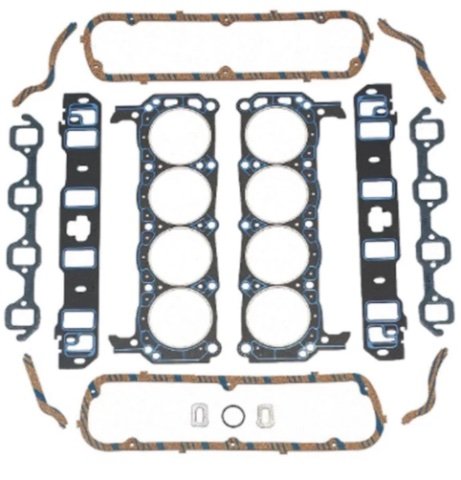
If they have the standard paper intake gaskets, throw them on the garbage and get the FelPro S3 gaskets. -
Fast Floridian's 240Z Track Build
FastFloridian replied to FastFloridian's topic in S30 Series - 240z, 260z, 280z
Good tip. I’ve got trickflow heads, so I got their gasket kit. -
Fast Floridian's 240Z Track Build
74_5.0L_Z replied to FastFloridian's topic in S30 Series - 240z, 260z, 280z
What intake gaskets do you intend to use? I like the FelPro 1262S3 or 1250S3 depending on the intake part size. The S3 version of the gaskets are much more durable than the standard Felpro gaskets. I also apply a really thin smear of Right Stuff RTV around the water jackets when I install the gaskets and lower intake. - Last week
-

280z 1jz track build from a pile of parts
flatout replied to flatout's topic in S30 Series - 240z, 260z, 280z
finished stripping and cleaning the underside and inner wheel wells and sprayed with some raptor liner. The raptor liner is popular around the youtube builds and I can see why. sprayed nice, covered nice, cured up nice and looks great. Taping up the fresh paint was a pain but came out great.
-
280z 1jz track build from a pile of parts
flatout replied to flatout's topic in S30 Series - 240z, 260z, 280z
Thanks. Interior is gonna be, black carpet in the front half. (unsure on door panels based off what will fit) Rear half will be a combination of the semi gloss charcoal grey that the cage is and some black with the raw aluminum bead rolled panels around the cell. May carpet the wheel tubs for a more "finished" look. The color goes real well with gray/black. -
280z 1jz track build from a pile of parts
FastFloridian replied to flatout's topic in S30 Series - 240z, 260z, 280z
Came out great, love the color. Whats the interior color or colors going to be? -
280z 1jz track build from a pile of parts
flatout replied to flatout's topic in S30 Series - 240z, 260z, 280z
Long week number like 200 but happy with the my progress. Made a tweak to a color based off a cadillac cts5 v blackwing. Its a bit more "copper" tone of orange than I was picturing with the modifications but I am very happy with it. As soon as I started pulling the masked off areas and was seeing the contrast with the grey I loved it. Did get some fisheye on one door so I'll have to fix and respray that at some point and a couple sags/runs in the clear to sand out, but I can make some serious progress on the build now. did get the engine stripped down as well. Bearings, rings, valve springs and a gasket kit have been ordered to freshen it up. but otherwise everything measured out good and seems like a good starting point.
-
Fast Floridian's 240Z Track Build
FastFloridian replied to FastFloridian's topic in S30 Series - 240z, 260z, 280z
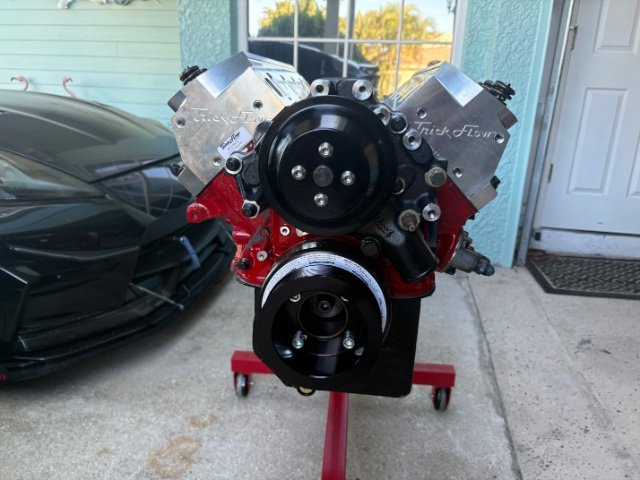
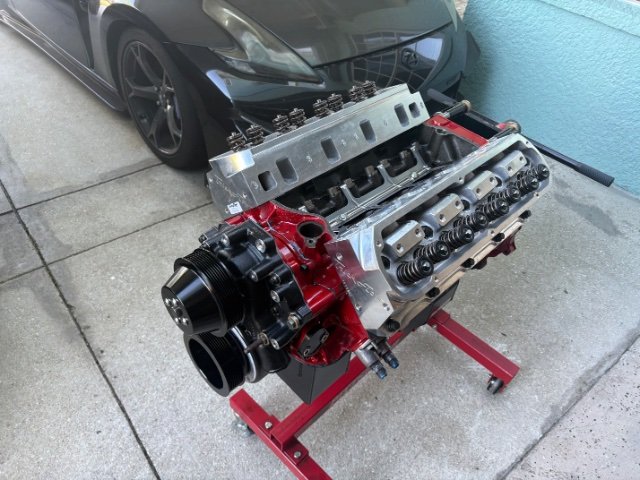
Thanks for the reminder, I had not. That’s a couple things you’ve caught, I really appreciate it as I’m doing a lot of these things for the first time. I owe you a few beers if we ever meet up. Took the lower bolts out one at a time, cleaned and torqued back with plenty of thread sealant. Got the second head on today too.
-
Fast Floridian's 240Z Track Build
FastFloridian replied to FastFloridian's topic in S30 Series - 240z, 260z, 280z
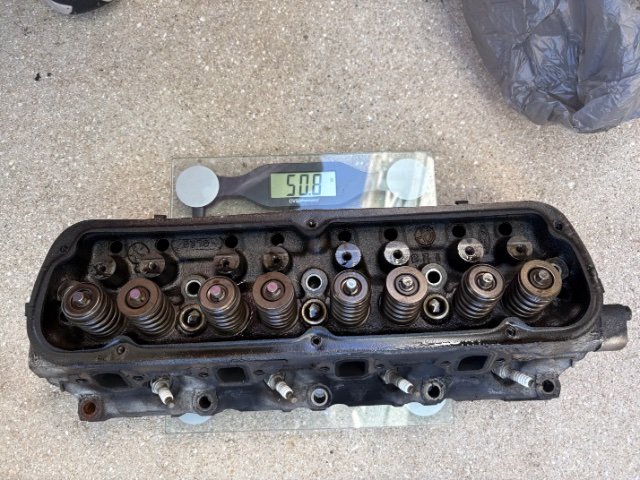
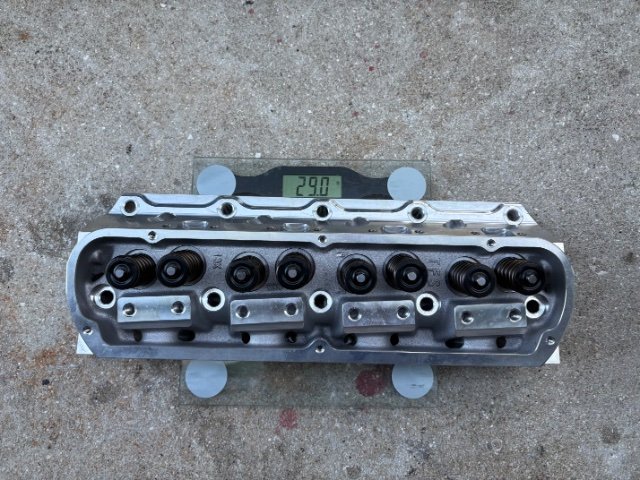
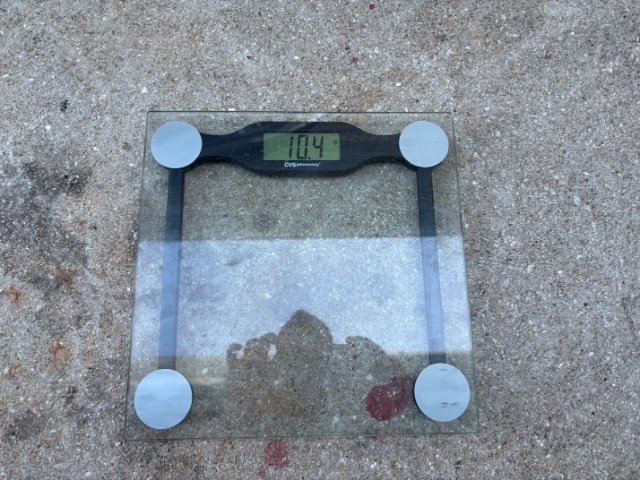
Got around to weighing the door and the heads. Old heads were 50.8lbs new ones are 29lbs. The carbon fiber (shell) is 10.4lbs, looks like big weight savings.
-
I just got a bunch of timeout errors today. Interestingly, the site also no longer remembers where I left off on threads I've read before.
-

Progress on my insane VQ35HR 240Z project
Leon replied to markrolston@mac.com's topic in Nissan V6 Forum
Gorgeous work! Amazing to see the transformation this car has gone through in the last 17 years that this thread has been alive. We desperately need some in-car and trackside videos! -

IMSA GTU vintage racer build
clarkspeed replied to clarkspeed's topic in S30 Series - 240z, 260z, 280z
Hi everybody, long time for updates. Been quite busy with kids and a very nasty divorce going on. The good news is my garage and cars are still intact and I am still making progress, although very slowly. Car is very close to track testing. I decided to have a new pair of steering arms machined to match the front geometry. I will post more when they are finished. In the interim, I took the time to catch up on some side projects I wanted to do. With the advancement of AI, some of the projects I considered impossible a couple years ago have turned out to be quite easy now and very inexpensive. Based on Arduino technology, I have integrated a motion sensor into my data acquisition system. I use a Race Technology DL1 Club box which is limited to 8 analog sensor inputs, but can decode an almost unlimited amount of CAN signals. So I built a circuit that decodes the motion sensor and outputs a CAN signal. I now have 3-axis roll, pitch, and yaw angles along with speeds and acceleration live data. It will all be packaged in a small box that mounts in the car. Next is a infrared tire temperature monitor. A 16x4 temperature array sensor once again combined with Arduino and CAN output board. I am trying to package this as small as possible so it can be mounted on brackets roughly 4" above the tire. Again real time data of inner, middle, and outer tire temps while driving. Hopefully saves a lot of time when dialing in the camber and pressures. More to come........... -
8 years later. The fundamentals have not changed. IMG_4754.HEIC
-
Fast Floridian's 240Z Track Build
74_5.0L_Z replied to FastFloridian's topic in S30 Series - 240z, 260z, 280z
Don't forget to use sealant on the short head bolts / studs. They go into the water jackets of the stock block. -
It's doing it today. It's never been this bad for me before, but I see what you mean now.
-

280z 1jz track build from a pile of parts
jhm replied to flatout's topic in S30 Series - 240z, 260z, 280z
Good work! (And nice garage/shop -- I'm jealous!!) -
280z 1jz track build from a pile of parts
flatout replied to flatout's topic in S30 Series - 240z, 260z, 280z
spend tons of time last week doing body work. I am TIRED of sanding. Saturday got the whole car in epoxy. Spent 13hr sunday, and 5 hours monday, block sanding and some final little body work touches. Weather got cold for some reason so taking the next couple days to dial in the last of the little details and hopefully later in the week get some color on this thing. I thought i had a good size garage until I need to hang 16 things from the ceiling for painting. A friend let me park my truck at his house. My 240 i just keep moving in and out of the garage. and have the dailies living outside in the driveway during this process.
-
very cool. new tool are always fun. Love seeing how people process a challenge and overcome it.
-
MrQuiet joined the community
-
Back out in the garage this past weekend. I made some progress sectioning in one of the repair panels: I used the new drill press and a hole saw to cut the drain hole in the replacement section. It is a tiny bit undersize, so I will use a die grinder to open it up the last bit to get to the correct diameter. I also used the "shrinker" die that I got from Mittler Bros back before the holidays They were running a Black Friday special. I also used the sheet metal brake I got from them at the same time. I am pleased to be getting some use out of these new tools. I should be able to finish welding this repair section into the right side floor soon. After welding and grinding down the welds, I will be doing some shrinking with an oxy acetylene torch to get the floor panel flat and eliminate any "oil canning".
-
I was able to find the time recently to make the above mentioned mods. And I made three more panels. I messed up on the second one, but the third and the fourth came out nice. This is the fourth. For this one, I didn't need as much extra material around the outside of the depression. This one will be going on the left floor panel. The third one with some extra material outside the depression will be going on the right floor panel. My attempts to weld supporting material to the back of the oval plate was not successful in making it rigid enough not to bend. I ended up determining that it was easiest to press the part by moving the assembly fore and aft in the press. I applied pressure to the middle, and then to each end. There were some tricks I employed to align the oval plate in the ideal position to push down through the plate with the oval cut-out properly. Mainly, I ran some bolts through to locate everything, and then unbolted and re-bolted the thin sheet in the exact location to ensure the oval plate pushed precisely where it needed to. There is some slop in the two forming plates, so you have to get things aligned properly in a way where you can't get it wrong. I got it wrong on the second piece. So I used bolts and holes in the forms for proper alignment in the final pieces. Next, will be sectioning these in the floor panels of the track car.
-
So, after the above effort, I needed to address three things: The edge on the pressing side of the oval plate is a bit sharper than it should be. One side of my form - the one with the oval cut out of it is 1/8" wider at the opening than the others side. I want to strengthen the oval plate so it will not flex in the press I was able to quickly address the first item by using an air powered 90 degree die grinder to soften the radius on the oval plate. I use 3" Cubitron 3M sanding discs (36 grit) for a first pass at contouring. Then I follow that with a course hand file for final shaping. For the second item, luckily the side that is too wide is the side that has another plate tack welded to it. Tonight, in a matter of seconds, I broke this plate free from the larger part of the form. Then I pushed one of the "fingers" toward the other just 1/8", and then welded the plate back on. With the form moved 1/8" on this one side, I now have a consistent opening for the length of the form. It'll only take a few minutes of grinding and filing on one side of the form to restore the proper shape. And finally, I will weld a couple of angle iron pieces (cut to the full length of the oval plate) in the orientation shown here so that I will be able to make the next panel with a lot less fuss with moving the clamped assembly around in the press. With those welded in place, pressing with the hydraulic ram just one time in the center should transfer the load equally across the span of the part because the oval plate will no longer deflect at the ends.
-
I tried using a rather thick walled round tube I had on hand to press down across the long side of the oval, without welding to the oval plate. It did better as it was able to distribute more of the load towards the ends of the oval plate, but it still didn't work as well as direct force below the ram. Perhaps it was flexing as well. I'll probably visit my local metal supermarket and look for some suitable drops to add to the plate to make it more rigid. I am thinking about adding some two solid square bars about 1/2" thick lengthwise on the oval from end to end. Then using another plate under the ram to push down equally on those. In the meantime, I turned the assembly 90 degrees and slid it fore and aft on the press bed to get different areas directly under the ram. All of my various sized C clamps made for an obstacle course, making it difficult to maneuver the assembly where I needed it to be. It would be better to bolt the plates together instead of using clamps. If I had to do it again, I'd to make the forms larger on the outer periphery and drill through them and use bolts. This would make a better finished panel and give me the additional material I need beyond the over depression. I could just cut the part of the panel where the bolts held it. Pictures of the finished "prototype" - where I removed one of the C clamps to allow maneuverability in the press I got a large wrinkle. And I got a few more wrinkles around the outside of the panel outside of the form. But I think I'll be able to straighten those without much effort with a hammer and dolly. I am quite pleased with this first attempt! However, I am going to address a couple of small issues and try again. I hope to make an improved version, and then a second one for the other side of the floor of my track car.


-
Who's Online 0 Members, 0 Anonymous, 477 Guests (See full list)
- There are no registered users currently online