Snailed
-
Posts
357 -
Joined
-
Last visited
-
Days Won
3
Content Type
Profiles
Forums
Blogs
Events
Gallery
Downloads
Store
Everything posted by Snailed
-
Wow, yeah, that's pretty fast. That's on a pretty small crank pulley too. So you need to try and reduce the long runs between pulleys and use enough wrap to counteract the forces of belt orbit? In the case of timing belts (much slower belt speed per rpm) do you think it's possible for the belt to be effectively shortened on the tension side and dynamically change cam to crank timing? I always wondered if the aftermarket timing belt idlers were necessary even on 9-10k rpm engines.
-
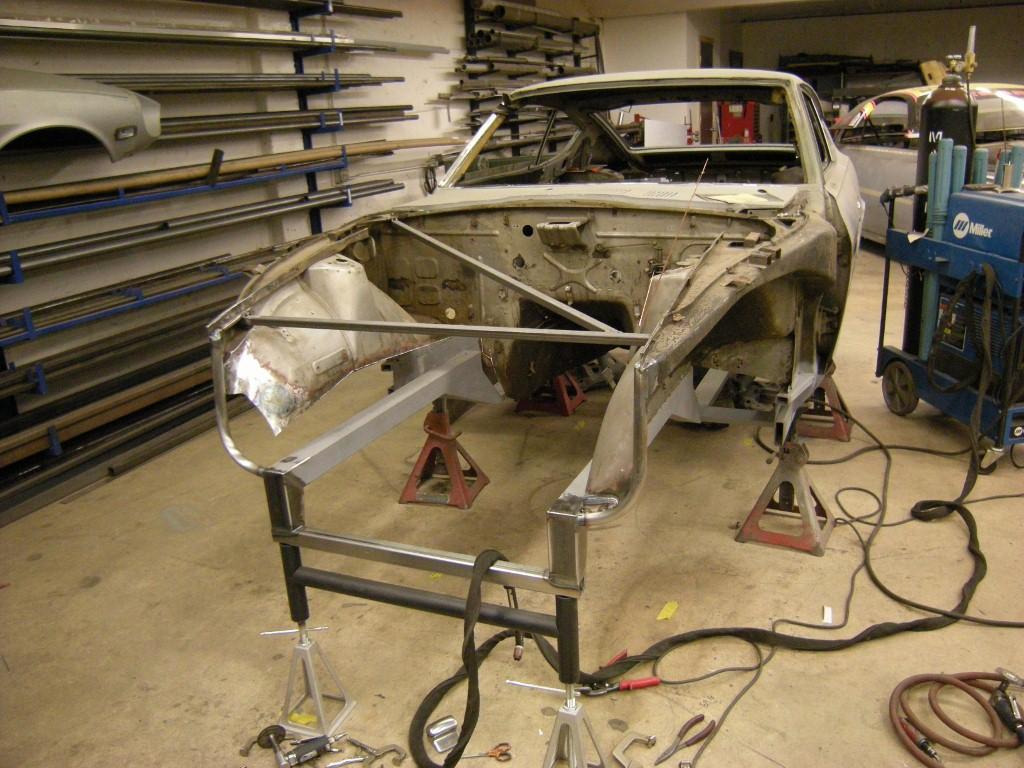
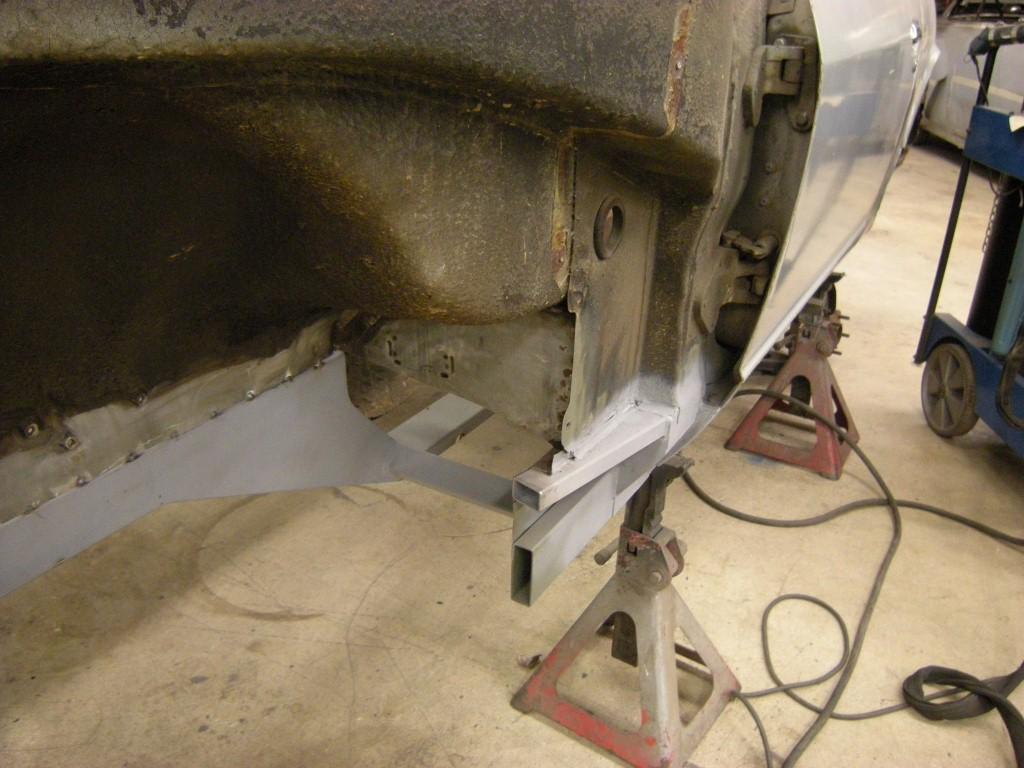
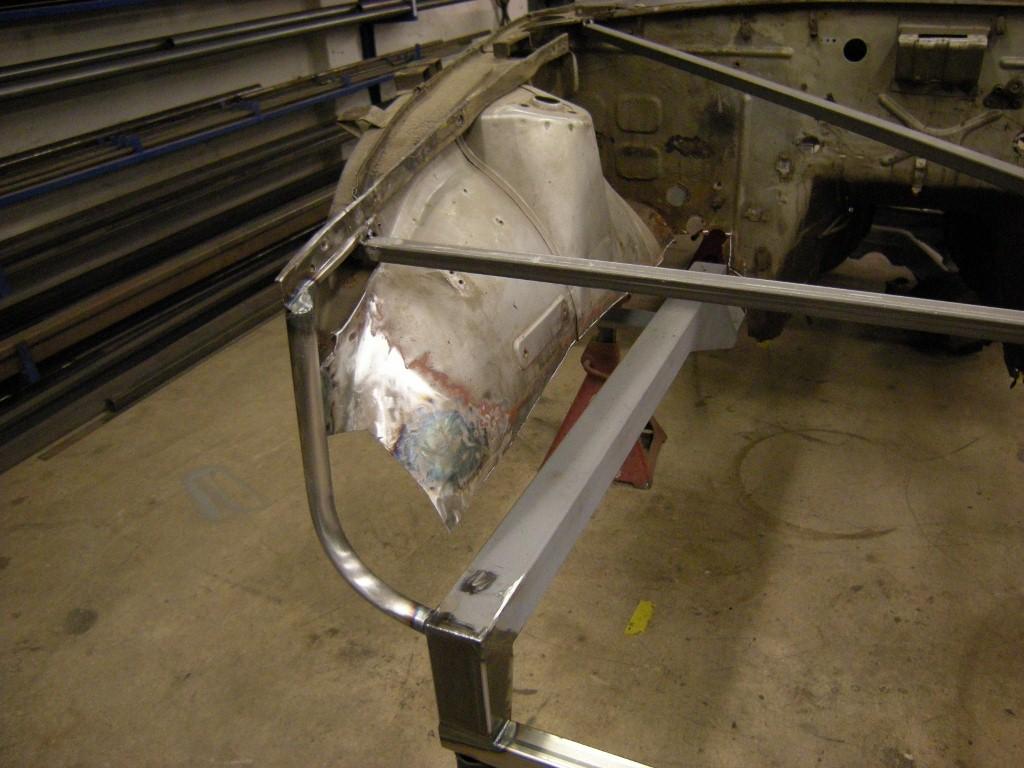
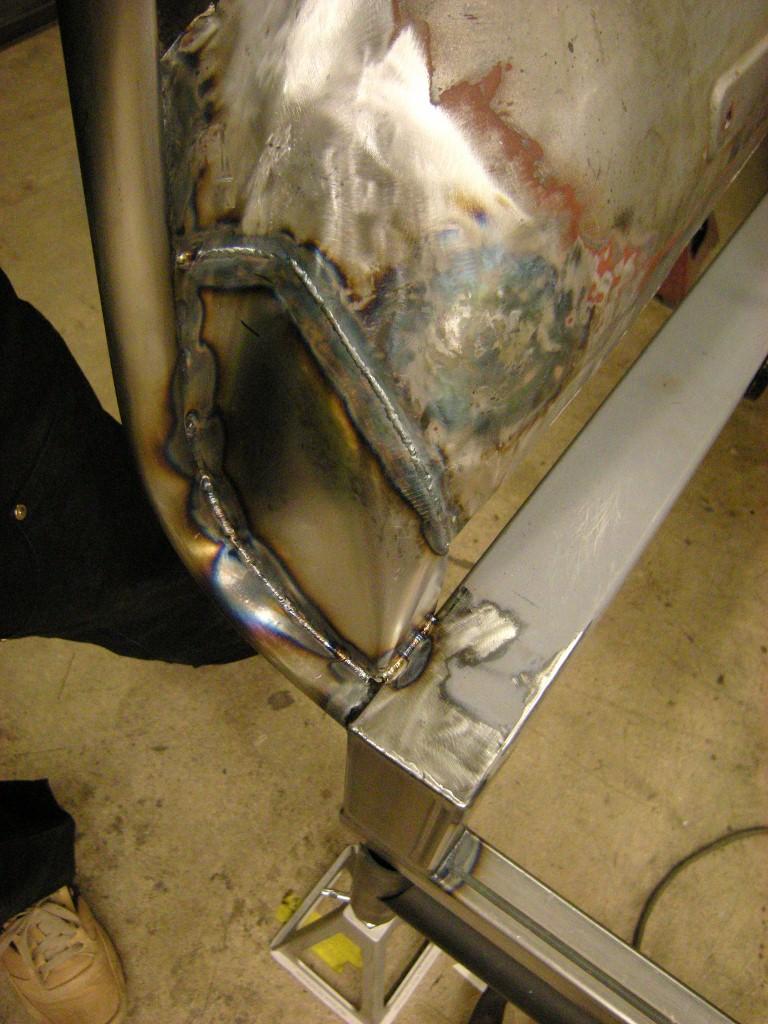
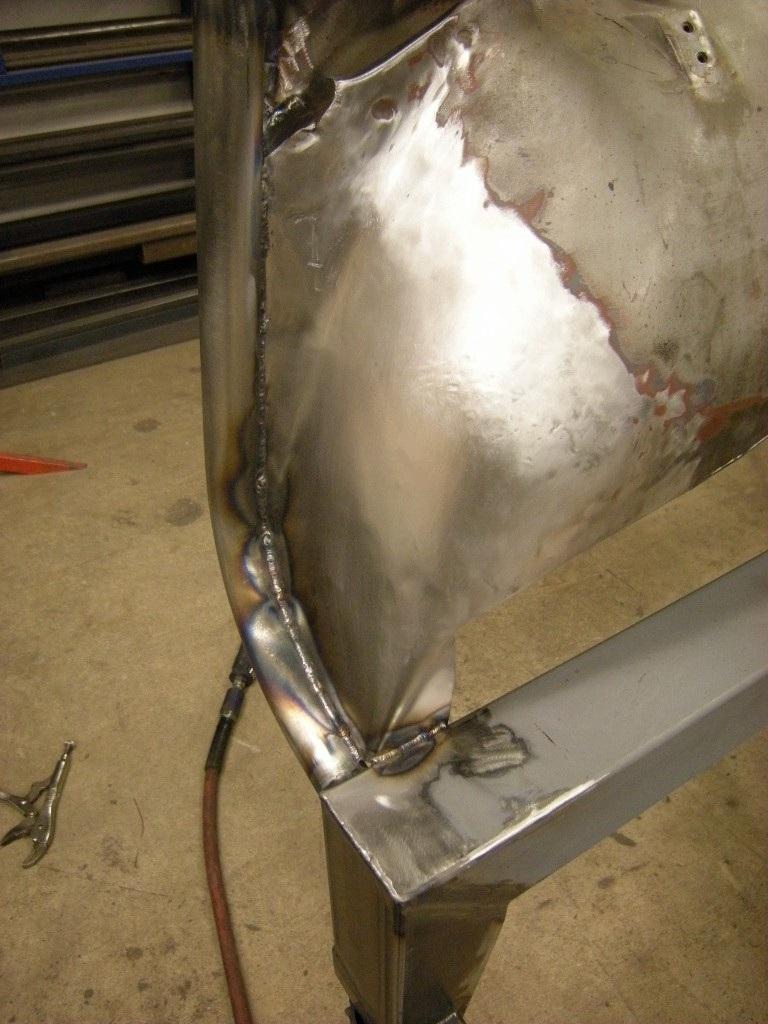
Thanks guys! So those cheap steel hubs I was looking at, the MBM ones, are about 6.5lbs EACH. That is a pile of unsprung weight. I got a good, used RX7 hub for about $30, which is aluminum and closer to 3.5 lbs including studs and bearing races (the MBM had neither installed). The inner bearing is a little bigger than the Mustang one, which is nice for durability. So my idea was to fit a slightly larger OD outer bearing by turning about .020" off the ID of the hub and pressing in a new race and then making a sleeve to adapt the large RX7 bearing to the Mustang spindle. But this didn't work out, the distance between the inner edges of the bearings is too close together on the RX7 hubs. I guess in a way I just don't like the idea of using off the shelf Wilwood hubs, and I'm cheap (see rear suspension). Like the spindles, they sort of make the best, reasonably price option and at 3.1 lbs bare, they are as light and a lot stronger than any OEM hubs I could adapt. And it will save me a lot of time messing with bearings...so, I'm going the boring route and just ordering hubs I think. Here are couple more shots of the front. I used a little piece of 16g to reinforce where the upper rail meets the 1" tubing. I put a little drain hole to get rid of any moisture that might collect from the fresh air ducts. You can also see the very small patch on the bottom of the inner fender.

-
Sirpents 260Z / C32 AMG Powered RS30 - Australia
Snailed replied to Sirpent's topic in S30 Series - 240z, 260z, 280z
You do nice work! I can't wait to see it finished. -
Oh, I misunderstood what you were saying. I thought it was an oscilation set up by the non-linear resistance of the supercharger. That does make sense though, I'm surprised that it's an issue at the fairly low mass of the belts and the high tension but clearly it is. Interesting stuff.
-
I never knew it was called "belt orbit". So belt orbit does not get started (as readily?) on a centrifugal setup I assume? I still have seen some belt problems with these but I would think it was more a function of smaller drive pulleys, less belt contact, and the increased work you are asking the belt to do, as you mentioned. I think people do try to address getting enough belt wrap, at least you hear a lot of talk about it on forums and from guys with cobras that don't perform when they need to. Wouldn't it be wise to grossly oversize the belt and not always be on the edge of...the road haha. I'm a reliability whore, sorry for all the questions. What about belt wear? Do you have figures on how the coeficient of friction changes. Is it a flat line that suddenly drops off or maybe a gradual decrease after inital seating of the belt?
-
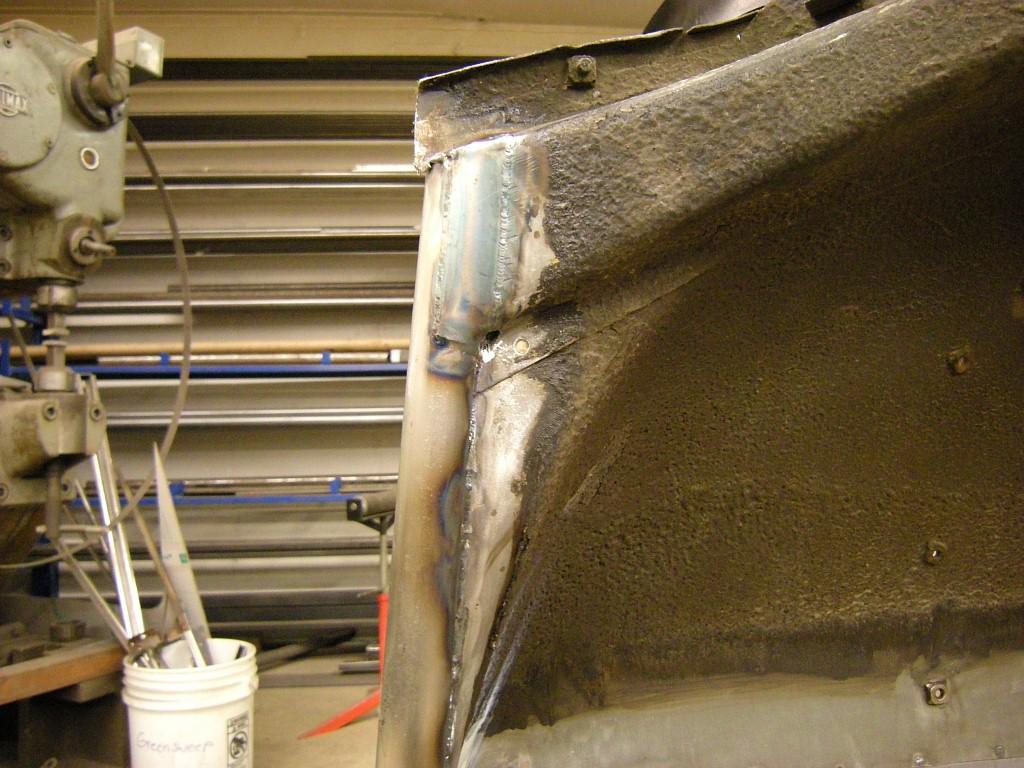
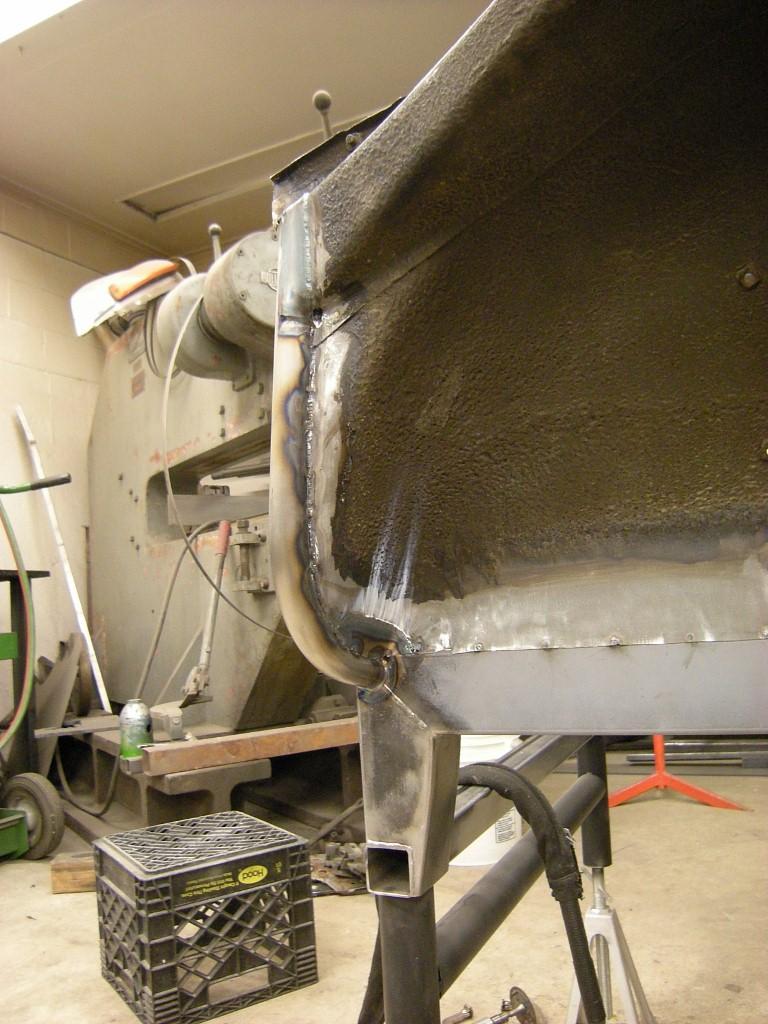
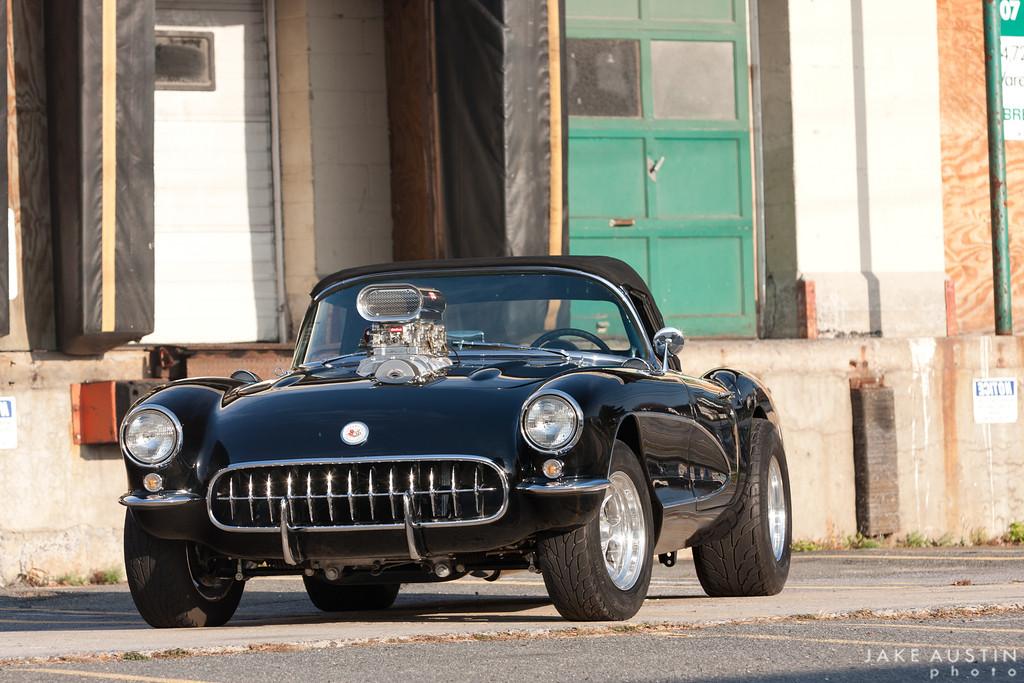
They do that way to much it seems. I have installed and tuned a bunch of bolt-on aftermarket setups and it seems like most of them at least develop slipping problems later on if not shread belts. Maybe a cogged belt like this Vette I just finished?
-
EZ wiring harness with ground switched turn signals
Snailed replied to dpuma8's topic in Ignition and Electrical
I found this here, on Hybrid-Z. I have not tried this but it seemed to work for the guy that posted it. I don't remember who it was unfortunately. You should spend more time searching in the future. I just happened to be researching wiring stuff and saw this. Painless Wiring uses the same General Motors wire color code so these should translate to the EZ Wiring if you got the colored harness. If you bought the black one, just cross reference the color to function. Combo Switch----- Z Wiring Harness Main Color/Stripe Color ---->Color Painless # Description Left Signal post White/Black ------------> Lt Blue 949 Left Rear Turn Left Signal post White/Black ------------> Yellow 926 Left Front Turn Right Signal post White/Red ------------> Blue 948 Right Rear Turn Right Signal post White/Red ------------> Green 926 Right Front Turn Signal Center Post Green ------------> Black 953 Flasher Head Light Power Red (heavy guage) ------------> Red/Black 925 HL 12v Head Light Power 2 Green ------------> Orange 959 HL 12v High Beam post Red/Yellow ------------> Light Green 908 High Beam Low Beam post Red/White ------------> Tan 909 Low Beam Dimmer center post White/Red ------------> Blue/Yellow 907 High Low switch Running Lights switch Green/White ------------> Brown 929 Tail Lights Running Lights switch Green/White ------------> Brown 927 Front Park Lights Running Lights switch Green/White ------------> Brown 930 Instrument Lights -
Here are those pictures...
-
EZ wiring harness with ground switched turn signals
Snailed replied to dpuma8's topic in Ignition and Electrical
Is there a reason you can't just wire the lights in the GM/EZ wiring fashion? What parts of the Z wiring are you trying to retain? Maybe this will help; http://forums.hybridz.org/topic/109980-need-major-help-identifying-combination-switch-wires/ -
That's the truth. I think the most significant thing they do is make people feel secure.
-
You are lucky! Next Friday the shop goes back to cellulose based drama only. Our painter is leaving...us alone . So as long as Cintas keeps up their end of the deal I should have it pretty easy for a while.
-
Boned Again! A rant about lifes little suprises aka Fear And Loathing!
Snailed replied to rayaapp2's topic in Non Tech Board
Wow, glad you made it out of that. Good luck with all the insurance BS. At least there are all kinds of nice Zs for sale at that end of the country. -
I don't have cable. I hear people talk about those shows like their first born is the star them. I prefer the real, unscripted drama of car forums and fab shops.
-
If Barris built nice looking or nicely built cars I might give his opinion some weight. He is responsible for some the ugliest hack jobs on wheels (I have seen some up close) so I can't even bring myself to look into this any further. Have a beer and chill, Lorenzo
-
Neat vac idea. Can you run a hybrid TPS & MAP based load scale with megasquirt or just one or the other? I have never tuned MS but some systems have that avalible for ITBs. It works well. I made a couple velocity stacks out of thin tube with a solid 5/16" ring that I rolled and welded to the end of the tube. With just a tiny bit of clean up, they looked really aerodynamic for what they were.
-
If the quality if good, $300-400 is very cheap in my opinion. Add up what all those gauges.functions would cost from a decent gauge company and it will be a lot more money. That is a pretty cool gauge for all kinds of different projects. It would be awesome in something like a Locost or Aerial Atom copy or even a shifter cart.
-
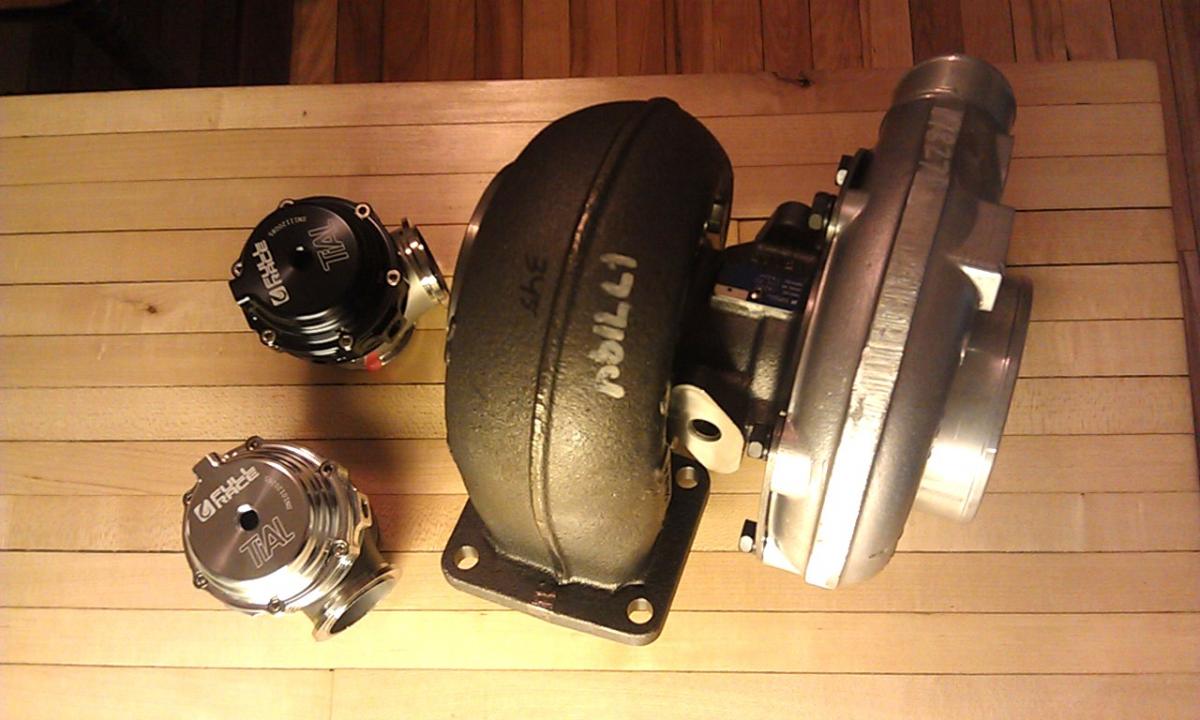
I have been working on the front of the car lately. Mostly getting the rails tied into the upper parts of the engine bay along with reinforcing the bottom of the door hinge pillar so I can get that tied in across the foot box area. I'll get some pictures up soon of this. Once I'm done here, it's time to position the engine & transmission and build or modify the tunnel. It seemed like a good time to order some motivational parts so I picked out the turbo I want and two Tial MVS wastegates. The turbo is a Borg Warner Airwerks S200SX. The 76mm extended tip compressor flows 60lbs/min. in this 4" inlet housing. The turbine is cast inconel wheel in a 1.22a/r twinscroll housing. This will go on a divided manifold and should spool at least as good as a small GT30R but make more power...and it's a journal bearing chra so there are no coolant lines. I want it to look nice, so less plumbing is always good. I'm thinking about making the manifold with 1.4" ID runners instead of the usual 1.7" to promote fast response. I want lots of area under the curve so it feels fast without completly wringing the engine out all the time.
-
Haha! yes, it does suck. I have very little experience with it, but I know I like TIG better as well. Just thought I would point it out becasue it's an interesting welding process.
-
A lot of people would argue that Oxy/Fuel welding is superior to TIG for welding sheet aluminum. It's a bit harder to do though.
-
Mittler Brothers 90 degree hydraulic bender with air over hydraulic pump. It's mounted on a stand that has wheels on one end as well as a holder for the foot pedal and pegs for all the dies. It's very easy to use, fast and is built well. It is mostly used for cage and chassis work, DOM and Chromoly 1.5" to 1.875" and lots of smaller stuff for control arms.
-
Yes. It looks like it changes the lower control arm setup to a semi-leading design too since the pivot is furter away from the cars centerline. Doesn't this make the suspension less compliant when hitting bumps?
-
Single stage Imron is pretty nice for fuel tanks and under-car stuff like suspension parts and subframes. I'm impressed with how it holds up well to various fluids and tool marks. I'm not a painter but I would think you could add a flattening agent to Imron to make it more of a satin or flat finish. That will hide small imperfections much better than 100% gloss.
-
Wow, that was pretty fast progress! I like the unique styling of your car, very cool. The finished weight is excellent too.
-
That cradle wouldn't be much help. As long as you don't change the geometry of the suspension for the worse when locating the trailing links you would be better off doing it like the guy in the first link, making individual mounts that are incorporated into the unibody. I would not copy his front diff mount though. Overall this is a pretty easy conversion if you don't have the money for all the billet, bolt on stuff. and can build stuff. Go for it!
-
Today's Test-n-Tune session: 1/4-mile
Snailed replied to RebekahsZ's topic in Gen III & IV Chevy V8Z Tech Board
What is the toe like in the rear? I wonder if it's changing a lot under acceleration. Too bad you can't easily dial in some anti squat...