-
Posts
357 -
Joined
-
Last visited
-
Days Won
3
Content Type
Profiles
Forums
Blogs
Events
Gallery
Downloads
Store
Everything posted by Snailed
-
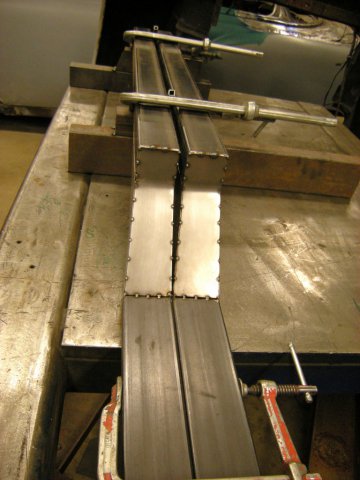
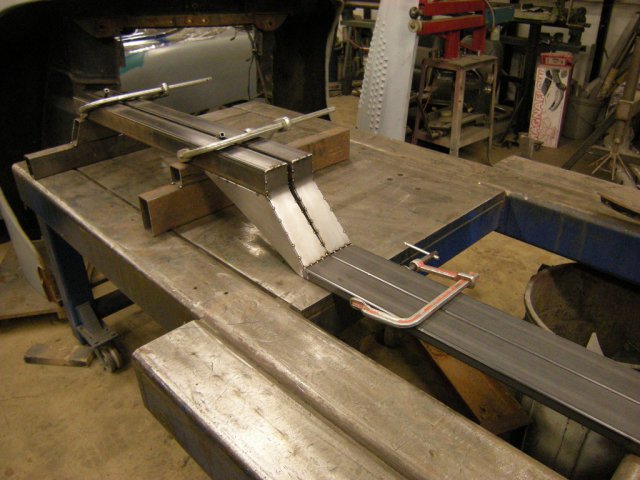
Alright, I'm back at it after a little break. I ordered a 1JZ-GTE swap for my Z the other day and started fabing the main rails today. I'm pretty sure I'm going to build an unequal length double wishbone front suspension for this. I haven't bought any parts yet but I'm iching to build a subframe and some control arms. Been spending way too much time on VSusp trying to dial in something that will fit and work pretty well for. I think a need to start a suspension thread and get some opinions on some of the details. There a several guys here that I would like advice from. Most likely going to use premade spindles of some sort. Forged Mustang II, 2" drop spindles for $110/pr? I also picked up a nice used R154 trans to sell or build up for later.
-

Roll Center Height/Roll Resistance
Snailed replied to johnc's topic in Brakes, Wheels, Suspension and Chassis
Why? That makes no sense to me. -
The car in the video can't be the car in the 1st post...10,000 miles between them, right? I hope it's not anyway. The video car is just poorly done even with the turbo flex and the grounded turbo.
-

1971 240z Series 1 - "Z-Wolf"
Snailed replied to jimmyjones000's topic in S30 Series - 240z, 260z, 280z
You polished plain steel bolts? -
Well said, Gollum. It's very important to make sure you set attainable goals. It's not easy to do and like you said, even if you have the motivation, it's easy to run out of money faster than you can build. My project is taking a while also but that's fine with me. The scope of what Racer_z want's to do seems very reasonable to me. It's pretty much all bolt-together stuff you can do at home if you can afford or already have all the fancy parts needed. There are much cheaper ways to get great brakes and suspension but they require knowledge/information, fabrication and time.
-
Yup, that's a big job. I have put a few 2005-2008 V8 domestic cars (GTOs & Magnums) under American cars from the 50s, making them a unibody car and retaining the entire floorpan, suspension & wiring from the drivetrain doner. It takes a lot of measuring and I think it would be a lot less fun without an electric overhead crane to help with all the careful fitting and moving big pieces of car around. I would also recommend building yourself a perfectly flat jig to build on. Wheelbase changes are the absolute least of your worries on something like this. Track width is very important if you don't have the skills or other means to form new outside panels to cover the wheels. Also be mindful of the drivers position relative to the windshield and fire wall. That is critical to making it a car that looks right and is nice to drive. Good luck! edit - Also if you have 6-10k to get this into a rolling car let me know and I will have it picked up. seriously Here is one idea...http://www.komycars.jp/drag/z.html
-
Pretty much what 1 tuff Z said. Just try to not bring out the metal too far. If you lay a flexible ruler across the surface you will be able to see the natural curve and if you need to tap it in or out to be on the same plane. Generally, any chrome place worth their salt will be very good at getting the part straight before they chrome and using layers of copper like bondo to smooth the surface.
-

Does anyone have more pics/info on this car?
Snailed replied to Turbo6.0's topic in Body Kits & Paint
Yeah, that is one of my favorite S30s that I have seen on the internet. It's in my top three. I'm curious what the front looks like. I have had no luck finding out anything else about it. -

Buying advice...would you bite? help asap!
Snailed replied to motorhead87's topic in S30 Series - 240z, 260z, 280z
That one needs a lot of rust repair. I would give him no more than $800 IF you are excited about doing lots of patches, otherwise pass on it. -

Getting back into the Z-game
Snailed replied to Jesse OBrien's topic in S30 Series - 240z, 260z, 280z
Seems like a cool swap from what I have seen others do with the BMW engines. I don't understand your logic on several steps of the project though. So you have a daily driver eliminating the need for to have the S30 a driving vehicle until it's done. Why buy a running, driving s30 if you want to change out the drivetrain and redo all the wiring? Why not search for the most rust-free s30 you can find since the body is the only major part you are keeping and forget about the running part? running cars always cost more...right? I don't get why you would have anything to do with the original harness if you intend to end up with a modernized, new one you will make yourself. Why not just draw up a schematic of what you want, remove the old harness and build your new one in place rather than pulling out one circuit at a time and even messing with old cracked wires and loom? You could even buy a decent aftermarket wiring kit and get 80% of the car rewired in a weekend. Just hearing about wiring a car this way makes my eye twitch haha I don't get why you would run the engine on a stand first either. It's a simple, stock engine with simple wiring, install it, wire it up and start it...it's and extra day+ of work for nothing. -
I love these cars but it's a "big buck" original 240Z somewhere in the area of $10,000? I wouldn't hesitate to cut up any of these cars if I wanted to have a modified one.
-
Neat project. The cost of upgrading a stock S30 rearend to disc brakes, LSD, coilovers, adjustable arms and axle stubs that won't break is outrageous in my opinion. These kind of swaps can be FAR cheaper and work just as well if you like fabricating stuff. How much does the ford stuff weigh? Here is my stock 240z rear suspension/diff/brakes on the scales for reference. 215.2lbs
-
Cool, glad to help. If you want to use pulse I can help you set that up too. I personally don't use it very often (just not in the habit I guess) but it can help reduce your total heat into a weld.
-
I sold my complete 1971 L24/4spd with 71k miles for $200 or $250...can't remember exactly.
-
Keeping tungsten sharp and clean is an important thing to be diligent about as well. The sharper the point the more focused the heat.
-
What machine are you using? I usually use a 1/16" or .040" thoriated tungsten (miller dynasty) for something like 22G and I would set the amperage to about 50 assuming you have pedal or torch control. .040" ER70s-2 is a nice filler for 22G. I use a gas lens and probably a #8 cup. No pulse TIG welding will warp the sheet metal just as much as MIG (more for most people). It's just a much easier weld to dress and metal finish. Spend a lot of time fitting the panel and you will save it on the other end. Do very close, fused tacks, reshape (stretch tacks) and then run as long and fast a bead as you can manage in one pass. Don't sit there and put heat into the panel. Get comfortable and in a good rhythm so you can do 3" in 10-15sec. When you dress the weld leave the haz on the topside so you can see areas where there might be more or less shrinkage. The haz width will be even once you get good at controlling your speed and heat. Stretch out weld with a medium crown hammer according to the haz width, being very consistent with your strikes so you stretch it evenly. More small hits are better. Same as welding. Get a good rhythm going and stick to it the whole way down the weld. Then finish with a slapper and dolly and you should have a panel that is exactly back to the shape you had when you tacked it. I have some TIG welded patch pictures in my project thread on here. edit - actually I don't, those are all MIG. I only tigged some on the A pillars.
-
The cage and harness look dangerous to me. Neat car otherwise.
-
I primarily use the Vibrant clamps at work and they are very nice. The locating ridge makes assembly a little easier and the quick release clamp is also a time saver. I also use Reid Washbon clamps for applications where I need to match an existing flange, light weight applications or low profile applications. Excellent service and parts selection. Never tried any of the inexpensive ones myself. RTz, What you are doing there is a similar effect as the Vibrant ones but unless you face the tube ends in a lathe, you won't get as nice of a fit on the "lip" you make. Either way will work fine though. it's splitting hairs IMO.
-
That's a lot of tire for a little car! Can't wait to see the progress.
-
I think the 2jz rods are also 17.2-17.7mm longer so that's 31+ mm taller from deck to crank center including the longer stroke crank. I would expect the valve cover and head heights to be different too... If I can get within 5mm or so that would be fine for what I'm trying to do.
-
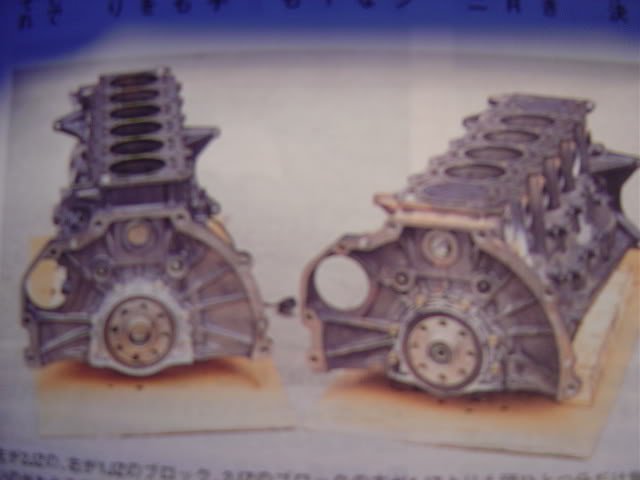
ok, so the head and valvecover on the 1jz may be about 1/2" taller than the 2jz? Here is a picture of the two side by side. Looks like slightly over an inch, no?
-
I plan on installing a non vvti 1jzgte in my Z but I may be able to use a 2jzgte to mock up my driveline angle so I can keep building as I save up for the swap. I read on supra forums that the crank centerline to deck on the 1jz is about 30mm shorter than the 2jz which makes sense and by pictures looks about right. Other factors would be head and valve cover height. Anyone have a non vvti 1jzgte they could measure for me? I'm concerned with hood clearance as I will probably have the engine mounted 2-4" higher than the typical 1jzgte in a 204z and would like to avoid modifying the hood if at all possible. Any help would be great. Thanks!
-

s30 flush fit windows.. Interested?
Snailed replied to MidnightRider's topic in S30 Series - 240z, 260z, 280z
My $0.02. I do this at work frequently on other types of cars. If you are not having cu$tom glass made and are doing body work anyway, all that is needed is to reshape the window opening, creating an adequate lip to mount he glass to and making the outside opening have whatever gap size you think looks good. Sealing has never a problem that I have seen since the glass is bedded in windshield urethane which is a far better seal than the stock style seals on older cars. You could do a nice job on an S30 window frame with a shrinker/stretcher and a welding machine in less than a days work and about $25 in metal and consumables. A tube of windshield urethane is around $11. The viewable opening may end up slightly smaller than stock on these cars, but I have not measured or even looked at the seal on mine. Personally, I think the old style window trim looks pretty cool on the s30 body but I can understand why some people might like this concept. -

No Brake Hardlines on new project!
Snailed replied to Benz's topic in Brakes, Wheels, Suspension and Chassis
^ That's all good advice. I/we make SS lines for most of the cars we build at work. It looks nice and if you have a good hydraulic flaring tool it's not hard to work with. It does bend a little harder than mild steel, but it's not too bad. We don't use any special bending tools with it. The main concern is that you use seamless tube and make very clean and square cuts since the tapered seat you are going to form won't be very malleable and leaks will occur if you don't have a very smooth sealing surface. On the other end of it the copper/nickle alloy tubing is very very easy to bend and you probably won't even need tools if you are good with your hands. It's about $1.70/ft through NAPA for 3/16"(PN 6413347). It's seats really well also so leaks are very unlikely even if it's your first time flaring tube.


