280zex
-
Posts
399 -
Joined
-
Last visited
-
Days Won
3
Content Type
Profiles
Forums
Blogs
Events
Gallery
Downloads
Store
Everything posted by 280zex
-
And I'm thinking this topic should have been posted in the "interiors" section......DOH!!!!
-
I thought so. I remember some of the pix he posted some years back but couldnt remember his name here... at one point I remember a huge spoiler mounted on the boot....
-
I found what I want.... Nice equipment, a bit spendy but it will do exactly what I want! http://aimsports.com/products/mxl-strada/accessories.html
-
Yes I do like the all in 1 setups and I am currently on google looking at options. Yours is definately spartan and it looks a bit of a tight fit!
-
I did find something on car domain I like.....I think this person is a HBZ member....I kinda remember this pic from around here some place....I love the interior!!!

-
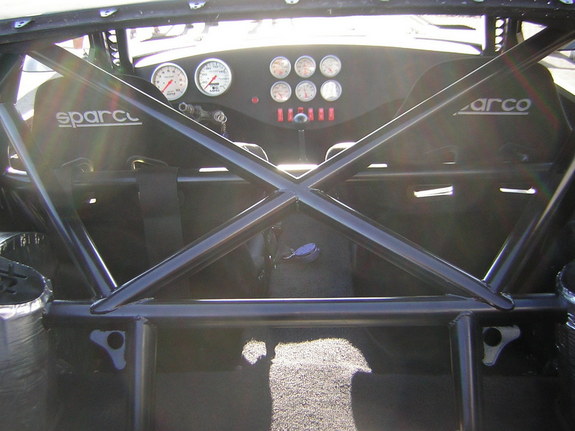
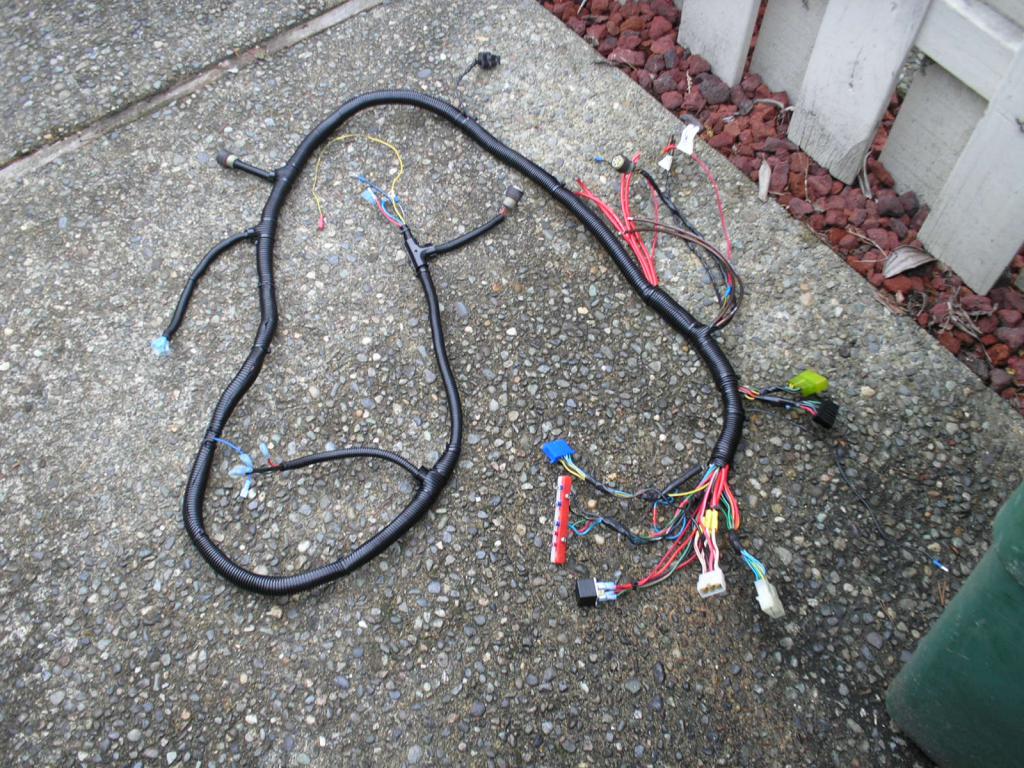
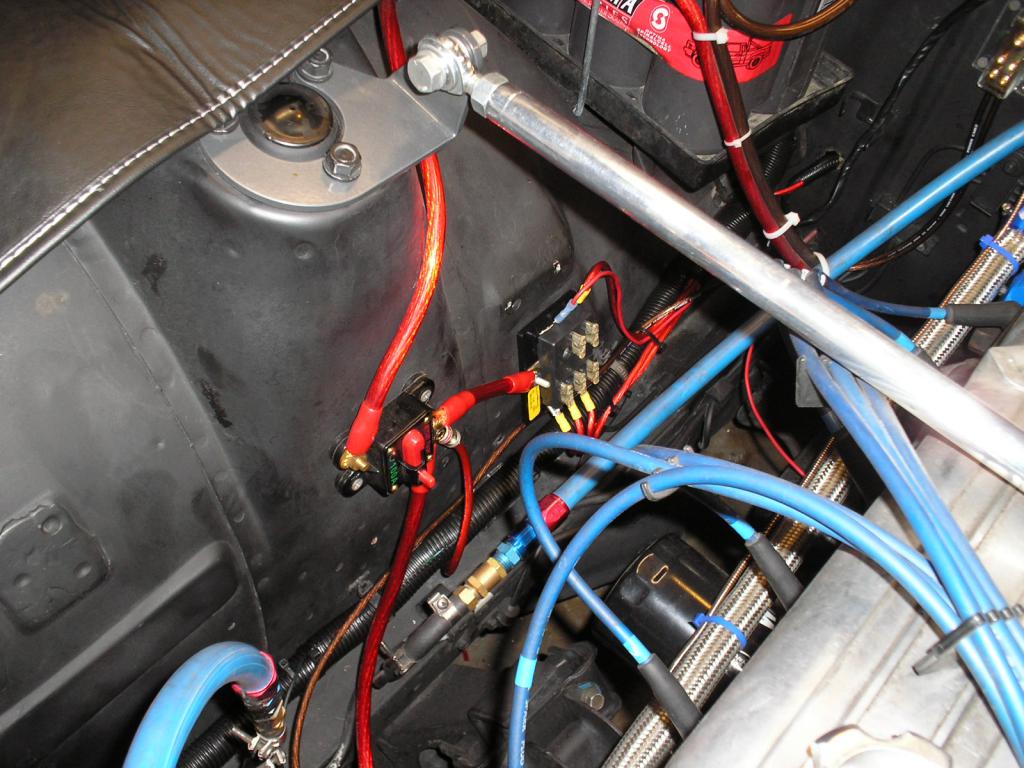
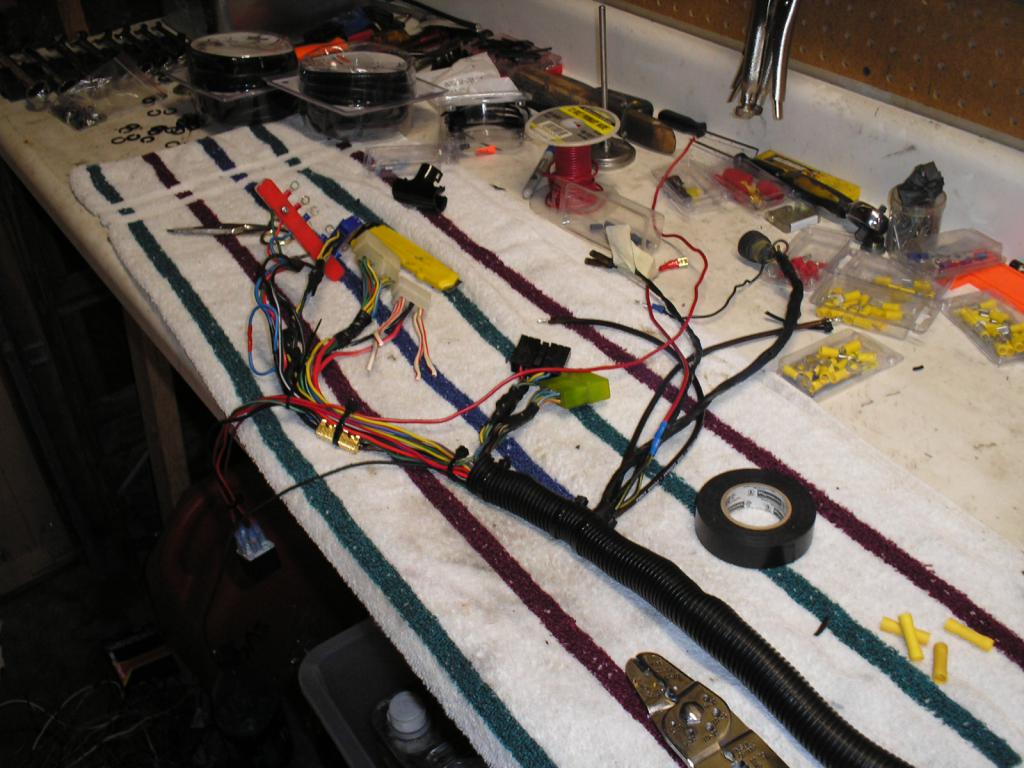
I dont know why but I have been seriously thinking about completely re-designing the interior of my 280Z. I'm talking about a total dash removal and cleaning up the firewall. I also would like to replace the steering column and re-do the gauge placement. I would like to place my tach gauge with a half moon style (big!) right in the middle of my steering column, just behind the steering wheel. Then have the other important gauges above and along side of that. I know enough about electronics to dis-assemble my current tach gauge and re-make that into a larger sweep, and to also show from 0 to 6500 rpms max. I also want to replace all my other analog gauges to digital and put in some other emergency type oil pressure/temp dummy lights. I already have a custom heater core and manifold I installed a few years back, so that part would be easy to do a slight redesign to do what it needs to. I found a company that builds custom aluminum steering columns at a fair price. I will be able to use my current custom Italian hand made steering wheel but I may change that out as well..... I will have to completely re-wire the Z for a wire tuck and new centralized fuse/relay panel. What I dont know is what the 280z looks like with the dash and wire harness removed.....Time to do some research!!!
-
No, inline6. The ball joints are/were Moog same with the outer tie rods. The inner tie rods are original 1976 oem. From my research, them inner tie rods are NLA. Not a big deal other than I need access to a lathe and milling machine so I can make some new parts. I have my designs ready, I just need some equiptment to git r done!! The only thing I need to find is the outer tie rod taper bolt for the new heim joint setup I have in mind.....Google is my friend
-
My tires checked out ok. I went to a local shop and spoke with the owner who races a few different cars on a weekly basis. While the wheels were being checked I decided to remove the entire front suspension components off my Z and have a good look at them. What I found was 1 bad ball joint and a bad inner tie rod....nothing lasts for ever.... So now I have to find a shop that will let me use some machining equipment so I can make some new steering rack parts........then find/purchase some heim joints... Then the Z will have a completely new front suspension and steering setup.....again...
-
Twin cam head for the L6 from Derek at Datsunworks
280zex replied to Derek's topic in Nissan L6 Forum
Sweet mother of all things mechanical, its, its almost like a picaso!!! -
Agreed!!! And prost
-
Thanks for all the replies. I do believe inline6 got it right. Even tho the ball joint boots were only dry cracked, not blown out, they were indeed bad. Strange that they went bad with only about 7000 miles, but they were not OEM. So there is that. I did a lot of poking and prodding around underneath the Z, found a few things that needed repair besides the ball joints. While the front end is apart I need to replace the strut dust boots. Time to bust out the spring compressor!
-
I have to wait on parts.....Holidays and all.... I will not know anything until this saturday if Im lucky.... I will be re-rotating the tires back to their original position and see what happens.....
-
All front end components only have 7000 miles on them. Everything was replaced with new parts. I have the TTT adjustable lower control arms and TC rods, all with new heim joints. I removed the entire front suspention components, hubs and rotors. Currently replacing ball joints as the rubber boots were torn up a bit. A local machine shop has my front hubs and rotors. They are checking for any possible warping. I also found a bad u-joint, so that shop is also replacing all of them. Then its off to the alignment shop.... I am starting to believe that I would have been better off buying that Ferrari 308 instead of my Z for the amount of $$$$$$$$$ in maintainance and repair.... To date I am into my Z about 64,000$ with 28,000 miles driven. Its only money :-/
-
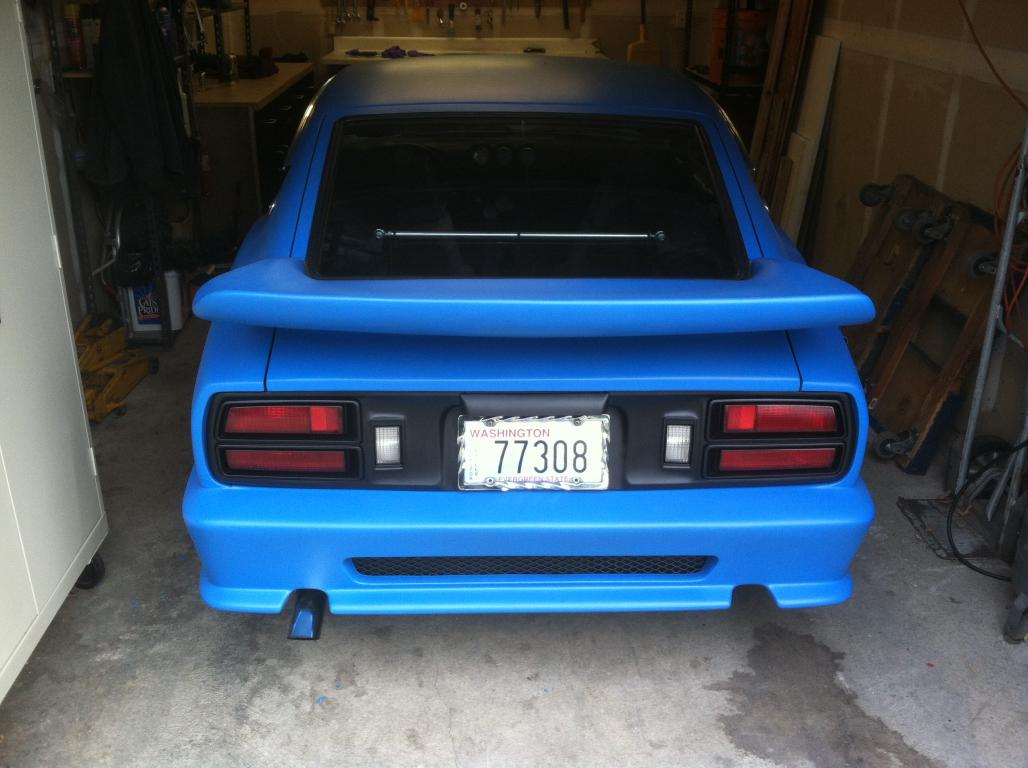
I like big butts and I cannot lie
-
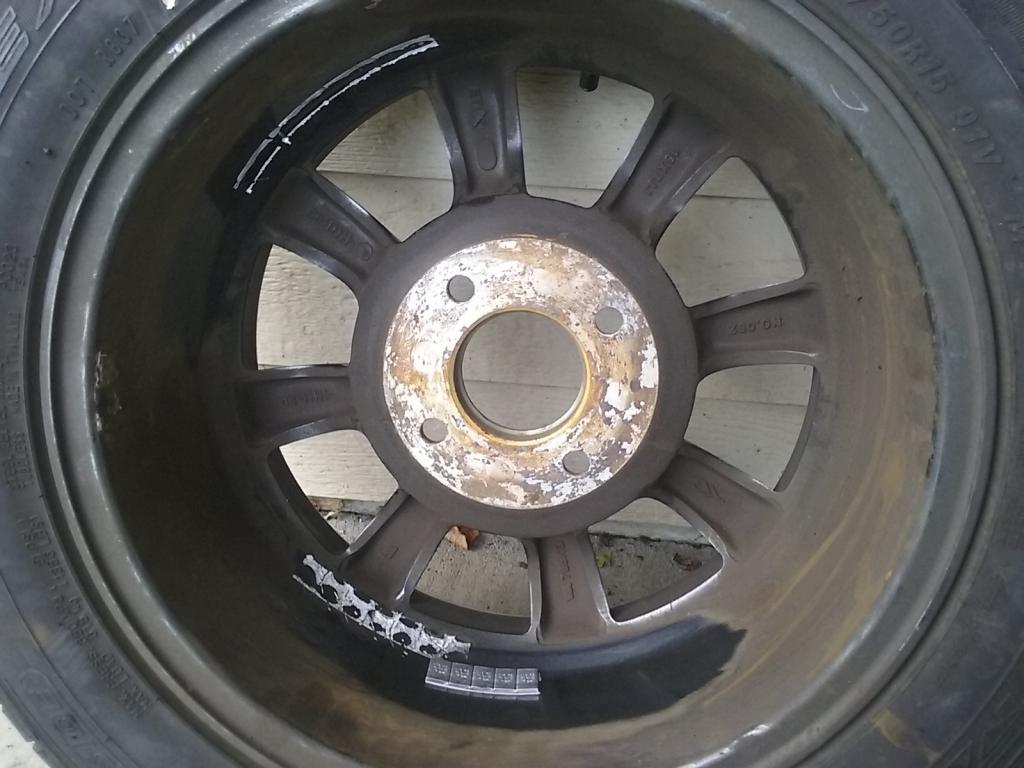
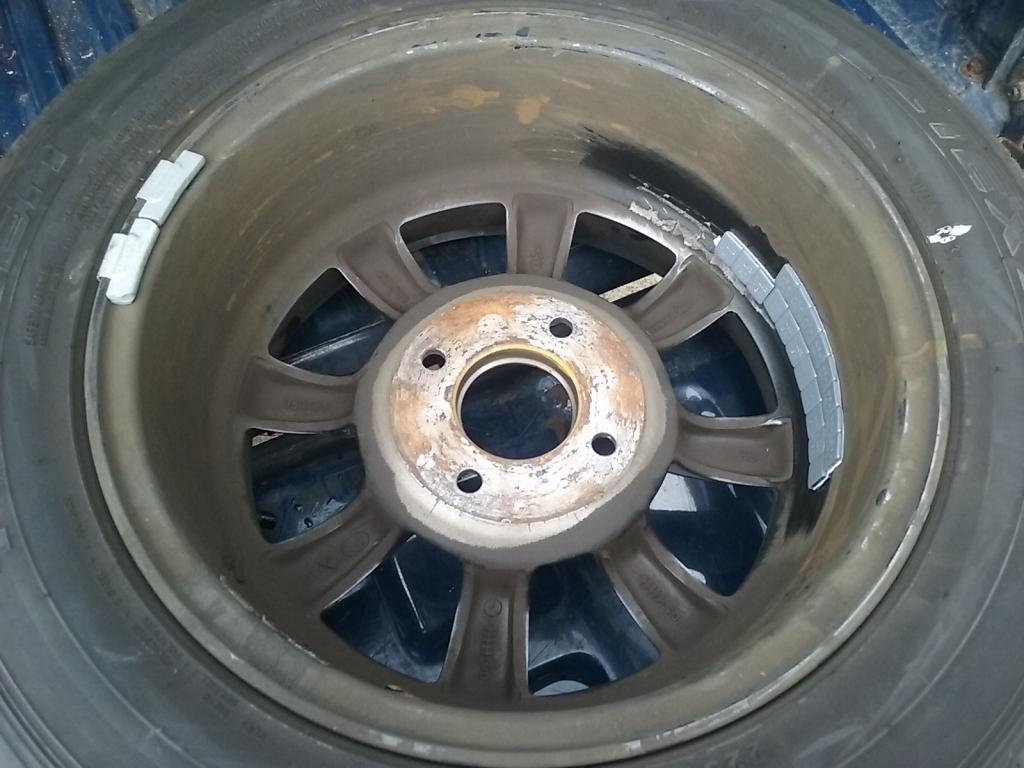
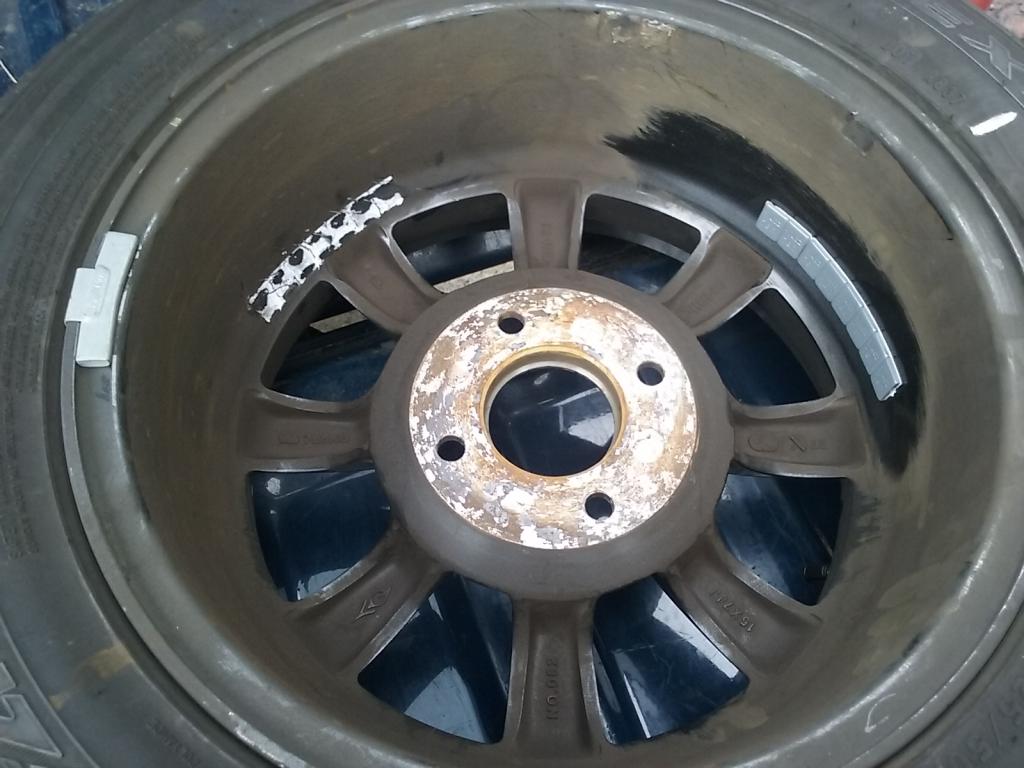
Update: I took the 2 front wheels to a shop and had the weights removed along with the tires for inspection and re-balance. NO problems were found....wheels were re-balanced. I did some research on Nissan spec lug nut torque. The information I found said from 58 to 72 ft lbs +/- 5 ft lbs. I re-torqued all 4 wheels to 72 ft lbs. I still have a slight shimmy in the steering wheel at all speeds over 30 mph..... My next step is to remove the front hubs and dis-assemble the rotors and have them inspected for warpage/run out. I might just tear the front suspension apart and check everything, just to be safe...... wheel A now re-balanced Wheel B now re-balanced
-
I pulled out my dial indacator and checked everything for center. It all checks out. I am going to take all wheels to a shop that has the right equiptment to check the wheels and tires correctly. At this point I just cant tell what the issue is yet...
-
To clairify, the now front wheels and new balance were on the rear during the 140mph run. I did not have any issues during the high speed run. Nor did the vehicle have a wobble. Smooth as glass she was. Nasty wobble appeared after wheel rotation. The rear wheels only have 4x7gram weights each as of today. Nor did they need any further adjustment. They were on the front during the high speed run...
-
I only held the high speed, 140mph, for 1 minute. my speedo is the autometer programable electronic unit. Trans is from early 240sx with magnetic pulse sender. As far as i can measure, the speedo is dead accurate.
-
Applied G forces measured with autometer D-pic acceleration gauge forward-1.98g Reverse-1.75g lateral-1.44 Scale weight with driver and 1/2 tank fuel is 2880lbs
-
Yes 912's The wobble appeared right after wheel rotation
-
My Z developed a nasty shake in the front so I took my wheels in for a check-up and asked the shop for a dynamic balance on them. The shop informed me that the 2 front wheels were indeed out of balance badly.... I asked how this was possible sense I have only put 7500 miles on them, I got not viable answer. Maybe some one here can shed some light on this.. Wheels= Konig classic rewinds 15x8 Tires= Falken Z1EX 225x50x15 Traction rating=AA Temp rating=A Date of MFR=25th week of 2013 Country of Origin= Thailand Valve stems= full steel inserts with aluminum stem caps Lug nuts= steel acorn style hub studs= factory Nissan highest speed to date=140mph donuts=1 time Lock ups/skid=never full burn outs=never hard launch with wheel spin=yes/infrequent tires filled with air compressor to 30psi Tires were rotated after the first 4000 miles from date of purchase. R/R to L/F, L/R to R/F, both fronts direct to the rear with no cross over. I use an electric impact wrench to set the lug nuts and finish that with a torq wrench set at 85ft lbs with the vehicle on the ground. Wheel A has 19x7gram weights on the inside and 2x1.25(oz?) weights on the outside Wheel B has 8x7gram weights on the inside and 1x1.50(oz?) weight on the outside This seems to have a large disparity, any comments welcome.... Wheel A Wheel B
-
I can do what ever you want. I guarantee my work. I live in Auburn
-
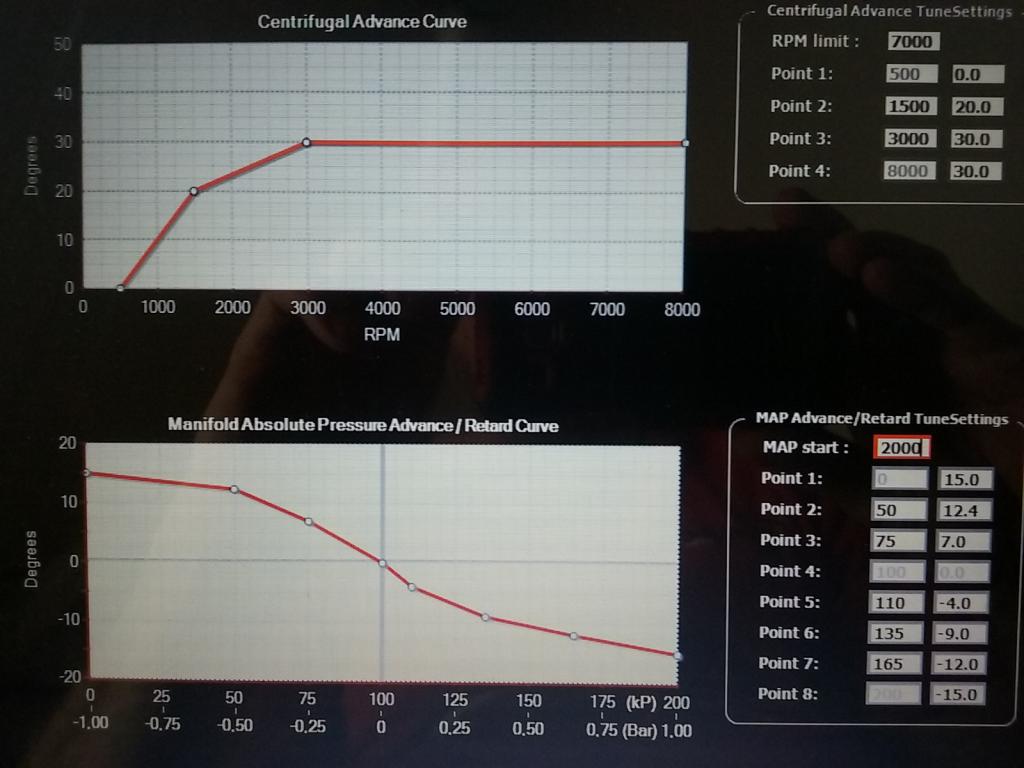
This is my current 123 ignition map. My Z is 2.9L turbo carb/blow thru, 280deg cam, .450 lift at the valve....
-
Machining Bell housing for S13/14 5 speed swap
280zex replied to 1976 280Z's topic in S30 Series - 240z, 260z, 280z
I also did the swap. I also had the same issues with finding some one to do the machining needed. I got fed up, so I did all the work myself with a dremel tool and a few sanding drums. I used the sanding drums and a 9o deg adapter to clearance the inside of the case on the lower bearing inside surface. I then used the same sanding drum with out the 90 deg adapter to enlarge the 1/2 gear shifter rod hole. I also enlarged the secondary bearing hole to accept the larger bearing. I have the training for this type of machining work. Its not hard to do but it definitely needs to be done straight, and requires a specific tool. I have a nice adjustable reamer/4 stone hone, a gift from an old school machinist friend. A solid, long reach drill press is also required, but a Bullard 6ft horizontal, oil float machine works best. you will need to cut the center section out of the trans brace, it needs to sit rearward about an inch. I used a miter box and a sawzall. I reinstalled the cut up trans brace, then i realigned and bolted it into place in the car. I then tac welded the pieces together. Then remove the trans brace from the car and weld it up solid. This took me only 3.5 hours. This is not that hard of a job. You dont need to surface the secondary bearing hole for the larger bearing unless your going to have a lot of engine output torq. My turbo setup has 448ft lbs of torq so I did use the bigger bearing...