redneck1545
-
Posts
216 -
Joined
-
Last visited
-
Days Won
1
Content Type
Profiles
Forums
Blogs
Events
Gallery
Downloads
Store
Everything posted by redneck1545
-
I don't think you should be concerning yourself with head/cross/tail winds as at highway speeds...or any speed above said wind, you are essentially negating that fact. Look elsewhere as in coolant flow. I had an issue on mine where I close looped the heater core right back into the block with no issues. I later added the heater core in normal configuration but with the coolant flow in the 'off' position on the valve on the inside of the car that flow shut off as its supposed to. However, I had previously blocked off the bypass on the water pump to better facilitate even cylinder cooling but had forgotten about that with this engine in this car. Long story short, the thermostat could not sense the temperature quick enough to open and allow coolant to flow. It would overheat in a matter of minutes with the heater and valve in the off position. But with the heat on, it never got above 190. Not saying you have the same issue but I just think you should look somewhere beyond the scope of airflow with regards to headwind vs tailwind.
-
4 to 5 lug swap options
redneck1545 replied to Kevin.pk's topic in Brakes, Wheels, Suspension and Chassis
The bearings are the same for the 'correct' pentagon style hubs and the s30, so I just used s30 bearings and 300zx seals but had to 'trim' some of the inner lip on the seal off to get it to fit flush on the s30 spindle. -
Do you happen to have the JTR adapter bushing for the bmw temp switch mentioned in the beginning of this thread? If so i'd be interested.
-
I only ran two 10ga wires from my alternator to my Distribution block and another 10ga straight to the battery. Not sure how much bigger one would necessarily need. I think my problem may be not enough grounds and/or bad body grounds...or the fact its a junkyard fan :/ On a side note, I like your profile pic! Do you fly for a living or fun?
-
I also used two 00 ground cables, one from the -bat to starter/block and another one from the front of the engine to the chassis. Might be time for me to chase some more grounding options. yea, pretty much I have +bat to starter, continuing in 00 gauge cable from starter to dist block. In 10ga wire +alt to +dist block, +alt direct to +bat. protected from short you say??? Only protection I have is in the back of my head saying don't touch any of 'these' wires to any of 'those' wires. I should put some inline protection on the 10 gauge stuff and probably will in the future but as far as the 00 gauge cable I'm just going to check it periodically like every other car to make sure its not chaffing on the positive side allowing it to ground on the chassis at any point.
-
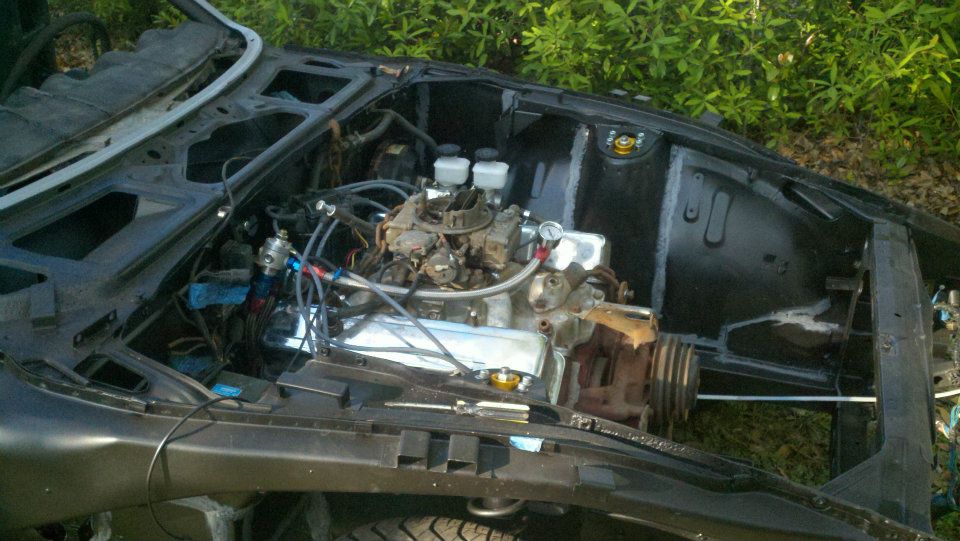
SBC 357, 10:1 pistons, around .500" cam, mild duration. Nothing special... Idles around 1150 at operating temp and drops to just below 1000 rpm with the fan on high.
-
Mike, I've got the same setup and have completely rewired the car using a EZ-wiring kit. I ran a 00 gauge wire from the battery to the starter and another 00 gauge wire to a SAAB 4 terminal 60 amp distribution block. I'm running my headlights off individual terminals on the distribution block for high and low beams with relays, as well as another terminal that feeds the volvo relay for the fan. I ran my alternator to the feed post on the distribution block as well as another alternator wire back straight to the battery. The problem I've been chasing, and others have had as well on here that I've read, is the fan pulls so much juice on high that causes my alternator to load so severely that my rpms drop by about 200 every time the fan kicks on. Everyone in the past has talked about massive alternators and such, I'm just curious as to if you have had this problem as well. Any info would greatly be appreciated!
-
JTR Radiator Alternative?
redneck1545 replied to gravityflyer's topic in Gen I & II Chevy V8 Tech Board
I went to summit racing and picked up a triple pass crossflow alum radiator. They were out of the double pass radiators and I talked them into selling me the triple pass for the same price as the double pass! I just measured between the frame rails and found dimensions on the website that would fit. I am also using the Taurus fan with the volvo relay. Very good setup in my opinion. My fan never kicks on at highway speeds and only on low speed at red lights. And I still need to shroud in the bottom of the radiator as well! Only downside to the Taurus fan that I've seen so far is the fan pulls so much juice that it causes alternator to load up so severely that it causes my engine to drop about 200rpm! I've completely rewired the car using the EZ-wiring kit and have my fan running off the volvo relay and a Saab 4-post 60amp distribution block. I could only imagine what issues someone would run into using the stock datsun harness. -
Could they be used for the regular interior plastic trim in the rear of the car?
-
Patiently awaiting paint pics...I'm trying to decide between KAD and KAC paint codes! lol
-
I completely rewired everything when i did mine with the EZ kit. The ONLY thing I didnt replace were the connectors for the tail/head lights but all the wiring up to that point was re-done. If your going through the trouble to re-wire the whole car then...well...re-wire the whole car. no point in skippin out on the gauges!
-
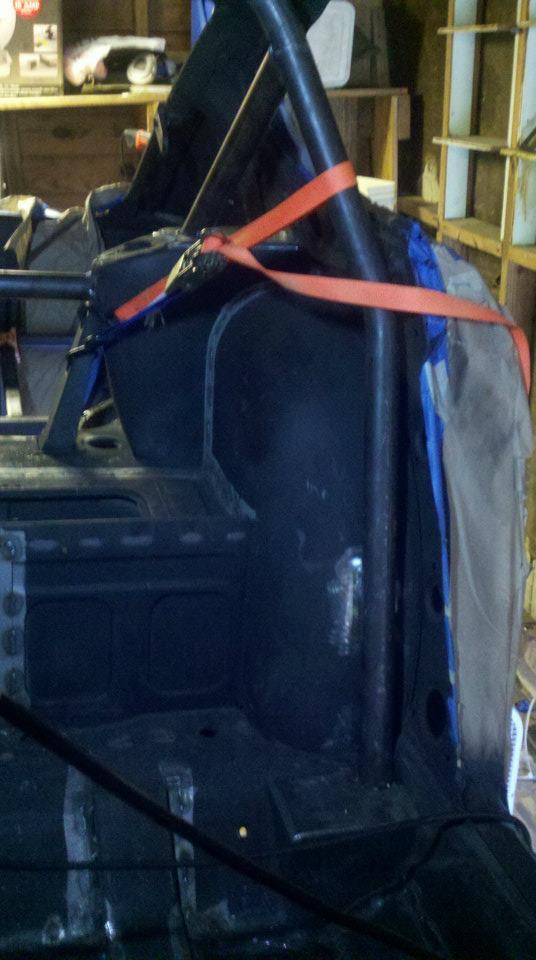
I agree with all the statements above about the cage, not about triangulating a main hoop with downlegs though. Although if its just for show I wouldn't particularly worry about changing the design now. My main hoop was built on 74_5.0l's spec sheet and was so tight to the rockers that I had to hook a ratchet strap to the ends of the legs and squeeze them into the car. Removing the tension on the strap once it was in place allowed the hoop to 'spring' up against the rockers...thats how tight it needs to be for safety concerns. The more important matter of the fuel cell though, yes you most definitely need to change the mounting! No way will those 'locating' tabs be enough to support the weight of a fully fueled cell...and then drive around town an hit bumps! Personally I built mine out of a 1"x1" square tube full cage with four down legs, welded the nuts inside the legs and made a fully supporting cage for the bottom of the cell to bolt up into the down legs. Ill try to get some better pics for you when I'm free to do so but heres some pics to give you somewhat of an idea of what I'm talking about.

-
Thanks! all I have laying around was a bunch of m8 x 1.5's and m6's. I wanted to know for sure before I made ANOTHER trip to the hardware store. Next build Im categorizing EVERYTHING. These little parts add up fast!
-
I thought there was a comprehensive bolt size list on here at some point but I can't seem to put my finger on it at the moment. Anyways, my question is does anyone know off the top of their head what size the bolts that screw the door hinge to the door are? Thanks in advance.
-
The bmw switch and volvo method have been used before and would most likely prove to be the easiest route. I'm using a volvo relay hooked to a rocker switch and it works flawlessly. I will soon be buying the metric adapter from JTR and make the fan fan come on automatically with the bmw switch. I would go with whats been proven in the past with a collection of various OEM parts vs making your own circuit board and such.
-
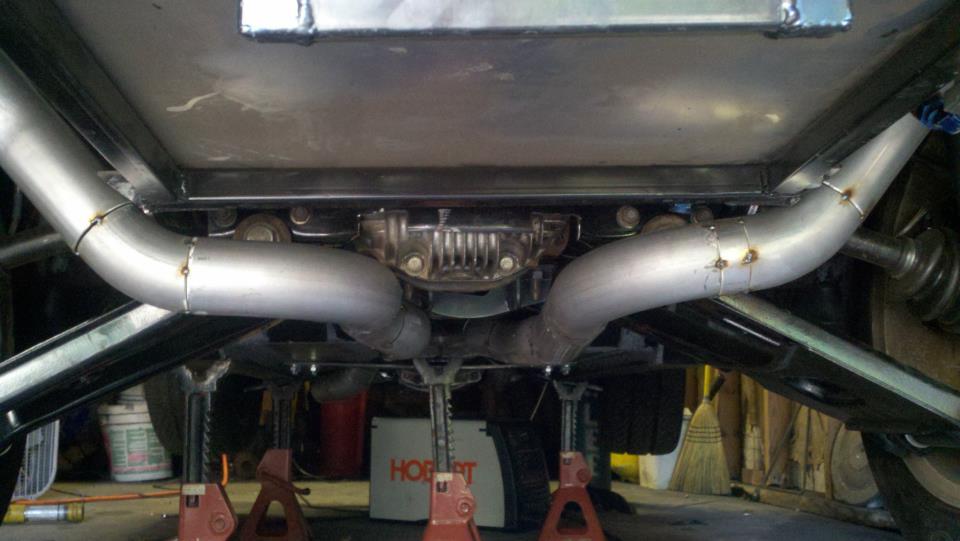
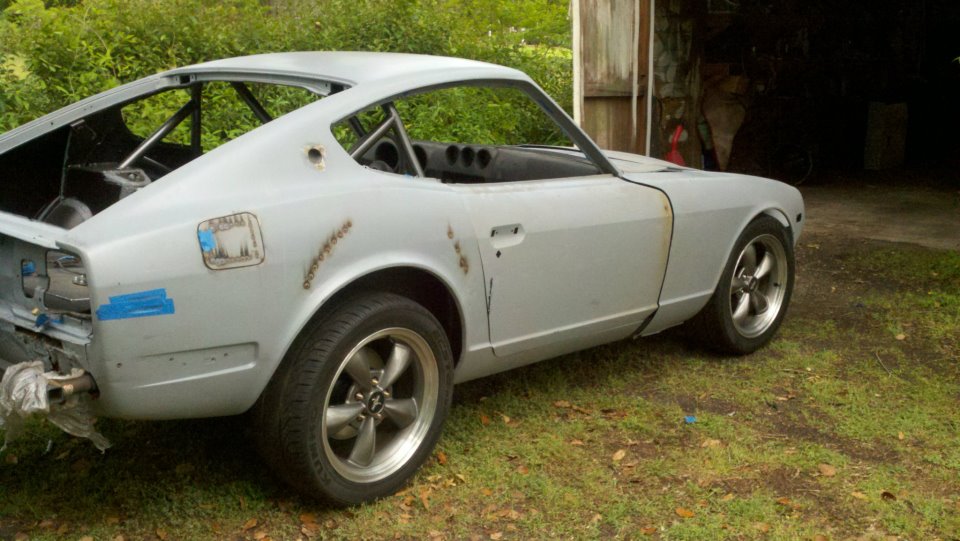
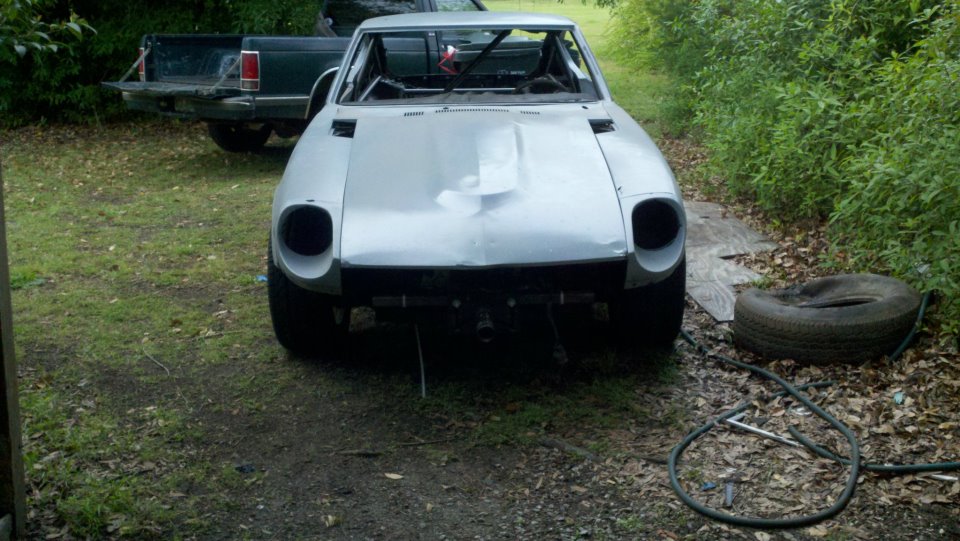
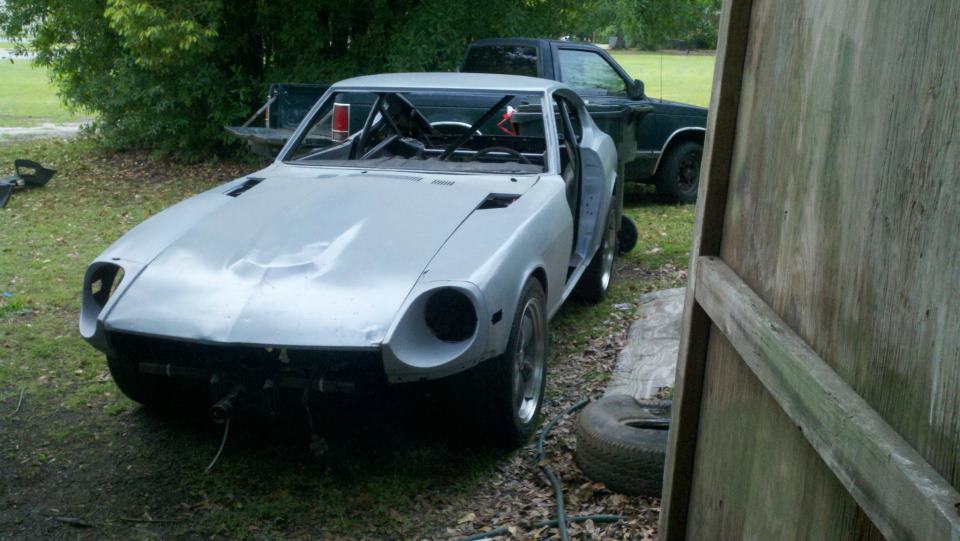
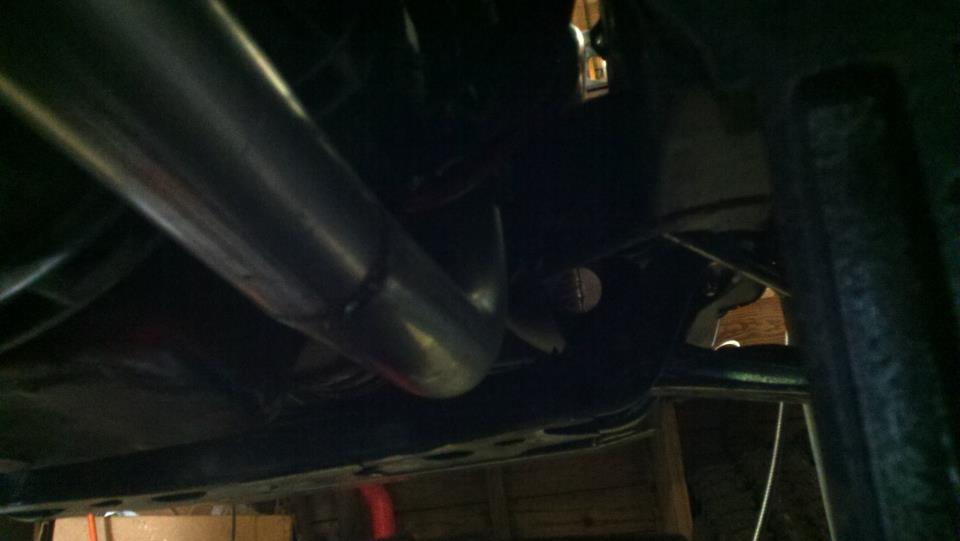
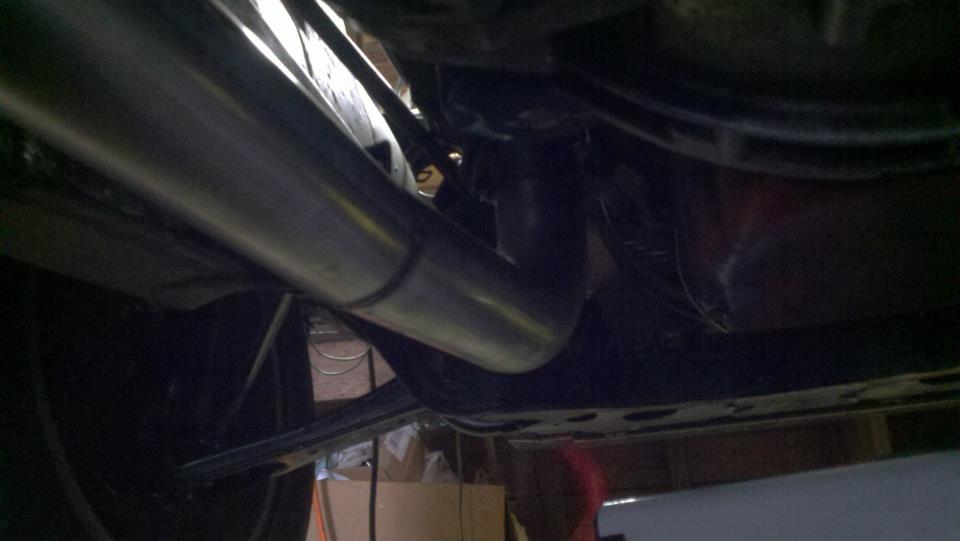
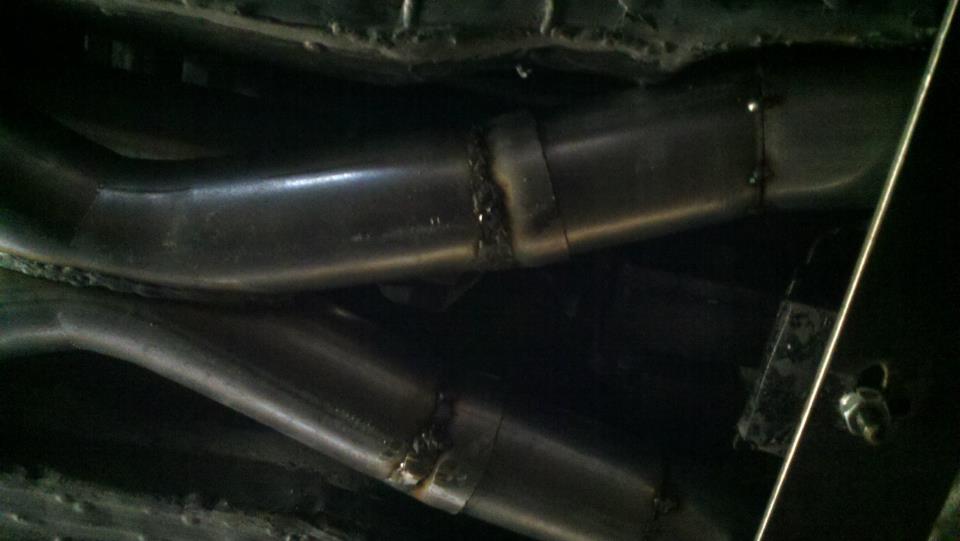
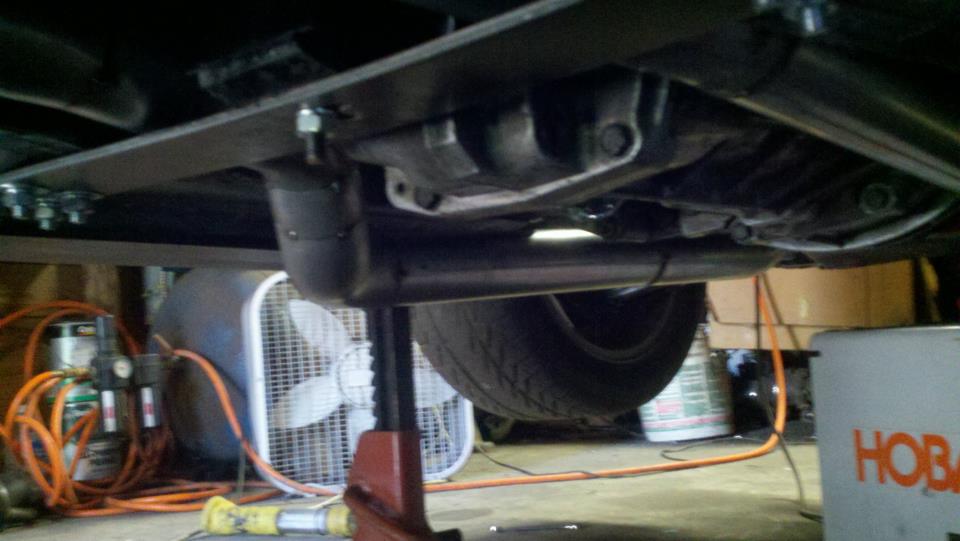
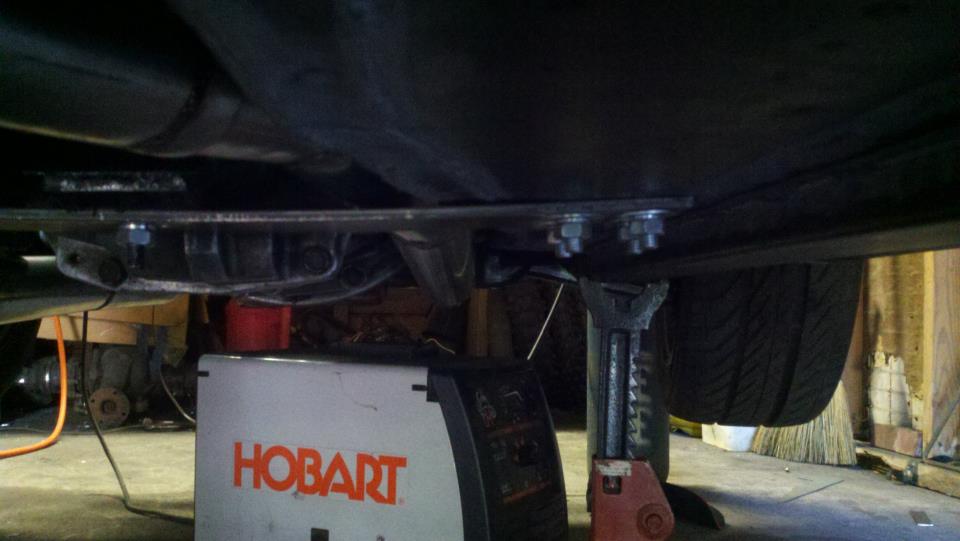
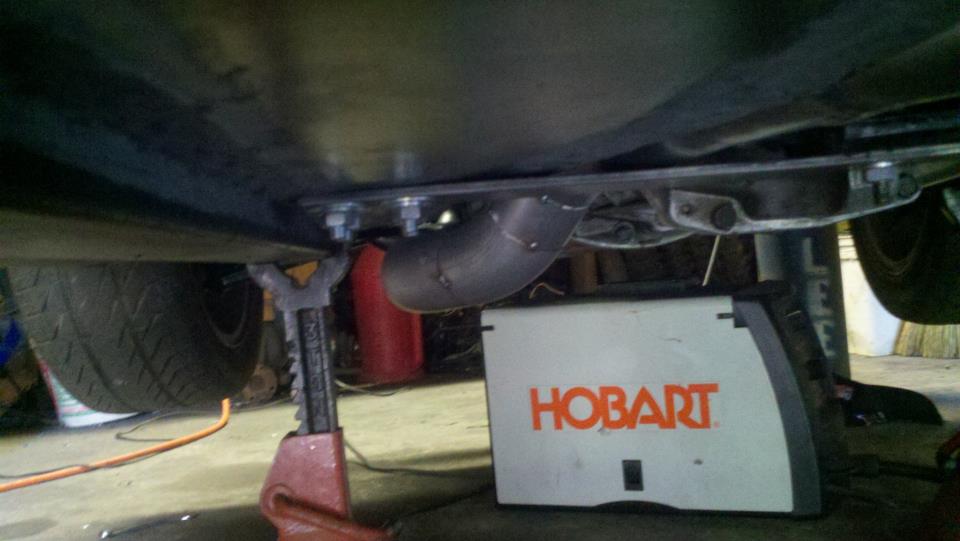
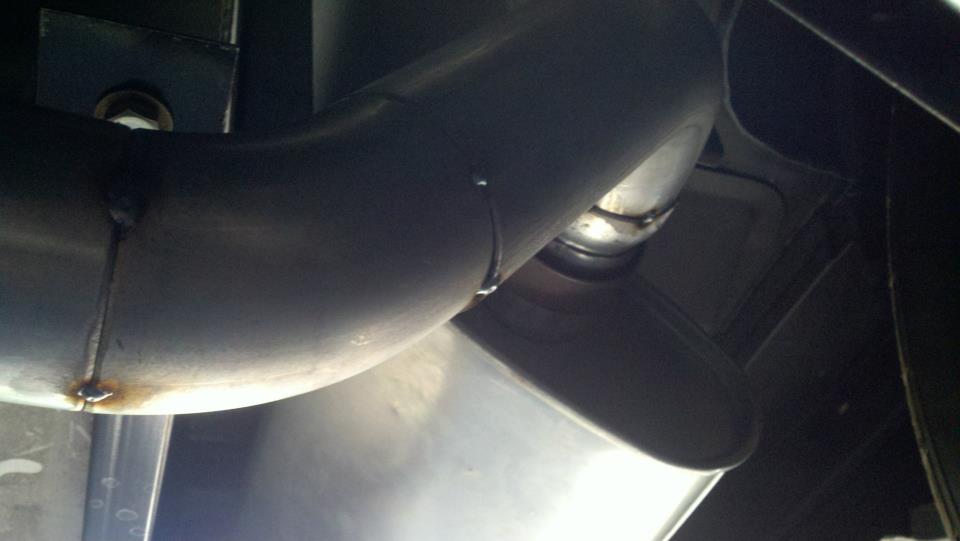
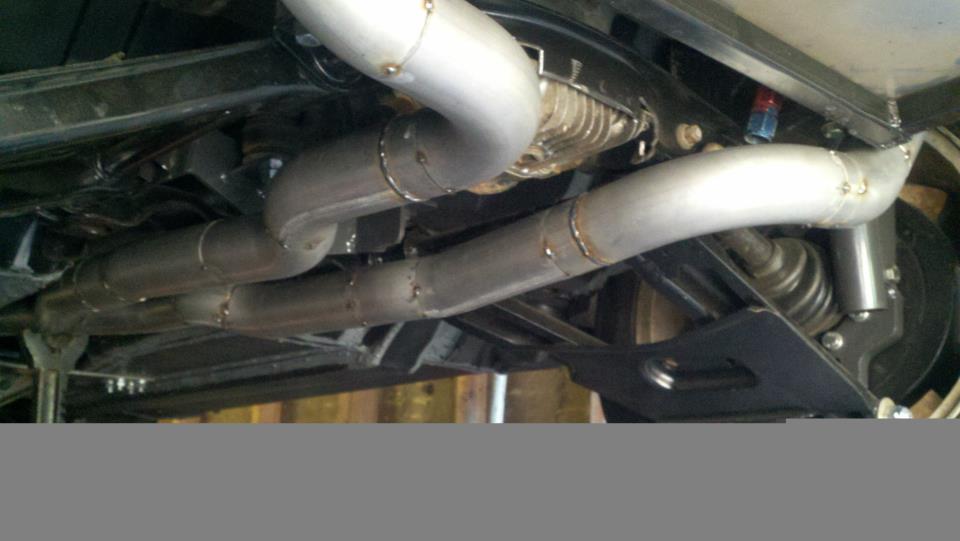
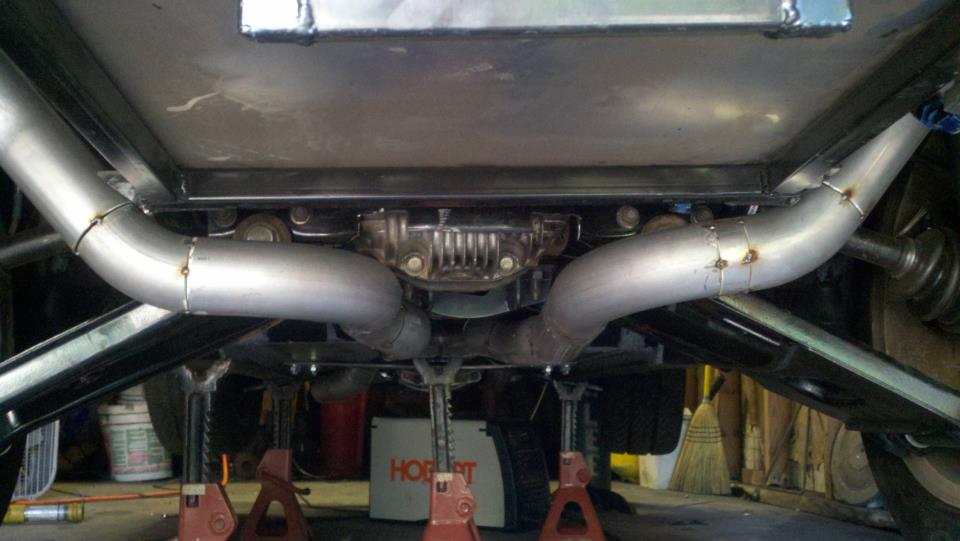
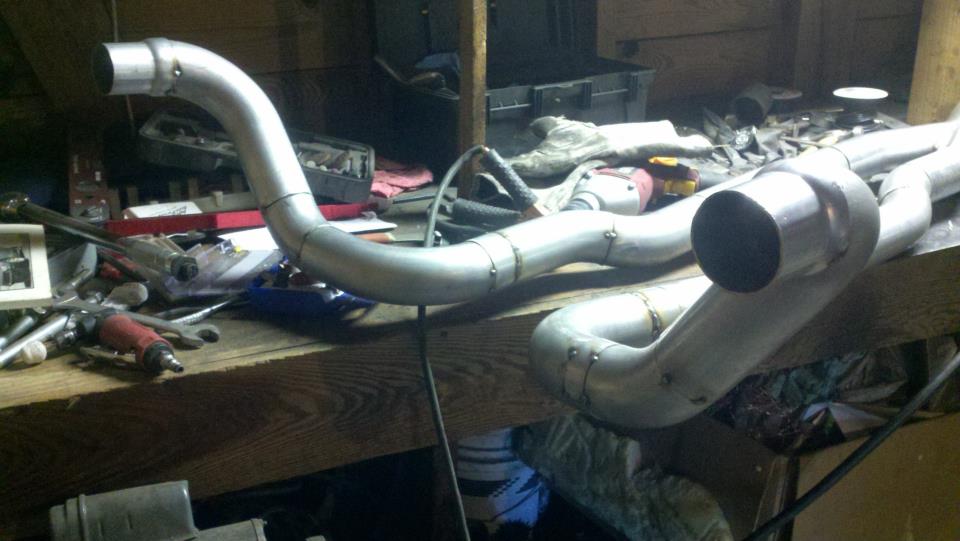
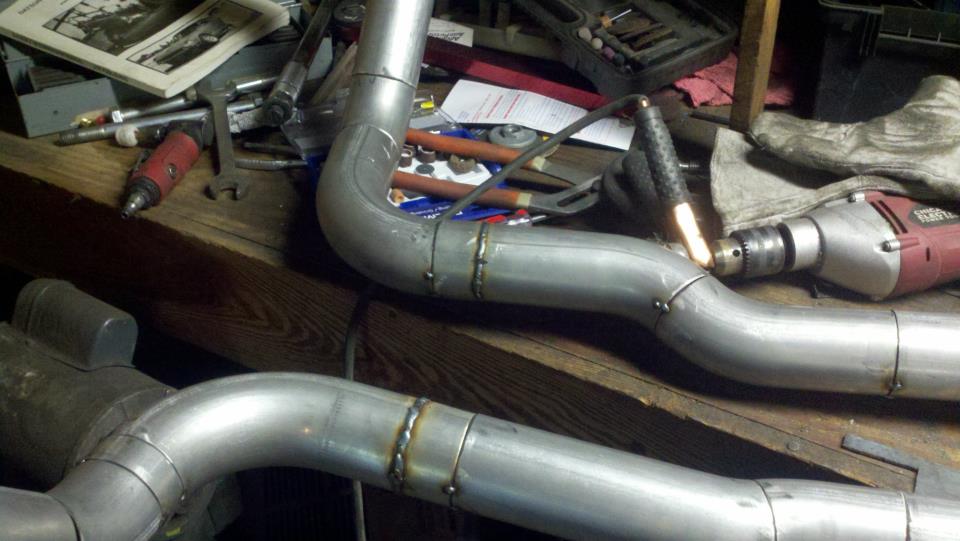
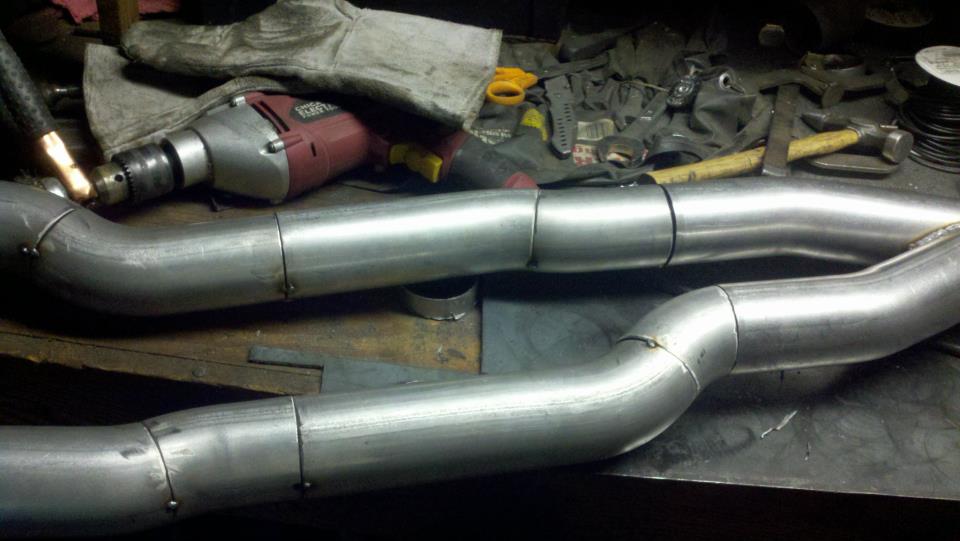
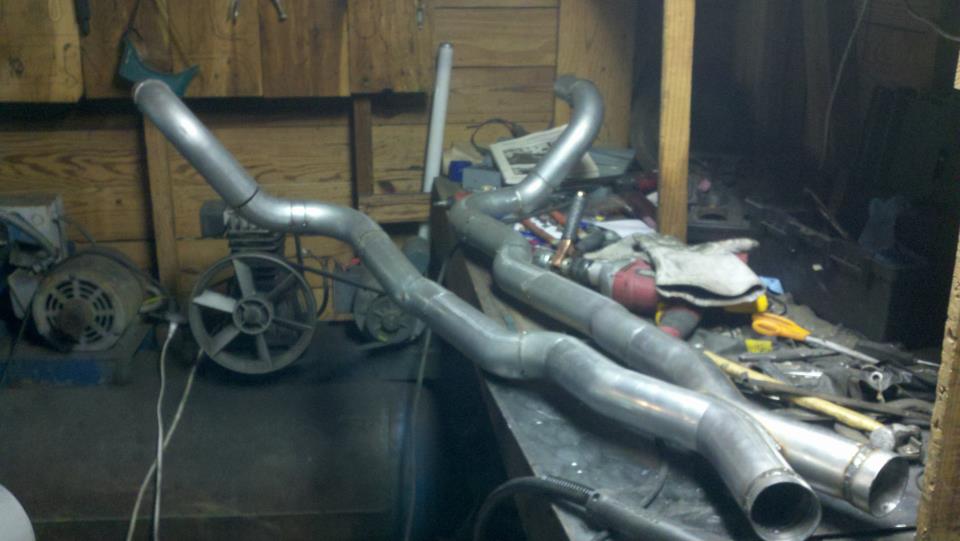
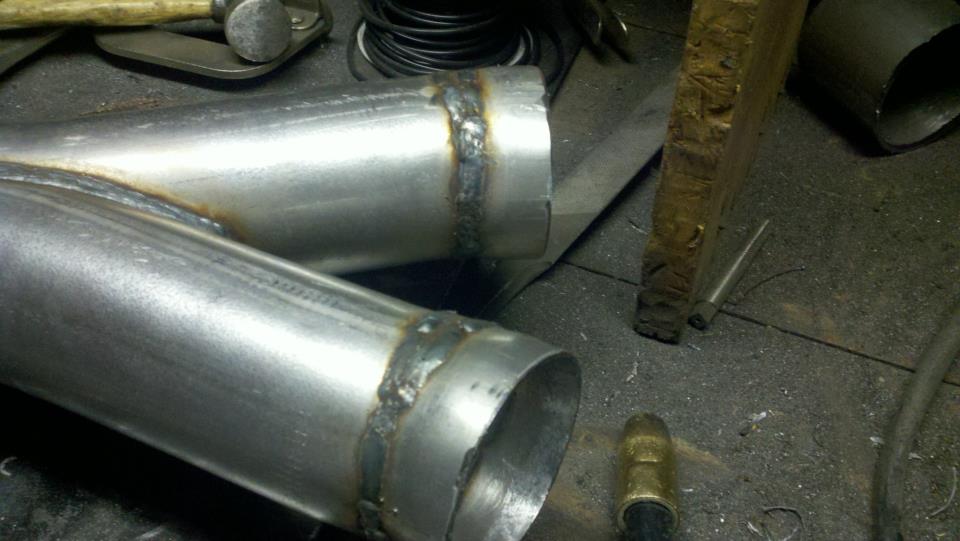
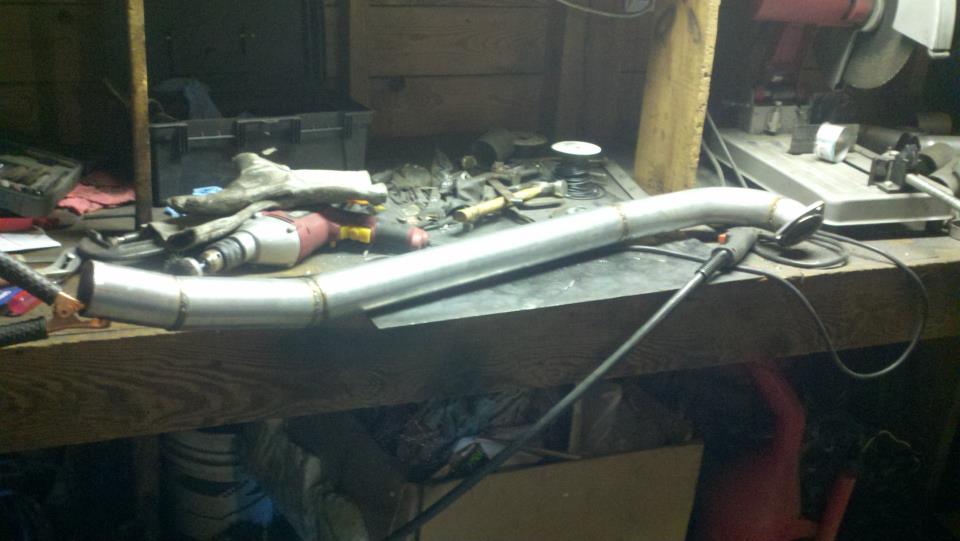
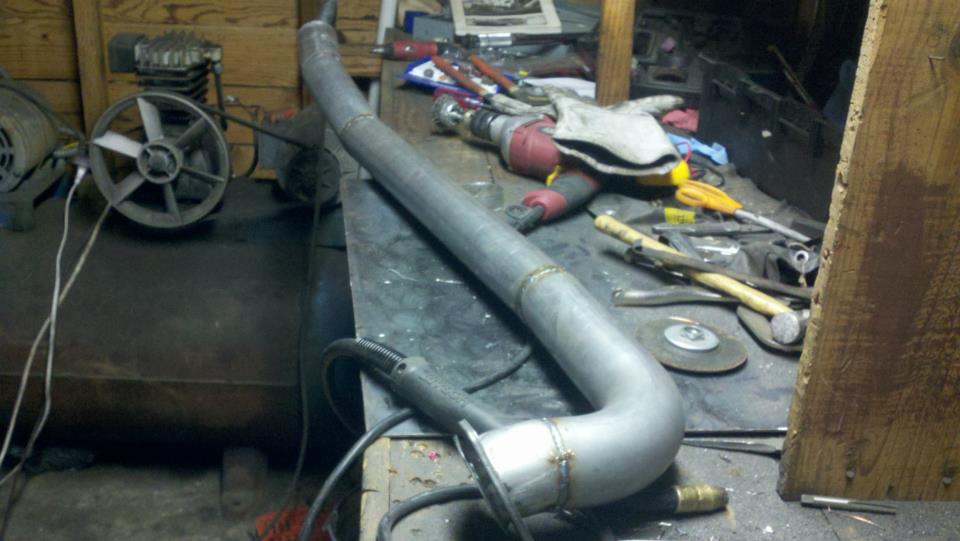
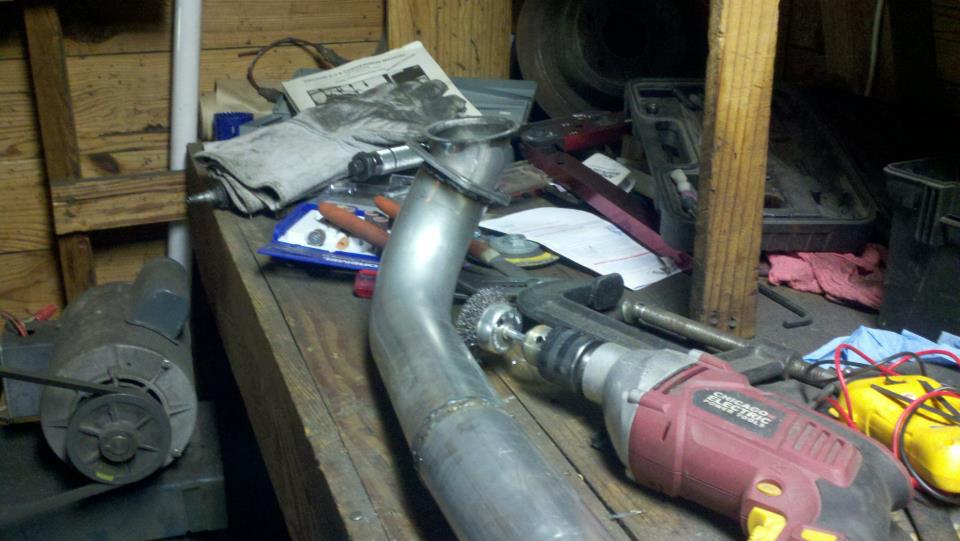
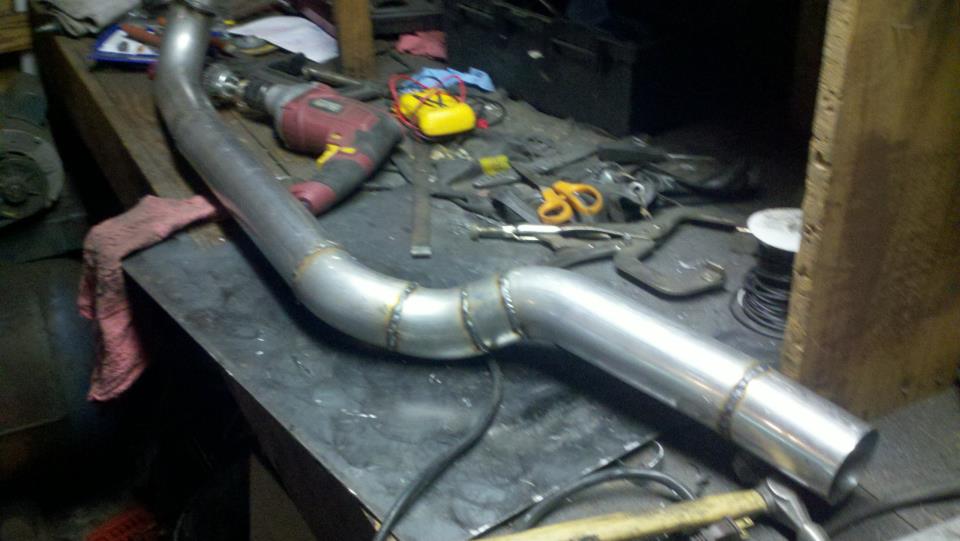
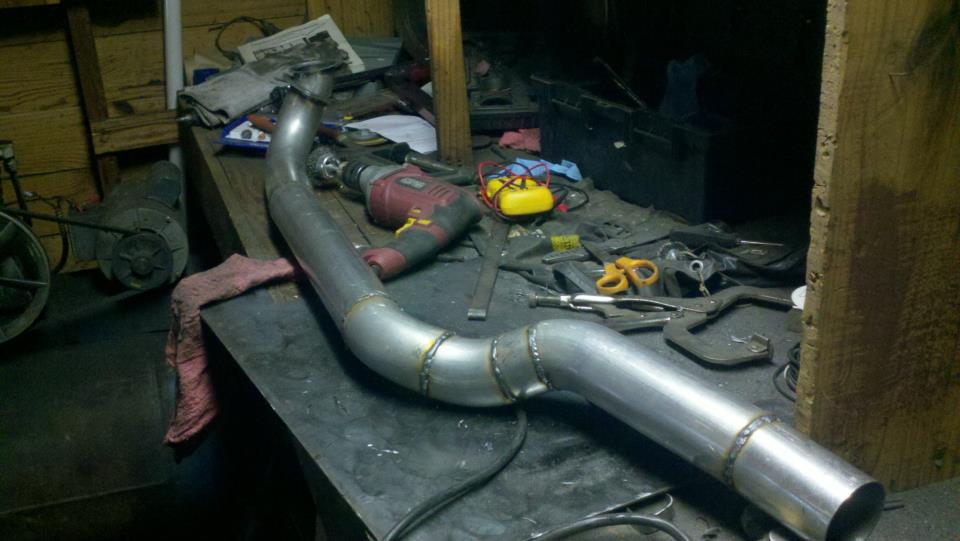
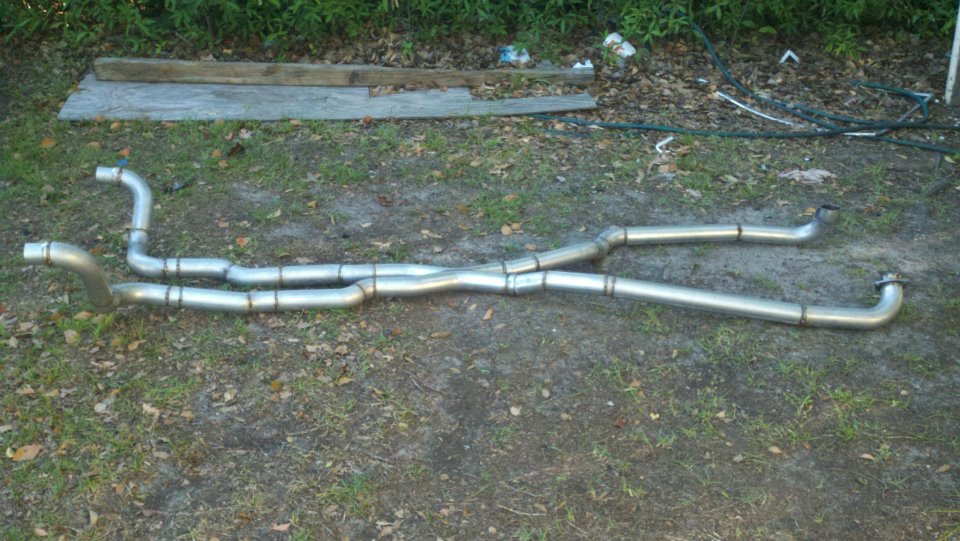
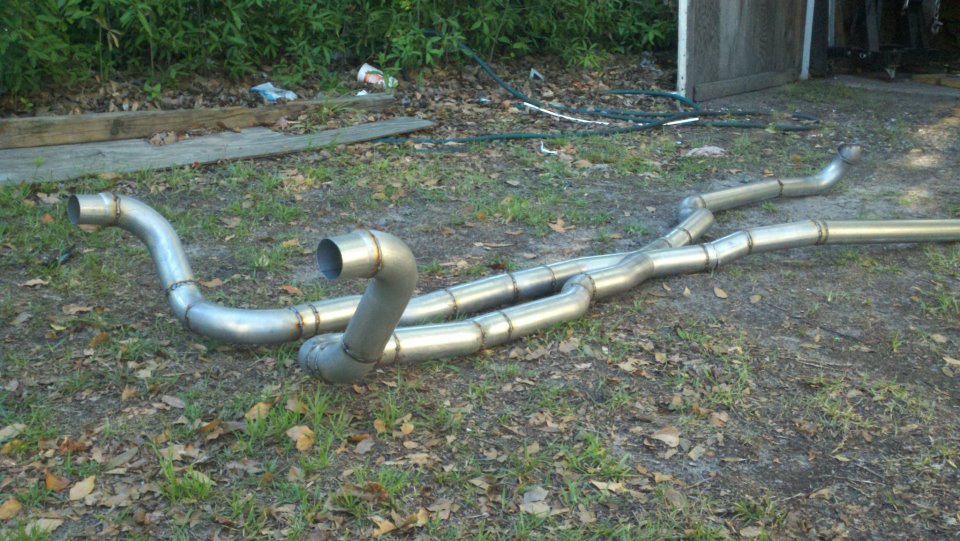
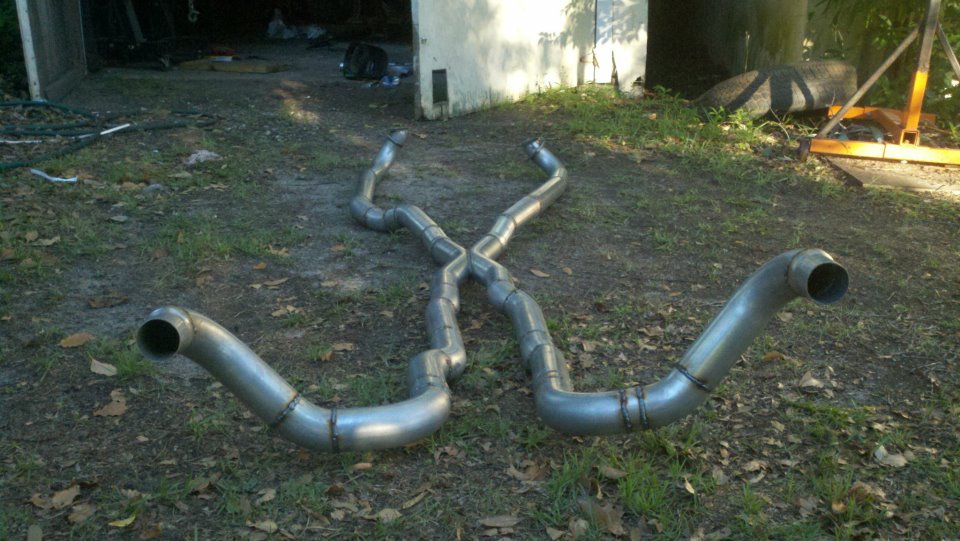
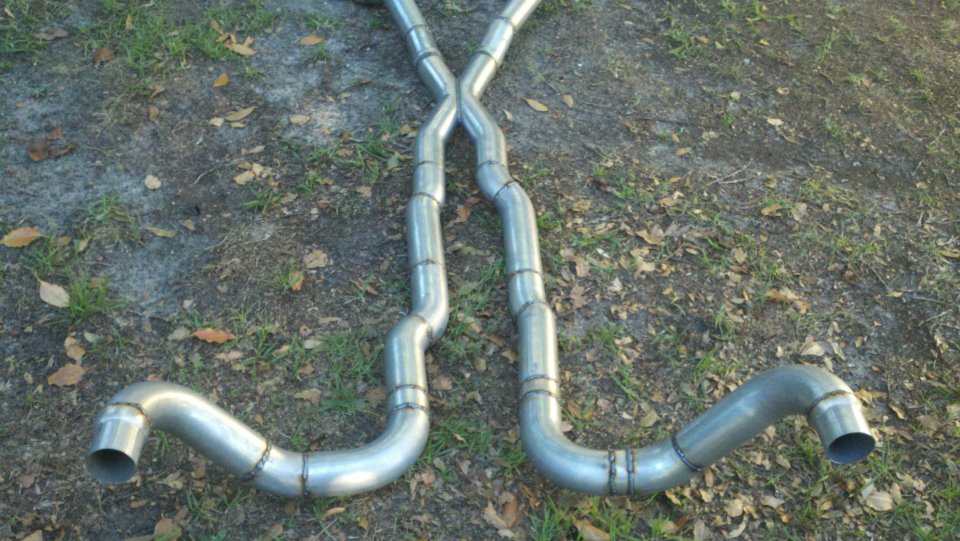
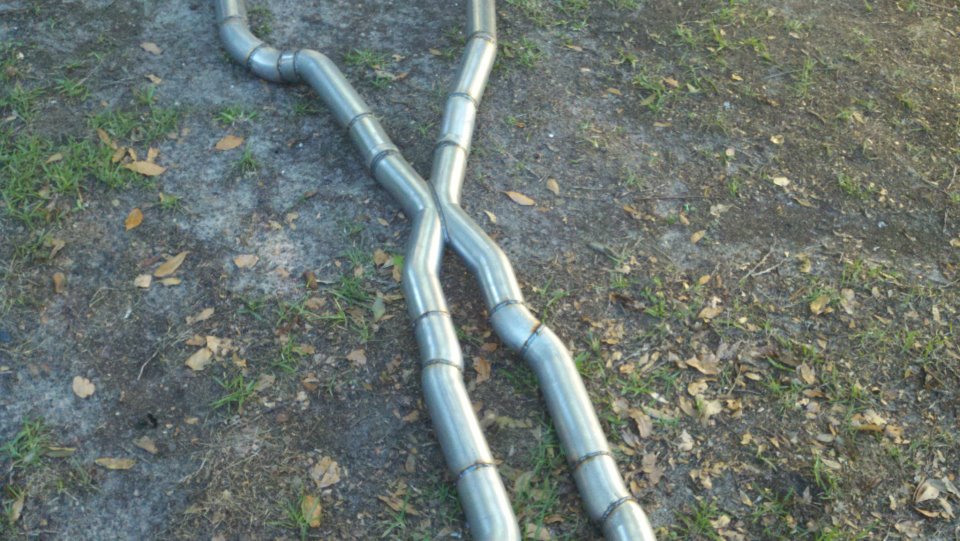
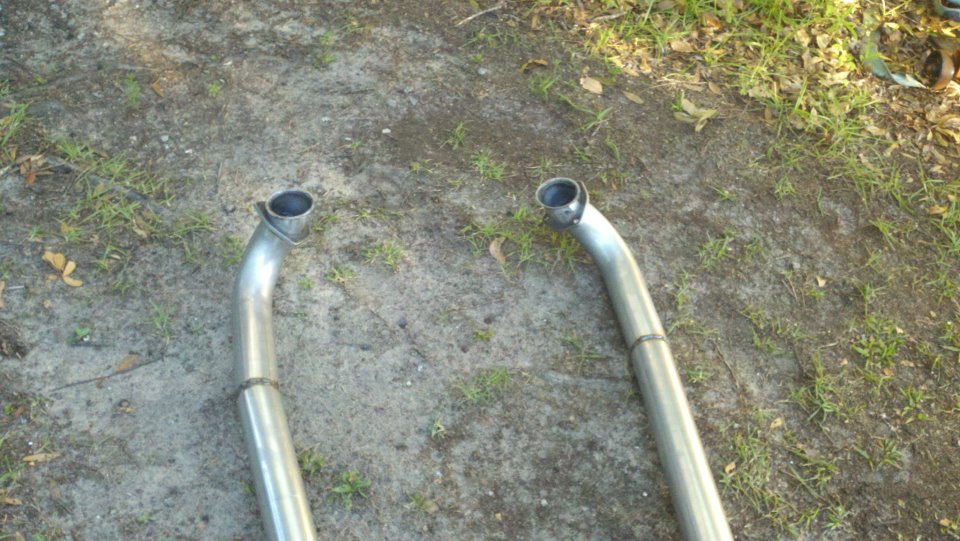
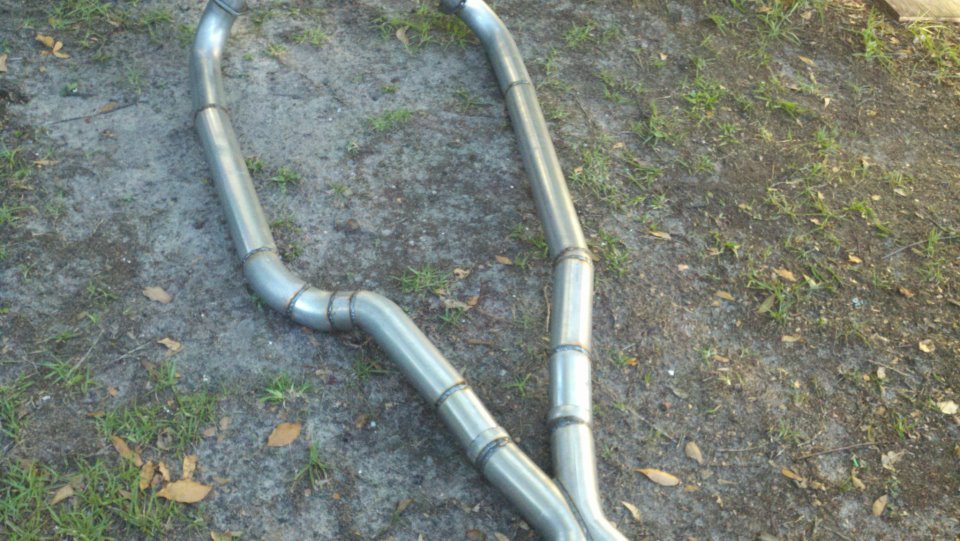
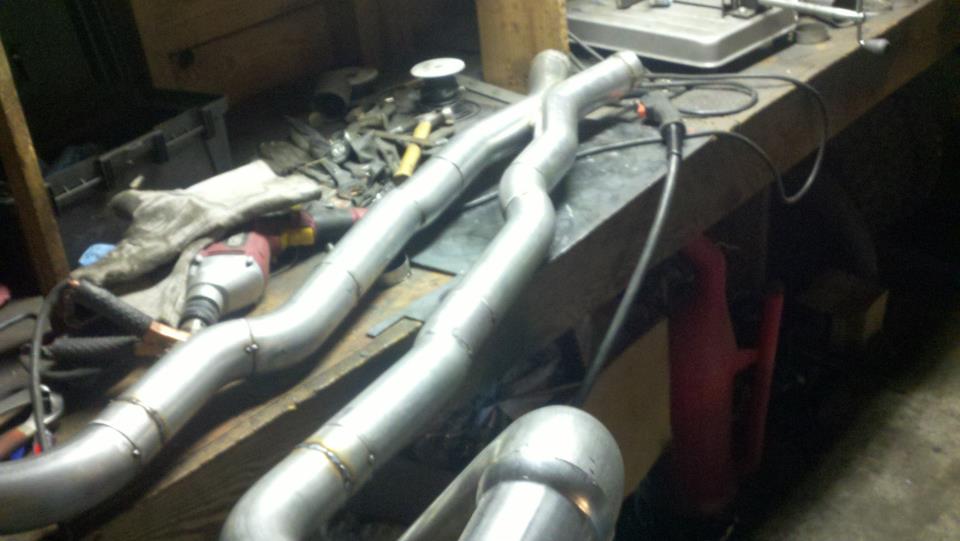
I haven't done an update in a while so heres my condolences annnnnd pictures I've done a lot more than im posting tonight but heres to getting my updates going again. I welded the whole joint on the cage as per recommendations...looks like snot but its a solid weld, Im adding some pics of the car on the ground finally. Rear is way high and will be lowered but here ya go. And heres some of my exhaust pics. I got bored toying with the idea of having someone build my exhaust and the added cost, and what the heck I built my roll cage so why not try something as trivial as some exhaust tubing So I made another journey to Summing Racing...If your are unfortunate enough as I am to live with in driving distance of one of these stores go ahead and send your apologies to the bank account... I picked up the universal 2.5" mandrel bent tubing kit, a Narrow X-pipe, some collectors, hangers and clamps. I took my time placing everything up and started from the header flange and worked my way back little by little. I'm usually anal retentive about measuring 10 times and cutting once but I'm ready to drive this things already! I measured one...count it, yes one cut, and eyeballed the rest of em. I deburred all my cuts inside and out and made sure to have no blow through or mig whiskers in the tube after welding. I tacked everything in place before I pulled the whole system out for final welding. I started off by cutting the flange off of the collector kit and welding it straight onto a peice of mandrel bend, Otherwise with the JTR headers it would have put the pipe too close to the oil pan. After that went into some 90 degree bends pointed toward the rear. A few very small bends were cut to point the straight pipe back. I wanted to keep good access to the oil filter and slave cylinder as well as keep the passengers side away from the starter as far as possible, but in doing so I may have sacrificed about 1/8"-1/4" ish ground clearance. I snaked both sides up above the transmission crossmember. 2.5" is TIGHT in the trans trunnel with a t-56 and straight x-member. I added some shortened slip joints to the x-pipe and slipped it onto the pipe coming over the trans tunnel. After that I just added bends as needed to keep the pipe as hight and tight as possible all the way to the rear where have them mounted to some 2.25" summit mufflers (dont hate, they were on sale for $10 bucks a pop, too good to pass up simply to get it quiet enought to drive down the road). I added some angled tips made from 2.5" pipe but don't have any pics of those just yet. All in all im pretty happy with the way it turned out considering this is my first attempt at any of this stuff. I may need to re-work the front based on how much ground clearance I have when its on the ground but time will tell. It sounds much better than it did in my old truck! My old truck had 2.5" with long tube headers, an h-pipe and glasspacks with LOTS of dreaded drone! This system has a very airy sound to it with lots of tone in the rpm ranges. Not too mbad for some on sale summit mufflers Let me know what you guys think.
-
http://forums.hybridz.org/index.php/topic/81766-welp-im-building-a-rotisserie-from-engine-stands-pics/ Pretty much answers all your questions and has tons of pics of other stands built by memebers here. I used these plans myself except that instead of buying a 3rd stand I simply went to the metal yard and bought the metal in the dimensions I needed.
-
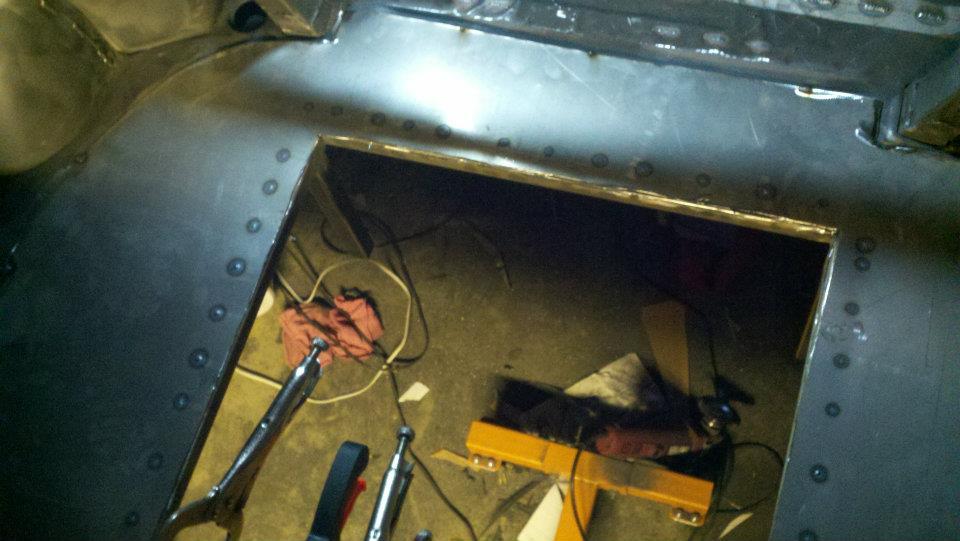
Sorry for the late reply but I have access to a shop with a box or pan brake as well as a shear. You could do it by hand or take it to your local HVAC fabrication shop. Although I se you've already put the floors in so I doubt you'll be doing any of that haha. Other than the brake and shear it was really just a matter of drilling out the holes for spot welds, a measuring tape along with an angle grinder and LOTS of cutting wheels to get the job done. Pretty easy, and this is coming from a young guy with no previous metal fab experience.
-
V8 240z Z spring options
redneck1545 replied to DatsunZman04's topic in Gen I & II Chevy V8 Tech Board
I bought all the pieces seperately and did a coil-over swap with 250R and 225F springs 10" in length. Seems to be the swap of choice for most street z's. -
My advice is to go with something more along the lines of 'proven' swaps. I bought an all aluminum triple pass crossflow radiator from summit for less than 200 bucks. A ford taurus 2-speed fan will move more than enough air and can be had for very cheap at pick n pull junkyards or bought brand new from rockauto for about 100 bucks. Thats my take on it, take it for what its worth. good luck
-
I have searched for the better part of the last two hours and found no sure fire answer to what I need. I have a lt1 t56 out of a 96ish camaro. Im bolting it to an early pre 86 350 sbc block. I already have the conversion flywheel from fidanza and I just ordered the 7/8" master cylinder, conversion adapter for weird gm fitting an roll pins, -3an line, and the aluminum camaro slave cylinder. The only part I've got left to figure out is that darn pilot bearing or bushing. I bought a bearing from advanced for the t56 (the roller type) and figured it would not work but thought i'd try none the less. Sure enough, it looks like it will fiit too far aft on the crank which will prevent the tranny from mating all the way. I think I need the pilot bushing for an older 5spd camaro or somethign similar, the bushing type that fits deeper in the crank. Is this a special bushing for this type of conversion or can I simply buy a pilot bushing for an older camaro?
-
I did what 74_5.0L did and only tacked my cage in place while I measured and cut all the additional supports to the rear main down braces. I 'should' have left a little more room on one of my braces for it to be easier to weld up but hindsight is always 20/20 right. Regardless, it now has a bead all the way around, just not as pretty as the TIG welding on all the other joints. I just made the whole rear half of the cage, tacked into place and rolled it out when I was ready to weld all the joints. Fit like a glove. The shop that did the tig welding for me asked where I wanted the main hoop placed in relation to the map light bar and as they were rolling it back in place they said " well dang this thing just kinda locates itself doesn't it, is that where you want it?" I took a quick look inside and it was exactly the same place where I tacked everything up at!!! I said sure is, weld away
-
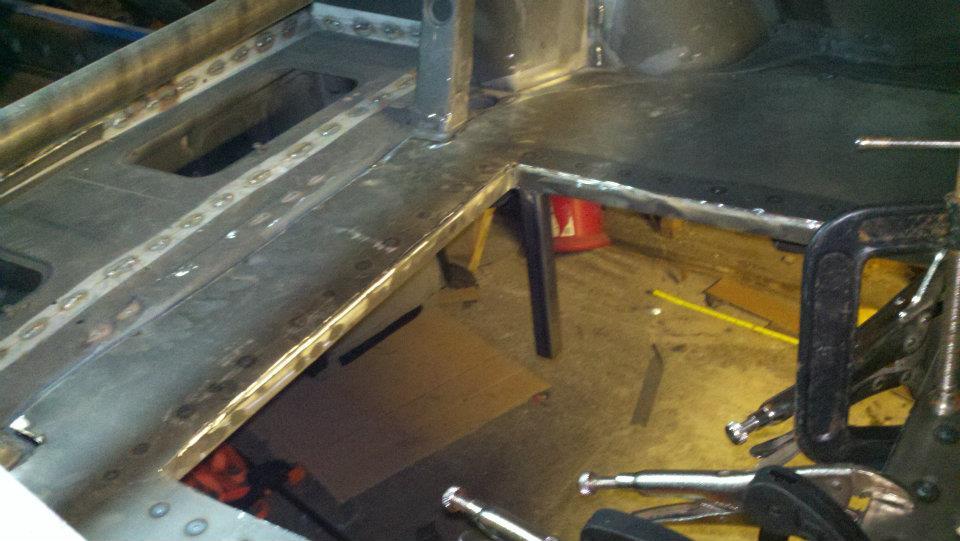
I just used a sheet of 4'x8' 16 gauge steel (0.060") I probably would have been better off buying some 18 gauge to save a little weight. But I definitely wouldn't used 1/16" as it is even thicker than 16 gauge. I would buy some 18ga sheet steel and call it a day. MUCH cheaper to fab your own rather than buying the MSA stuff.
-
No kidding, I think that floors and rail replacement are pretty much standard procedure one these cars. I did mine on a rotisserie about and year and a half ago and just yesterday put it back on the ground on its own suspension!
-
I honestly wouldn't even worry about the front support. Make some U channel and weld it over it if your that worried about it. The damage is ahead of the strut support and thats really the only place you should be concerned about. Our cars are known to have wrinkles and the rear strut brace looks like it was cut and welded back together. I would plan on cleaning up the welds and adding a rear strut tower brace. Are you planning on building a cage for this car?