-
Posts
939 -
Joined
-
Last visited
-
Days Won
33
Content Type
Profiles
Forums
Blogs
Events
Gallery
Downloads
Store
Everything posted by Zetsaz
-

A musician's therapist (The $300 Z)
Zetsaz replied to Zetsaz's topic in S30 Series - 240z, 260z, 280z
Gotta have something to do to keep me warm in those Utah winters haha. Honestly have rarely been quite this excited about a new product. So much of "this other part number works" and limited info on rebuilding these. Something new and ready to go out of the box is a welcome treat considering how much I'm a bit burned out on rebuilding stuff. There was another one last night! Again I'm far enough away to not really experience damage, but it was enough to make my bed feel like a hammock for a bit before evacuating my building. Almost felt like I was being rocked to sleep before my sleepy brain finally realized there was something I was supposed to be doing haha -
Yes, I'm referring to the small slotted piece on the top rear that bolts to both the compressor and the main bracket. It's hard to tel if the small piece was used strictly for cost or if the curvature on it is strictly necessary to avoid fouling on the compressor, but I did see the turnbuckle on someone's (maybe on. instagram?)
-
Some "professional" shops are professional mostly because they have the tools to do it quickly and functionally, not necessarily pretty. There was a guy close to me in Washington that had a really impressive setup with hardlines on his car, but he doesn't offer that to most people in his shop just because it's much more pricey and time consuming. @rossman I have the same AC mount, and I actually recently saw someone who replaced that rear piece with a turnbuckle. Seems like it'd be a good solution for proper tension. I'll probably try to upgrade that bit on mine when I'm home this winter even though my lines aren't done.
-

A musician's therapist (The $300 Z)
Zetsaz replied to Zetsaz's topic in S30 Series - 240z, 260z, 280z
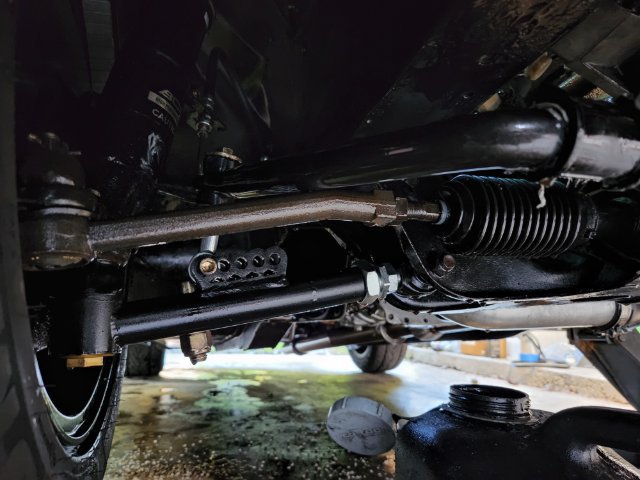
A mild update from the faraway land of Mexico: My new T3 steering rack arrived yesterday! Brother sent a picture and took the car out for a quick ride. The stock rack was worn and would have been very difficult to fix up. On top of the slower steering ratio than a 240z I had a sticking point just outside of center that prevented me from tightening it up, so it always felt a bit sloppy, even with brand new steering and suspension components everywhere else. In unrelated news for those who care: yes I was close enough to the earthquake epicenter down here to really feel it, but no real damage to anything where I am. Someone somewhere probably had some glass bottles break. It happened only a few hours after we had a scheduled evacuation drill at my school... long day haha. -

A musician's therapist (The $300 Z)
Zetsaz replied to Zetsaz's topic in S30 Series - 240z, 260z, 280z
Yeah, no way I'd do it if my commute was longer than a few miles. That's actually part my beef with US cities, everything is soooo spread out. Realistically I could walk a block or two away for my basic grocery necessities even. if I want a snack or a bit there's literally a tiny shop across the street from my apartment building. A Jimny would be so rad. I see them everywhere down here. They're well past the initial run they did to test the market and they're always in low supply at dealers. Are apparently super popular. Yeah, I'm at a fairly nice American school here. As a location (other than the unbeatable natural beauty of the pacific northwest), for my social life, and as a job this is way better for me, but specifically as a music program it's a notable downgrade. I'm teaching middle school with no real team like i used to have and the past few years have killed the program a bit. BUT, that does mean I have some flexibility in how I approach it and I get to start most of the kids totally fresh. -

A musician's therapist (The $300 Z)
Zetsaz replied to Zetsaz's topic in S30 Series - 240z, 260z, 280z
Mexico is solid! My new wheels are a Marin hybrid bike. Aluminum frame, hydraulic disc brakes, all that fun stuff that I've now kitted out with everything I need to commute on bike. Minimum 2 years I'll be living here. After we'll see. No car right now, we'll see how long that lasts. Will either bring down the hardbody or buy a new Jimny if I stay here for a long time. Z will probably not come down Guadalajara is a pretty well developed city, especially by latin american standards, but a lot of speedbumps would be killers down here, and I trust most drivers in the city here even less to not completely destroy my car in an accident. The upside is i'm saving a ton of money not insuring another car or paying for gas. Will be my summer car every time I visit family. First purchases I have planned for next year are the new T3 steering rack, Z car garage brakes, and if I'm saving a lot more than expected, new flat top pistons to up the off boost performance below boost. -
Pretty sure mine is seeping from the same area, but much more, and it's driving me insane.
-

A musician's therapist (The $300 Z)
Zetsaz replied to Zetsaz's topic in S30 Series - 240z, 260z, 280z
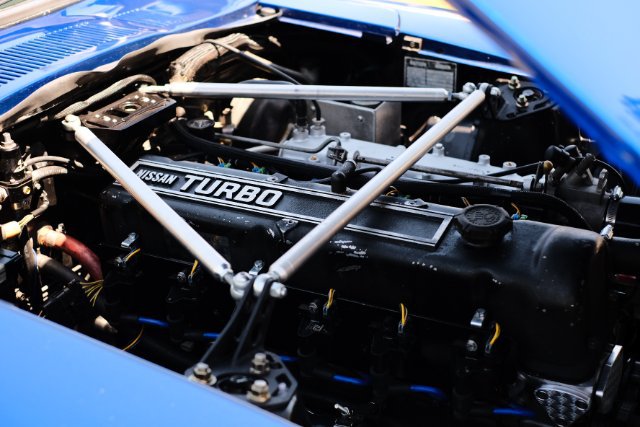
Realized sometime during 4th of July weekend that I had a cylinder not firing. Seems like one of my ignition coils was toast, and the plug was fouled as a result. I replaced the coil and plug, did some retuning of the fuel map with autotune and it's running much better! Averaged 19mpg on the way here from WA, which I thought was low. I had assumed it was just the conservative tuning on the megasquirt to run slightly on the rich side coupled with my 3.9 rear end, but it still seemed unusual for a turbo engine. Did a datalog on a drive to SLC with a friend and averaged 23mpg after the fix! That's without trying to baby it. Was over 70 or over 80mph depending on the section of the interstate we were on as well as a few strong pulls to near redline on the on ramps. Pretty sure if I keep the speed down a bit and don't gun it I could get 25 mpg highway 😎 Very satisfied with how things are turning out so far, just need to redo my exhaust hangers and hopefully it'll solve my little rattle. Only a week until I head to mexico though, so it might wait. -
That's looking really good! I like the really simple tab you used for the hanger farthest back. On my old exhaust I had a hanger on the exact spot you're using for the center. My vibration problems seem to be unrelated to the exhaust, however, so I'll have to check if a CV is going bad or something else is fouling. Deleted the front diff crossmember with the z car depot billet control arm clamps and the noise is identical. Can't get the thing to bump no matter how far I make it swing. Next upgrade really needs to be some electric fans like yours.
-

A musician's therapist (The $300 Z)
Zetsaz replied to Zetsaz's topic in S30 Series - 240z, 260z, 280z
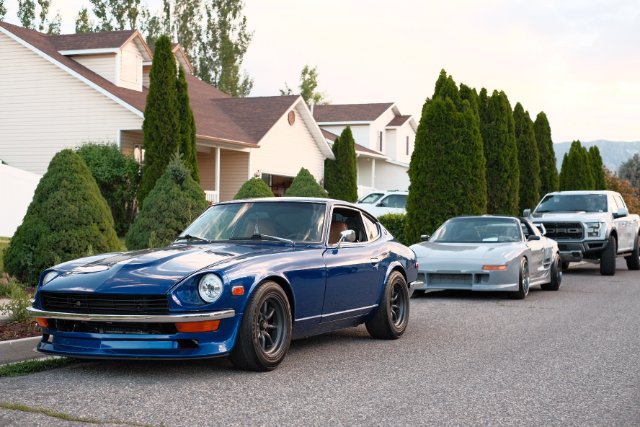
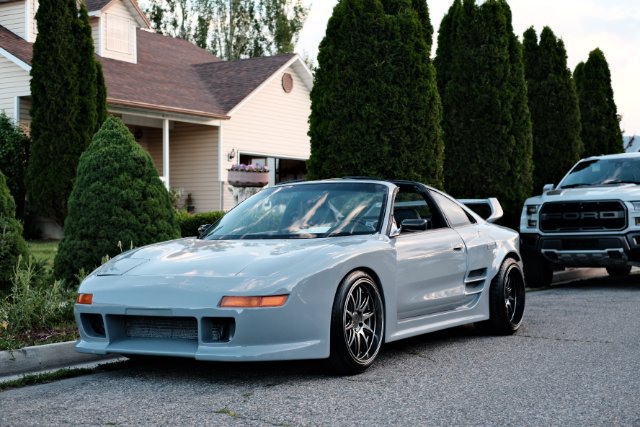
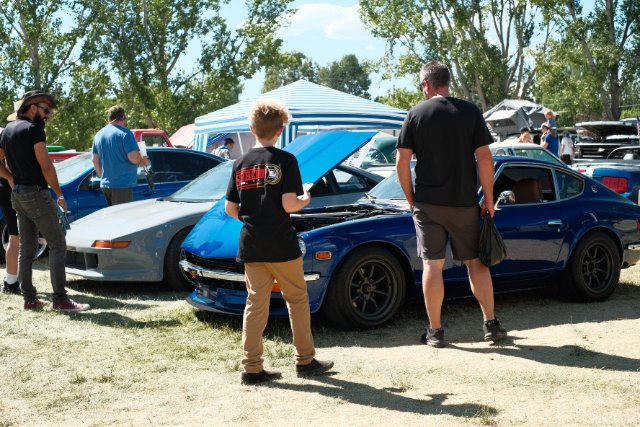
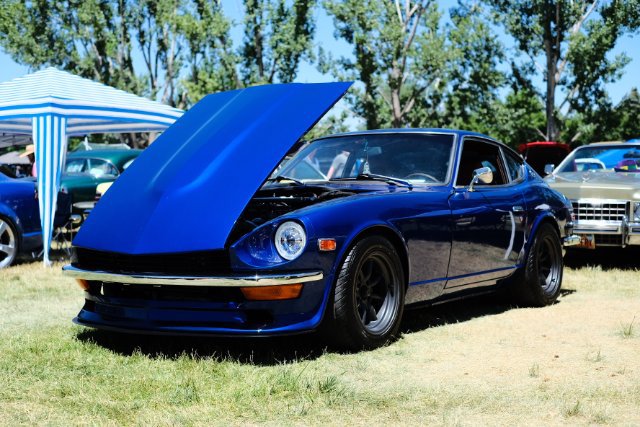
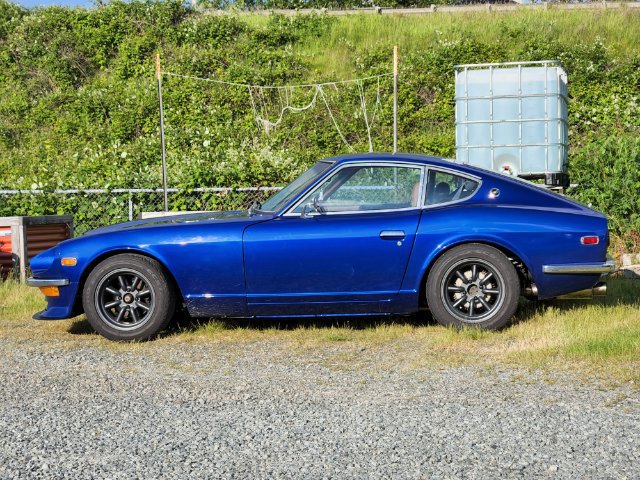
A few select shots from this year's cruise-in. The car sure has come a long way! Was excited to have my brother join me in his MR2 even though his is still even more of a work in progress than mine and isn't quite as clean. Still a looker. Expecting clamps to delete the front diff crossmember soon which will hopefully solve my exhaust "buzz" problem. It's no longer a rattle but still a bother. Will likely still redo at least one exhaust mount to a more solid style with a rubber or urethane washer on a through hole instead of a rubber hanger to limit movement -

A musician's therapist (The $300 Z)
Zetsaz replied to Zetsaz's topic in S30 Series - 240z, 260z, 280z
Great to catch you too! Despite my little gripes like the small exhaust rattle and the constant work in progress nature of the thing, it's REALLY satisfying when other people enjoy it. I forget that even with the spots on the paint that aren't perfect it's still definitely a looker. Haven't seen it in bright sun in a long time and it's very fun right now 😁 -
Your "more vibrations" is probably still way less noise than the buzzing I'm hearing currently. I'm sure it'll be great!
-

A musician's therapist (The $300 Z)
Zetsaz replied to Zetsaz's topic in S30 Series - 240z, 260z, 280z
I'm here until I move to Mexico! Third week of July I fly down. In the mean time I'm attempting to relax with family while also taking care of figuring out housing down there and submitting the last bits of employment paperwork. -

A musician's therapist (The $300 Z)
Zetsaz replied to Zetsaz's topic in S30 Series - 240z, 260z, 280z
Made it to Utah and have my car in the Cache County Cruise-in Drove 800 miles yesterday.... Only to find out that my less than stellar mpg was because I've been running on 5 glorious cylinders. Averaged 19mpg, which i thought was low for my setup and turns out i was right. Coil pack failed and fouled a plug. Replaced both today and even without adjusting my fuel map it feels SO much better Hoping to do a bit of road tuning after filling up tonight and seeing how much better I can make this thing feel. The increased smoothness on the engine even lightened up some exhaust tapping that was driving me nuts. Really only hear it on right turns right now which is more reasonable than any time I'm under load. -
I'd love to see some better pictures of how you have that braced. I have some rattling on mine in that area that's driving me nuts. So much so that I'm willing to get rid of the front diff crossmember altogether since I have a top mount. With my resonator in the middle I just don't have great clearance if I drop it too far (and with the angles it has, dropping it too far leans the pipe towards the driver side of that little opening where it's already bumping.
-

A musician's therapist (The $300 Z)
Zetsaz replied to Zetsaz's topic in S30 Series - 240z, 260z, 280z
Added a resonator to the midpipe yesterday with a vibrant straight through piece and shortened up the mid pipe by a quarter inch. Made a super basic jig to fit things up the same. 100% worth it. Downright tame at lower rpm now so droning around town doesn't bother me with the windows down. Looks like my ground clearance has been ruined however. Was hoping it wouldn't be toooooo bad but i already scraped a tiny bit on a particularly rough spot coming out of my alley so i plan on dropping by my friend's again to add a kick up and maybe one more brace near the diff or the transmission crossmember to help make sure I don't get occasional exhaust rattles -

A musician's therapist (The $300 Z)
Zetsaz replied to Zetsaz's topic in S30 Series - 240z, 260z, 280z
Mostly just cruising and shaking things down lately. Running much better and very smooth after some help from Richard Boyk to adjust settings. This thing is SMOOOOOOTH... if it wasn't for needing just a couple tweaks to keep the exhaust from rattling on occasion haha. The brake fade is noticeable after a spirited drive earlier. I think one of the first upgrades soon is a turbo blanket, and for major upgrades for next summer i might be getting the Z car garage brakes. A bit burned out on custom stuff. I think I'm okay paying more for a really well built kit that'll get the job done right without a bunch of reading and tinkering on my part -
I run a mix of T bolt clamps and worm gear clamps right now because it's what I have on hand and they honestly work fine at my boost levels. I only have one support on the passenger side and it's to help make sure that the piping running under the engine doesn't dip more than the half inch or so it's already lower than the front crossmember. I would think with even shorter runs you don't need any bracing since it's fixed on one end by the turbo and on the other by the intercooler and brackets there. You should really only have 2-3 couplers between those spots which is enough to flex but still well supported so the entire length doesn't move much. If I upgrade any clamps I think I'll probably be using some higher quality worm gear clamps. I feel like the t bolts I have just occupy way more space than necessary, but better clamps will probably cost me close to $100 for every place I need.
-
What overflow tank is that?? Looks like a nice fit. I might try moving to that on my mishimoto radiator.
-
post pics! I was lucky enough to drive it before it sold. Super fun car.
-

A musician's therapist (The $300 Z)
Zetsaz replied to Zetsaz's topic in S30 Series - 240z, 260z, 280z
I think other than their OEM bits they just have generic hardware store stuff in whatever the closest size is. Your diameter issue isore severe, but I've noticed the closest stuff i find is usually fractionally shorter than the OEM hardware which is why I had that issue. Protunerz might be running into the same issue on some of their kits. Still waiting on the rest of my hardware after they told me some of the hardware they got for the thermostat kits was too short. I know for a fact my bolts holding in the lower thermostat right now are shorter than stock and and really hoping to replace those soon with the new stainless bits -

A musician's therapist (The $300 Z)
Zetsaz replied to Zetsaz's topic in S30 Series - 240z, 260z, 280z
Was leaking kind of substantially from the cover but I'm pretty sure the only spray was out the pump. The higher rpms from highway cruising plus the fan being right next to it helped it splatter all over. Combine that with being thinner from running at operating temps and it made it easy to spread all over. Got it running a couple hours ago and sprayed engine degreaser all over the passenger side of the bay and the suspension components that got oiled up. Drove out to a car wash and hosed everything down thoroughly. I think it might be cleaner and drier than it was when I first got the new setup running haha. No signs of leaking so far after a double check and quick highway drive so I think the problem is solved. Will know for sure on a longer drive tomorrow. -

A musician's therapist (The $300 Z)
Zetsaz replied to Zetsaz's topic in S30 Series - 240z, 260z, 280z
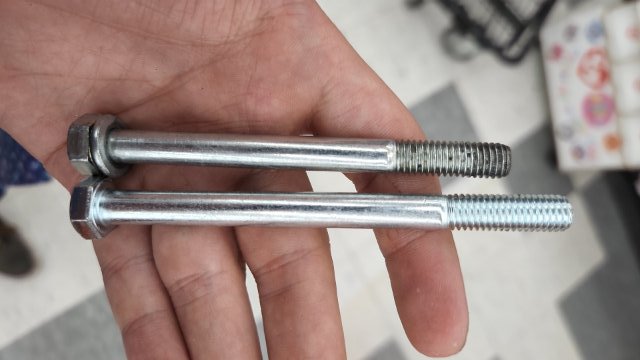
New bolts and metal spacers purchased. Pics of the oil everywhere included, plus the old bolts (with the black on the end sort of indicating how many threads were actually grabbing) vs new bolts for the pump. -

A musician's therapist (The $300 Z)
Zetsaz replied to Zetsaz's topic in S30 Series - 240z, 260z, 280z
Well the first failures of longer drives have shown up. Had two MAJOR oil leaks (sprays more like) from the back of the valve cover and from the oil pump. I thought the gaskets failed, but it seems less likely now that I've torn into it. The spacers I used for the new coil pack mounts aren't as sturdy as I thought and can't apply enough pressure on the valve cover without distorting. Got a new gasket anyway, but I'm replacing them with metal spacers this afternoon. The oil pump might be more serious, but after pulling it it looks like the stainless bolts I had from Z Car Depot at some point are too short. They only have 3 or 4 threads into the aluminum on the timing cover and cross threaded. Got a new gasket for that as well, but also chased the threads and buying longer bolts today to get better thread engagement and a better seal. Hopefully that solves my problems, but there's oil EVERYWHERE on the passenger side from my drive home. All over the passenger suspension, on the wheel, and splattered onto the passenger fender and door from spinning around on the wheel while warm and thinned out. Lots of cleaning to do. -

A musician's therapist (The $300 Z)
Zetsaz replied to Zetsaz's topic in S30 Series - 240z, 260z, 280z
No, but I heard my friends like that haha. Definitely sounds a bit like a diesel, but I'm not a fan. My current cam is already enough at idle. I love the sound much more once it smooths out during accel. I have the head cooling mod now which is my coolant feed for the turbo. Was suggested by a builder in Vancouver who works on a lot of these. So far 0 temp issues, but I'm not on boost a lot, and honestly as a street car I just don't see myself driving it in a way that would get me there. This is already overkill for my use. You're totally right about the torque drop off. Considering just how hard it pulls when I'm barely getting to into the 5000s, I don't see myself using that supposed 7200 rpm redline either. Maybe eventually that'll become a tuning thing to limit boost at lower rpms, but that'll have to wait until I sort my current boost creep. Moving out of the country soon, so that's unlikely haha. just trying to enjoy it as much as I can this summer before it's stored at my brother's.

