Zetsaz
-
Posts
943 -
Joined
-
Last visited
-
Days Won
34
Content Type
Profiles
Forums
Blogs
Events
Gallery
Downloads
Store
Everything posted by Zetsaz
-

A musician's therapist (The $300 Z)
Zetsaz replied to Zetsaz's topic in S30 Series - 240z, 260z, 280z
Was leaking kind of substantially from the cover but I'm pretty sure the only spray was out the pump. The higher rpms from highway cruising plus the fan being right next to it helped it splatter all over. Combine that with being thinner from running at operating temps and it made it easy to spread all over. Got it running a couple hours ago and sprayed engine degreaser all over the passenger side of the bay and the suspension components that got oiled up. Drove out to a car wash and hosed everything down thoroughly. I think it might be cleaner and drier than it was when I first got the new setup running haha. No signs of leaking so far after a double check and quick highway drive so I think the problem is solved. Will know for sure on a longer drive tomorrow. -
A musician's therapist (The $300 Z)
Zetsaz replied to Zetsaz's topic in S30 Series - 240z, 260z, 280z
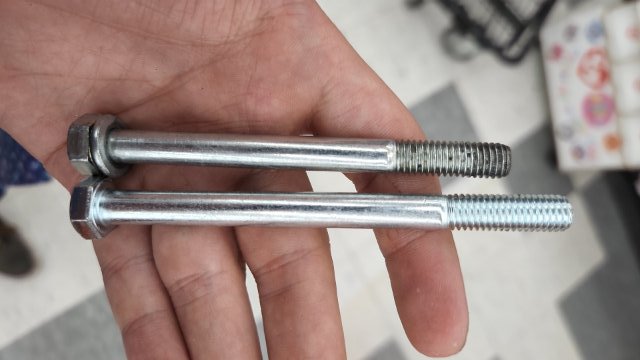
New bolts and metal spacers purchased. Pics of the oil everywhere included, plus the old bolts (with the black on the end sort of indicating how many threads were actually grabbing) vs new bolts for the pump.
-
A musician's therapist (The $300 Z)
Zetsaz replied to Zetsaz's topic in S30 Series - 240z, 260z, 280z
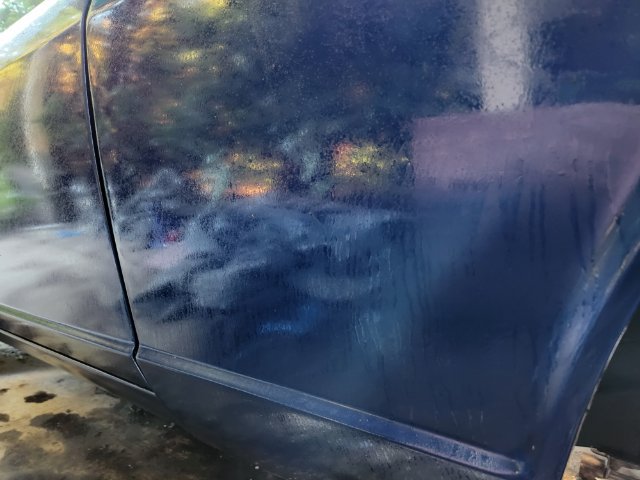
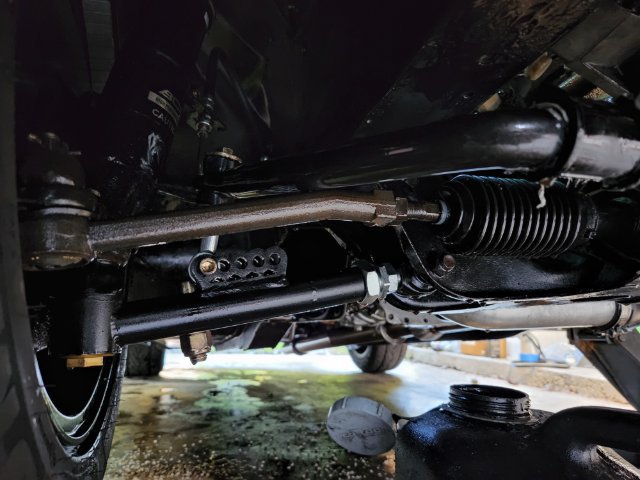
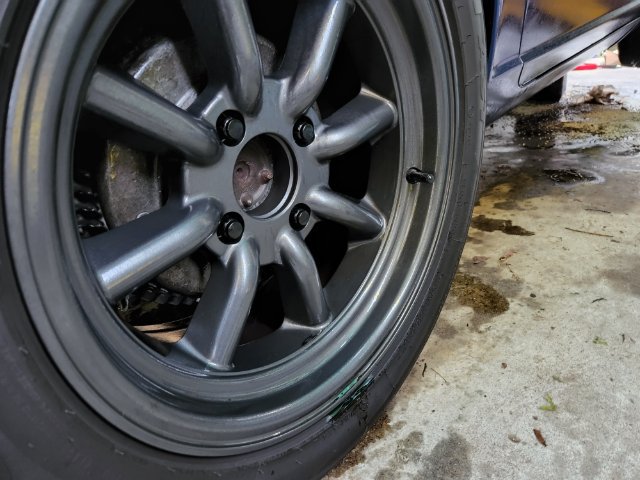
Well the first failures of longer drives have shown up. Had two MAJOR oil leaks (sprays more like) from the back of the valve cover and from the oil pump. I thought the gaskets failed, but it seems less likely now that I've torn into it. The spacers I used for the new coil pack mounts aren't as sturdy as I thought and can't apply enough pressure on the valve cover without distorting. Got a new gasket anyway, but I'm replacing them with metal spacers this afternoon. The oil pump might be more serious, but after pulling it it looks like the stainless bolts I had from Z Car Depot at some point are too short. They only have 3 or 4 threads into the aluminum on the timing cover and cross threaded. Got a new gasket for that as well, but also chased the threads and buying longer bolts today to get better thread engagement and a better seal. Hopefully that solves my problems, but there's oil EVERYWHERE on the passenger side from my drive home. All over the passenger suspension, on the wheel, and splattered onto the passenger fender and door from spinning around on the wheel while warm and thinned out. Lots of cleaning to do. -
A musician's therapist (The $300 Z)
Zetsaz replied to Zetsaz's topic in S30 Series - 240z, 260z, 280z
No, but I heard my friends like that haha. Definitely sounds a bit like a diesel, but I'm not a fan. My current cam is already enough at idle. I love the sound much more once it smooths out during accel. I have the head cooling mod now which is my coolant feed for the turbo. Was suggested by a builder in Vancouver who works on a lot of these. So far 0 temp issues, but I'm not on boost a lot, and honestly as a street car I just don't see myself driving it in a way that would get me there. This is already overkill for my use. You're totally right about the torque drop off. Considering just how hard it pulls when I'm barely getting to into the 5000s, I don't see myself using that supposed 7200 rpm redline either. Maybe eventually that'll become a tuning thing to limit boost at lower rpms, but that'll have to wait until I sort my current boost creep. Moving out of the country soon, so that's unlikely haha. just trying to enjoy it as much as I can this summer before it's stored at my brother's. -
A musician's therapist (The $300 Z)
Zetsaz replied to Zetsaz's topic in S30 Series - 240z, 260z, 280z
Pretty sure I have the same Tial actuator you have. Other than your stroker setup, I think some of our stuff is very similar at this point. I'm not sure I should be seeing a bit over 20psi if you were seeing 15, especially since I haven't even taken it close to redline. Need to get a boost gauge so I don't have to stare at a screen to monitor it. It's part of the reason I'm playing it so safe right now. Can't just eyeball a gauge. Rear end is is a 3.9 CLSD from a Z31. Not sure I wanna go through the trouble of pulling the turbo to open up the hot side right now, but if everything else checks out I'll consider that down the line. For now, I think my stock compression, plus the top end of my VE map running a bit rich, plus my timing and AFR targets being safe maps from @Chickenmanwill keep things safe even if I'm boosting more than expected. Just won't take it to redline at all in case it creeps even more. -
A musician's therapist (The $300 Z)
Zetsaz replied to Zetsaz's topic in S30 Series - 240z, 260z, 280z
Okay now that I'm making boost and starting to work on the VE maps it's SO fun. Took a break from tuning and engine stuff last night to install the headliner. What I thought would be 2-3 hours took 7... fortunately it turned out mostly okay, especially for a DIY job and the noise levels are noticeably better now that a bunch of holes in the car (wiring etc) that technically lead right outside aren't pumping wind and exhaust noise into the cabin. They are good mods.... because I hit 20psi yesterday according to my data logs with no issues haha. This is technically a bad thing because it means I'm over boosting. Not sure if I have the actuator arm just a couple turns too tight or if it has a leak somewhere. Might try to figure out a way to test the Tial actuator with my air compressor. There's also the small chance I was shipped the wrong one. I'll check the part numbers and make sure I wasn't accidentally sent their 22psi actuator instead of the 10psi I ordered. Anyway, here's a poor vertical video I sent my brother of some baby pulls i was doing on a a rural dead end road with a looooong straight. Wide open and super convenient for some mild testing. Including my squeaky clutch i fixed when i got home. Didn't even get it to 5k here. Once I was comfortable that the charge pipes were holding the pressure I pushed it a bit more in 1st and second after double checking the VE map. Took it to about 5.5k getting onto the interstate and honestly it pulls SO much harder than expected, but that may just be the 22psi haha. The block was fully balanced by Top End including the balanced crankshaft according to the build sheet I managed to get, and the basic cam info I got supposedly claims a 7200 redline on the cam... can't imagine what that's like since I haven't even hit 6k yet while tuning Snapchat-1473947449.mp4 -
A musician's therapist (The $300 Z)
Zetsaz replied to Zetsaz's topic in S30 Series - 240z, 260z, 280z
Not entirely sure yet because I've only barely made boost. Was making like 3psi yesterday and realized a couple clamps weren't tight. This morning when I felt like I was ready to try a short pull in first I didn't even hit peak boost because the coupler on the compressor housing got blown off haha. I think I DEFINITELY want to go with flat top pistons on this eventually to help the off boost responsiveness, but part me almost wants to go with an ITB 3UZ in the super long run if this thing ever blows. I kind of like the simplicity of NA.... that or I'm just used to it and will completely changed my my mind once this thing is properly dialed in. Turbo noises are definitely satisfying though -
A musician's therapist (The $300 Z)
Zetsaz replied to Zetsaz's topic in S30 Series - 240z, 260z, 280z
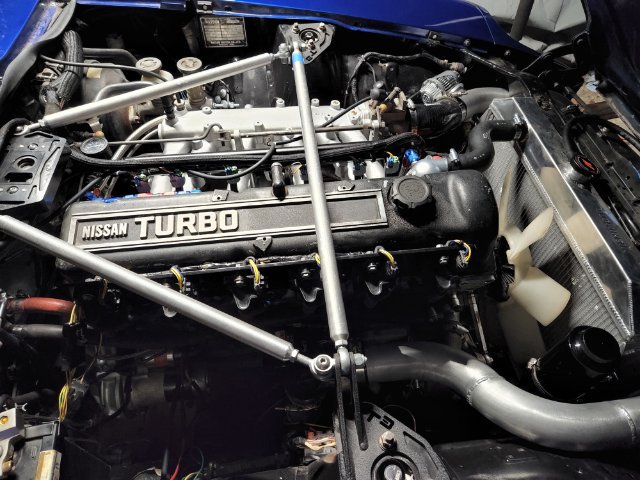
Between the all the transmission and finalizing the last few pieces of the engine I've been working on this thing almost all my free time and the baby mistakes are adding up. That being said here's the engine bay update, now with completed charge piping and some mediocre wiring and vacuum hoses I plan to redo completely and tidy up at some point. Next steps, some of which are just fixing my own mistakes are: -Get new shift knob at my door because I've been running without haha. Datsun threads are M8 and all the later Nissans use M10 -Check and adjust oil feed. Dripping just a bit while running -Adjust exhaust more. Occasionally starts rattling. May just need to tighten the hangers at the back. -Tighten couplers.... Only made 3psi boost earlier because I didn't have the couple on the throttle tightened 🤦🏻 -Make top bracket(s) for intercooler. Just running some flimsy brackets on bottom. Charge piping is helping keep it stable but it shouldn't have to
-
A musician's therapist (The $300 Z)
Zetsaz replied to Zetsaz's topic in S30 Series - 240z, 260z, 280z
Well she's moving! Charge piping isn't done and my coils might be wired funny because it only runs on wasted COP, no sequential spark right now. That or my tooth #1 angle is off or my trigger wheel is upside down, or or or.... But she moves! Friend is helping me with the hot side charge piping tomorrow that's holding me back. Hopefully I can figure out some settings and get it running smoother asap
-
Smart move. $400 for machining only is highly excessive. I had trouble finding anyone that did small batch work and ended up at a local machine shop that deals almost exclusively with marine work do mine for $80. I feel like that was REALLY cheap, but considering how little work it is for a shop with the right tools, anything over $150 seems excessive. it's really only opening up 3 holes plus some clearance on the thick part of the bearing opening for the thicker 71c gear.
-
A musician's therapist (The $300 Z)
Zetsaz replied to Zetsaz's topic in S30 Series - 240z, 260z, 280z
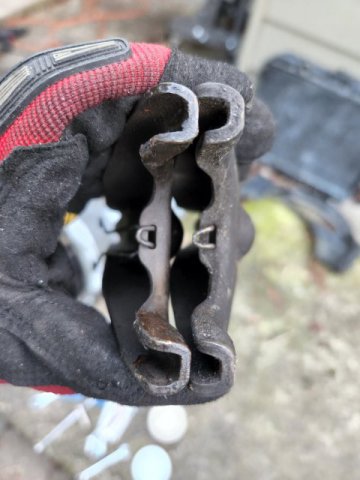
Transmission in. Coolant fittings for the turbo done. The silver lining to pulling the transmission is I accidentally used the thinner Datsun clutch fork when I first installed it instead of the noticeably thicker "71C" fork. Comparison in the second pic. Checklist for first start is just -Remount coil packs -Refill trans fluid (Redline MT90 arriving today) -Install shifter -Refill coolant -Install Vacuum hose for wastegate and BOV -Burn new tune onto ECU (Already updated settings for new injectors, removed IAC, and new AFR Target Map) Technically optional for just a first start. -Finish intercooler hot side piping (Running into some issues with fitting things the way I had planned)
-
A musician's therapist (The $300 Z)
Zetsaz replied to Zetsaz's topic in S30 Series - 240z, 260z, 280z
Transmission problems SOLVED. A check ball was missing during assembly and the selector over travelled and got stuck out of place but on reinspection they also noticed one bit near a synchro was assembled backwards? can't remember which piece specifically but apparently one piece is nearly identical front to back and wasn't set right which made it tough to go into gear to begin with. The shop redid the work for free and got it back to me same day! Will try to get it back in tonight and assemble the last of the coolant fittings which are arriving tomorrow. Unless I'm missing something i might be able to try a first start tomorrow night. If I'm missing anything hopefully it's by the end of the week -
A musician's therapist (The $300 Z)
Zetsaz replied to Zetsaz's topic in S30 Series - 240z, 260z, 280z
Well... the engine itself is dangerously close to firing. Just waiting on a few fittings and some BSPT plugs then I'd be running again. Transmission problem doesn't seem like what I thought. Seems like the stick is in 5th, but the trans is in neutral. Started the laborious process of pulling the transmission yet again. Will be taking it back to the shop that rebuilt it to see what the deal is. Seems like the selector forks aren't lining up or something because the stick goes to "neutral" but towards the right with some force and in "fifth" it has a lot of play up and down but neither is actually selecting a gear. Silver lining - I accidentally used the thinner Datsun clutch fork instead of the mutch thicker 240sx one, so I guess I at least get the chance to swap them out now, and triple check that I actually put the right release bearing in.
-
All that work kind of makes a carbon fiber panel seem cheap haha. I think if i have to replace my hood ever I may not even bother with repair, might just go straight to a Seibon hood and try to paint match
-
The distance you're picturing is exaggerated. I just measured and it's about 2-2.5" lower like Rossman mentioned.
-
I'm not sure I'm understanding your description correctly. You may be thinking of it backwards. Unless you somehow went even taller than a 280z radiator, OE 280z hoses should work for either application especially with a straight, with the small caveat that you may have to cut a bit of the end going into the radiator if the bend becomes too tight. They're slightly longer than you'll need if you have a 240z radiator. I still have my 280z radiator sitting around. Never got around to recycling it (started leaking). I'll take some measurements when I'm home today and let you know exactly how much higher up the 240z outlet is. Sadly, my 280 hoses are cut, so I can't just eyeball if they'll kink or work as is for you. PS - if I didn't already have the Mishimoto and wasn't already hemorrhaging money trying to finish this thing I'd ask ask to just make a second radiator and send it my way. Looks like a very nice piece haha
-
A musician's therapist (The $300 Z)
Zetsaz replied to Zetsaz's topic in S30 Series - 240z, 260z, 280z
I may take you up on that. Underneath the car, the fuel lines are one of my biggest frustrations. They work fine, but I just flared them for EFI rubber hose for now. Trying to get my cousin to help me 3D print some mounts to run along the frame rail, right now they're just sort of hanging with only a couple of clamps in the back and front and zip tied to the brake lines which are more properly mounted. Stock rubber mounts don't work since I upgraded to 3/8" stainless line. it's not too bad since I only have very short sections of rubber, especially at the front. The rail is deadheaded and the FPR is running "returnless" style. I've heard that's not ideal with boost, but I figure if the "Medusa" Z is running that way with much more power than I'll ever have and Z Car Garage didn't bother to change it when they did a lot of work for him, then I'm probably fine. -
The radiator is physically taller in a 280z. I'm sure a 280z hose would work fine on a modified radiator with a straight outlet, especially closer to 240z dimensions since you don't need to lengthen the hose. At the very worst, you'd be trimming an inch or two off the end if the new bend from having the radiator outlet a bit higher somehow created a kink in the hose. I trimmed my 280z hose to fit a Mishimoto radiator which only comes in the 240z style with the lower outlet upturned. Z Car Depot has aftermarket 280z upper and lower radiator hoses as well as OEM units, the Mishimoto hoses are only made for the 240z upturn but seem excessively expensive.
-
A musician's therapist (The $300 Z)
Zetsaz replied to Zetsaz's topic in S30 Series - 240z, 260z, 280z
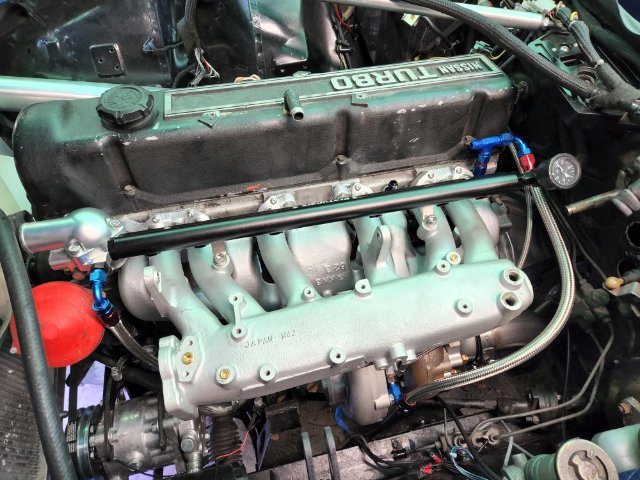
Thermostat housing is on and turbo is split apart for a sec while i wait on a couple of AN adapter fittings for the coolant lines which should arrive tomorrow. Occupied myself installing new door dome light switches and touching up the paint around the old busted ones. Finally managed to pull the old turbo studs put for the new longer ones to use with the spacer. Even welding nuts on the end didn't work. The stud extractor tool was worth every penny Had to relocate the PCV to clear my wastegate actuator and ground down the mount for the original one as well. While i was at it I baked the intake and exhaust manifolds in VHT flameproof paint. It's not quite ceramic coating, and I've heard of some people having issues with it flaking off, but realistically I'll eventually replace the intake at the very least with a nicer and better flowing Protunerz manifold. In the meantime, I'm satisfied with how i plugged some of the open holes and cleaned things up. Will probably run wiring under the fuel rail to keep things tidy.
-
Looking goooooood. Not sure why you had to kick down at the trans mount though. But your 73 is a bit different than my 75. Just saw your post on Facebook and started following so I could see other's ideas haha.
-
A musician's therapist (The $300 Z)
Zetsaz replied to Zetsaz's topic in S30 Series - 240z, 260z, 280z
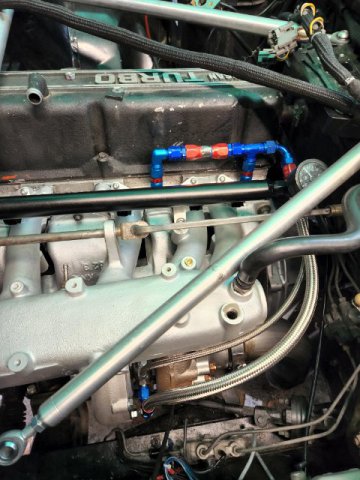
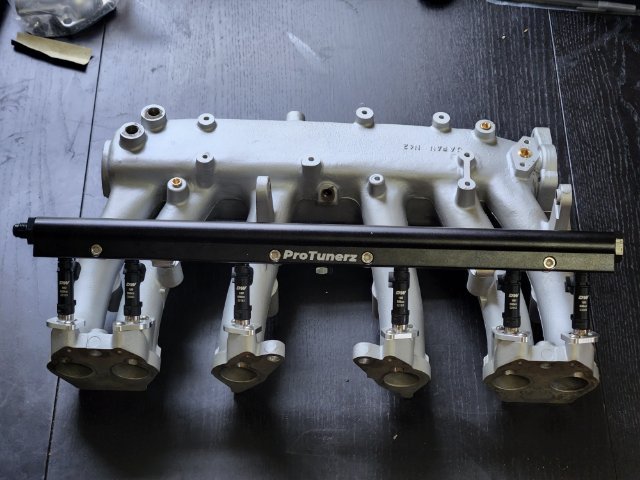
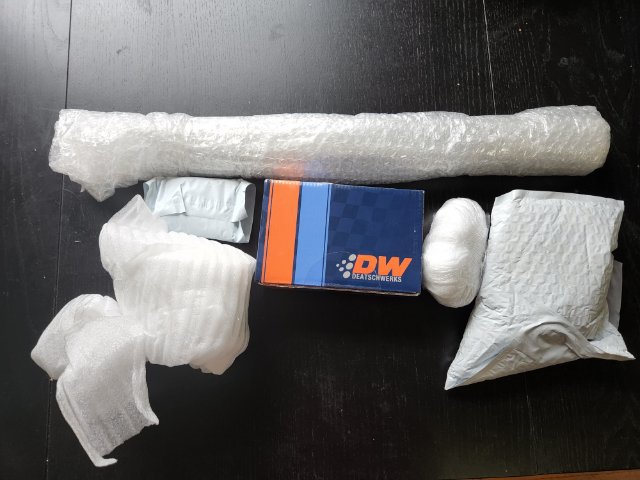
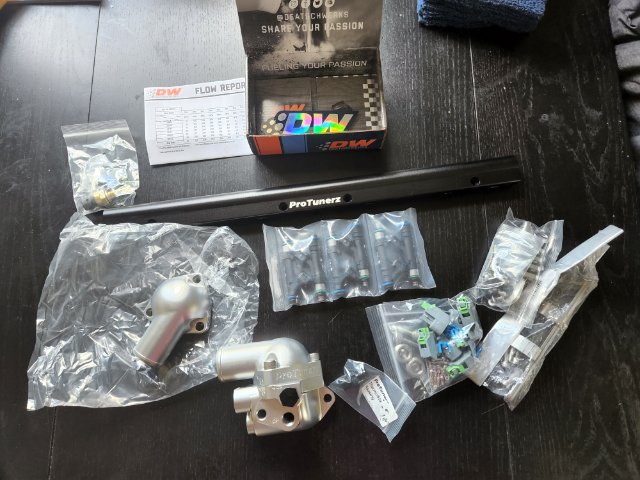
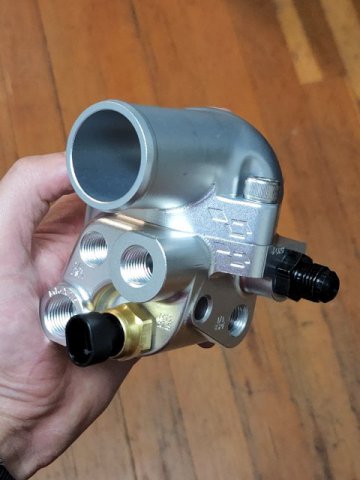
Spacer, new fuel rail and injectors and thermostat housing. Started getting the exhaust manifold fitted up and figuring out the correct angle on the compressor housing to clear everything. Super happy with the quality on the thermostat housing, but notice they accidentally sent me another outlet instead of the water neck haha. ProTunerz has excellent service though and already said they ship the neck on monday along with a return label to send back the extra outlet.
-
Yours is looking much nicer than mine, i must say! Granted you have a much nicer workspace than what I have available to me
-
A musician's therapist (The $300 Z)
Zetsaz replied to Zetsaz's topic in S30 Series - 240z, 260z, 280z
My very much not Chinese made spooly boy has arrived. Thermostat housing and injectors should be shipping out sometime this week according to protunerz SO close to a new "first" startup. Will just need to sort water lines and the intercooler piping once it's bolted up, but it's super close.
-
A musician's therapist (The $300 Z)
Zetsaz replied to Zetsaz's topic in S30 Series - 240z, 260z, 280z
Since I'm running the very conservative stock compression with dished pistons I figured the "newer" ball bearing turbos would get me better response on the low end, even though the GT series is starting to get a bit dated. The GTX for this size is apparently only a marginal improvement, and the G series is just too expensive for me right now. I got the whole assembly (housing, outlet, and water neck) for $194+shipping. Looking at other options which are just stock replacements that does seem like a good deal now that you mention it. Andrew (Milkfab) is also running a clutch fan and has now problems, but he has 3" intercooler piping which caused some fitment issues going under the engine. Mine is all 2.5" which fits great so far as long as I'm able to aim the compressor outlet just right to clear the steering column without having the couple hit anything. -
@JMortensen Those charts are barely legible even if you zoom in. It's one of my big frustrations with the forums after the major update some years back. Images uploaded directly to it all get compressed and you lose detail on some of this stuff. I have personally experienced the lift that you're referring to and the front definitely makes the most difference. A lot of people don't realize how much of a parachute effect the front hood has to create lift. My coilovers were adjusted poorly before adding more of the interior and carrying some things in the rear deck which caused the back end to lower enough to cause problems. Before the front splitter was added, the lift on the front end was enough to make the back rub since it was already close. Over about 55 or 60mph the lightest blip of the throttle would cause one side to rub. Over 65 or 70 mph the front end lift was dramatic enough to cause constant rubbing.