
Ben280
-
Posts
353 -
Joined
-
Last visited
-
Days Won
26
Content Type
Profiles
Forums
Blogs
Events
Gallery
Downloads
Store
Everything posted by Ben280
-

List of Options for Crank and Cam Position Sensors
Ben280 replied to cockerstar's topic in MegaSquirt
Thanks for putting this together! Awesome resource for future MSx installs. I've got the Hoke Performance crank trigger kit installed on a Professional Products SFI rated damper (PN: 90055). - install guide from Andrew. In your price breakout, there are also some taps and drill bits needed to install the kit, adds about $20 IRC. -
I've had good luck with a zip tie. You could go with something heavier if you were worried, but I don't think there is a need.
-
I replaced one of the sensor on the bottom of the thermostat housing for coolant temp sensor. If you're out of space there, you could get a spacer in the upper radiator hose that has a bung. For an IAT sensor I welded a bung into the center of the bottom of the intake (between the #3 and #4 runners) and it seemed to work pretty well! EDIT: Looking at where you've got it located, I imagine you'll be all set. It might not react to the manifold heat soaking as quickly, but it should be ok!
-
Steel hose barb to AN fitting
Ben280 replied to grannyknot's topic in Trouble Shooting / General Engine
After seeing the images, tube nuts won't work, and I don't think anything that requires a flare to be put on the end of the line will be possible. You might be better off welding fittings onto the rails. -
Steel hose barb to AN fitting
Ben280 replied to grannyknot's topic in Trouble Shooting / General Engine
Well after an exciting jaunt through the bowels of the internet and it's weird tracking nonsense, I'll post up another solution for 5/16 hardline to AN. You can use a -5AN Tube Nut and a -5/-6 Female Union. Similar to the previous solution, but one I'm personally familiar with. Either way you will need to do a 37º flare on the fuel line. Summit makes a tool for this, but I HIGHLY recommend the ratcheting RIGID tool. https://www.amazon.com/Ridgid-41162-377-Flare-Tool/dp/B001HWNS40 (for the love of pete, PLEASE go to the right link) Yes its spendy, BUT a good clean flare is essential to a quality fit and avoiding fuel leaks. -
Halloween update! Been progressing slowly, everything is out of the car and ready to slowly start coming back together. I noticed a small leak out of one corner of the fuel cell, and needed to investigate. Got everything apart and pressurized the bladder. Sprayed throughly with soapy water and couldn't find anything. I suspect one of the fittings wasn't tight and fuel could leak out in between the bladder and steel cell. While the cell was out it is a good chance to investigate my fuel starve issue. I've been using a ford focus SVT fuel basket, which has a small built in surge tank. I think the pickups were clogged and it wasn't refilling the tank, because at free flow the pump was pretty weak. Took about 15 minutes to fill a 5 gallon jug... I jumped the gun and was looking at new pumps, but decided I should flow test the pump outside of the fuel basket. Night and day difference, was able to do a gallon in 45 seconds, so just under a 255gph pump. Looks like that will be staying with the car. I ordered a Holley Hydramat to replace the teeny factory pickup. It's a 3x15" version, and should let me run below 6 gallons in the cell pretty easily. Working on my "To-Order" list so I can get everything headed back into the car! Right now it looks like a new shifter assembly for the 240sx trans, velocity stacks and a filter.
-
Ahhhh yes, I see what your saying. Yes the Montgomery/O'Gorman car is a mighty foe, don't think anybody besides Kiesel has been as dominant in a class. There was one guy in FP running a SLA front end and I wish I got a better view of it. Might be a good time to go back to school and get an engineering degree!
-
Hoping to get some good results next season Tube80z! The suspension should hold up, need to do some swaybar tuning next year, and likely a shock upgrade will be in the works soon. Clarkspeed, I'm looking into that possibility, it would certainly be cheaper and easier for intake tuning!
-
Picked up a new (to me) motor today! Rebello built 13.8:1 with Carillo running gear the original dyno sheet from 3 years ago shows 282hp at the flywheel with SU carbs. Hoping that EFI/ITB's and tuning will get it into the low 300's at the flywheel, and 270+ at the wheels. Excited to get my ITB's finished up and synced! Need to do a bit more research on tuning for pulse length before I throw down money for velocity stacks.
-
I think it was old tires, but the springs are definitely helping. Don't remember my lap times from when I was at the Enduro in 2013, but that benchmark is a good piece of info! I end up looking at a couple of the other prepared car drivers regionally, and comparing PAX time. Maybe next year I'll be able to get back down there!
-
SeattleJester, If you're ever out there, come say hello! RebekahsZ, our local club doesn't, but since it's a national event, the national crew puts down chalk lines.
-
Sad news everyone! My L28 has finally broken on me. Cause of failure has yet to be determined, but it is out for the rest of the season. I think its cracked compression rings, or something oil related, a tear down will tell the whole story. The car will miss nationals, but I'll still be going, just in an STS Civic! I'm also calling and emailing engine builders. if I have to rebuild a motor, then I'm going to rebuild a motor worth owning. I've got some video from this past weekend, but haven't downloaded it yet, so heres some footage from the SCCA National Tour stop! Combined, my runs were good enough for 4th place in XP. Looking forward to making some more mods this winter, and adding hopefully double horsepower to the equation!
-
Driven Daily Hillclimb 2016 Build
Ben280 replied to Jesse OBrien's topic in S30 Series - 240z, 260z, 280z
Wish I was still local, I'd be more than happy to come lend a hand. As it sits, sorry to see your plans go so pear shaped, but I'm excited to see what you manage to make out of this! Love the ETS Ute as well, seems like a great inspirational place to start (again) from. As for your tire pick, depends on what that side wall says. If it begins with an A and is sticky at room temp, you're golden. Otherwise, you might have a hard time getting them hot without heaters! -
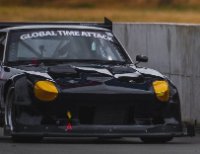
Video from last week at Oregon Raceway Park. The lap in this video is a 2:06.xx, guess where I lost heaps of time! I ran 3 2:02.xx laps in my last session, no video, only data. Excited to go back and do it again!
-
It turns into this really odd rust/krypton coating that is really tough to remove and fairly corrosive to aluminum wheels. I've been having to deep clean my wheels after each event since they have polished aluminum lips. Need to try out various wheel wax strategies!
-
Mid season update! Just been fiddling with the car, my co-driver and I are starting to work out some of the body roll, hopefully some beefier springs will solve some of the issue, or at least give us an actual baseline to start with. Upping from the AZC mystery 200-300# something springs to 400# front and rear. We've been lifting wheels in the slaloms and through hard banking corners. The tire can/should hold 1.8g but we are struggling to get and hold 1.3-5. Here's a video to for you guys, this run was good for top time at our SCCA club event. PAX-wise (for all you SCCA calculator racing fans out there) this time was good for 9th overall. I feel like I'm consistently about 2-3 seconds slower over a 60 second run compared to the fast prepared guys in the club. Bringing the car to the national tour stop, so it will be a good benchmark!
-
Ok, thought after about a year of running this kit, I'd come back for a follow up, particularly for all you track guys out there! I've done a full season and a half of auto-x, and 3 track days (two at Oregon Raceway Park, one at Portland International) and I've been able to further develop the setup for the car. First off was adjusting the brake bias. Even with a small rear caliper, I had to adjust the bias forward to keep the back from locking well before the front. With my dual master setup this was super easy, just a few twists of a knob. If you were doing this on stock power brake system, I imagine you would want to remove as much of the distribution and proportioning blocks as you can, and then install an inline proportioning valve. Easy way to tune brake bias, just take runs at the track/auto-x area and have someone watch as you drop the hammer on your brakes. You want them to lock at about the same time, and dial your adjuster in the appropriate direction. Video is very useful if you are a solo operation. Second off was tuning for the pads. Originally I got the BP-10 that came with the kit, which were fine for most of the auto-x stuff, and held up through 1.5 track days before glazing and becoming 100% useless. Useless to the point that I was bleeding and flushing the brakes mid event trying to solve my weak brakes. I realized that I had probably cooked the pads at the ORP day and swapped them out for some Hawk Black pads. These pads with this brake kit will stop a freight train. After a full day at the track with 0 fade in pedal feel or initial bite (running 40 min sessions) I can get behind these! I will say they are VERY dusty, and when the dust gets wet, well, don't let it get wet.
-
I thought I'd share my latest modification with the group since I've searched and searched for something like this. Problem: Arizona Z Car Coilovers have their adjustment knobs on the bottom of the insert. There is a provided solution for the rears (Just attach hose to be knobs) but nothing for the front. You have either the "Set and Forget" method, or you can remove the insert every time you want to make a change. Neither of these are good solutions. Solution: Extend the adjustment knob! Many companies make extention knobs for cars that have inaccessible rear strut tops. These basically consist of a sheath, a rigid metal cable, a knob and a cup to mount over top of the adjuster knob. All these pieces attach together with set screws. I bought a set of these from Fortune Auto (http://shop-fortune-auto.com/collections/upgrade-accessories-and-replacement-parts/products/rear-adjustment-extenders) The 9" seemed like a good bet for up front, I ordered the 14" for the rear. When I got them I was bummed (but not surprised) to find that the cup was too small. Not way too small, so a quick upsize with a drill was all that was needed. Yahoo! A sweet extension piece attached onto my coilover! (Ignore the foil tape, I'm trying to keep all the settings the same!) Detail view of the knob. You can see the cup at the other end, attached over the old knob. Hopefully these indicate proper direction, if they don't we will find out quick! Now to get the whole mess packaged into the front knuckle. I drilled a slot in the back side of the knuckle, just big enough to slide the outer sheath through. Needs to be a slot because otherwise the radius is too sharp, and the adjuster will bind. The slot is 2 5/16" holes, 1 5/16 up from the bottom of the knuckle (measured on a 77 280z knuckle, your mileage may vary). I then removed the knob the sheath from the adjuster, and threaded the sheath through the slot. Thread the insert back onto the knuckle and there you go! Adjustable front Arizona Z shocks! All back together! You can see the slot, this is as low as is possible to drill into the knuckle. Be careful, these things are THICK! x2! I'm getting the rear adjusters tomorrow, I'll be able to take more photos of all the component pieces! Hope this helps some of you out there.
- 1 reply
-
- 1
-

-
Oh bummer! Sorry to miss you, I wasn't over there very much until end of the day. Next time for sure!
-
Tell me about it! I'm shooting for a 250~ whp L motor in a few years. When am I gonna see your monster?
-
One more for you! Dyno pull at English Racing in Camas WA: https://youtu.be/GDk7fx-5ME8
-
Thanks Nelsonian! Here are a couple videos from last season. One at National Tour (before the injector exploded) and a few longer ones from ORP. One is where I realized that my hood was seriously deflecting at speed! National Tour: https://youtu.be/xrVM4rVbvCQ ORP Session 2: https://youtu.be/MuhEKT8anXo ORP Session 4: https://youtu.be/PeG4XwHKOj4 I saw that! Too funny, particularly as it was for a different region! ORSCCA doesn't advertise our events in Sportscar, although we probably should. These cars are a blast, even if they are increasingly less competitive on the national stage.
-
They are available for purchase. This was their first set, but I think he is offering them now! I'll have to look into those areas for weight savings. Getting anything out of the nose and tail of the car is perfect, keeps the weight inboard. I imagine there are some pieces left in the rear, although the front is pretty stripped out!
-
After a few rounds of buying pizza and beers for friends, I finally got the wiring all sorted out. Still not 100% with where it’s all at, so no photo, but it finally is all together! Engine side coil harness. Nice fat insulated NASCAR spark plug wires. Go Ebay! Branch on the firewall, splits out coil harness and injector/sensor loom Injector side wiring, I’m using 440cc ‘87 Mazda RX7 injectors. They are everywhere, and high impedance, so you don’t have to wire in dropping resistors. Mmmmmmm wires. To complete bringing the car into the 21st century, I added an Autosports Labs RaceCapture Pro/2 data logger box. This will let me track GPS data for runs, along with TPS, brake %, steering angle (once I get the sensor hooked up) along with all the functions monitored by the MS3 box via CANBUS! The setup on this has been a little of a chore, but their customer service is phenomenal, and I can’t say enough good things about it. AND an added advantage is that I can bluetooth into it from a tablet, and now I have a low budget digi dash! This is custom configurable with all sorts of options! Even has a screen for predicted lap times, although if you are looking at it rather than the track, I’m sure you’re gonna have a slower lap! Once I got the car to idle, I decided to get the whole thing tuned on a dyno. The purpose of doing a stand alone system is 100% defeated if I just road tuned it to the best of my poor abilities. I wanted to make sure I was making as much power as I could make safely! Aaron at English Racing took amazing care of me, and got this thing running like a top. A keen eye will notice that I picked up about 10% on my HP and torque numbers all across the range compared to the PSI dyno this time last year. While that’s awesome, the major upgrade is that the AFR numbers are in a safe range, rather than the 18.x that we were reading at the first dyno. So, more power and room to grow! Silly baby wheels on the car for dyno tuning! These are a 15x6 (240sx stock wheel)!! Now you may be wondering where the Gotti wheels went, and the short answer is that they are gone. I got tired of their finicky leaks and bead locks, so they have found a new home in SoCal with a collector who I believe will be putting them on an extremely cool project shortly. I had to replace them with something, and was lucky enough to team up with a local company Bagged Proper, to source some new wheels! They sourced a VERY cool 4 spoke that harks back to the old Enkei Apache 1, or an SSR Mk2. Both fabulous wheels, but at this point, very rare and aging. Bagged Proper got in touch with a company in the Bay area, Art In Motion, where they had this design on ice, fully drafted, but never produced, just waiting for the perfect customer! After a few months of waiting, they finally arrived just in time to bolt up and take to the first couple events of the season. 16x12-35 (x4) These are monsters, they are light and they are AWESOME! Of course it’s on a trailer, but damn! So excited how it all worked out. Meet the new boss, same as the old boss, but better! We are officially in the height of race season now, so hopefully I’ll be able to post some more small progress updates, as well as some good photos!
-
I also knew this year that I wanted to get into more reliable power and be able to document everything that was happening with the car. The ECU was definitely the final stumbling point and really the only area that had been left untouched, and was holding back more power and engine upgrades. I explored several options for ECU’s and kept coming back to MegaSquirt for feature list and expandability. Spoils of a rare DIYAutoTune black friday sale. If I was going to go with a full stand alone system, the stock dizzy had to go as well. This will unlock infinite timing curves and I won’t have to worry about vacuum advance, or trying to lock the weights on the dizzy. I really liked the ease of the Hoke Performance crank trigger kit, and jumped on that to run a wasted COP setup for the car. Bolts right to the back of a SFI Pro Products damper. The damper leaves something to be desired, I had to take it to a friends shop and re-bore the hole. After we did that though, it was a good fit. Quality machined block off plate for where the dizzy used to live! Once that was mounted up, I needed to fabricate a bracket to hold all the coil packs. I decided to use LS1 coils, since they are readily available. One of the goals was to use easy to source parts for faster repairs if something breaks. Start of the bracket. Installed on the motor. Still needs some refinement, but it’s doing the trick! I also was tired of my huge stupid Optima red top battery, so I opted for one of those fancy lithium batteries. Been having great luck with it for the past few months, just have to be careful with the load at idle, and I got the special charger for it. Also needed to make a new bracket! It’s a bird, it’s a plane, it’s…… Oh. Thats boring. Fits like a glove thought! This assembly is getting bolted to the firewall right about where the original battery used to live. I realized after I did this that I’ve had 3 different batteries in 5 locations.