-
Posts
1384 -
Joined
-
Last visited
-
Days Won
12
Content Type
Profiles
Forums
Blogs
Events
Gallery
Downloads
Store
Everything posted by rossman
-
^Yes. I have a factory solid lifter p90a head on my car.
-
Thanks for the replies guys! I got what I needed.
-
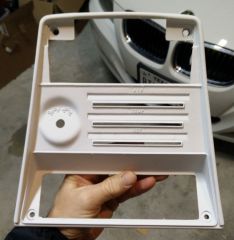
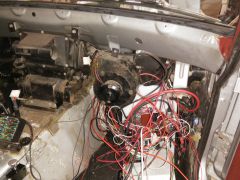
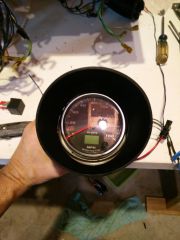
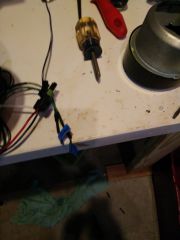
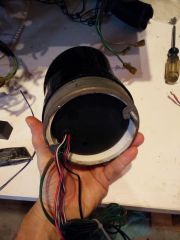
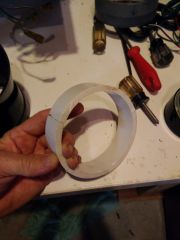
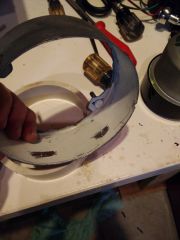
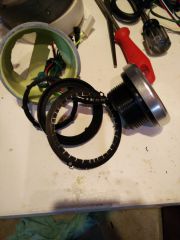
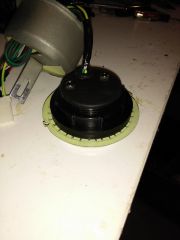
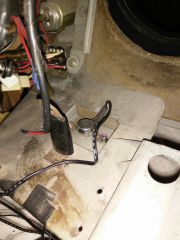
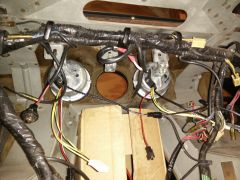
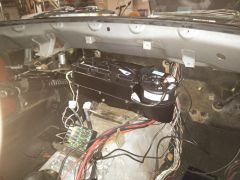
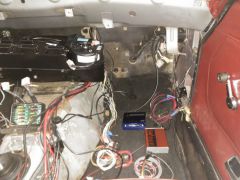
Been doing quite a bit of work on the ol' girl so it's time for an update! Lots of mods planned for the car. First and most importantly is installing Vintage Air AC. This will make the car drivable in the Houston summer heat without getting soaking wet with sweat. Going to replace the stock Hitachi compressor and condenser with a Sanden compressor and high efficiency condenser. This, of course has already been done many times on HZ but here is the compulsory picture of the evaporator in it's new home. There might be some brackets missing. Re-routing and opening up the choked-off PCV lines. This isn't much to look at but there WAS a 3/4 NPT to -8 AN elbow here. I had to cut it out to remove it without taking the manifolds off. I'm going to replace it with a straight 1/4' pipe to a -12 AN catch can. Cleaning up the rat's nest of wires under the dash and in the engine bay. This is what it looked like after pulling the dash. What a mess! Here it is now, wires sorted waiting for me to decide where to place everything. I think I'm going to install the ECU, J&S (this is new to the build) and pump speed controller on the passenger side kick panel. A new power supply box and Hella fuse/relay panels will go on the passenger firewall. Re-installing the SpeedHut Speedo and Tach. I did have them wedged in the original pods and "bonded" with RTV. One of them fell out when I took the dash out so I decided to change plans. This time I'm installing them in the original metal housings with spacers made from 4" PVC pipe hold them in place. Here are a few pictures showing the process. I realized I trashed the odd-shaped filler piece from the original gauge. I'm not yet sure what, if anything I'm going to put in it's place. I'm going to paint all the non-black parts, flat black so they shouldn't be too noticable set way down in the dash....although it sure would suck to put all this back together and have it bug me. You can see the 4" PVC pipe section in this picture. The way I did this mod, the length only needs to be long enough to cover the little housing screws that hold the plastic shroud onto the metal housing. I believe I cut the length to 1.25". Just long enough to engage the side housing screws plus a little edge distance and short enough to avoid interference with the plastic shroud internal lip. This picture doesn't show the pipe positioned correctly. Here is the 1.25" long 4" PVC pipe. It was too tight in the housing (that's what she said ) so I split the ring with my table saw. The blade kerf was just enough so that it fits nice and snug inside the housing and around the Speedhut gauge diameter. Here you can see where I ground down the side screw hole edges so the PVC can slide in easily. Once everything is was cut I pre-assembled the parts, positioned the gauge and marked the side screw hole locations on the PVC pipe section. Then remove the pipe and drilled out the match marked holes to to the same diameter as the side screws. Once the screws are installed the PVC pipe is held in position and gauge captured between the plastic shroud and PVC ring. I'll apply RTV to the back to keep the gauge from spinning and rattling in the hole. Did I mention that I'm installing 2-5/8" Speedhut gauges in the stock gauge locations? Yep! Here is a picture from the backside. I'm using 3 clock gauge housing for each location. The other gauge housings won't (easily) work for this mod. In the picture you can see how I cut out the backside to allow the Speedhut wires to pass thru. To mount the gauges in the housings, I cut the stock thin sheet metal faceplate to 2-5/8" and clamped the gauge in place with the Speedhut provided lockring and spacer. The pictures are pretty self-explanatory. I had tossed out the faceplate from the gauge that came with my car so I had to mod the one from another gauge. The other gauge faceplates are raised so I cut part of the raised section off (had to figure out the correct length so it would lay flat at the correct diameter), split remaining part with my dremel cut-off blade then hammered the plate flat. The hole in the faceplate doesn't have to be precise, just small enough to clamp onto. It was a pain in the ass but it worked. For the remaining 3 2-5/8" gauges the plan is to design and 3D print a custom ABS gauge pod. The pod will replace the stock heater control and radio. First I'm going to digitize the stock panel, then use that model to design a panel that replaces stock heater control and radio locations. I'll have to cut out the stock panel for the printed panel to drop in and bond in place. That's the "plan" at least. I'm a little worried that my scanner at work isn't going to pick up all the details of stock panel. I may have to play around with it the scan and merge each side in CAD. Here is the panel, ready for scanning. Other mods on the todo list are... Sound damping everywhere New carpet everywhere (replacing the stock vinyl) Baddog frame rails and floor pans S2000 leather seats (already got those) Ditching the Greddy boost controller for Wolf v500 controlled boost, with gear dependent boost to Adding Wolf v500 controlled turbo timer Adding a hidden kill switch for theft prevention probably more....
-
Need stock speedo and tach to finish out my aftermarket gauge install. Gauges can be working or not. I just need the plastic housing parts. Metal housing, wires, etc can be hacked up or missing. Thanks, Ross
-
Thanks! Post a question and I'll try to help although my knowledge of Wolf and engine control is pretty limited. I'm currently re-wiring/cleaning up my setup and plan to implement the turbo timer and boost control features and add a delayed shut-off security circuit.
-
First, Thank you KTM and BRAAP for sharing. It has been a big help setting up IAC with Wolf on my car. Second, I'm not completely happy with the performance as I have it set up. There seems to be a significant lag when the car is first started and when the IAC actually brings the idle up to the target RPM. Have either of you experienced this lag? How did you fix it? Thanks, Ross
-
Stock Car Mafia's '78 280z LS2 Build
rossman replied to Stock Car Mafia's topic in S30 Series - 240z, 260z, 280z
Love your build! I can't tell how low it hangs but you might want to reconsider your tank setup. I have a rear sump in my stock tank and it barely clears when I back out of my (very steep) driveway. I've also scratched up the fittings coming out on a parking block once too. -
I need help deciding whether to keep the stock firewall insulation or replace it with sound deadening material. I have the dash out of the car to install a VintageAir Gen-II Mini and gauges. It's a good opportunity to replace the insulation *if* replacing it quiet down the interior *and* provide just as good or better thermal insulation. It it were falling apart it would be a no-brainer but it's actually in decent shape and I haven't noticed any excessive heat so it's apparently doing its job thermally. So the question is, should I remove all the stock insulation and replace it with a layer of RAAMAT and couple of layers of Ensolite or should I just add a layer or two of Ensolite and call it good?
-

Twin cam head for the L6 from Derek at Datsunworks
rossman replied to Derek's topic in Nissan L6 Forum
Wait...what? No, I don't think so! Here are the dimensions, for the record...

