
cheesepocket
-
Posts
124 -
Joined
-
Last visited
Content Type
Profiles
Forums
Blogs
Events
Gallery
Downloads
Store
Everything posted by cheesepocket
-
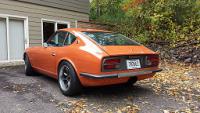
From the album: Cheesepocket
-
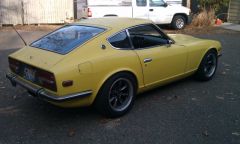
From the album: Cheesepocket
-
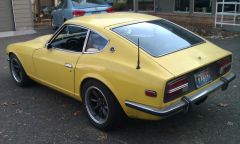
From the album: Cheesepocket
-
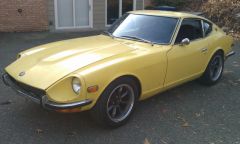
From the album: Cheesepocket
-
From the album: Cheesepocket
-
From the album: Cheesepocket
-
From the album: Cheesepocket
-
From the album: Cheesepocket
-
From the album: Cheesepocket
-

From the album: Cheesepocket
-

t-56 mechanical reverse lock-out
cheesepocket replied to alrighty's topic in Gen III & IV Chevy V8Z Tech Board
Looks great. Unfortunately I would have to drop the tranny as mine is already installed. And dropping the tranny, at least in my car, means pulling the engine and tranny. I wish this was a year ago when I had it all out.... -
I'll be pulling mine out likely late December and will sell em shipped for $30. Total of 200 miles on em. Coming off an R200 bar. PM if still interested, thanks. Cheesepocket.
-
Alright thanks all. I've got some 280z parts cars and I'll go rob one of the boosters off one of those. I'll assume, maybe incorrectly, that the booster is the same from 240-280. Pretty painless to try.
-
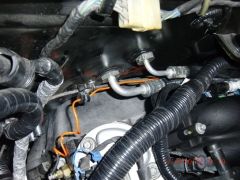
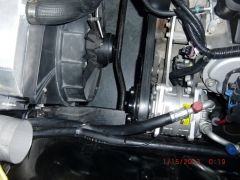
I never drove my car with the six for comparison, but if I hook the vacuum line from the booster to the factory tube on the LS1 manifold, I get way too much assist, like stepping on a marshmallow and then way too much braking for the effort. Really tough especially to heel-and-toe that way. I tried leaving the vacuum source capped, but then it's alarming in how much effort it takes, and I feel like I'm gonna put my foot through the thin firewall. I tried getting an industrial valve designed to regulate pressure/vacuum, but all that did is allow full boost for maybe 1.5 pumps and then the booster was depleted. In other words it regulated the volume but not the pressure. I have the stock front disc and rear drum setup stock for my 72 240, and don't want to go down the road right now of the full front/rear and master cylinder upgrade, just want to drive the car for awhile. I doubt I can just mount the master right to the firewall and simply delete the booster, but I don't mind manual brakes if it's easy and relatively cheap. I didn't post this in the brakes section as I am hoping for an LS-specific solution that might still allow me to use the booster.
-
t-56 mechanical reverse lock-out
cheesepocket replied to alrighty's topic in Gen III & IV Chevy V8Z Tech Board
I might, depending on the details. The MGW shifter has such close gates I accidentally grind reverse too often when grabbing 5th. -
Wow, I'm blown away by every detail of this build. Given every obstacle I've had to tackle doing a relatively mundane LS retrofit, I can't imagine how much time went into research, getting the wrong parts, and the manual labor. Indeed as a previous poster said, the bar has been raised.
-
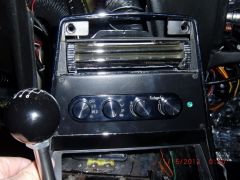
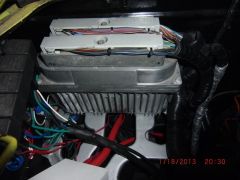
Wfritts is correct, in my '98 LS1 with '98 PCM the computer must know when you're cranking the starter by reading the input from the reluctor wheel, so it starts firing the injectors and coils to get it to start. I didn't connect anything to my PCM to tell it I'm attempting a start. I put a high-current pushbutton starter from Jegs or Summit right into the hole that the cig lighter used to occupy, and simply ran that wire that used to be on the key switch through that new pushbutton, and of course tied that factory Datsun wire to my LS starter. I put shrink tube over my old Datsun alternator connectors and tied them off, and ran the big red power wire from the alternator to the starter post, and the smaller "sense" or "excitation" wire through a 350 ohm resistor (using solder and shrink tube to keep it clean and reliable)to a +12 VDC keyed on source. I used two power junctions under the hood, one for constant 12 VDC power and one for keyed power. I bought them from delcity.net which has a whole bunch of supplies to do clean wiring with. Good luck, the wiring isn't much fun, but it is rewarding when everything works without the smell of burning insulation.
-
Sunny, super-impressive beating a Z06, that sort of seems to be the standard for "is my car fast?". Appreciate the info on the Driveshaft Shop. I didn't know anyone could rebuild the stock style 300ZXT halfshafts with new hardware and I've been super-disappointed with my boneyard ones that each have a couple degrees of lash in them. In fact I went back to the 280Z halfshafts for now just so I could enjoy driving my car for a bit before the cold months hit. This is a more economical option for me than the Porsche-style ones from Wolf Creek and I own the MM adapters anyway at this point.
-
The factory manual calls the spacer the "distance piece" and they go to a bit trouble to emphasize using the correct length one for your hub. It makes sure you are holding tension only against the bearing inner races, and I'd bet on a very short bearing life if too short or missing spacer is the issue.
-
The vibration starts to come in at about 65 mph and it doesn't matter if I'm in gear or coasting. i haven't tried 4th gear to see if it's the gearbox. There was a bit of backlash in my boneyard 300zx turbo cv shafts so to test I put the stock 280z U-joint shafts back in. Backlash went away but the high frequency vibe is still there. I'll start a new thread in the Drivetrain section once I've tried the new rubber bushings and had the driveshaft shop check out the shaft I got new from JCI.
-
Several checks, first to get the mandrel bends, then to have the guy do the work, added up to a little over $1000. Keep in mind he also closed up the original exhaust hole and modeled up a nice sort of flanged center outlet for that cost. I'll do a writeup soon on my LS conversion. I won't re-hash the stuff other guys did that paved the way for me, but rather just the unique stuff I did to get by certain obstacles that hopefully would be useful to others. Car is driving, but still have nagging drivetrain noise and vibration from the driveshaft or diff. Changing back and forth from CV shafts to original 280 U-joint shafts haven't made a difference. Going away from my poly diff mounts and back to rubber to see if that helps, fingers crossed.
-
I'll add this to the conversation here and say +1 for the short shaft/short stub end on the driver's side. I just snapped them in this morning, can't wait to go for a ride with the new non-binding CV's. Got a few other details to work out, before that ride.
-
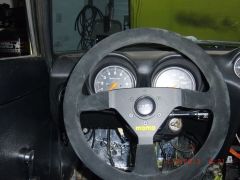
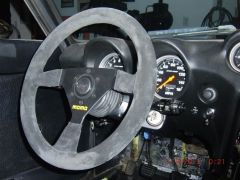
I agree, I used the black face version (Pro Comp I think) and it was so easy to set up. Then when I changed out tires and wheels I could simply re-calibrate from the driver's seat using the procedure on Auto-Meter's website. I tapped into the sine-wave VSS signal going from the T56 to the PCM connector. Color depends on the year harness. Mine is a '98 and it was violet.
-
300 ZX Turbo CV shaft disassembly and reassembly
cheesepocket replied to JMortensen's topic in Drivetrain
Thanks for the step by step Jon. I always dread this job, not because it's hard, but because that grease gets everywhere. As an addendum to step 23, I had one sheetmetal cap that would not stay in. So I staked it by using a small pointy punch and lightly tapping in several places around the outermost diameter. This expanded it just enough to keep it in place without wrecking it. Sorry, no pic.