SHO-Z
-
Posts
710 -
Joined
-
Last visited
-
Days Won
3
Content Type
Profiles
Forums
Blogs
Events
Gallery
Downloads
Store
Everything posted by SHO-Z
-
Lap welding might look easier but the body work is more difficult. I had both on my convertible project. It seamed just about the time I had everything smoothed out I would expose a seam on a lap weld connection and have to redo the area. Butt welding is the best way to go. Take your time and weld in about 1 to 2†lengths at a time. This will eliminate warping and reduce burn through.
-
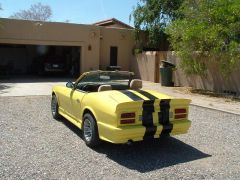
Here is the MSA rear bumper on my Z. It was not a bolt on install, I had to fiberglass the under side to fill the gaps. http://forums.hybridz.org/showthread.php?t=111048
-
I bought these driving lights for $9 at Harbor Freight cut out the backs and installed turn signal bulbs. The original housing have a removable bulb socket. They even snapped into the existing holes at the original location, no bolting required!
-
You can solder the holes up with body solder. Take a drill bit and counter sink the area around the hole then add small piece of sheet metal an back up the area. You can get some body solder and solder up the holes with a propane torche. Do not use Bondo it will crack. If you have to use the body filler method buy some flexable filler from an auto paint store. You still need to counter sink the area around the holes. I would add some small flat head screws to attach the backing metal, and grind them smooth.
-
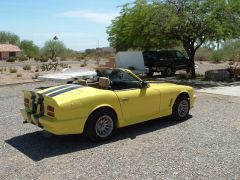
The spoiler is a modified Trans Am spoiler. I think the ends on a camaro would have been easier to mold in, looking back on the hassle of molding them in.
-
I am seriously digging the 'hurricane' style rims. Any info on your wheel choice? They were on the car when I bought it from my sister inlaw. They were completely black from dirt and brake dust. I sand blasted them and polished them out. I really do not know if I am going to keep them, thinking of installing wheel addapters and Mustang rims.
-
I have a TR7 top bows but no top. It took to long to get this far. I might go by and see John Washington and see if one of his hard tops is close to fitting. I have wanted to paint the car this color since I saw I on a Mustang. After seeing your engine bay pictures, I will keep my hood closed!!!!!!!!!!!!!
-
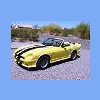
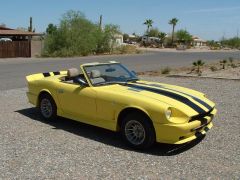
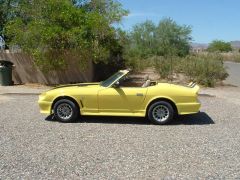
I have finally painted the Z. The when I did the conversion I painted it my self. Was considering it again then found a paint shop that was having a sale on and decided to just get it done. Now after 5 years of not driving the Z I guess I need to pass the AZ emissions test, fails bad a idle, and wait until fall to drive it when the temp drops out of the HELL range. It is sort of "OLD SCHOOL" of course I am OLD TOO!!!!!!!!!!
-
-
-
-
-

-

-
Wrap your corners on the welds can reduce the possibility of cracking. Also do not put a lot of weld on one side compared to the other. As the metal cools it will draw in warping the fabrication.
-
Where 3D modeling gets neat is stess analysis. Adding loads to the parts and see if they are up to snuff. When I was in engineering school they didn't have the programs that are around today. I do work with some of the pipe stress analysis.
-
The next time I move I want to use Pods. I will load them and they will deliver them to my new place.
-
I am thinking of getting some wheels of a late model mustang. I have searched the web for 4 to 5 lug adapters and cannot find anyone who makes them. There was a post a few months ago that had a company that had them but it looks like they no longer carry them.
-
While not the same set up, I am planning on tripple SK racing carbs, weber clones. It would be simple to fabicate a braket off of the bolt location where the AC bracket is installed. Getting the proper belt length I still need to research. Do a search and there is a lot of info.
-
This is for all of you without a welder. You can soft solder 50/50 or braze the trim holes and add a backing plate on the larger holes. It is the old school way.
-
Fabricate a 1" spacer between the Carbs and the Manifold. Tap the spacers for your injectors. You could look them down so they are hidded from view. There is no reason to cut up a set of $600 carbs, ebay price, for no reason.
-
The Mercedes supercharge off of the SLK230 is a M62 and has a 3.5†Diameter pulley. I am looking at a 8.5†drive pulley for 10.8 psi off boost. I found this place for the drive pulley, I need to design my adapter. https://www.rpmoutlet.com/lightaspm.htm To calculate the boost on an Eaton supercharge use: (Super Charger Disp * Ratio * 14.7) - 14.7 = Boost Pressure (1/2 Engine Displacement) One thing neat about the Mercedes supercharger is the electric clutch on the drive pulley. It would be possible to drive around with it in bypass for regular street driving, using low octane gas. When you want to show off, filler up with high test. Of course this would work best with FI or wet supercharge. All that is needed is to install a bypass around the supercharge with a check valve.
-
It all depends on if you are the listing agent. It could be from 2 to 6% if you own your own firm. Nothing is set in stone, in a hot real estate market the seller can negotiate lower percentages. Most of the time the Company get their cut, the listing agent gets their cut and the selling agent gets thier cut.
-
No red reflectors and you are asking for the "Man to give you a Ticket" It's a federal law that requires a certain size of red reflectors, most tail lights have them built in.
-
You do not need dual 4 barrels. A single 4 barrel will do. You can run either a wet of dry supercharger. I am still workin on my set up with tripple SK Racing Carbs, weber clones. I have a eaton M62 supercharger and plan on around 10 psi of boost. The simplest set ups that I have found are on TR6s with a single Jag SU feeding the supercharger. Do a search to find out more info.