jkelly
-
Posts
147 -
Joined
-
Last visited
-
Days Won
1
Content Type
Profiles
Forums
Blogs
Events
Gallery
Downloads
Store
Everything posted by jkelly
-

My '72 240z project -- Rotisserie Restomod
jkelly replied to jkelly's topic in S30 Series - 240z, 260z, 280z
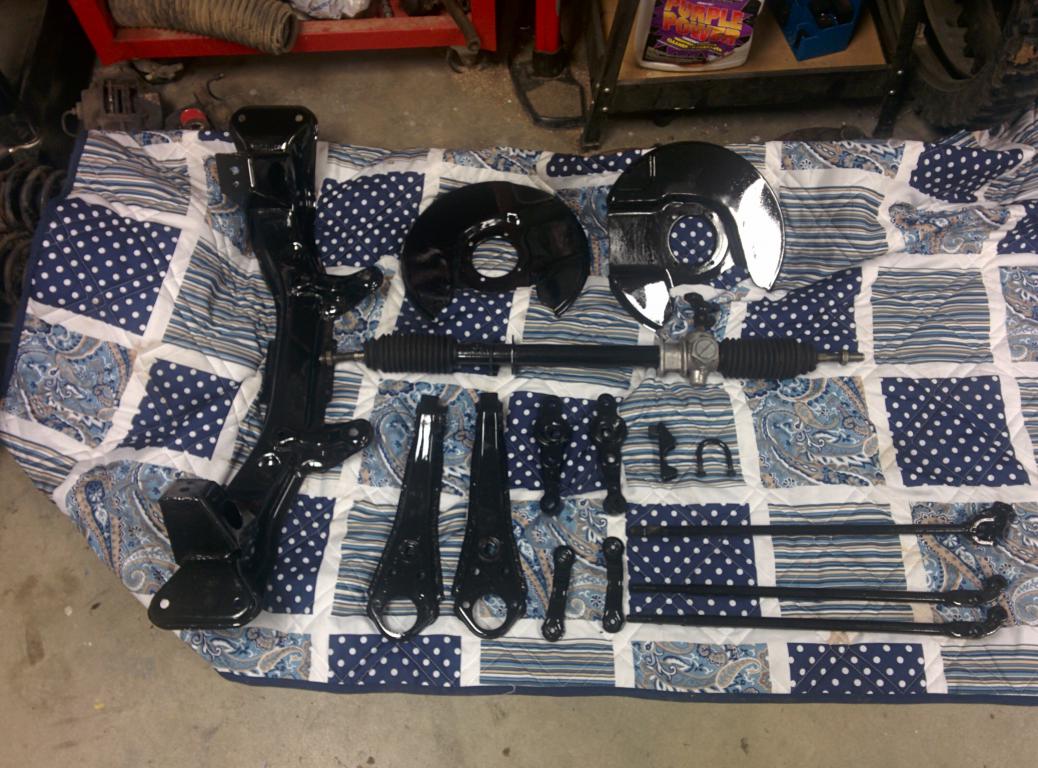
Almost forgot about the freshly POR15 painted front suspension. I still have to pull the springs and paint the struts, and do the entire rear suspension. I usually alternate between sheet metal repair and suspension. When the metal repair gets to be too frustrating I switch to something easy like shooting paint and making things pretty! Can't wait to get this baby on the road.
-
My '72 240z project -- Rotisserie Restomod
jkelly replied to jkelly's topic in S30 Series - 240z, 260z, 280z
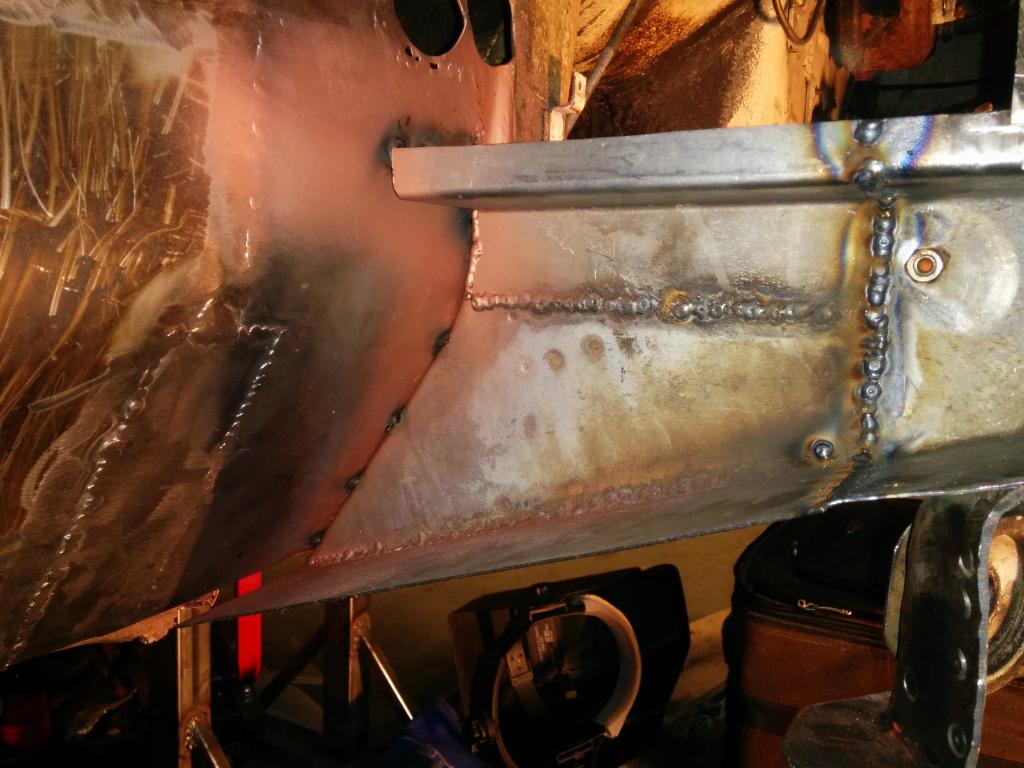
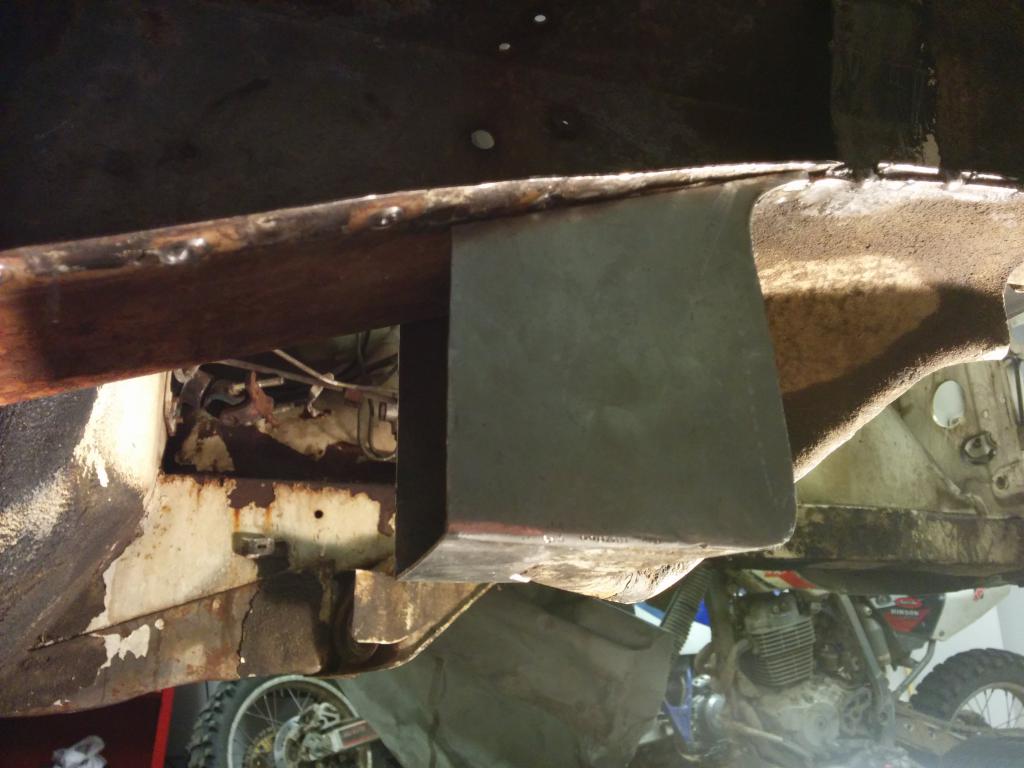
Thanks! Made a little progress this weekend. Replaced a section of the front passenger side frame rail and welded it back in. Next step is to weld in the lower frame rail directly under the one pictured here.
-
Thanks, John. I'll be sure to start cleaning those up before welding in. Thanks again.
-
Thanks. I hadn't planned on any major bracing, other than replacing the forward frame rails I showed with 16ga, the under floor pan rails with 16ga as well as extending them to the rear of the car and possibly fabricating subframe connectors. I'm not opposed to adding more bracing if you guys think it's necessary. Planning to drop in my rebuilt NA L28.
-
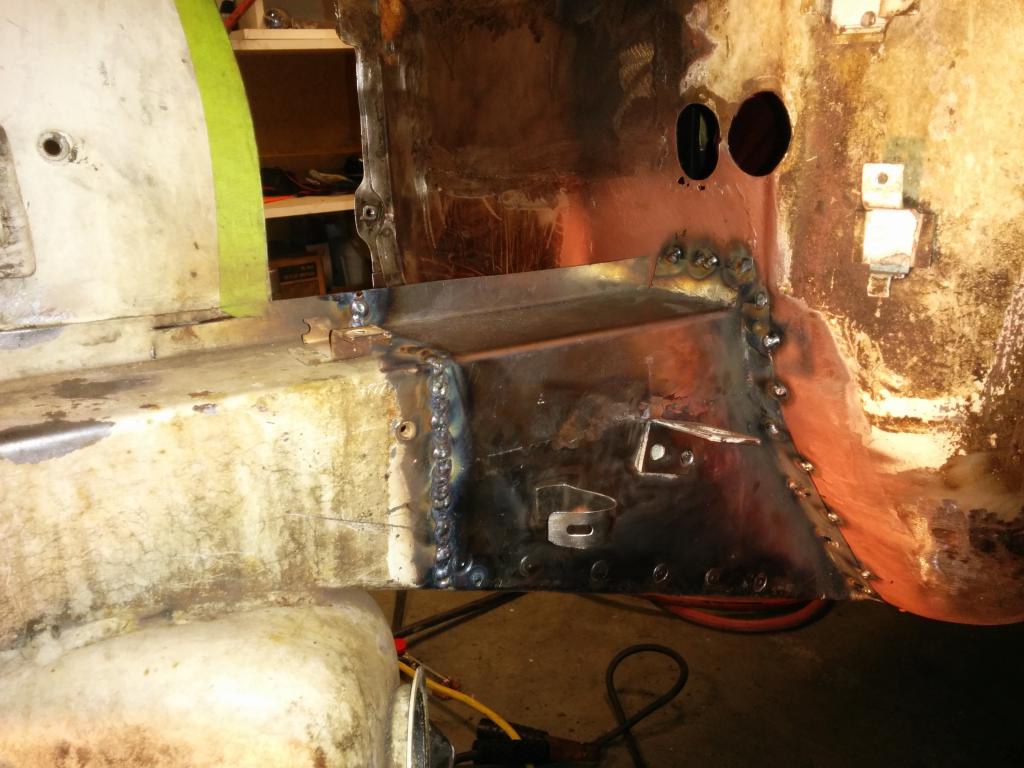
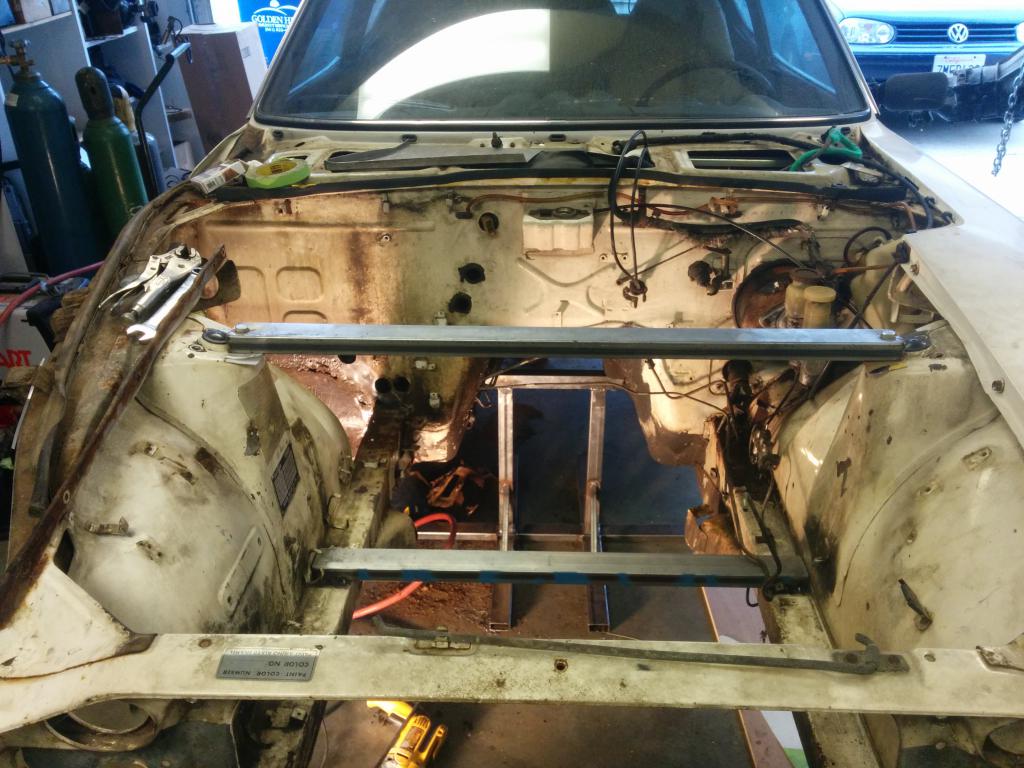
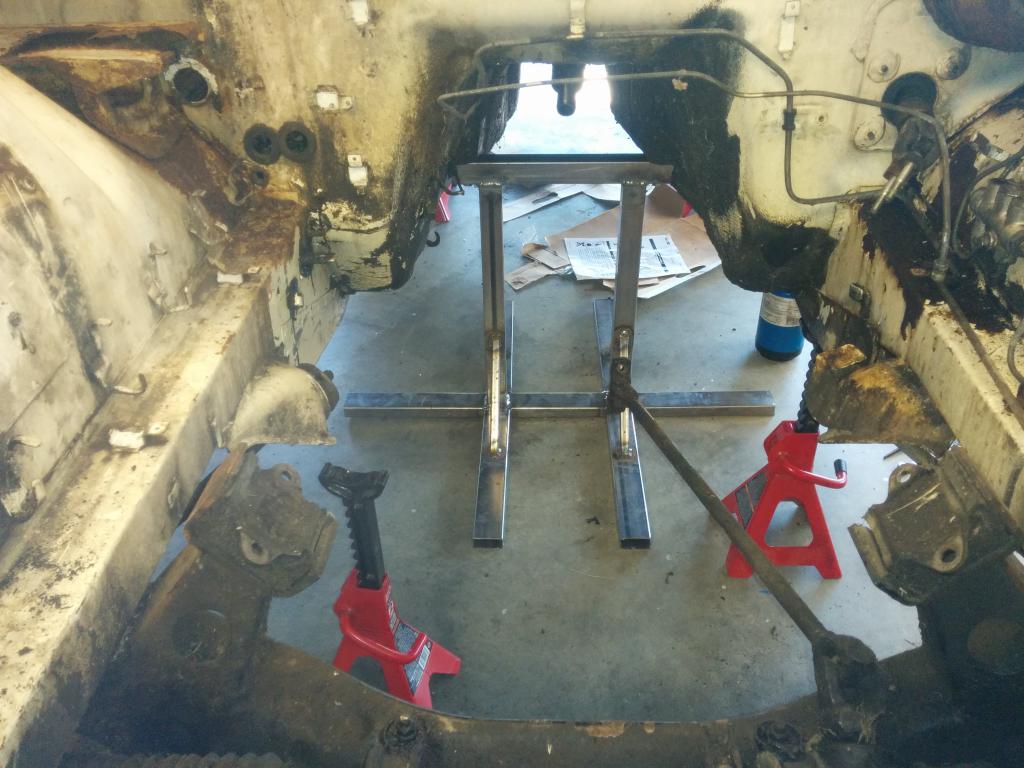
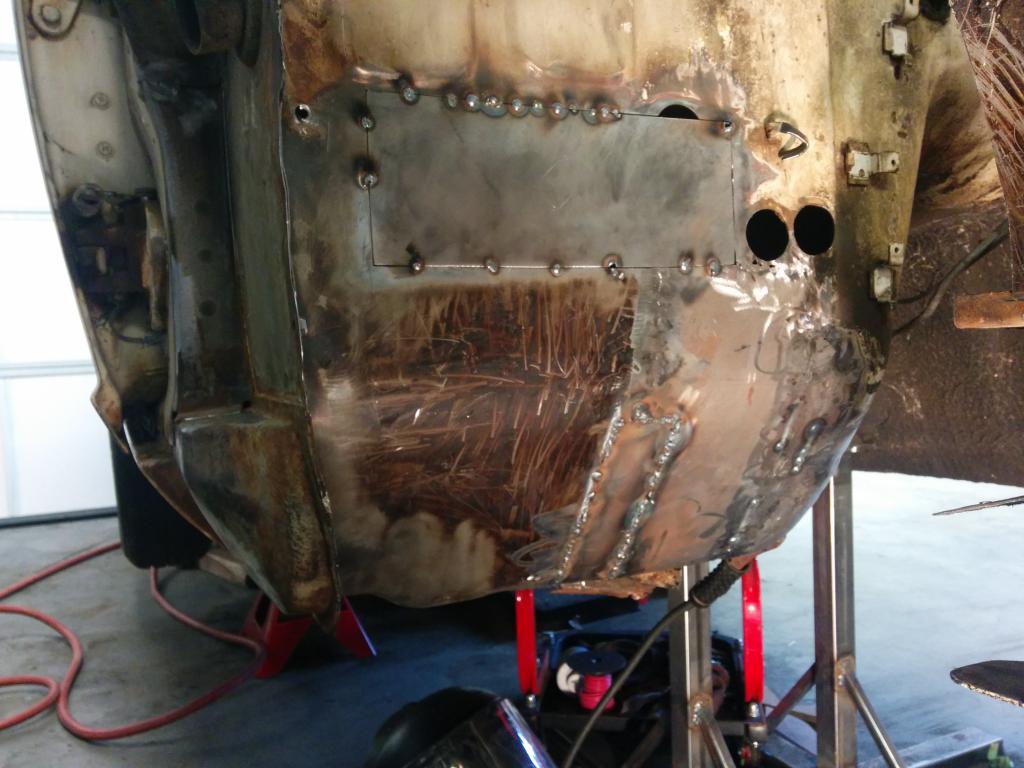
Hey guys, I've been posting my build in "Member's Projects", but wanted to get some advice from you guys on my welding and panel/frame rail replacement. The passenger side front frame rail under the battery box was rusted, as well as the firewall. I've cut out most of the rust and have fabricated several panels and welded the firewall panels in. The frame rail section is 16ga and everything else is 20ga. I'm also replacing a portion of the curved frame rail that is spot welded to the firewall, and will be fabricating it myself. Also replacing the passenger side floor pan, but I'm going to weld in the front frame rail first to ensure more stiffness before removing the floor pan. I know this is a critical section of the car as far as overall rigidity goes, so do you guys have any suggestions, concerns, comments, critiques? The last thing I want to do is spend a lot of time doing it wrong now just to create more work later and possibly a hazard to myself or others. I'm using a Hobart Handler 140 with 75/25 Argon/CO2 shielding gas and 0.023" wire. The car is supported by a custom stand bolted to the transmission mount and by jack stands in the back. Engine and front suspension are out. I braced the engine bay like so. Test fit only. Frame rail patches are 16ga. Inner fender section is 20ga. Firewall patches in 20 ga. I've been using the "pulse welding" technique; moving around the panel placing a single spot weld until I've filled the gap completely. Also using copper backing plates because I'm a noob.
-
My '72 240z project -- Rotisserie Restomod
jkelly replied to jkelly's topic in S30 Series - 240z, 260z, 280z
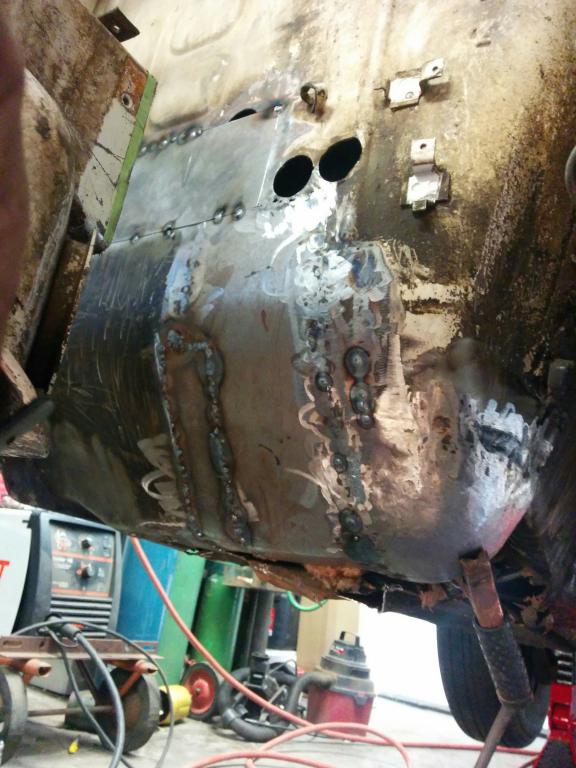
I got some 3M Rust Fighter with a wand attachment for the frame rails. Also ordered some 3M 08360 Ultrapro seam sealer; supposed to be good stuff. I made a little progress on the rust battle over the holiday. I cut out the portion of engine frame rail to firewall and removed the rust from the firewall and welded in patch panels. Being a beginner to welding, the butt welds were pretty hard and I had a lot of blow through starting out. I started using a copper backing plate, which helped, but still pretty difficult. Hopefully my welds hold up, considering this seems to be a higher stress region that others. Comments or suggestions? EDIT: I did end up fully welding the patch panel gaps.
-
Doesn't look like it's sold yet. http://www.ebay.com/itm/Datsun-Z-Series-/111808930992?forcerrptr=true&hash=item1a0854e4b0:g:w9MAAOSwl9BWLpzr&item=111808930992
-
My '72 240z project -- Rotisserie Restomod
jkelly replied to jkelly's topic in S30 Series - 240z, 260z, 280z
Great advice guys. Thanks for taking the time to reply. Glad to hear the lap joints can be dealt with without drilling 100 spot welds and removing panels. I picked up some U-pol #2 weld thru primer a while back. Probably going to pick up some of the 3M Rust Fighter and a wand too. -
My '72 240z project -- Rotisserie Restomod
jkelly replied to jkelly's topic in S30 Series - 240z, 260z, 280z
Rear dog leg to rocker
-
My '72 240z project -- Rotisserie Restomod
jkelly replied to jkelly's topic in S30 Series - 240z, 260z, 280z
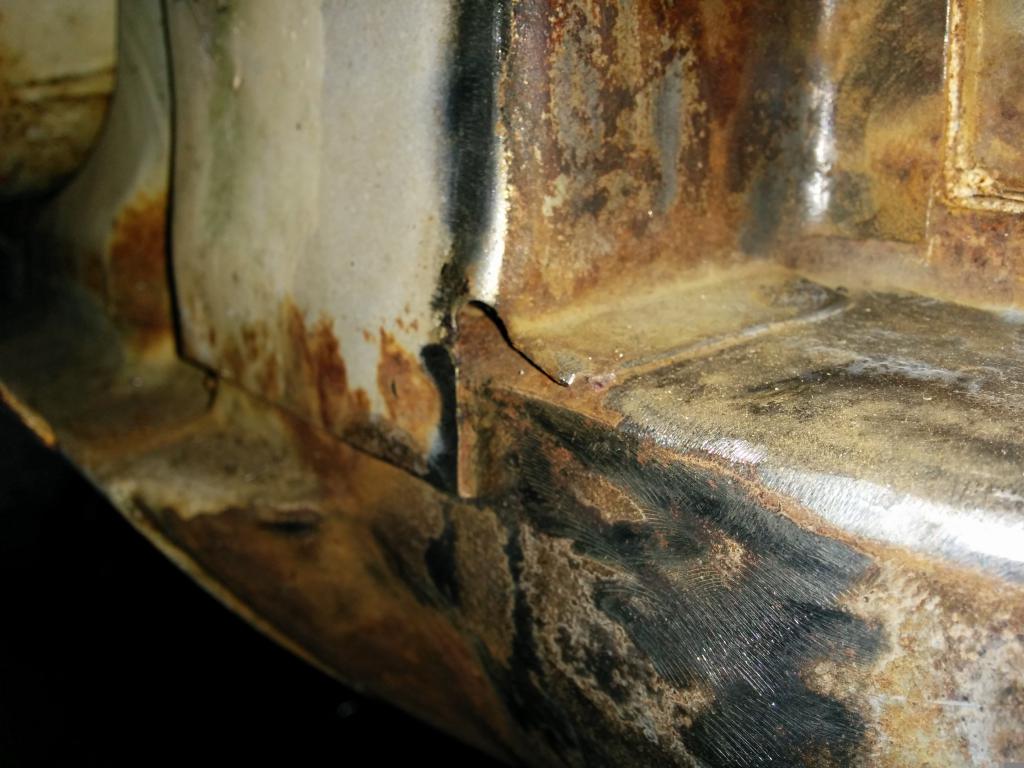
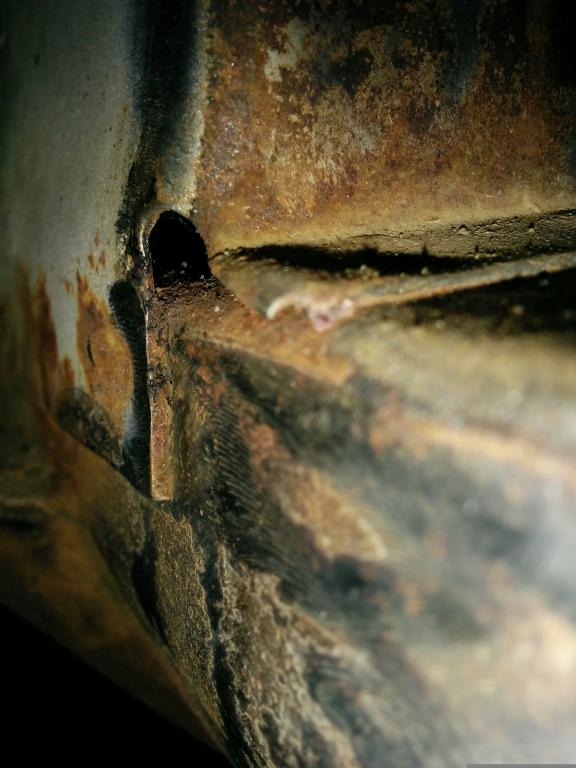
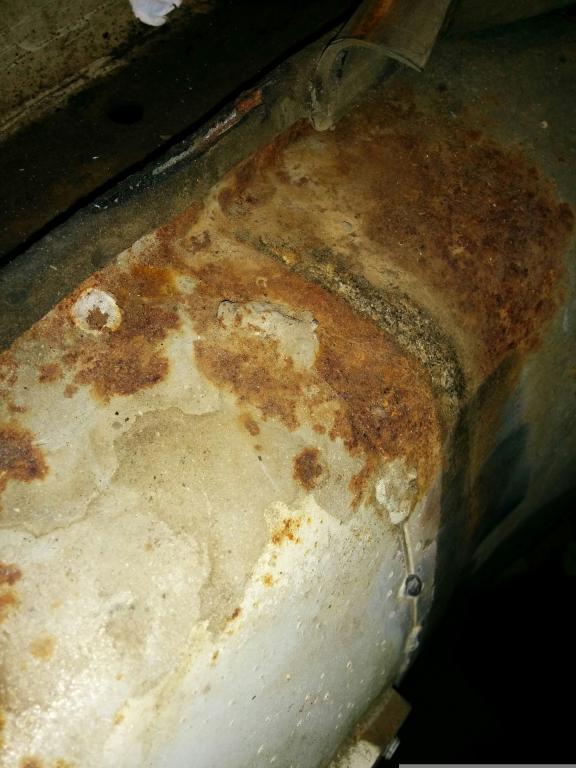
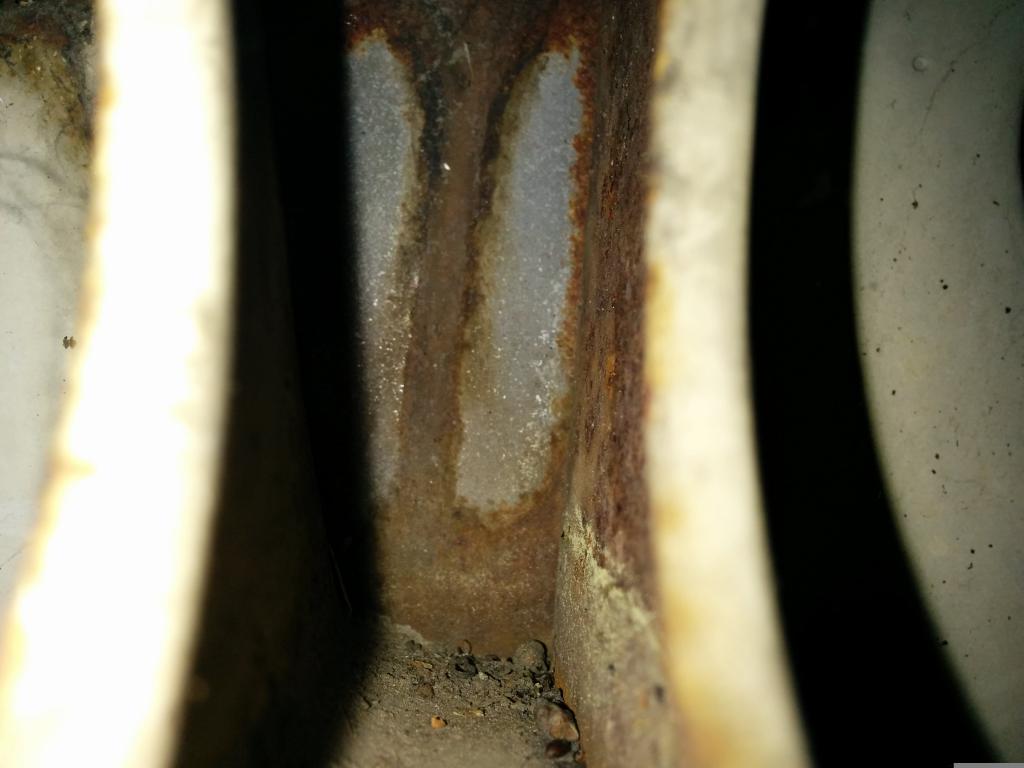
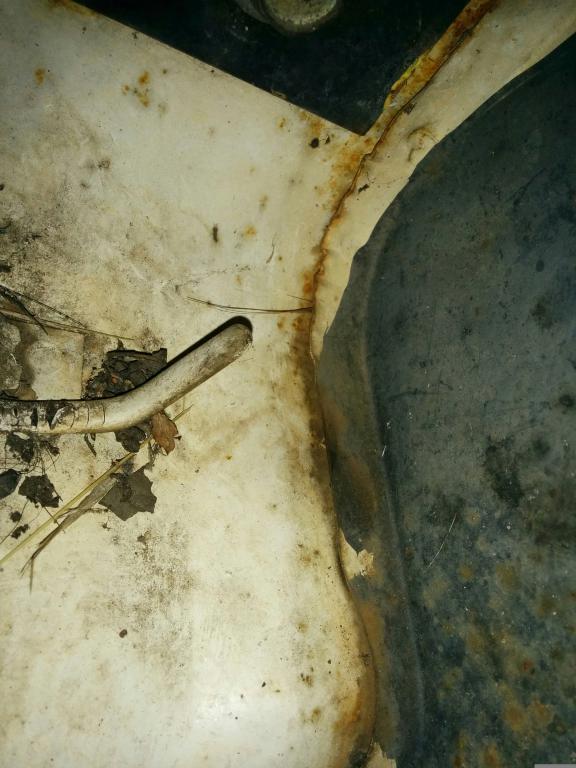
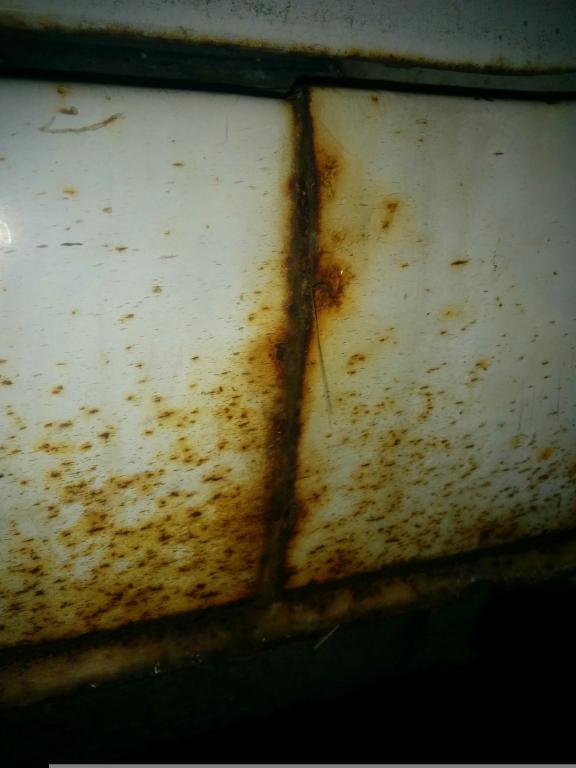
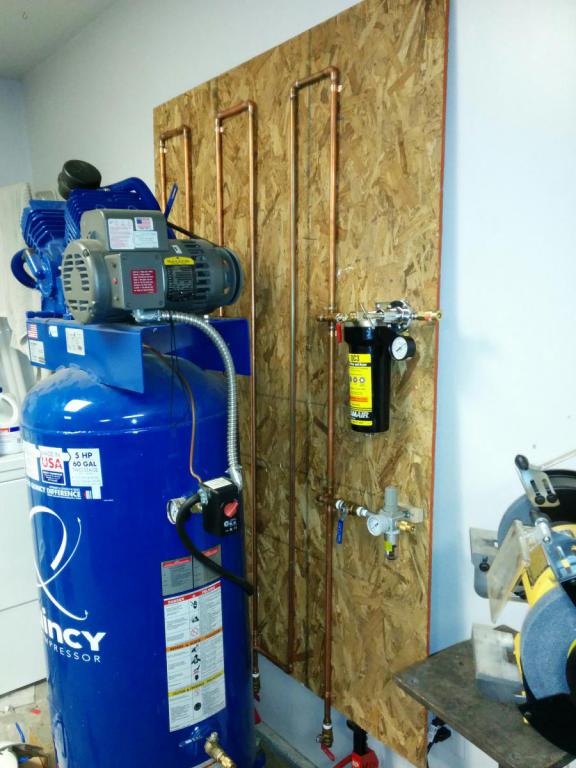
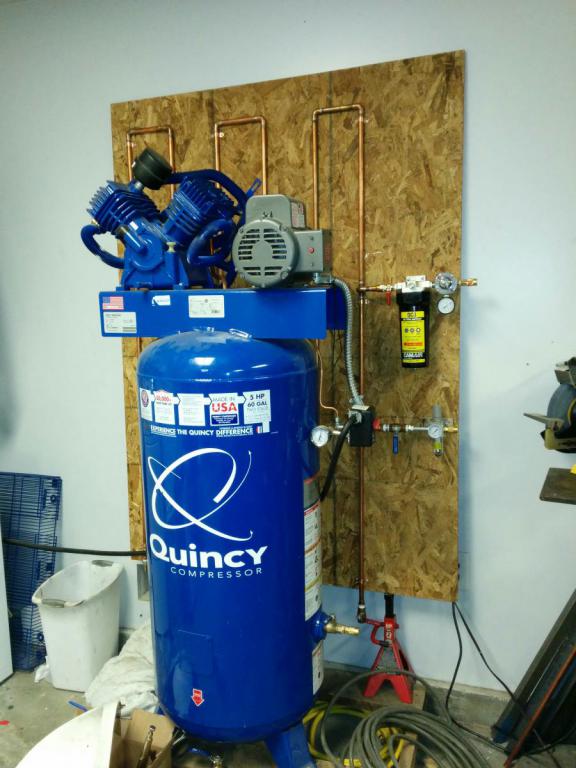
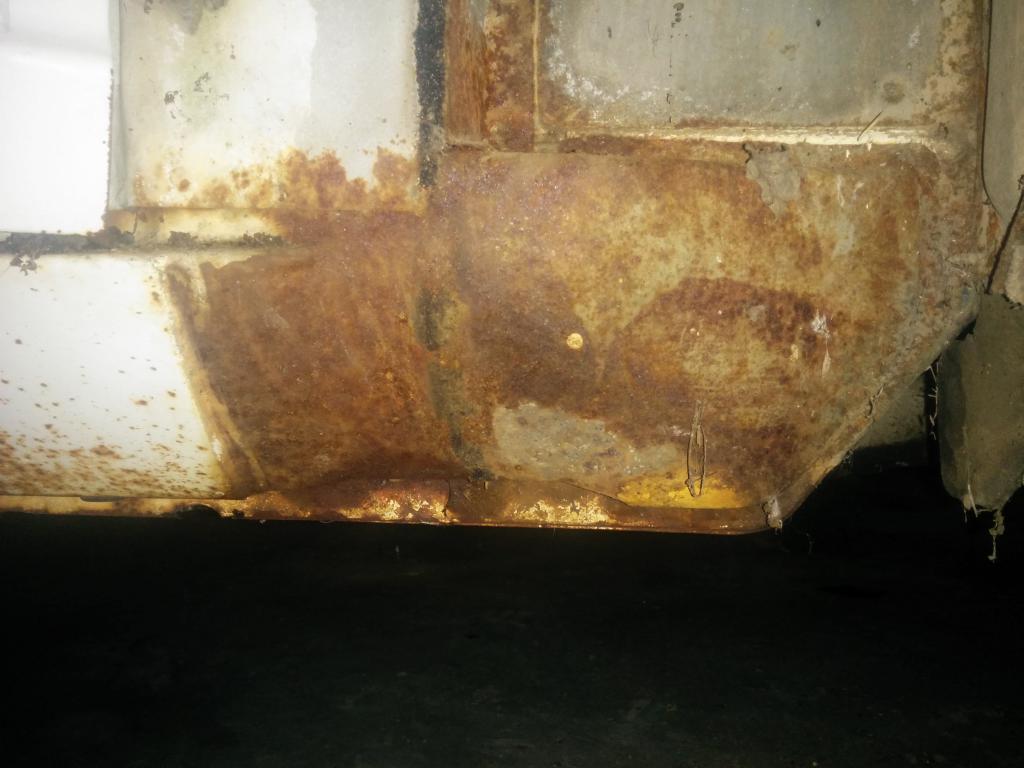
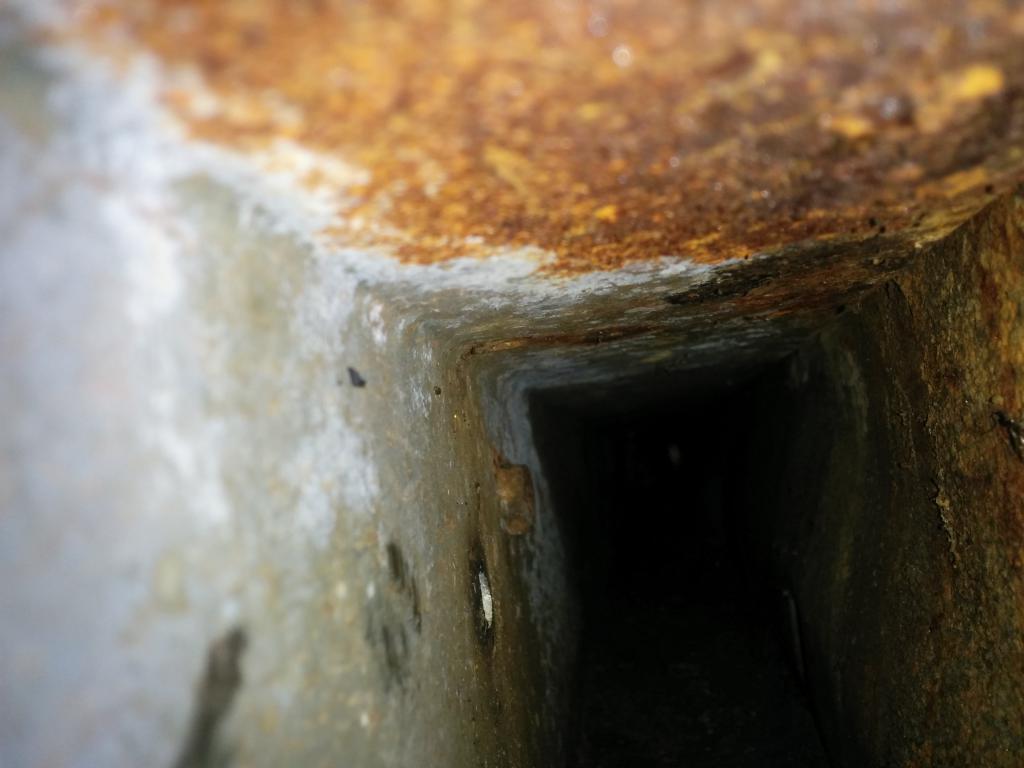
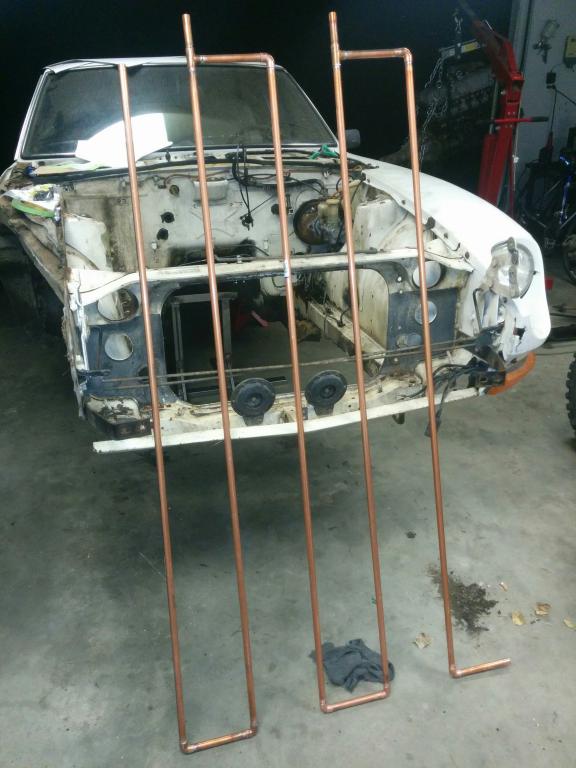
Thanks for the replies guys. The copper tubing is a condenser I made for my compressor. It's about 30' of tubing and has three drain legs before coming to a DeVilbiss QC3 and another filter/regulator. There are some more pics of it in post #5. Here are some more pictures of areas of concern. Most of them being lap joints where rust is creeping underneath. Rocker panel again. You can see the rust inside that cavity. Lap joint of the upper inner fender where it meets the front bulkhead area. Inside the radiator support looking outboard. More radiator support Where the radiator support meets the inner fender. I can grind away a lot of the rust because it isn't that bad. But what do I do about the stuff I can't get to (lap joints, cavities, etc.)? Just treat it?
-
My '72 240z project -- Rotisserie Restomod
jkelly replied to jkelly's topic in S30 Series - 240z, 260z, 280z
Thanks for the feedback and compliments guys! I don't have any prior experience. I just watched a bunch of videos on metal work then dived in head first! Thanks a bunch for the advice RebekahsZ. Some of the big questions I've always had: When do you cut metal out? When is the pitting too bad and it has to be cut out? A lot of the lap welds on my 240 do have rust in them. It's only surface rust, but how long will it take to spread and get to a point where it will need to be fixed, if I ignore it now? I see you live in Florence. I grew up and lived just down the road in Corinth MS. Just recently moved from there to Southern California. -
My '72 240z project -- Rotisserie Restomod
jkelly replied to jkelly's topic in S30 Series - 240z, 260z, 280z
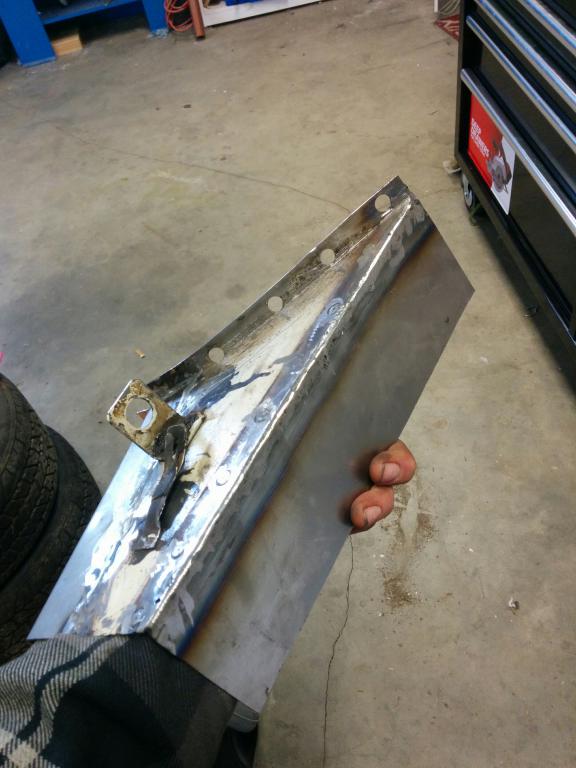
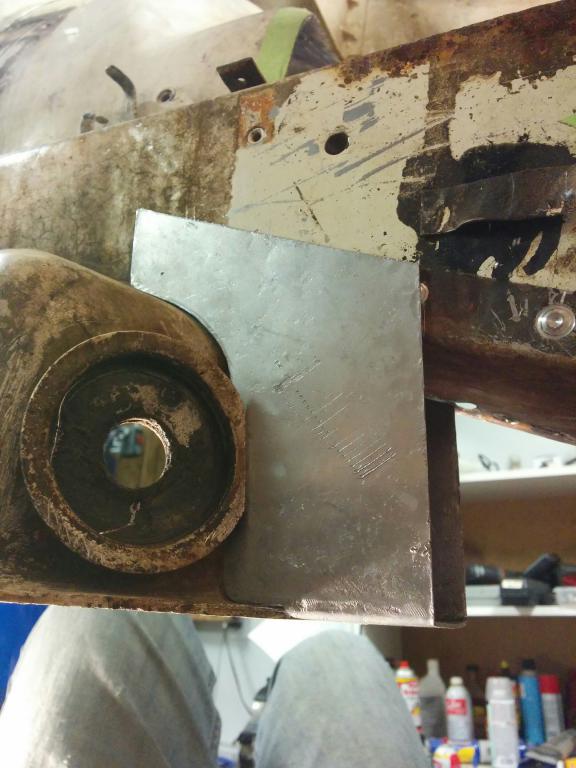
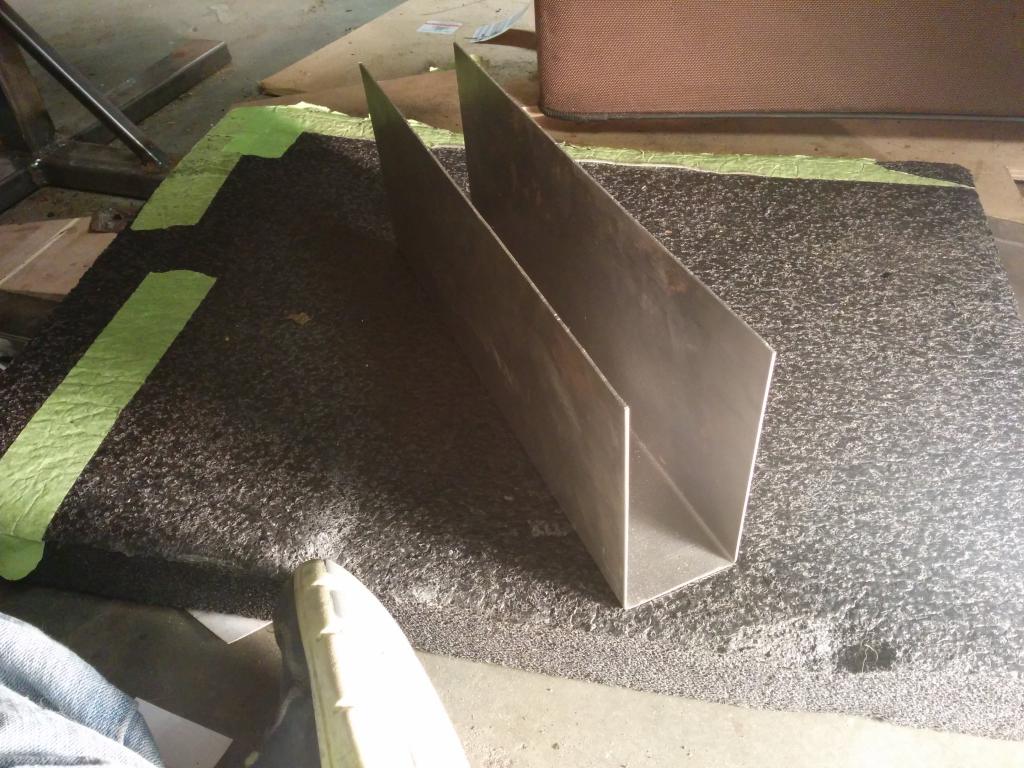
Fabricated the rest of the passenger side forward frame rail. Test fit: Next step is to cut away the rusty portions of engine bay frame rail that connects to the fire wall, fabricate that piece, then cut away part of the firewall that's rusted and fabricate that panel. Then I start welding in all of the replacements.
-
My '72 240z project -- Rotisserie Restomod
jkelly replied to jkelly's topic in S30 Series - 240z, 260z, 280z
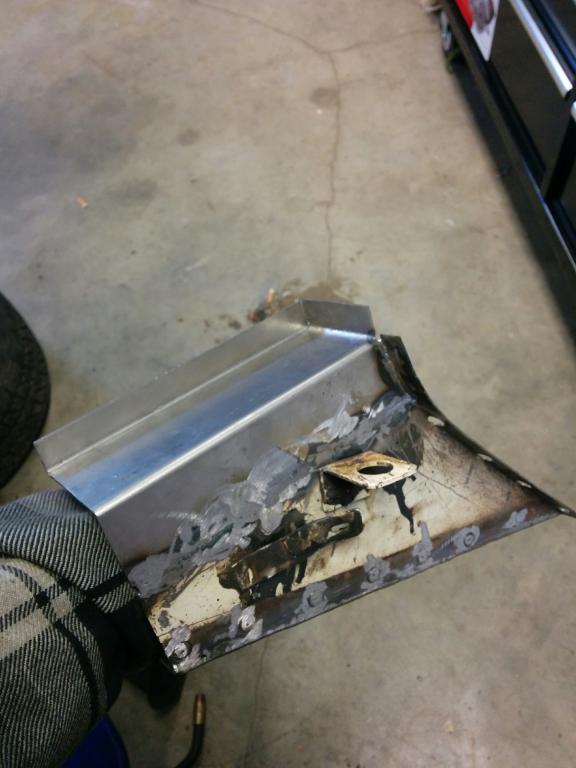
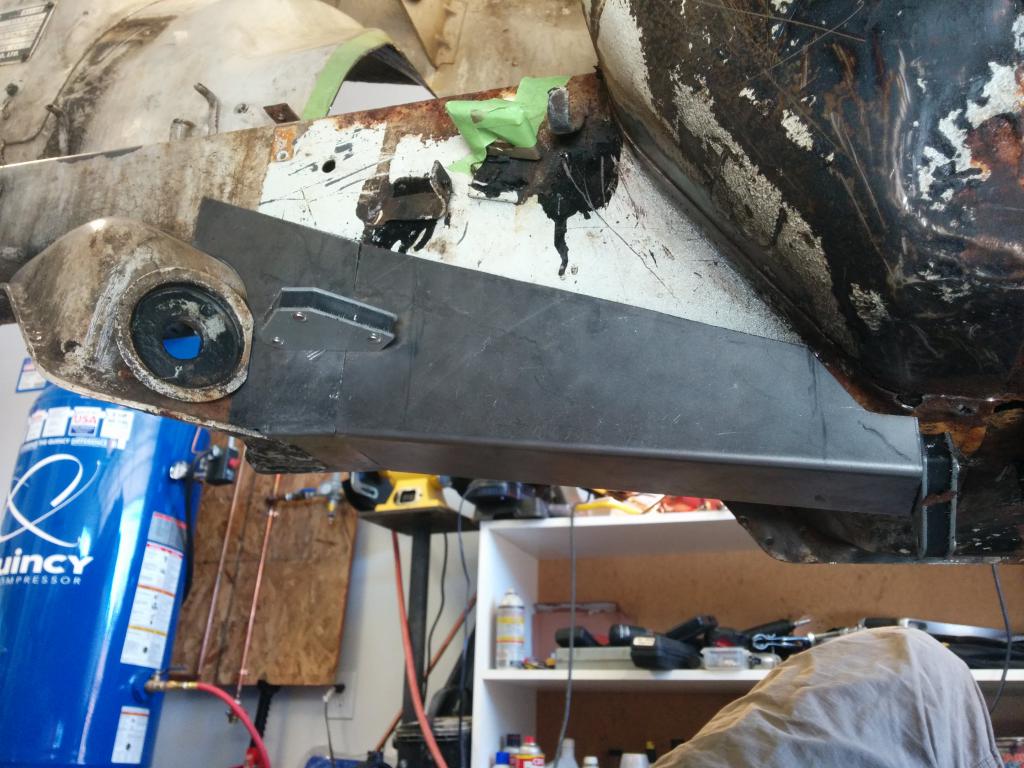
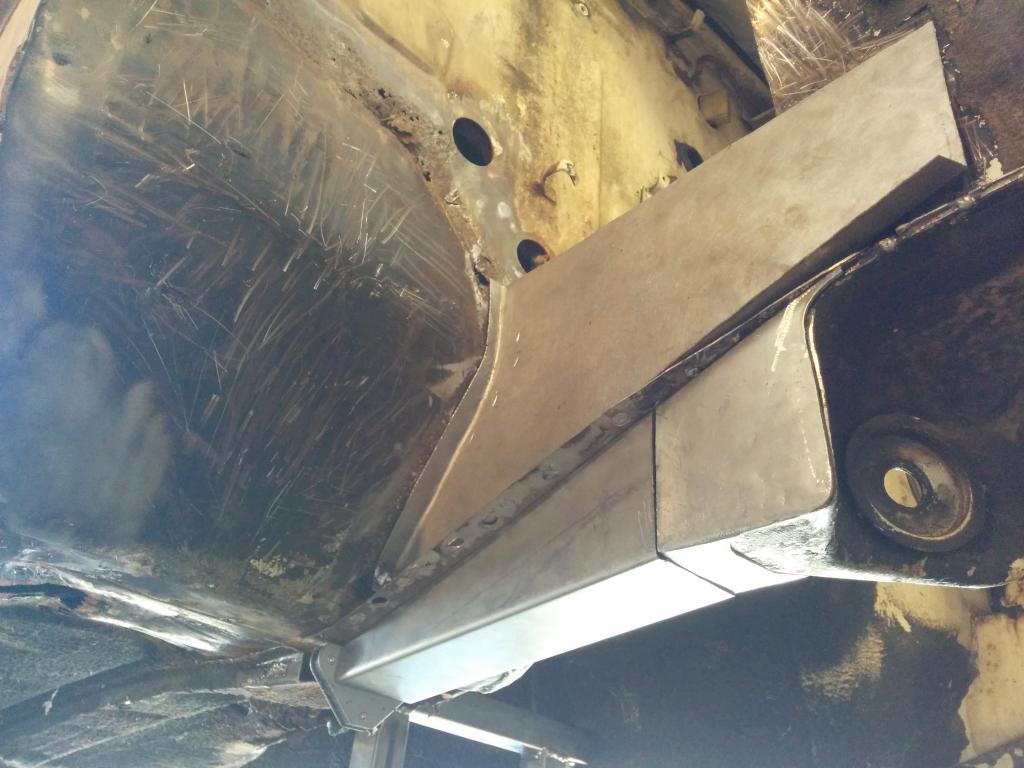
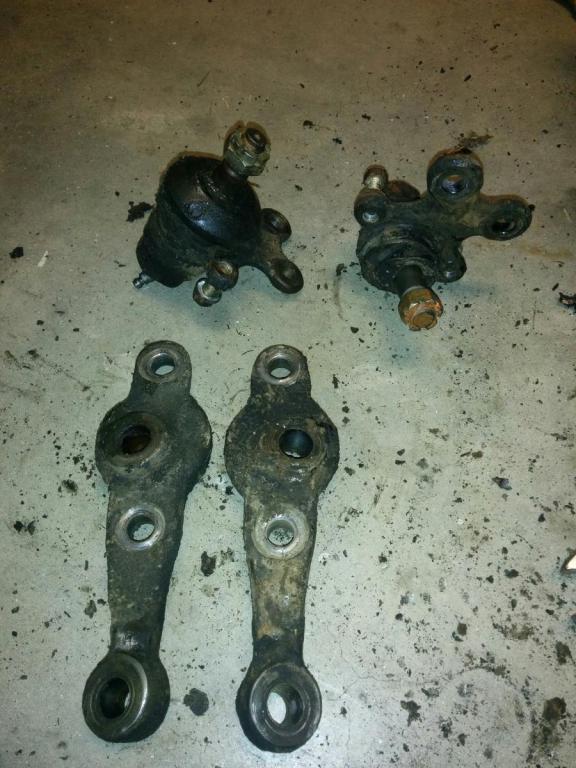
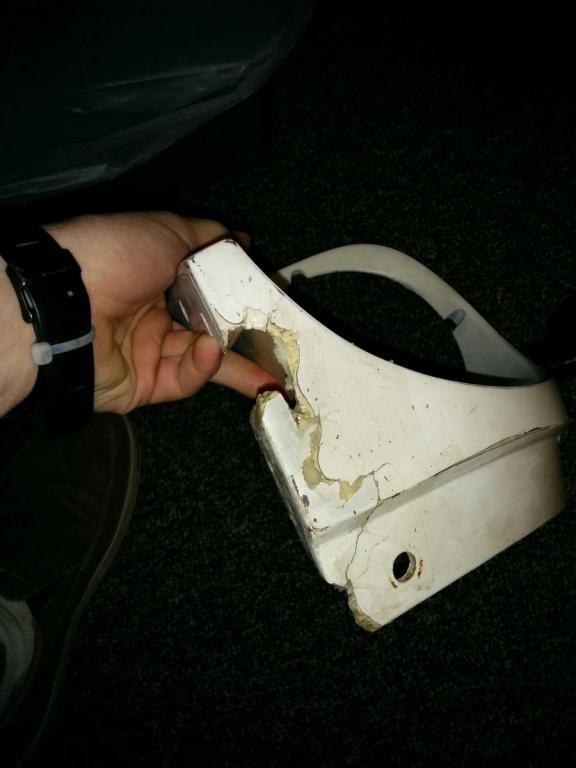
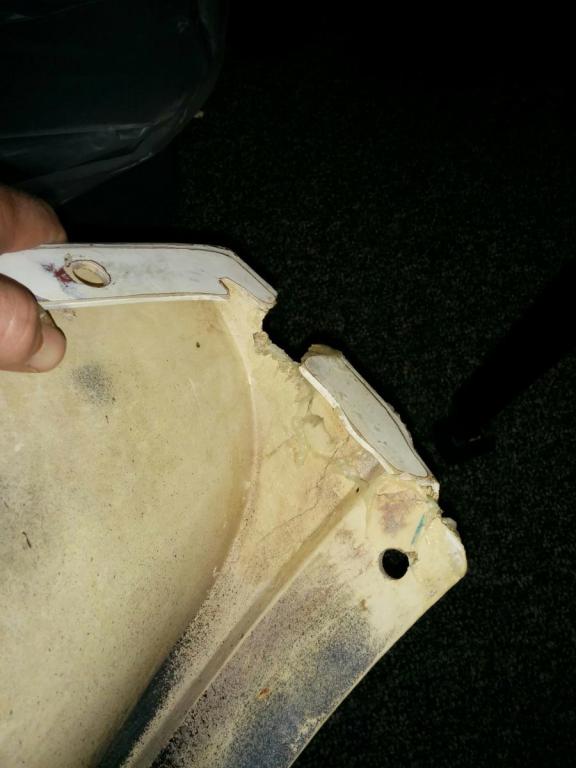
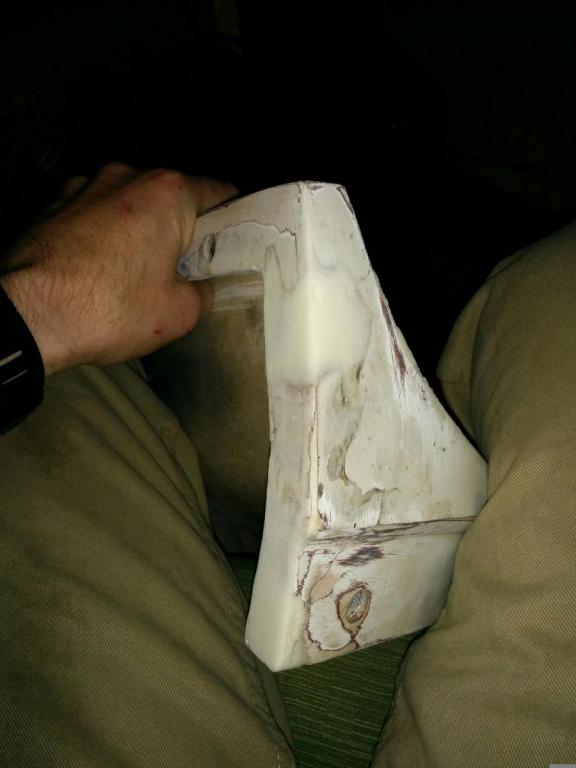
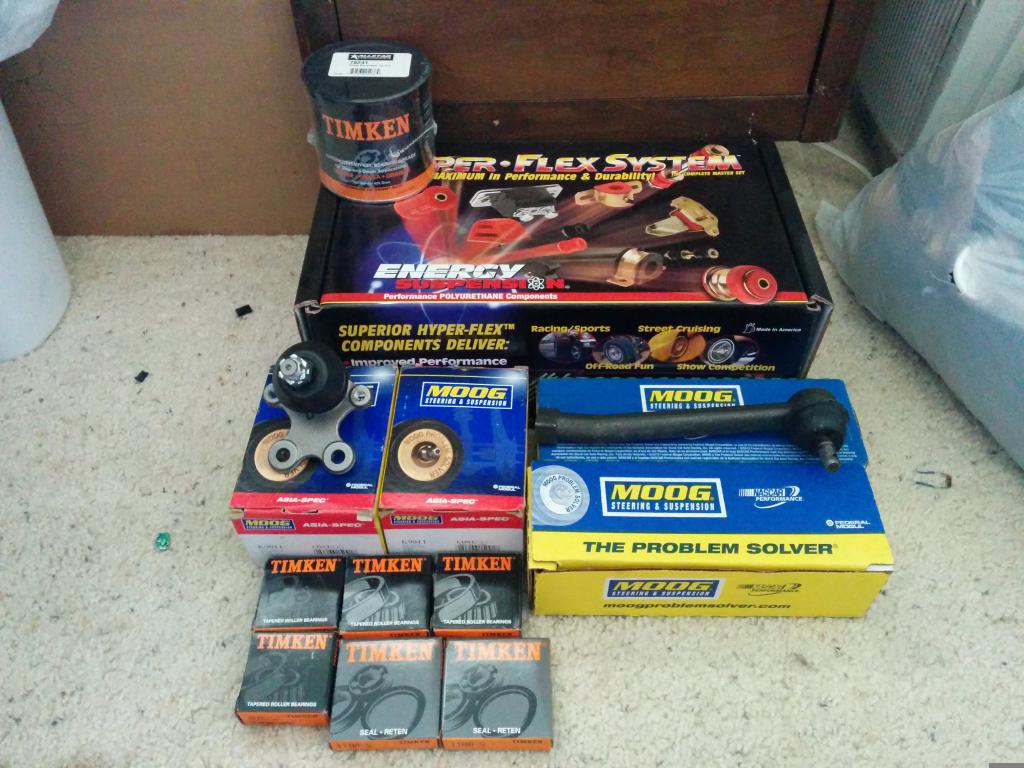
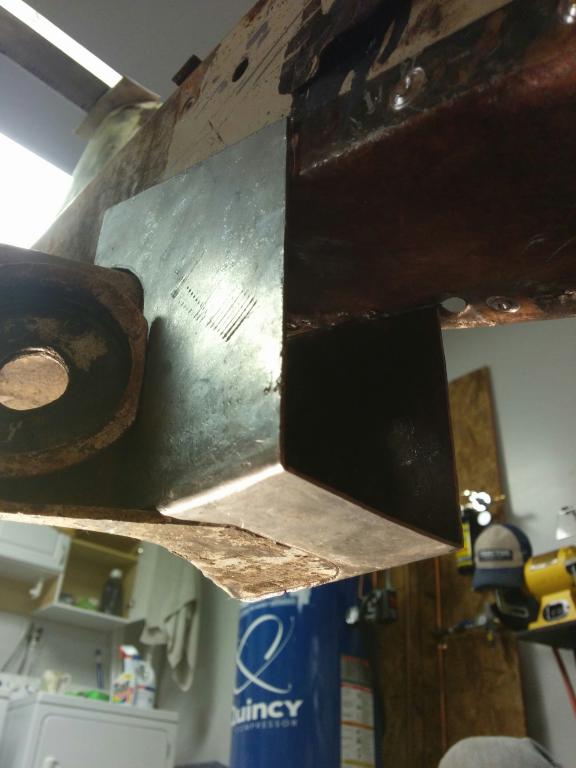
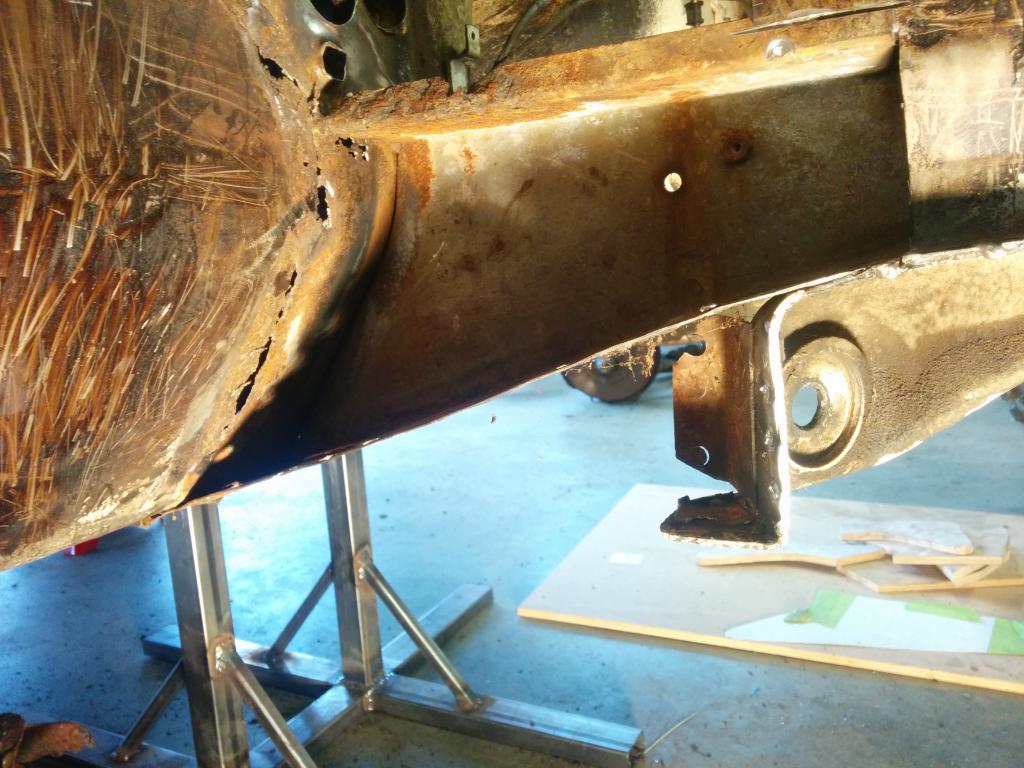
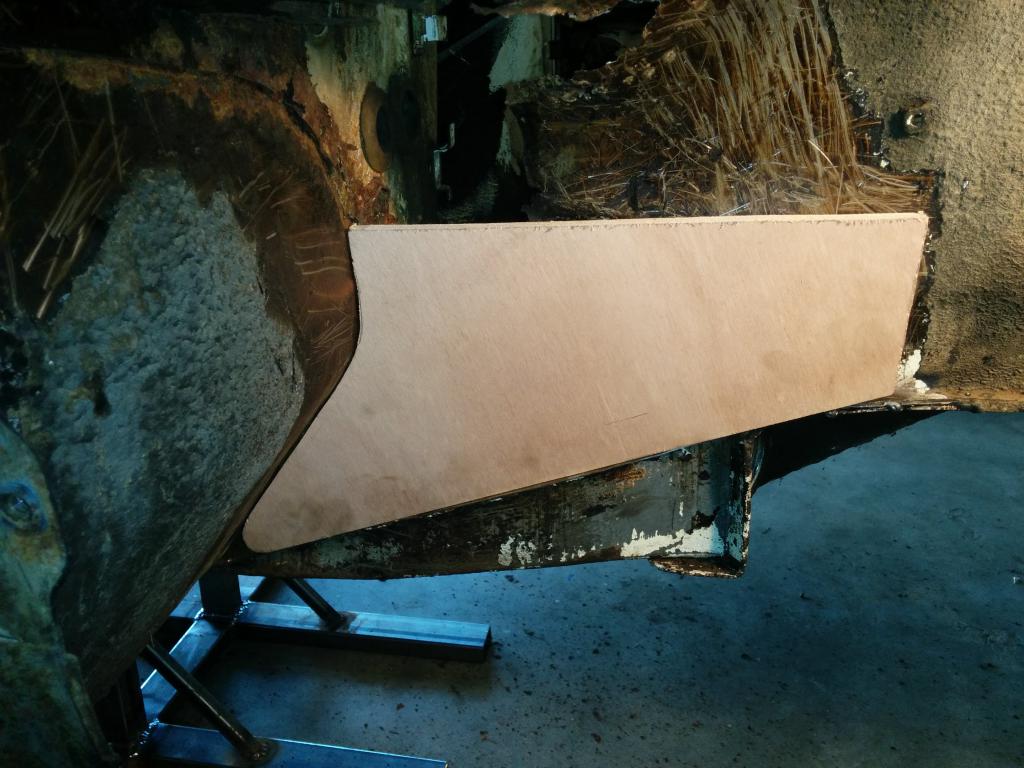
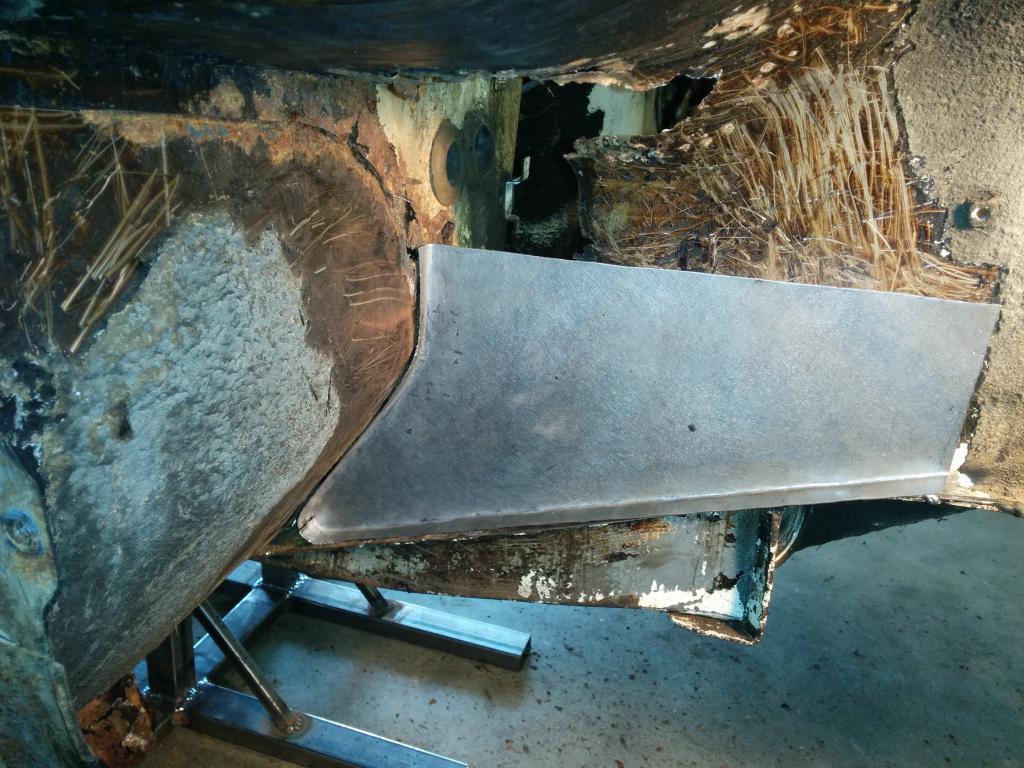
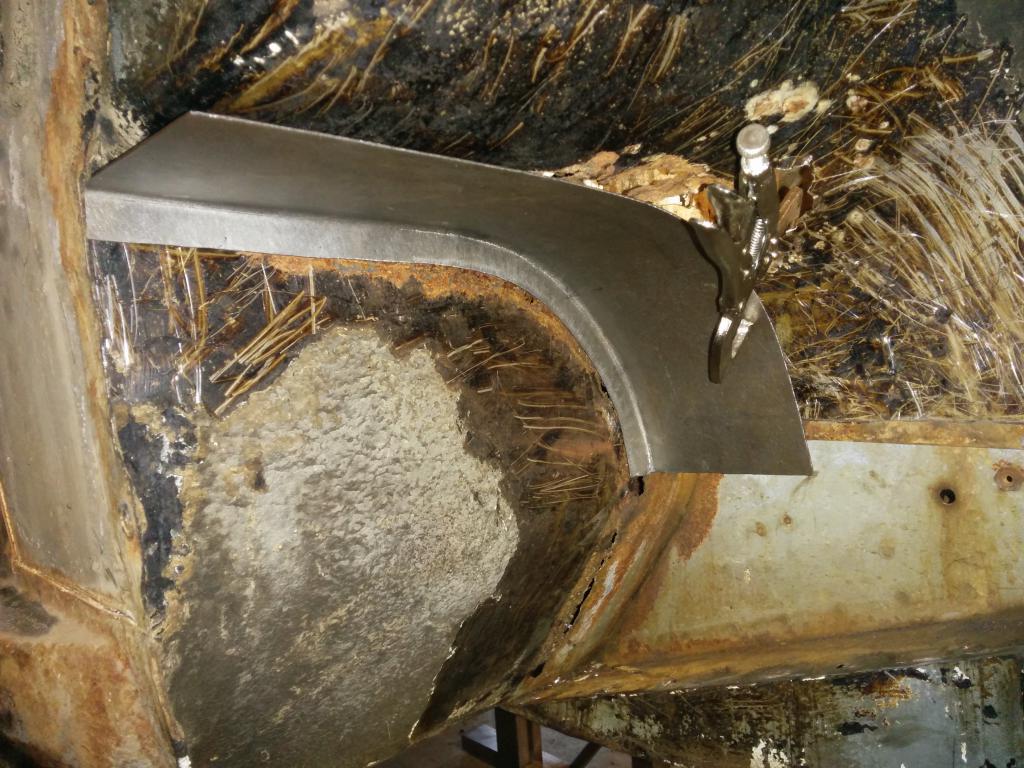
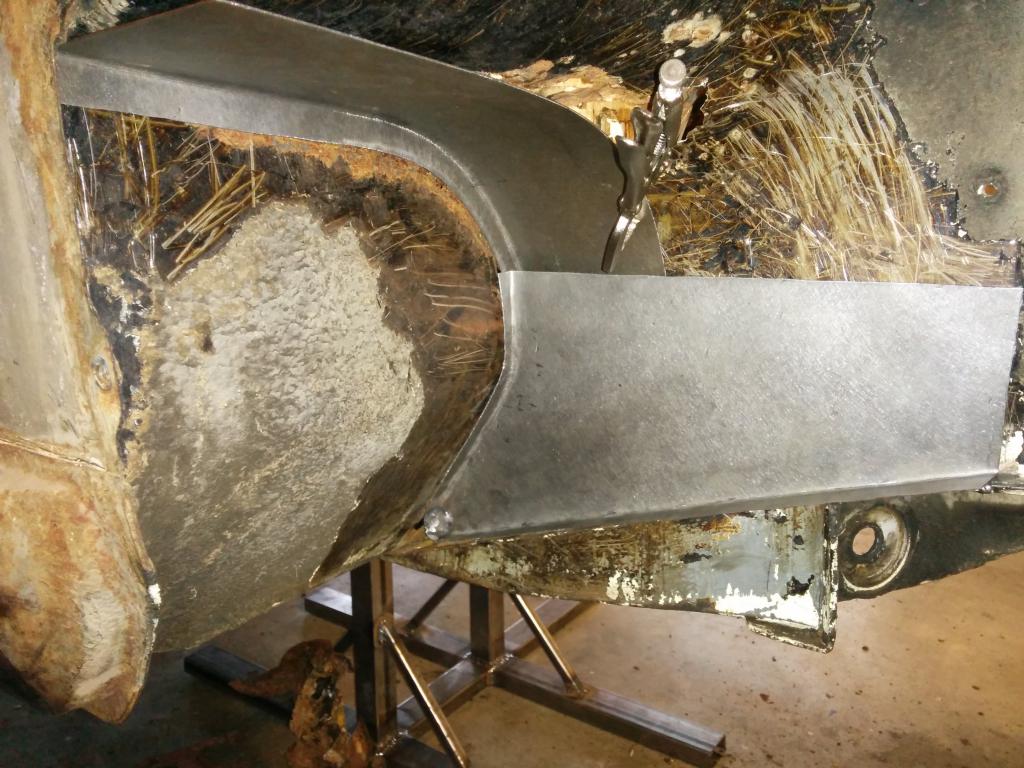
It's been a little slow as I got a piece of hot metal in my eye while cutting sheet metal for the frame rails. Had to go to the ER and then to an optometrist to have it removed with a needle and a drill. Pretty gnarly. Still healing. I finished up my hard line condenser and filter system for my compressor. ~30' of 1/2" Type L copper pipe with a drain valve at the bottom of each leg. Using a Devilbiss QC3 for water sensitive tools and a $35 Pneumatic Plus filter/regulator for other tools. First time sweating pipe and no leaks! Since I'm in a rental house I wanted to make it fairly portable, so I attached it to a piece of plywood and set it on two jack stands behind my compressor. Waiting on a 3/8" air hose whip to arrive to run from compressor to the condenser. I also don't bother with an automatic drain valve and just be sure to manually drain my compressor tank every time I use it. I disassembled the front suspension in preparation for sand blasting. I ordered a new Energy Suspension master urethane bushing kit to replace all the bushings. I may end up swapping the front sway bar over from my '78 280z to the 240. I believe it's a couple millimeters larger in diameter. I'm also planning on using either rubber bushings, drilling the urethane bushings, or using a ball/joint style compression rod bushing in order to avoid the issue of snapping compression rods. I also ordered new Moog lower ball joints and tie rod ends. In addition to urethane bushings, I ordered all new Timken inner and outer wheel bearings and races. This came in handy when looking for wheel bearings. http://www.showmetheparts.com/timken/ I'll be honest, I've found most of my replacement suspension parts at the best price on Amazon. And usually with Prime shipping. I've also started repairing the fiberglass headlight bucket that cracked and had missing chunks. With sheet metal repair on this car, my goal has been to eliminate any unnecessary lap welds by using butt welds and improve rust prevention when possible while keeping an original look. The passenger front frame rails to compression rod brackets were pretty rusty so I decide to cut it all out and fabricate something that seals better. It will be two pieces. 1.A piece that fits around the compression rod bracket and should eliminate most of the water access. 2. A piece that connects to the under floor pan frame rail. All 16 gauge.
-
My '72 240z project -- Rotisserie Restomod
jkelly replied to jkelly's topic in S30 Series - 240z, 260z, 280z
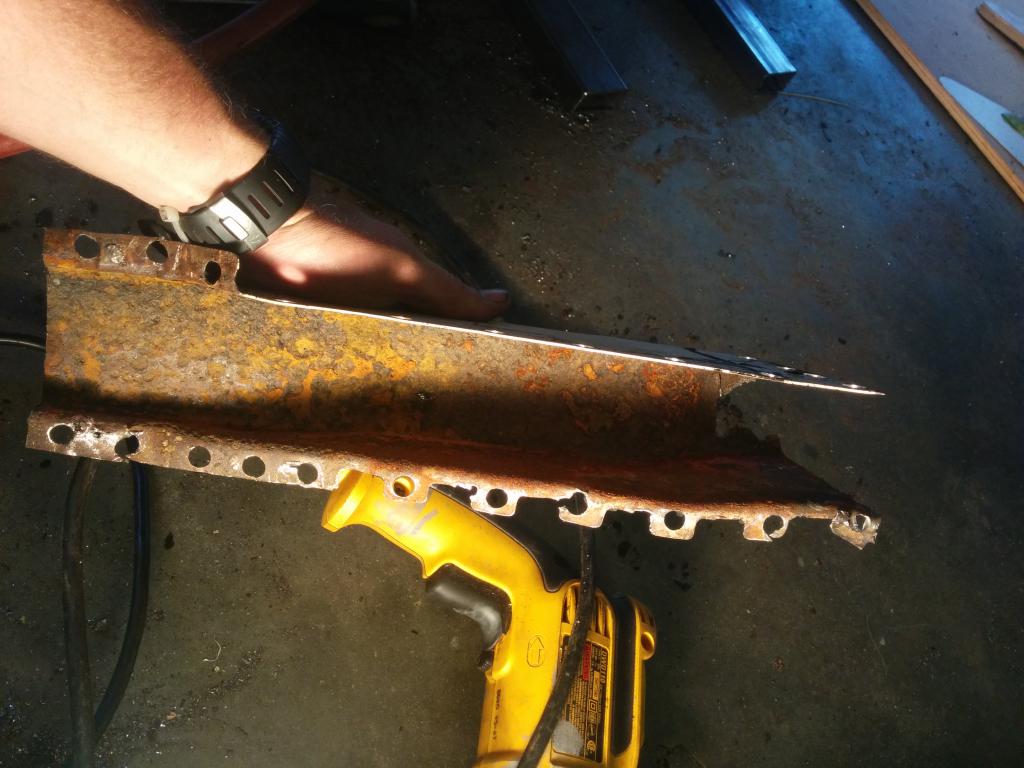
Thanks, Leon! I picked up David Gardiner's Bodywork Restoration Tutorial DVD a while back and have been watching it off and on. It's a really good DVD. Yesterday I decided to brace up the engine bay a little more before cutting into the frame rail. I drilled the spot welds on the forward main frame rail and removed the entire section from the firewall to the tension rod bracket. Here's a picture of the inside of that section. Lots of heavy pitting. I'm going to replace this section and the rest of the under floorpan frame rail with 16ga metal. I noticed that most guys replace both floor pans at once, but my driver side floor pan is in decent shape. I'm guessing there was a nasty weather stripping failure on the passenger side. Do you guys know if you can buy only the p-side ZF floor pan? Also, if you guys have any suggestions on how or if I should brace the forward frame better, please let me know! I'm planning on cutting away that portion of the engine bay frame rail that connects to the fire wall in picture 2. Perhaps a couple braces from the firewall to my current braces would help even more.
-
My '72 240z project -- Rotisserie Restomod
jkelly replied to jkelly's topic in S30 Series - 240z, 260z, 280z
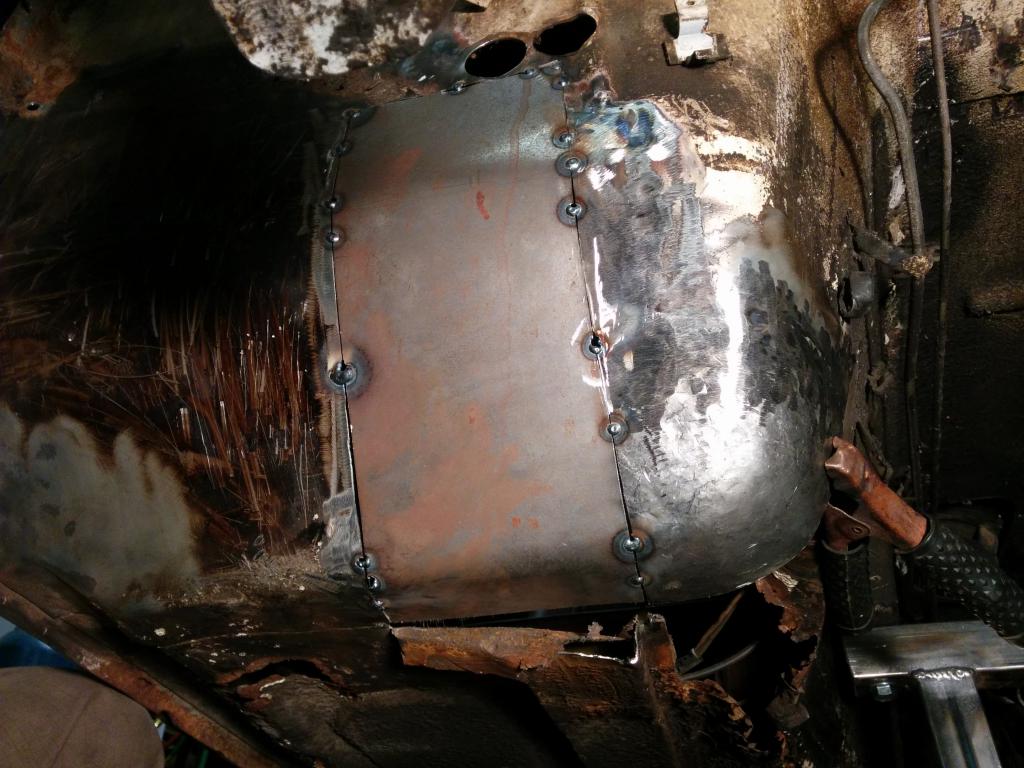
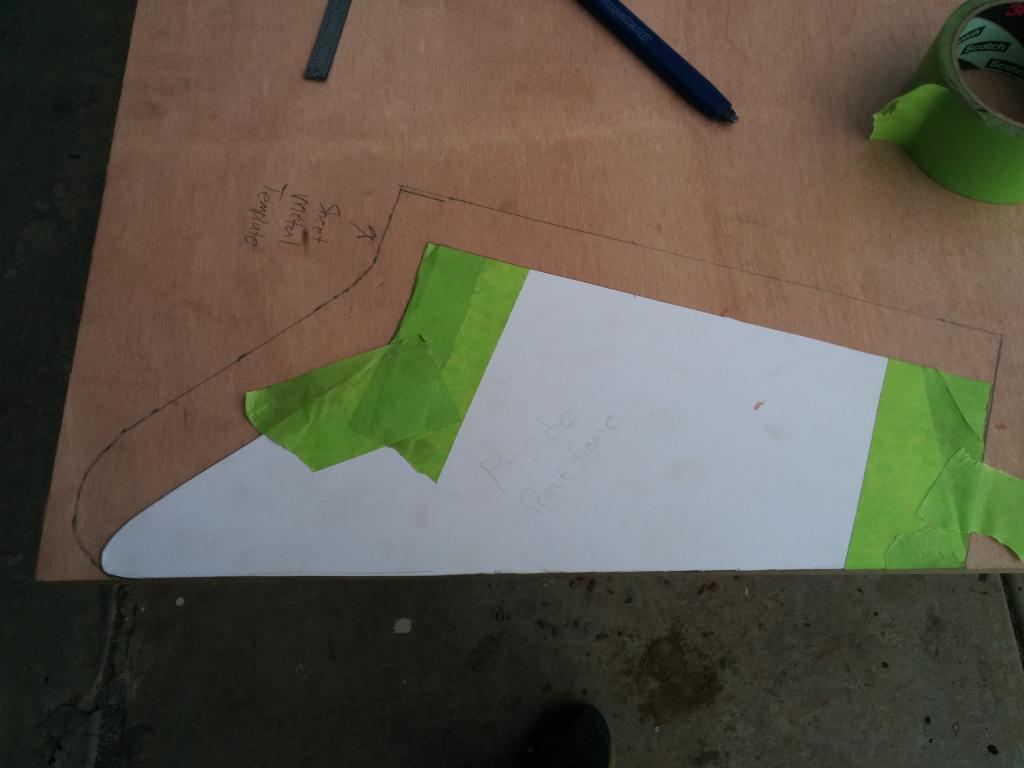
Made some patch panels for the battery tray area today. First made a template from poster board and traced it onto hardwood to make a hammerform. Clamped the sheet metal cutout between the two hammerforms and hammered the edges over. I made this one using a Hardbor Freight shrinker. A rough fit of both.
-
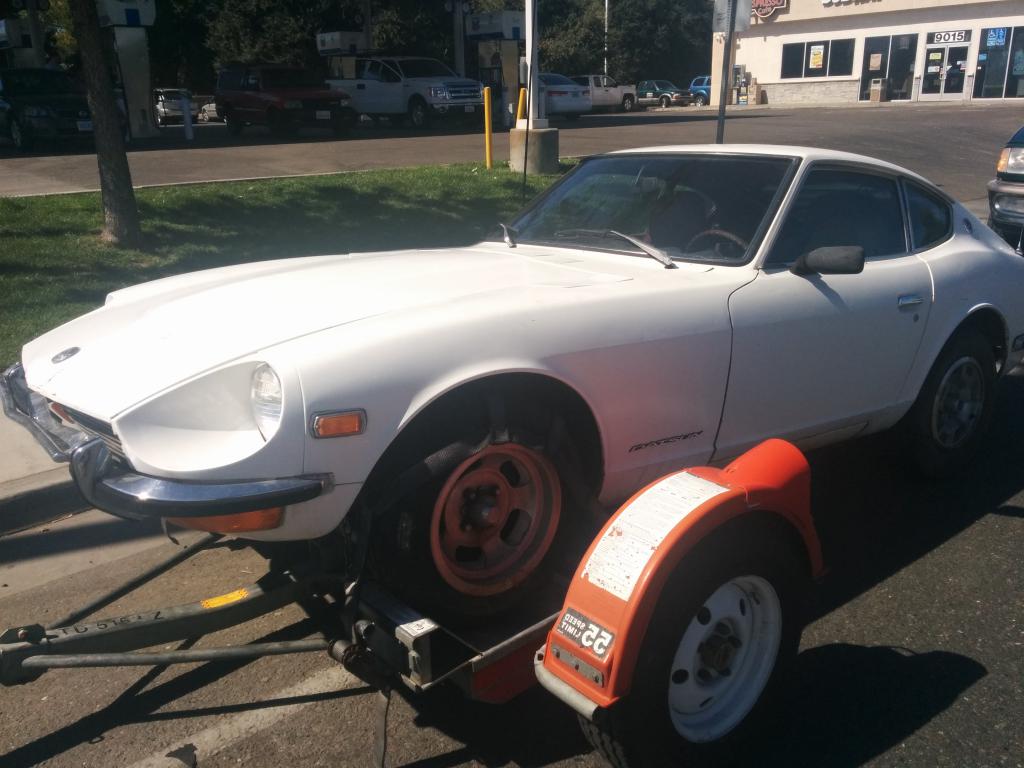
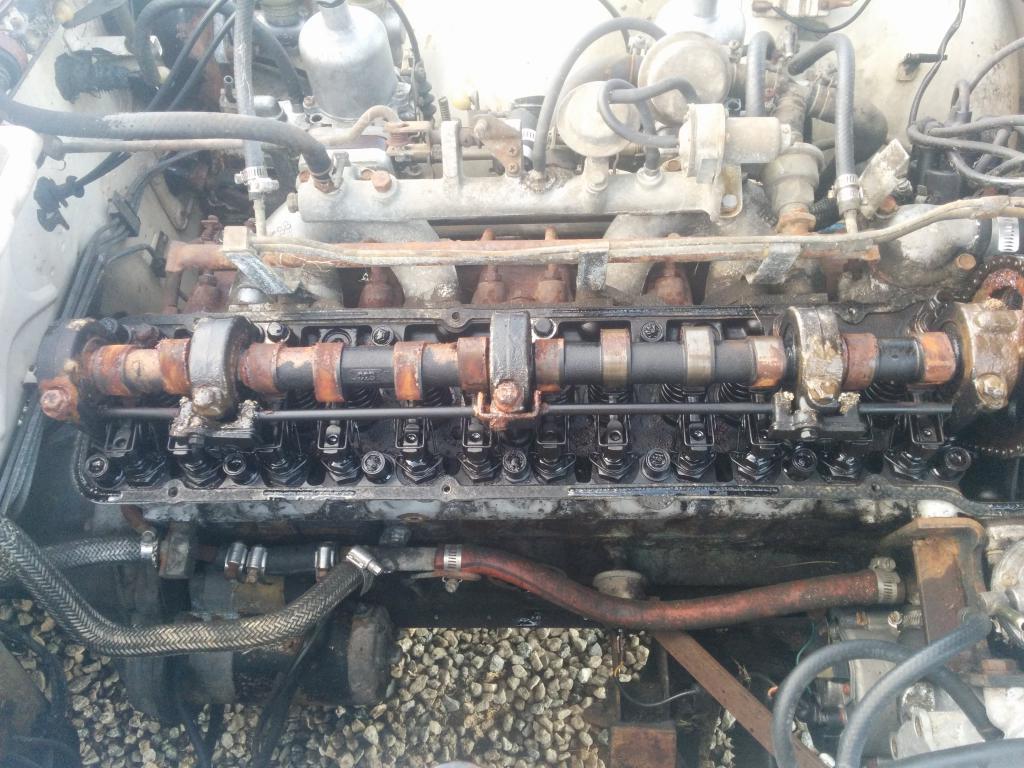
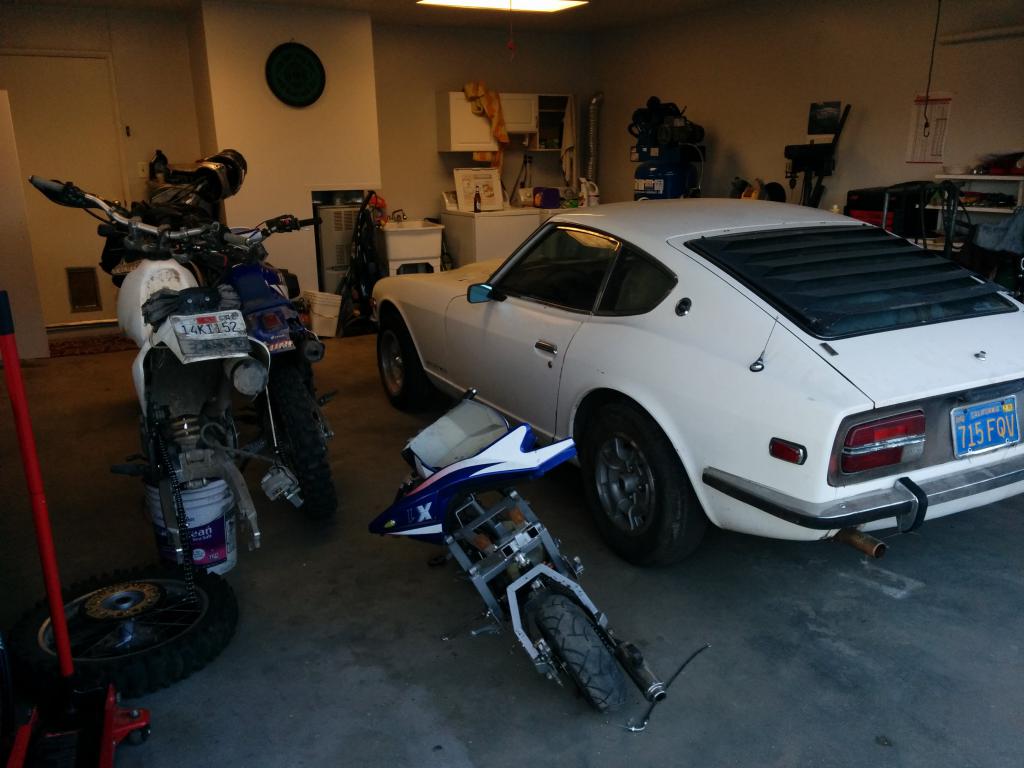
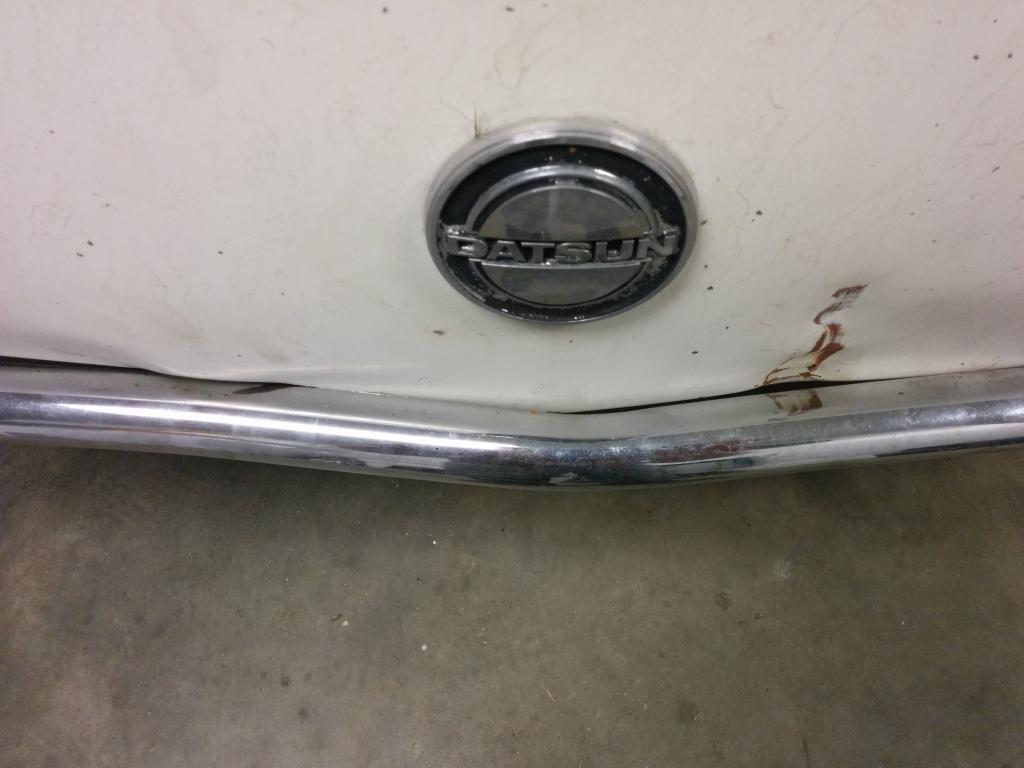
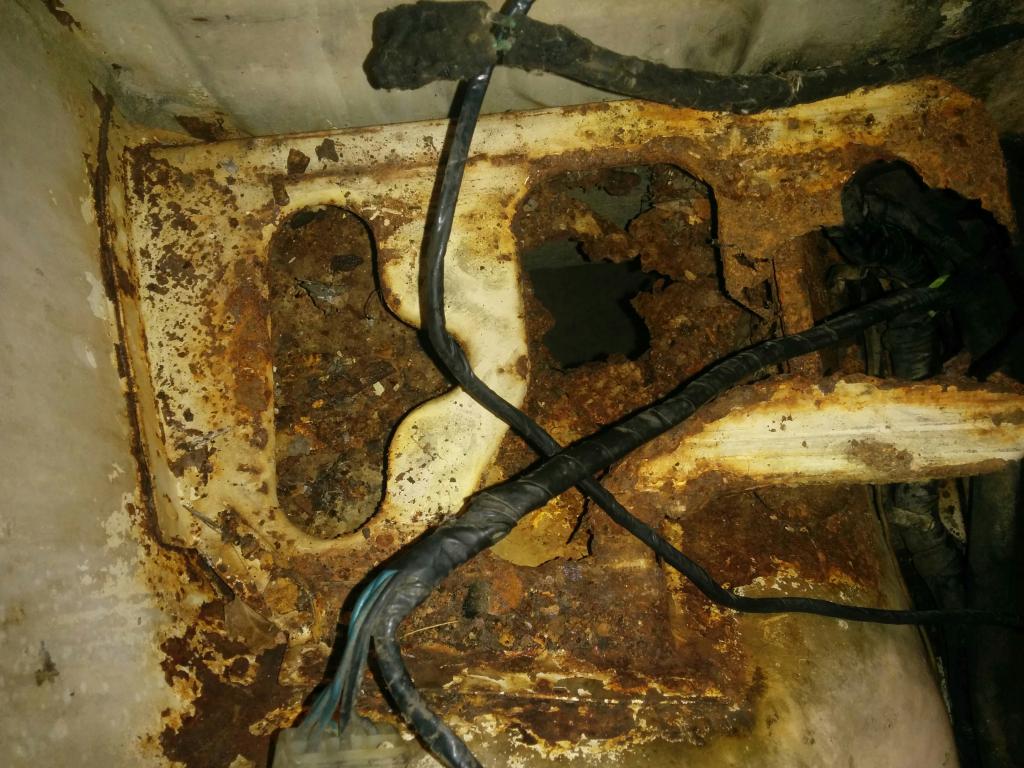
Hey guys, I recently bought a 240z and it ended up having more rust than I originally thought, thus begins my new winter project. Pulling her home with my 1987 2WD Toyota Pickup. That was a long haul between northeast of Sacramento and Southern California. The truck performed well though! The car sat for a while and the engine internals have rusted. The overview plan is to pull the engine, fix the front half of the car's rust problems, swap the SUs from the L24 to my rebuilt L28, install the engine, and drive it while fixing other things (interior). Some hood damage. Hopefully I can bump these out. Starting to inspect for rust on the passenger side frame rail/firewall interface. It's definitely in need of some work. Inside engine bay rail. Engine removal In preparation for cutting into frame rails I dropped the front suspension to remove as much stressed from the rails as possible. Stand I welded up to support car from the transmission mounts. I've made a little more progress -- started making patch panel templates and cutting metal from the battery tray area. It looks like I'm going to be replacing a lot of metal around the battery tray area -- frame rail, battery tray inner fender, a piece of the firewall, and passenger side floor pan. Hopefully driver side isn't this bad.
-
I'm looking for something I can register.
-
Sweet. Thanks for the tip. I can't believe I missed that one. I was also looking in the Oregon/Washington area. There are a lot up there, but are of course a bit more rusty.
-
Hey guys, I've been looking for 240z rolling shell around Southern California for a while now. I'm looking for something with a fairly solid body/frame, but not necessarily perfect. Interior and motor aren't big concerns. Doors are a plus. This will be a restoration project and will definitely be going to a good home. Shoot me a message or leave a reply here. Thanks for reading!