-
Posts
676 -
Joined
-
Last visited
-
Days Won
9
Content Type
Profiles
Forums
Blogs
Events
Gallery
Downloads
Store
Everything posted by cgsheen
-
Besides getting the 3 plugs back into the ECU, you also have the 2 other connectors (Labeled "2" and "3" in the FSM Turbo Circuit Diagram) plugged back together? One of them feeds the Coil and ignitor... (You used the coil harness from the '83 ZXT?) The ECU controls the ignitor on the signal from the distributor so double check the 4-pin dizzy connector to the ECU Harness... You really haven't given much background, so I'm going to ask some stupid questions - The ECU gets power from 2 sources: Both are connected to battery through fusable links - one Green, one Brown? (Brown powers EFI Relay, Green powers Injectors and ECU Injector circuitry) You know your injectors open? The L28ET injectors make a distinct clicking noise and it's easily heard if you know what you're listening for. (Mine were original, had been sitting unused for who knows how long and were mostly all stuck shut...) Electrical connectors seem to be a weak link on most Z's - mine definately were... Double check / clean your connectors. The stock L28ET ECU controls the fuel pump like this: At IGN on, it runs the pump for 5 seconds and then shuts it off. It won't power the pump again until it gets signal from the AFM that air is moving through it. (engine cranking or running) You've double checked the fuel feed and return to make sure they're connected correctly? I made the rookie mistake of having them backwards once... The only thing I could think of that would make noise is the fuel regulator on the injector manifold.
-
I think all S30's have the same Tach setup. My 74 260 and my son's 76 280 both did... When we did our L28ET swaps, it was just a matter of tying the lead from the turbo coil back to the original wiring. On ours (originally) it's a blue wire from the Coil negative side that's pretty much the end of the engine bay wiring harness. That harness starts under the glove box (passenger side cockpit) - (which is where you'll find that rectangular resistor, by the way...) goes through the firewall near the battery, continues along the frame up to the front of the car, along the frame in front of the radiator, and down the other side to the coil... On the S130, the wiring to the coil is on the opposite side. It's a small harness that disappears into the fender well near the coil and travels back to the cockpit by the ECU (at the drivers feet). It doesn't really matter if you used that small harness or not. You just need to get a connection from the negative port on the coil back to that resistor. If your original engine bay harness is there, just use the blue wire that ran to the coil originally. If you're using the S130 coil harness, take it's blue wire from the coil and connect it to the BLUE wire on the rectangular resistor (NOT the Blue-White wire - that goes to the Tach). The resistor is easy to spot - it's almost as big as your finger, in a rectangular case, and usually wrapped with black tape near the wires... (BTW, "carfiche.com" has the '77 FSM (and the '82 280zx FSM)... Just looked at the circuit and wiring harness diagram - as far as the tach and coil go, it's basically the same as my son's '76 280 (and my 260...))
-
It has to be an aftermarket A/C unit. The 260 was the first Z that came with factory A/C... (and it's on the left (intake/exhaust) side of the engine - not the alternator side of the engine)
-
-
Really? I'm using the speedo cable from my '81 zxt donor on my 260... The 260's original cable was seized up. As I recall, they were the same length (or so close it didn't matter as the 280zxt cable runs the exact path the 260 cable did...).
-
Well, my son's '76 280 and my 260 have stock L28ET swaps... So we wired them up exactly the way the S130 ECU, AFM, dist, coil, and ignitor were wired. If you follow the wiring diagram, the other side of the condensor is wired to the transistor ignition. Now, what it does or doesn't do for the spark, I have no clue...
-
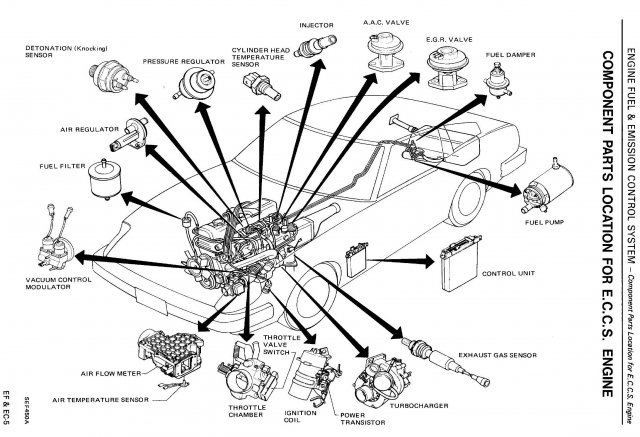
The 3 L28ET's we've had have all had a black wire connected to that spade under the distributor. It runs to a condensor that's near the coil. Here's a pic from the 280zxt wiring diagram and a pic from our 280zxt donor that shows the condensor in it's original position (bottom right of the pic)...
-

Drum brake problem - no starwheel
cgsheen replied to rickl750's topic in S30 Series - 240z, 260z, 280z
We had trouble removing the drums on both my son's 280Z and my 260... You get to the adjuster wheel from the outboard side of the drum NOT the inboard (backing plate). There's a hole, which if you're lucky, will have a round rubber plug in it - the hole is maybe 3/8" (maybe 1/2")... You'll need to turn the drum so the hole is about the "4 to 5 O'Clock" position on the passenger side and "7 to 8 O'Clock"-ish on the drivers side. The adjuster is on the bottom of the shoes and towards the front of the car on each side. You'll probably want to look at the FSM pictures. To back off the adjuster wheel, you really need to hold the adjuster arm down away from the teeth of the adjuster wheel. It's a little tricky through that small hole. That may not be the only thing keeping that drum from coming off though... Mine and Nick's drums were pretty corroded around the lugs AND at the hole in the drum center around the wheel hub. Heat and penetrating oil helped loosen things up at those points... -
My 260 has louvers and it didn't (doesn't) seem to help much on it's own. Replacing the weatherstripping on the hatch helped in a major way, but there's still a few places I need to seal up. There are more "seals" than come in a weatherstripping kit and after 35 years they can't be much good... I'm sure I need to check the rear lights too. I guess I also need to recheck the fuel filler and all the evap hoses on the fuel tank, when I pull a hard left turn I get some gasoline fumes...
-

Whats your Favorite color for the S30?
cgsheen replied to 19762802+2's topic in S30 Series - 240z, 260z, 280z
Yup, when I get around to re-painting my 260, It'll stay orange... Which is wierd - I'd NEVER consider orange for any other car I've ever owned (or wanted to own...). -

Installing 83 zxturbo into 77 280z
cgsheen replied to IdahoKidd's topic in S30 Series - 240z, 260z, 280z
Have fun! And let us know how it goes... -
-
Um, look at the FSM... Neither the water temp sensor nor the thermotime switch have anything to do with EFI on an L28ET. They don't connect to the ECU... The water temp sensor (yellow) goes to the gauge in the cockpit. The thermotime switch just runs the injector fan (after the car stops running IF the water temp is over 2xx degrees (sorry, can't remember the exact temp)) The temp sensor connected to the ECU is the Cylinder Head Temperature Sensor on the oil filter side of the engine. The TPS only shows "throttle closed" (no throttle) OR "throttle not closed" (you've stepped on the pedal). It doesn't show "amount of throttle" (the switch can't show 1/4 throttle, 1/2 throttle, etc...) or WOT (which it can... that function just isn't used by the L28ET ECU) My bet would be: wiring, electrical connectors, vacuum (including VCM and/or the 2 things it controls: AAC and EGR) (In a stock ZXT, the VCM is mounted opposite the AFM on the same bracket)
-

Installing 83 zxturbo into 77 280z
cgsheen replied to IdahoKidd's topic in S30 Series - 240z, 260z, 280z
Well, we old guys need to stick together... (OK, I wasn't going to admit it, but I was raised in Idaho Falls - so I guess "spud-heads" need to stick together too...) My son and I have done 2 "turbo swaps"... First, into his 76 280Z - then into a 74 260Z for me. Your 77 makes for a nice swap because it's an EFI car from the start. You won't be using the 77 ECU or it's harness, it's AFM... Remove all that stuff from the ZX carefully and it doesn't hurt to take a lot of pictures. First, go to carfiche.com and download the Factory Service Manuals for the 77 280Z and the 1982 280ZX (includes Turbo). (the 82 will be the same as the 83 280zx...) Second, rewiring is not really all that hard and it'll be easier for you because you have the complete 280zx to see "how it all went together in the first place". If you're going STOCK L28ET, you want the ECU harness intact from the 280zx and you're going to put it in the 280 pretty much the same way you take it out of the donor. It mainly goes from the "computer" box out the firewall along the left side of the engine to the AFM & VCM and onto the engine for the injectors and sensors. There's a branch off to the right out of the firewall to the battery and right-side sensors (cyl head temp and knock sensor). Personally, I used the relays (EFI and Fuel Pump) and fusable links from the ZX on my 260 (all near the battery location - some of that stuff is in the fender (body) beside the battery and runs down to the fuse block)- easier than what we did on my son's 280... Use the ZX Coil and ignitor and take the wiring harness from the coil (follow it back through the fender of the zx all the way into the cockpit...) You'll only use some of the wiring - much of it is for the washer pumps & etc on that side of the zx... One of the biggest "gotcha's" with these old Z's is electrical contacts - they can really corrode over the years. When you're going through this stuff, clean all the electrical connectors up. Make sure the wiring and connectors are good. It can save you a LOT of headache and wasted time trying to eliminate glitches down the road... The zx was built for it's AFM. It's a little tricky getting that big old air-box into your Z Car. It won't mount like the Z AFM... You have to play with the air intake, maybe re-position the coil, find a spot for the VCM (if you use it - we did in both our cars - there's room above the A/C compressor (oh ya, we both have A/C... this IS Arizona...)). We both ditched the stock air cleaner, re=piped the cold air intake and used cone filters... Nick kept the stock 280 radiator, mine didn't have one so I made the radiator out of MY 280ZX turbo donor work in my 260. The oil cooler came stock on the Auto Tranny 280ZX Turbo models (but not the Manual Tranny model). Neither of us use the oil cooler even though both our engines had them originally. Nick's has been running for 2 1/2 years (in Arizona) - mine since April. And ya, it's September 14th and it's STILL nearly 100 degrees here! The ZX uses an alternator with a built-in voltage regulator (and cranks more amps bacause the ZX was PACKED with electronics!). Neither my 260 or the 76 280 did. The regulator was external. I eliminated voltage regulator from the start and re-wired the 260 to be 280ZX style in that regard. With Nick's 280, we used his original alternator (and voltage reg.). It worked fine for 2 years but when that alternator went out, we replaced it with a ZX alternator (we had as an extra), eliminated the external voltage regulator, and did the simple re-wire so it worked and charged properly. You have the choice of going either way... The engine is the same as far as mounts go. It'll mount right in the 280 frame and mate to the Z's transmission. It's WAY easier to pull the engine and tranny as a unit. You can use the stock ZX downpipe and exhaust (through the Cat). We had to use a catalyst here - emissions testing... Unless you're going to use an MSA downpipe, it's not a bad idea to use as much of the ZX piping as you can. It fits (until the end of the cat...), it's heat shielded (and that turbo lights up the exhaust...), and it simplifies the exhaust out of the turbo. Then you'll have to have an exhaust fabbed or buy a kit from MSA to go from the Cat (or end of the downpipe) back... Save the boost gauge from the donor car. I made 2 custom boost gauges for our cars using the boost gauge guts from the ZX - I mounted them in the clock housing from the Z cars... Our clocks didn't work, but our boost gauges do! If you don't use it, send it to me (or send it to me and I'll make you a "clock boost gauge" too). Leave the power steering mounting bracket ON the engine! It covers and seals the now-non-existent mechanical fuel pump port. The Z fuel pump may be sufficient for the turbo motor, but I'd use the fuel pump from the ZX instead. The turbo puts a lot of heat on that side of the engine. You can use some of the heat sheilding from the ZX. Keep the shield that's next to the brake master cylinder. We also kept the "hood scoop" from the drivers side of the ZX and cut our hoods so we could use it. It directs air down past the turbo. We only use the scoop and 1st vent section (so there are 3 mounting bolts) - but the 77 has hood vents already - don't know if that'll work for you. Lastly, (for this post ) there are lots of people here that know a lot about Z Cars so have no fear... You may have lots of questions as you get into it. All the answers are here so have fun (busting the hell out of your knuckles!) At least you'll be doing it in the freezing COLD, snowy, blowing winter of the Frozen North! -
What... You guys don't remember 1974??? "5 MPH" bumpers were required on all US cars... For some that meant putting big-ass rubber blocks on the stock bumper - like my TR-6 (that was fugly!). For most it meant some kind of "shock absorbing" bumper like Nissan used. It also meant pushing the bumpers out away from the body because the bumper had to take the impact without any damage to the rest of the car - that was the rule... Anyway, My early 260 had mounts and "pushed out" bumpers just like what "langford" showed. BUT, it looks like the body has all the right mounting points for the earlier 240 series bumpers as well. I've seen a "late" 260 and it's original bumpers look fairly identical to my son's 76 280Z. His bumper mounts were even bigger than mine (at least the flange on the end of the piston that the bumper bolts to is much larger... And, ya, his bumpers were huge...) The body of his car has no mounting points for the 240 bumpers. If you want a "tight" bumper, you'll have to go aero-kit, custom built, or pre-1974...
-
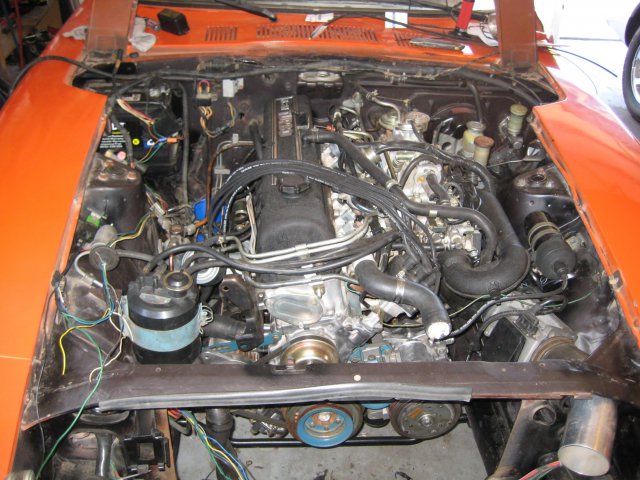
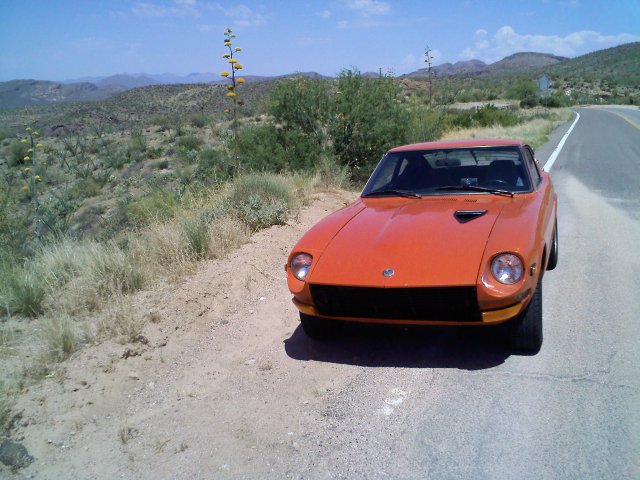
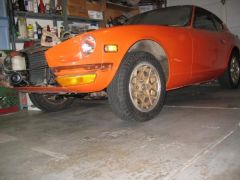
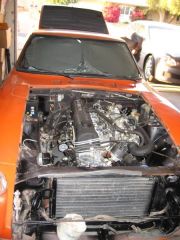
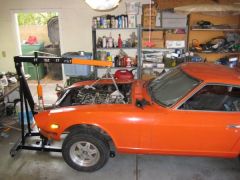
07/74 "early" 260Z frame with a stock L28ET swap... My youngest son bought a '76 280 several years ago. I finally helped him get it running after he'd had it for a few years but the engine didn't last. We found an almost new L28ET & did the swap into his 280 in early 2007. Last year, he found another L28ET and gave it to me. I had to buy this 260 frame to put that engine into... Bought the 260 last December, almost had it running and roadworthy in time for the 2009 West Coast Nationals - but not quite... Next Spring for sure.
-
IIRC on my 81 ZXT donor the 6-pin connector "3" (as it's labeled in the wiring diagram) was near the battery (and may have been in the fender beside the battery with it's wiring leading down to the fuse box / relay assortment by the passengers feet...) On the Turbo ECU harness, that Blue/Red wire is part of of the wire bundle that goes across the firewall from the main bundle (splits off near the brake booster) over to the battery side. That bundle also carries the wiring for the cylinder head temp sensor and the knock sensor...
-
The "5 seconds and off" is how it works stock and that's controlled by the ECU. The ECU controls the Fuel Pump Relay. The Fuel Pump Relay is a simple "normally open" relay (and a relay is just an electrically operated switch). It gets voltage from the WB (white-black) off the ignition switch to it's "common" or input pin and outputs it to the +12v side of the fuel pump on the "NO" (normally open output) pin of the relay. The "coil" is the part of the relay that turns the switch ON or OFF (oversimplified). One side of the coil is connected to ground and the other is connected to the ECU (Don't know the ECU pin but it's the LR (blue-red) wire on the white "CONNECTOR 3" (the 6-pin connector) of the turbo ECU harness). So, the ECU controls one side of the relay coil and thus whether power goes to the fuel pump or not. With the fuel pump connected to IGN, hit a tree (or another car) and the puel pump may keep pumping gas even if the engine is no longer running. If something broke in the crash, that may be "adding fuel to the fire". With the ECU controlling the fuel pump that's not likely to happen - if the engine stops running, it shuts down the fuel pump... They designed that as a safety feature since the engine isn't driving a mechanical fuel pump anymore.
-
After reading this post I took a look at my 260's latches - Ya, I have to slam the doors shut too. I cleaned them up and decided to to go the "OEM route" rather than welding additional metal onto the striker or cutting metal off the backside... I found a piece of plastic tubing (I'm a plumber - think 3/8" water tubing, not soft plastic or rubber) and trimmed it to fit over the oblong knob on the door latch that first hits the striker plate on the body. (to replace the nylon piece that's on it from the factory - referred to above) With the latch still on (in) the door, the knob faces down when the door is open and rolls back inside when you press it to the "door closed" position but it's still not hard to get the plastic piece on it. Just make sure it's the proper length and fits securely to both sides of the knob so it stays in place. (The additional "width" of the oblong knob with a nylon or plastic covering causes the "latching knob" to roll properly into the notch on the striker plate. Without it, the latching knob hits the back side of that notch and causes the problem most of us have... That's why grinding down the back of the striker plate works.) Anyway, It worked! And it's so simple. And EASY to re-do if this one rots, cracks, falls off, or whatever. Both doors close and latch securely with minimal effort and have stopped "popping open a notch" when I hit a bump. Edit: Sorry - for those not used to working with pipe or tubing: Cut 1/4" or so off the end of the tubing (about the same width as the knob) then slice the side lengthwise so it's NOT a complete circle anymore. Now it'll go over the knob (and it's already curved...), just make sure it's the right length to fit securely...
-
From the album: cgsheen's 1974 260Z turbo
-

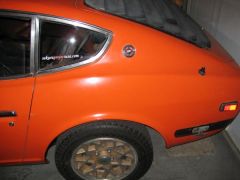
I can't wait to replace the gold on those '81 snowflakes with black
cgsheen posted a gallery image in Members Albums
From the album: cgsheen's 1974 260Z turbo
-
From the album: cgsheen's 1974 260Z turbo
-

Sigh, I should have swapped the VQ35HVR out of that G35! Mrs, Sheen wouldn't let me...
cgsheen posted a gallery image in Members Albums
From the album: cgsheen's 1974 260Z turbo
-
From the album: cgsheen's 1974 260Z turbo
-
From the album: cgsheen's 1974 260Z turbo


