280Z-LS3
-
Posts
208 -
Joined
-
Last visited
-
Days Won
2
Content Type
Profiles
Forums
Blogs
Events
Gallery
Downloads
Store
Everything posted by 280Z-LS3
-
ANOTHER Datsun Z/LS3/T56 Swap Thread
280Z-LS3 replied to Ironhead's topic in S30 Series - 240z, 260z, 280z
Shooting from the hip here but maybe reducing the paint could help. Then there is the battle of the runs to deal with. Often pondered how people paint the interior with roll cages installed, getting adequate coverage in all the blind spots. -
280Z build w/ LS3 and 2015 Mustang spindles/8.8
280Z-LS3 replied to 280Z-LS3's topic in Gen III & IV Chevy V8Z Tech Board
A bit of Googling revealed on Jalopy Journal the active ingredient in Lizard Skin Ceramic is micro glass spheres that can be bought at Aircraft Spruce for $10/lbs . Some guy on there says to just add to paint. Interesting, may buy a bag to satisfy curiosity... -
ANOTHER Datsun Z/LS3/T56 Swap Thread
280Z-LS3 replied to Ironhead's topic in S30 Series - 240z, 260z, 280z
Wow, attention to detail amazing as usual! Thanks for the heads up on seam sealers. 2K products are the way to go for two reasons, quick cure and no shrinkage. The single stage gave a nice glossy finish. -
280Z build w/ LS3 and 2015 Mustang spindles/8.8
280Z-LS3 replied to 280Z-LS3's topic in Gen III & IV Chevy V8Z Tech Board
From my experience and research achieving large amount of noise reduction requires mass to absorb the sound waves. MLV sheets (mass loaded vinyl) applied on top of products mentioned above is the best way to tackle noise at the expense of adding literally like 100 lbs to your car. Already concerned with the added weight of primary layers like spray on liner and/or butyl sheets so will not be adding MLV. Does the Lizard Skin Ceramic work better than the foil on the butyl sheets? Foil reflects a fair amount of IR radiation, does the ceramic stuff as well? -
280Z build w/ LS3 and 2015 Mustang spindles/8.8
280Z-LS3 replied to 280Z-LS3's topic in Gen III & IV Chevy V8Z Tech Board
For under coating will be using the Raptor liner as well, gets the best reviews. You have me rethinking interior sound deadening material. For past builds used Noico 80 mil foil backed butyl which is hefty at 0.7lbs/sq.ft. Would be nice to use something that does not have such a weight penalty and easier to install. -
280Z build w/ LS3 and 2015 Mustang spindles/8.8
280Z-LS3 replied to 280Z-LS3's topic in Gen III & IV Chevy V8Z Tech Board
Ironhead, totally agree. My car barn is drafty so the humidity tracks with outside levels. Hopefully we start getting rain soon here in CA to help with fires. After all the seam welding is competed I am going to treat/brush with Tamco Mono Coat 1K rust encapsulator, a similar product to what you used, then scuff before seam sealer and paint. I would not be surprised if all the newer rust encapsulator products on the market use similar water cured urethane technology. How did you treat burnt paint on the back side of the panels in the cavity forward of wheel wells? Because of the long lasting strong smell of body wax don't know if it's a good choice for cavities with openings leading to interior cabin. -
280Z build w/ LS3 and 2015 Mustang spindles/8.8
280Z-LS3 replied to 280Z-LS3's topic in Gen III & IV Chevy V8Z Tech Board
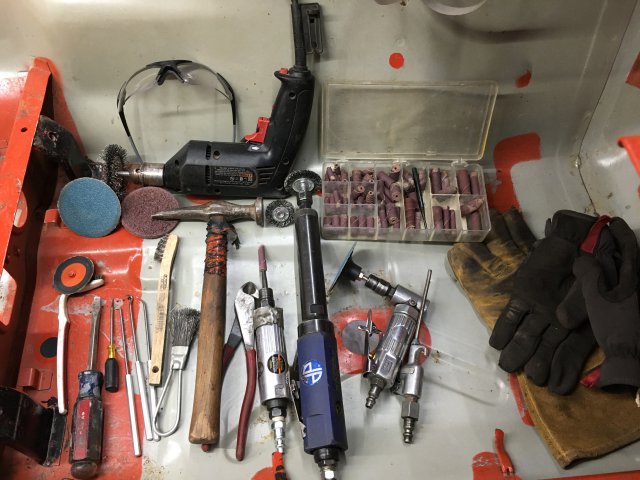
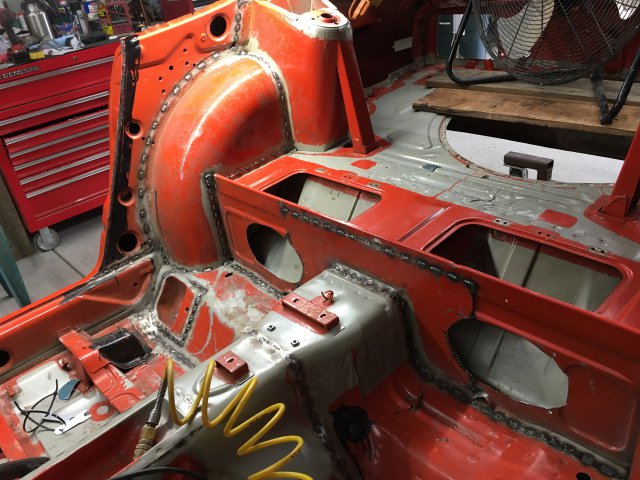
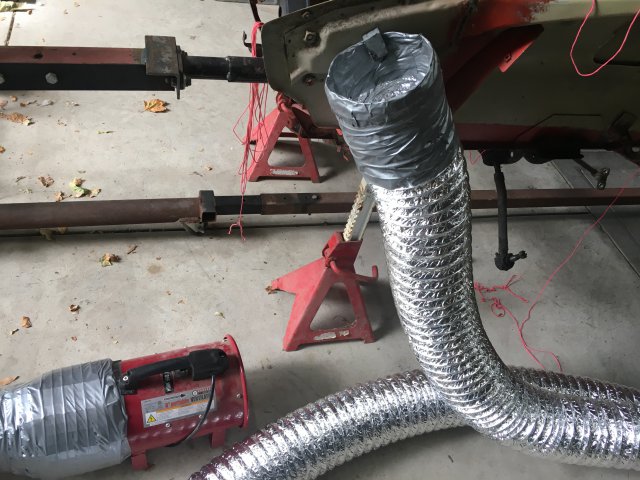
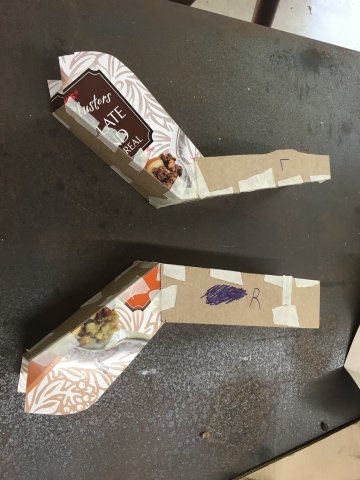
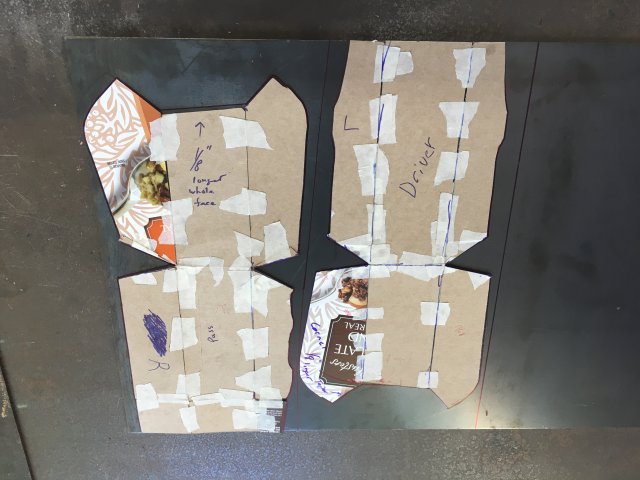
Seam stitching progress. Tedious process getting paint and seam sealer out of seams but it's better get good and clean than having to deal with contaminated welds. I have not found a trick to get-er-dun quickly. A small flat head screw driver turned out to be the best for tight corners and the pointed body hammer helped close some wide gaps before welding. To help keep burning paint and seam sealer smoke from welding out of my face and lungs, even with respirator, I picked up a 6"x25" hood vent duct from hardware store and attached to bullet fan to draw away smoke. The hose end is held in place by a powerful magnet allowing for ease of movement and sturdy location. The magnet was one of those impulse buys, "gotta have it but don't know what I'll ever use it for", which finally found purpose.
-
Advice on radiator and fan for LS3 swap
280Z-LS3 replied to 280Z-LS3's topic in Gen III & IV Chevy V8Z Tech Board
Modern engines are designed to run at higher temps. The piston to bore and bearing clearances to machined for an anticipated temperature range and resulting degree of expansion as the metal warms up. From what I understand accelerated engine wear can occur from constantly running the motor too cold. Something to think about... -
Seriously looking into an this kit, MSRP $2400, as a solution to entire car wiring and dash instruments/gauges for my build. I decided to scrap the original EFI and body harness to simplify the build. Considering the total cost of individual gauges and entire car harness there would not be too much of a premium to pay for this upgrade. Anyone have experience with this setup? It's relatively new to the market. Custom dash will be needed which I'm ok with. Until now was planning on using Holley Terminator X engine ECU and harness so need to check compatibility on that front.
-
280Z build w/ LS3 and 2015 Mustang spindles/8.8
280Z-LS3 replied to 280Z-LS3's topic in Gen III & IV Chevy V8Z Tech Board
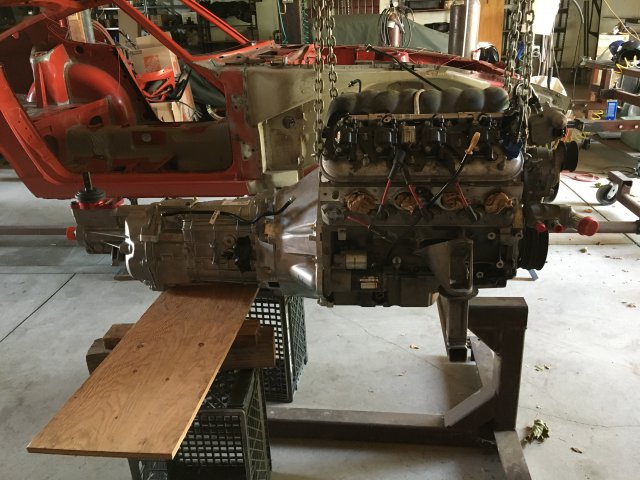
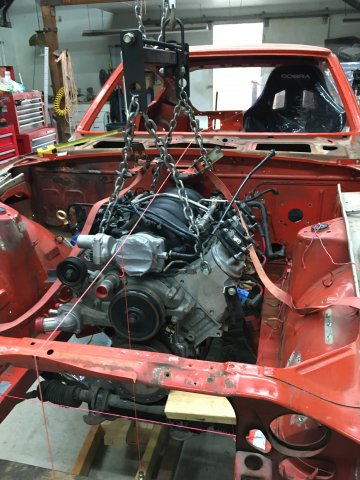
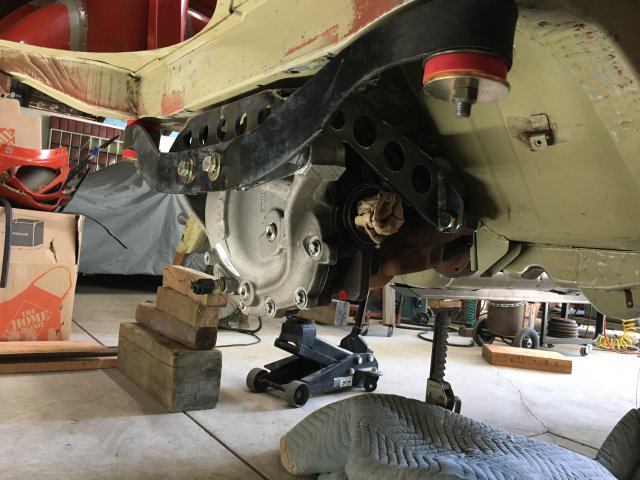
Oh, here is a pic of engine/trans assembly. Working alone required some creativity with milk crates and scrap lumber getting trans into place, it is one heavy MOFO!
-
280Z build w/ LS3 and 2015 Mustang spindles/8.8
280Z-LS3 replied to 280Z-LS3's topic in Gen III & IV Chevy V8Z Tech Board
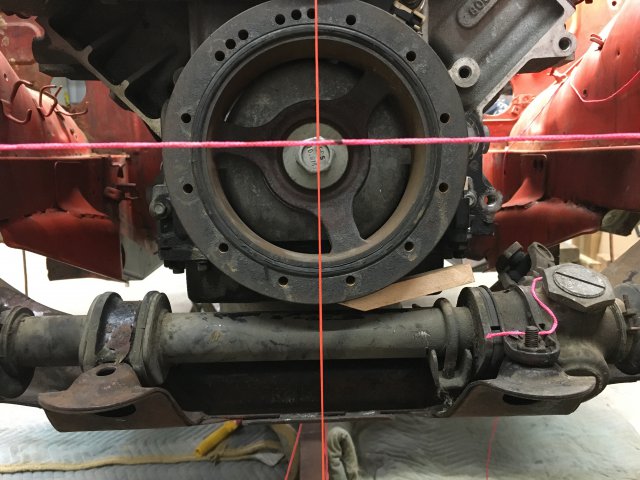
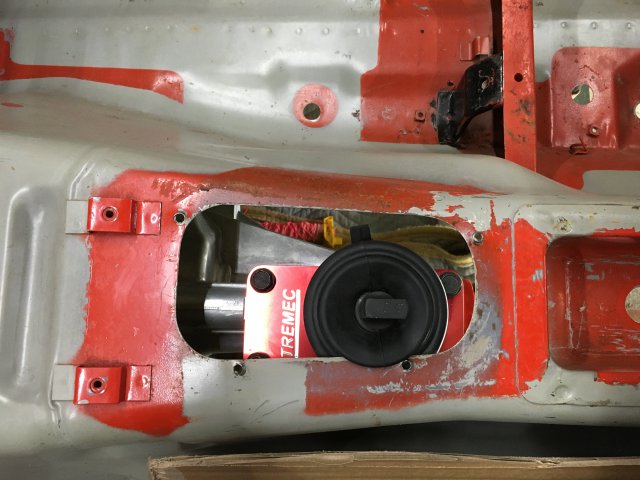
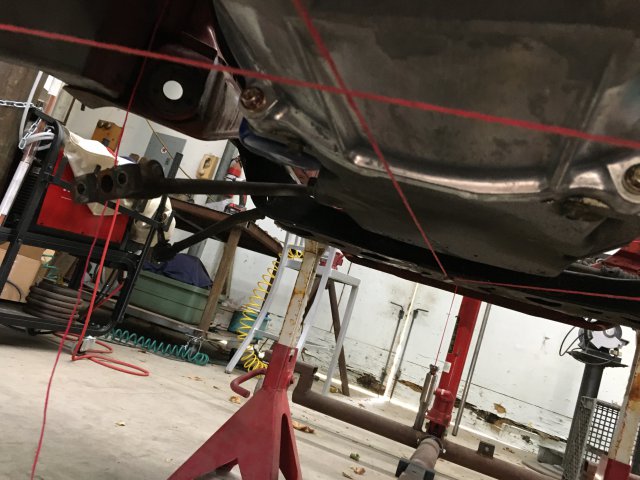
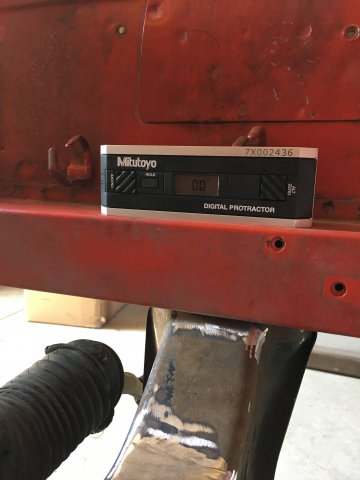
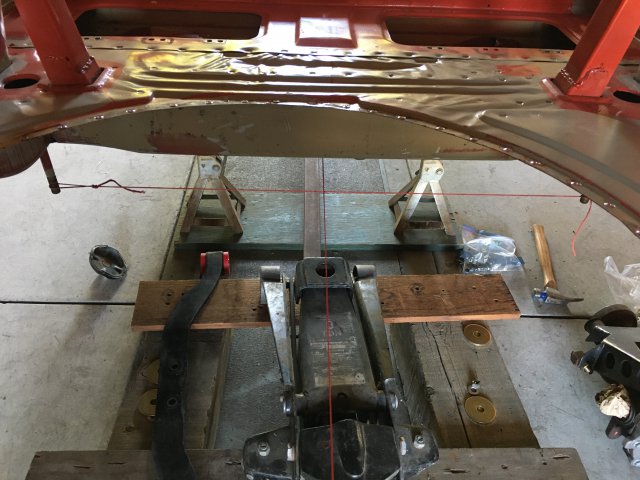
Test fit LS3 motor and F-Body Magnum trans. Played with different engine tilt angles and seems 1.5-2.5 degrees rearward gives best placement. Any more angle such as 3 degrees allows for more harmonic balancer/steering rack clearance at the expense of extending rear of oil pan and bell housing below frame rails. I pulled lines across frame rails and from cross member to check oil pan and bell housing clearance, to see if they hung below frame rails or cross member. The limiting factor of getting the engine as close to the firewall as possible is the vacuum hose at back of intake manifold. I was able to achieve 4cm/1.5" from block/trans face to firewall and the center line of crank approximately 1cm below top of frame rails. Could possibly go lower after I install an ATI 10% underdrive harmonic balancer and pulley having about 3/4" small diameter than OEM netting about 3/8" more clearance. How do these measurements compare to other LS swaps? Keeping trans tail shaft on chassis center line offsets the F-Body Magnum shifter to the driver's side of tunnel hole. Notice in photo above the shifter housing is offset to driver's side. If this shifter location becomes bothersome will fab up a spacer to center stick more to the right. Looks like I will need to clearance the tunnel hole so the shifter boot does not get chewed up. Also purchased from EBay a mechanical reverse lockout to replace the massive solenoid type. Waiting on three things to complete drive line placement ATI dampener, dry sump oil pan and Ford Super 8.8 pinion nut (not re-usable) which is a dealer only item part #FL3Z-4320-A for swapping the Mustang pinion yoke to Yukon YY F100603 which utilized 1350 u-joint. I was going to modify the LS3 pan by adding 2 scavenge bungs but seriously considering just getting a good dry sump pan, either ARE 1005M or 1005S. Waiting for parts to arrive I pulled rear diff and motor/trans and have begun the stitch welding of sheet metal seams.
-
Advice on radiator and fan for LS3 swap
280Z-LS3 replied to 280Z-LS3's topic in Gen III & IV Chevy V8Z Tech Board
I think the reason for running hot in traffic is the lack of fan shround, air is not being pulled through a large portion of radiator. Then while moving temps go down indicating rad has good air flow. Get a C7 Corvette fan assembly, that maybe the easiest solution. -
Advice on radiator and fan for LS3 swap
280Z-LS3 replied to 280Z-LS3's topic in Gen III & IV Chevy V8Z Tech Board
Have tried a hotter thermostat? Are you using a fan shroud? Let's see a pic of your setup -
280Z build w/ LS3 and 2015 Mustang spindles/8.8
280Z-LS3 replied to 280Z-LS3's topic in Gen III & IV Chevy V8Z Tech Board
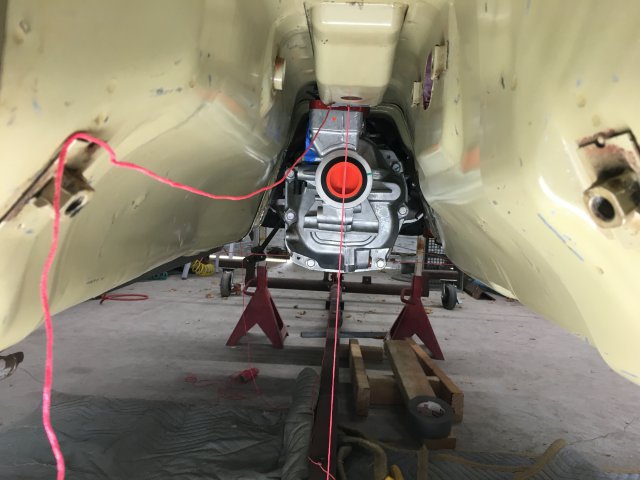
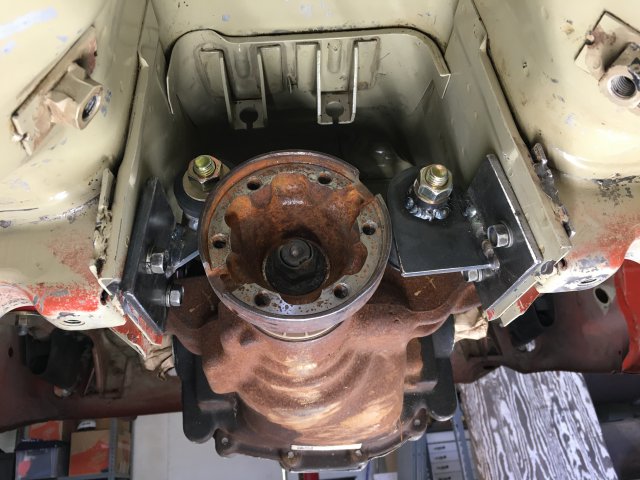
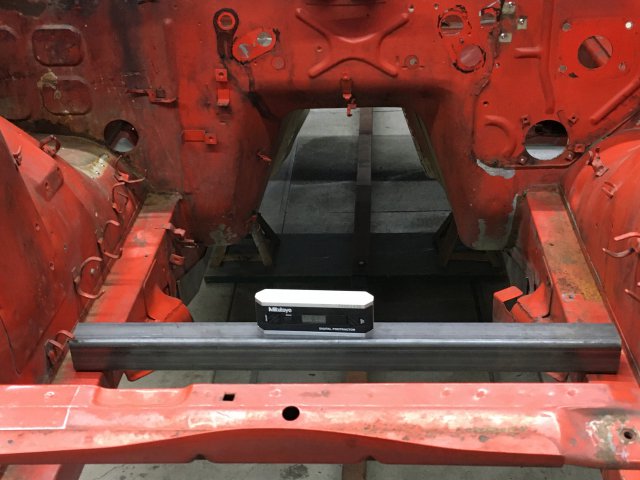
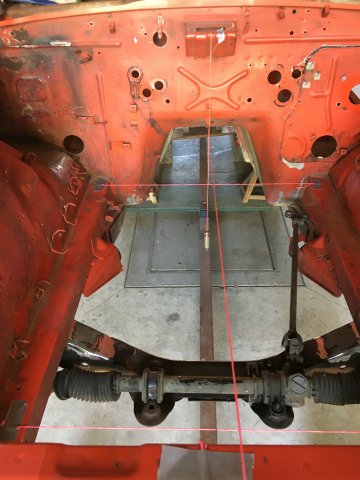
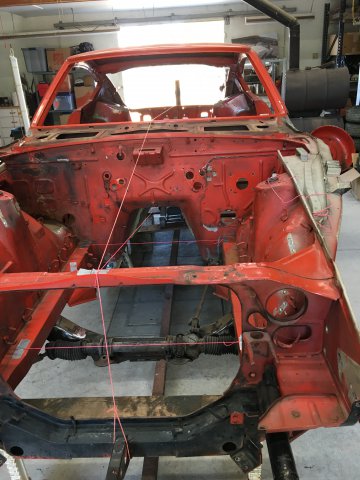
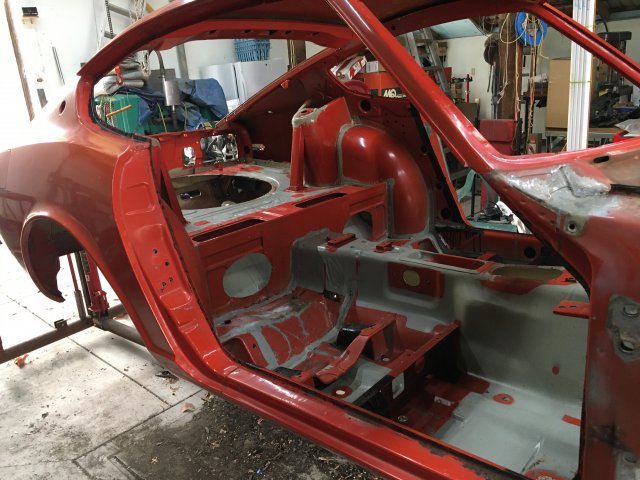
Time for a update! Test fit the 8.8 diff. Engine/trans going in next. Should have them in by end of today. I also leveled the body on jack stands by using the frame rails as point of reference both side to side and front to back. Notice I have cut the engine mount towers off cross member making room for DIY puck style engine mounts. I needed to determine chassis center line for both engine placement and welding in camber plates square to car center line. If the camber plates are not square caster will change when camber is adjusted. Pulled mason line across three points, front of frame rails, back of frame rails near fire wall and between mustache bar mount studs and wrote with marker center of each point of each line. Then pulled mason line front to back both under car and through cabin using plumb line to locate using the three reference line points. Marked where mason lines touched the chassis with marker so can easily be removed and re-install as needed and also to have reference points to refer to when engine/trans is installed interfering with line installation.
-
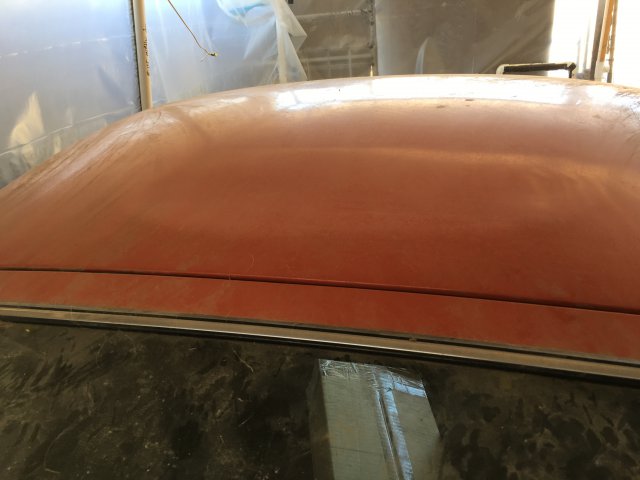
Thanks. I'll look at the videos and do a bit more internet searching for different techniques before I tackle the repair.
-
My Datsun 280Z has a collapsed hood. While being stored in barn my daughters dwarf goats decided sleeping on the the roof was a good idea. Their weight was enough to collapse the roof. I can bang on the inside of the roof panel to pop it back up but there is a deformed ring where the metal bent during collapse. What's a few methods I can try to fix the damaged panel? See pic
-
Advice on radiator and fan for LS3 swap
280Z-LS3 replied to 280Z-LS3's topic in Gen III & IV Chevy V8Z Tech Board
Yeah, his name is Andrew. He is unbelievably helpful and knowledgeable on LS swap stuff, asked him numerous questions and always happy to give solid advice. Checkout his posts on Ls1tech -
280Z build w/ LS3 and 2015 Mustang spindles/8.8
280Z-LS3 replied to 280Z-LS3's topic in Gen III & IV Chevy V8Z Tech Board
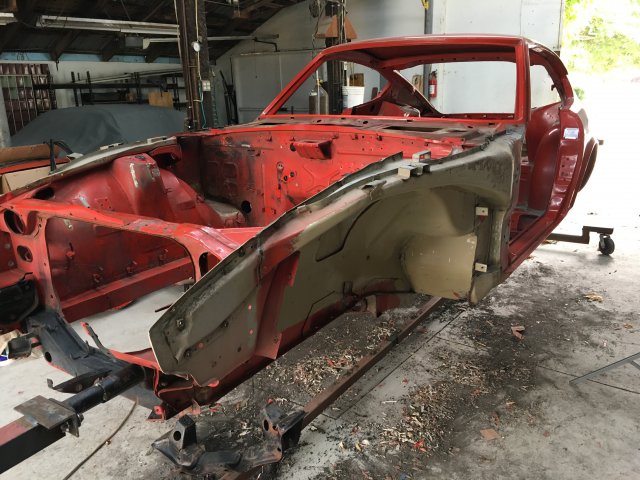
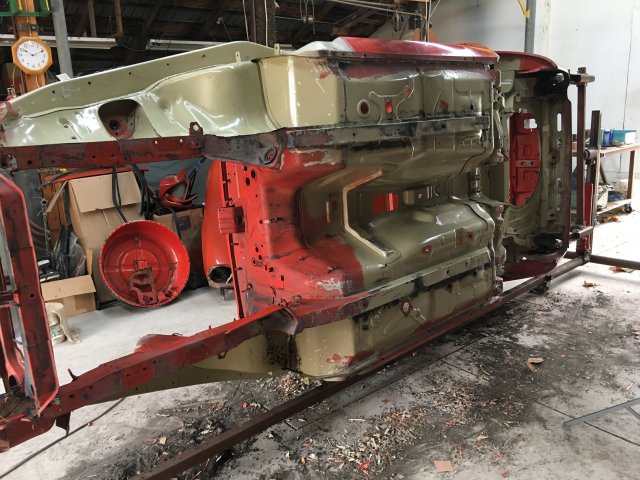
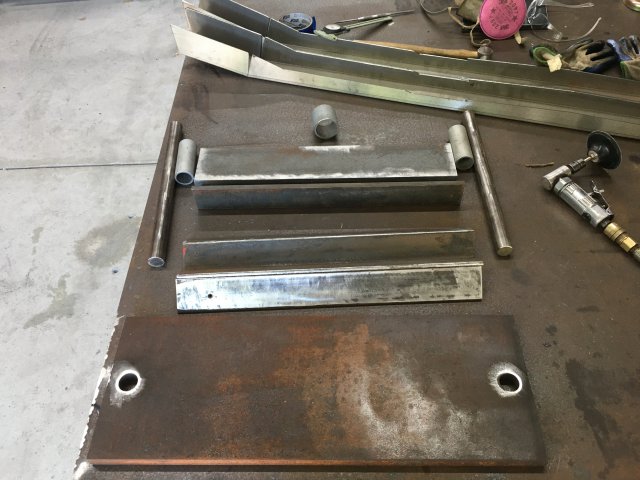
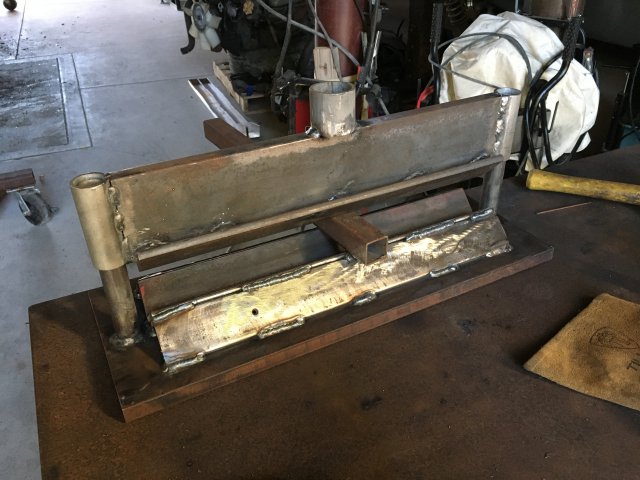
Finally completed cleaning up the chassis by removing undercoating, seam sealer, glue, etc. That was a long and crappy job! Thinking I am going to get the engine/trans mounted before tackling the seam welding and roll cage because of my idea for trans mount. I would like the trans to bolt to the Bad Dog frame rails with blind nuts, nuts welded to the inside of frame rails. I also removed the spare tire well and miscellaneous brackets in the engine bay that will not be of use. While trying to keep from going insane with undercoating removal I broke off to make a press brake for my cheap HF 20 ton press and some sub-frame connectors templates. The press brake is to bend up some 3"x5/16" steel bar for transmission mount. Transferred connector shapes to 12 gauge sheet metal and just need to be cut out and bent up. I am pretty certain these will clear the rear roll bar. As of now I don't plan on using a rear bar but though it would be nice to retain the use. Gathering some material for a DIY 4' sheet metal brake to form the connectors and maybe a custom center console and dash in the future.
-
I have been looking into Tamco Paint who offer a compete line of painting products. Their epoxy and primers have rust inhibitors and also have "rust encapsulator" product called MonoCoat. Here is a YouTube video of product which I found very informative. Check out some of Tammy's other videos explaining other products Tamco offers. Have not used their coatings to date but decided use them exclusively on my current build from primers to clearcoat. FYI, they usually have a 30% sale at end of November from what I gather so it maybe good chance for anyone to experiment with Tamco products like me.
-
ANOTHER Datsun Z/LS3/T56 Swap Thread
280Z-LS3 replied to Ironhead's topic in S30 Series - 240z, 260z, 280z
My feeling with Iron Head's application needs is he could have used almost any product touted as "rust encapsulating" and be fine, it's a clean build! People read "can apply direct to rust" and think no prep is involved like removing as much rust as possible before application. Sounds like PO of rossman's car just slapped POR 15 over flaky rust thinking it would penetrate to solid metal, no bueno. For those interested I have been looking into paint products and seriously considering Tamco Paint for all coating needs this time around. Relevant to this conversation they have "Direct to Rust Primer" which I think would also work well to brush into seams and welds to treat rust. -
Advice on radiator and fan for LS3 swap
280Z-LS3 replied to 280Z-LS3's topic in Gen III & IV Chevy V8Z Tech Board
Sweet setup, don't think you will have cooling issues!!! I have been busy with chassis work and expect the fan/radiator purchase and install will be in a few months off. Can you post a link to the radiator you purchased? Thanks for posting. -
ANOTHER Datsun Z/LS3/T56 Swap Thread
280Z-LS3 replied to Ironhead's topic in S30 Series - 240z, 260z, 280z
How much Rust Bullet would you say is needed for your job, 1/2 gallon? I'd like to experiment with this product and would like to purchase enough for the welded areas and exposed seam metal. The cowl area in my car has a fair amount of surface rust. My plan was to treat with phosphoric acid because there is no way to hand sand many areas. Doubt media blasting would work either since no "line of sight" to aim the blasting gun. Maybe using Rust Bullet on seams, joints and inaccessible areas in cowl is the way to go for this job also and forget about using the acid with it's neutralizing concerns. With the body on rotisserie and getting creative with application tools thinking I could get everything coated. Allow me to commiserate and empathize. At the moment I am choosing not to have the underside of shell blasted clean but may change my mind if things don't clean up as planned. At first scraping off the under coating was relatively easy because went for the low hanging fruit, flat floor pan areas and portions softened by oil and grease then onto areas where the undercoating was dried out and brittle. The wheel wells, OMG, it's like the Devil himself took a crap and just smeared it around, seems to take forever just to clean a few square inches because it's waxy and doesn't chip off. I've almost completed this horrible task and then will use mineral spirits to remove remaining residue. Actually looking forward to breaking out the MIG welder to stitch weld all the seams. Following your lead using dental picks to scrap out seam sealer from seams. I know it will not smoothly but anything must be better than scraping under coating. -
ANOTHER Datsun Z/LS3/T56 Swap Thread
280Z-LS3 replied to Ironhead's topic in S30 Series - 240z, 260z, 280z
Intrigued by this product Rust Bullet since I am now seam welding and doing other chassis stiffening welding. From the product web site I could barely read the label but did make out it is an epoxy product. A few questions: Is is a two part epoxy? Does it have a thin viscosity to flow into joints? How is it different from say Tamco's epoxy primer which does not have a 24 hour minimum temp requirement? I assume it's ability to penetrate rust claim that makes it different. I have used SPI epoxy primer which needs 70+ degrees for 24 hours to fully cure/cross link and it's a super strong coating that can be brushed on which I have not ried yet. I would think most coatings can be brushed on as long as the product can be applied before it starts to set. Per Barry, the owner of SPI, his epoxy can cure quicker at higher temps, say if the work piece was placed in the sun to heat up after coating if ambient air temp was slightly below 70. For me this temp requirement was nerve wreck because I don't have a heated work space and temps here on the central coast of CA vary greatly in 24 hrs period year round. -
Settling on two rear end options...
280Z-LS3 replied to AydinZ71's topic in S30 Series - 240z, 260z, 280z
He makes the Super 8.8 swap kits, AKA Invincible Extremes. -
Settling on two rear end options...
280Z-LS3 replied to AydinZ71's topic in S30 Series - 240z, 260z, 280z
After researching what it takes to get my 75 280Z rear end up to task to handle LS3 torque I decided to go with the 8.8 swap. I wanted one of Will's kits that was made a few years ago and was hoping to get in on second production run, even bought a 2002 Explorer diff. Well, he went off to school, sold his Z and the second run never happened. A year to two later Vlad started his Super 8.8 swap kit thread and I became hooked. I purchased his u-weld kit then the diff (in that order lol) and in the process of installing now. Very happy with quality of parts and initial fitment. What sold me on Vlad's kit: 1) First and for most it has been proven in high HP cars. 2) Affordable and easily accessible parts. For example paid $500 for a diff with Torsen locker with 3.73 gears 3) 5x4.5" wheel bolt spacing broadens wheel choice possibilities 4) uses stock rear suspension geometry/lower control arm design There are 5 lug hub kits to convert the front to 5x4.5" all priced around $500 so matching front to rear is not hard.