Wildfire490
-
Posts
24 -
Joined
-
Last visited
Recent Profile Visitors


Wildfire490's Achievements
")
Newbie (1/14)
0
Reputation
-

78 280Z LT1/T56 Project
Wildfire490 replied to Wildfire490's topic in Gen I & II Chevy V8 Tech Board
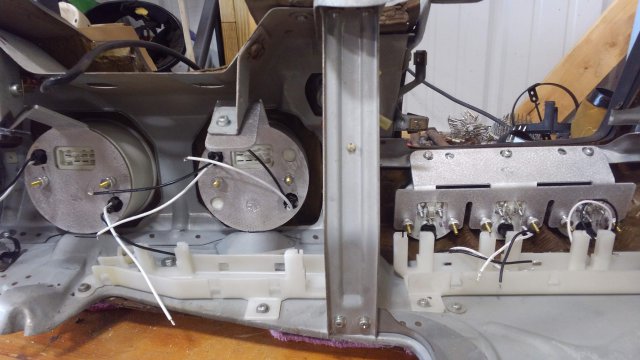
Hey everyone, finally a weekend where I could make some good progress again! It was a pretty productive weekend of wiring! That's literally all I worked on when I was working on the Datsun. I got the gauges mounted and wired up for the most part, as you can see. I'm honestly not a huge fan of the mounts I bought. I had to make holes for the gauge lights in the single mounts. On the three gauge mount I had to notch a edge to get it to fit right. Also, the three gauge mount had no angle to it so the gauges aren't angled towards the driver like they should be. If I had to do it over I wouldn't buy those mounts As far as the body harness goes, I'm getting really close to being done with it! I made a lot of progress today! The rear tail section is pretty much done! I also wired in the radio because that is crucial of course lol. I'm pretty much to the point of just buttoning stuff up on the body harness wiring. Then I can start on the fuel injection harness!
-
78 280Z LT1/T56 Project
Wildfire490 replied to Wildfire490's topic in Gen I & II Chevy V8 Tech Board
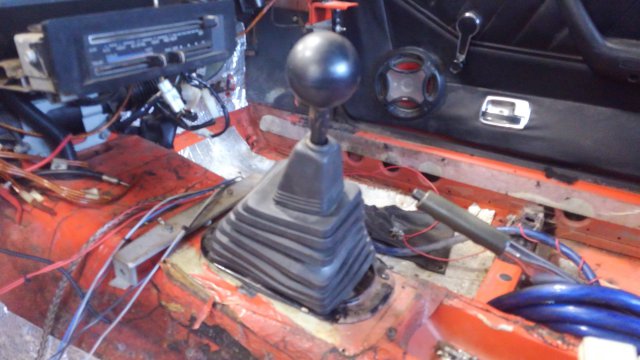
I worked on the Datsun a tiny bit today. I mainly wanted to install the shifter and see if it was going to hit or not. It doesn't! It is a perfect fit! Lines up and required no cutting! I also worked on the gauges a bit but I don't have any pictures to share of that yet. The mounts are having to be modified a tiny bit. I'm hoping that the dash and the rest of the interior can start going back into the car soon. I was super busy this weekend so I'm hoping that next weekend I can make some better progress
-
78 280Z LT1/T56 Project
Wildfire490 replied to Wildfire490's topic in Gen I & II Chevy V8 Tech Board
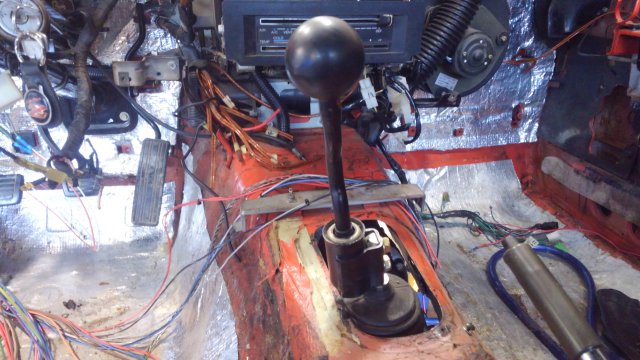
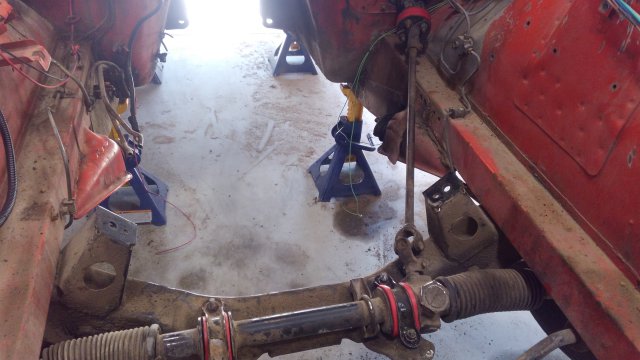
Here's a picture I grabbed today. Also, I slowly worked my way around each bolt, tightening them one at a time repeatedly until the floors were sandwiched as flat as I could get them where the crossmember bolts up. The shifter seems to line up pretty good but I haven't tested it out yet to see if it's hitting or not. I might have to trim the hole a bit bigger
-
78 280Z LT1/T56 Project
Wildfire490 replied to Wildfire490's topic in Gen I & II Chevy V8 Tech Board
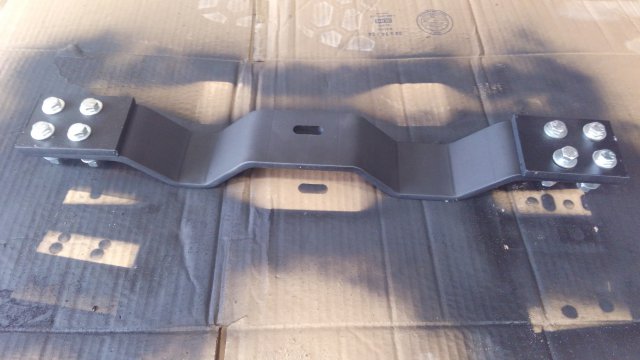
It came with the conversion kit that I purchased from JTR. You can also buy it separately. I made the plates for the top, to sandwich the floor. I also painted it myself. Other than that, that's how I received it. I actually installed the T56 last weekend but I haven't got around to posting any pictures. Maybe I'll post a update and some pictures later this weekend or next weekend. By the way, quick tip for anyone swapping in a T56. Go ahead and cut out the stock Datsun transmission mounts. The Borg-Warner T56 is not one of the transmissions that will fit in between them -
280Z build w/ LS3 and 2015 Mustang spindles/8.8
Wildfire490 replied to 280Z-LS3's topic in Gen III & IV Chevy V8Z Tech Board
https://forums.hybridz.org/topic/131462-78-280z-lt1t56-project/ I'm installing painless body and fuel injection harness' in my 280Z. I mounted the body harness fuse block on the driver side near where the stock Datsun computer was. I'm going to mount the LT1 computer and fuse block on the passenger side near where the Datsun fuse block was. I have some pictures of my progress so far in my thread. If you have any questions, feel free to ask -
78 280Z LT1/T56 Project
Wildfire490 replied to Wildfire490's topic in Gen I & II Chevy V8 Tech Board
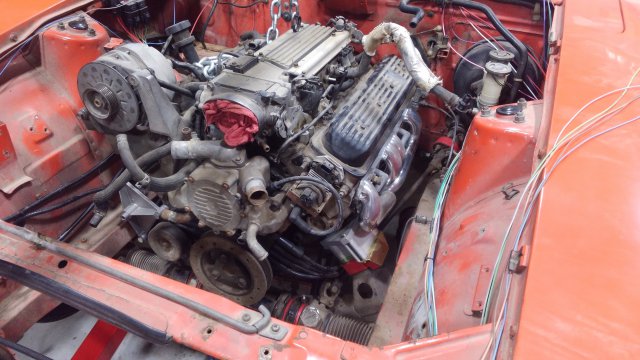
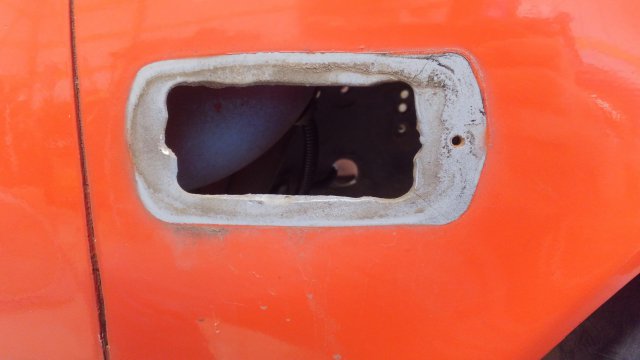
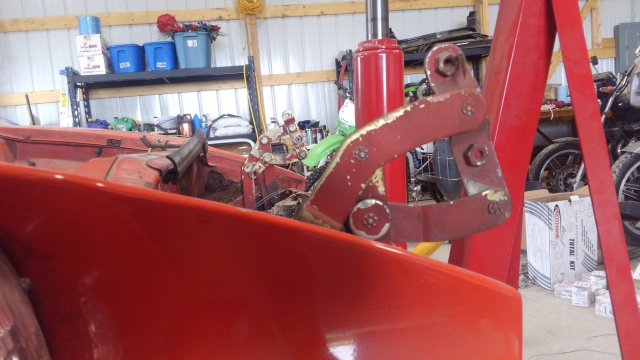
Hello everyone! So between work and family time I have still been making progress on the Datsun! It really hasn't been anything exciting lately. Just more wiring and painting my transmission crossmember. Until this weekend! I started off the weekend by cleaning the shop and moving the car to a new spot. Then I got it up on jack stands and went to work! My goal for this weekend was to finish up the stuff I needed to do before the engine went in and then get the drive train in. So last week my total bushing kit had finally came in after waiting forever! So I installed the steering rack bushings and the steering coupler bushing. The driver side steering rack bushing was pretty stubborn but I got it in. I'm saving the rest of the bushings for a later date. Then I got The engine off the engine stand and on to the cherry picker. It was at this time that I discovered the extremely disappointing news that the flywheel I had ordered was wrong... The one I have is a 2.42" flywheel crank flange register. I need more like a 2" one. So I need to call Centerforce and see if they have what a I need. I don't know why this one is listed as fitting a LT1? Unless they have different flywheel crank flange registers on different LT1's? Either way, really disappointing since this means I couldn't put the transmission in and I have to return the flywheel plus wait for a new one. Big pain in the butt. So instead of the putting the LT1 on the ground or back on the engine stand, I decided I might as well just drop it into the engine bay. So I did! It's a pretty tight fit but so far the only thing that hit was my AC Delete Pulley. It's a 5.25" pulley. So I pulled the pulley and then later on I ended up pulling the whole accessory bracket. I'm hoping to get a smaller alternator and mount just the alternator only using a heim joint. I forgot to grab a picture without the accessory bracket. Other than that, everything fits but it's pretty tight. Once the transmission is on it should tilt backwards a bit more providing more clearance in the places I need it like the transmission tunnel and steering rack. Right now the engine is being supported with the cherry picker and a floor jack for extra security. Yesterday and today I just worked on wiring for the most part. I finished up the headlight section wiring other than a few grounds and the wiring loom. I got my new to me side marker so now I have matching side markers. Also I found what I believe is body filler behind the side marker? Also more evidence that it was painted. Plus I later found the red hood hinge, I don't know how I never noticed that. I also looked at the paint code on the radiator support. It says 110 red. I'm assuming someone had it painted 918 orange which I discovered was a 240Z color. I've got most of the interior wiring done, mainly just the gauges and the rear section left. I ordered some nice autometer gauge mounts and will be installing them next weekend along with hopefully the transmission if everything works out with getting a new flywheel. Anyhow, I think that about covers everything. It was a busy weekend and I'm hoping next weekend will be too! I've been pushing and trying to make good progress but I also realize there is still quite a bit to do!!
-
78 280Z LT1/T56 Project
Wildfire490 replied to Wildfire490's topic in Gen I & II Chevy V8 Tech Board
Hey Paul, thanks for the pictures! I'm sure they'll come in handy! I've got my AC delete pulley modified and mounted. As far as I know, nobody makes the power steering delete pulleys anymore so my plan was to have one of my friends who is good at machining build me one! Nothing has happened yet though. It's interesting that you converted your LT1 to carburetor. I'm still waiting on bushings to come in for the Datsun but I will be installing the LT1 as soon as that happens! I've progressed some more on the wiring but for the most part I've been too busy with other stuff to work on the Datsun. Hopefully I can get back to it this weekend -
Advice on radiator and fan for LS3 swap
Wildfire490 replied to 280Z-LS3's topic in Gen III & IV Chevy V8Z Tech Board
I hope that my fans from the Z28 are strong enough to pull air through the 2 row Champion radiator!! -
Advice on radiator and fan for LS3 swap
Wildfire490 replied to 280Z-LS3's topic in Gen III & IV Chevy V8Z Tech Board
Actually, pretty much all modern cars use single core radiators. In most case a single core radiator is going to be better if you are using a electric fan. With a single core radiator a electric fan can more easily draw air through the radiator. Single core radiator also have wider tubes, usually 1"-1.25". The wider tubes provide more surface area which results in better heat transfer and better cooling. People like to fall into the "Bigger is better" mentality and go with bigger radiators. Not only do they weigh more but for every row you add on a radiator the tubes get narrower. Also, one the cooling air has gone past the first row in a radiator, it doesn't draw as much heat from the additional rows. Let's look at what Champion Radiators offers for my 78 280Z... they have a 2 row core and a 3 row core radiator. No single row unfortunately. Anyway, on the 2 row core they claim "cools up to 400hp!". On the 3 row core they say "cools up to 650hp!!". If you look though, the 2 row cores have .75" thick tubes vs the .63" tubes in the 3 row. Now remember, both of the tube widths are much smaller than what would be in a single core radiator. Anyhow though, looking at the two radiators offered by Champion, I would think the 2 row would cool better than the 3 row using a electric fan. This all information based on using a electric fan with a aluminum radiator. Hope that helps As far as radiators go, if the dimensions are correct that C7 radiator should fit in your car. The 280Z's have a bit more room but I'm not sure what Z you've got. I would definitely go with the complete C7 radiator and fan setup if I were you. Plus that way you can plug your fans right into your fuel injection harness and be good to go! I really wanted to use my single core radiator out of my 94 Z28 with my LT1 swap but it is way too wide and tall to fit. So I ended up going with a Champion 2 Row because everybody seems to be running Champion and they bolt right in. Hopefully it will work out well. I'm going to bolt my Z28 fans and fan shroud onto it since they will fit -
I'm installing a painless universal body harness with a painless fuel injection harness into my car if you want to follow my thread. I also have a link posted there with how other people have wired up their cars
-
Relentless - 1977 280z LS (5.3l L59) swap
Wildfire490 replied to Box5's topic in Gen III & IV Chevy V8Z Tech Board
So are you using two regulators or just one? -
Relentless - 1977 280z LS (5.3l L59) swap
Wildfire490 replied to Box5's topic in Gen III & IV Chevy V8Z Tech Board
Thanks for the diagram! I would personally run the filter on the pressure side though. I've heard of pumps burning up because of a filter on the inlet side I actually have a 280Z but I'll have to check it out! By the way, it's been a while since I've owned a LS1, but does it not have the fuel pressure regulator on the fuel rail? -
World Class T5 from 1992 camaro
Wildfire490 replied to shakav's topic in Gen I & II Chevy V8 Tech Board
Personally I would just hunt down a T56 from a LT1 car. The LT1 T56 is fairly cheap and I doubt that T5 will last too long behind a LT1 -
I was literally just going to suggest this. Before I started rewiring my car I had some stuff wired this way. You should probably be able to find open spots on fuse block and if not, just wire into something that isn't super essential if you blow a fuse
-
Wildfire490 changed their profile photo
-
Relentless - 1977 280z LS (5.3l L59) swap
Wildfire490 replied to Box5's topic in Gen III & IV Chevy V8Z Tech Board
Hey Box5, I just discovered your post and I'm really impressed with the work you did and your Z looks like it turned out great! I was wondering if you could explain your fuel setup a bit more to me. Maybe even with a diagram? Is your LS getting enough fuel with the 7/16" port on your tank? I'm curious because I'm about to drop a LT1 into my 280Z and I'm going to need a bigger supply line. From the factory LT1 Camaro's had a 3/8" supply line and a 5/16" return line, so I only need to replace the supply line.