A to Z
-
Posts
1071 -
Joined
-
Last visited
-
Days Won
32
Content Type
Profiles
Forums
Blogs
Events
Gallery
Downloads
Store
Everything posted by A to Z
-
I imagine you will be saying Sayonara to the body for at least a year. Quicker than that you must have an "in" with the body and paint hop. Here's to hoping you get it back as soon as possible.
-
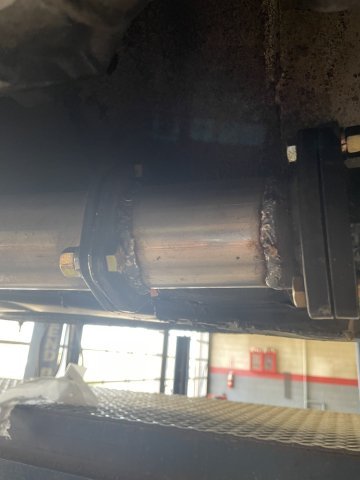
On mine, I also used the Z car Depot ones, I had a mobile welder install them.....basically he did what he could with them.....it seems the bend radius is not tight enough and so when welding you have to weld up that "gap? or relief cut, being thick gauge metal, it wouldn't be fun to beat it down flush.
-

My Z car log....small jobs done and fun things
A to Z replied to A to Z's topic in S30 Series - 240z, 260z, 280z
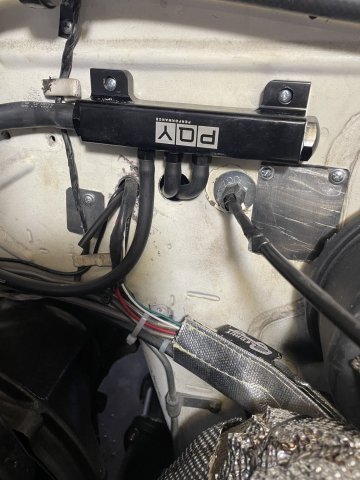
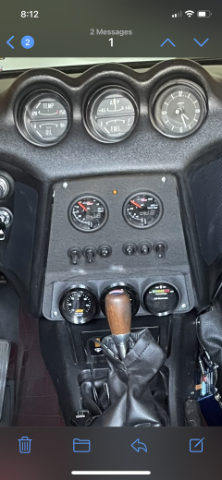
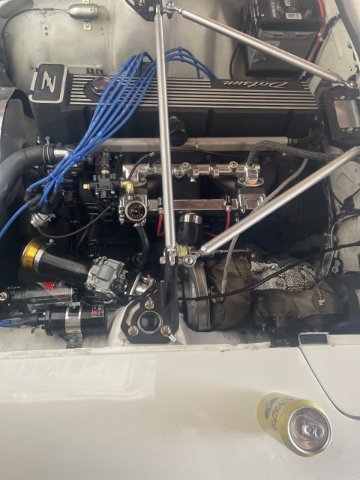
05-02-2025. I got my shift knob with button. I got it from Speed Dawg Shift Knobs. Top notch shop. Shipped it very fast, well packaged and I even got a military discount. If you need a shift knob check this guy out! I got it installed, and all wired in to my Snow Performance Stage 1 Water/Methanol injection kit. I also got my Vacuum Block from Amazon, and got it all hooked up, so the vacuum needed for my Boost Gauge and J&S Safeguard is more professional. I also added a pic where you can see my passenger well is all cleaned up. Good day!
-
love the custom work. I installed an AutoPower race 4 point rollbar, and later had to cut out the straight across bar down low. I just HAD to recline the seat!! On the diagonal bar I put a piece of rollbar foam on to rest my head. I made it work.
-
Yet another LS 260z swap :)
A to Z replied to christianmoller's topic in Gen III & IV Chevy V8Z Tech Board
it should, however some guys think out of the box and do their own work. -
04-26-2025. Well, I was able to fix a few little things on the Z today, getting it more and more cleaned up. I ended up putting a stainless clamp around the turbo to manifold hose, as it was getting sucked in pretty bad from the pressures, this keeps it from doing that to a great extent. I let it idle and revved it a bit and I could see a real improvement. I developed a front tire rub again, which is weird as it was entirely done and good a long while ago, but it is what it is, so I was able to get that done, changed out the timing belt for a much better one, and ran the wiring from the shifter, through the boot and under the console down to the point where the connections are for the Water-Methanol injection.. It will be on a push button shift knob I ordered. The boost switch just wasn't working like I wanted. I want more control over it. I drilled a small hole at the top of my dash insert and installed a small amber light which when wired in, will let me know when the water/meth is on. I also took 2 video's, once of the finished engine idling, and a walk around. So 2 pics and 2 videos. Cheers! Videos (2) click below (14) Facebook
-
Turbo Guru's, T3 question(s). Please advise
A to Z replied to A to Z's topic in Turbo / Supercharger
oh yeah, perfect size for teh engine. Thanks a lot for your help. -
yeah, I'm happy with it. Thanks for all of your help.
-
No problem, have a blessed night Sir.
-
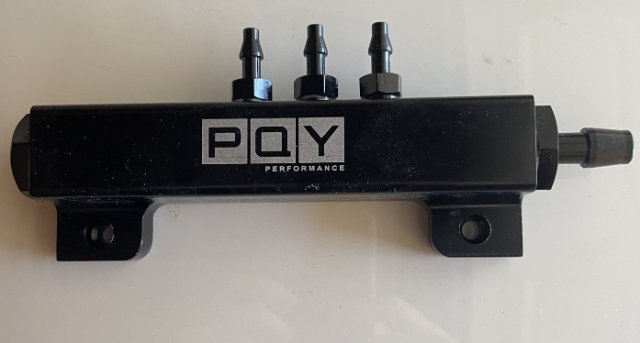
very nice. You don't happen to make a vacuum line distribution block do you? I have 3 items needing vacuum supply, and they don't like T's in the line.
-
1980 280ZX Brake lights will NOT turn off - battery dies
A to Z replied to PhilbertZ's topic in S130 Series - 280ZX
do you have a pic of your Ace Hardware stopper? Thanks. -
The ads on the site are loaded by the site admin, and are ads that have been paid for. In your situation you are going to have to block the ads on your end. I am a moderator, but I can't access or change that. Sorry Sir.
-
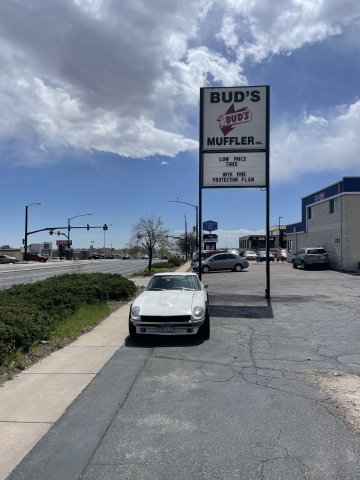
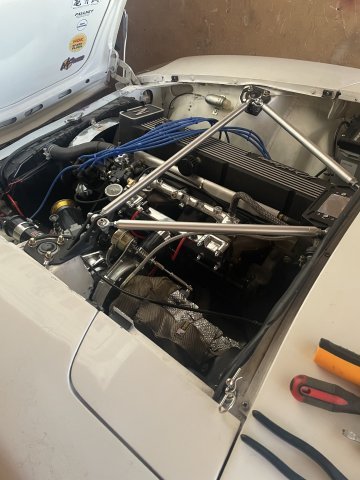
Just an addendum. Now DYNO is next. "4-22-2025. Things came into the right alignment today, and I was able to get the exhaust tied together at Bud's Muffler here in Colorado Springs, and get a final tune on the Z car. The exhaust threw all the tuning I had done before out the window. My pilot is now at 50, my needle is on the notch above the bottom groove, so more fuel, and 2 turns out on the air screw. washers are no longer under the choke, running just on the intended circuits. She is VERY quiet now, and the added backpressure seems to have made a difference, she acts better now. here are some pics and a walk around video of it all done. I would like to get a DYNO sometime. Now it's back to washing and cleaning and waxing, etc. pics follow. Cheers and God bless." Click below for video: (9) Facebook
-
Turbo Guru's, T3 question(s). Please advise
A to Z replied to A to Z's topic in Turbo / Supercharger
UPDATE: Spool starts at 2600 RPM AND FULL SPOOL BY 2900-3000 RPM. Great turbo for a street Z car S30 IMHO. -
ALL DONE, PROJECT LENGTH, 5 MONTHS, 20 DAYS. I WILL POST DYNO RESULTS HERE, OTHERWISE, THAT'S IT!~
-
UPDATE: she starts spooling around 2600 and fully spooled by 2900-3000 RPM. I will have to wait to see the dyno graph, but it seems to be pulling to 6K RPM no problem.
-
3 layers of insulation brake master hovers around 200 degrees F. No issues. Couple years when I bleed the system I will go to the Motul 600 degree F brake fluid.
-
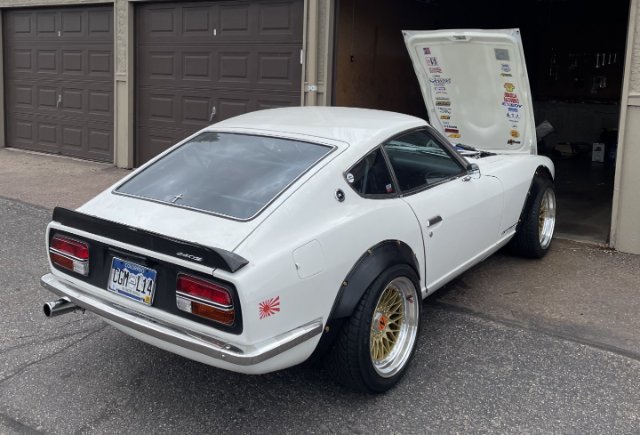
04-21-2025 TURBO PROJECT UPDATE. Well she is done. A 5 month project and it fought me all the way, but she is drivable and just needs to go down and have the exhaust tied in.....but she is running and driving. The HSR carb, being a Motorcycle Carb has a very short throttle when used in a car. I have a 1 inch to maybe just short of 2 inches of travel, but I think it's more like 1.5 inches of travel. So, you have to ease into the power, if you just mash the throttle, it can overwhelm the setup. Granted, this is a hilly billy built, shade tree mechanic, DIY turbo setup. I started with a very dusty box of worn out crown turbo parts that I had to clean up and then order parts that would bolt together, and nothing ever went together like it was supposed to in my mind. I went with a Chinese T04/T3 Hybrid Turbo that I then sent off to the "G POP SHOP" to have them put carbon seals in it (mandatory on draw thru turbos) and go through it and make sure everything was good. I then came up with using the motorcycle carb after seeing other Z car builds other builds, even though they weren't turbocharged, but then finding out that Turbo Corvair guys were using them. My 2.9 stroker with a ported head needed a lot of fuel, even at my 6000 ft. altitude! Endless jet and needles changes, and then finally settling on a 240 main jet, a 45 pilot jet, a Y8 needle jet, a stock needle with the clip on the 2nd to last clip, 1 turn out of the air screw and still having a bit of fussiness, so I then thought out of the box....the choke circuit is a separate circuit. When idling, I pulled onthe choke and the engine got REAL happy! to I looked at the distance of the shaft when I pulled the choke knob. I then took 3 washers and ground them open and stuck them on the choke shaftand then pushed the knob down. Now I had a system where by I could, through trial and error remove a washer or "shim" one at a time to find the sweet spot! 1 washer seems to be it, although still a tad bit extra fuel at the top under wide open throttle. I can udjust some of the fuel out by adjsuting the accelerator pump to not pump during htat situation, which will lean it up and make it run even better, jsut more trial and error. I will fien tune it a bit and then take it and get it put on a syno jsut to see for fun what I have. It would be nice to think my homemade deal would give me 40 horsepower, but we won't know until DYNO day. I have added a few pics and 5 video's of driving the car. keep in mind, the exhaust is loud but you can really hear the turbo. Thanks for all the positive comments over the last 5 months.....and the few that told me "you're going to blow up the engine" ......."it won't work" .........."you're just going to destroy it"....."you are stupid, everyone knows draw through systems and carbs do not work." (even though Corvair guys and air cooled VW guys do it all the time, and were a huge source for info)...... .well, it worked so I guess you aren't as smart as you have led yourself to believe. Cheers! Pics and vid's (5) follow click below for video's. should be 5 total, one after another. If it doesn't work, PLEASE let me know. VIDEO link: (20+) Facebook
-
04-21-20205 UPDATE: I went ahead and dropped the needle, went down to a 45 pilot and increased the main jet to 230 from a 210. quick drive, starts and idles easy at 1.5 turns out on the pilot screw now, needle movement was too much, as soon as the throttle rolls into the needle, A/F ratio goes to 16/17 to 1 I managed to get through that and on to the main jet, instead of fall flat, now just pop and sputter....LEAN..... SO......I will richen the needle 1 slot, go from 230 main to 240 and see what happens. I lost the plastic washer under the clip for the needle and installed anyway, seems to have the effect of leaning it out 1 slot, I ordered some plastic washers for it, if they don't come in before I work on it again, will adjust needle and main and see what happens. I can't believe it finally idles on it's own. Once this is better then I can take it down and get the exhaust fixed. 99% done.
-
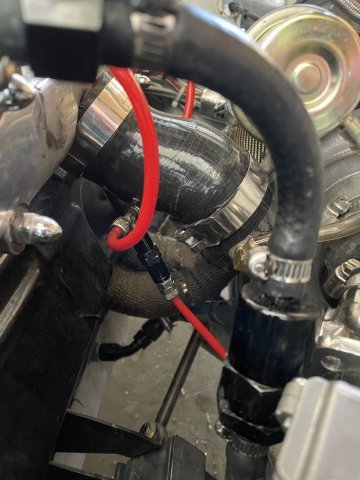
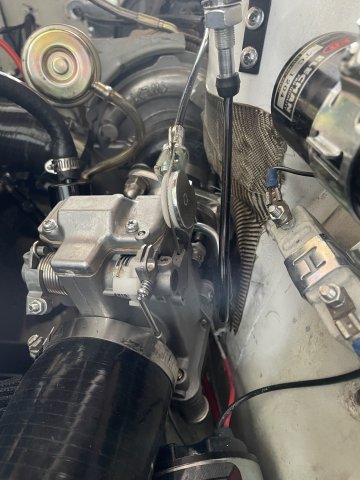
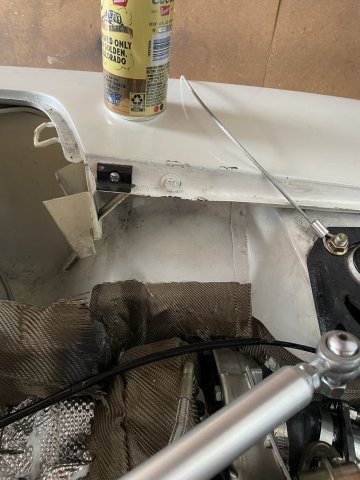
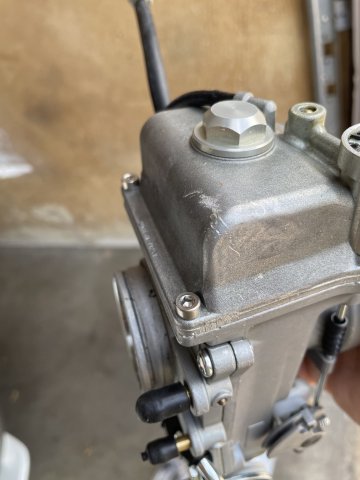
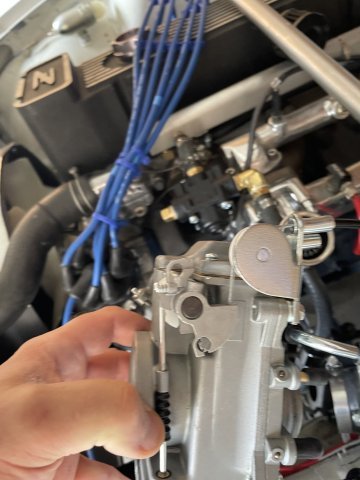
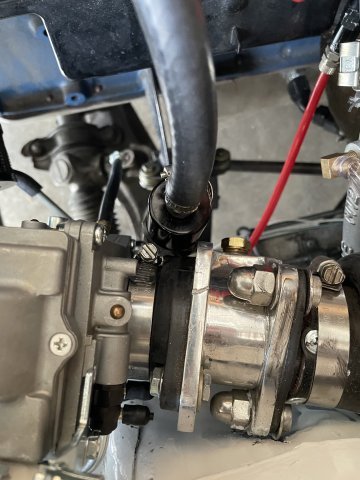
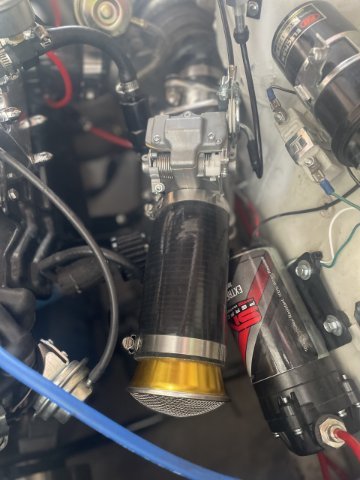
04-20-2025 TURBO PROJECT UPDATE: I replaced the main turbo hose as the original was leaking and causing me to lose vacuum. I cut it off and then held up the replacement hose I got online, made by HPS, it has an offset bend it in, which from the pics, you can see i needed. it is of a much more sturdy design, and I had to take measurements and then wrap it and cut it with a cutting wheel in my Dremel. it is VERY difficult to get on there. you have to remove the manifold and then once together, you have to use a small pipe as a lever to get it started, but then it pops on, saving HOURS of work to put it on without using this trick. After this, I started cutting and installing a piece of carbon fiber I got off of eBay. It is sticky on one side, so it was simply the task to cut and fit, then peel off the back and install. This is part of the final beautification to finish the project off. Then it was time for a drive. I have a weird situation with a hanging throttle, and it allowed me to get it idling and I was able to fine tune the air screw on the carb to make it better, but I think it is too rich. but I am not sure, as it easily dies if you blip the throttle and let it come down on it's own to idle.....50/50 chance it idles or dies, so maybe it needs MORE fuel? this is part of the idle or pilot circuit from idle to 1/4 throttle, the transition to the needle "feels fat".....I think it is just too rich. I had moved the needle up to get more fuel, and now I think i need to lean it out. once I hit 3/4 throttle and go on to the main jet, it reacts like a power band on a 2 stroke engine, night and day performance, it squats the rear and rips up to about 4500 then falls flat, so I guess it doesn't have enough fuel? I will also have to go through my checklist on my ignition knock sensor. A major issue is coming up to a stop, and the idle just hands up at a high RPM until I blip the the throttle and then it falls. Any ideas? Thanks. Pics follow:
-
'77 280Z Track Car Father & Son Project
A to Z replied to RCVTR's topic in S30 Series - 240z, 260z, 280z
WOW, you have really gotten after it! Massive amount of work done. I bet you're tired. very pretty. GOOD JOB! -
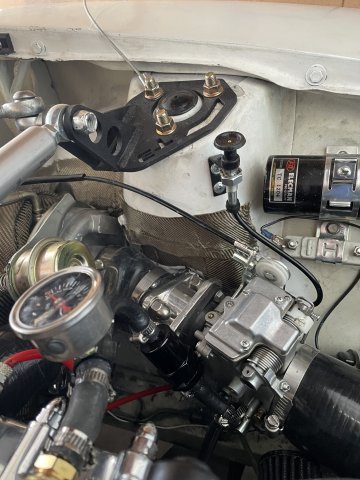
04-13-2025 TURBO PROJECT UPDATE: so now I am in the world of carb, carb, carb. I must have taken the carb off, changed jets and re-installed about 10 times today, I didn't keep count, but at any rate it was a lot! I got tan idea from another guy to use "Chat GPT" and when you give it all your information, you would be amazed at how well it can give you an idea on tuning everything in! I did manage to drive the Z to the nearby gas station to get some gas....and although it wouldn't idle without giving it gas, and it was rich, once I got into the mid range circuit of the carb it started running better, when I hit wide open throttle the sound, everything changed and it roared like a wild beast! seat of the pants it felt like 300 h.p. or close to it. I......Couldn't tell the boost, my AEM gauge is wonky....., it had to have been over 10 psi it felt like, FWIW. Then I heard a loud "POP" and the engine died. I pulled over and checked everything and everything seemed ok. I started it back up and drove it back home, and it didn't pull like that first time, but wasn't sure why. Later I was running it and watching it, and I could see a burning charge coming out of my main turbo coupler! So, the POP was the coupling giving out. No wonder I can't get it to idle. BUT, CHAT GPT gave me a lot of experience with it, and it is now sitting with a 47.5 pilot jet in it. I just ordered the coupling, so God willing we will give it a go at a later date! Here is a crummy pic, but you can kind of see how my customer center dash piece turned out.~Joe
-
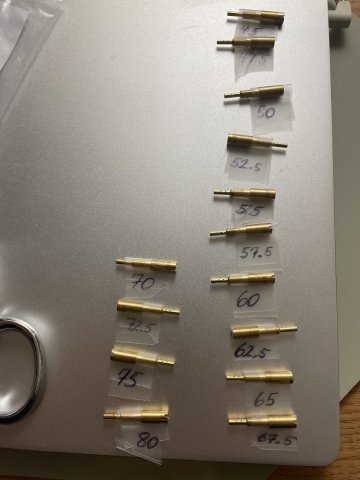
My BIG pilot jets for the HSR carb arrived today.....at some point the beast will have enough fuel to idle! cheap at amazon! No name China made, but they work.
-
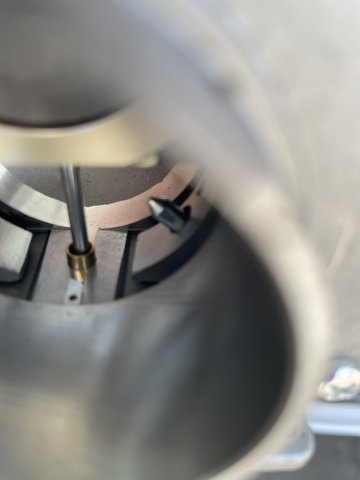
for curiosity, on an HSR carb, the pilot jet for idle sprays into the bore right behind the needle. here is a pic. When I looked online I couldn't find a pic anywhere.
-
04-09-2025 TURBO UPGRADE UPDATE: So, I started the day by pulling carb off and changed the pilot jet out to 37.5 and then dropped the needle back to the stock range and put everything together. she still won't run! so i put the largest pilot jet i have in the carb a 42.5 with the air screw all the way in she runs great! but won't idle. There is still not enough fuel to idle, so I have to pump it, and so i got it running, and then I leaned out the door and sprayed starter fluid on places where there could be a vacuum leak and I found 3 places. Then I decided to get some permatek black gasket maker and run a bead on those spots then wipe it clean. once it is dry enough i will try again. Right now, with the 42.5 pilot jet AND the choke pulled she ALMOST idles! it's a big engine, so she wants fuel! Right now she will start without starting fluid using the 70-accelerator nozzle. so, iII went ahead and ordered some pilot jets that are even richer which will be here in a couple days off of Amazon. For the first time in 5 months the car left the garage and i was able to sweep it out and put the Z car back in the garage with the tail facing out. Laugh if you want but after 5 months of mental hell that is a huge deal! i almost have her ready to go! can you believe she likes a 42.5 pilot AND choke?!? but still wants more to idle on her own. 2.9 litre, she wants fuel! After letting hte gasket maker harden up for an hour, she still wants more fuel, so when the Idle jets come in we will continue to feed the beast until she will idle on her own! SO cool to actually get her out even if just in the parking lot.....progess is progress. FWIW a neighbor commented on the car while it was out. Sent from my iPhone