-
Posts
48 -
Joined
-
Last visited
-
Days Won
1
Content Type
Profiles
Forums
Blogs
Events
Gallery
Downloads
Store
Everything posted by JavelinZ
-
Looks like your adapter tubes have 2" +/- of thread in the tube so that should probably be you minimum of engagement in the tube. Considering you said this is for a 280 what concerns me the most is your rear strut housings. The 280 had longer strut tubes in the rear because the rear strut towers are different (taller) than on a 240. I found that in order to get the front and rear of a 280 level with coilovers the rear adapter tubes have to be approx. 3" taller than the front adapter tubes in order to achieve level ride height all the way around. Only way you could achieve that with your adapter tubes would have been to leave a bit more than 3" of the stock tube on the rear housings and weld the adapters on 3" above the casting. As it sits now you are probably going to be hella dumped in the rear. I know this from another car I helped put S13 coilovers using the stock top hats.
-

Twin cam head for the L6 from Derek at Datsunworks
JavelinZ replied to Derek's topic in Nissan L6 Forum
Made my day. -

Twin cam head for the L6 from Derek at Datsunworks
JavelinZ replied to Derek's topic in Nissan L6 Forum
Derek, that sounds backwards to me. Solid Mechanics was a couple of years ago for me, and I am aware there are other factors that can go into figuring the proper stretch for a bolted application(especially in something subjected to heat cycles like an engine). If you have two bolts that are the same in every way except, they have different lengths. The longer bolt will have to stretch/ elongate more than the shorter bolt to achieve the same internal stress as the shorter bolt at a given stress. The total end stretch of a shorter bolt should be less than the longer bolt when it snaps. I guess what I am thinking is, if the stock block and head were fine at 60lb-ft why wouldn't this new head be okay? Torquing the shorter bolt to a higher value seems off to me. Did ARP recommend that torque value or is that just what the kit said? Also, even though the cylinder head thickness has changed (thinner) why would the factory 60lb-ft not be adequate for holding this new head? The iron heads on my AMC with 1/2" head bolts get torqued somewhere between 85-100lb-ft as I recall. That sounds a bit much for an M10? It is pretty common practice in the AMC community to machine early blocks with 7/16" head bolts for 1/2" when updating to later dog leg heads that used 1/2" bolts. Maybe larger M12 head studs would be a good idea if this head needs more clamping force. Granted there are high horsepower L motors out there already and I haven't heard of people tapping their blocks for M12 studs for more clamping load to get there. I'll stop here, just thought I would spill my thoughts out for your consideration. Maybe someone else with more experience than I, can offer some input. -
You can get that color in the states. My friend painted a customer car that color. He gave Sherwin-Williams the paint code and they mixed the wine red metallic. You need to just tell whoever is painting your car what color you want and let them handle it or go to the paint supplier and have them pull it up. The internet isn't that great a resource most of the time. You may have to try a couple different paint places. I've seen on numerous occasions that one paint mfg doesn't have a color. Call the next guy on the list and they will have a mix code for what you are looking for.
-

Techno Toy Tuning - GTX2 Control arm and T/C Rods
JavelinZ replied to ktm's topic in Brakes, Wheels, Suspension and Chassis
Nevermind the fact they use a fully threaded bolt. -
Venolia is a good piston quite a few AMC guys were putting those in their builds back when I was putting my car together. Everything was made to order so brand or size didn't matter. You'd have to mic the piston to get the specs, since Venolia makes them per the customers specification.
-

Twin cam head for the L6 from Derek at Datsunworks
JavelinZ replied to Derek's topic in Nissan L6 Forum
Awesome Derek, it's exciting to see this come together. -

Need advice on cutting stainless hard line
JavelinZ replied to RebekahsZ's topic in Fabrication / Welding
I've worked with stainless and aluminum tube, both flaring and bending. I'll pick stainless over aluminum every time. Swagelok can also be a good resource for what you are doing. they might have some good info on their site. They have a cool "compression style" fitting system for their plumbing. http://www.gen-aircraft-hardware.com/images/pdf/GAHco_Flaring_Stainless_Tubing.pdf Here is what I read when I was learning, and I honestly feel it is the best method for stainless tubing prep and flaring. If you're doing compression fittings the flare stuff won't concern you but the prep is the same. I personally use a 90-degree countersink to remove the burr from the tube ID. The countersink is cleaner and faster to use than the goofy file they show in the article. -

Sakura Garage / Stance Coilover Install
JavelinZ replied to JavelinZ's topic in Brakes, Wheels, Suspension and Chassis
Well, I had to work fast. I wouldn't choose to do it like that again if I could. I was hurting after it was all said and done. Yeah they already have some rust on them, nothing a wire wheel and DA can't take care of though. They're getting painted in a week or two. Yeah, I already know about the bottoming out and scraping, it will scrape on speed bumps if I'm a bit too eager in some parking lots. It has plenty of bump travel. The ride height adjustment is independent of the damper stroke. That's the one compromise that always kept me from doing the sectioning thing. I didn't want to lose travel because the car was lower. I already have a camber/caster gauge, looking at getting a toe gauge and maybe some turn plates. I'm not into the slammed thing, makes the car pretty worthless.- 10 replies
-
- inverted damper
- camber plate
-
(and 1 more)
Tagged with:
-

Sakura Garage / Stance Coilover Install
JavelinZ replied to JavelinZ's topic in Brakes, Wheels, Suspension and Chassis
- 10 replies
-
- inverted damper
- camber plate
-
(and 1 more)
Tagged with:
-
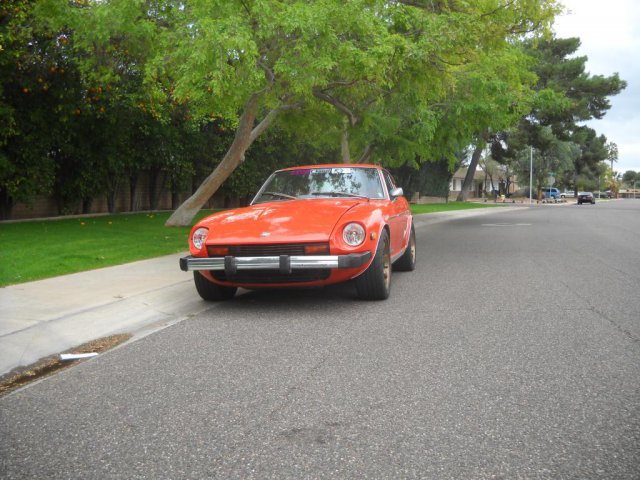
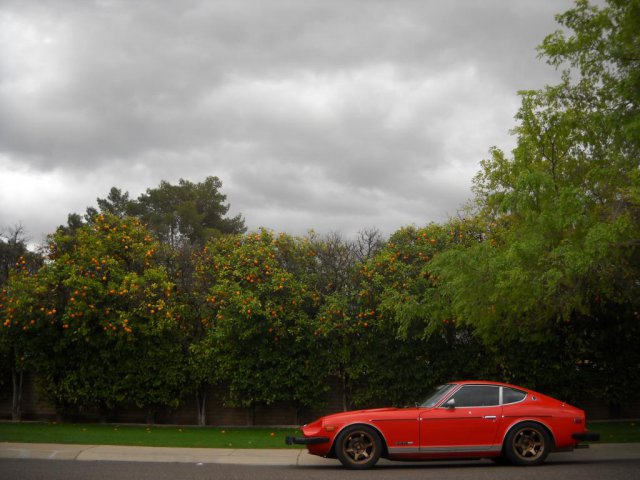
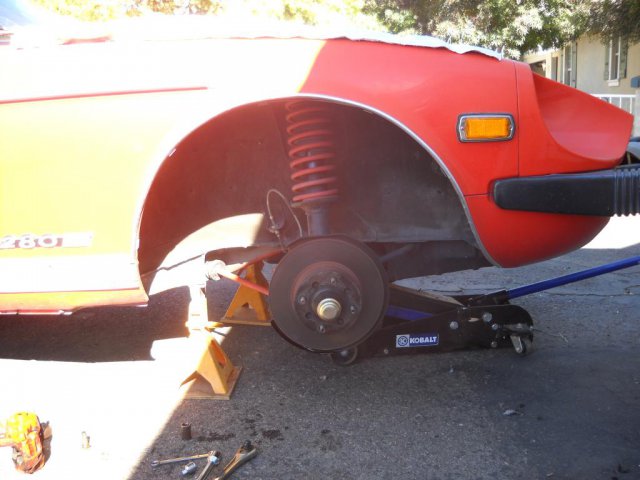
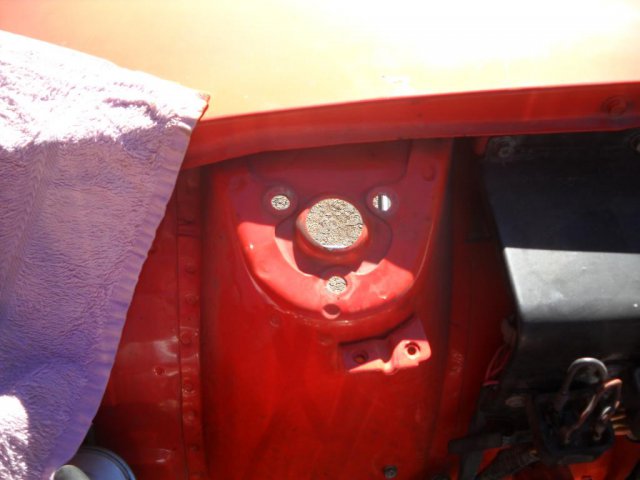
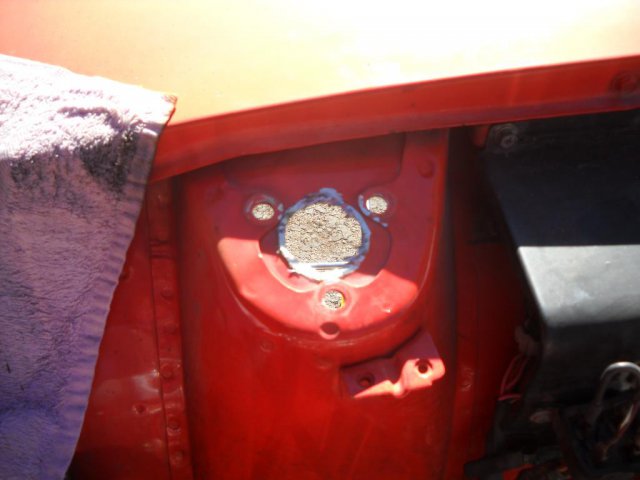
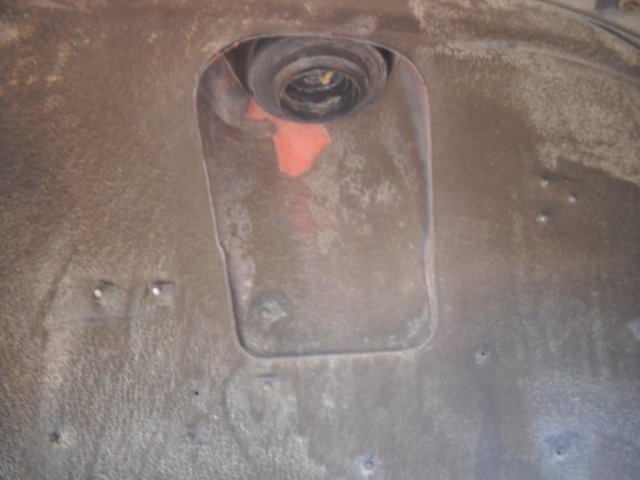
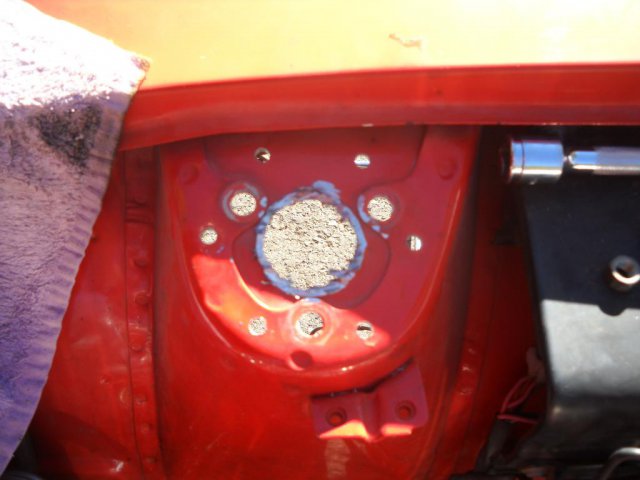
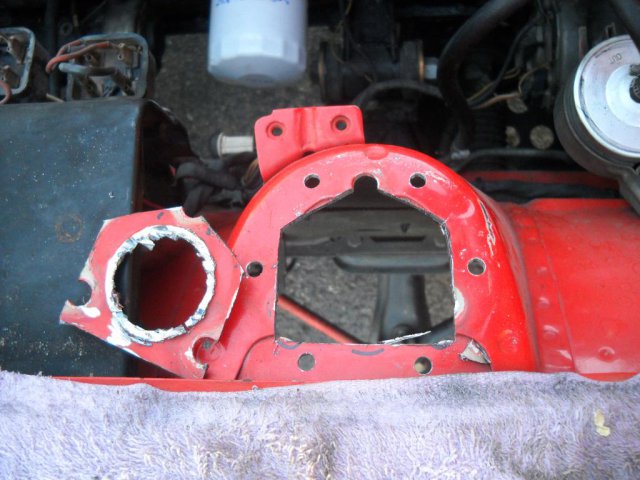
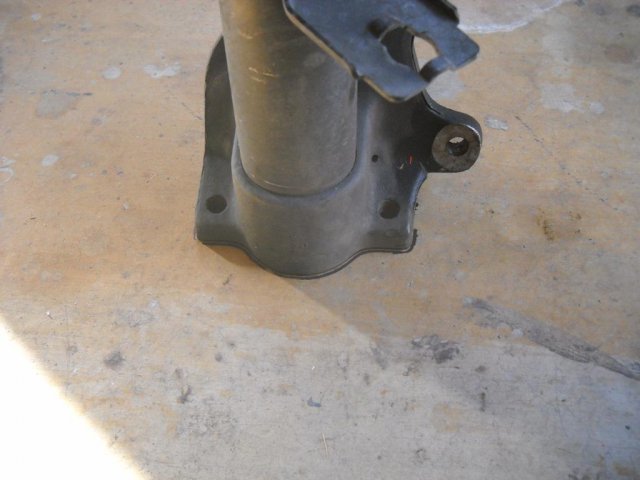
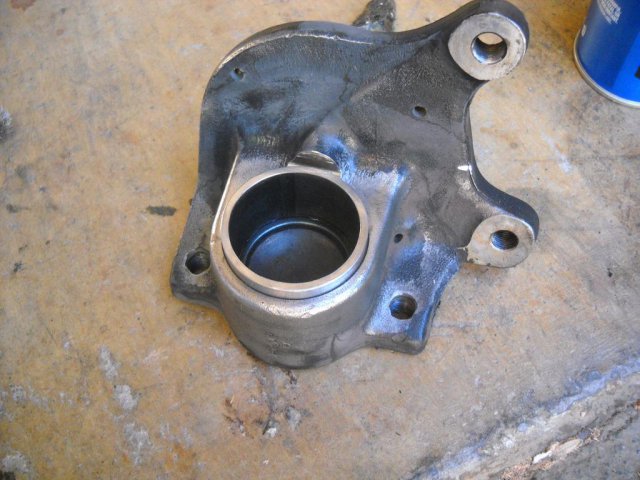
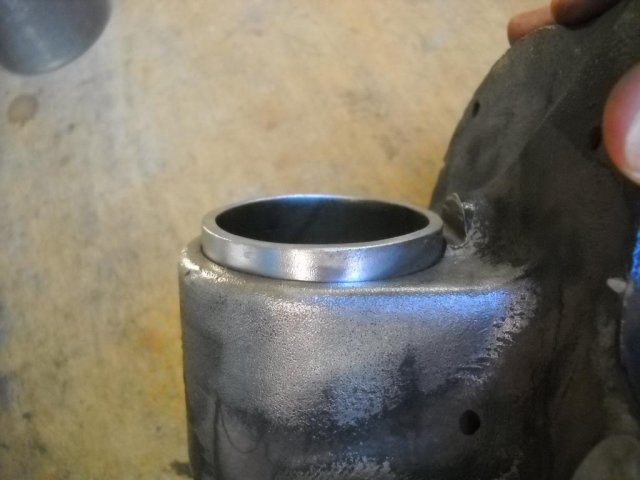
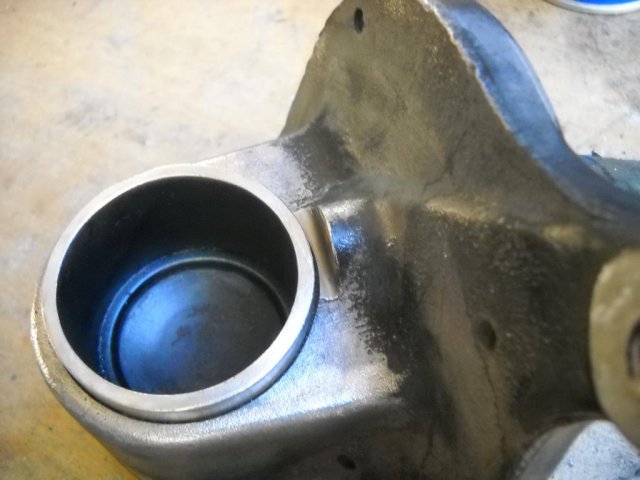
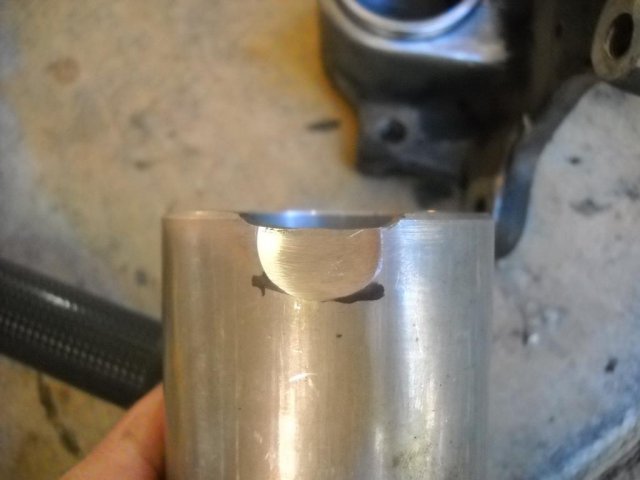
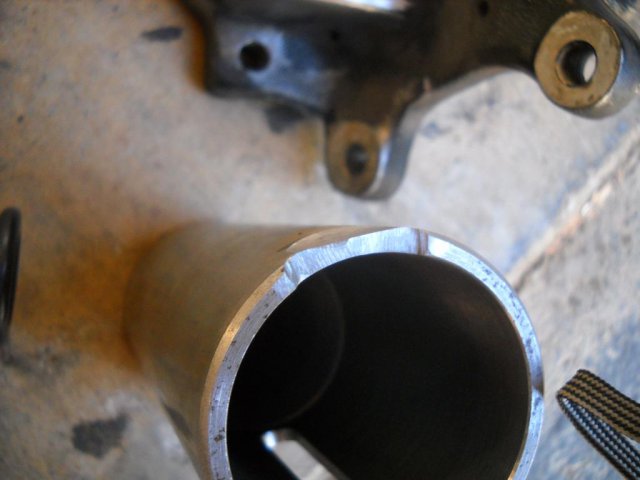
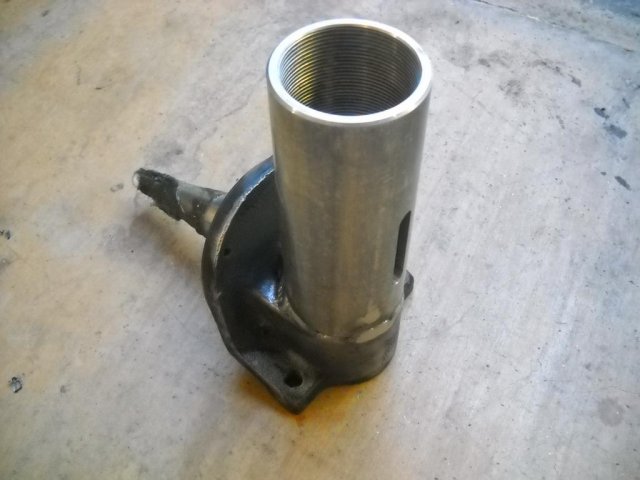
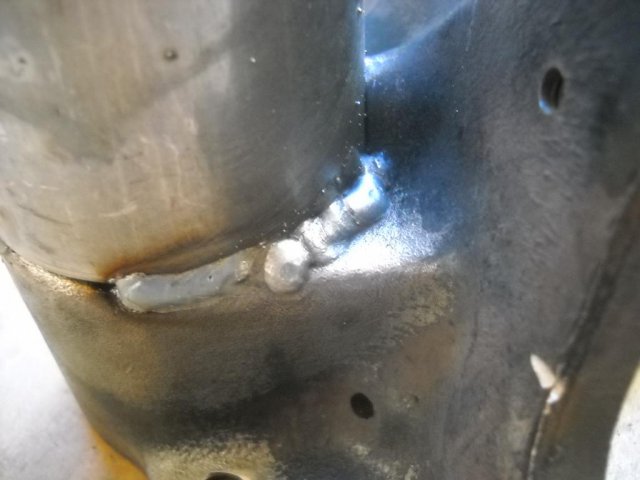
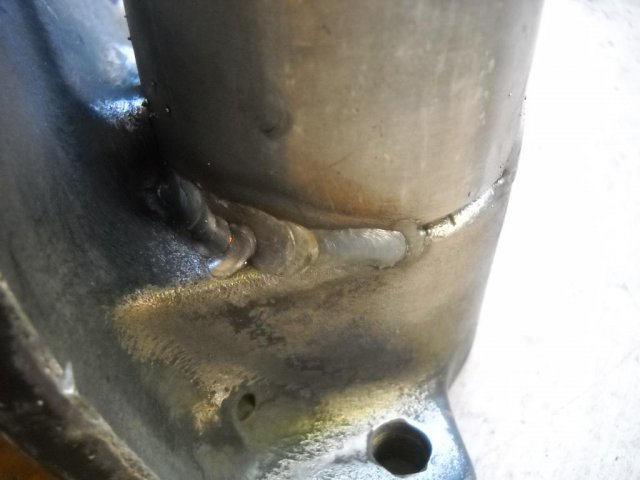
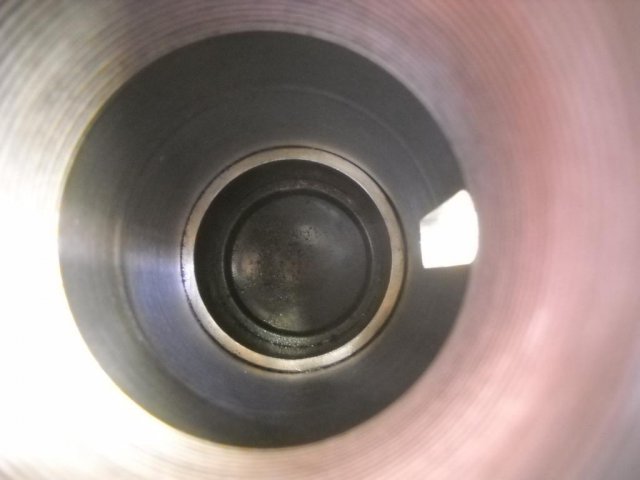
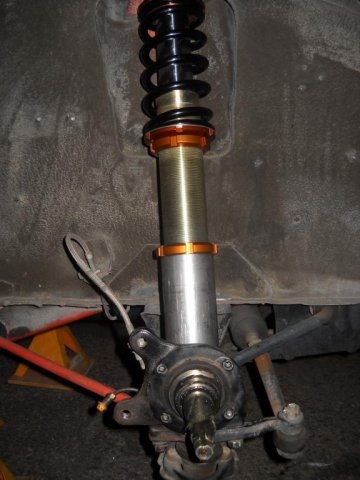
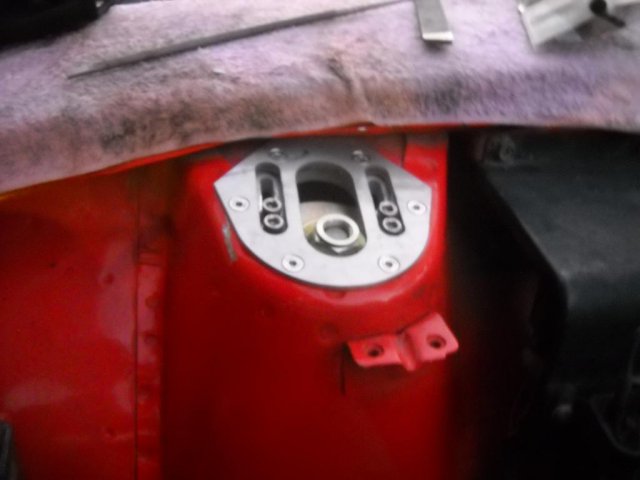
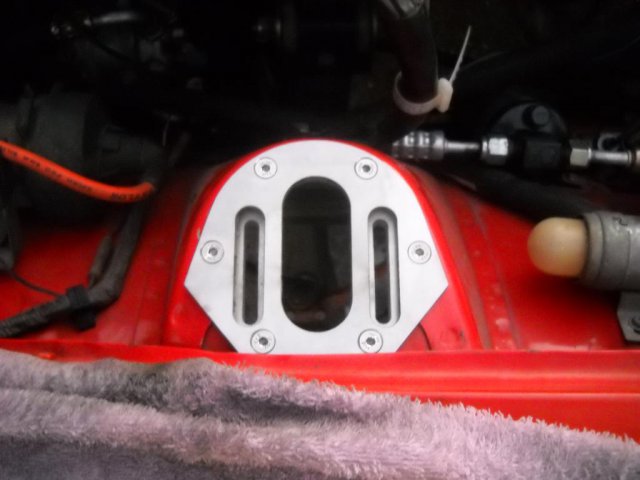
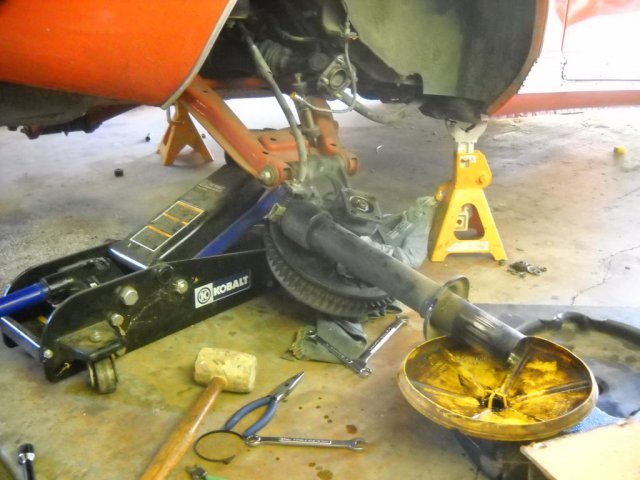
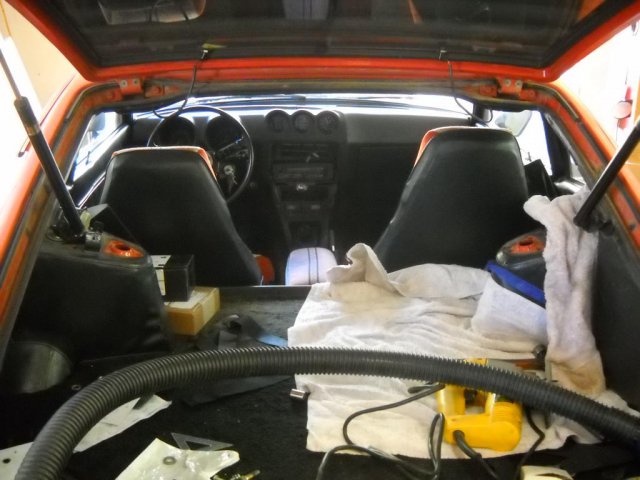
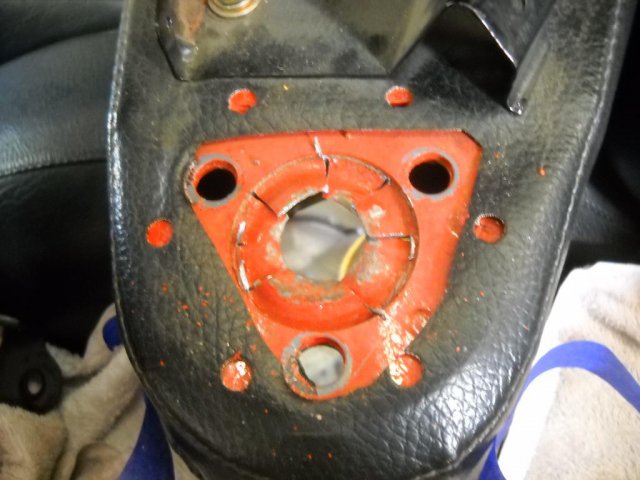
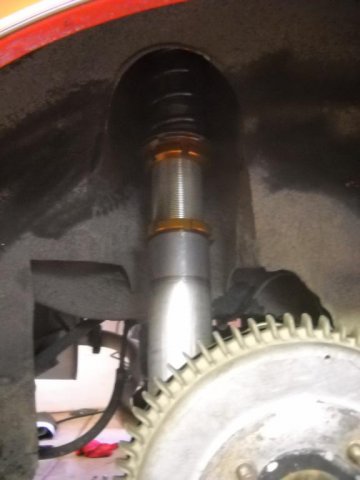
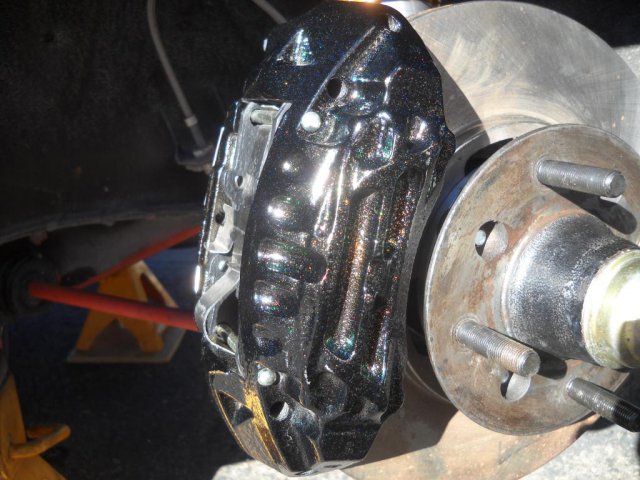
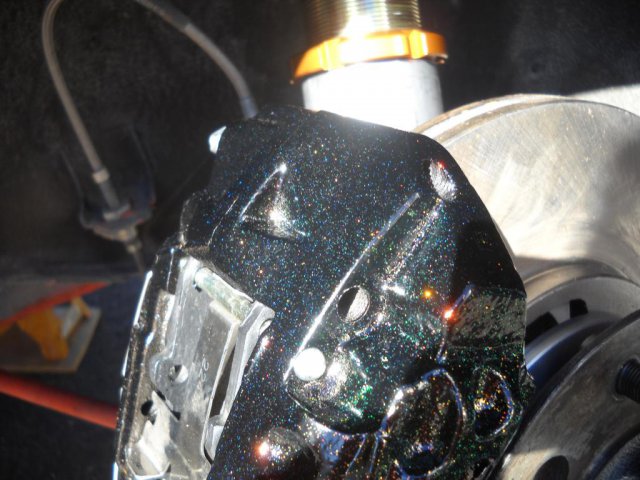
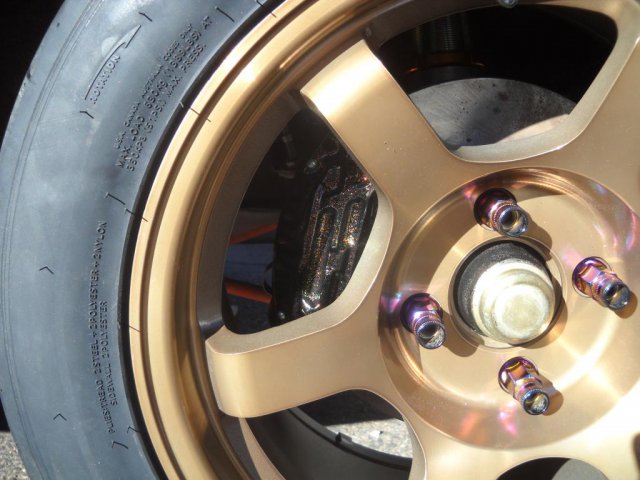
I finally got around to installing my Sakura Garage / Stance Coilovers in November of last year. The car is a 77 280Z w/ 5 speed. I have been daily driving this car since 2008 and I have put 65000 miles on the chassis in the last 6 years. Most all of those miles were on a poly bushing kit, stock springs, cheap replacement kyb struts, and stock brakes. The only real upgrades to the car have been an o-ring fuel rail with 22RE injectors swapped in, and some custom captive engine mounts built by myself and another engineer friend utilizing the mustache bar bushings. Other than those two items the car was in its stock form up until this swap. I was also running 14X6 turbine wheels w/ 195/70-14 Yokohama Avid S Touring Tires. I did this swap almost entirely by myself over a four day period. Tools I used: Miller 180 Mig welder (Autoset) w/ Argon CO2 mix and solid wire. 4.5" Angle Grinder with a cutoff wheel and a 120 grit flapper disc An edge deburring tool SawZall with Milwaukee Torch blades Saber Saw (for cutting out the towers, not my first choice but it is what I had at the time.) Hand Drill Center Punch Angle Finder I have a couple thousand miles on this kit now and I am extremely happy with it. 6k front / 7k Rear on 16X8 Rota Grids (5mm spacer in front) w/ 225/50-16 Hankook RS3 tires all the way around. This is a phenomenal R-comp tire. Very happy with the grip. I also swapped to a set of Vented 300ZX rotors and S13W calipers off a 95 4Runner. This is the caliper that other suggest be avoided. Pedal is a bit soft w/ all the vac assist from the motor but I can maintain stock travel and feel if I give the brakes a "confidence pump" when slowing/stopping. I am running Porterfield R4S pads and shoes all the way around. Good pad but very dusty, I will be looking for a new compound to run in the front due to the dust. The vented rotor spacer is one of my own design. I forgot to take pics of them. Disassemble the front end I ground the nub off first (Cover your engine bay/windshield) so you don't spray sparks and grit on them) I used the old isolator and bolted the drill template from Sakura Garage in place to hold the pattern in place while I center punched the drill locations. I used a small bit (1/8" or slightly smaller) to drill a pilot hole for the 1/4" bit I used for the final hole size. I laid the vanity plate over the holes I drilled and traced the slots onto the strut tower with a sharpie and started cutting with the cutoff wheel and the saber saw. I used some blue tape to help keep the saber saw from beating the paint on my towers. If you let it bounce it will hammer your paint. Struts Marked a reference location on the ground to measure my strut tube angles (oriented like caster and camber) before welding and after. After scribing a line a 1/4" above the spindle casting, I cut off the strut tubes with the cutoff wheel and hack saw just above the scribed cut line. I then used the flapper disc to smooth the cut down to the line and hit the edges with the deburring tool. I only had to relieve the adapter tube slightly to fit it around the bump on the spindle. I then tacked the 6" tube on to the spindle and checked the angles were the same as the stock tube. Once I had everything where I wanted it I did three caterpillar welds to fuse everything together. I am a welding newb, but I was satisfied and confident with my results, the miller makes it pretty easy. All finished inside On the car I countersunk my plates for M5 Flat Heads since I have access to a mill. Rear Struts The rear is kind of a repeat of the front so I will mostly just post the pics for this section. The rear isn't as well documented as I was running out of time to finish since I had to drive this to work on Monday and I was feeling pretty beat. These are the 9" rear tubes for the 280Z. I cut the strut tubes off 3/4" above the casting since the rear on a 280 is taller and the front strut will bottom out before the rear ever will. I pie sliced and beat down the nub to fit the template the same as I did the front. You could probably do this up front as well. Less mess I think. I have a taste for flashy zazzed things. I am really happy with how this design turned out and glad I was able to work with Sakura Garage to put it together. If you are looking to do coilovers, I highly recommend this kit. I really do love it, the car has an enjoyable performance ride and the handling is superb. I'm looking forward to taking it on the track next weekend. I will get some after shots of the car put up soon. Thanks for reading
- 10 replies
-
- inverted damper
- camber plate
-
(and 1 more)
Tagged with:
-
Yeah, I have a lot going on right now. Trying to finish my engineering capstone this semester, which is going to eat up most of my time for the next month. There is a bit more work to do before I am ready to make drawings and go into fab/production for the strut braces. I probably won't get any real work done on these S30 parts until after school finishes up.
- 51 replies
-
Two guys here in Arizona are currently running the Sakura/Stance kit on their Z's. They are both members on the Desert D forum and this forum I believe. You don't have any direct/specific questions in your post so it is hard to respond. (You mention how they stack up against a Koni/T3 setup, but what are your criteria for the comparison?) What are your goals for the car? Some form of competition, or just be low? If it's the latter than comparison is pointless.
-
Hey thanks for the reply beerman, much appreciated. Tony, thanks for the clarification on the function. I'll definitely check the fuel pressures at those speeds after I get these done as the guys all asked for a fuel pressure gauge. Over the past few days I had basically resolved to drill a .050" diameter hole in the restrictor I am making. I figured that would work fine and be close. So I'll have to get a 1mm drill bit then. I doubt that .007 difference in hole size will really matter but I might as well make it accurate.
-
Hey everyone, I have what seems to be a bit of a dilemma. I'm currently working on fabricating some extruded aluminum fuel rails to replace the factory setup for the SU carburetors for some of the guys in my local Datsun club. They want to keep the fuel return system which is fine. What I just found out last night is that there is a fuel line restrictor in the return section of the factory rail to help keep the fuel from percolating or vapor locking the fuel system while idling in traffic when it is hot(which is an issue here in Arizona). I have a read number of threads that mention this restrictor but not a single one mentions the actual diameter of this restrictor. I would think this hole diameter is critical to maintaining the correct fuel pressure as Pressure = Force/area. So my main question is; what diameter is this restrictor? so I can incorporate one into my system. Or does the smaller diameter of the return line (3/16"??) act as the restriction? I was going to post an image of my design but photobucket is acting up right now and won't show the image. Thanks for your help.
-
I understand how you feel. I'm in my junior year of mechanical engineering school myself. I did my first two years at a community college and transferred in to the university. I had to retake Statics and Dynamics at the CC and I'm currently retaking Circuits I which through me for a loop (no pun intended) last semester. Now this is all coming from a guy who was never a math whiz, in fact the opposite math has always been my worst subject. I'm not the fast guy at calculations or seeing how to solve an equation. Statics was over my head the first time I went through it but I nailed it the second time. You said you were worried about the courses that lie ahead after Statics and I think I can offer some alleviation for your concerns and some advice. Don't get to down. (I don't know about your course but in my program Statics is an 8 week course with Dynamics taking up the second 8 weeks.) It is designed as a water shed course. My ASU class chart says next to Statics, "Predicts success in major" Basically they set it up so that people who can't cut it don't become engineers, it is hard for a reason. I used the Hibbeler book its a great book as you've noticed. My advice is to use it to gain your understanding. The pictures for your HW are the most important thing usually you can see from the picture what they want you to find. So use the good book for learning and the crap book pictured problems for doing HW. You may still have to figure out the wording but stick with it and try to ignore the grammar that seems poorly put together or exhaustive and simplify it. Doing that I was able to figure out what they were asking for and by looking at the pic. Also it is still relatively early in the semester as it looks like you are solving for resultant forces and vectors. The biggest thing in Statics I would say is KNOW HOW TO SETUP A FREE BODY DIAGRAM. Once you can do that the problems practically start solving themselves. It's a lot of TRIG based stuff, so know your triangles and Pythagoreans. My buddies and I found ourselves banging our heads on the desk a few times so stick with it. Now about future course work obviously a good professor can make all the difference, anyways here is what I have to say about a few future courses you have. Solid Mechanics- Stress and Strain baby, practically all the equations in this class revolve around hooke's law (springs) F=delta*X Thermofluids 1 - This is another one they consider water shed, but if you put in the time you'll be good. You live in the Steam/vapor Tables it is has a lot of basis in chemistry. After these most of the courses go further into the previous topics from what others have told me. Also it seems that you do well in the EE end of things personally I hate electrical doesn't make a lot of sense (la'place and all that). Don't know why but it is hard for me to understand I guess I like things I can see and put in my hands. Or maybe that time I got hit with 300 or so Volts did me in, man that sucked. Also you may like Industrial a buddy of mine switched to it, they're focused on efficiency. Most of their upper division stuff has a business/manufacturing type focus. They look for ways to streamline processes is the best way I can think to sum them up. Definitely research the different fields and find out what they do. Oh and be glad you're parking is only $125 or so dollars, a permit at ASU for one of the campus structures runs I believe $820 per semester. That's why I walk onto campus.
-
Honestly it would be difficult for me to offer much of anything for that. When it comes to cheap/run down cars, that don't run the most I'll consider offering is $500 and that would be generous. The reason I say that is when a car like the '76 I bought doesn't run you don't know what you're getting.(I don't wanna buy a $1000 boat anchor) Honestly that car needs everything. If you buy that car your gonna be sorting and trying figure out how things mounted or were wired, what screw went where blah blah blah. Maybe that guy bagged and tagged whatever he has that he took off, but more than likely he didn't basket cases are awful when you don't already know where every bolt goes(what if you don't have a special bolt for the car that you've never seen before? where are you gonna get one?). Also I think your estimates are low for the paint, if your going to learn to do the bodywork yourself and paint it you can plan on having $800-$1000 just in the supplies to do it. BTW painting cars is 90% bodywork and 10% actually shooting the car. The bodywork is the part that nobody likes doing. Here's my part list for that car off the top of my head; -Suspension rebuild (stock with urethane) you can plan on that running around $1000 -Brakes are gonna need a check- if you have to replace stuff it could be a couple hundred (rear wheel cylinders on pre '77 are about $100 a piece, brake hoses pads, rotors, bearings all need checked) -Interior I found decent carpet kits for around $160 on ebay that's not bad. (If you have seats and panels reupholstered your looking at around $1000 let's say because that's highly dependent on material.) Your gonna need new tires. Couple hundred, (new wheels? moar) Paint if you do it yourself expect around $1500 and that might be low yet, cuz your gonna need a booth and decent gun worth its salt. (You could do a maaco but I don't think you want that it's not gonna last or look great.) Weatherstripping will run you a few hundred. So if you add that up you're looking at about $3500-$4000 and you don't even have a running drivetrain thats been sorted. That'll be a couple grand if you go the JZ route you're interested in. You can also tack on a couple hundred for miscellaneous little crap that always burns holes in your pocket. This is where I get the buy as much car as possible thing. It's really hard to win on cheap deals. I know Utah doesn't have the Z market that Arizona or Cali has so, I know Z's are slimmer pickings in your area. Ultimately you have to decide what you want to do. I will say, that if it is possible go look at the car in person if you can before you make any sort of offer. Upon a visual inspection looking at it top and bottom running your hands on the body for dents or bondo should let you know whether you really want to mess with it. Maybe some other guys can chime in on the price stuff I was listing but I would say it's pretty accurate from my own experience and that's just for trying to make a decent car to enjoy.
-
Well I guess I'll come out and offer my 2 cents. I'm a college student myself so I can relate to having limited time. I'll try to keep this short and offer my experience of buying Z cars. I don't know what kind of experience you have with cars, you said you've done some reading which is good, I did a heap of reading before I bought my first Z which is how I found this site. So inform yourself, knowledge is your weapon(this forum can supply that weapon). The more you know about the type of car before you buy it the better you can feel about what you offer. I'm with Gothal, the most I would offer from what I can see is $1000 and that might be high. That's just from the picture estimate, I'd have to see everything that I'd have to finish up or fix to make it reliable and most importantly enjoyable. I don't know if you need this car to drive everyday or if its a project, that's for you to decide. I looked at Z's for about six months before I found the one I'm driving right now. So being patient can be valuable. Something I found handy when I was looking at cars was making a price list of replacement/upgrade parts I might need to get the car where it needed to be to drive everyday. Right it down on a square of paper and keep it in your pocket while your looking at the car so you can figure out a rough idea of what it's going to cost you on top of what the guy is asking. You may find the cheap deal to not be so cheap. Also consider what tools will be necessary to fix said items. Also "buy as much car as you can" is the mantra I've learned from my own experience and others around me. The more complete and together it is the better. You said you have about $150 a month to throw at it, well keep saving it and grow your buying power. Think of it as, every month that goes by you step into a nicer Z market. Finally don't be afraid to walk away. There is nothing that say's you have to give the guy what he wants for it. I work hard for my money and I assume you do too, I'm not anxious to throw my money at someone who can't finish something they started. People who walk away from projects should know that you don't get a 100% return from your investment. I'm gonna leave it at that. Here's a Z here in Phoenix, if that car is rust free and mechanically sound like it appears to be, I would say he's asking a fair price, that I would be comfortable with. I might haggle a bit but a fair price none the less. http://phoenix.craigslist.org/evl/cto/2820148079.html Now this car no way, for what he's asking the mirror shouldn't be broken, the seats ripped, or be an automatic and with all the corrosion on the valve cover I'd have to do a thorough rust inspection. http://phoenix.craigslist.org/wvl/cto/2782596282.html Well so much for keeping this short.
-

L28 NA Fuel Injection Upgrades.... Confusion
JavelinZ replied to MidnightRider's topic in Nissan L6 Forum
I don't know if this helps, but here's a link to a swap I did a few years back.injector swap I'm still running it and I drive the car everyday. I don't know that you need more fuel to the motor with what you're running. I agree that since your cam could/has altered the factory torque curve the fuel maps could be off. Necessitating a re-tune of the factory injection. -
The injector spacing can be found doing a forum search. Here's a link to one: http://forums.hybridz.org/index.php/topic/70721-l28-injector-spacing/page__view__findpost__p__669437__hl__%2Binjector+%2Bspacing+%2Bfor+%2Bfuel+%2Brail__fromsearch__1 There are other posts that have this information along with hole drilling sizes which is important because there is a certain interference that you need to have to properly seal the o-rings in the rail. The information or links to it can be found with some searching here on hybrid. I can't say that I would do anything different. It's still running great so no complaints or modifications there.
-
Now improvements, when I did this swap I was just looking to get rid of the miss and the fuel leak. I didn't expect the to run smoother, quieter,and dare I say faster. I used to be able to hear the L-jets ticking going down the freeway now it's just dead quiet. From a light traffic used to pull ahead of me and it took me longer too catch up. Now I've actually noticed that I'm keeping up with traffic and usually pulling ahead and my driving style and shifting is the same as before. So I know I gained some power back by doing this. Just revving, the engine responds more smoothly. So I thought I would post this writeup for those guys running the stock setup who aren't ready or can't afford an aftermarket ecm. So here is an alternative to the L-jets. I also did this conversion for about the same price as a new set of L-jets($300). Another reason I did this was safety as my Dad had one of the boomerang rail half connecting hoses on his Z rupture on the freeway emptying his nearly full tank. Luckily it didn't catch fire. So all around this swap is an improvement. So if your interested in doing this the information can be found here; port spacing and bracket angles, as well as sources for the injectors. I've been running this for a couple months now and all is well. (Oops! I was moving between tabs and programs while I was typing this could a mod move this to the fuel delivery thread for me sorry guys.)
-
Well my '77 280 had, for several months an issue with the number the #2 injector. There was an intermittent misfire that was causing an idle issue, plus it was making it hard to get through emissions. The injector was cycling properly from listening to it, which led me to believe that it wasn’t atomizing the fuel properly. If I removed the plug wire the miss became steady, it was also steady if I removed the injector connector. So I narrowed it down. Well I started trying to explore my options since I didn’t feeling like throwing $300 at new injectors that I already wasn’t fond of when they did work. A few months later my #5 injector started leaking fuel externally so now I had an actual safety issue on my hands so the Z got parked. Luckily my previous job called me back for the summer so I had access to a mill and a lathe and some other machining equipment. This made a fuel rail conversion a more feasible idea (since Pallnet temporarily halted making his fuel rails). Which figures whenever I need stuff I always hit walls that make everything harder, oh well. So I researched on here some more to find out what was necessary. I knew about the Toyota 23250 45011 injector that came in the 22re 4-cylinder. Yet I still had some unresolved questions as to whether this would work or not. So I took the plunge anyways. I found everything I needed to know to do the work on the rail myself here on HybridZ. Materials Required: 2 ft. of aluminum rail stock (I purchased mine locally from Arizona Speed and Marine @ $10/foot) (6) 23250 45011 Toyota injectors (purchased from Motorman $25/each) End mill and reamer ( Actually a reamer isn’t exactly necessary an endmill can produce a smooth finish for the o-ring to seal.) 3/8†pipe plug fitting and hose barb fitting (I chose to tap for 3/8â€npt -6AN is also an option.) The pictures pretty much show what all is required. Here's the old fuel rail after I pulled it out. This is #5 clearly the tip was corroded oddly; enough this injector wasn't the one causing the misfire. Go figure. Here is the engine bay with the ugly rail removed. I cleaned the injector ports so the new o-rings would seal good to avoid a vacuum leak in the intake Before I cleaned the ports. You can see where they were leaking. These are the cutting tools I bought to do this. Gold finish on the tap and "F" size drill bit is a TiN (Titanium Nickel) plating. Not necessary for cutting aluminum but it helps a lot when cutting hard metals like steel and stainless This is the 13/32" 2 flute center cutting endmill I used. The reamer was a 27/64" straight flute. Here is the bridgeport I used to machine the rail. The DRO (digital read out) is accurate to within +/- .0005in. The rail is 20in. long so the vise being wider would have helped keep chatter and part flex down. We did contrive a 'cornballed' clamp setup to help prevent movement I drilled and bent the brackets at home 3/8 holes at both ends. Bent to a 37 degree angle to mount the rail. The Channel locks are for keeping your fingers from getting messed up if the drill seizes while your drilling. Here's a comparison of what I did. The rail is tapped on both ends for 3/8 pipe thread. The other piece is for a second rail I later machined for my Dad's car which is also running this same setup now. I drilled and bent the brackets 3/8" holes at both ends. Bent to a 37 degree angle to mount the rail. The Channel locks are for keeping your fingers from getting messed up if the drill seizes while your drilling. Here it is installed: Dang birds!
-
Well I might as well chime in here. I found my Z about two years ago and spent about 6 months trying to find it. I was mainly looking for a daily driver/project since I finished up my first car. Really what I was looking for was something that looked good and had an inline 6 for ease of maintenance. I stumbled on Z's and started learning more about them so I knew what I had to have. You don't want to get something thats missing a lot of stuff because it will nickel and dime you to the point where you would have been ahead to just get something better. It's not as big a problem with Z's thanks to the aftermarket. It was a problem with my AMC. So that all said, I think what has been said so far is good. I don't know what all you've done with cars before so I'm just going to say that everything is always more involved than it appears. Something that you think will take an hour to do will probably take longer. One thing I will recommend is do a search and find out where to look for rust on these cars its been discussed before I'm sure.(I can already see issues under that cars paint.) Now I live in Arizona so unless a car comes from out of state a rusty car is just non existent(however sunburned/ruined interiors are everywhere.)The fact that a car has rust won't make me walk away, its all about where the rust is located. If its in some hard to reach nook or cranny, well your probably looking at a cancer victim. http://forums.hybridz.org/uploads/monthly_08_2010/post-12746-085161100%201282397647.jpg The bubbling at the lower fender in this pic is common I would say because run off from the cowl drains down behind it. However the bubbling behind the door in the "dogleg" (still a common place) tells me that someone just through a paint job on something without taking the time to fix the real problem. Which brings cause to be concerned about what else could be wrong. The floor pan rust looks to be close to the inner rocker and that's all structural. If you have to fix rust on a Z you need to weld it together because these are unibody cars something in the trunk can effect something in the front clip, you don't really know until you get in there. If I were you I would probably pass on it. You're looking for a project and projects aren't necessities, so keep searching and saving. When I first started looking for mine I only had about 2000 that I had budgeted and by the time I bought mine I had around 4000. So remember that even though you're waiting your funds are growing which is helping you move up into better market Z's. Just keep that in mind. Keep looking though you never know when a crazy good deal could show up on craigslist or somewhere else. That's enough of my blabbin. Good Luck.
-
Here's a few questions I have about the 23250 45011 Toyota injector. I have a '77 280 that is all original as far as the engine goes. It still has the original injectors which I want to get away from for two reasons: 1. #2 cylinder injector is acting up and causes that cylinder to misfire intermittenly (when I disconnect the injector clip the misfire is steady.) 2. Injectors are orignal; so the rubber is showing it's 30yr age plus getting rid of the boomerang fuel rail and hose splices between the halves would be a safety improvement. I did as much research on the web as I could, and was unable to find the opening and closing time for the Toyota injector. So my questions; to clarify Pallnet's info. Will this injector work with the original Z ecm? Is the injector open/close time critical for this setup?(I know that you guys running stand alone ecm's have to put the time in as a parameter for the injectors to function) Also, due to the difference in flow/pressure between the stock injector and the Toyota one, will I need an adjustable FPR to get the 190cc/min flow out of the new injector? Will the stock pump handle the raise in pressure? So, Can I use the 23250 45011 Toyota injector that Pallnet listed? I appreciate the help, from the reading I did it looks like it will work. The injector cycle time and the fuel pressure differences are what left me unsure. I Don't really want stock injectors when I could convert over to a better safer setup for roughly the same price. Thanks everyone.
-
The dash looks great, however I think I would have that aluminum panel engine turned. Then again I'm a sucker for engine turned aluminum. Excellent install looks real clean

