Search the Community
Showing results for tags '240Z'.
-
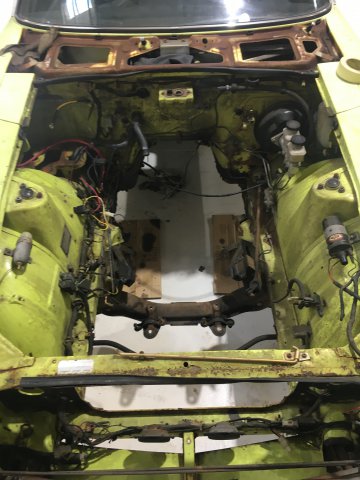
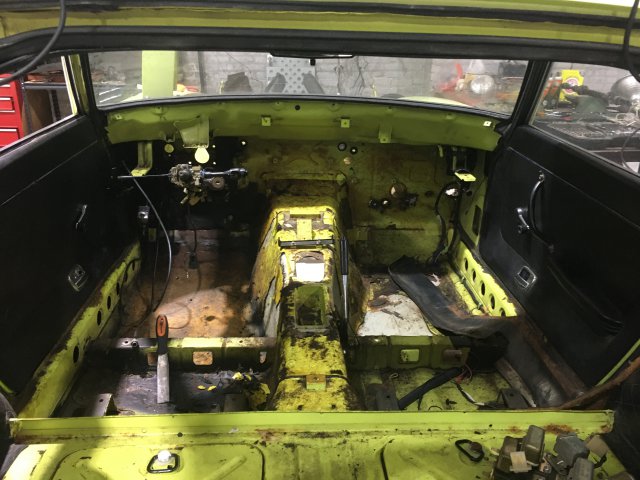
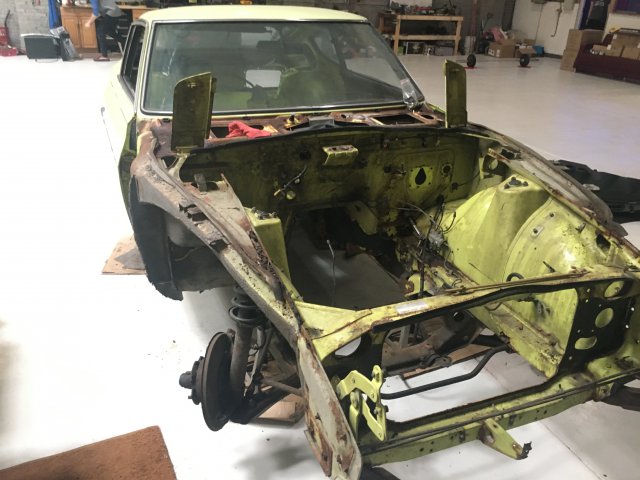
With the free time I've had due to being unemployed from this crisis I have had the time to put in some good hours working on my 240Z. I'll start this thread for my plans of my build in the long run: 1. Complete chassis restoration, rust removal, minor chassis strengthening 2. Stock VQ37VHR (using ZFever wiring harness and McKinney engine mounts) 3. CD009 6-speed transmission (using McKinney trans mounts) 4. Complete suspension overhaul with coilovers and TTT or Apex Engineered front and rear pieces (either a R200 or Ford 8.8) 5. Complete re-wire of the rest of the car (simplify the wire harness, Honda wiper and blower motor) The past few weeks have been reserved for completely stripping the car, finding damage and rust, and getting it ready to get sandblasted before going to my body work guy. I decided to avoid doing any sort of write-ups or videos on the chassis stripping because for the most part this is a pretty easy to disassemble car, but if you've got a rusty Z I suggest having a good deal of your favorite beer nearby and be ready to snap at least 25% of the bolts on the outside of the body. Interior removal was pretty smooth and can be done easily with simple tools and buddy to help with the dash and glass. GET A GOOD ORGANIZER BIN AND A TON OF SMALL BAGS TO KEEP TRACK OF BOLTS! One of the Z parts websites sells bolt kits, but having the originals well organized makes it easier if you plan on reusing your bolts and screws. Here is my Z sitting in the garage before starting the work. As you can see I have a pretty basic workstation, but my buddy who owns the garage has the other wall lined with toolboxes and equipment. Got the VQ37VHR sitting on my engine stand there on the left (Only 25k miles, pulled running from a rear end totaled G37, pretty lucky find) Old Engine Removed. At this moment I still have the engine for sale and will probably post it here soon. It's a running L28 with ZTherapy SU carbs connected to a 4-speed trans. Some bad rust on the front main frame rails, both sides. My floor pans and their respective frame rails are also kinda garbage, so I got a new set of floor pans from Zedd Findings and I am about to order the Baddog Frame Rails and rear subframe connector soon. Got the interior pretty much stripped down. Still need to remove glass, headliner, and steering column, then strip and remove the doors Fenders off. Need to find a way to modify that cowl drain, who designed it that way????

-
 After looking everything over and doing some digging I came to the conclusion that using 65 mustang hubs on 240z spindles is not a cost effective solution for big brakes. I am now looking into a ball joint adapter that bolts to the control arm of the 204z and uses press in 2014 mustang ball joints. I intend to use this in conjunction with 2004 Subaru wrx coil over struts to allow the use of 5 lug 2014 mustang hubs and brakes. Which are 5x114.3 The intent is to have the outer wheel mount flange be pushed out roughly 35mm.... effectively converting our cars from a "zero offset" wheel to a "plus 35mm" wheel... aka just like the 300z and the 240sx, Toyota supra etc... It's a front steer, rear caliper spindle just like the stock 240z, once I know what the bump steer geometry will be I will have a clearer picture of things. Someone could use a widebody or flared setup if they chose to run a zero offset wheel, or use cheap and readily available 350z wheels and have stock track width. Let me know if anyone has any input on this. Good idea, bad, etc...
- 90 replies
-
- 1
-

-
- suspension
- 240z
- (and 5 more)
-
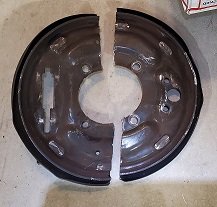
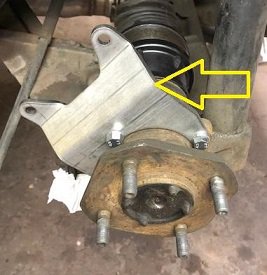
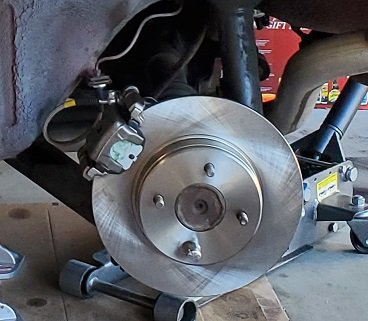
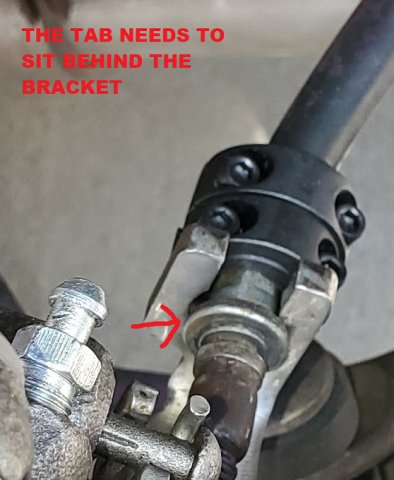
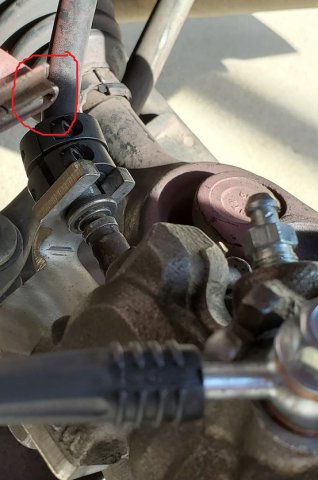
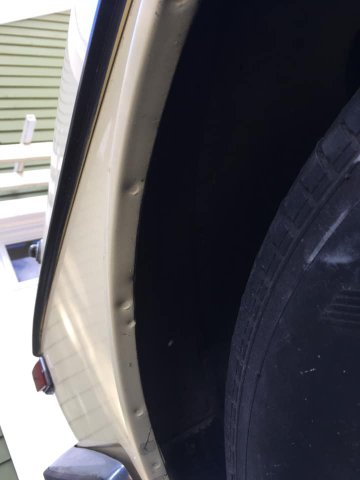
 Hello HybridZ! My 240z recently seized up its drums at the track and I thought it is time to convert to a disc brake. I went with the kit from Zcardepot and ended up adding some parts of my own as well to make it work. Here is my review and headaches and pointers from installing this kit. I will go though the process and when the issues occur will be written in chronological order. GOOD POINTS WILL BE HIGHLIGHTED IN BLUE. MEH I AM NOT MAD NOR PLEASED IN GREEN. BAD POINTS WILL BE HIGHLIGHTED IN RED. 1. Removing the Stock Drums There are tons of write ups on this. I chose to cut the back plate because I will never really go back to drums, and I have had it with the drums seizing or messing up or not adjusting right, and messing up my brake points. OEM brake lines were easy to remove since I soaked them in PB. Clips were easy with pliers, and a wrench. 2. Bolting up the ZcarDepot bracket. THE GOOD There is really only one way to bolt up the bracket and Zcardepot has many photos and write ups on this part. So here is a photo from their website(no copywrite infringement intended 😊) Both the stock bolts work and the new JNC bolts that Zcardepot supplies. 3. Bolting up the Calipers Clean up the hub and slide the rotor on. Put a lug nut on and hold the rotor to the hub surface. Now the rotor spins in line with the hub surface. With the whole caliper try bolting up to the zcar bracket. THE MEH, the calipers needed to be shimmed on the driver side caliper in order to center the rotor in the middle of the caliper slot. The passenger side is okay and did not need any shims at all. I have installed willwoods on several cars and they also required shims to get the caliper and rotors inline. SOOO thinking I would rather have to shim the caliper outward than having to grind the back plate or caliper retainer. 4. Hooking up the brake hose (hose is the flexible bit, hardline is the solid metal bit) The brake hose used are some 240sx rear brake hose, I recommend a stainless braided hose. I had some 240sx braided hose sitting from my older projects so I used those instead and they are DOT, but for a 240sx. THE BAD the idiot installing the kit ME 😂 This was my problem, caused by me but you might run into a similar issue with the normal rubber hose provided. The brake hose are quite short for the application and I recommend a brake hose that is at least 15inches long end to end. The 240sx brake hose is 12 inches end to end. The good thing is the 240sx brake hose is just long enough to clear all the critical points. 5. The handbrake.... THE BAD THE PAIN THE STRUGGLE Everything was going smoothly, up until this portion of the install. Trying to get the oem handbrake to work with the 240sx calipers. There are two options now. If you have the oem 240sx handbrake brackets (rare) you will need to make an adapter plate to link the 240sx caliper handbrake hook to the 240z handbrake cable. Here is a picture from a nice man who has a page on how to install the 240sx rear brakes from way back when. http://www.zhome.com/ZCMnL/tech/Calipers/zbrakeupgrade.htm If you have the Zcardepot 240sx handbrake brackets (provided with the kit) you still need to modify a few things. I have both but I chose to go with the zcardepot handbrake bracket. On the OEM 240z handbrake there is a flat tab, that flat tab has to sit behind the flat of the caliper handbrake bracket. The Zcar depot brackets are shorter than the 240sx OEM handbrake bracket, this makes is possible to simply hook them up. BUT HERE COMES THE BAD the driver side bracket was too long and I could never get that tab behind the flat of the zcardepot handbrake bracket. The passenger side zcardepot bracket was perfect, and the 240z OEM handbrake fit perfectly. I ended up using some shaft collars on the oem handbrake to hold the handbrake tab on the driver side. 6. CONCERNS JUSTIFIED After having bolted up everything I am really concerned with a few things. 1. The bracket for the handbrake is really close to the chassis and the OEM brake hardline. 2. The handbrake cables being too close to the drive shaft. I know you can swap sides and it fixes it, but I just used a zip tie and held the oem cable to the mustache bar. As its turned out I the bracket made contact with the mountings. here is a photo of what happened when I compressed the suspension. THE SOLUTION COMES IN THE FORM OF TWO THINGS. 1. THE BRACKETS NEED TO BE PUSHED TO THE REAR OF THE CAR AND THEN BOLTED 2. BUMP STOPS NEED TO BE THERE AT LEAST 1INCH TO KEEP THE HANDBRAKE BRACKETS FROM MUNCHING YOUR BRAKE LINES. Overall, the kit works perfectly fine. There aren't any major issues that cannot be fixed by normal means. The braking is greatly improved, with much better pedal feel and heat capacity. I am running the 280zx master cylinder as well, so that helps. BRAKE balance is just as good as properly adjusted drums, I will lock up the fronts a touch earlier than the rear, but all 4 wheels will lock up with R comp tires on the car. The rear of the Z gets a few mm increase in width because the oem drums are not as thick as the rotor. The kit gets a 7.5/10. A passing grade.
- 5 replies
-
- 1
-

-
- 240z
- disc brake conversion
- (and 3 more)
-
Inspired by the Head cooling on cylinder #5 thread (http://forums.hybridz.org/topic/59029-head-cooling-on-cylinder-5-solutions/), I decided to make my own diagrams of the cooling system for US Z/ZX L6 engines. I had to exaggerate and diminish a few proportions to maintain decent flow while using a flat layout. These charts are as accurate as far as my knowledge and research have shown so far. I will gladly accept any corrections and update accordingly. The year cutoffs are approximate and do not reflect all of the small month-to-month changes of course. On the ZX diagrams, some cars got the throttle body heaters while others didn't. I left them in both diagrams just to cover all the bases. I did spend a fair bit of time on these, so if they do happen to find their way elsewhere on the web, make sure at the very least to cite where they came from. Red = oil passages Blue = water passages and flow direction Yellow = direction of water flow in flexible hoses 1970-1974 240Z / 260Z 1975-1978 280Z 1979-1980 280ZX 1981-1983 280ZX
-
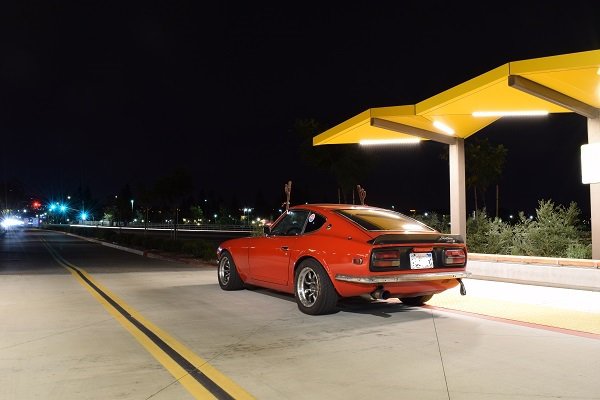
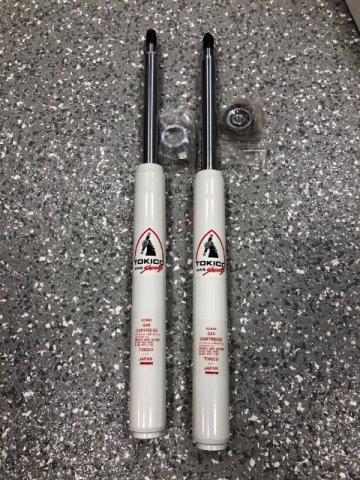
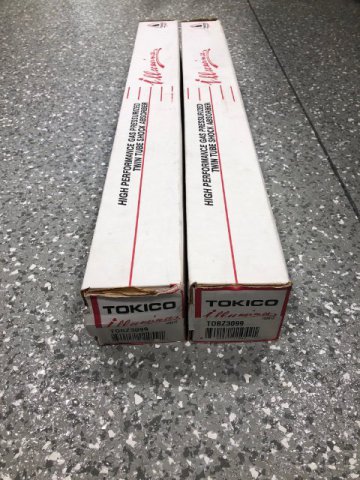
 I have two brand new in box Tokico Illumina adjustable struts p/n BZ3099. These are for the Toyota MR2 1987-89, but have been popularly used in sectioned struts for the 240, 260, 280Z. I bought these several years ago and never installed them and now my 280Z project has taken a different turn, and I will no longer be needing these. I will only sell both together for $250. Buyer pays shipping from Zip 29303. Please do not request a shipping quote unless you accept the purchase price already. I will need a few days to box these properly and securely including adding packing material to protect these parts for you before I can get the quote from UPS. I am attaching an article I printed from HybridZ forum many years ago that explains the sectioning in case you can't find it here doing a search. Strut sectioning.pdf
-
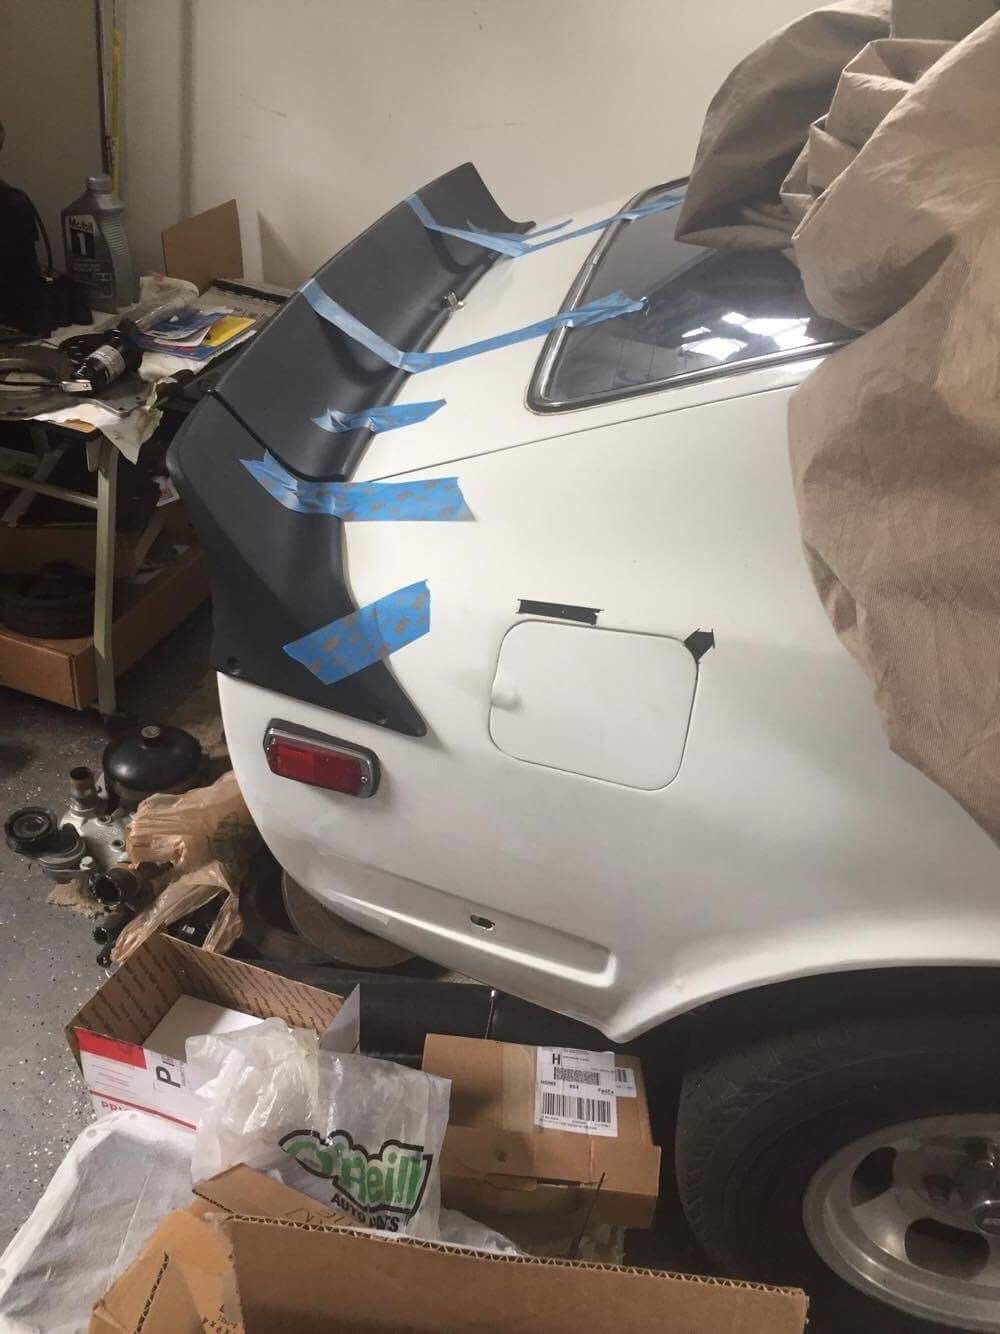
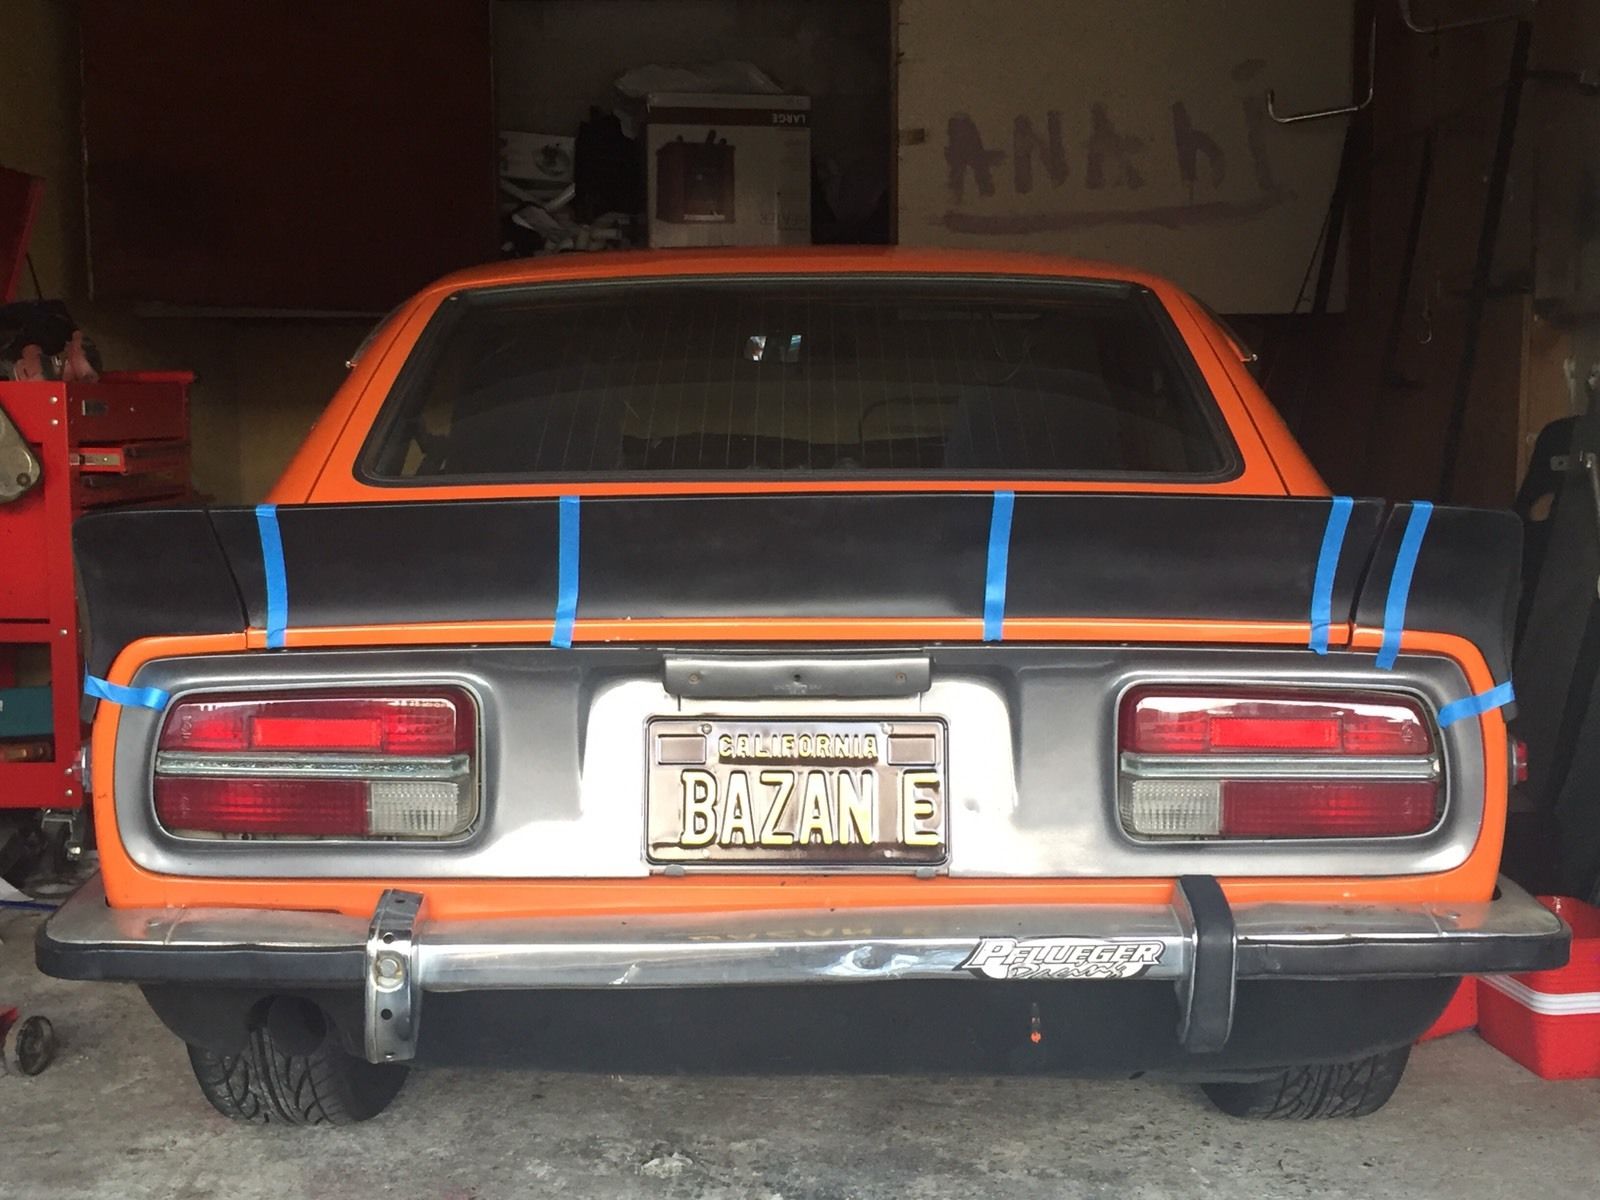
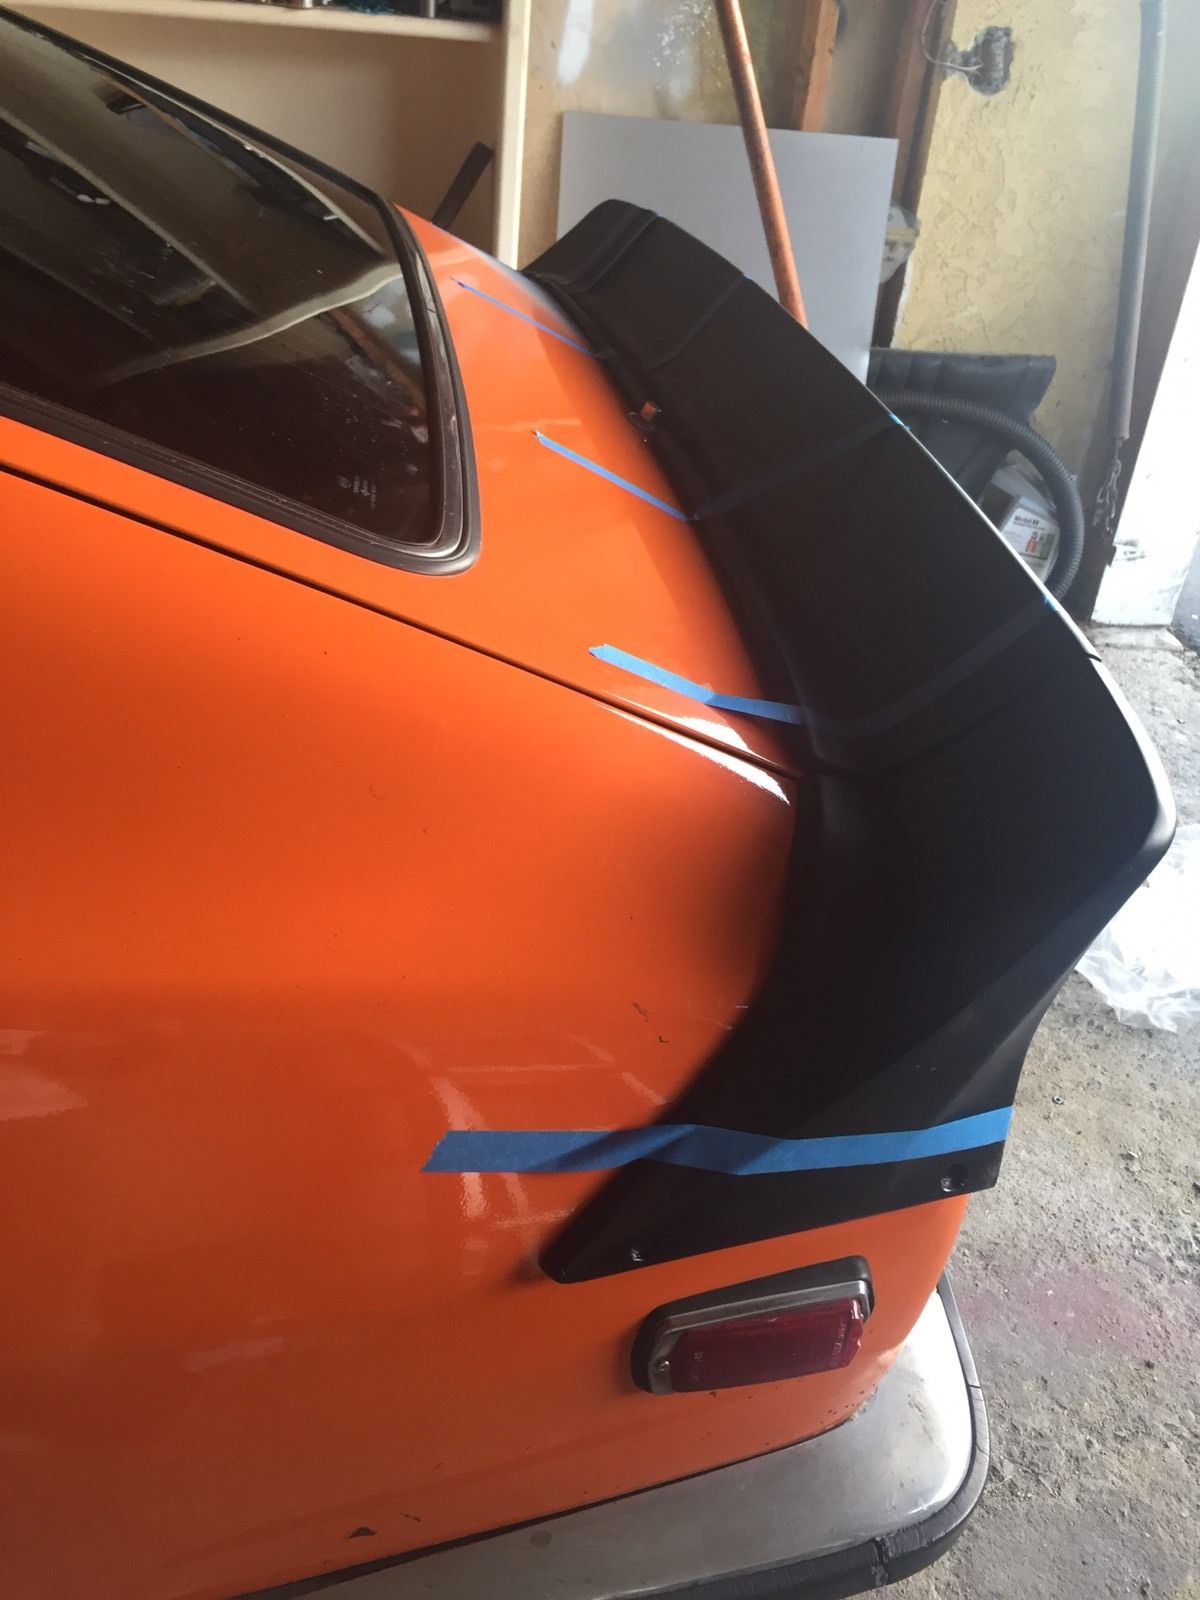
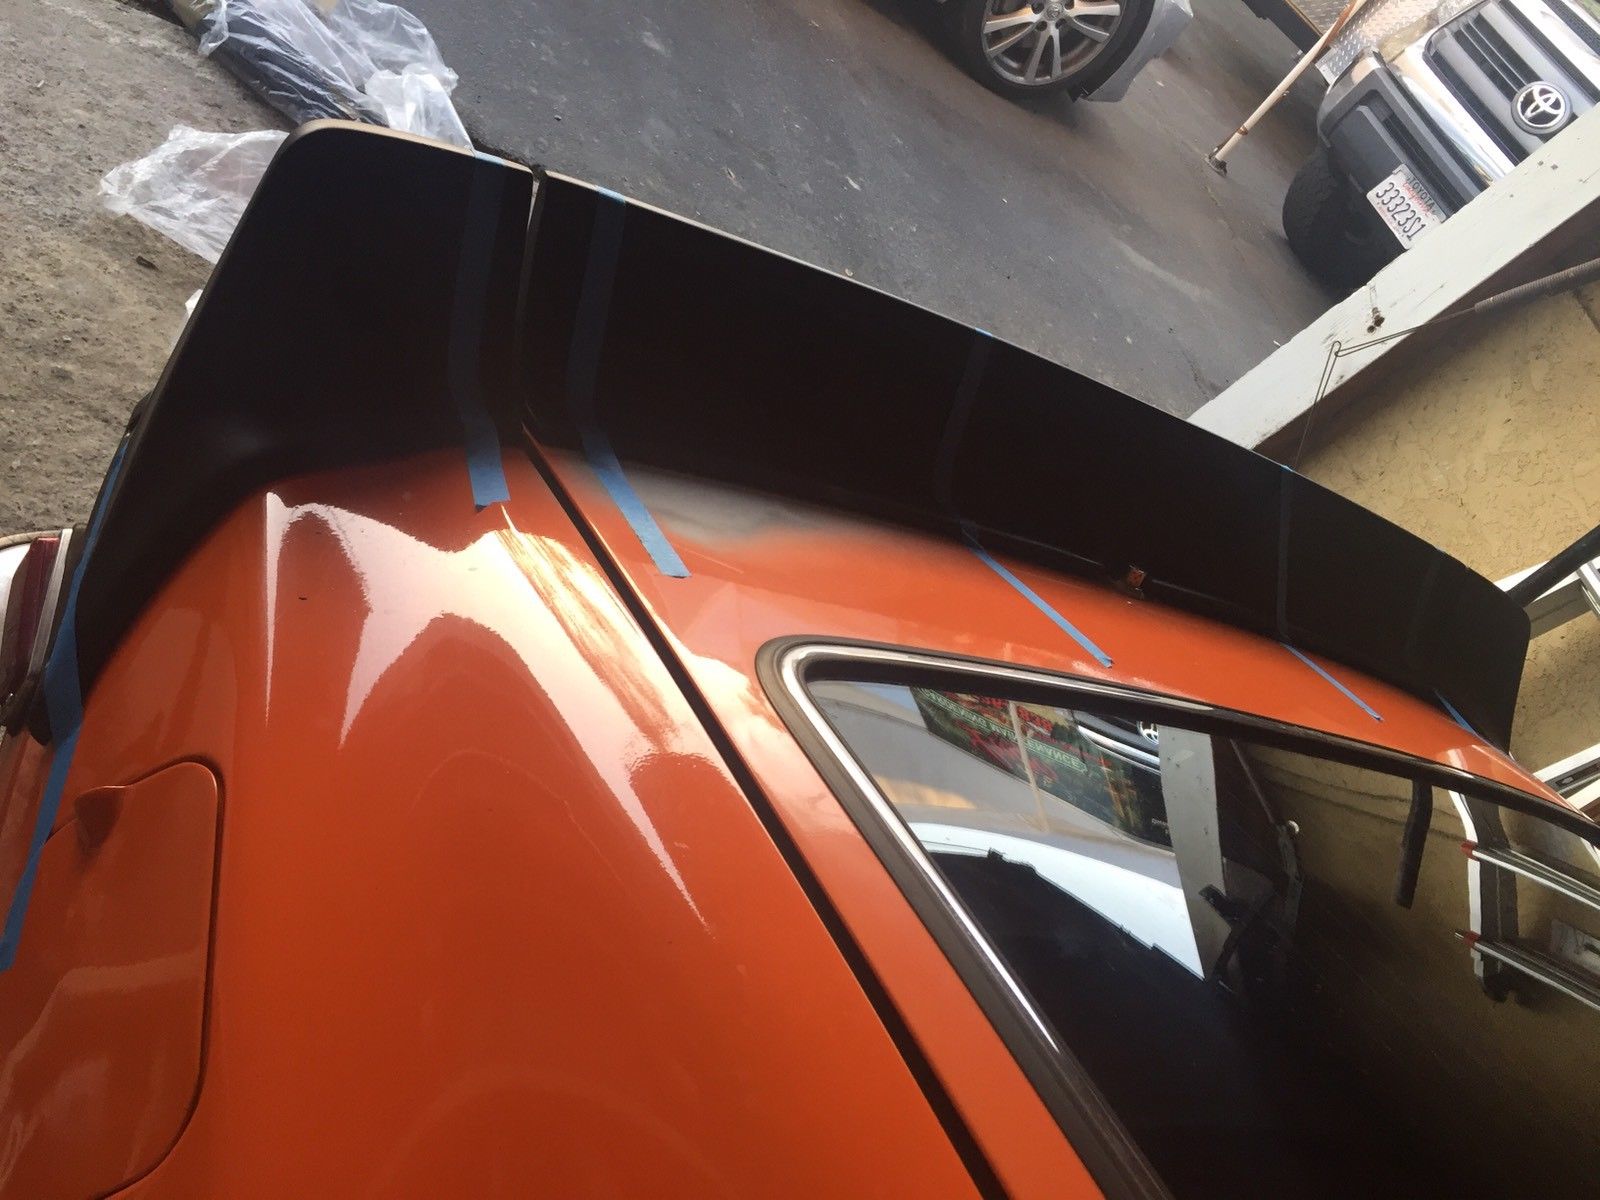
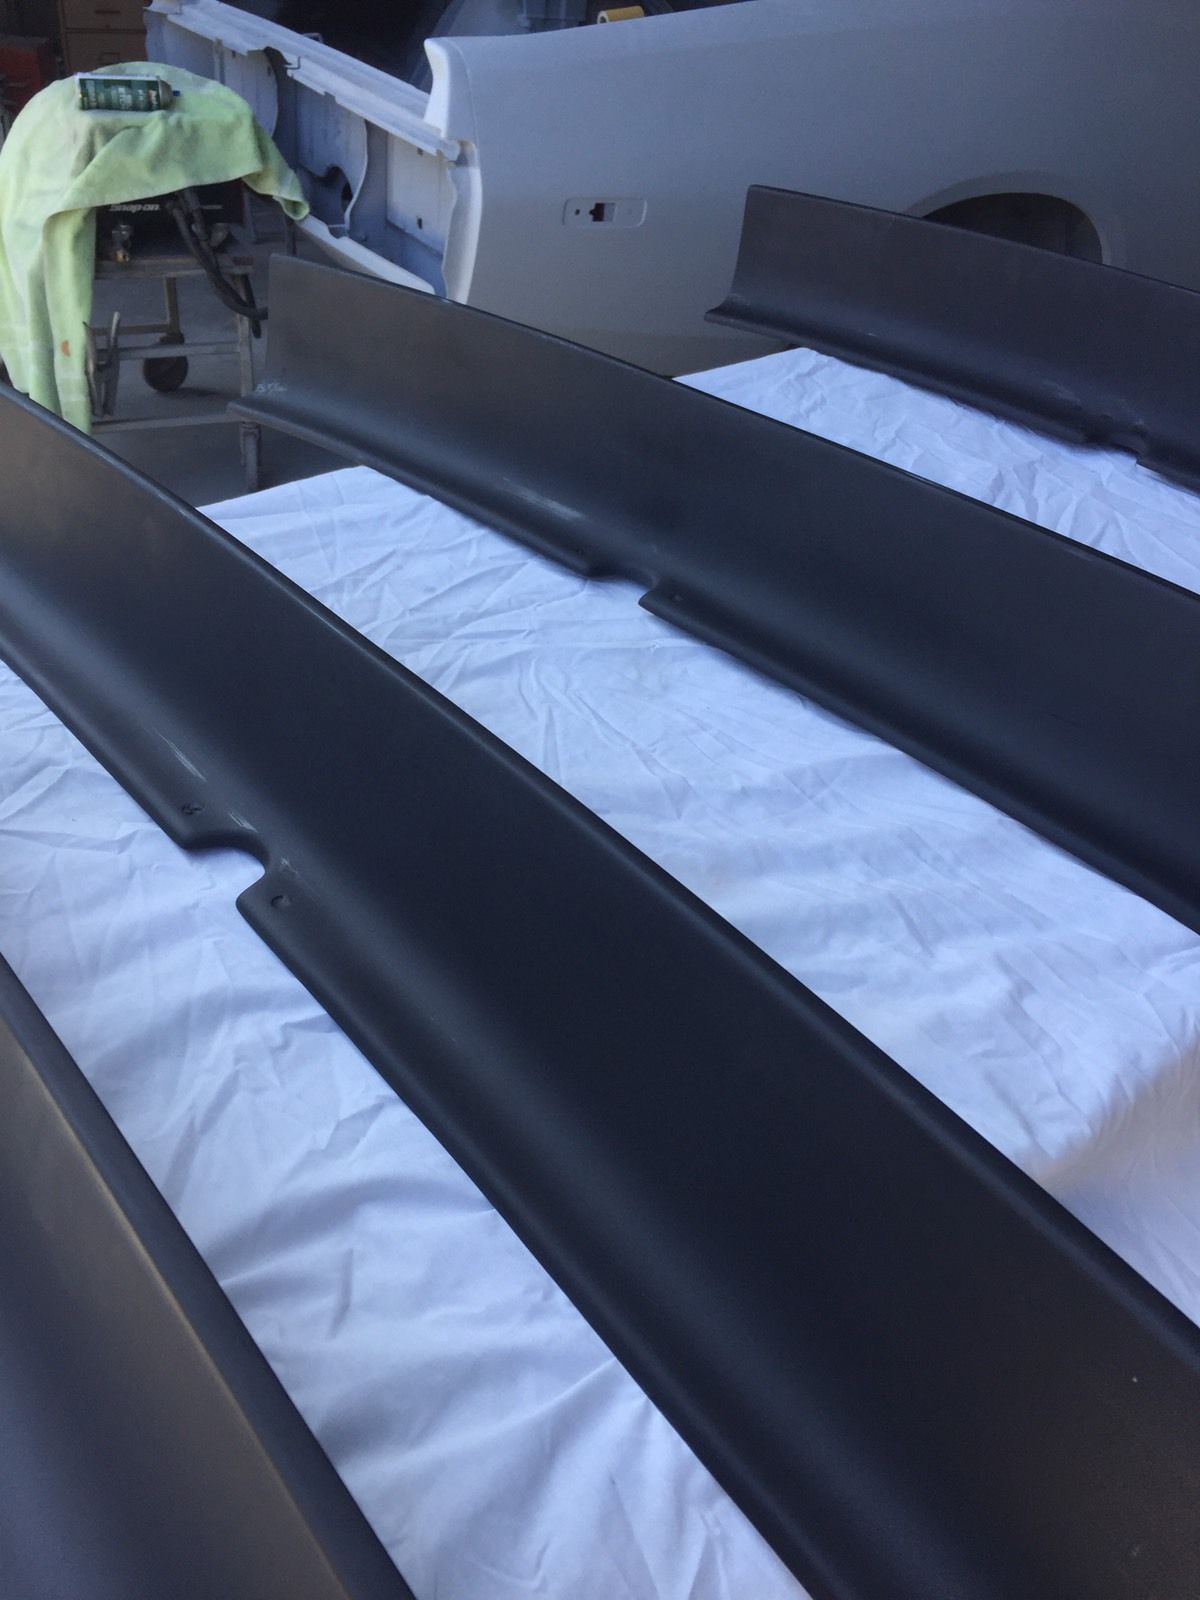
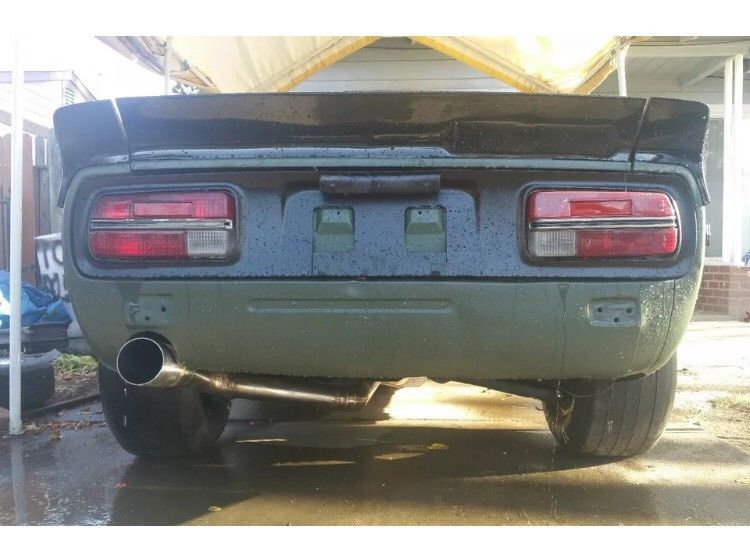
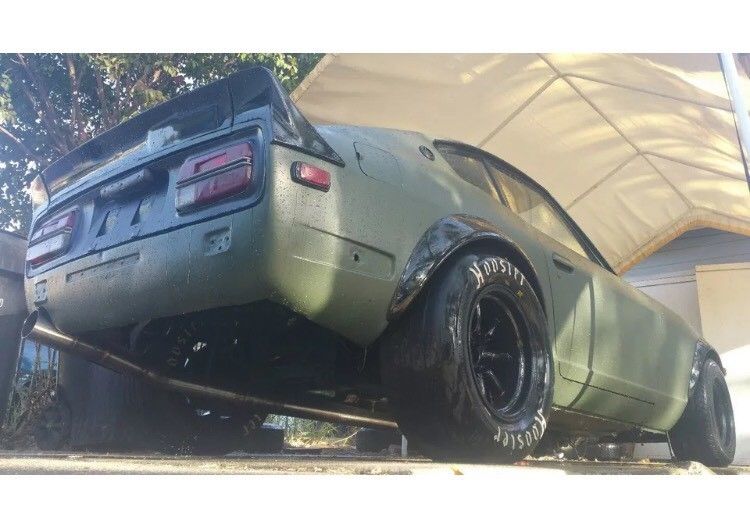
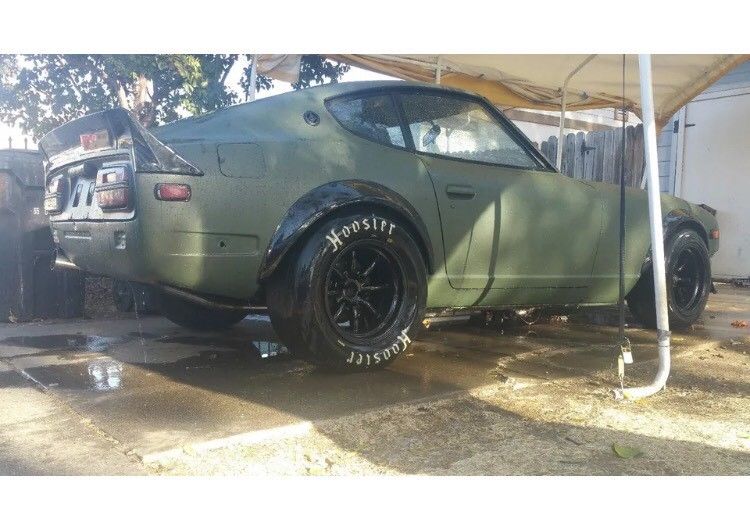
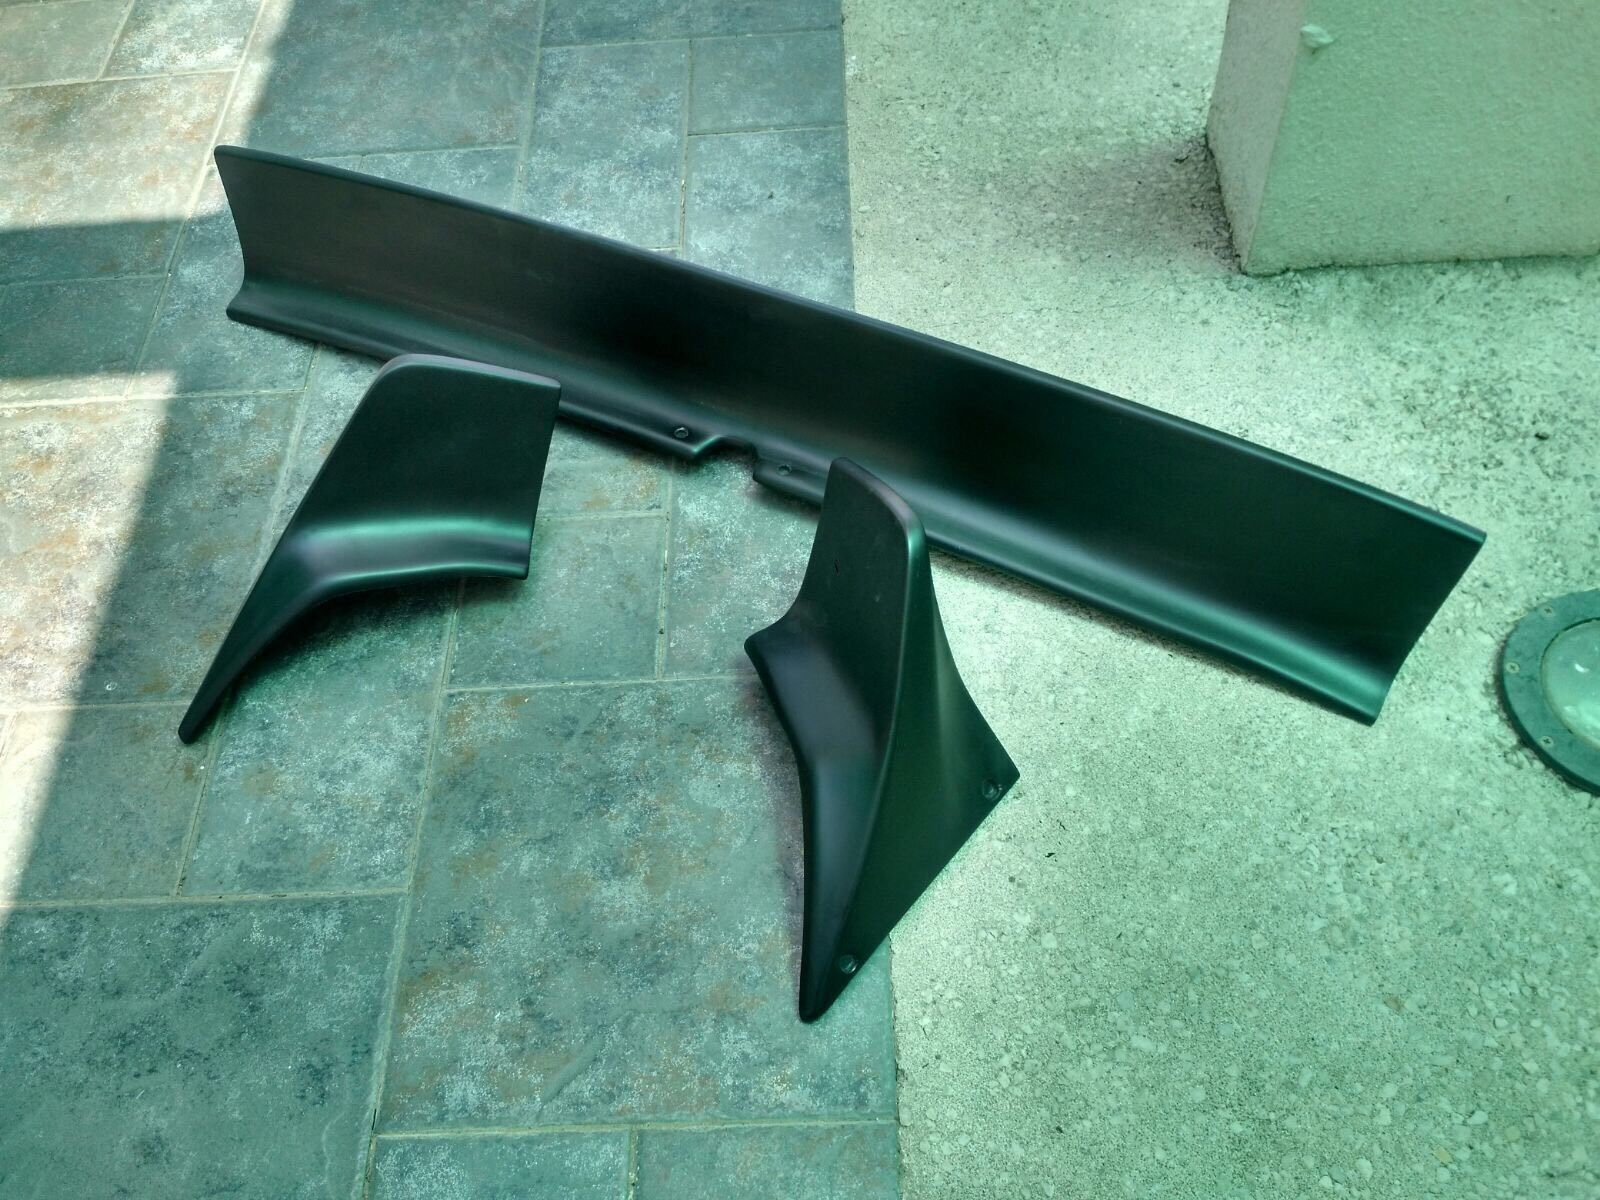
Hello Hybridz Members! Three piece spoiler for Datsun s30 240z 260z 280z Product is made from fiberglass with a flat black primer finish. Hence, spoiler is not a finished product ready for paint. This spoiler has 2 mount holes in center piece and 2 on each individual corner. It also has 2 threaded inserts in center piece and 1 on each individual corner.Quality and fitment are really good, all spoilers are brand new and never installed. some modification might be needed for perfect fitment. Price $280 shipped! - I can provide a discount for a group buy (5 minimum) Item ships from California* Local pick up available Payment: Paypal or cash for local pick up Any questions please feel free to send a PM
-
Introducing our first product to hit the market is our 1971-1978 LED Emblem turn signal kit. Each kit is hand made at our shop in Las Vegas, NV. Our kit is a plug n play harness kit that integrates LED turn signals into the pillar emblem. Installation is easy and we even have a tutorial video posted to our YouTube channel. To order you can visit our website https://harmonresto.com/ or send a DM to our Instagram page! https://www.instagram.com/harmonresto/
-
This is my first post here so I hope I won't get flamed, but I have really been thinking about the possibility of swapping a ford ecoboost motor into a first gen. I daily a focus st, and the car is just a riot so the thought of putting a similar engine in a lighter rwd car is really appealing. The engine itself mates perfectly to a trans from a Miata, and ford sells a control pack (all of which can be had for around $2500) it also bumps power to a claimed 280hp/360tq at the crank on 91. I'm aware of the need to fab a bunch of crap, and run new fuel lines and such. To me it sounds like a pretty badass project, I'm open to any and all opinions. Thanks.
-
 https://www.zcarblog.com/
 -
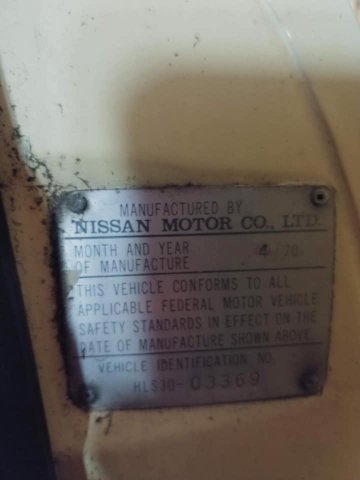
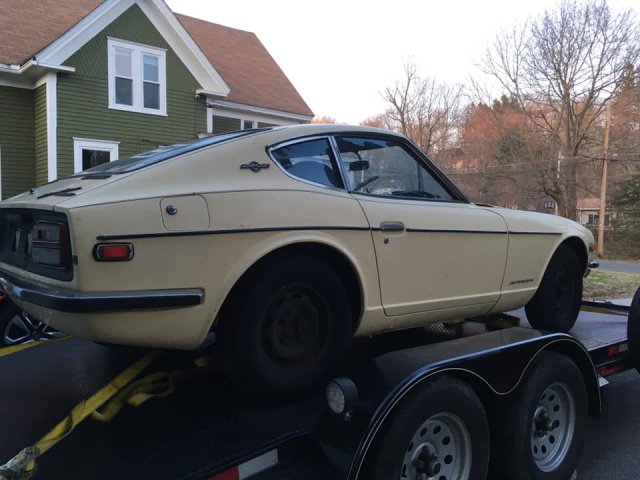
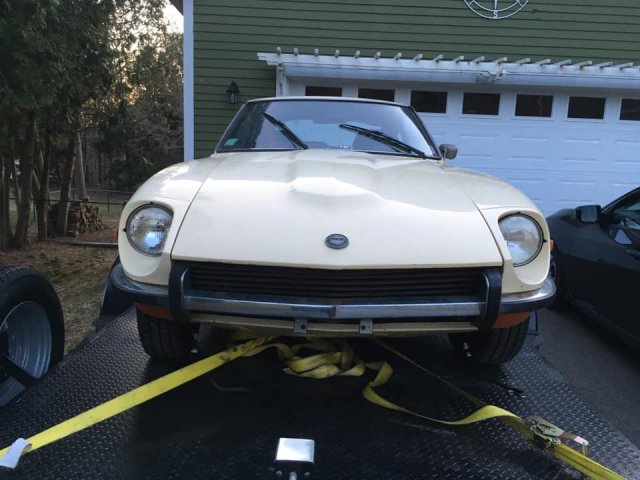
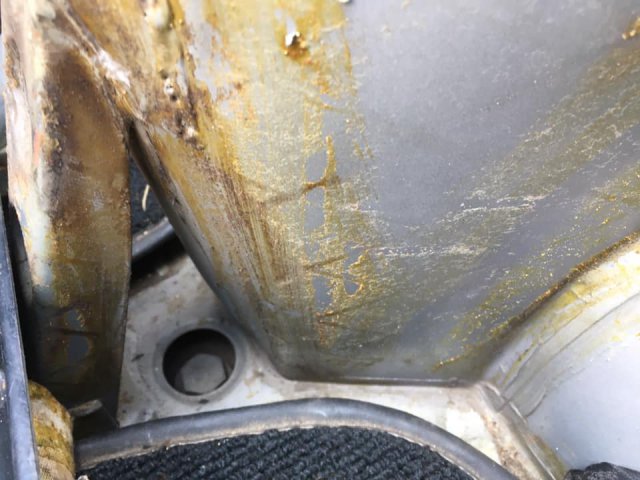
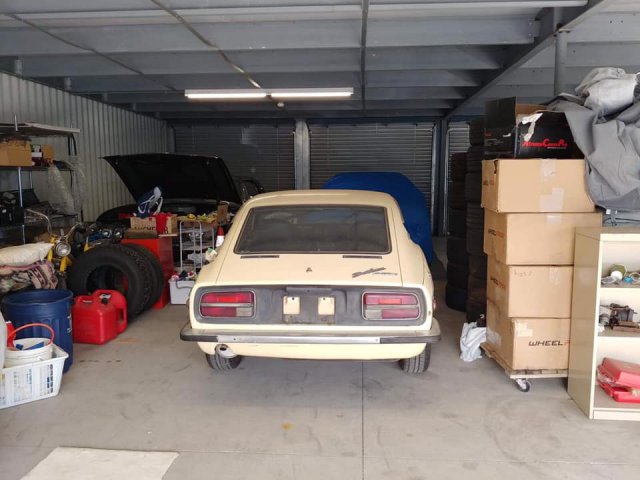
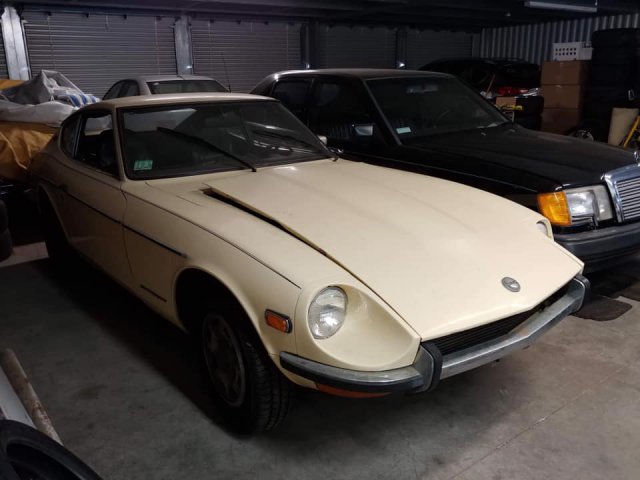
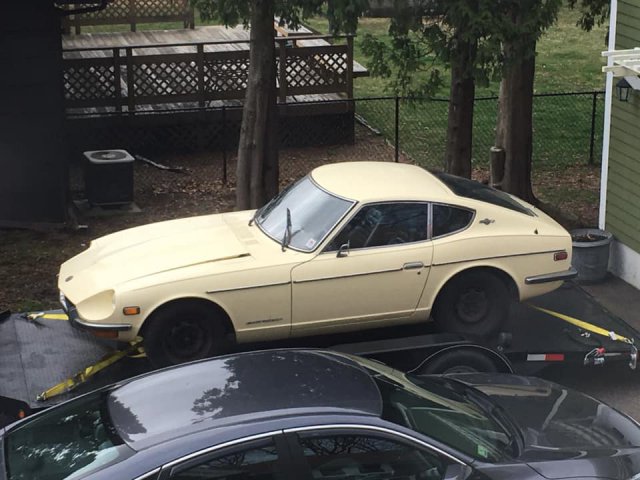
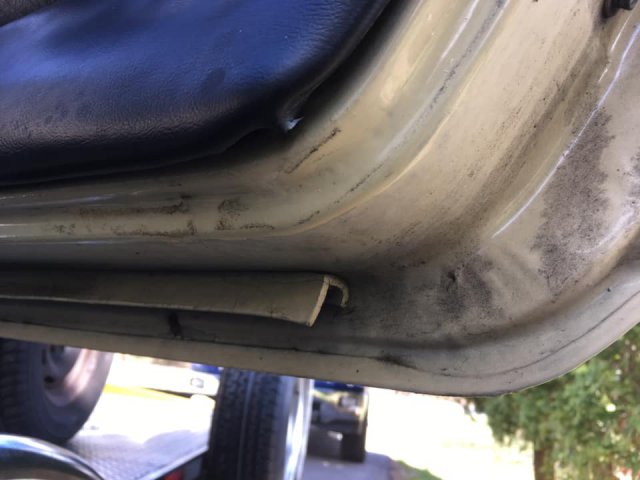
So this project actually started a while ago. I have been working slowly on my own project while working on customer cars on the side. It was one of those facebook post by some kid on behalf of the original owner who was now 87 years old. This one and only owner pre ordered it in december of 1969 and he recieved it 4/70. The maintenance records and documentation that came along with it are amazing. I have always had a passion for the S30 and this was finally my S1 I have been after. It was painted mercedes off white late in the 80s and thats the way the owner wanted it so that is the way he made it. Originally from California it traveled over to the east coast and sat inside a warehouse since 2003. (good thing too becuase I have worked enough cars over on the east coast to see what the salt does to them.) Anyhow the car was listed on FB for a few months and I had glanced over it a few times. It was a few months after I saw it that I decided to contact the seller. I asked if there was any documentation and low and behold I was presented with stacks of paperwork and service history. The ad did say it had an L28 now and this was why myself and I assume others passed it up. Turns out the original engine blew in 1990 and the owner got it serviced (like he always did) at Nissan. They had no more L24 engines so the installed a brand new NOS L28 Long block. It is all documented on the reciepts and work from the repair facility. At that moment I knew this was the car for me. I immediately worked out the viewing and hurried to pick it up with my trailer. It was better than I had expected and the documents made it that much better. It had to sit for some time after I got it home, but shortly I started work making it better. I will post in chronological order the progression of work through pictures. Enjoy...
-
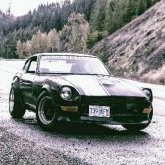
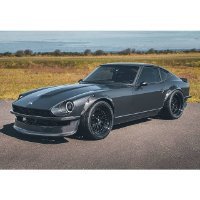 Hello everyone, my name is Brandon Henness. I've building a 240z for the past 7-8 years and I've finally "finished" it. I've made a build gallery on imgur if you're interested in checking it out. Otherwise here is a before and after of my car. It's swapped with an LS1 and a T56, upgraded suspension, big brakes, chromoly stub axles and CV shafts, self made PCB LED taillights, and much much more. I'm currently entered in SEMA BOTB Young Guns and I'm trying to accumulate some votes so I can win a spot at SEMA in 2021. You can vote for me by following this link, you can vote every 24hr until October 25th at midnight. Thanks Everyone!
 -
So this project actually started a while ago. I have been working slowly on my own project while working on customer cars on the side. It was one of those facebook post by some kid on behalf of the original owner who was now 87 years old. This one and only owner pre ordered it in december of 1969 and he recieved it 4/70. The maintenance records and documentation that came along with it are amazing. I have always had a passion for the S30 and this was finally my S1 I have been after. It was painted mercedes off white late in the 80s and thats the way the owner wanted it so that is the way he made it. Originally from California it traveled over to the east coast and sat inside a warehouse since 2003. (good thing too becuase I have worked enough cars over on the east coast to see what the salt does to them.) Anyhow the car was listed on FB for a few months and I had glanced over it a few times. It was a few months after I saw it that I decided to contact the seller. I asked if there was any documentation and low and behold I was presented with stacks of paperwork and service history. The ad did say it had an L28 now and this was why myself and I assume others passed it up. Turns out the original engine blew in 1990 and the owner got it serviced (like he always did) at Nissan. They had no more L24 engines so the installed a brand new NOS L28 Long block. It is all documented on the reciepts and work from the repair facility. At that moment I knew this was the car for me. I immediately worked out the viewing and hurried to pick it up with my trailer. It was better than I had expected and the documents made it that much better. It had to sit for some time after I got it home, but shortly I started work making it better. I will post in chronological order the progression of work through pictures. Enjoy...
-
 I'm in the process of installing a long nose R 200 limited slip differential with 280 ZX turbo tripod half shafts into a 240 Z. I have transferred the dust shield from the 240 Z companion flange to the 280 ZX turbo companion flange, although I'm not exactly sure why I needed to do that. However, as many of you know, there is a problem with the grease seal. There have been writeups in the past on this recommending using the R200 Pinion seal with the rubber removed off of the outside of the seal. However, in my circumstance, it was too large by 0.080in. By measuring the seal journal of the 280 ZX Turbo companion flange and the inner diameter of the housing for the 240 Z, I came up with the dimensions of 40 mm for the outside diameter of the companion flange seal journal, and 72 mm for the inside diameter of the 240 Z housing. So, there are several sources that make a 40 x 72 x 10mm grease seal. I ordered one from Timken and it was a perfect fit! Problem solved! I found this seal simply by google search. I hope this helps anyone trying to do this conversion.
 -
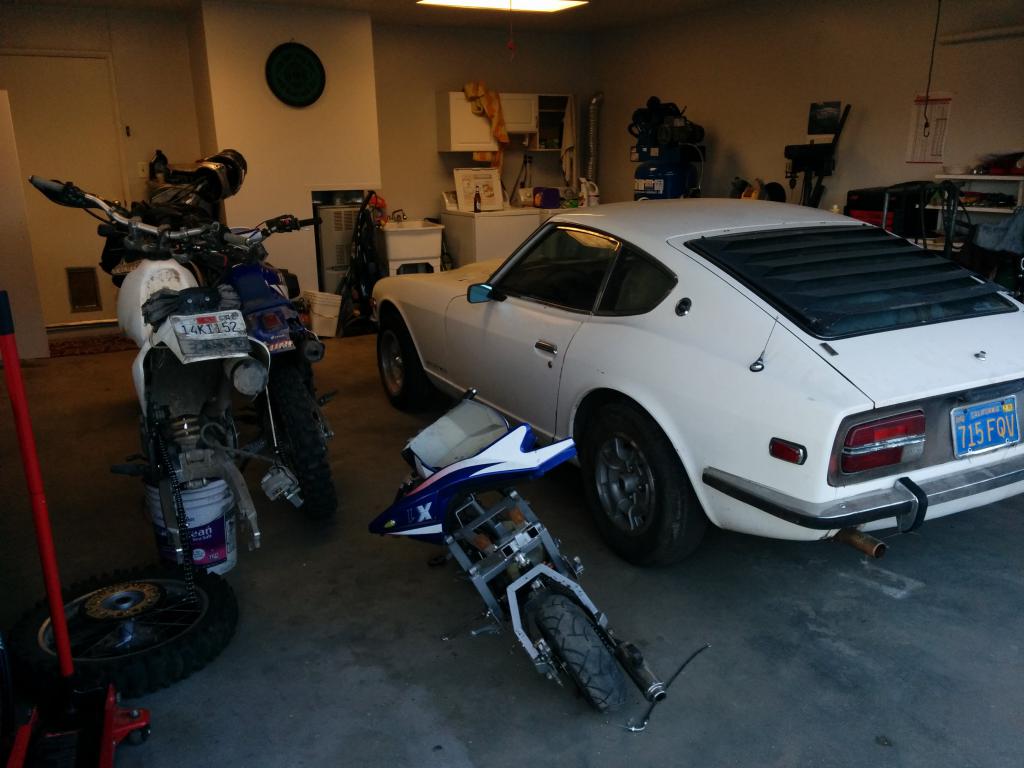
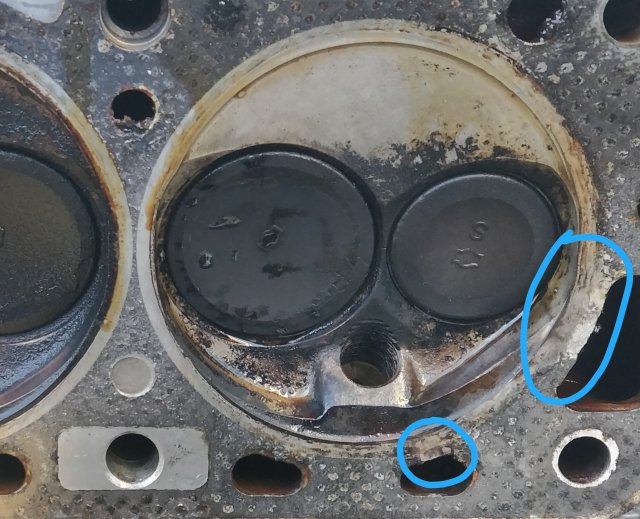
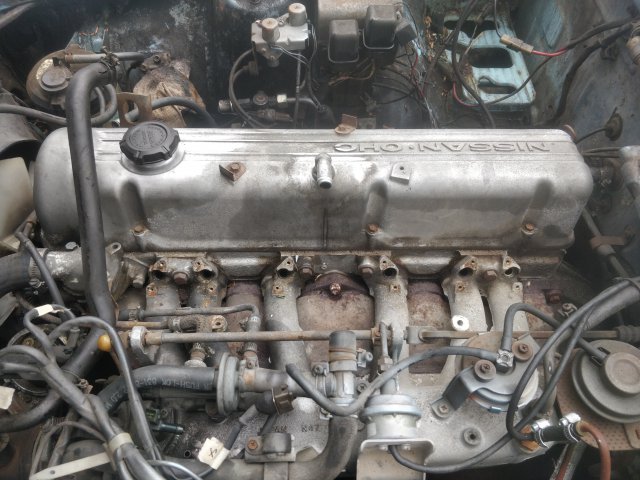
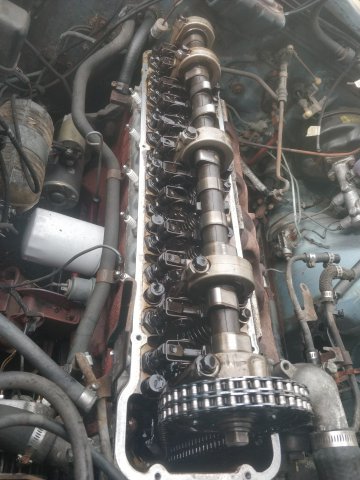
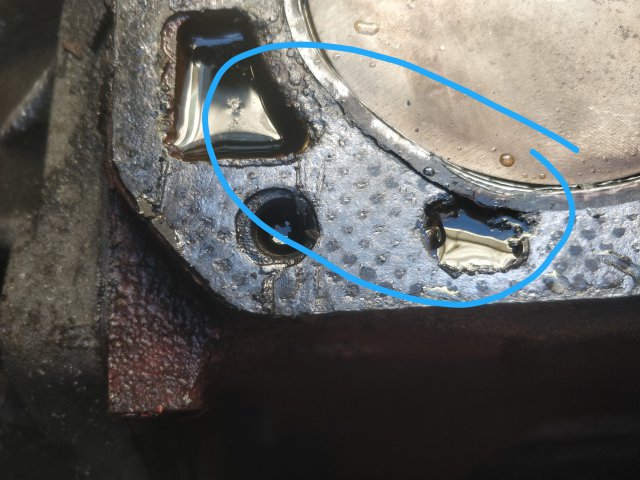
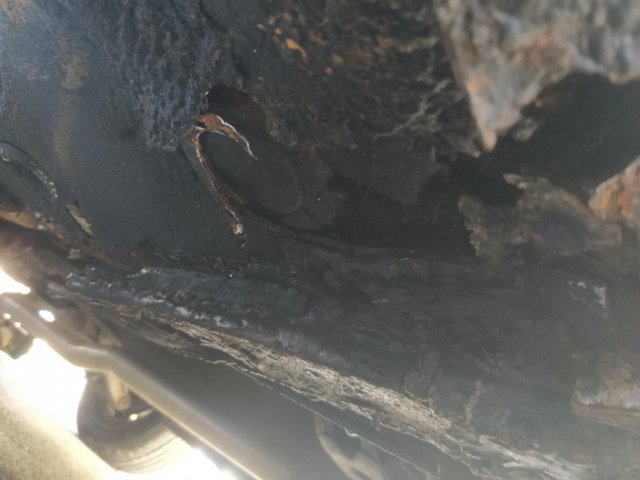
MODS: I apologize, should this be moved to Member Projects? Unoriginal, I know. Blasphemous, for sure; wouldn't have it any other way. I just wanted to pop in with the standard "Long time lurker" introduction. I've been trying to restore a Z for the past year and half, which has ballooned way over my head in what surprises a 40+ year old Datsun has in store for an unsuspecting hobbyist. It started off with buying a running, seemingly decent condition 280z which was to be a joint project for my girlfriend and me. We were going to do right by the car, keep it simple and just restore it. As we started to peel back the layers, that all started to change. Feb-April 2019 The car ran! Only had two owners, came with a lot of documentation and detailed sheet of when/what was done with all corroborating receipts. The guy literally tracked running hours on engine rebuild. It did start puffing a bit and he was forthcoming and stated it needed a head gasket. We start cracking away and the next set of photos you're all familiar with.... We got a quote on rebuilding the head and it came out to over $1000 since the components are hard to come by or custom. Looking at engine options through Datsun Spirit, who are local, just destroyed so much of the budget. Especially now that we had to battle the unseen cancer... We just started to tear everything apart. Sadness ensued. The best part of the car
-
 When uninstalling/reinstalling the diff, I noticed the passenger side axle companion flange rotated independent of the axle while loosening the bolts. I could pretty easily rotate it back and fourth by hand a couple degrees or so. The axle nut was still staked in place, but had definitely lost its clamping force. I could clamp the axle down with a new nut, but with as much play the splines now have, I'm thinking this axle is toast and would be too risky to continue using. Wouldn't want it to snap during a launch. Does anyone agree? Is it likely the axle wasn't installed properly? (I have never disassembled the passenger side axle, so I wouldn't know) Should a fresh install with a new nut torqued down to 230+ ft lbs be fine? Would it be wise to inspect the axles after each autocross? Thanks in advance!
 -
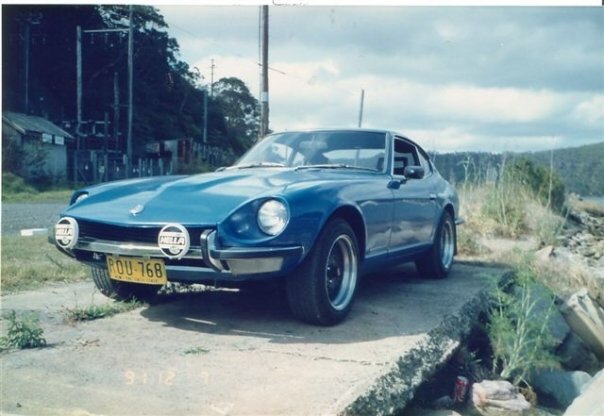
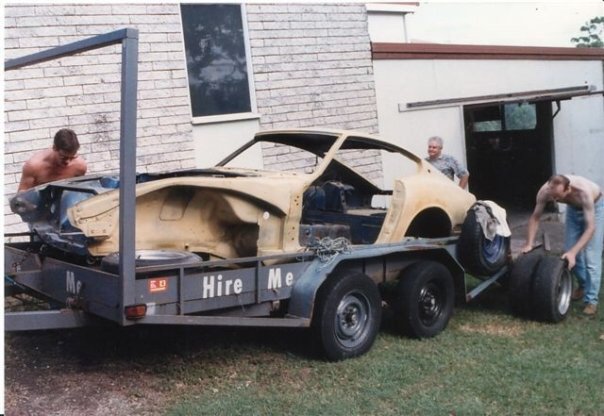
I think I better start firstly with a quick intro. Hello from the Wide Bay area of sunny Queensland in Australia. I’m a long time ‘guest’ lurker to the HybridZ forums mainly for research and ideas particularly when it comes to round top Hitachi SUs. I’ve loved Z cars since I first laid eyes on one in my early teens when I went to a historic race meeting at a local track with a friend’s family (who also have an affiliation with Datsun 1600/510). There was no escaping the ensuing obsession. This was only made worse by the inception of the Fast and Furious franchise coincidently at the same time I acquired my learners driver licence. I am shamed to say I have had at least one car with “cool” under body neons…. On to the car! This particular car is a 1971 chassis number #629 purchased in 2009. The car was a daily driver retaining the L24 and had a 280ZX gearbox and ignition. I believe it was Victorian sold in a blue colour and was repainted to red in the late 80s or early 90s (judging by the Australian fashion sense in the photos). I have maintained continuous registration of the car as well. The car has had various levels of priority around my life choices and events. I think I put less than 1000 miles on it between 2010 and 2017, is this considered Datsun abuse? I am now at a stage where I can tinker with it more and crack on with a long time goal to leave a legacy of my experiences and information on YouTube and lessor so on Instagram. One immediate goal is to try for 200WHP with only optimisations to fuel, ignition and exhaust. There are gaps to the story thus far which I intend to fill in with further posts. I want to keep this post short and sweet. Cheers, Neubs PS. The current specs are: ENGINE (currently making 170WHP) - Overbored and stroked to 2996cc - Approx. 10-10.5:1 compression ratio - L28 F54 block - L28 N42 head, 1.0mm O/S Ferrea Super Flo valves and match ported - ‘V07’ LD28 crank, balanced, knife edge and nitrided surface - L24 connecting rods - Modified Mistubishi pistons - Crow Cam camshaft; - 292° duration 0.495” valve lift intake - 296° duration 0.510” valve lift exhaust - Innovate Motorsports LM-2 datalogger and wide band O2 sensor COOLING - Ebay 75mm alloy radiator - 2 thermo fans - 280ZX thermostat with Tridon temp switch IGNITION - Pertronix Ignitor I module - MSD 6A ignition - L24 distributor with ‘7.5 plate’ and vac advance FUEL DELIVERY - Rebuilt round top 240Z Hitachi SU carbs with ZTherapy rebuild kit - SM needles with higher set fuel float level - Holly Red fuel pump EXHAUST - ZStory stainless steel Race/Sport headers - ZStory stainless steel Z432 style JDM muffler - Recycled mild steel centre pipe and generic hotdog muffler TRANSMISSION - 71C RB20DET gearbox - Exedy ceramic clutch and pressure plate DIFFERENTIAL - Standard rebuilt open centre 3.9:1 R180 - Standard uni joint drive shafts BODY - Restored Japan polyurethane front bar INTERIOR - Stock (and very worn out) - 280ZX modified tacho SUSPENSION - Stock springs - Stock brakes - Stock geometry components - Koni adjustable shock absorbers ROLLING STOCK - Rota RB-R
-
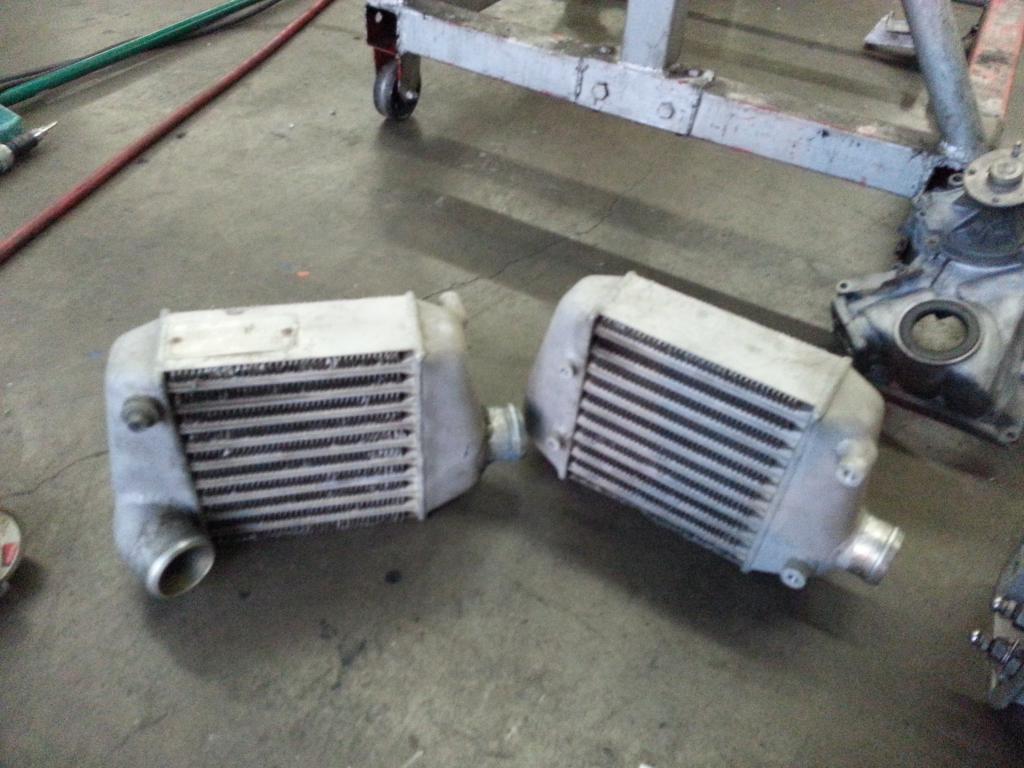
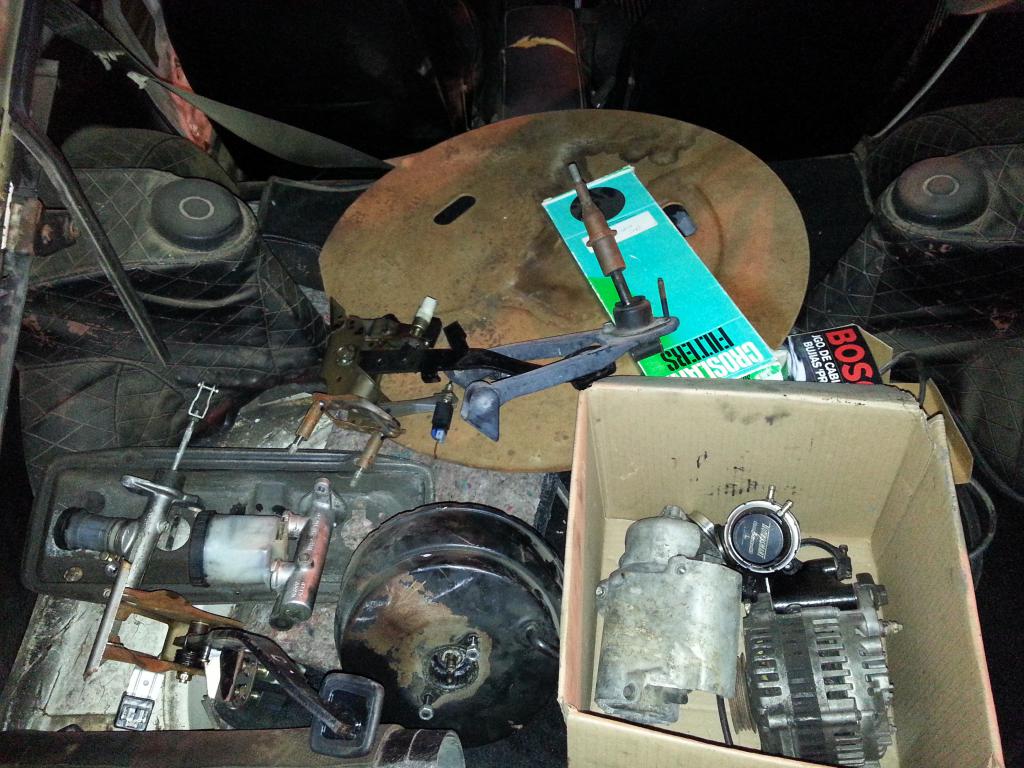
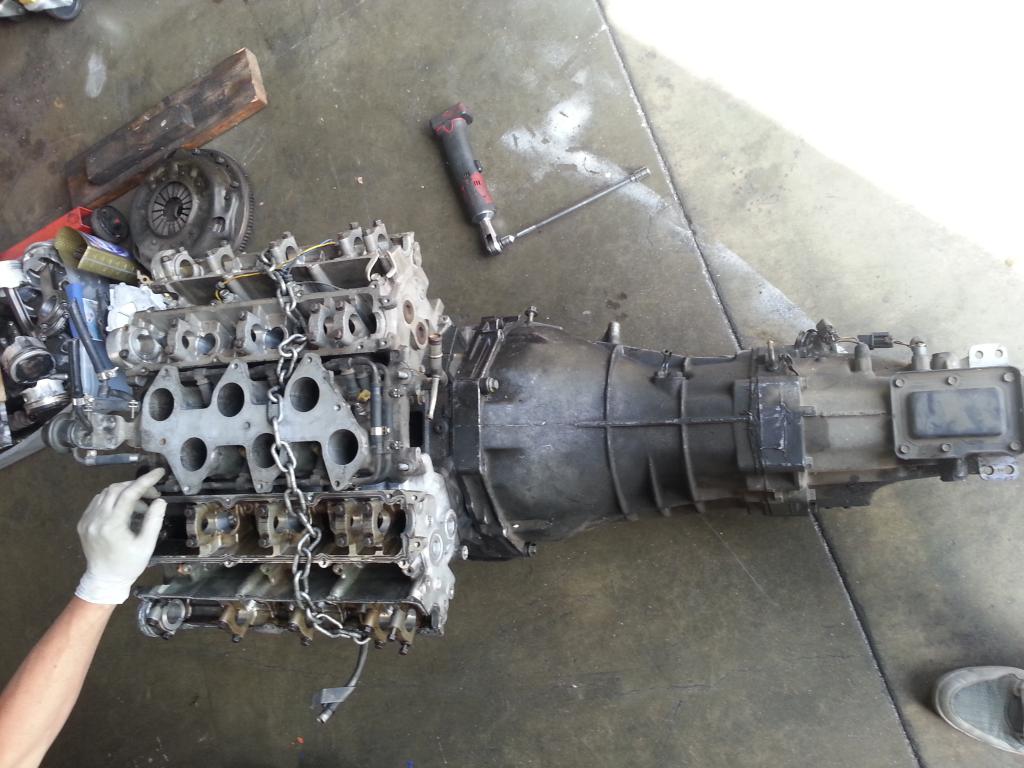
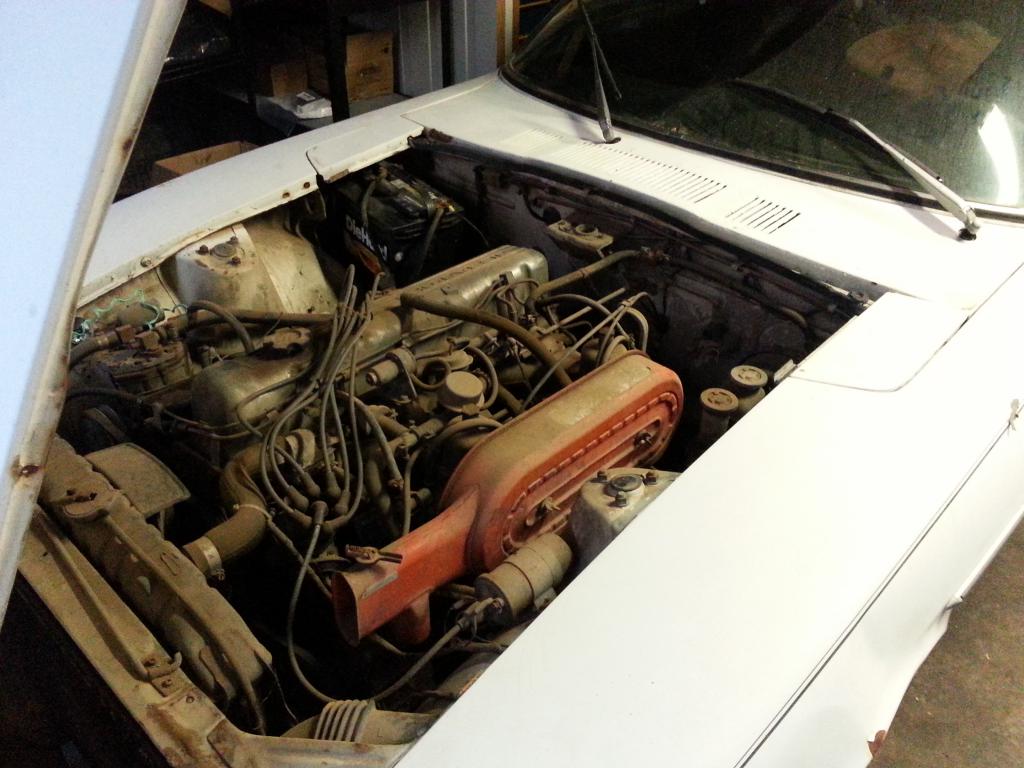
Recently aquired a 1972 240z with 108,112 miles. Having an new extra vg short block laying around and a set of cima heads and manifolds, I decided to swap the vg into a s30. Not sure on what turbo I will run, but im looking into compturbo 6262, or a borgwarner s200. Looking for around 550-600hp. Heres my list so far: Stock motor with ported cima heads and jwt springs relocate position of turbo from driver to pass. side (not enough room to keep on driver side) aeromotive fpr walbro 485 pump -6 feed and return line id1000 injectors compturbo or borgwarner turbo custom top feed fuel rail turbosmart wastegate boost controller R32 gtr front brakes calipers with custom bracket (I will be running 16" so I will try to fit the largest rotor in them. custom intake manifold with q45 throttle body had a pair of ARC z32 intercoolers laying around that I will have modified to a single. z32 brake booster, master cylinder and possibly pedal z32 clutch master and possibly pedal possibly z32 diff installed and thats where im at now. The paint on the car will be redone. I purchased a new center console, new seals from black dragon and a bre rear spoiler. The respray will be porsche's carrera white
-
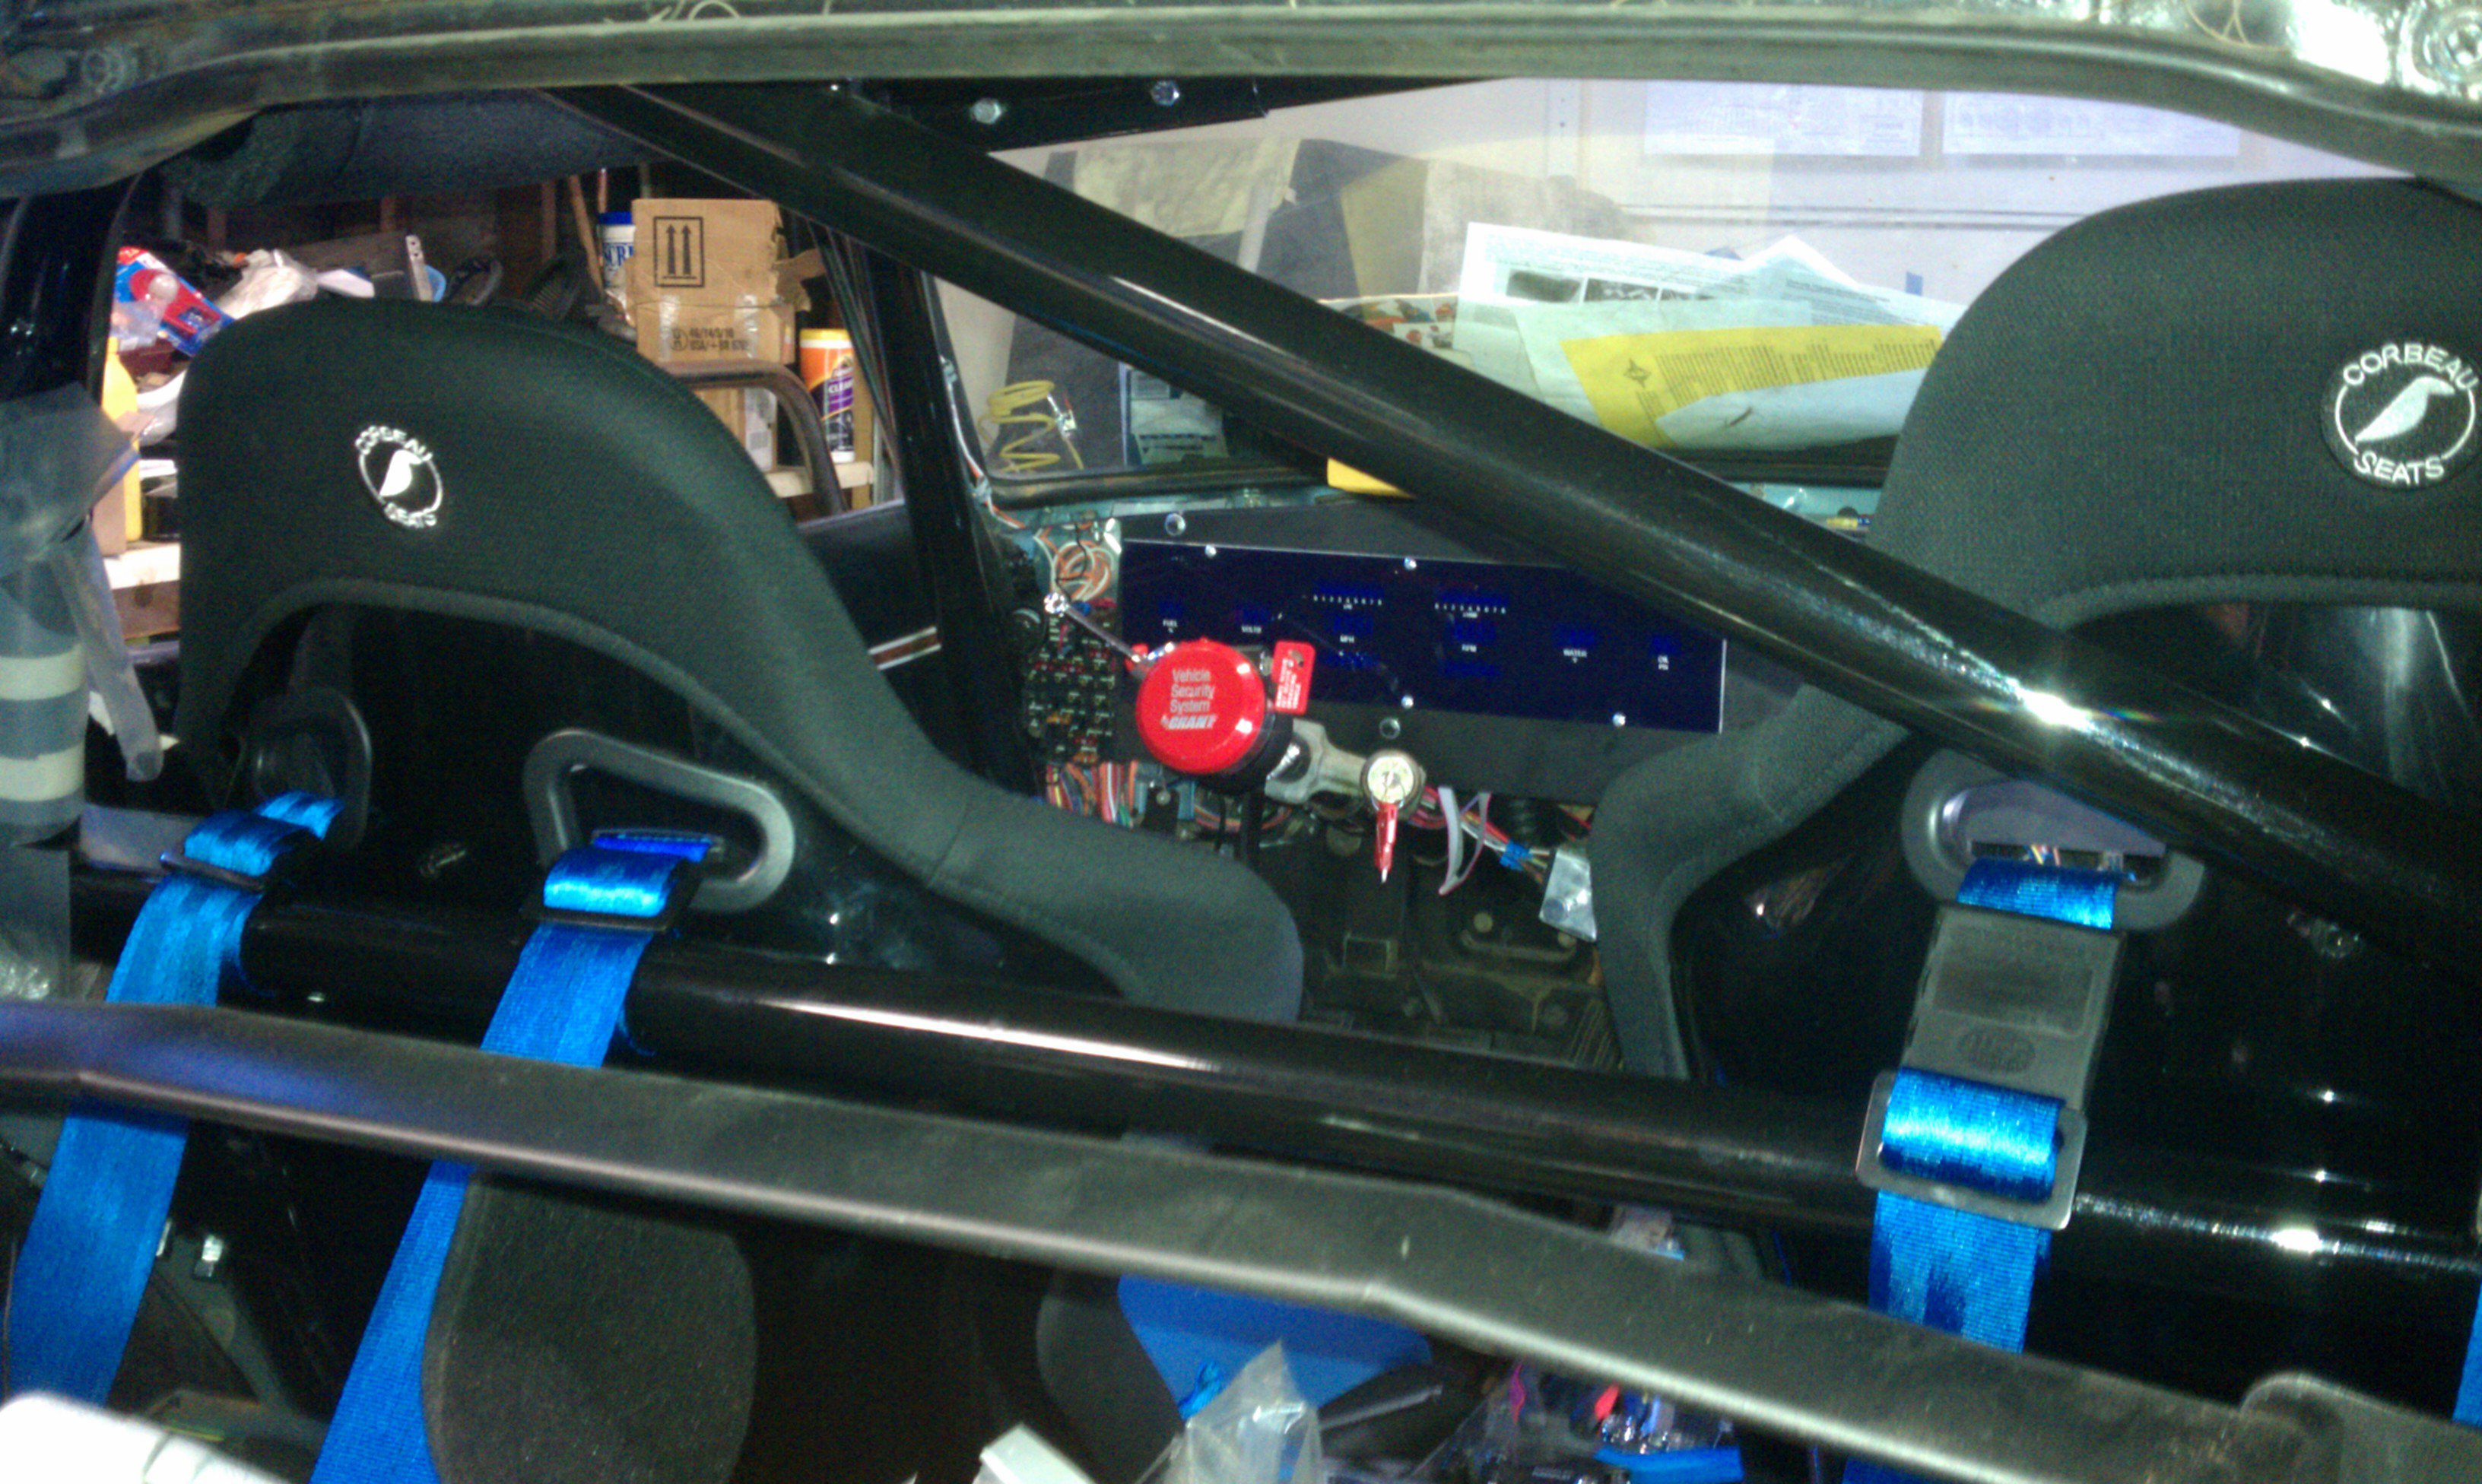
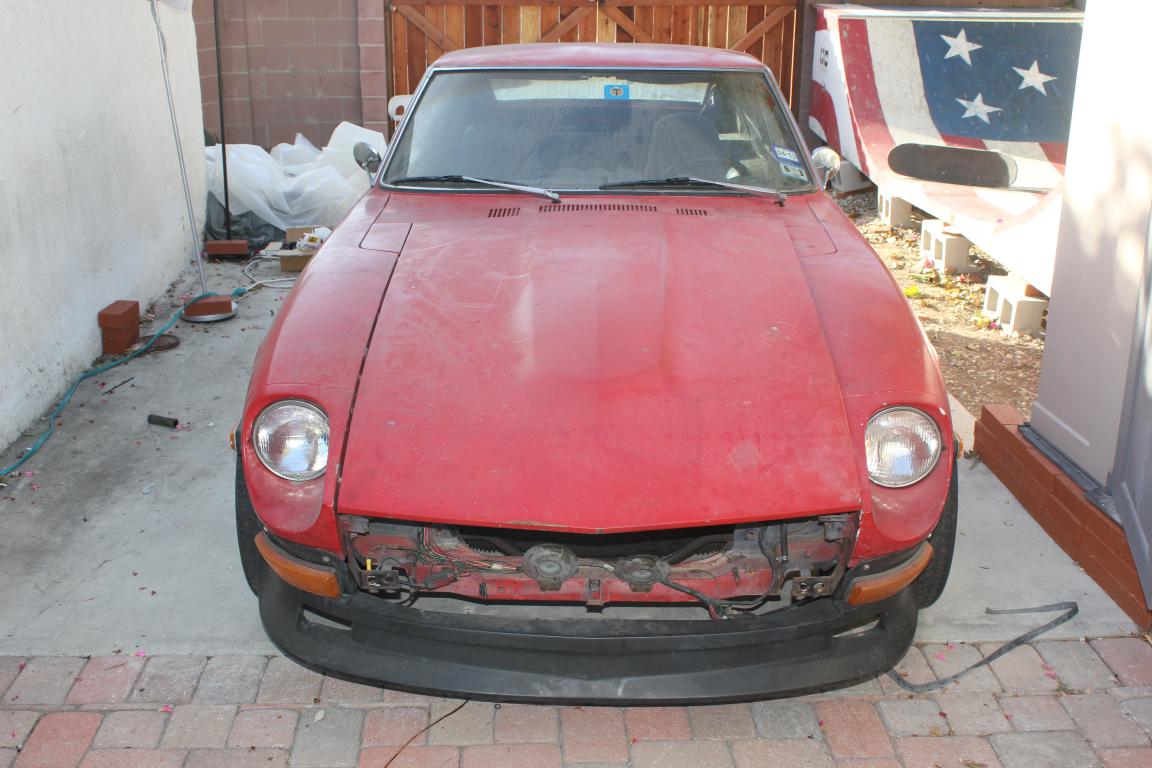
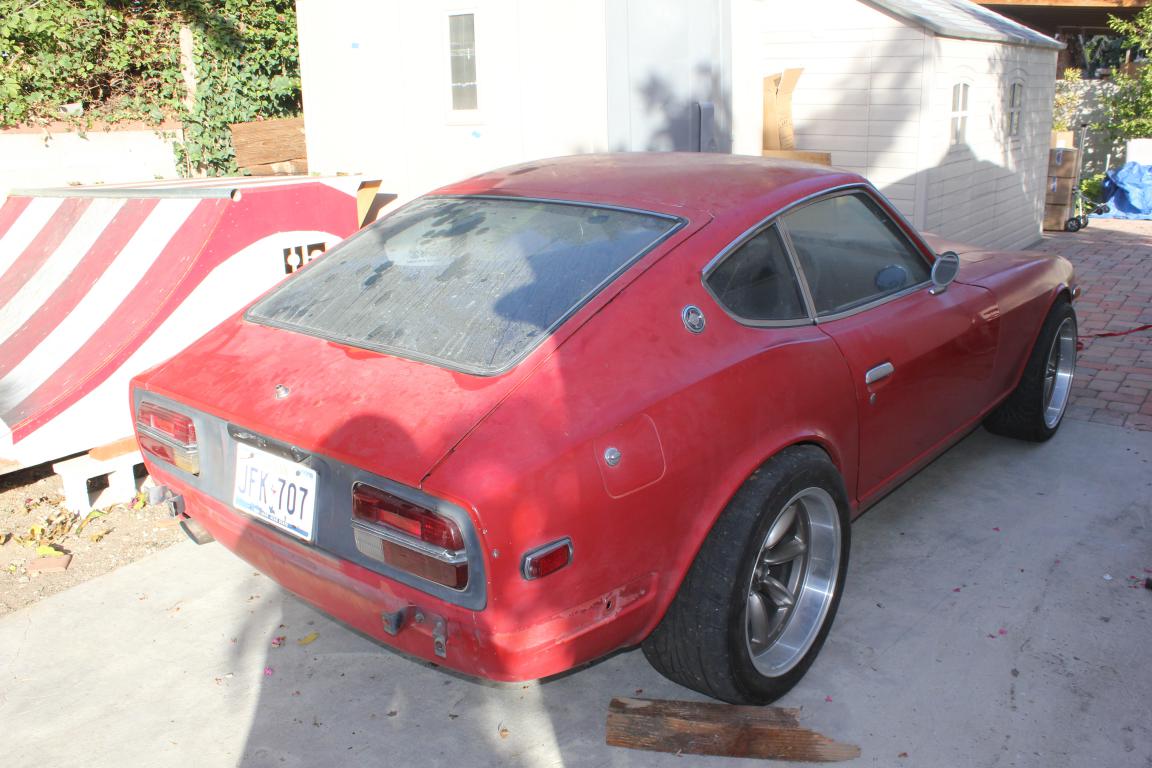
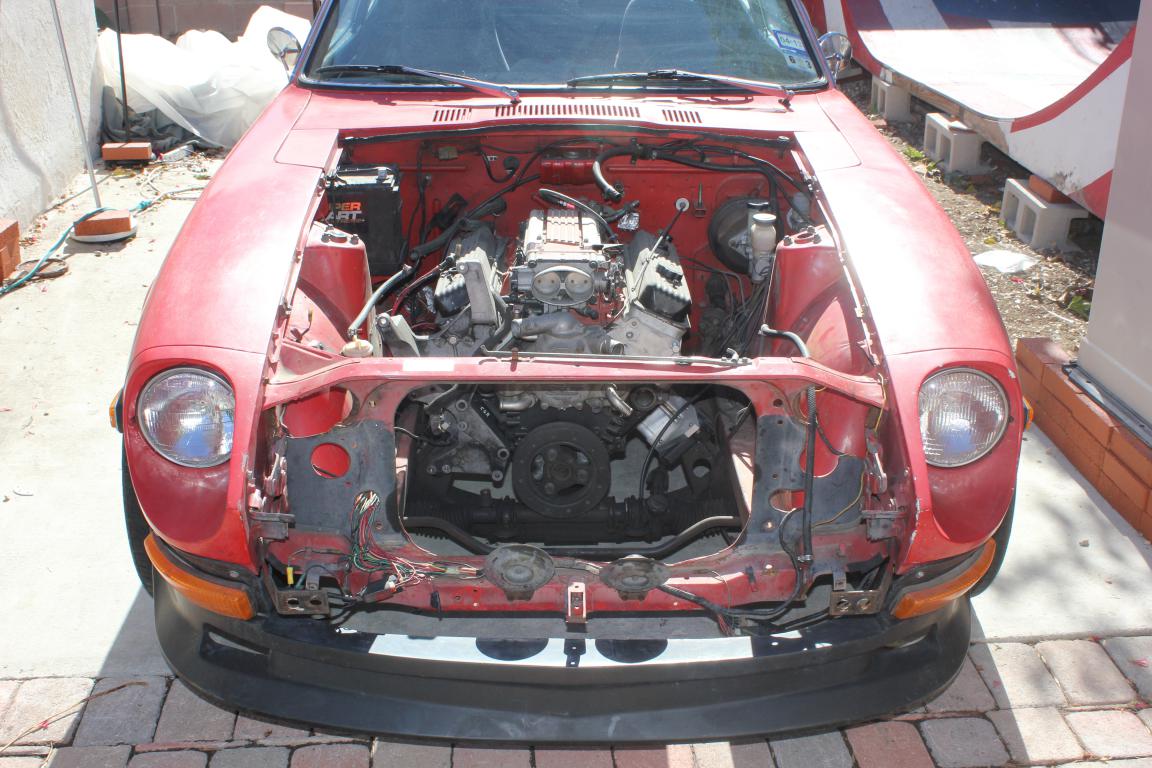
I am selling my 1973 Datsun 240Z. Bought as roller without engine/trans in 2011/2012. Previous owner/s have changed the roof and various parts, so some of the stuff i pulled out was off a 260z/ 280z and there might still be some mixed parts on it. That and all the modifications pretty much eliminate this as a show car. Do not buy this thinking it can be restored to show car quality. It would take far more than would make economic sense. This is purely made to run quick/fast, not to look pretty. It's raw and needs muscle to be driven. It has manual brakes without booster and manual steering without power assistance. You need to be strong like bull. But it is rewarding! If you dare you can get 0-60 in just over 4 seconds, while carrying a passenger. I've never felt the need to put effort into it, but I am certain it'll crack the 4 second mark if you just lower the tire pressure... This is a great handling, light weight car with balls! Once you get used to its noise and raw roughness or like me, fall in love with it, this car is AWESOME! Took it to tracks and autocross events and thoroughly enjoyed the @#$% out of it every time i drove it, but I am almost done building me next racecar and I need the funds to focus and finish it up... Now to the great things about this car. I'm just going to list as much as I can and I'll save some details for when you come to see it: SOLID 1997 Pontiac Trans Am LT1 V8 with 310 hp at around 5250 rpm and a torque curve that starts well above 320 ft. lbs. from the word go all the way into the rev limiter. Max torque 340 ft. lbs. Stand-alone engine harness and Howell Engineering computer, tune-able, obviously T56 manual 6-speed transmission out of the same 1997 Pontiac Trans Am S1 Sequential Shifter that translates forward/ backward motion into the H-pattern - yeah, it's awesome! R200 rear diff with a fantastic Quaife ATB torque biased helical limited slip differential upgrade and 3.545 final drive ratio Nissan Armada CV jointed half shafts LED sealed beam replacement headlights with aero covers Both, front and back bumpers lightened (not good for crash resistance, so be aware) Fiberglass bumper covers, front and back, front with lower air dam Fiberglass fenders Fiberglass hood with vents and secured by lockable aerocatch latches Fiberglass cowl Fiberglass flares Wilwood brakes (almost 13" all around) with 6 piston front calipers and 4 piston rears - high temp fluid, track disks, track pads, biasing valve installed Complete Arizona Z car suspension kit with billet control arms etc pp, which keeps the rear control arms straight while the vehicle is lowered! 5-lug Rota wheels 17x9 front and 17x9.5 rear with Nitto NT01s in 255/40/17 fronts and 275/40/17 rears Autopower bolt in 10 point roll cage NRG hub and deep dish steering wheel with quick disconnect and lockable cover Custom light weight polycarbonate dash board Dakota Digital gauge cluster with 0-60 timer and 1/4 mile timer and couple neat functions Ignition activated dash cam with GPS Corbeau racing seats on sliders, forth and back adjustable! Schroth ASM harness belts Fuel-Safe bladder fuel tank with functioning level sensor and external high flow filter and Mallory pump Fiberglass deck lid spoiler American Autowire chassis harness Clean California title Made in 1973, this car is PRE-smog and does not have to go to smog inspection! Current registration Asking price $12,500.00 Located in San Diego
-
I'm in the process of installing a long nose R 200 limited slip differential with 280 ZX turbo tripod half shafts into a 240 Z. I have transferred the dust shield from the 240 Z companion flange to the 280 ZX turbo companion flange, although I'm not exactly sure why I needed to do that. However, as many of you know, there is a problem with the grease seal. There have been writeups in the past on this recommending using the R200 Piñon seal with the rubber removed off of the outside of the seal. However, in my circumstance, it was too large by 0.8 mm. By measuring the seal journal of the 280 ZX Turbo companion flange and the inner diameter of the housing for the 240 Z, I came up with the dimensions of 40 mm for the outside diameter of the companion flange seal journal, and 72 mm for the inside diameter of the 240 Z housing. So, there are several sources that make a 40 x 72 x 10mm grease seal. I ordered this from Timken and it was a perfect fit! Problem solved! I found this seal simply by google search. I hope this helps anyone trying to do this conversion.
-
Wanted: 240z, 260z, or early model 280z. I need one with all glass and a body with no major damage. Rolling body with a dashboard is a big plus. Im located near sumter sc, and can have family look at cars near louisville ky.my max price range is 8k.
-
So I can find a ton of posts about the main hoop needing to have only 4 bends and those bends cannot exceed 180 degrees when totaled up. The problem is, I can;t find that in the nasa or SCCA rule books. Is that an actual rule? My cage builder bent this main hoop for me, I am just verifying before I have him re-do it as it would open up some space. Thanks! Here is a picture for reference, notice how the hoop bends around the rear wheel tub.
-
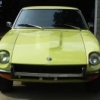
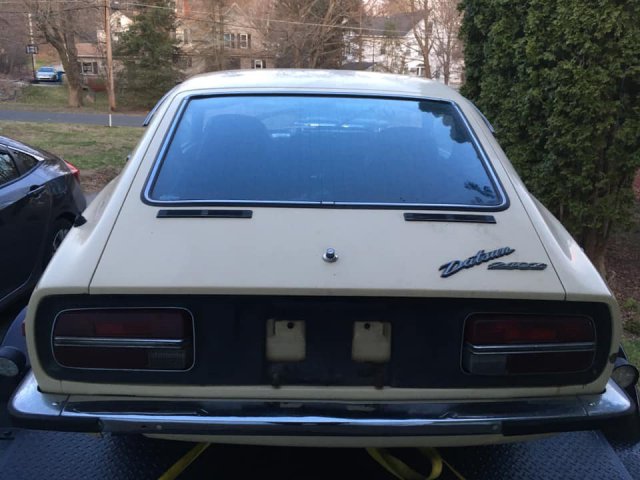
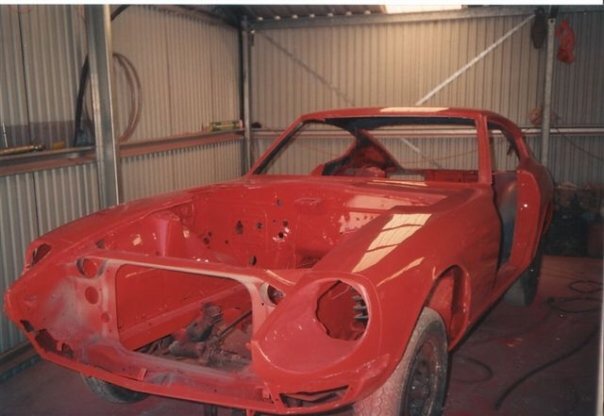
 Just bough this BEAUTIFUL 1971 240Z from Texas without even seeing the car in person. I'm amazed How clean this car is. Frame is straight and rust is extremely minimal. All the regular rust areas are clean! I have a rebuilt LT1 and 4l60e with zero miles, planning on selling the 4l60e and getting a T56. Anyway Here is the car, I started stripping it for paint. Will pull drive train tomorrow after I get my cherry picker back from my friend. He borrowed it 2 years ago
-
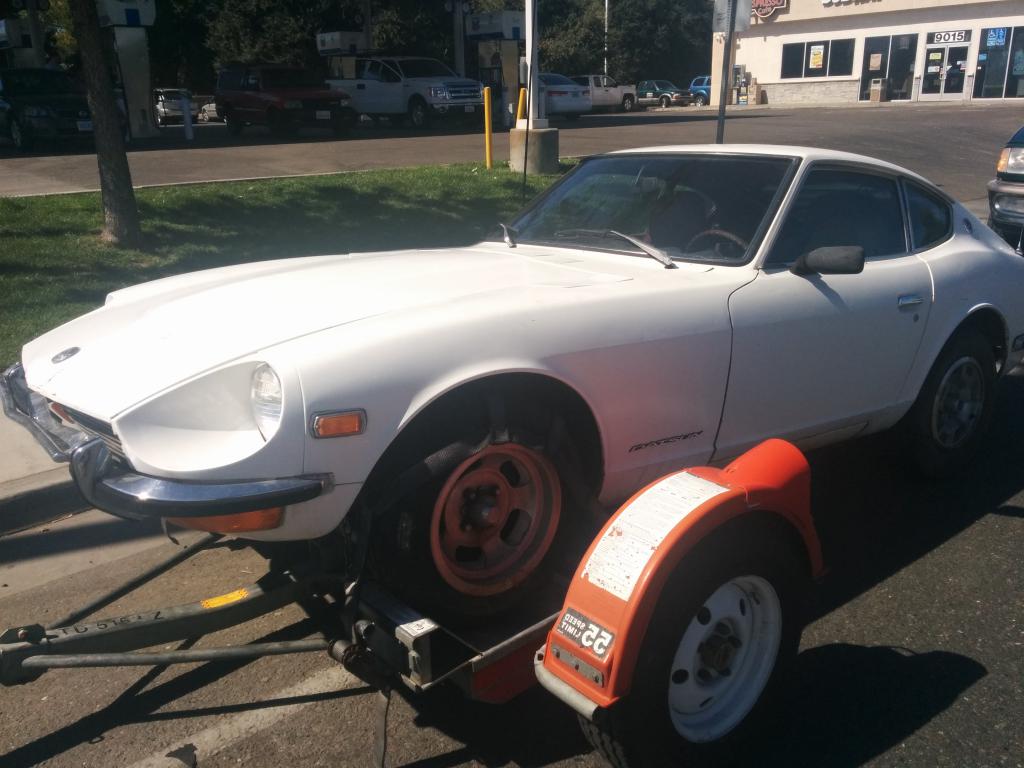
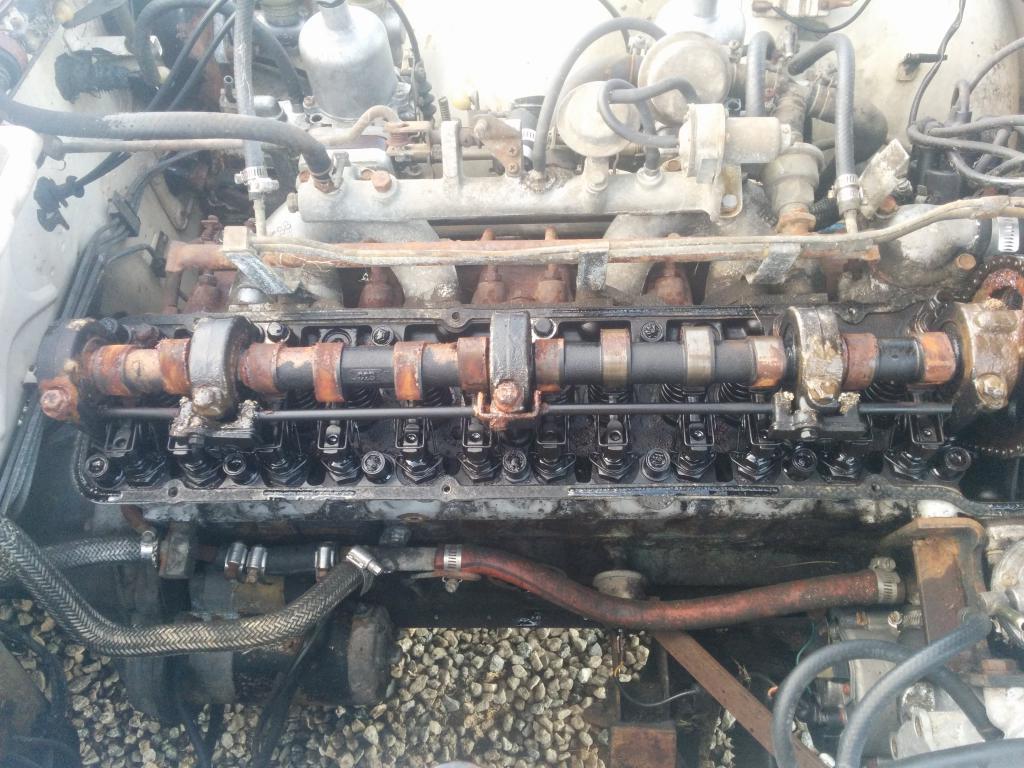
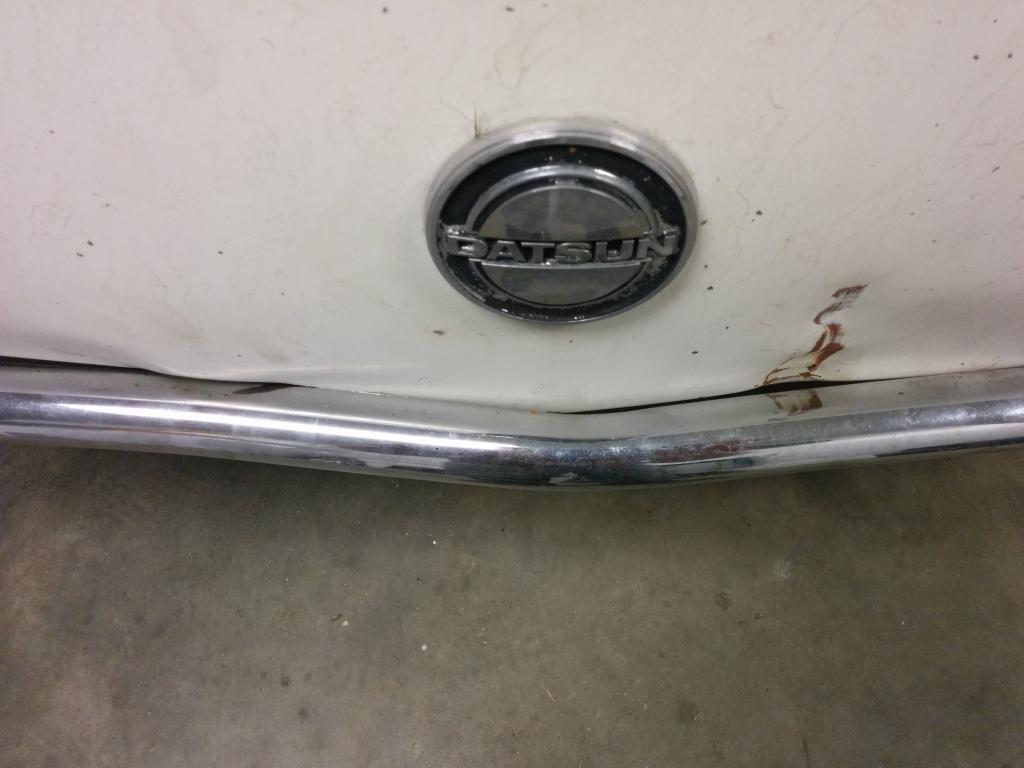
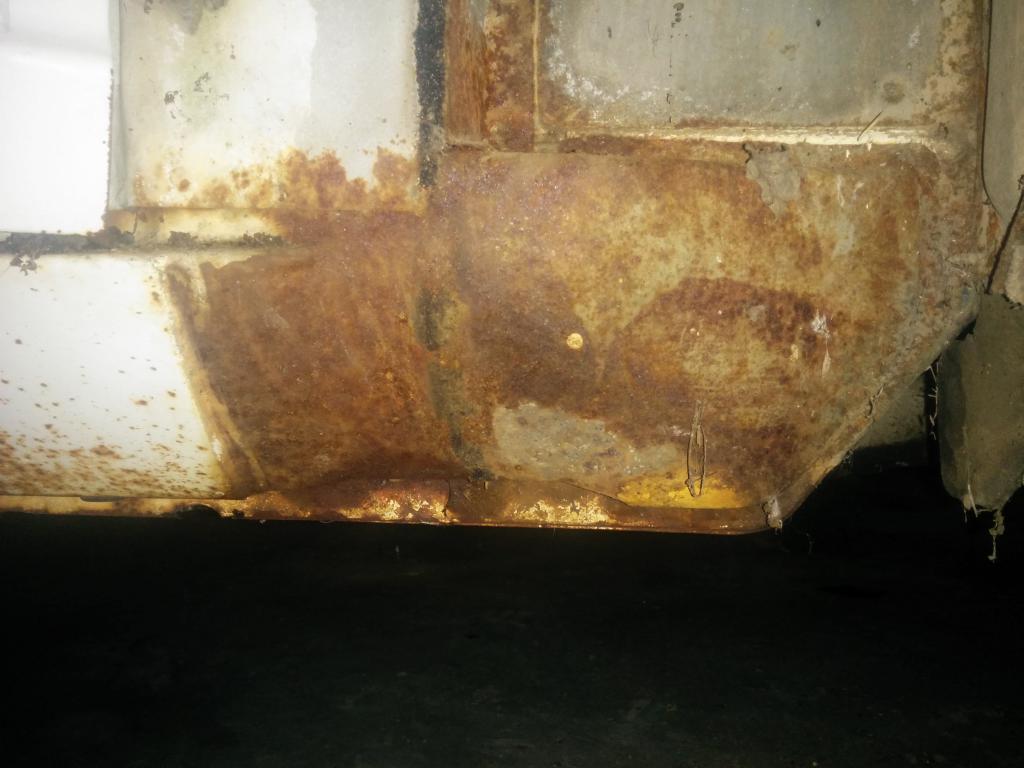
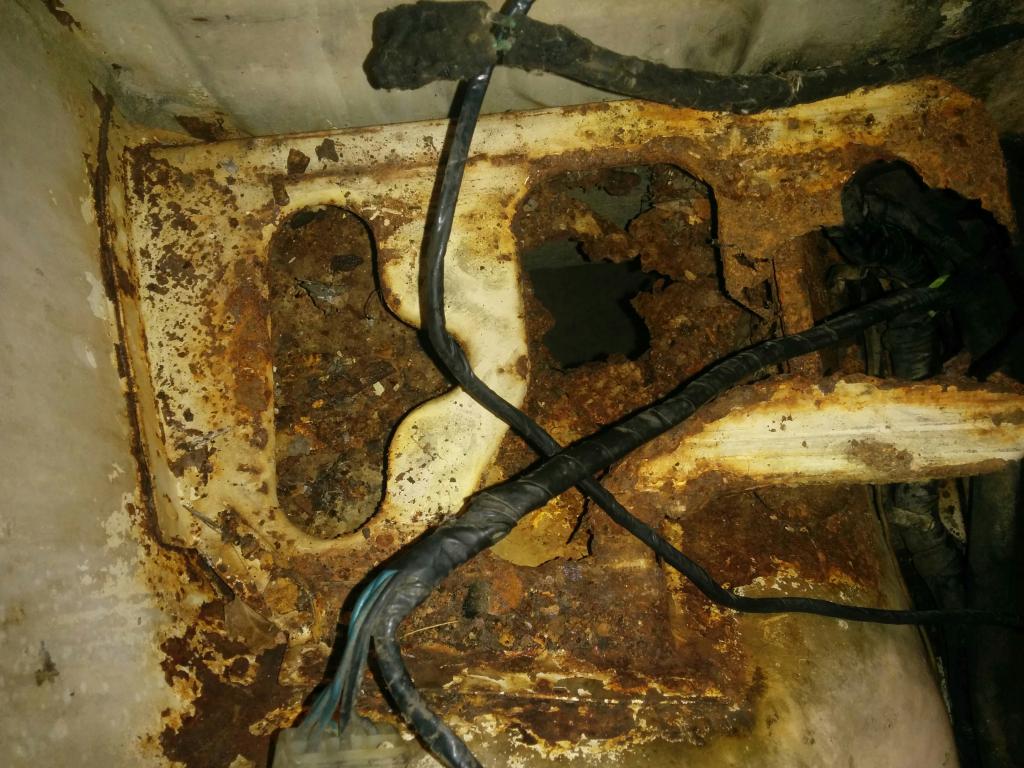
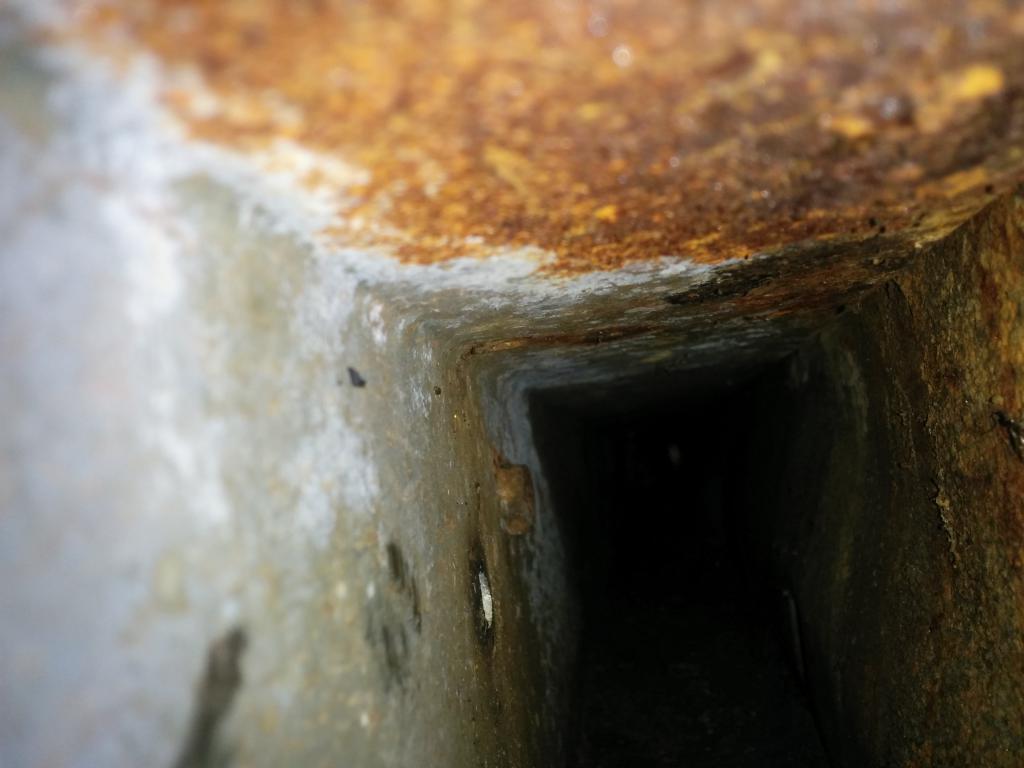
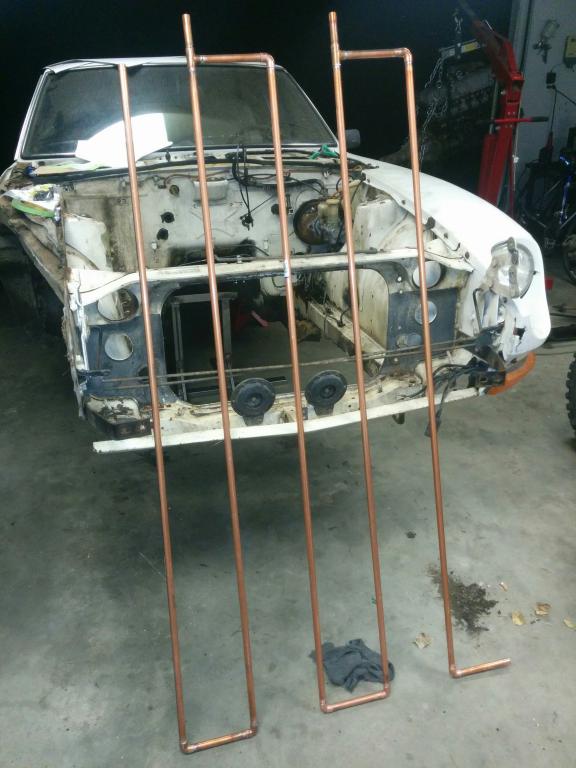
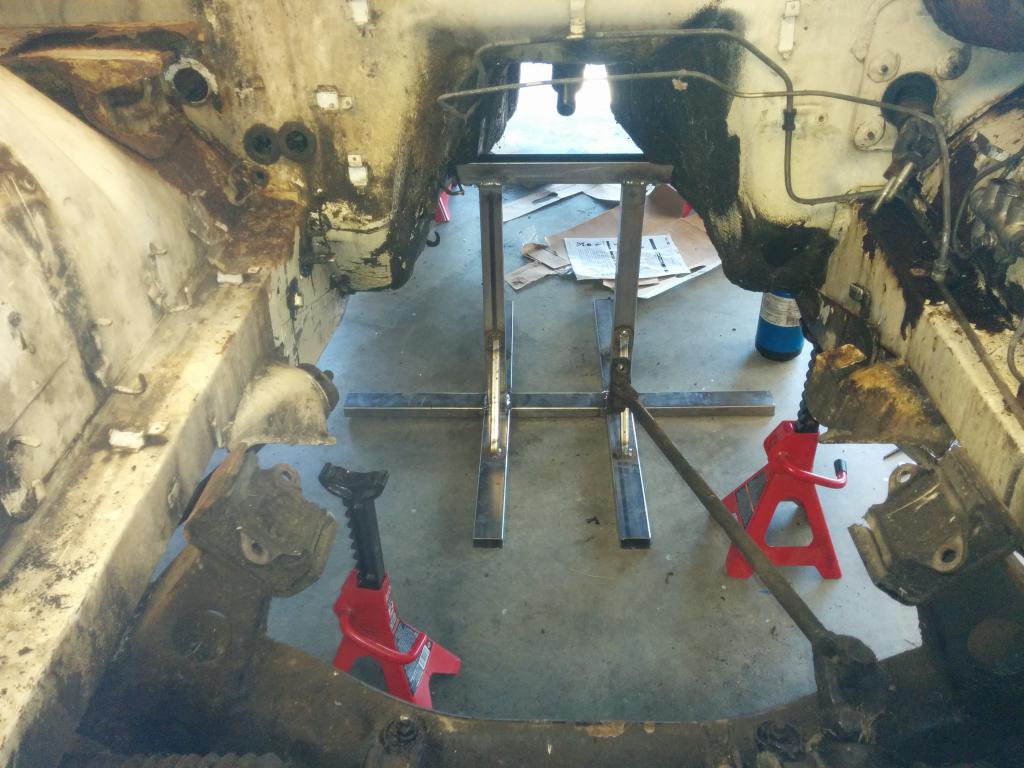
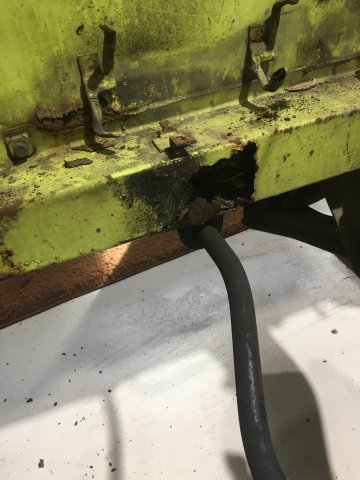
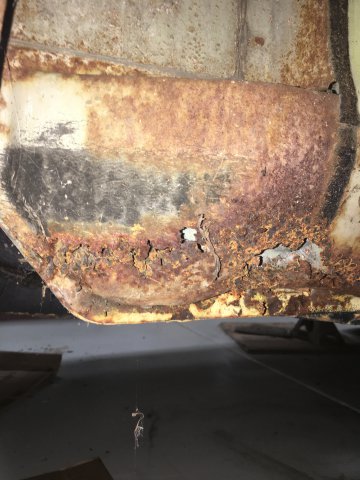
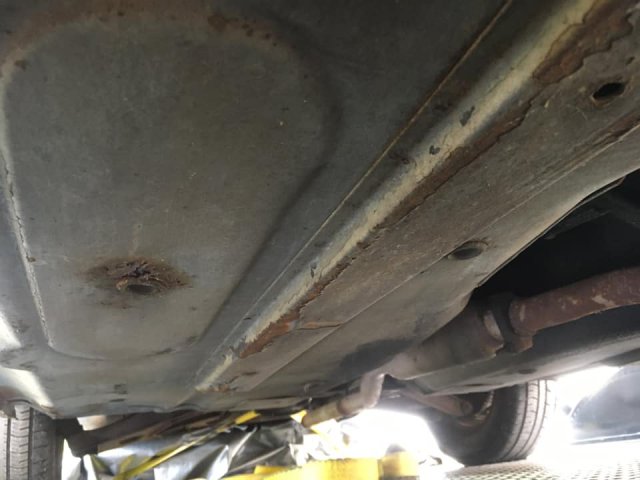
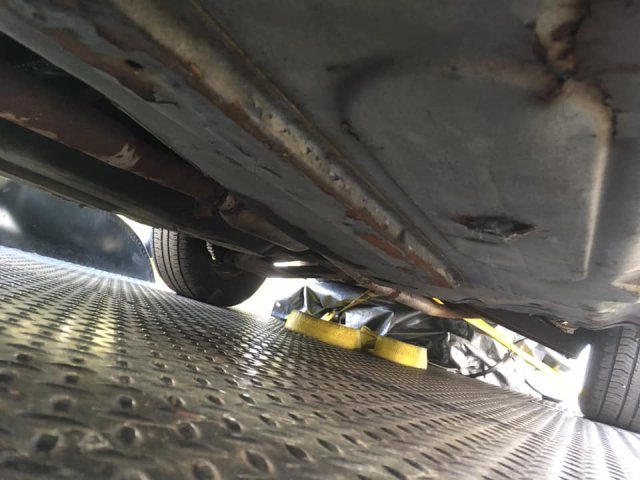
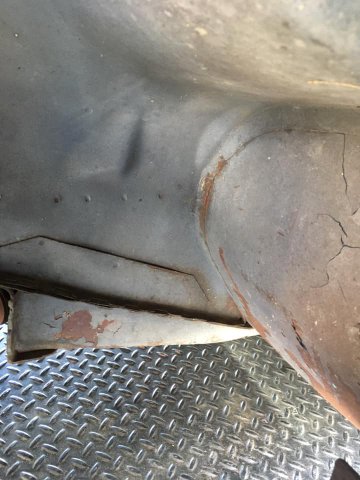
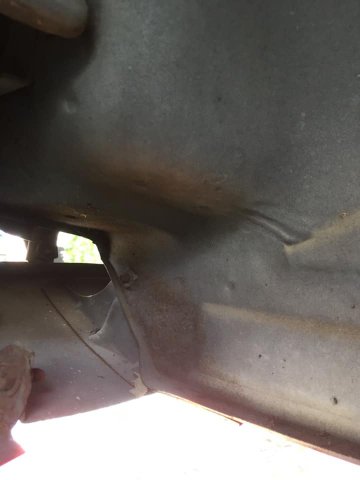
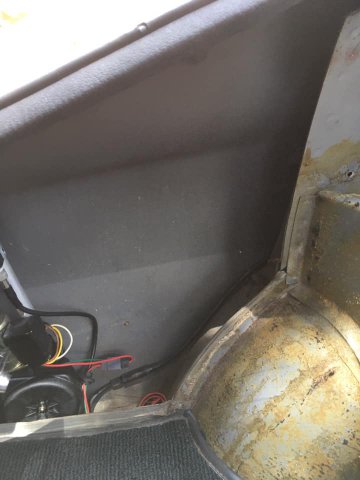
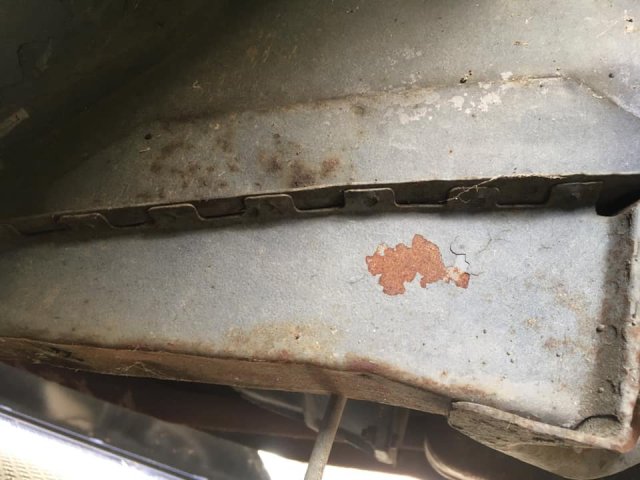
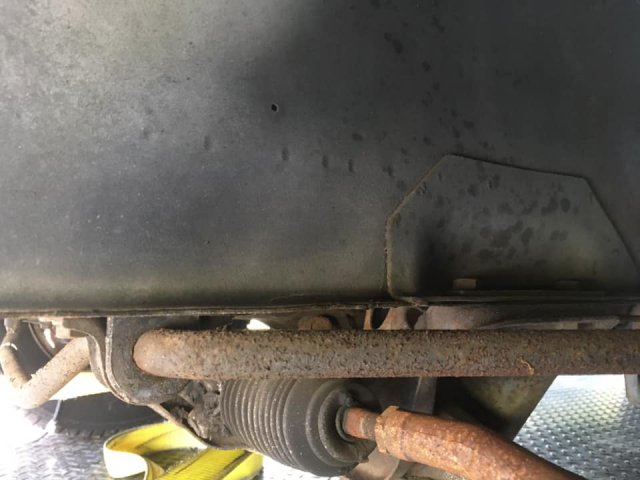
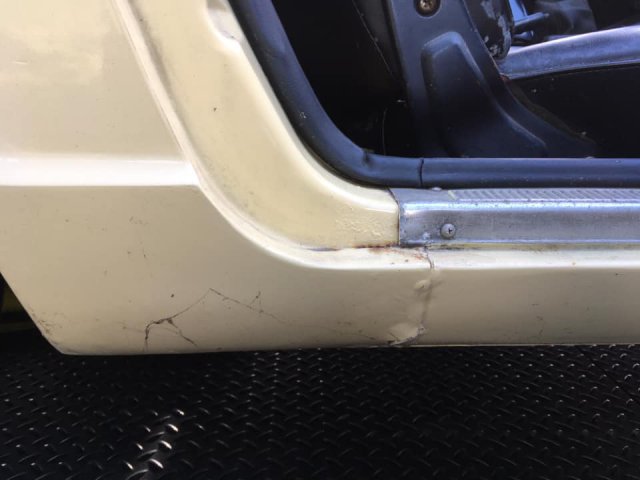
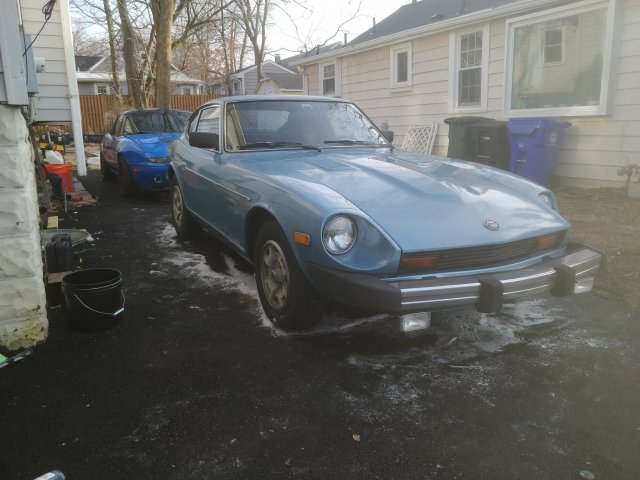
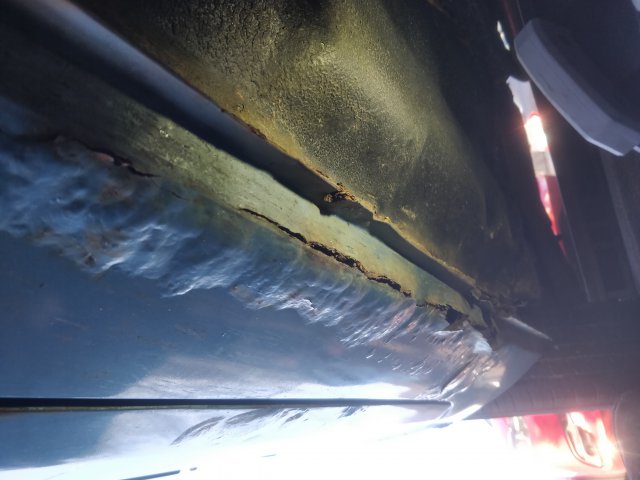
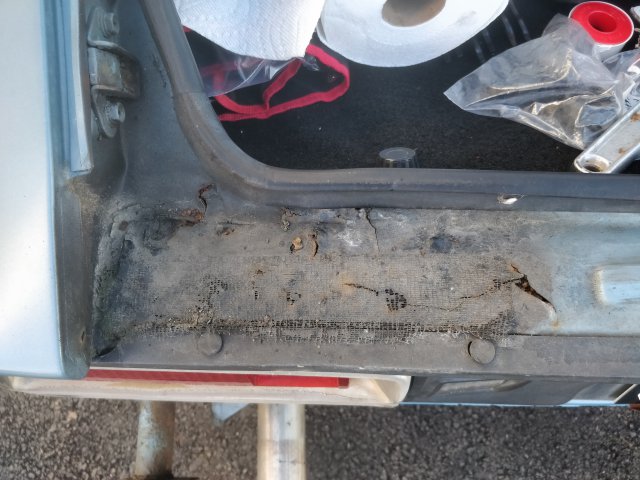
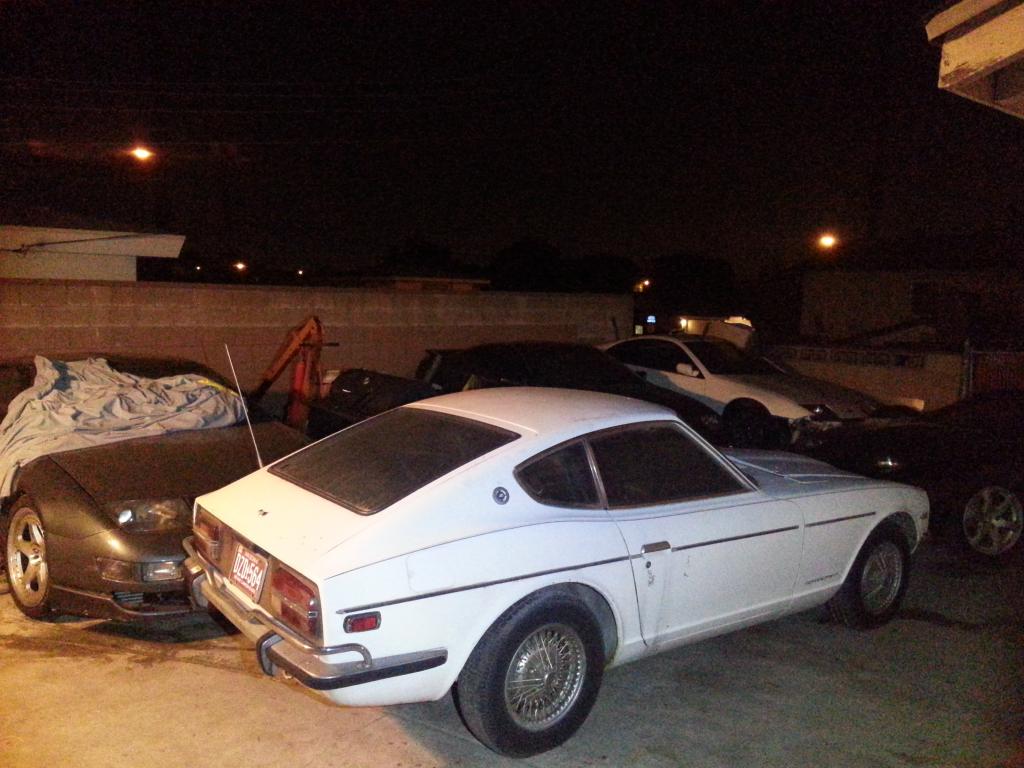
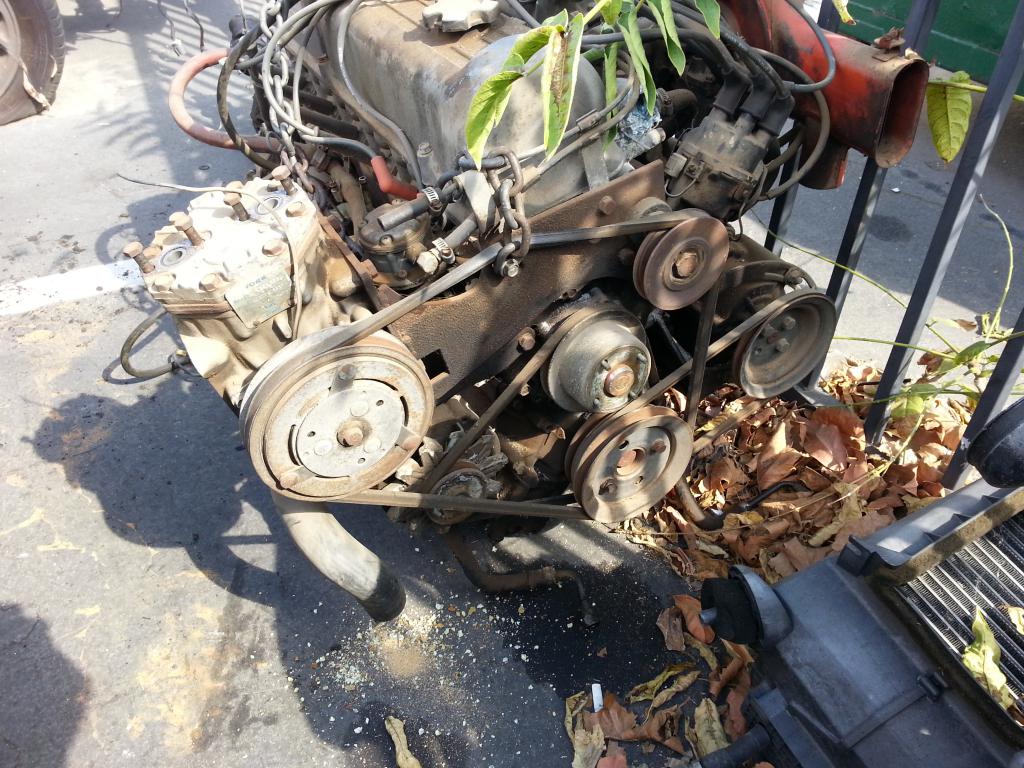
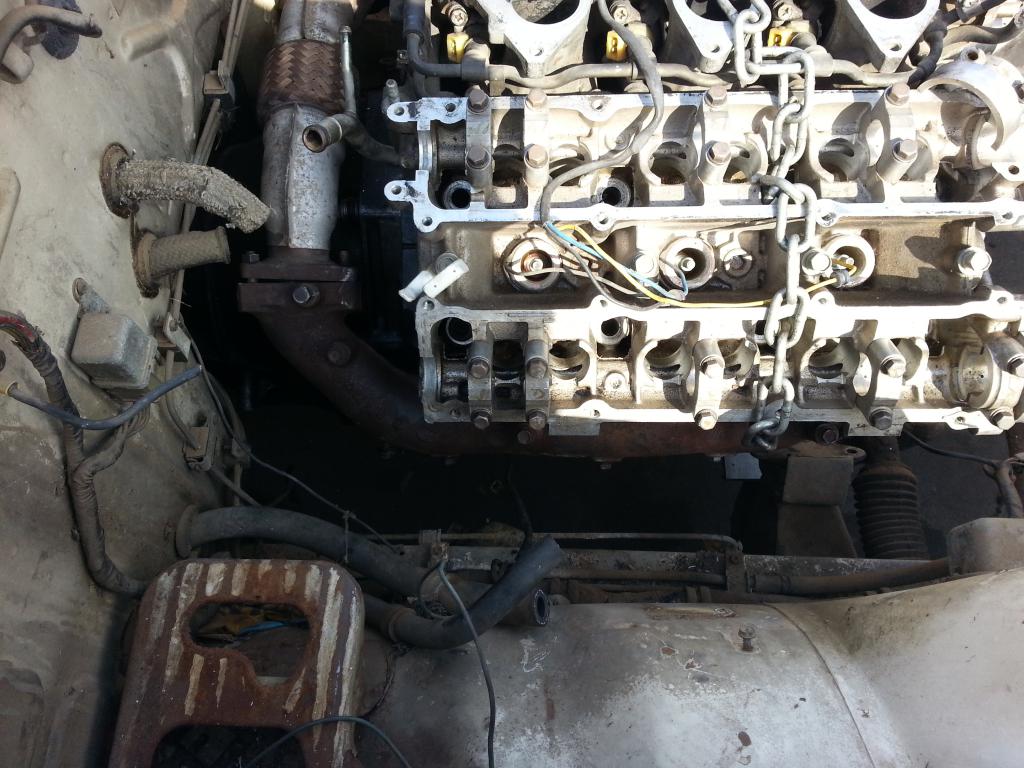
Hey guys, I recently bought a 240z and it ended up having more rust than I originally thought, thus begins my new winter project. Pulling her home with my 1987 2WD Toyota Pickup. That was a long haul between northeast of Sacramento and Southern California. The truck performed well though! The car sat for a while and the engine internals have rusted. The overview plan is to pull the engine, fix the front half of the car's rust problems, swap the SUs from the L24 to my rebuilt L28, install the engine, and drive it while fixing other things (interior). Some hood damage. Hopefully I can bump these out. Starting to inspect for rust on the passenger side frame rail/firewall interface. It's definitely in need of some work. Inside engine bay rail. Engine removal In preparation for cutting into frame rails I dropped the front suspension to remove as much stressed from the rails as possible. Stand I welded up to support car from the transmission mounts. I've made a little more progress -- started making patch panel templates and cutting metal from the battery tray area. It looks like I'm going to be replacing a lot of metal around the battery tray area -- frame rail, battery tray inner fender, a piece of the firewall, and passenger side floor pan. Hopefully driver side isn't this bad.
-
I have 10-20k to spend on a clean car. Is anyone looking to sell? I'm willing to have it shipped to me or drive to pick up the car


AC3_7245_May2017_CaliPhoto.jpg.df5567204d8e493511d4c32660d68afb.jpg)