-
Member Statistics
33232
Total Members5167
Most Online
All Activity
- Today
-
 I had the J pipe and down pipe cerakoted and then I wrapped them. Makes a huge difference in heat management.
 -
My custom modified crown turbo system on my L series six. here are pics of what I fought through and learned lessons very valuable. The Crown turbo kits, are very basic, and were designed to use stock parts to get a turbo onto the engine, and this was back in the days of carburetors and point ignitions. the factory exhaust manifold is used and a "J" pipe, made by Crown bolted on to the bottom of it and curved up for the turbo to mount on. From that point the exhaust went to the right and down, and to the left was an adaptor, the carb, and then you had to finagle on your own a throttle cable, fuel line and air cleaner. It was designed without a wastegate....the idea being your foot is the wastegate....you have to be smart enough to know when to let off. The J pipe, I had to cut off the factory flange and weld on a flange for a T3 turbo housing. I had a welder do this and he had to do so that the pipes from the J pipe came into the flange with any gaps closed off. Here is where my problems began. on the factory Rayjay turbo, the turbo flange came straight down......on modern turbos the flange is offset. So, today, you either have to make a new J pipe that is a tighter bend to make the room necessary, or what i did, which was to cut a hole in the inner fender and part of the strut tower and run the turbo halfway into the wheelwell and angle the intake out and back into the engine compartment. This required me taking the wheel off and bending sheet metal around the turbo to close it off....in effect making a channel down the side for the turbo. I recommend NOT doing that. I would recommend using a 280ZX exhasut manifold and having a T# flange welded on, or getting the CX Racing turbo header and then using the crown pieces to get the charge from the turbo into the intake manifold. Also, I initially ran this on a Mikuni 45 HRS motorcycle flat slide carb, and then went to EFI. EFI is the only way to go. You will have to weld an O2 bung into the exhaust, and while I am thinking about it, know this, with a draw through turbo setup it is MANDATORY to have the turbo rebuilt with CARBON SEALS installed. "G Pop Shop" has done them for me, cost is under 200 bucks. you can't avoid it. without the carbon seals the turbo will create pressure that will pull engine oil through the regular seals and the engine will smoke like a chainsaw. Don't take anyone's word for it that it already has them.....pay the money have new ones installed and they go through the unit and you get back a turbo that will actually work. RLR makes the intake I used. It is made for a draw through turbo to be installed on a air cooled VW engine. In the Draw Through Turbo world, the only ones who anything about it are the air cooled VW guys and the Corvair guys. 99.9% of the people you talk to DO NOT know anything about them....and I was told I would destroy my engine, it wouldn't work, they are terrible, I was an idiot etc. This is not the case. (never got any apologies)...but they are a bit of a wild animal......in a carb'ed setup, you can only tune it to a happy medium, and that frankly sucks. they only run good when floored, every other time, they are a real pain int he neck. Don't debate it with me, I have lived it. spend 800 bucks and later go EFI anyway and the money you spent for that turbo carb was wasted. The Holley Sniper 2 saved me. BUT you have to unscrew the port plug and put the plug in the threaded hole on the bottom, the base....then install a 1/16 NPT nipple into the boost port. This allows the Sniper to make corrections based on actual air fuel ratios in the intake manifold, instead of a guess by the ECU from where the fuel enters the throttle body before being charged. Turbo Joe's is a page on Facebook, and he is the sole tuning source for making these work. Thanks to him, my car runs crisp and normal. The Water methanol injection is my intercooler , is set to start flowing at 4 psi and has added over 30 horsepower on it's own and allows it to run on pump gas. Spark plugs. NGK is the only way to go period dot. NGK BPR8ES..... 2 heat ranges cooler and go .031 on the gap. Well.....Good luck. There is a draw through turbo page on facebook as well. It is ran by a 240Z guy. Pics follow, Peace and God Bless. ~ Joe Guy 12-21-2025.

- Yesterday
-
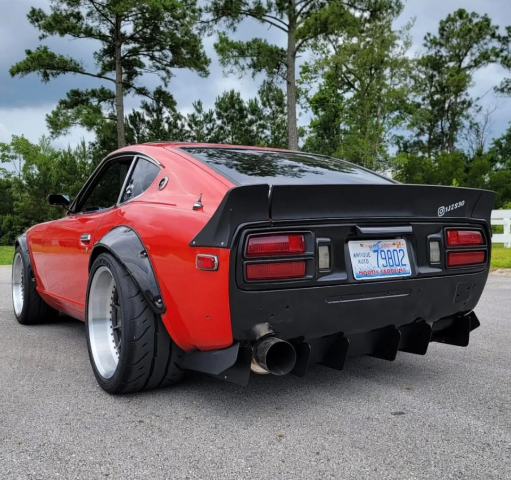
Have you rebuilt your L28E with forged pistons and H-beam rods? Lowered compression? In my opinion that's too much turbo for the unmodified S30 chassis and "supports 500 HP" sounds good - but is it? In an unstiffened early unibody Z - probably not. We saw a 300HP RB25 swapped Z here in Phoenix tear the spot welds apart. It was a 240Z chassis and the 280 is a bit beefier but still. This is a town with no rust. The kit looks legit however (I'd still go for a different turbo, but that's me). I'm not a fan of the charge pipe config that an opposite-side intercooler requires but it's a little more difficult to get same-side charge piping through the radiator core support. Don't get me wrong, I'm in the TURBO EVERYTHING camp - but do your research, and do it the right way, and you'll have a Z that's FUN to drive and will stay together while you're doing it.
-
You're in Gilbert? Alma School and Guadalupe. I have a loose intake manifold if you'd like to look at it.
-

Fast Floridian's 240Z Track Build
FastFloridian replied to FastFloridian's topic in S30 Series - 240z, 260z, 280z
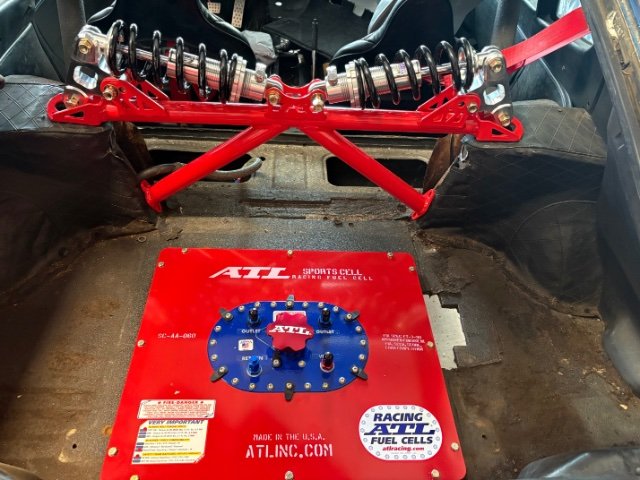
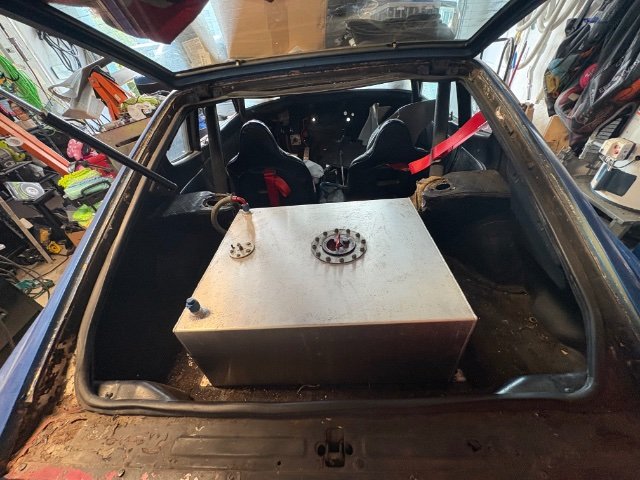
I got a little bit of garage time today. Removed the old fuel cell and got the new one in. I still need to build a frame for it, but it can sit here for a while. Rear subframe bushings came in yesterday, I’ll try and get the rear end mounted next weekend.
-
thank you very much Kevin! i appreciate you taking the time to post the info with links. Im getting them now so i have them later for reassembly. awesome post man!
-
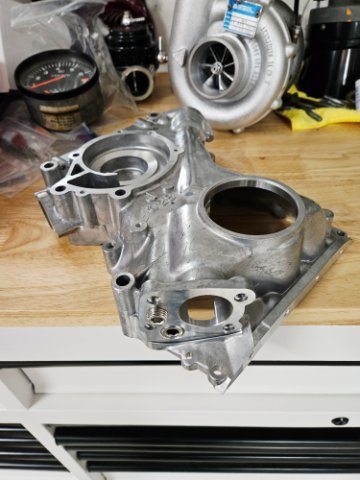
Have been busy with the end of year and splitting time with other project vehicles but called my machinist and found my parts have been ready for the past month. Still going through things but for the engine cover I opted to plug the supply and return holes with NPTF type flush plugs. I've seen the block plugged as well but I figured this allows maximum flexibility on internal/external oil supply and feed without significant motor disassembly. This next month I will need to figure out specifically which mil spec bulkhead connectors I will need as I welded and shaved the firewall harness holes before dropping to car off to the restoration shop. For the turbo build I'm thinking to convert the ignition to crank fire and leave some extra pins for future expansion.
-
These seats would color coordinate real nice. Any of you have any experience with this company? Miami Blue Universal Adjustable Black Luxury Racing SR3 Style Alcantar– Bull Boost Performance
-
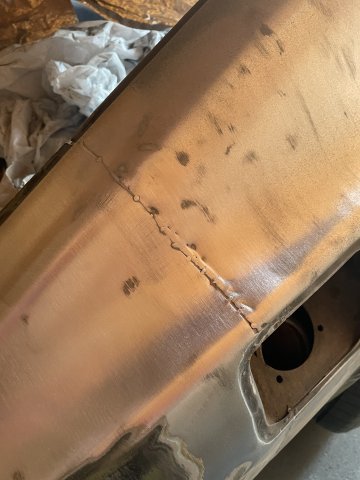
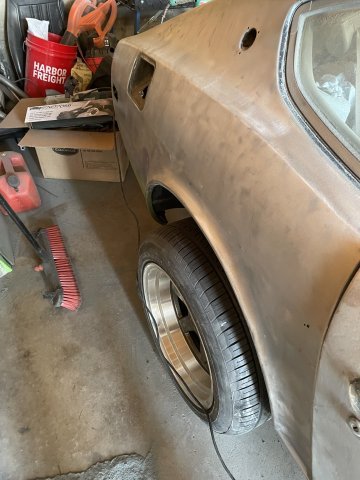
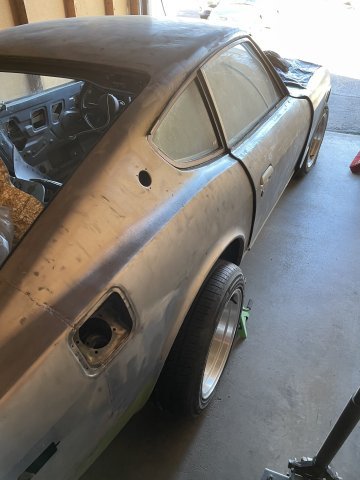
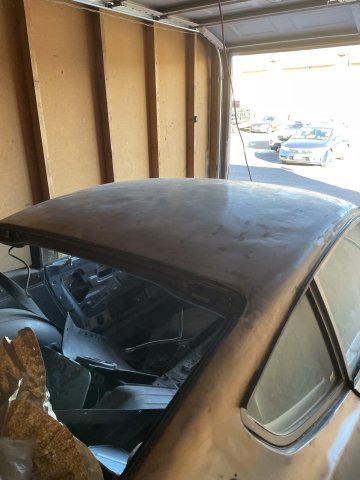
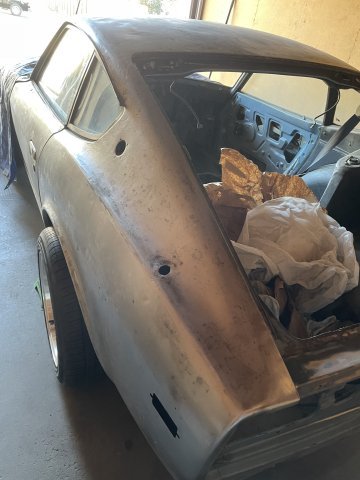
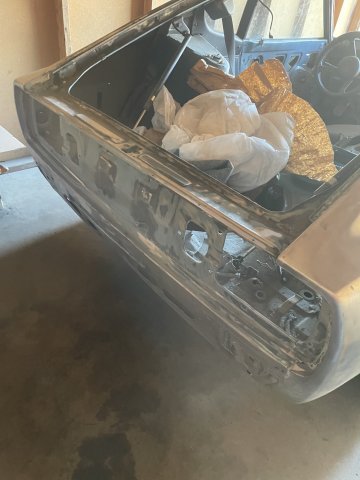
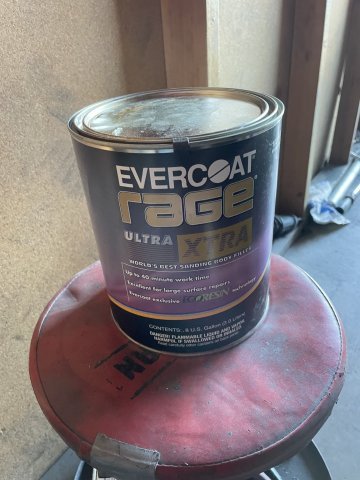
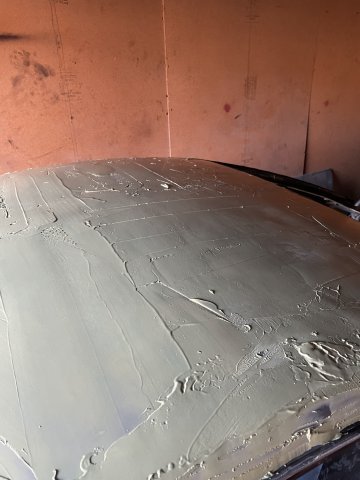
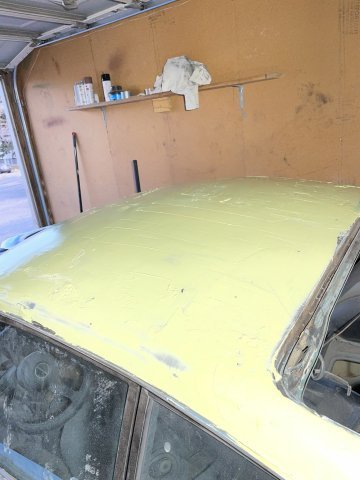
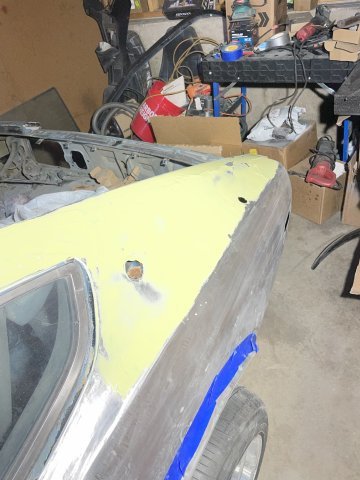
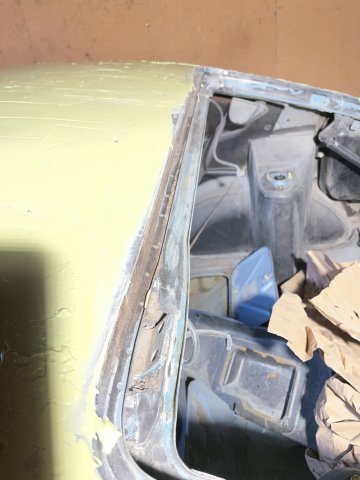
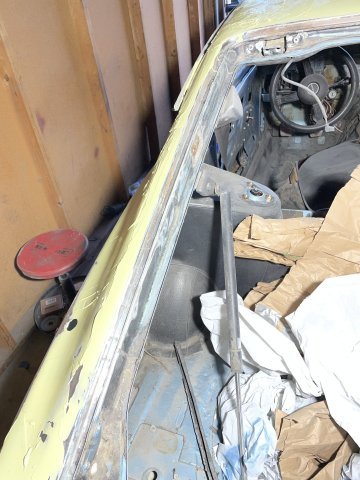
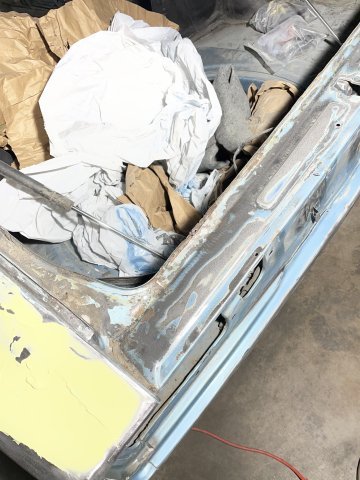
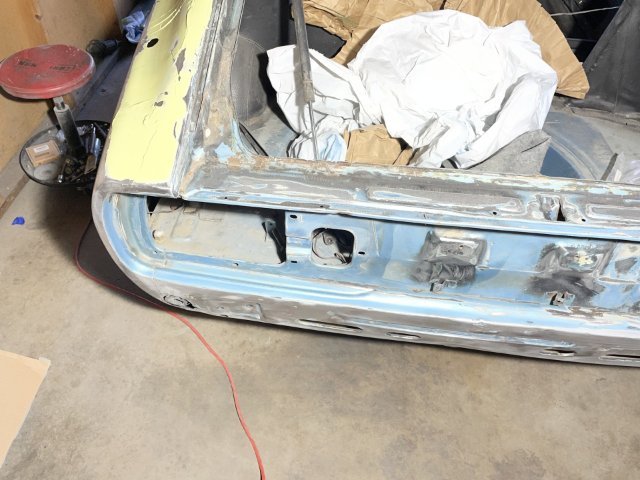
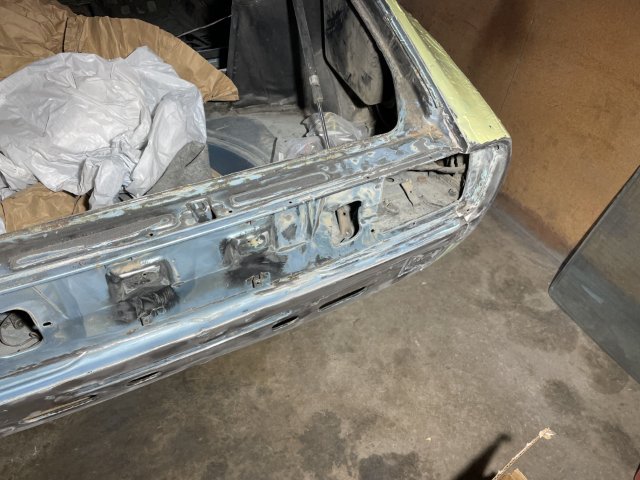
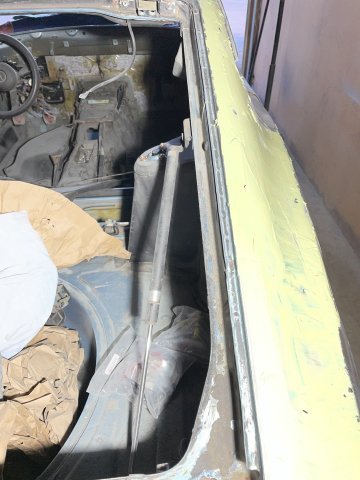
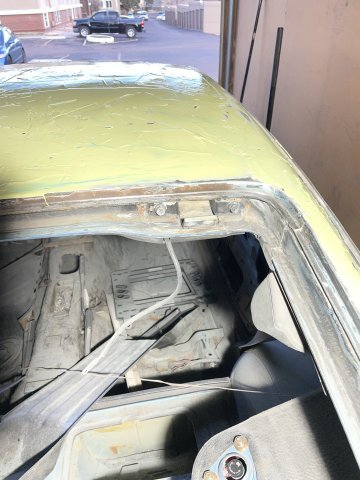
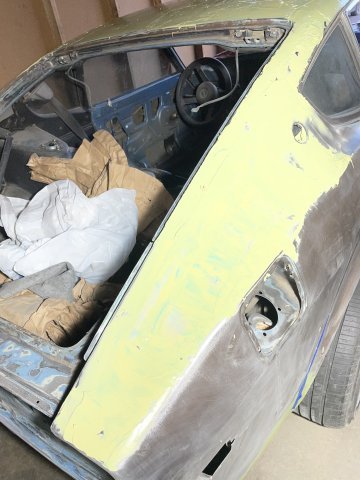
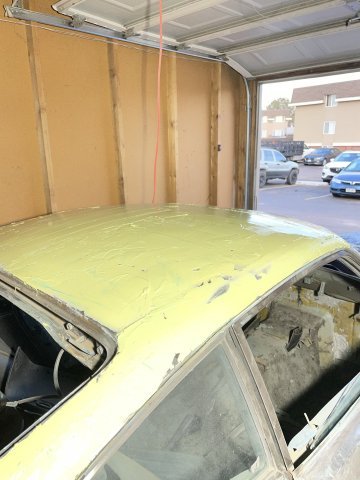
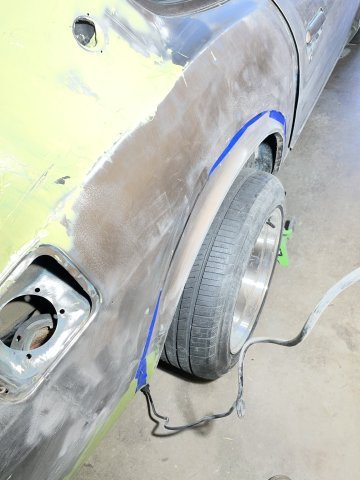
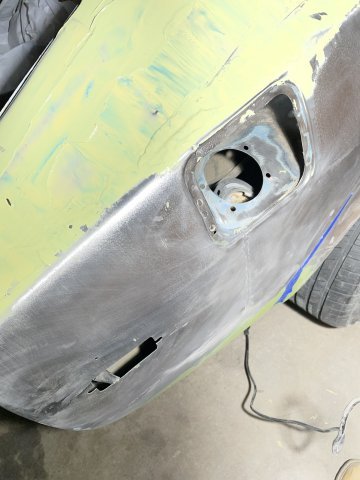
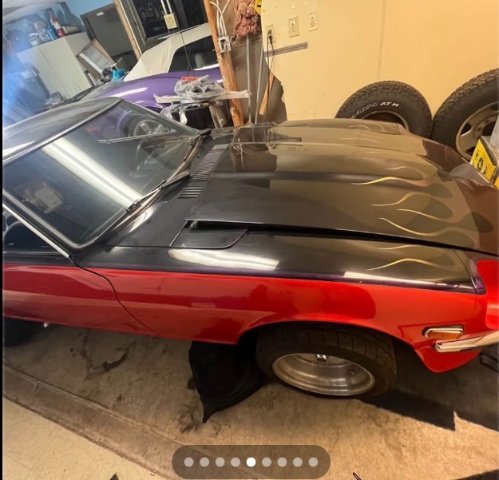
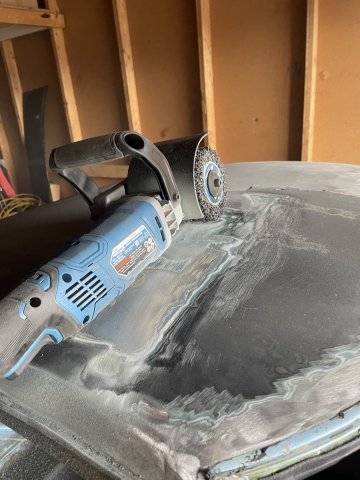
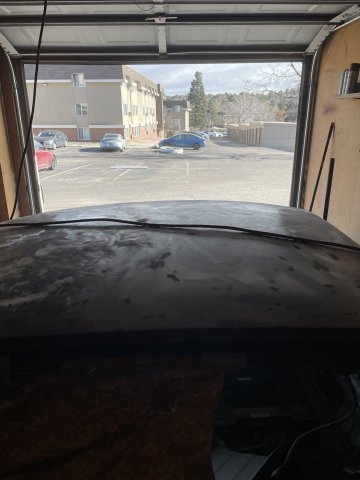
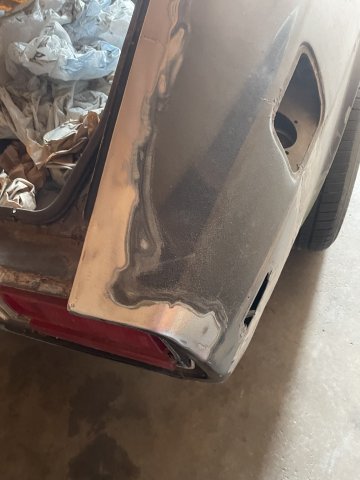
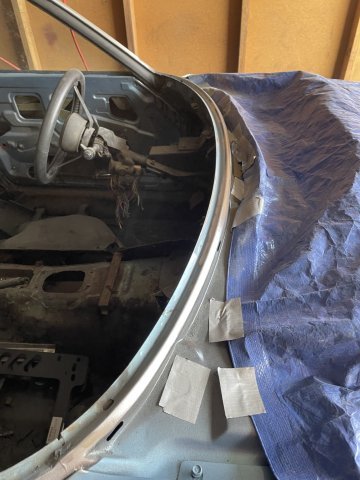
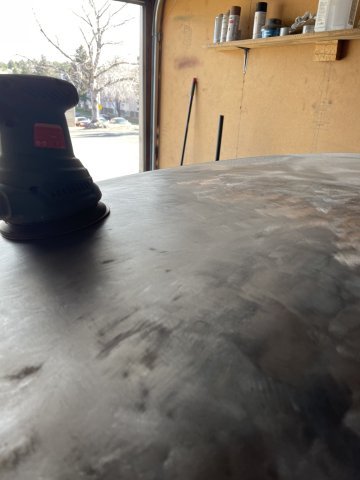
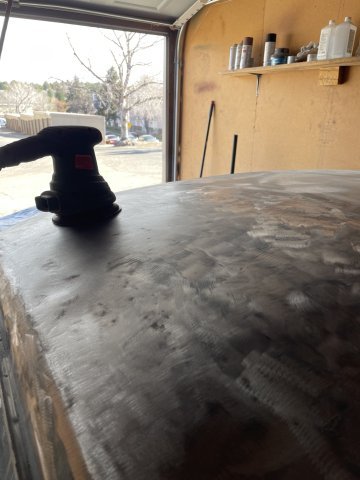
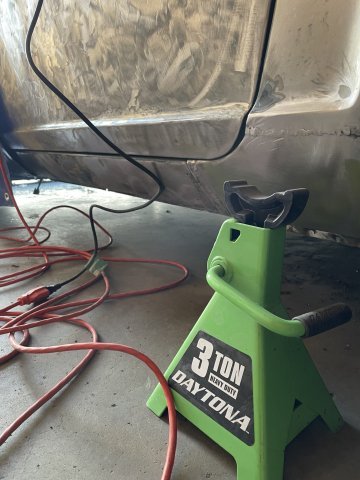
12-20-2025. Today officially started the mud and blocking part of this build. I had to finish removing some of the stubborn old paint and filler and yep.....more hidden damage, well repairs, and they did a good job, so that is good. Then I attacked the rear hatch jamb. Using a wire wheel attachment, I was able to go around both "levels" of the jamb and get it prepped for paint when I get there. I finished going over the entire body with a DA sander and 80 grit to smooth out the rough metal from having to go heavy duty getting it off. I took some pics f it all cleaned off then cracked open the filler and started laying it on the roof and sail panels. It's a learning curve. So, some real progress was made again today. Spent a lot of time getting the body ready for blocking....except I didn't pull the door handles yet, I guess next time. PICS
- Last week
-
Thank you for confirming this. I should of course have checked when the group was created 😅 I just saw 2k members, but there was still something suspicious about the price of the parts I was looking at Regards
-
I can tell just by the page name that it is a big old scam, but I'll go check anyway. Went and checked: 1. The page was made in October. Scam 2. Patrick Reynolds just made his account Nov 27 and posted a bunch of pictures that same day. That's also sign of a scam. 3. Eddy Watson, the other admin, posted a bunch of brand new photos from different time periods all on the same day in the middle of October. Third sign of a scam. 4. Probably the biggest and most glaring clue other than the page age is that every single parts post that Patrick Reynolds makes has a different background. Different tables, different floors, different trees if it's outside. That's because they're all stolen pictures.
-

Paint design selection. opinions wanted
calZ replied to A to Z's topic in S30 Series - 240z, 260z, 280z
Your car is already going to be pretty bold with the picture frame hood and the fully polished engine bay, so maybe it would be good to lean into that and go bold everywhere with the two tone. It might be on theme. -
Paint design selection. opinions wanted
calZ replied to A to Z's topic in S30 Series - 240z, 260z, 280z
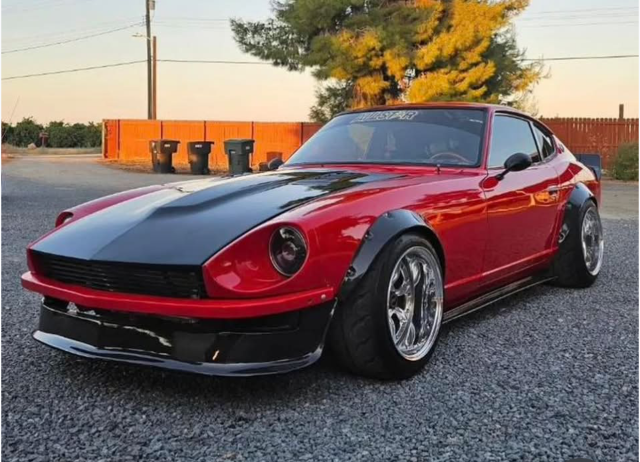
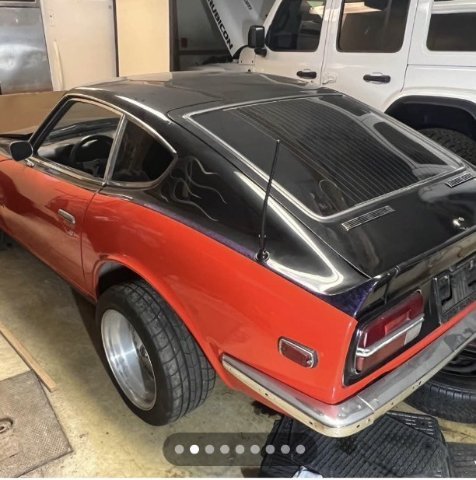
I like the first picture where the hood and flares/skirts are black and the rest of the car is a color. I really dislike the top/bottom two tone in the other pictures. To me, it looks like those cars where guys put muscle car-style wheels, a cowl induction hood, and metal flake paint on a 240Z and try to make it look like a Camaro. That's a paint job for a classic pickup imo. I don't think it fits the car at all. That said, it's just my opinion. We all have different tastes. It's your car and you're the one that's going to see it every day. If you like the look and it makes you happy, then that's what matters. -
Zyzzel joined the community
-
Good day Have anyone here bought anything from Patrick Reynolds? From a Facebook page called "Datsun spare parts for sale and swap? Regards
-

New All Aluminum Body Panels of Datsun240Z manufactured in Japan
toolman replied to toolman's topic in Body Kits & Paint
This You Tube Video shoes the actual conversion of this Aluminum Panel 240z in a home garage. -
Heavy Duty frame rails and connectors
toolman replied to toolman's topic in Gen III & IV Chevy V8Z Tech Board
This You Tube Video goes over the conversion of a regular 240z to one with mostly all Aluminum Exterior Panels. The work seems to done at a home garage located in California. The owner never said level or how much his experience with aluminum panels. However, most of the panels are bolted on to the original sheet metal structure. The aluminum roof, both rocker panels and rear quarter panels were probably attached using a special aluminum to sheet metal epoxy. I worked with Japanese after market body panels and found their fitment was very good. Most of the corrosion damage found on the 240zs was actually caused by rust starting on the exterior panels. Then it spread into internal structural parts. So using these Aluminum Panels ,new Seam Sealers and Rust Preventive Methods will make these 240s last a long time. -
Paint design selection. opinions wanted
A to Z replied to A to Z's topic in S30 Series - 240z, 260z, 280z
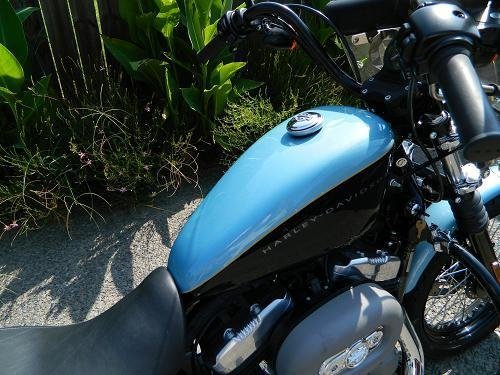
this has been on my mind.....the blue color is the same.......
-
Paint design selection. opinions wanted
A to Z replied to A to Z's topic in S30 Series - 240z, 260z, 280z
?????????
-
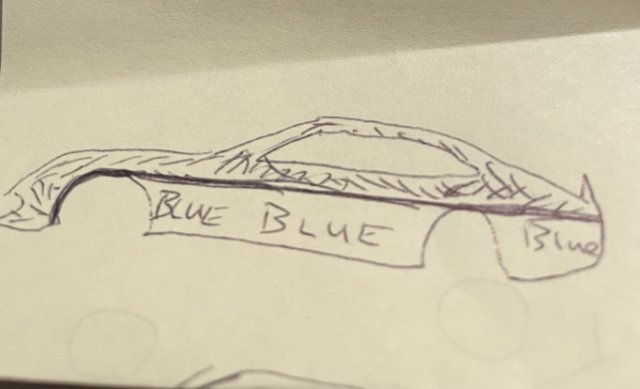
Ok, I posted about this earlier.....but now I have put together the pics that I have been using for inspiration on painting my 260Z the last is a drawing where everything X'd out is black with the highlighted being blue from the top......the sides being blue and the flares either black or blue. I am asking for any and all opinions of idea to think about. there the car is red int he pics, on mine it will be light metallic blue like me engine compartment. Thanks
-
I have struggle to find a cap for my 1972 240z and I refuse to spend $200+ for a new one. I did find this one on Amazon and it appears to fit well -- https://www.amazon.com/dp/B07GZP12SW?ref=ppx_yo2ov_dt_b_fed_asin_title. My fuel door closes fine and the bayonet mount appears secure. For about $12.00 for two caps it seems like a good value. Now, I am restoring the car and I have yet to run the car with the new cap so standby for an update.
-
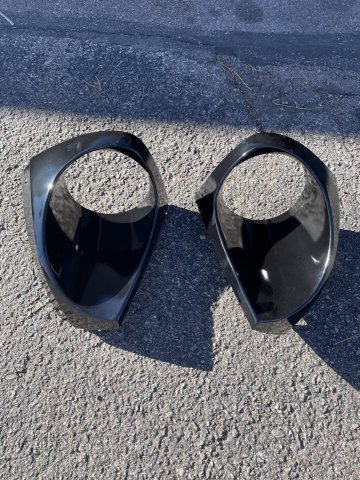
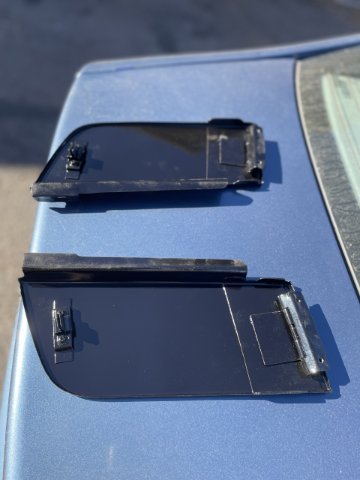
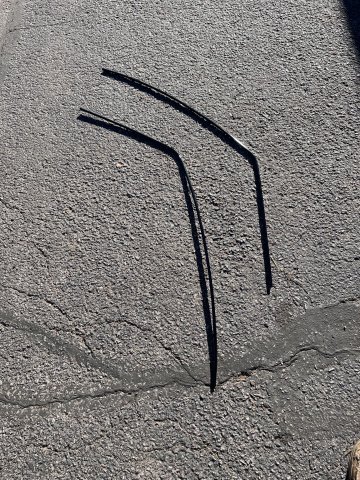
12-16-2025. Picked up some more items from the powdercoaters....headlight buckets, inspection doors, dash plate and gutter trim....all gloss black
-
Gasket link. The site kept pasting an old file. https://www.rockauto.com/en/catalog/nissan,1978,280z,2.8l+l6,1209260,engine,intake+&+exhaust+manifold+gasket+set,10220
-
RTZ seems to do good work. I'd trust the dimensions that guy above used, which he got from the RTz post that he linked. Or, the gaskets are probably correct. If you have one around.
-
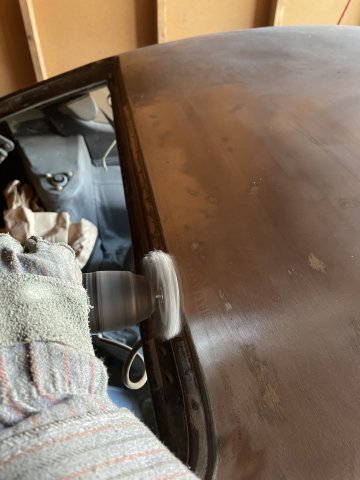
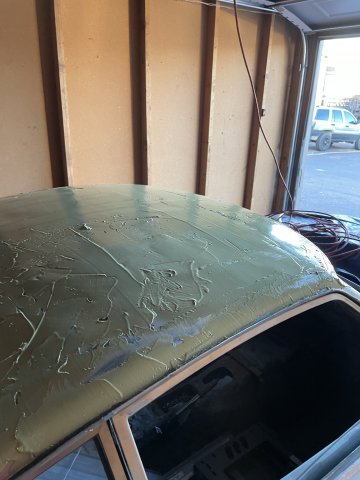
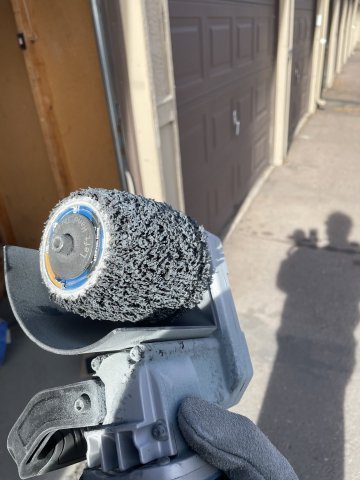
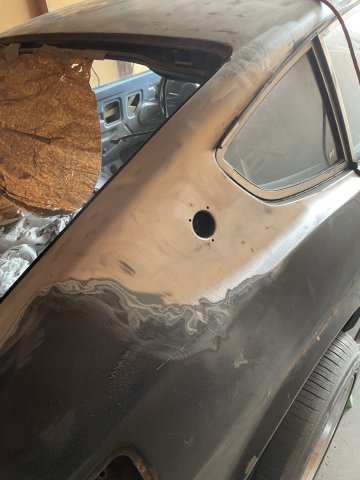
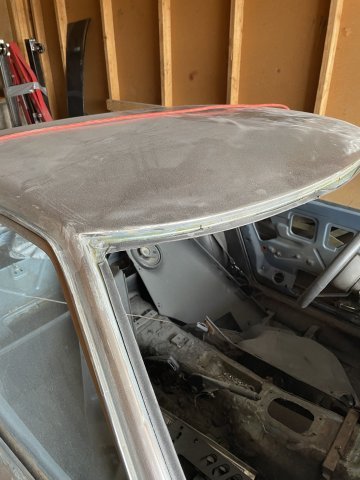
12-16-2025. Drum Sander. I have been advised to use a drum sander, as it is easier on the sheet metal than a flap disc on an angle grinder. Well, yes it is! However, even at 40 grit, I finished the roof, started on a rocker and a few other spots and wore that drum half way out! Pics follow, you can see the difference comparing both methods side to side. I also took a couple pics to show how it will look ran over with a DA on 80 grit to prep it for filler. DUSTY! closer to starting the blocking.
-

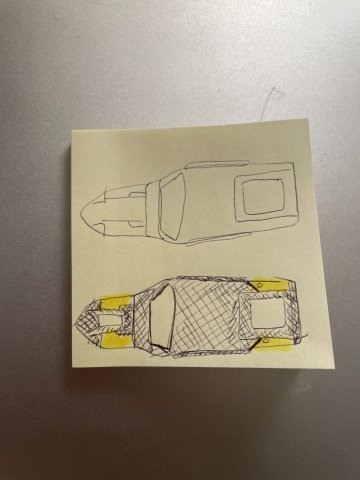
L28ET Intake Manifold Flange Dimensions
Toiletduck34 replied to Luke280turbo's topic in Nissan L6 Forum
Sorry for posting on 5 year old thread... but I am looking to 3d print this for testing. I see the last response stating the injector spacing is wrong. has anyone gone through this to test at all?


-
Who's Online 2 Members, 0 Anonymous, 571 Guests (See full list)