madkaw
-
Posts
2366 -
Joined
-
Last visited
-
Days Won
27
Content Type
Profiles
Forums
Blogs
Events
Gallery
Downloads
Store
Everything posted by madkaw
-
The cheapest thing to do is replace all your vaccuum lines associated with the heater. You will probably stumble across on ehtat is cracked that you didn't see before. About 5$ worht of hose is pretty cheap and easy. I am speaking from experience:mrgreen:
-
Well I know the gears are all there and working-albeit they work much better for speed if you manually regulate shift points. First gear shifts way to early. The car just doen't have any snap at all off the line-but don't have any other zx's to compare it too. Still, I would like to play with the timing a bit with this car if I can find an easy way to do it.
-
I wish it was that easy Mat, but it is down below. Makes me want to convert to that style.
-
I have searched on this site and a couple of others about adjusting the timing on a stock 81zxt. I do have the FSM downloaded and have read about checking the position of the CAS. The FSM talked about a bolt or screw that you turn to adjust the position of the pick-up-thus changing the timing. Well I have A/C and I can't even see it. I am asking for any pointers for doing this task(adjusting timing). I checked timing before and it was at 20BTC I believe, which is stock. The car seems sluggish of line(automatic), don't know if a couple of degrees advance would help that or just the nature of the beast. I hear no audible pinging and I always run premium(93). I believe the car is in tune, but have yet to put a wide band on the engine to see what's going on there. Also, It looks like the front main seal is leaking ,so it looks like I might be getting up to my elbows in this anyway. Again, any helpful hints would be appreciated.
-
I've been wanting one of those laser temperature guages just for this reason. I think it could be an excellent troubleshooting tool , especially in this scenerio. Can you explain the big difference in the #6 cylinder temperature compared to the others. Are you zeroing in the laser on the head where you would tap for the coolant on 5& 6 ?
-

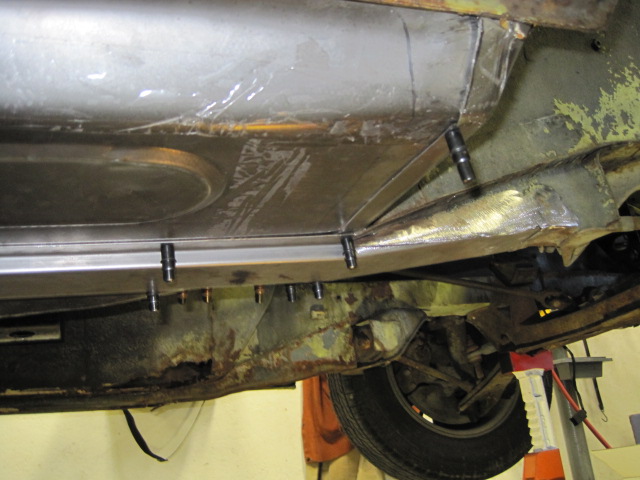
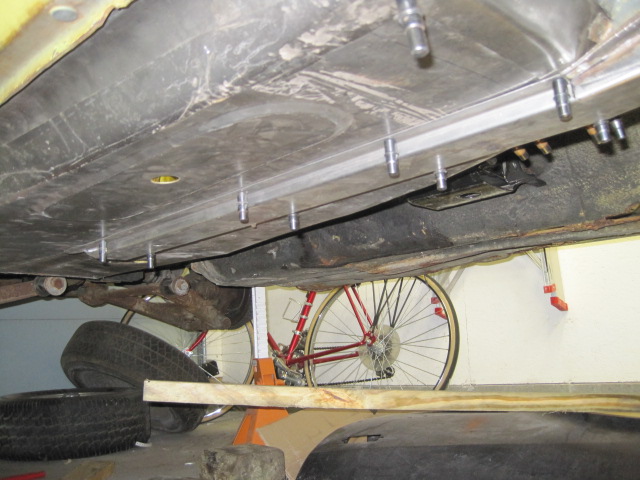
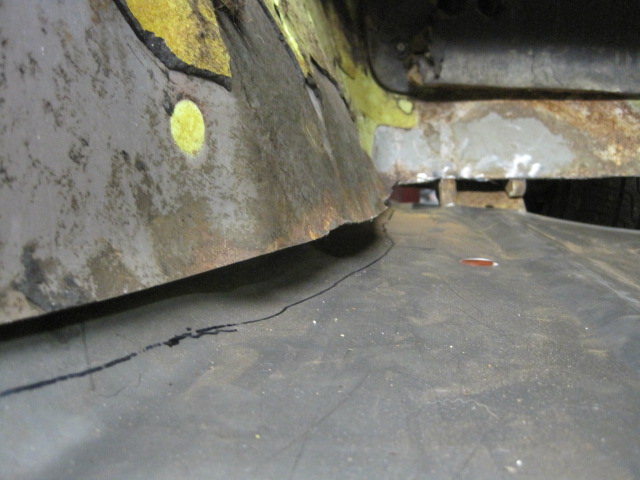
How much to weld in new floor pans and frame rails
madkaw replied to Negligence's topic in S30 Series - 240z, 260z, 280z
The frame rails will come out with whatever section of floor you take out. They are welded to the floor, so if the floor is bad-more likely the rails are bad-so rip them out any way you want, sawzall, cut-off wheel. Now if you are talking about the SEAT RAILS, then you need to get a spot weld cutter, or just cut the floor around them and methodically remove the floor metal from them so you can reinstall later. -
thankyou!
-
How much to weld in new floor pans and frame rails
madkaw replied to Negligence's topic in S30 Series - 240z, 260z, 280z
Yeh those clecos can be a lifesaver on abig job like this. You can order them from any on line speed shop(jegs) and they are cheap. You can mock up the hole job with these to test fit and remove them as you weld around them. Then like he said, weld the holes shot. The small ones are only 1/8" holes. -
Hey guys I am wanting to get my daughter some replacement speakers for her 81zxt, but don't know what size they are and she has the car. Can someone tell me what size round speaker will fit in there so I can do some christmas shopping. Thanks
-
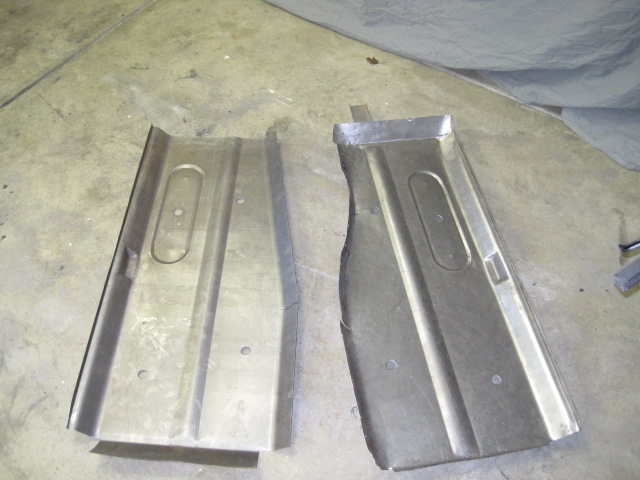
How much to weld in new floor pans and frame rails
madkaw replied to Negligence's topic in S30 Series - 240z, 260z, 280z
I'm doing a set for a customer now and it's a pretty big job-especially for a first timer. Replacement pans need a lot of persuasion to fit, even the good ones from Zed Findings. Plus the work is all back braking, knee scuffing, eye contaiminating, knuckle busting work that body shops don't make any money on. I will probably have 25 hours a side in on this car, but I don't move fast or slow, there is just that much work. If you haven't done this kind of work before(sheet metal fab and welding) this job will be a hand full. Look at the 2 panels side by side and see how much you have to form them. I think between 1000$ and 1500$ is a good estimate for panels that look at fit stock. The other good thing is that most of it gets covered up:)
-
DITTO- Bob you are not alone- My Current Money Pit... It doesn't even need a garage and is sure to take more of your money in the event it feels that you have yet to contribute your yearly 6.5million dollars.
-
The poor man's rear toe-in adjuster
madkaw replied to blueovalz's topic in Brakes, Wheels, Suspension and Chassis
Thanks Terry for the reply, I was a little worried about what kind of movement would be there. -
The poor man's rear toe-in adjuster
madkaw replied to blueovalz's topic in Brakes, Wheels, Suspension and Chassis
I do have in the poly bushings and I am running the RT mount. As far as the vent goes, I took out the original and inserted a nylon hose so it would have some flexibility. I just need to figure out a place to stick the hose or find a filter for the end. My cross brace is welded lower then yours so you probably have more clearance then I do in that area. -
The poor man's rear toe-in adjuster
madkaw replied to blueovalz's topic in Brakes, Wheels, Suspension and Chassis
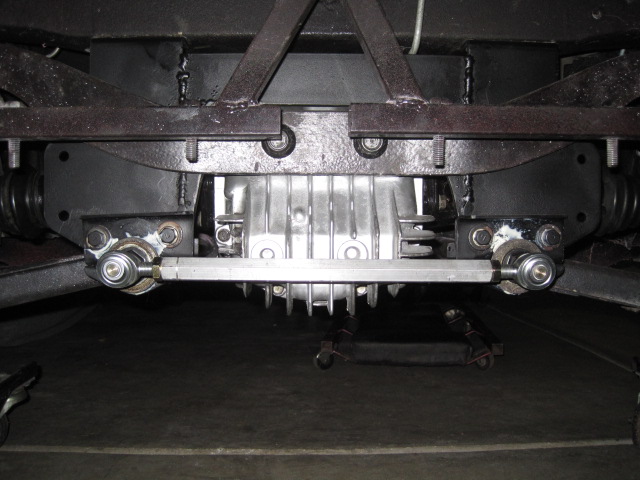
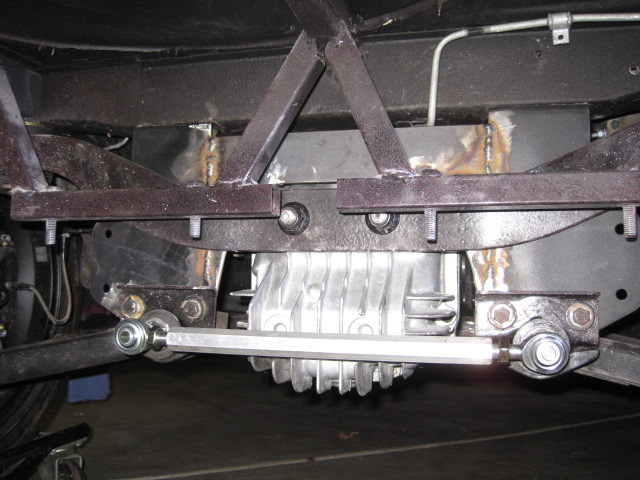
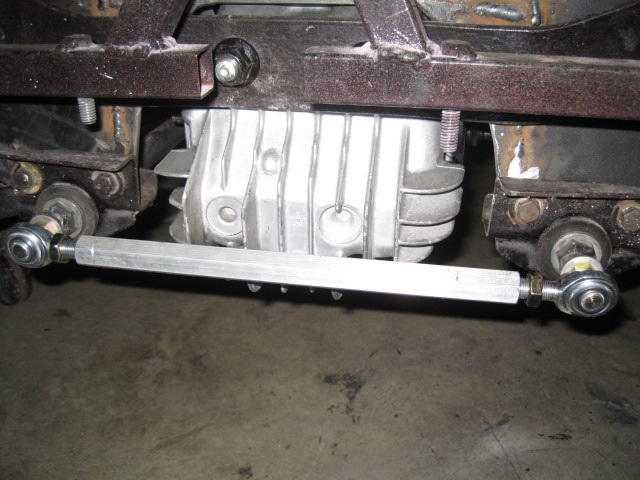
Well I finally finished my latest(while I'm at it) project. Now the parts are painted and installed for good-I hope. Jon, I hope you see this because I need to ask you about the clearance between the moustache bar and the reinforced uprights. I put large washers between the diff and the moustache bar to space the diff forward away from the uprights now that the uprights have more material on them. Even with that, the breather off of the diff is right up against brace that connects the two uprights. How much movement can one expect from the moustache bar?
-
The poor man's rear toe-in adjuster
madkaw replied to blueovalz's topic in Brakes, Wheels, Suspension and Chassis
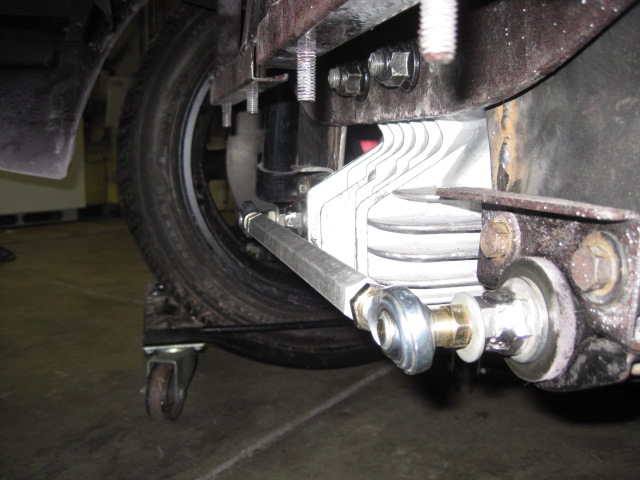
Here the latest. I recieved my heim joint set-up and welded a nut onto the bolts on the rear control arm. Jon, as you can see the bolts turned out to be very short. I might have actually got away with drilling and tapping the bolt since there was ample clearance between the cover and the threaded rod. I believe this will be plenty strong for what stress it will endure. I need to make slotted holes now in the uprights and make some nutplates.
-
Well here's my 81 zxt(actually it's my daughters-I bought it for her:wink:). I bought it for 1500$ and it has 91k miles on it. I have put more money and time then what I should have for a college car, but I wanted my daughter to have something cool to drive. I told her that if she ever earned a scholarship I would buy her a new car, but I think she rather I paint her Z and keep it going instead. I forgot to add that everything works on this car-down to the clock!
-
The poor man's rear toe-in adjuster
madkaw replied to blueovalz's topic in Brakes, Wheels, Suspension and Chassis
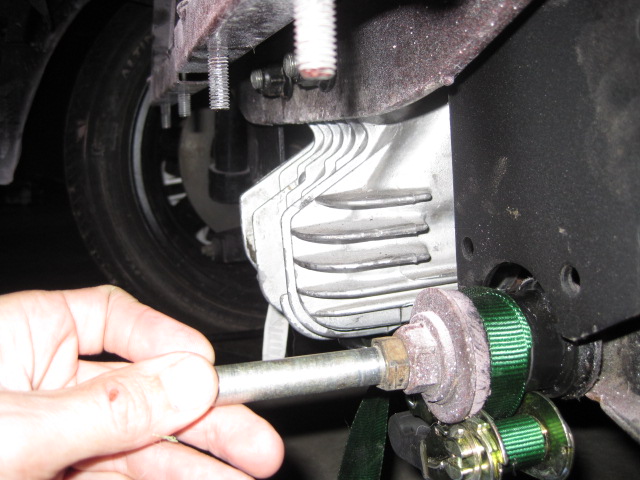
I think I have the uprights finished. I started making it too big looking for strength, but then I noticed the clearance on the moustache bar getting too tight, so I widdled'er done a bit. Now clearances look better. The diff vent lines right up (in the way)with the brace work, so I had to notch it(the brace) for room. I think I will run a rubber line in the vent hole so I can direct it around the brace. I need to elongate the holes for adjustment and make some of those handy nutplate pieces that BlueOvalZ made to make adjustments easy. I just ordered the heim joint today to finish out my plan to connect the control arms. I found a complete set up for about 50$ using .5" ends. Once I get the rod ends I can figure the length on the bolt to be welded to the control arm pivot bolt.
-
The poor man's rear toe-in adjuster
madkaw replied to blueovalz's topic in Brakes, Wheels, Suspension and Chassis
That bolt that I used in the pic is way too long, I just used it as an example. Since my control arms are just flopping around there in the picture, it is hard to tell how long of a bolt I will need, but I was figuring that the heim joint would be about 1.5 inches off the head of control arm. I am with you Jon in keeping the bolt as short as possible, PLUS reinforcing the uprights so that the heim joint is only really there for adjustment and not carrying much of the load. Next time I have time, I will bolt up everything and take better measurements and some more pics. Now to learn how to make TIME:) -
The poor man's rear toe-in adjuster
madkaw replied to blueovalz's topic in Brakes, Wheels, Suspension and Chassis
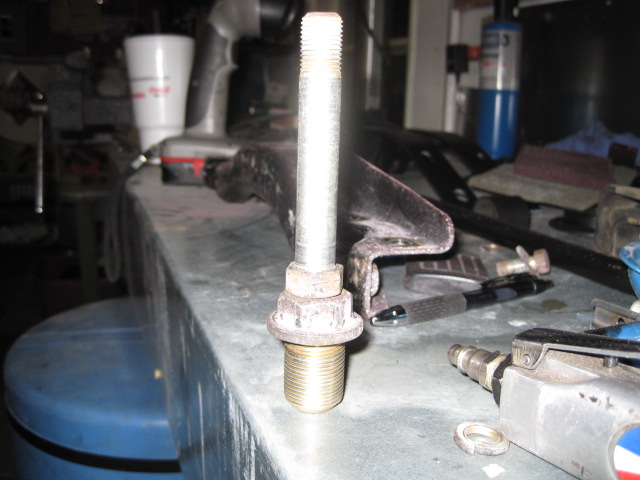
I know this thread is a little old , but the context is very relevant so I thought I would ask your opinions on an idea I had. I am also installing an LSD complete with cover on my s-30. I would also like to have the toe adjustment advantage(while i'm at it thing you know). My option would to be weld studs or bolts on to the control arm pivot bolts as a mounting point for my heim ends and for adjustment( inplace of the transverse link) The bolts would only need to be a 2.5 inches to clear the fins and I would reinforce the uprights like Jon did with his, so the load isn't on the heim ends. It is just a very simple place to have the adjustment. I guess the question would be-is that area strong enough? That pivot bolt is 7/8" approx, but don't know it wasn't made for that kind of loading.(although loading would be minimized by upright reinforcement) If this is a viable option, what grade of bolt would you use and would an half inch bolt be plenty big enough?
-
It sounds deep and throaty and just better all the way around. My daughter even liked the way it sounded-of course she was just glad to get her car back:) I am still really impressed by the bang for your buck with this improvement-especially since I had to do the job anyway. Now I need to start shopping around for an intercooler setup.
-
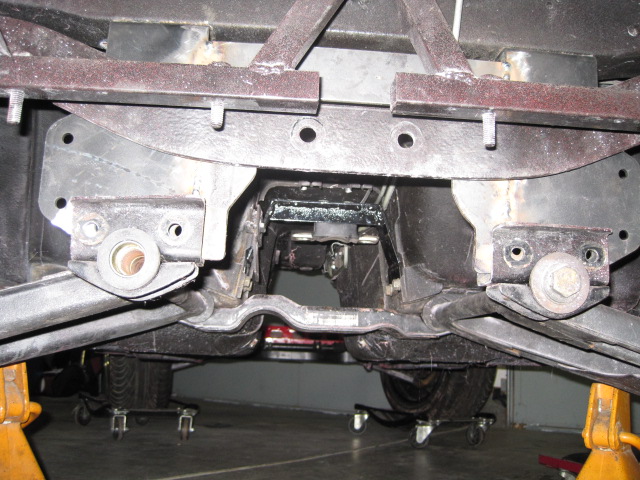
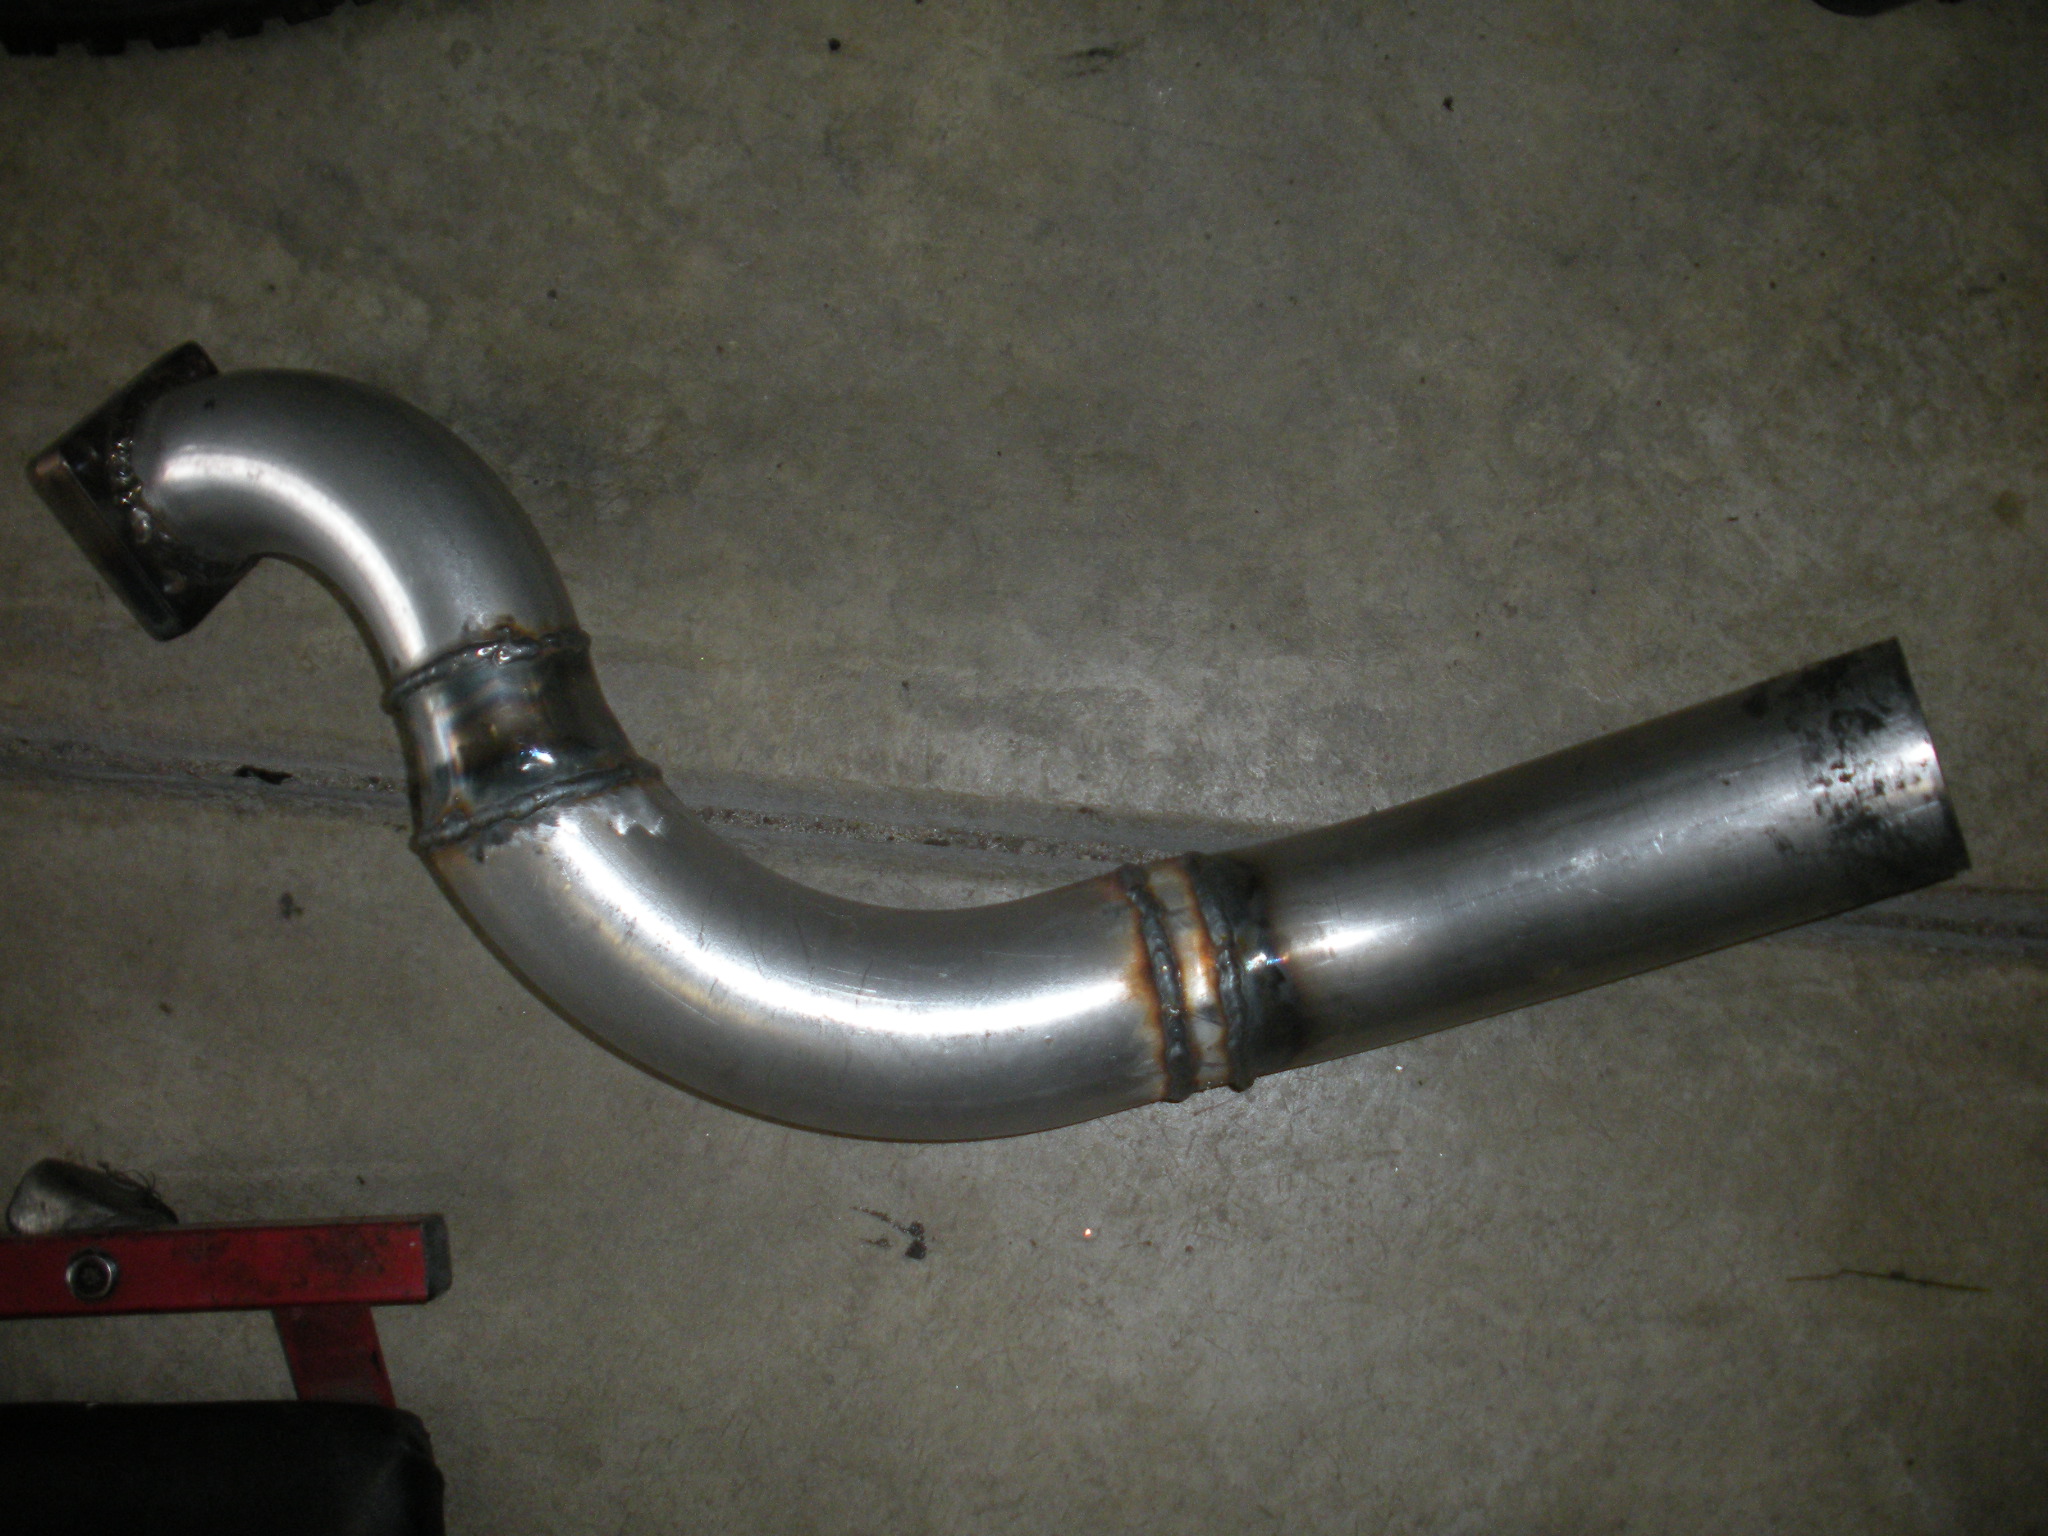
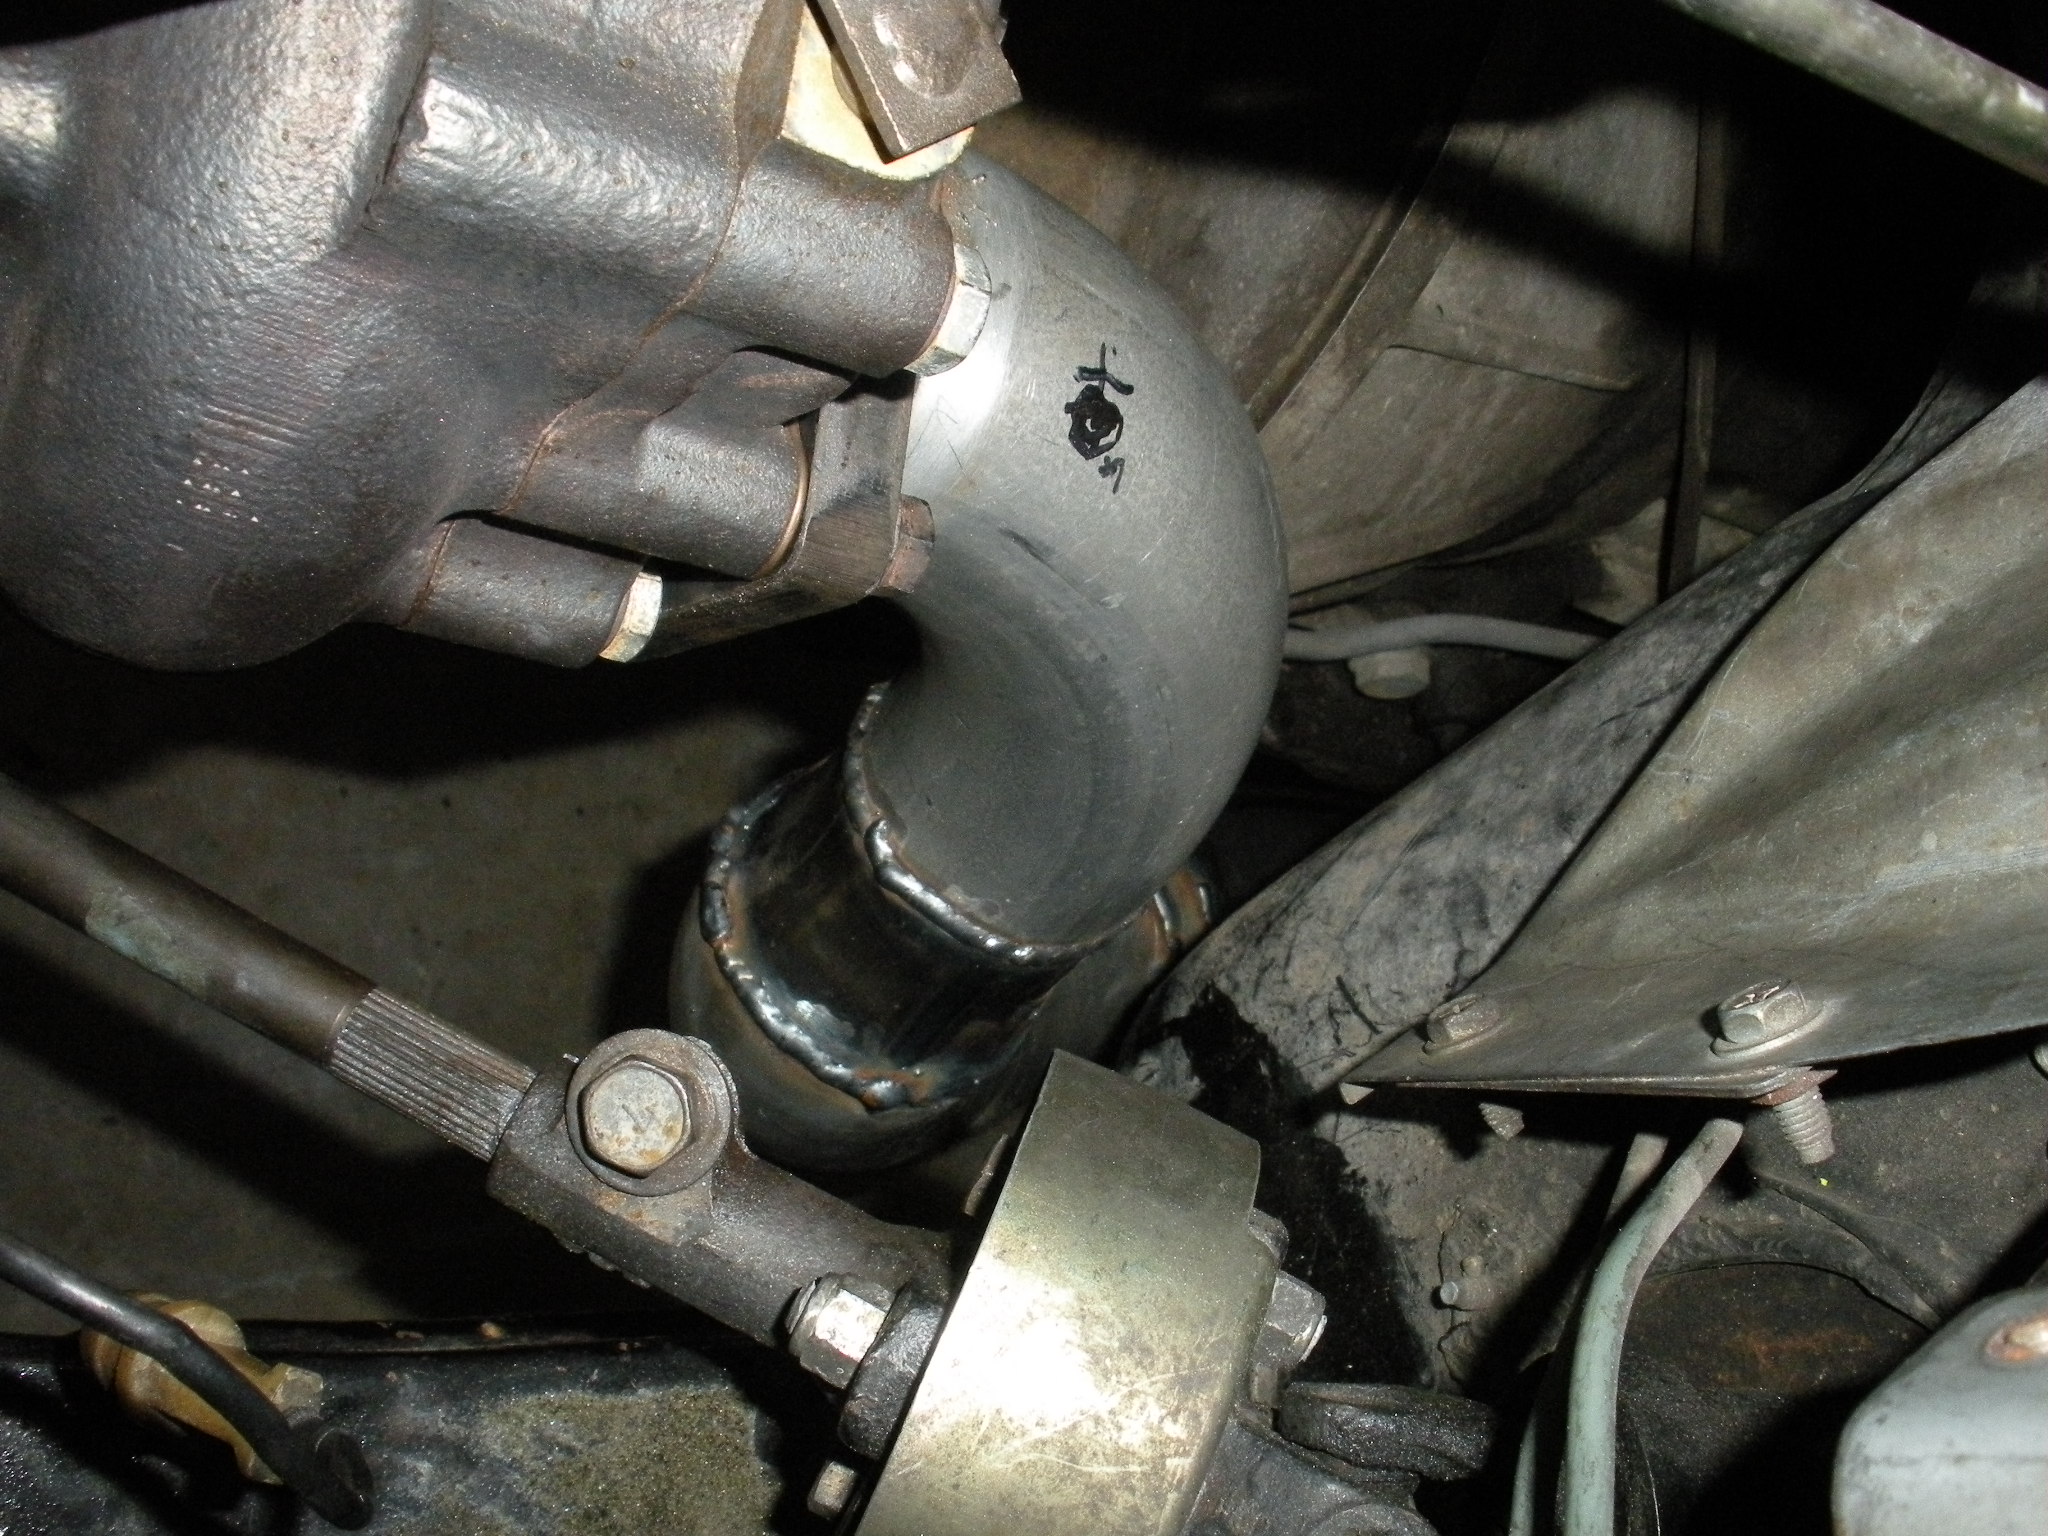
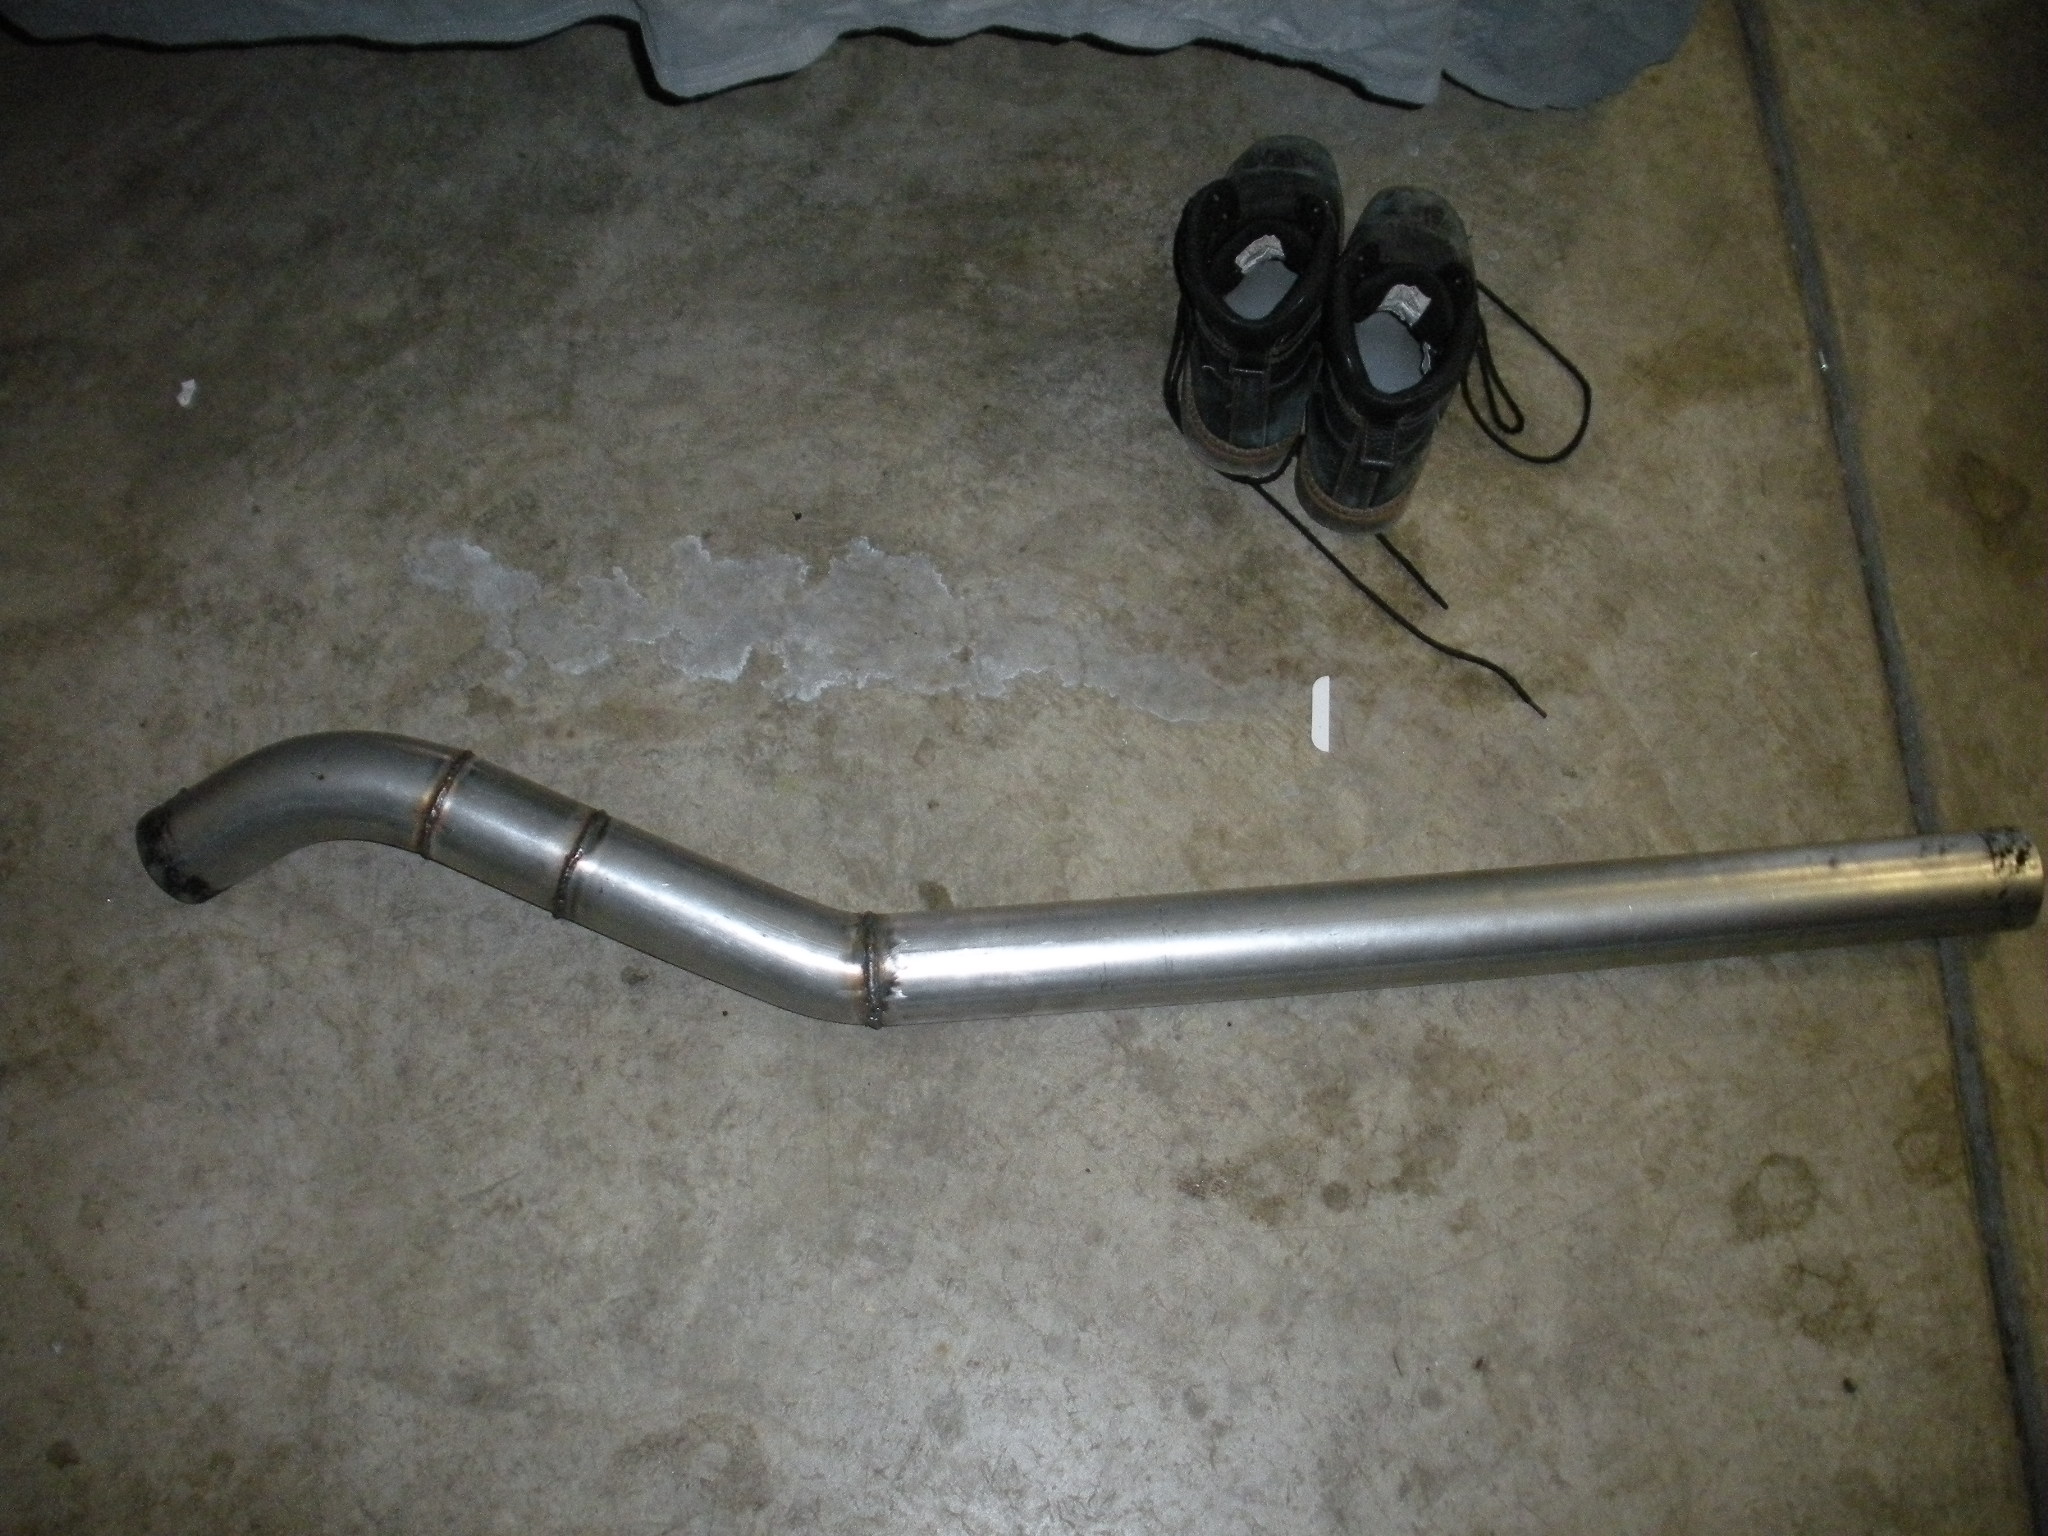
Well after hours on my back and a lot of cursing(wasn't really that bad) I got the exhaust done. I had the flange made by a local machine shop out of 3/8" steel. Nothing fancy, just a rectangular flange with 5 holes punched in it-40$. I managed to utilize the 2 band clamps to have 2 seperation points. Of course the use of band clamps meant that the ends had to butt up square. Getting it all the come togther was the hard part. I had to remake the joints on the downpipe twice. My welds aren't the best, but they should hold just find. After driving the car I am a true believer of the added HP from this upgrade. Definite improvement all the way around. I actually timed the car before changing the exhaust. I did some "passing gear" runs timing the car from 50-70mph. Now this car is an automatic, so I let the car downshift on its own. Before 3" 50mph-70mph 6.5 seconds after 3" 50mph -70mph 4.9 seconds I think that is very respectable improvement for the little investment in time and money, especially since I needed a new exhaust anyway. The exhaust tips were chaepies from autozone.
-
I Have been following your thread on the members projects and you do nice work. I went with just 2 disconnect points using the band clamps. I'm going the cheaper route with two 8$ clamps. Now I need to come up with the flange for the turbo since the one I ordered is incorrect.
-
Well I hit my first bump in the road since the flange I got does not fit the turbo. I ordered it with the pipe but the bolt pattern is square instead of rectangular like on the stock turbo. So off to the machine shop I ran and I am having one made. This will slow things up since I need to tie the front with the back part of the exhaust so I can check clearance. I'm not happy with the back half and I am going to shoot for more clearance. I almost forgot how much this is a pain in the back to do-I said almost:)
-
Drax, the exhaust you have now is exactly what I am building -sorry to hear it sounds like a motorboat. It actually didn't sound too bad in the video. I don't know if you can achieve the sound you want easily with the turbo, but good luck.
-
I'm also looking for a source for those long studs used for the down pipe flange.s