deja
-
Posts
2075 -
Joined
-
Last visited
-
Days Won
4
Content Type
Profiles
Forums
Blogs
Events
Gallery
Downloads
Store
Everything posted by deja
-
Yep, I did use the PS delete pulley (part # BK-MB31K) from PSC MOTORSPORTS. But the link I had doesn't work anymore. I had to call them to get just that part# so they may still have it. 1-817-270-0102. I had to re-tap the bottom hole in the Camaro accessory bracket to match the 3/8 bolt PSC provided. I think the one GM uses is metric, easy tap if the engine is not in the car. The AC delete pulley I used I got off Ebay, its the one with the small pulley. I moved my knock sensor to the drivers side using an adapter I got from DETAIL ZONE Its only $17 delivered. If I had not already had the JTR mount on the engine I would have done what gvincent did.
-
In case you aren't aware, before you attempt to install that engine you have to do a few things to it. Pull the LT1 exhaust manifolds, they will not fit. Also the AC unit which is on the bottom of the passenger side will not clear the steering rack so that's got to go. You can get an AC delete pulley to replace it. The PS pump can be gutted, the hose fitting plugged and put back on.
-
Well yeah but ya have to get a wheel that will fit the hub. Not all wheels will fit all hub adapters. Grant Steering Wheels has hundreds of wheels to pick from and they a reasonibly priced. I just googled the adapter Amazon has it
-
Yep. The Grant adapter for the Z is Grant Products part# 3592
-
I recently bought some stuff from Brian, he will respond to your email at that address. Great guy to do business with.
-
I put a '94 Z28 steel tank in my Z. couple things to consider. #1 the tank has to go in backwards since the filler on the F body tank is on the opposite side from the Z. #2 and something I did not look at is clearance for your exhaust. My tank sits very close to the rear suspension leaving very little room to get the exhaust in. We managed to make it work but its not ideal. #3 getting the filler to the tank proved to be difficult. I ended up cutting almost all the Z28 filler off and fabricating a new one so I could get the filler hose to line up. If I were going to do all this again I think I would have a custom tank made that would utilize the stock GM fuel pump, I like having the pump in the tank. There are a few picts in my Gallery
-
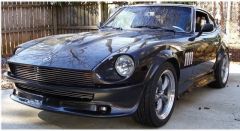
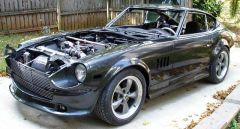
Brace yourself, here is a slide show of the two cars
-
That's the problem with all these shows. Seems like American Chopper started looking like a ass is a good thing. At least thta seems what the producers think. That custom Z was a shame IMHO and was that Glen Smith the head of Motorsports Auto at the end?
-
Car Warriors on SPEED TV tonight at 9:00 pm EST is doing a 73 240Z. Yeah the show is pretty lame but at least its a car show, LOL.
-
-
-
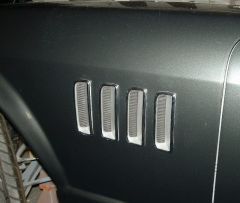
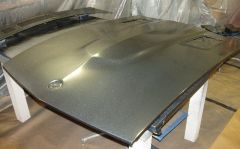
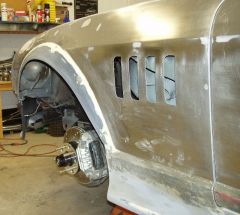
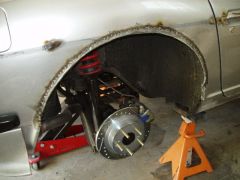
From the album: Body Work
-
From the album: Body Work
-
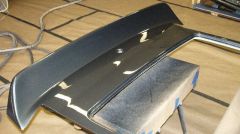
From the album: Body Work
-
From the album: Body Work
-
From the album: Body Work
-

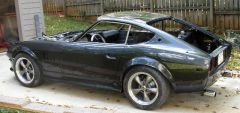
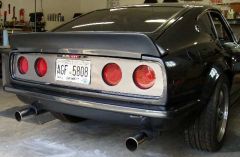
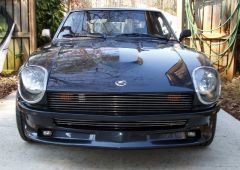
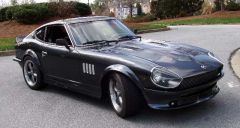
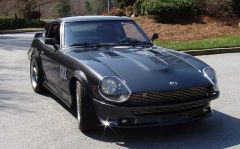
From the album: 280Z8
-
From the album: 280Z8
-
From the album: 280Z8
-
From the album: 280Z8
-

From the album: 280Z8
-
From the album: 280Z8
-
From the album: 280Z8
-
From the album: 280Z8
-
I have this on my website, right click and download it please, don't run it from my site. Sorry, no clue about the 350Z pump working. BTW I have NOT done any of this. I downloaded it a while back in case I ever get the urge to install PS. Power steering
-
Been there done that. MSA now offers a flare intended to be glued to the car. Most new cars use body adhesive to adhere nonstructural panels. I have no idea how good these MSA flares are. They didn't have those when I bought mine. So I widened the inside of the edge of the flares where they meet the car body to give me more area to add 3M 08116 panel adhesive. I still used the mounting screws with red loctite to add some stability. I then used fiberglass and Rage Gold to fill in the screw indents and the seam at the car body. How well this all holds up remains to be seen. The project just finished and I have only put on a few hundred miles, so far so good.