

Phred
-
Posts
33 -
Joined
-
Last visited
Content Type
Profiles
Forums
Blogs
Events
Gallery
Downloads
Store
Everything posted by Phred
-
As I said in the post above, CWC ( at least mine) has lugs. They are a bit more sharp, or square than the "Japan" cores. Phred
-
Tony, I have six L6 cams. One of them is a CWC, and it has lugs too. All the others are Nissan "Japan" cams, and all but one have lugs. I do have one "Japan" cam without lugs, its internally oiled from an unknown engine. Phred
-
Crank bolt is 16mm x 1.5 pitch Phred
-
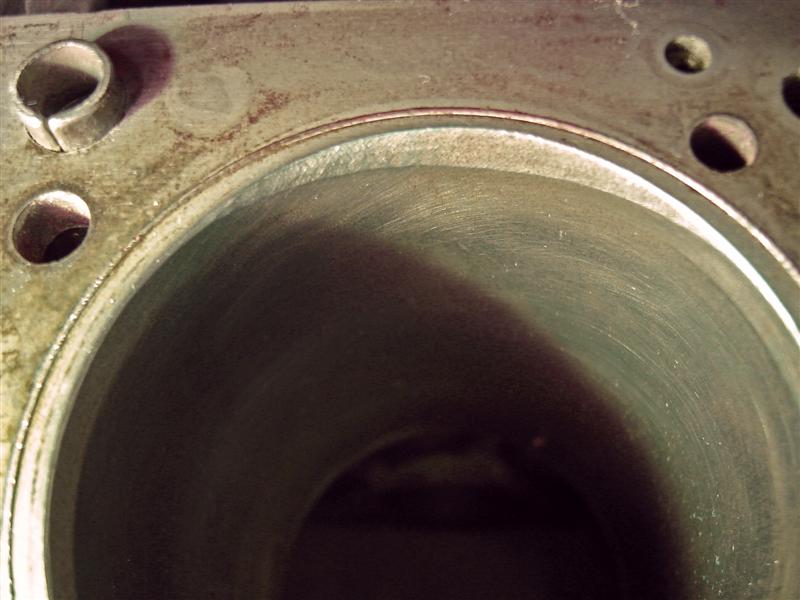
I have worked for three nationally recognized racing engine shops. At shop #1 we built Trans-Am (and many other series) Chev engines. We had a specially built torque plate that allowed both boring, and honing through the same plate. The final results of this method was simply quicker than boring without a torque plate, then honing with a plate. This is because you could bore closer to your final size, and therefore have less material to hone to final size. There is always a minimum amount that needs to be honed, as the boring process (even with a finishing tool bit and a .003 finish cut) microscopicly tears the metal. Honing to a selected finish depends on the rings to be used, and the material being honed. After torquing on the plate of a small block chev,the surface of the bore will be displaced from the previous "round" bore, in an area next to the bolt (or stud). This displacement, is a small area about the size of a nickel, about an inch below the deck. This happens to be right where the rings are at their most important point, attempting to seal all the compression just before and during ignition. If a torque plate is not used, upon compression, a very small amount of compressed mixture will sneak by the five "windows" around the top of the cyl. With plate honing, the bore is true whith no windows to leak compression. Similarly, the main bolts/studs are also torqued before honing as they also distort the bottom of the cyl's., But this distorsion has more to do with lower bore integrity. During this time I used the same process to build all sizes of Datsun L engines with sucess. Although these blocks were not as adversly affected because the head bolt holes are further from the bore, and distorted the cylinders less. The 2nd and 3rd engine shops I worked at, were involved with professional formula car engines. These were Cosworth, Lotus, English Ford, and Toyota as used in Formula Atlantic. These shops, in addition to torque plates, used hot water pumped through the blocks. The hot water has as big an effect as the plate, as the entire block will distort as heat expansion and distorsion varies depending on the thickness of the cyl wall. It is also much more precise in setting the clearance between piston and cyl. Now, weather you want to avail yourself of these extream methods is up to you and your needs, and wallet. But, there is no dought these methods are measurable, and do increase the power potential of the engines discussed here. The increases were repeatable, and noteable on a first person basis, as I did the machine work, assembly, and at times the dyno work. Phred
-
This is not a cam card as normally supplied by cam grinders. Cam Analyzer is computer program, used with a fixture that rotates a cam in a jig on a bench. Electronic sensors send the rotational, lobe, and lift info to the program which converts the info to data and lobe profile charts. All this info is of little use to an end user, but is very usefull to an engine builder who can use the data to compare cam profiles from one grind to another. The program allows onscreen overlays to quickly visualize and compare grinds, and make a decision as to which profile to use for a given engine. The chart you attached also has all the info that is normally supplied with a std. cam card. If you want to compare this cam to others, the specs you want to pick out of all this mess is: Lobe centerline Lobe lift or valve lift Duration See the cam timing sticky on how to degree your cam, and it will make more sense. FWIW This is just general info supplied by someone who has used this type of equipment.
-
It won't happen again. This is excactly why I rarely post here. People who know nothing, know everything. Phred
-
Info from someone who used to port, and flow heads; I don't have an answer as to who can do this, but... The general idea in porting a head is to decease obstuctions to flow. Porting, is understood by most as increasing the cross sectional area, and volume of the port. In a race engine this is good, in a street car, not so good, and can be detrimental to performance in certain situations. Port velocity is very important to engine function, be it a race, or street engine. When port volume/size is increased, velocity is decreased. In a race car this desired, as the engine can then pump more air, and all that is needed is more rpm to get the velocity back. In a street car, the increased rpm needed to feel the difference in flow and performance, becomes detrimental to good low rpm/street performance. So, for a street engine the idea is not to increase port size, but rather to smooth casting imperfection, and to reconture the area around the valve guide and the area leading up to the valve seat. The seat then needs to have very accurate muliple angle's, which match the valve. There are also modifications which can be made to the valve that will help flow, without increasing port size. The extra cost to verify flow improvements on a flow bench, for a street engine, is not a reasonable or justifiable use of your money. Inreased engine performance comes from a lot of other things, which when done, will then be awakend by increased air flow. For a street car, porting a head, is a classic case of the cart before the horse. Phred
-
bead blasting piston domes and combustion chamber
Phred replied to philipl's topic in Nissan L6 Forum
First, ZZZeee shot peening is very rarely used on piston domes as it can be very aggresive and damage softer alloy's if not done very carfully. The strength of a piston dome comes from it's design and alloy. The only reason to blast piston domes is to clean during a rebuild, or prepare for a coating, or to blend the surface after reconturing, or diegrinding the dome after machining valve reliefs, or machining to lower dome volume. Many pistons as recieved from the manufacture, have sharp edges on the domes or valve notches. So it is not uncommon to take a brand new piston and deburr and blend the sharp edges away. Sharp edges on a piston dome can cause distubances in the mixture flow, and also cause hot spots which may lead to preingnition or detonation. After this work, the domes may be glass beaded to blend, and remove the surface scratches. Media blasting is the generic term for all the different substances that are used for surface modification/preparations. There are many different grades of glass and shot, garnet, plastic pellets, walnut shells, and the least known, soda. Soda is a wonderful basting media. The only downside to it, is it requires a special basting delivery system, which can be very expensive. The one I use at work cost well over $12K. It is a constant loss design, which carrys away the dirt and crud with the soda. The soda crystals explode on contact, and are sucked away as dust or fine powder. The most important feature of soda blasting is that it is biodegradable. You don't have to worry about getting all the soda out of the water or oil jackets. You just flood the part with water, and the soda is disolved. Presto, a perfectly clean part! Soda leaves a slightly duller, smoother finish than glass, as it does not change the surface texture or machine marks. A bright, freshly machined piece of aluminum will be turned a dull silver however. Which means soda can be used on the entire piston if desired, as it will not damage ring lands or pin bores. Different parts of the engine require different blasting media. Some parts require shot, some glass, and if you have it, soda. They all serve a different purpose, and you just need to know the limitations of each, and the desired results for a givin part. Phred -
bead blasting piston domes and combustion chamber
Phred replied to philipl's topic in Nissan L6 Forum
jt1 is correct, all you others, relax. Glass beading is commonly used in all race engine shops for domes, combustion chambers, and just about every other area. I have been doing this for over thirty years on every type of racing engine from Cosworth formula engines to Trans-Am, to Turbo'd big blocks. The only concern is complete cleaning after the process. A few glass beads in the wrong area can severely damage an engine. Glass beads come in various sizes for different applications, just like steel shot used in shot peening. And to a small degree, glass will have a similar impact on the metalurgy of the surface being impacted. I wrote the following paper which describes shotpeening, and how glassbeeding can enhance the shotpeening effect. Phred The principal function of peening is to increase the fatigue life of cyclically stressed parts. Small steel balls (shot) hammer the part, coompacting the surface, which relieves both surface, and subsurface, granular stresses. This process builds a tough outer layer which is very resistant to fatigue cracking. This protective skin actually strengthens the part. The useful life of a properly peened part is usually twice to five times that of an untreated part. Shot peening is of most benefit on con rods and crankshafts. It can also be applied to almost any part subject to fatigue cracking. The following preparation is necessary befor a part is peened. 1. The part should be Magnaflux or Zyglo inspected 2. All sharp corners, nicks, machining flash, and similar stress risers should be removed. A polished surface is not required. 3. Precision finished surfaces, such as pin bores, or journals, require masking prior to peening. Intensity is the critical component in successful shot peening. High intensity peening will distort a thin section part. Peening intensity must be high enough to produce an effective skin, but not so great as to damage or distort the part. Controlling intensity in the peening process is accomplished by using shot of different density and diameter. It is also controlled by the distance from the gun nozzle, angle, air pressure, and exposure time. The intensitiy used for different parts also varies with the type of metal being peened. The ideal intensity for a specific part is determined by knowledge of metalergy, experimentation, and experience. Double Shot Peening Most parts benefit from "Double Shot Peening". Wherein the part is first peened using larger shot and high intensity. Then peened a second time using smaller shot (usually fresh glass beads) and lower intensity. This produces a much improved surface appearance and considerably improves the fatigue life over single shot peening. Double shot peening is a patented process, (U.S. Pat. No. 3, 073,022) issued to General Motors. The rights of which are not being enforced. It is mentioned only to underline the value of the process. The patent papers cover seven pages and include fatigue life charts showing life cycle comparisons between unpeened, single peened, and double peened parts. They leave no dought in the readers mind as to the advantages of double shot peening. -
How to modify your Nissan & Datsun by Frank Honsowetz. ISBN 1-55561-237-7 Phred
-
notching/beveling/butterfly l24 block for valve clearance
Phred replied to rossman's topic in Nissan L6 Forum
Sometimes it doesn't take too much grinding. Phred
-
Woldson, FWIW. I have been building engines much longer than Paul (BRAAP), and I have never had issues with any advice he has given. Phred
-
Cam cards give an engine builder a good idea how a cam might perform, but don't draw any hard conclusions by them. There are a lot of other engine component factors that can upset the apple cart. Generally, a "bigger" cam will produce more power higher in the rpm band, with a corresponding loss in the lower rpm range. Having said this, any cam can be made to change it's characteristics by changing the cam timing. Example: a stock L24 cam in an SCCA ITS car set at 1.375 degrees retarded will make power all the way up to 6500rpm. But it doesn't do very well under 3000rpm. Take the same cam and advance it a few degrees, and it will now respond well at lower rpm levels through the mid range. But, the engine will probably fall flat from 6000 and up. I have degreed and dynoed till I was blue in the face, and after all these years I have a good idea what to expect, but I won't throw a cam under the bus just because of what the cam card says. It's very hard for a home builder to pick the perfect cam for his engine. Just remember how important cam timing is, and how it can change an engines attitude. Oh, and to make this thread relevant, use a good break=in oil additive when you first fire it up. Phred
-
Whats wrong with these people. Why they can't have a standard height for checking cams? FWIW 25.4 is the constant for converting mm to in. and vise-versa. Either multiply or divide. My choice would be the "bigger" cam. The advertised duration is not that much more. If it were me, I would install the cam 2 degrees advanced for street use. This will help pick up the bottom end performance a bit, and help offset the slight loss you'll get by going to a bigger cam. My 2 cents. Also, the springs at 180 open will be good for a street racer. Phred
-
In one of your pics, I can see 3 or 4 spring shims under the spring seat. Get rid of those, and your installed/open pressure will more reasonable. Generally, .060 over coil bind is acceptable, .015 is not. I have run springs closer than .060, but there is no need to for your set up. Jon has the right idea. You need to know what the installed, and open pressures are. If you don't know how to do this you will have to take the complete head to an engine shop. They will measure the installed height, then put the springs in a valve spring pressure tester. To find open pressure, you subtract the amount of net valve lift from the installed height. Then check the spring at that height. Anything over 220 lbs. open, for a street/race engine is too much. Most aftermarket race springs are too heavy for the street, and some discretion is need here. For example, 250 lb. (open) is enough to control valve float ( with steel valves ) at 8000 rpm on an L6. And 250 lbs. can control Ti valves at 9000 rpm. Most engine shops that are not familiar with L engines tend to over-spring. I have taken heads apart that have 350 lbs. open pressure, and they only turn 7500 rpm. All that does is waste HP, and wear every thing out in a big hurry. Some cam manufacture's have spring pressure charts that are included with the purchase of valve springs. If you have one, this can be a good start to finding the correct pressure for your particular engine. Phred
-
This thread has evolved from cam damage, proper assembly, through metalurgy, and oil composition to....more questions. While I have no clear cut answers, it looks like its a combination of all three. On the oil issue, I have one more tid-bit to offer. A few years ago Joe Gibbs Racing started to engineer their own oils. http://www.joegibbsdriven.com/trainingcenter/index.html They have very specific oils for each specific application. Now, many top racing engine builders have come to agree that it is the best on the market. I mention this only to point out how important oil composition is. And no, we don't use it, only because it is very high priced. However one So-Cal builder, Esslinger, uses it exclusivly, and won't warranty an engine if it is not used. For the last three years, I have been building Porsche racing engines. (sorry) which have a similar type cam/rocker design as Datsun. During that time, as the oils lost their Zinc/Phos content, we have seen more lobe/rocker and bearing damage than when the oils had a higher content of Zinc/Phos. Makes you go Hmmmmm. For the last year or so we have been using 15-40 Swepco with good results. http://www.swepcousa.com/lubesite/highperf.htm Valvoline offers specifically street, and track oil. If you're a Valvoline Synthetic user, be sure to use the track oil, even if you drive on the street. I don't think the Feds will arrest you. If you are becoming paranoid about what to put in your new engine. At least break it in with some G.M. EOS, it will help. Then wait till the planets line up, howl at the moon, pour in some oil, and pray. Phred
-
Here's an adjuster I made up. Its just a half inch fine thread set screw that I machined a spring perch on one end. Then drilled and tapped the cap. Not shown is is a thin brass sealing washer to keep oil from leaking past the adjusting nut. The nut is jam nut for a spherical rod end I had laying around which was pre drilled for safety wire. Phred
-
Scarfed cams in L engines is unfortunately one of the most common killers of rebuilt, modified engines. You're among a group of many, although I know that doesn't make you feel any better. My only questions are to further the database of commonalities. (1) was the cam a reground original or an aftermarket core? Original cams will have "Japan" cast into the core between the third and fourth bearings. The most common aftermarket cam will have a CWC cast into the core. CWC cams have the worst record for failing. (2) were the rockers original or aftermarket. I can't remember the casting designation on the side of the rockers, but originals are about $30.00 each. So how much you spent on them is usually a good indicator. After doing many post-mortem exams I have found the most common reason for failure is the difference of, or lack of, hardness of both parts. Datsun engineered their cam to be compatible with their rocker in terms of hardness. If the cams and rockers are hardness tested, there should be a difference of at least four or five points on the Rockwell "C" scale. It has been a few years since I last did these hardness tests, and I can't remember the excact numbers. However, the damaged cams/lifters that were checked always had a similar hardness, or there were only one or two points difference. Point of interest, Datsun/Nissan is not alone when it comes to lobe failure. A similar cam/rocker design is used on the Ford 2000 four cyl. engine used in SCCA Sports 2000 spec engines. A few years ago there was a series of cam failures, all cams that failed had the CWC casting ID. And all that I checked had similar hardness numbers on both cam and rocker. These are my personal findings, which have been corroborated by other racing engine builders who have also independantly done testing. I am not aware of any technical papers on this subject, but I would be very interested to find some. Although I have been building racing engines for thirty years, consider all of the above FWIW. Phred
-
I agree completely. And yes I do these things, and have been for thirty years or so. Checking lift is just a simple thing that most people can do. As long as they are setting up the lash, why not? Also, any decent shop with a DCM, Rottler, Sunnen, etc. will be happy to do some equalizing of valve heights if you ask. If they can't, go somewhere else. Most people here are enthusiasts, and those of us in the business should offer support and options whenever we can. Phred
-
If you have a dial indicator, check the lift of each valve. I have set up many heads with different sized lash pads on the same head to equalize the lifts. The wipe may look the same, but the lifts my vary. Setting up for equal lifts is most important when valve to piston clearences are getting close. Also, if you have equal lifts the fuel curve will be equal on all cylinders, leading to even EGT's. All this is usually done on a racing engine, but if you have the time, it makes for a nice running street engine too. Phred
-
Another supplier with good prices. www.rpmrons.com/SInissan.html
-
Piston Pins, Pressed...Full Floating..Trying New Technology!
Phred replied to slownrusty's topic in Nissan L6 Forum
To correct a slight inaccuracy, pin plugs as Continental refered to them, were/are made from aluminum. Most aircraft engines use these, and are either a slip fit in the pin, or are pressed in. Teflon style butons were offered by Datsun Comp. as far back as 25 years ago, and I used these on many L motors. It is required to maintain tight clearence in the pin, and end clr. in the bore for proper operation. Don't forget another type of pin retainer which has even a better record of staying put under extreme use. The round wire lock is nearly bullet proof. It is designed to be used with a pin which has a a precision outside chamfer. In use, the pin will exert longitudinal force, and will push the round lock down into the lock groove, instead of out. These are being used by more manufactures than in the past, and I prefer them to all other types which I have used for many years. The last set of JE pistons I ordered for my LD28 have these round wire locks. Porsche has used these locks exclusivly in all their engines for years. Phred
-
Before doing anything else, reset the lash in increasing increments of .020 or so. Then recheck. Keep resetting the lash till you have some V-P clr. Once you know how much lash you need to clear the pistons, Then you can dicide which action you must take. if possible check your cam timimg as in the Cam timing sticky by Braap. You need some info that only a dial indicater will provide. Note: The valves will be closest to the piston at 10 degrees before (Exh.), and 10 degrees after ( Int. ) TDC. You will need a Minimum of .040 Int. & .060 Exh. Preferably a bit more. Phred
-
Piston Pins, Pressed...Full Floating..Trying New Technology!
Phred replied to slownrusty's topic in Nissan L6 Forum
I built Trans Am Chev engines in the late 70's, early 80's. Cosworth and Ford based race engines in the 90's. Porsche engines at present. On the old trans-am engines we did a lot of experimenting with rods with and without bushings. All the results are directly tranferable, since then I have used this info when deciding which type to run in many different brands of race engines. Really, it just depends on the customers budget. A non bushed rod with non coated pin @ .0008 clr worked well for about 5 hours before very slight metal transfer occured. This happened with a single top oil hole, or two underside holes. More initial clr. was tried, extending the life a couple hours. (engines were min. 530 hp, dry sumped, 8500 rpm.) Then we tried oil grooves, with the same results. Then we tried something unique. We first honed the rod to .0007 clr. Then shot peened the pin bore. Then did a final plateau hone over the top of the shotpeened bore with a final clr. of .001. This left a fine dimpled surface that retained oil, and the life of the pin bore was then as long as the rest of the engine. Note: the only reason we went to such lengths was to make the small end of the rod as light as possible. The small end was turned on a rotary table on a mill so the wall thickness was a consistent .120. For one race only engines (9000rpm) we could reduce that to .100. But, for all the effort expelled, a bushed Carrillo rod was only slightly heavier, and could be rebuilt (rebushed) easily. Casidiam (DLC) had yet to be invented. But I have built USAC Midget engines that have Titainium pins coated with DLC. Those engines take a severe beating and live long lives. Upon disassembly, the coated pins look perfect. They run in bushed Carrillo, or Titainium rods. For the ultimate life expectancy, a bushed rod is superior, no mater what type of pin/coating is used. FWIW. Phred -
Pics of My JE Forged Pistons & Some F54 Block Prep Pics
Phred replied to slownrusty's topic in Nissan L6 Forum
The valve relief placement does look different. Maybe its just the different depths that create an illusion. The only way to tell if they are in the right location is a simple test. drop a little clay in there and rotate it over to see how much clr. and edge relief you have. I have milled many reliefs in pistons, and set up the valve centerline by a light center punch mark on the piston. When pre-assembling your eng., run the piston up to 10 degrees before TDC. then set the bare head on the block. Take an old valve, and cut the head off, and machine a center point on the remains of the stem. Then just drop it into the guide and lightly tap it. This will leave a mark on the piston at the exact center of the valve at the closest point the valve will come to the piston, usually between 8 and 12 degrees before or after TDC. Also, JE does offer (for a price) a service called 3D lightening. Where they machine the underside of the piston to match the dome, leaving a constant dome thickness. For more comparison, this pic is a set I have that was made with the same forging as Yassin and John's. Its a flattop with deep reliefs for a bigger cam. Phred
.jpg)
.jpg)
.JPG)
