Jump to content
HybridZ

1 tuff z

Members
  • Posts

    1916
  • Joined

  • Last visited

  • Days Won

    12

Everything posted by 1 tuff z

  1. removed my vents from the ser 1 z. the plan is to drill the 'grill' mounting holes, paint flat black behind the grills, then mount them. gives the appearance of a ser 1 hatch w/o the ductwork.
  2. paul, i was figuring you'd buy the L parts he has listed now and add them to your 'cool parts inventory'!
  3. link to his fleabay L engine parts; http://motors.shop.ebay.com/shewmax/m.html?_nkw=&_armrs=1&_from=&_ipg= link to the video, sweet sounding Nissan L6 powered hydroplane, love the open headered L6 running at hi rpm's-music to my ears! excerpt from their racing website; "Sho nuff III is powered by a highly modified, fuel injected Datsun 240Z engine. Size - Approximately 165 cubic inches, six cylinders. Fuel - Methanol Alcohol. Engine speed is over 9,000 RPM's. Every part in the engine is modified for increased speed".
  4. see post #2 to inquire regarding further details...
  5. i wondered how long before someone noticed the t-jet ho cars in the display case...good attention to detail!
  6. gonna have to get it painted then...new 'wild rice' graphix! deja, nice looking z-where is the rear aero skirt from?
  7. rags, i didn't even have the old one off and my 14 yr old boy alan sees and says "cool dad, can me and emma have the old one for our z?". i just smiled...
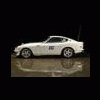
  8. the brown truck delivered a gift from santa on christmas eve for my 1tufffz so i guess i was a good boy this year. this rear spoiler is a prototype from sdi as we saw used / mounted on roddy's z for the hbz wind tunnel testing. it rises nearly 6" off the decklid and roddy tells me that driving at anything beyond normal highway speed will create not lift but downforce. i think he actually said, go out, drive fast and make lots of downforce. hmm, let me see what i can do. i am both hopeful and confident that this will be thoroughly tested at watkins glen in 2010, and possibly nashville super speedway roval at the z convention. as u can see from the pics i have it temporarily mounted after i gently removed the old xenon urethane spoiler which has been mounted since...1990 when the white paint was applied [had a bodyshop do it while i was stationed in pensacola, fl in the usmc]. i am very fortunate to have this prototype, don't ask as to; price, production info or such as i can not answer. been sworn to absolute secrecy by roddy. the only thing he said is they have something 'in the works'... old spoiler quarter view... profile of my old spoiler, vast difference in height and angle of attack...
  9. 1 tuff z

    DSC02536

    From the album: body aero

  10. 1 tuff z

    DSC025371

    From the album: body aero

  11. 1 tuff z

    DSC025381

    From the album: body aero

  12. dustin, are your door seals new? they look great, how is door closure?
  13. interesting, i didn't see any specifics as to precisely where to apply but looking at their sample rotor pic it looks to be on the cooling vanes. what do you think dave? expensive, yes, as compared to mismatched pads, no.
  14. cause it's from japan and very smart:mrgreen: [sorry i couldn't resist]. i believe it ties into the vss- vehicle speed sensor. my car has one that comes off the t56 into the gm pcm, i tapped into it to provide the vss signal for my cruise control.
  15. 3 words. plain, simple, beautiful i'm guessing [a few-probably more than any of us would care to admit...] painstaking hours were spent simplifying and sanitizing the engine bay.
  16. john, i actually ran this setup all summer with no issues. i wound up 'ovaling' the inlet tube on the backing plate to provide a bit more clearance for where it snakes between the tie rod end and sway bar. i used some zip ties to loosely hold the hoses in place and keep them from dragging on the ground but still allow adequate slack to compensate for the wheels turning. i'll post pics of the hose routing when i reinstall everything. 12 degrees farenheit this morning. gotta be a tad more balmy before i head to the garage...
  17. dc, i like the idea of temp paint, anyone know where to source it and how/where i apply it? jr, no bending just trimming to clear the larger caliper/mounting bracket.
  18. b, i think the answers/opinions to your questions can be answered once we all see the current spoiler mounted with clear shots from; profile, overhead and rear views. otherwise, it is difficult to gauge how to change it. my 2 cents...
  19. 1 tuff z

    DSC02518

    From the album: Brakes...

  20. looking at my rotors last year i observed the inner part was beginning to develop stress cracks. i figured the lack of air was creating a temp differential and i needed cooling! my idea, use the stock backing plates, modify them to clear my larger calipers, add an inlet and cooling source and...voila-home brewed cooling ducts! here are the stock backing plates, 2.5" exhaust tubing, 45 deg angle cut and welded in place. i then removed the material to allow air to flow thru the tube. i mounted the plates in place after i had modded them to fit my brakes. then determined where to place the inlet based on clearance of; sway bar, tie rod end as well as estimating placement of cooling hose, etc. here is a shot of one mounted... this shows the parts all blasted and zinc plated, next job is to reinstall them. the funnel looking things are the inlets i had made to fit in my kaminari air dam [pics of the air dam in my photo section]. i'll post pics of them mounted when i get the energy to head to my 20 degree freezing garage!
  21. 1 tuff z

    DSC01058

    From the album: Brakes...

  22. 1 tuff z

    DSC01054

    From the album: Brakes...

  23. can you post some bigger pics. my older eyes are in need of larger images... thanks
  24. i'm with nigel on this one. i did consider that the pic nig referenced may be distorted due to either the close proximity of the camera, a wider angle lens or both. be nice to see a direct shot of the spoiler from a bit further back as well as a profile view.
×
×
  • Create New...