
dat240zg
-
Posts
818 -
Joined
-
Last visited
-
Days Won
1
Content Type
Profiles
Forums
Blogs
Events
Gallery
Downloads
Store
Everything posted by dat240zg
-
Best way to wash a car covered in two years of garage dust?
dat240zg replied to Sparky's topic in Body Kits & Paint
When I actually began working on the Z it had been sitting for several years. I didn't want any of the dust and grit scratching the surface so I took my compressor and first blew the car out really good. That in itself took care of the majority of the dirt and construction particles without any scratching. Then I followed Davids way (only I use Palmolive ). Don't grind in the dirt! -
Thanks Guy. I'll head out and see if there is any movement possible. The dowel was sticking out almost a quarter inch farther than the rotor cap would go on. Bryan
-
Well....kind of a weird thing for you guys. I went to replace the Optispark cap and rotor (The kit that I was putting on was the MSD set for the optispark1) and found that it didn't fit. The shaft that the rotor sits on stuck out too far. I recognize that the shaft sticking out farther is an indicator of the OptiII, but mine is not vented (that I can tell). BTW, the motor is a mid '94 LT1 from the Firehawk. Has anyone run into a mid year optispark that had some of the characteristics of the Opti1 and Opti2? Even Summit was having a hard time matching up the parts. Thoughts anyone? Bueller, Bueller???? Bryan Dat240zg
-
Combo Switch Schematic...again (and yes I've searched!!!)
dat240zg replied to dat240zg's topic in Ignition and Electrical
Thanks to both of you. Looks like the Autozone link is going to help me. I had looked at the FAQ and seen the diagrams, but for whatever reason, even the number of wires that I have coming from my switch is different, not just the colors. Thanks again. Bryan -
Guys, Thanks to Nissan for giving us one of the more confusing bit of electrical wiring thingies....I'm almost done with re-wiring the Z and just have the combo switch to go. I've done all of the searching, including the FAQ on the Painless to Combo switch, but the problem is, all of my wires are different colors than the one in the FAQ as well as any other pic/schematic that I've seen. In fact, it's different than the other switch that I have, which is also different from the ones that I've found here!!!! SO......anyone else want to volunteer a combo switch schematic that I could use? I saw an older post about someone that was swapping in the combo switch from an early 90's DSM. Anyone know if this ever happened? That would be a slick piece! If you have pics or advice, I'm open to both. Thanks again! Bryan Dat240zg
-
Nissan OEM G-Nose spotted on S.F.craigslist
dat240zg replied to zlalomz's topic in Body Kits & Paint
$3500!!!! Sheez....what's it made out of....gold? I know the price on those things has gone up, but didn't think it was to that level... -
Fat Mat is in! (The while I'm at its are killing me!)
dat240zg replied to dat240zg's topic in Body Kits & Paint
Thanks for the words guys. The fatmat added about 22 lbs (I added the amount that I had left over from the 100 sqft. and subtracted from the original weight of 30). I did remove all of the old that was down with the exception of the back deck. I added the fatmat to the inside of the rear quarter panels, the inside of the taillight panel and doubled it up on the back deck. -
Well, this summer started as a simple (tongue in cheek) V8 swap and has grown to take on a life of its own... While I was at it....I decided to strip the interior, replace the wiring harness completely (because I was going to have to rewire for my Euro taillights anyway...uh huh...), replaced the seats (the straps were broken on my stockers...sure...), put in a roll cage (for safetys sake....right on...), replace/upgrade all the brakes (more power means more brakes....of course), put a MSA Type3 air dam on (help direct more air for cooling...that's a load), installed a Hot Rod Air A/C system (well sheez..it's a daily driver!) yada, yada, yada...and oh, by the way, still need to finish the V8 swap . But - it's almost there! Here are a couple pics of the FatMat: More pics to follow as progress happens! Life is great! Bryan
-
Did you "edit" your harness originally or was it speartech/etc? I guess it'd be a pain in the butt to remove it, but if it were a speartech harness, it seems like John could add that back in for you fairly easily. BTW, ignorant question coming, after the initial tuning of the pcm, what's the advantage to using the tunercat? Is it more for further tuning after other changes? Bryan
-
I can help you with this one. I just did the swap out of a '94 Firehawk. I cut the radiator supports so that I could get in there and then took the whole thing out as one piece, with the hoist hooked to the motor and a motorcycle/ATV jack under the t56 to give support. I know that you probably know this, but just double check that you've pulled/disconnected all of the wires, especially the clutch slave cylinder. BTW, when you take that out (the slave cylinder) the easiest way that I found was to disconnect it from the clutch pedal, remove the whole assembly together without disconnecting the cables (which will mean you have to blead the cylinder, etc.). I had a friend help. Also, don't make my mistake - I did everything else by the book and forgot to drain the tranny which dumped fluid all over the garage floor. Other than that, it's straightforward.... Bartman? Guys? EvilC? Hope this helps... Bryan Dat240zg
-
You're right...brain freeze..... Man, I tell you what....I'll be glad to get this mount situation sorted out. Word to the wise (or those who want to avoid going completely bald like me), the two tranny mounts (JTR and JCI) may look similar, but they aren't! This has been a good but time consuming lesson. I'm sure that many people prefer the JCI kit for the LSx motors, but for the LT1/T56 swap, the JTR is probably better. I believe that the JCI kit would do great for the LT1/4L60 swap, due to the difference in length of the tranny, but the manual puts it too far forward. I'm getting tired of this. Bryan
-
I just finished swapping the mounts yesterday and can tell you that, based on the book, on the drivers side setback plate to block, then spacer, then chev mount. Couldn't tell you if the location would be the same or whether it makes any difference at all. As far as the chevy mount, you do bolt it from below, I believe that it was a 7/16" bolt, grade 8. To make it easier, I loosely bolted all pieces the pieces together then threaded the bolt through the crossmember - gave me a little more wiggle space. Hope it helps. Bryan Dat240zg BTW, anyone looking for an inexpensive JCI mount kit?
-
So did you just remove the stock regulator and plumb in the Paxton? Hang on, I think you mentioned one time that you welded on AN fittings to the ends of the rails right? BTW, the length of the Aeromotive pump with the 2 filters is about a foot and a half! Where did you mount your pump? I recognize the need to get it as low as possible, but, sheez, theres no room! Bryan
-
I ordered the rear exit fuel line setup from S&P and mentioned that I had installed my aeromotive FPR. The guy that I was talking to strongly recommended against the aeromotive setup and felt that the stock regulator was strong enough. The aeromotive guys seem to think that a 8 AN supply line and 6 An return is the way to go, along with the FPR. Anyone want to chime in with advice or opinions? Anyone else made changes to their setup? Bryan Dat240zg
-
Thanks again Jon. Great explanation. Wish I could change the title of this thread so that it would be more helpful for others when searching. BTW, anymore vid's of you autocrossing?
-
This is kind of interesting...maybe. This is a R-180, but has some different markings on the top. It's different than any of the other diffs that I have laying around. Pretty sure that it's just a R-180, 3.90 but.... Someone take a look at the pics and set me straight. Normal R-180 door stop? Pic: Here's a better pic of the diff: Pic: Thanks. Bryan Dat240zg
-
I started in June with a Z that had no motor or tranny. Since then, I bought the Firehawk, pulled the LT1/T56, prepped the motor and the Z, bought/bartered all of the parts, installed the motor and now am tying a lot of loose ends (going all over the earth for deals), redoing the gauges, sumping the tank, etc. I have 3 weeks left before school and have to have it dependable as a daily driver by then. Optimistic? Heck yeah. BTW, I teach school, so the summer was mine and I have a very understandable and accomadating wife. Bryan Dat240zg
-
So, suspension compressed? I can get you a pic of #248, no fender, on wheels, but no motor means that it's ridin' a little high. Would that help at all? Bryan Dat240zg
-
eibach progressive rate springs?
dat240zg replied to FI_JUNKY's topic in Brakes, Wheels, Suspension and Chassis
I've had them on my 240Z for several years now and they work well if your primary use is commuting. I had them combined with Tokicos and for the most part they were great, just not quite as stiff as I was hoping. Also have the Suspension Techniques swaybars and new bushings. Bryan Dat240zg -
Easy Killer...no jack intended...the title of the thread was Johns Car Mounts question and that's what I have - the Johns Car LT1 mounts and was just looking for some basic info from Phantom. Bryan Dat240zg
-
I'm with you. I recognize that the two motors are totally different; I was just wondering about the dimensions - whether they are fairly similar (within a inch or so). Somehow there is a dramatic difference in the mounts from JCI or my T56 had about 4-5 inches amputated! Bryan
-
Bill: After I got the LT1/T56 installed using Johns Kit, the shifter came up 3-4 inches short of the factory hole. My question is this (and it may be a dumb one): Is the LS1 a longer engine as far as the distance from the water pump to the back of the motor (so that the T56 ends up in the correct position) or do the JCI LS mounts place the motor back farther? Do the LS mounts mount to the crossmember like the LT1 mounts, or are they more along the lines of adapter plates that place the motor further back? I already spoke with John regarding the positioning, and he indicated that not very many people use the kit for the LT1/T56 combo, not exactly what he told me when I was buying it. Thanks for whatever insight that you can give me. It looks like I'm going to have to ditch the JCI crossmember mounts and use JTR mounts after all. Bummer. TIA, Bryan Dat240zg
-
248 looks rough, but believe it or not, it's in a lot better shape than first meets the eye. Aside from the damage that we discovered, it's in really nice shape. What's not so clear is the horse stall directly next to the drivers side that's full of the rest of the parts of the car. I agree with you Jon. I want to do a nice job rebuilding #248, but I would do a good job regardless of the VIN #. More than anything, I want to have a Z that will meet my goals performance wise and reliability wise. Having that be a low VIN is just the topping on the cake. If someone has the money to back up their opinions regarding the type of restoration that I should do, fine, buy the car from me. Otherwise I'll start my "rod-storation" as quick as I can.
-
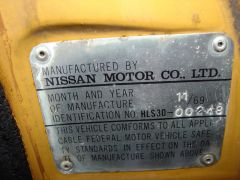
Well, here are the pics of #248. I know that I looked like some sort of story book redneck, pressure washing the Z in the barn, mud flying everywhere....but it's finally cleaned up! After looking, there is some damage that we found in the passenger quarter and evidence of a hit on the front drivers corner, so I'm a little unsure. My grad class starts this week, so the Z will have to sit for a few days till I can get it to the body shop for a professional opinion. I't was a tough decision, but because my goal is a 100% reliable daily driver, I went ahead and listed the twin turbo kit and Scarab parts for sale. As cool as they would have been, I'm on a pretty tight budget and these should help me reach more of my goals. Sheez....budgets suck. But, compared to pushing and staring at the Z, driving will be great. Here are the pics: Spraying out 25 years of crap... Spraying part 2: LT1 here I come!!! Vin Tag: Thanks for all of the thumbs up. I'm looking forward to getting going on this hybrid. Hopefully the body shop will tell me good things. Bryan dat240zg
-
 Lowest Vin# Hybrid here I come!!!!