-
Posts
264 -
Joined
-
Last visited
-
Days Won
2
Content Type
Profiles
Forums
Blogs
Events
Gallery
Downloads
Store
Everything posted by JoeK
-
Just starting my ls1/t56 build!
JoeK replied to CableSrv's topic in Gen III & IV Chevy V8Z Tech Board
Might be time to change the name of your build topic. You're well past "Just Starting", haha. -
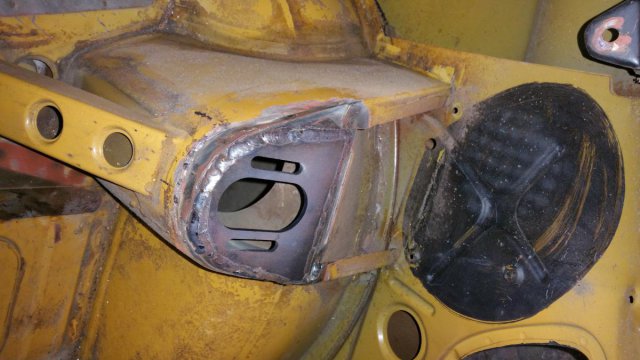
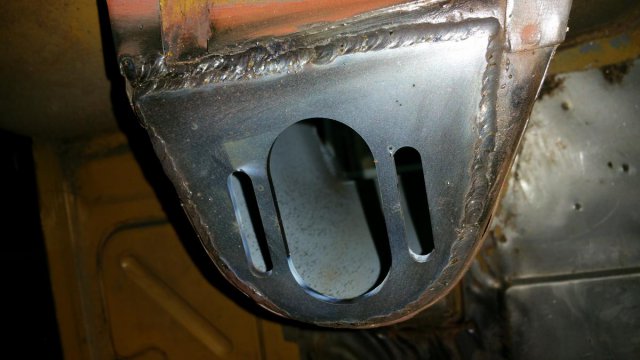
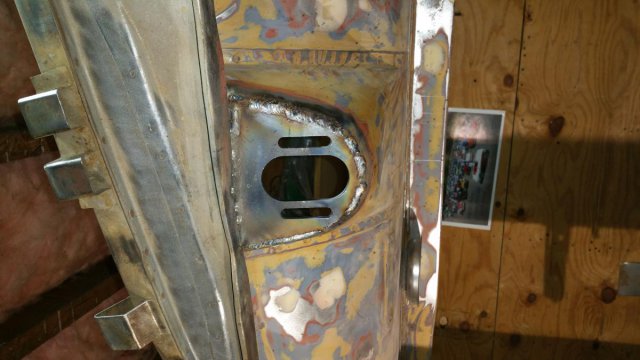
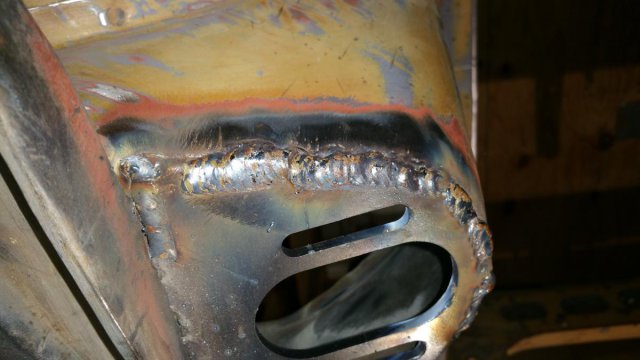
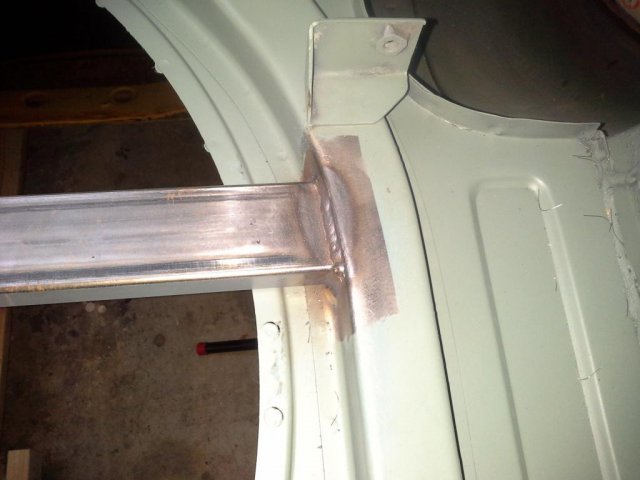
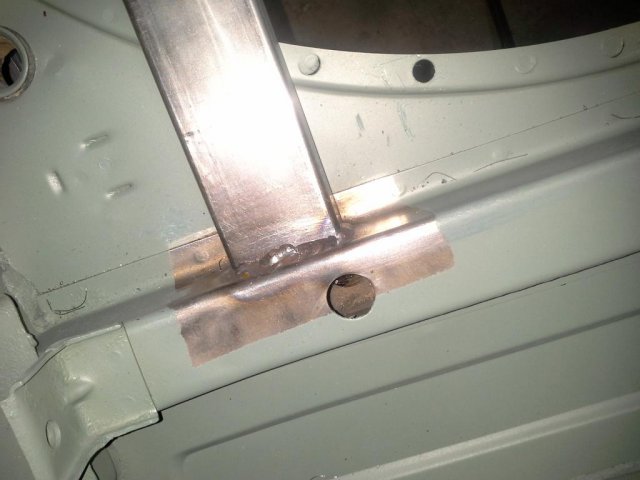
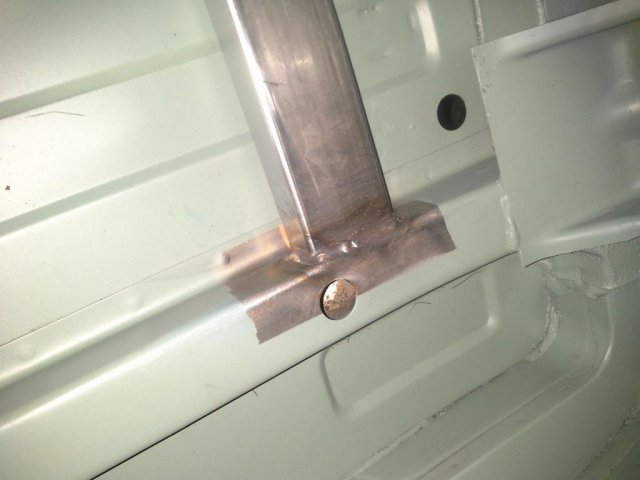
Finished welding in the rear plates. Welds look prety good to me. I turned down the feed speed just a tiny bit, from like 34 to 33, sure made for a tighter weld. I won't be grinding these ones smooth like the fronts. 1st pic is drivers side, 2nd pic is passenger side. Starting on the sleeve to spindle welding. I'll only be doing the fronts, the rear is getting a TTT set up so the backing plate mounts will get welded to sleeves. Anyway, realized today that unless I'm missing something, the front struts will not be adjustable without major disassembly. Guess I'll start with it set in the middle.
-
http://forums.hybridz.org/topic/58528-wheel-show-post-your-pics-of-you-wheels/
-

Just starting my ls1/t56 build!
JoeK replied to CableSrv's topic in Gen III & IV Chevy V8Z Tech Board
Yes, congrats. Looks like it won't be long before the first road test. -
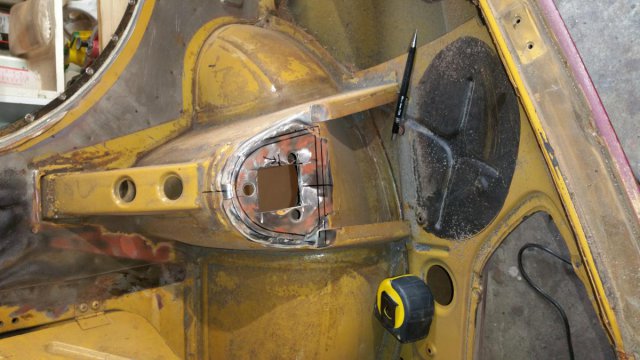
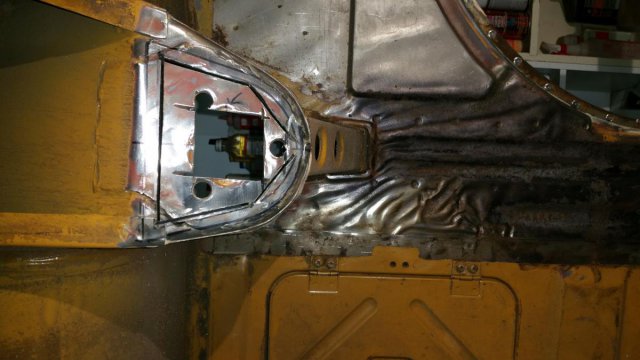
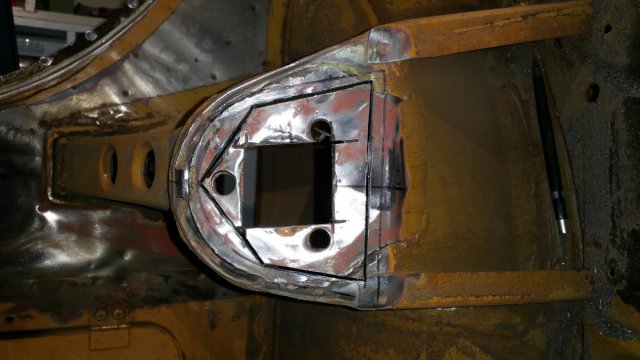
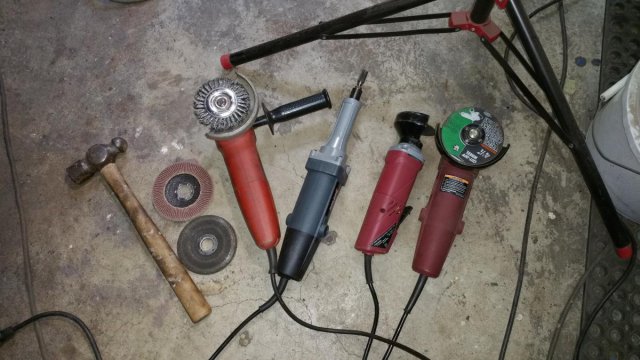
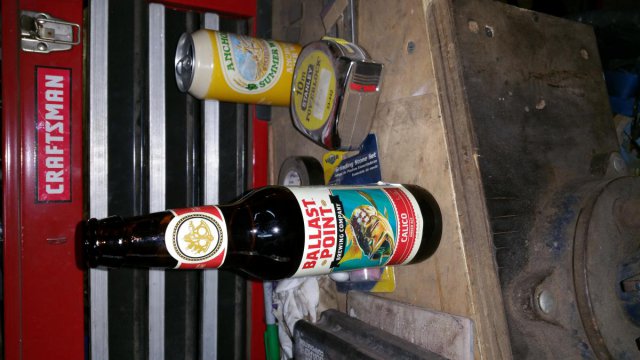
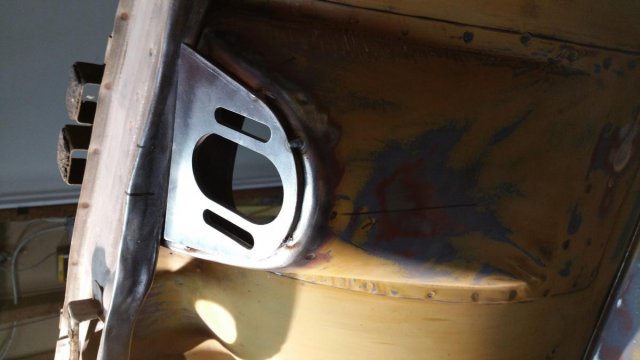
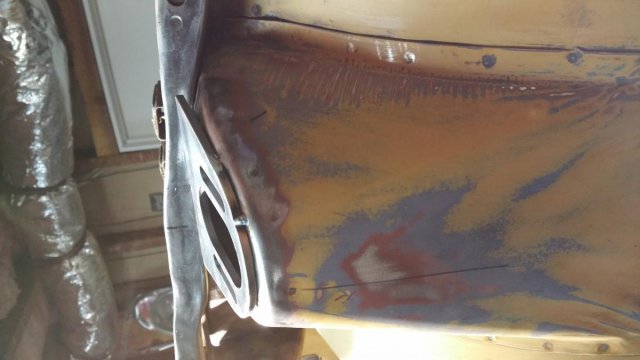
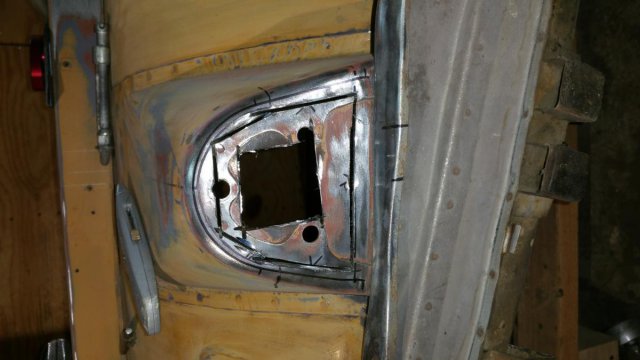
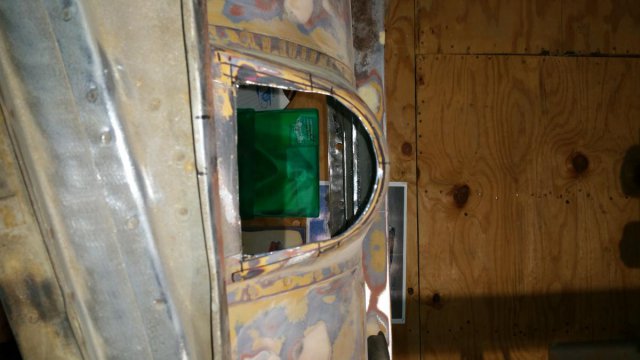
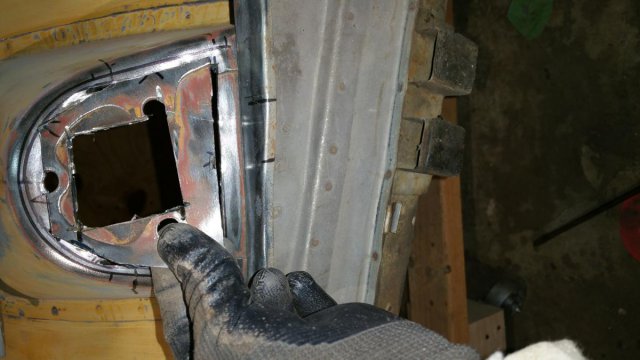
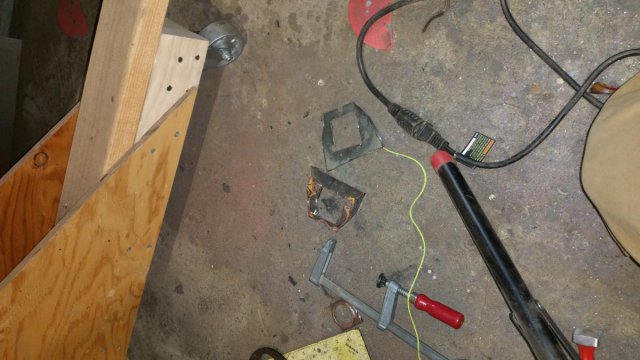
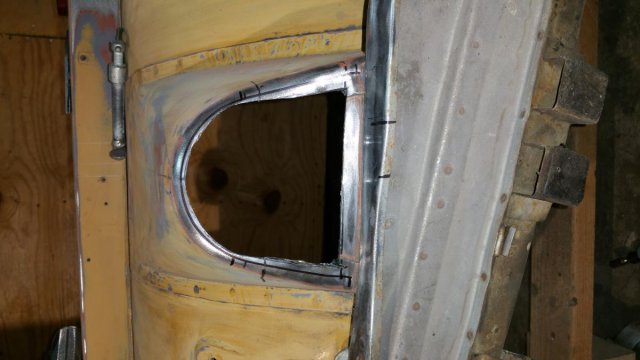
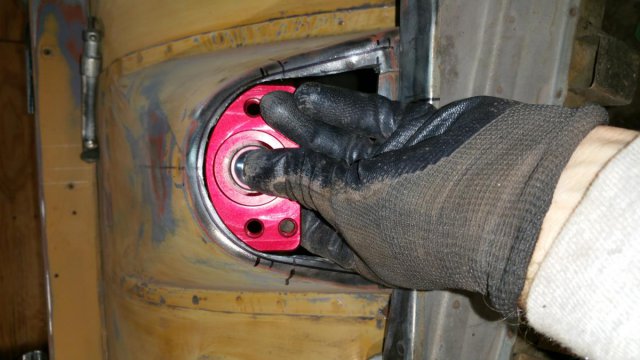
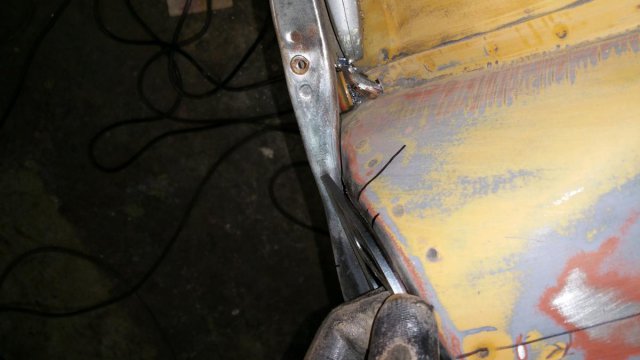
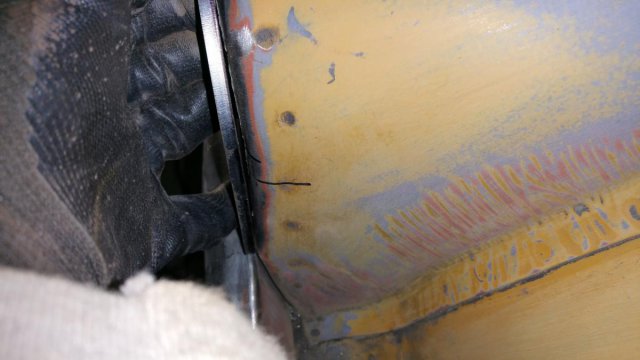
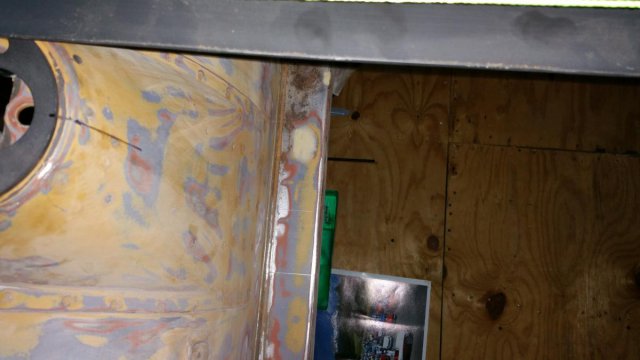
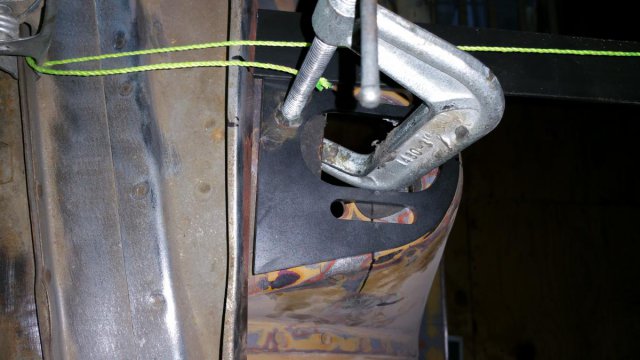
Yes, I absolutely realize that these cars are never going to be perfect, and probably don't need to be. And I'm not trying for pefect either, but if it takes me an extra 1/2 hour to align things to some reference point I don't mind one bit. So if I try to get things within a 1/32", then it'll end up +/- 1/16". This isnt valve lash we're talknig about here, and I'll be driving this thing on the pothole riddled streets of Oakland, Ca so I'm sure it'll be close enough. This is all just for fun anyway, and I'm really quite enjoying myself. And on to the rears. The mark with the little arrow pointed to it is 1 1/2" from the center of mustache bar mounting post. This gives me a reference point. Thinking about this now, this really doesn't have much to do with the rear suspension, just the location of the differential. I think i'll re-lay it out from the center of the lower control arms poly location. either way, this is all within the adjustability of the camber plates anyway so doresn't make a difference in the end. I just want them to be pretty close to equal when both sides are set to the same amount of camber. Location of camber plate with regard to front to back of the car doesnt matter, in my mind. There is no caster at the rear, or whatever amount there may be is controlled by the lower control arms and there is no adjustability. So I just lined the plates up with the existing strut bolt holes. There is a good write up by Sunny Z about his camber plate installation. His car is a '78 280z, and the rear strut towers are constructed slightly differently on my '71 240z. The sheetmetal on top is different, on his the thin top layer of metal is spot welded on. On mine, it was welded around the perimeter, and doesn't go underneath any additional sheetmtal. I just ground out the welds and removed it, as can be seen in the last picture. This will make welding these in much easier, as I won't have to burn through that top layer. Of course, access to actually weld looks worse, but you take the good with the bad. Kids playdate ended early so I didnt get to finish up the cut outs, but I'll use the die grinder to round out the cuts. That's a rotary file mounted on it, which cuts quick when sharp. And yes, those are some cheap tools, but it leaves me more money to buy expensive beer. I considered buying a plasma cutter, but I've come this far without one. I'll leave this one comment about cheap tools. If I'm not sure how much I'll use a tool, I buy a cheap version. If I burn it up, I replace it with the best I can afford. Those Harbor Freight grinders are crazy cheap but keep on running. The Harbor freight wire wheels are crazy cheap, but throw wires all over the place and I consider them dangerous. Finding a good balance can be difficult.
-
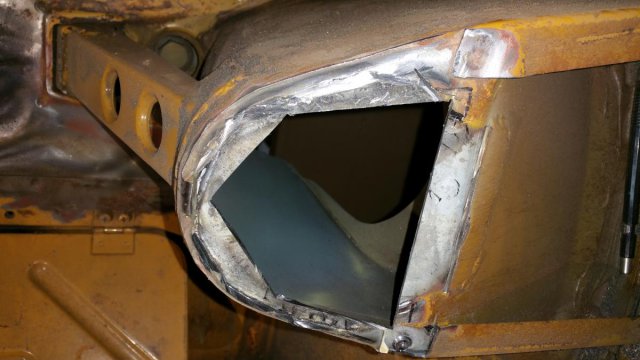
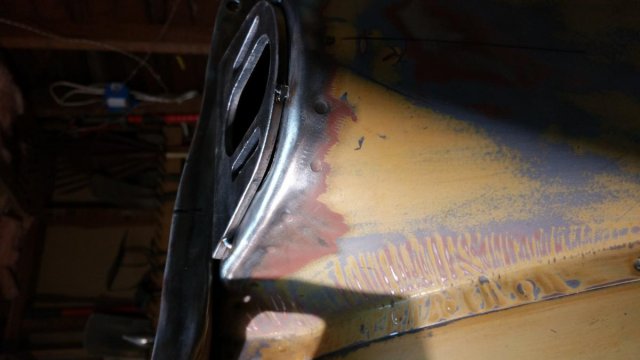
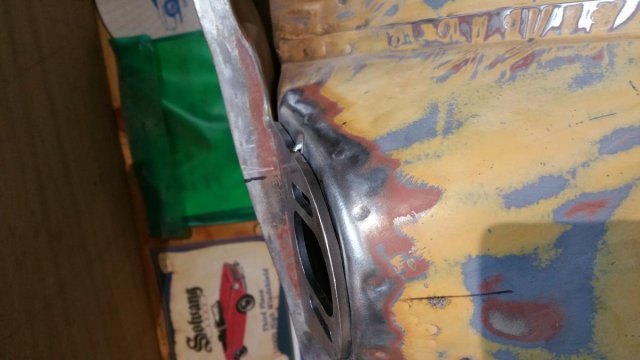
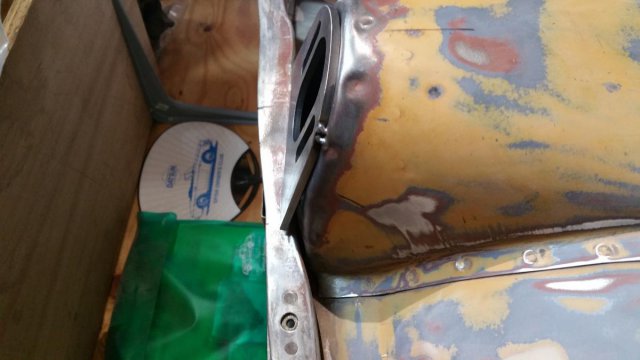
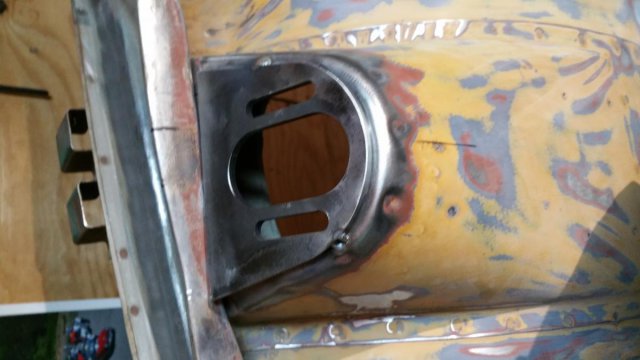
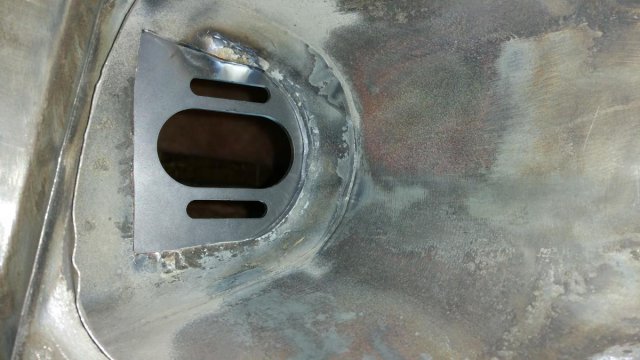
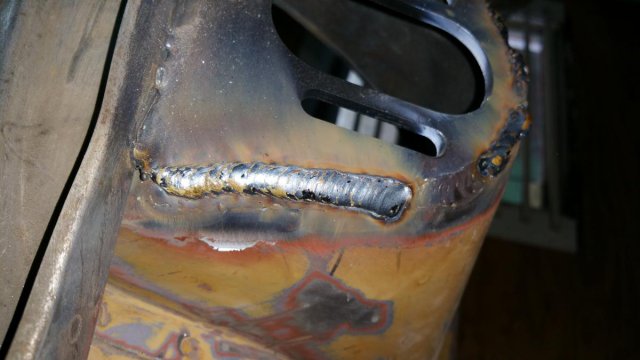
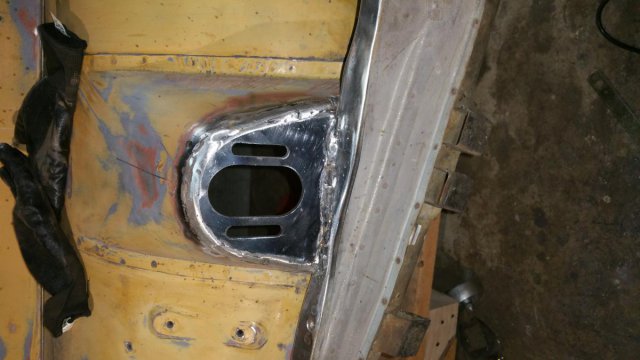
Got the fronts burned in. Tested my welding abilities to the limit, and was probably beyond the limit of my little Hobart 130 mig. Burning through the thin top layer of sheet metal to get the lower one, then getting good penetration into that was difficult. I found the trick that seemed to work was flick into the thin part to burn through it, then push the weld puddle into the hole, flick to create a hole, and push the puddle into the hole, again and again like that, if that makes any sense. I'l stilll go back in from the underside and weld a couple runs, especially at the fender side where I really couldn't get a very good bead because the gap was too small. The pics of the completed weld already have a second pass over them to give me enough metal to grind and finish, as seen in the last pic.
-
To be perfectly clear, I know only enough about suspension to get myslef in trouble. I am trying to learn, and puttiing my assumptions out there so that people who know more can tell me where I am wrong. Google-Fu informs me that SAI = Steering Axis Inclination. Same google-fu informs me that caster should be with .5 degrees side to side. Thanks for the strut length measure clarification. To be clear, I was not actually measuring anything, just lying in bed trying to get a rough idea of how much difference say an 1/8" would make. Photos from last nights battle. The tops of the strut towers aren't very flat. I read a post from JohnC saying there shouldn't be any gap. That would require alot massaging, and I havent seen any talk of massaging the towers to conform to the flat plate. Largest gap is 1/16", except the front corner where I'll need to bend the plate.
-
I guess it will be easy enough to check that the crossmember is perpendicular to the centerline of the car. My thinking is that it is important to be parallel with the crossmember so that the lower control arms are the same angle. I do plan on getting adjustable control arms and TC rods, but if you have stock TC rods, then perhaps what you need to do is verify that the centerline of your camber plates is equidistant from the TC mounting buckets on the frame. How much caster change would you need to start seeing a difference? Some quick math tells me that if you had an overall strut length (from center of spindle to top of camber plate) of 18", then you'd have to move the camber plate 5/16" to get a 1 degree caster change.
-
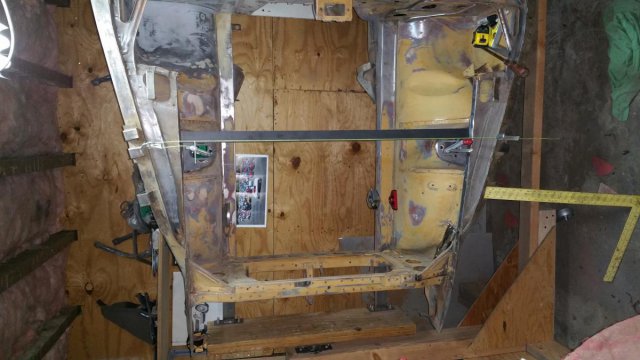
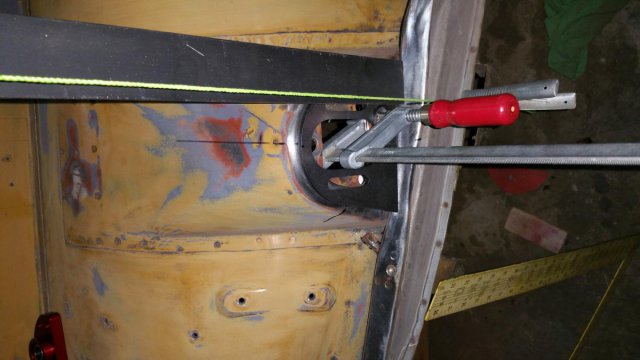
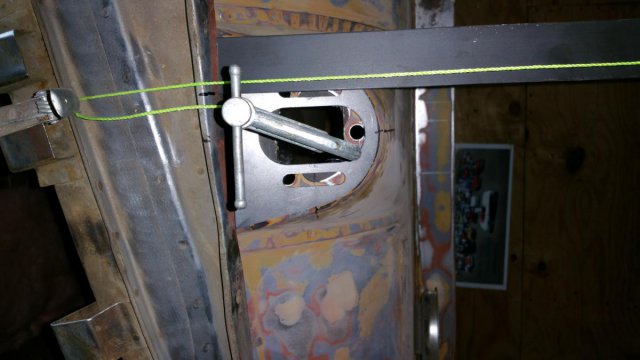
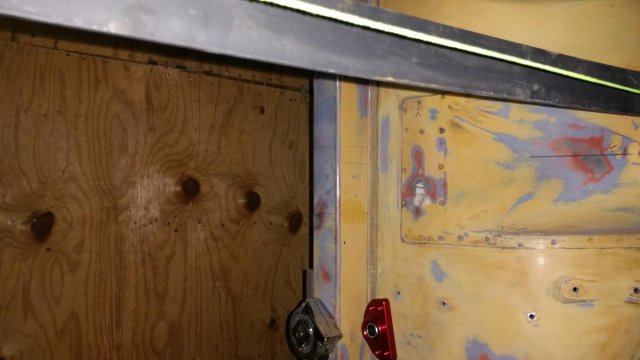
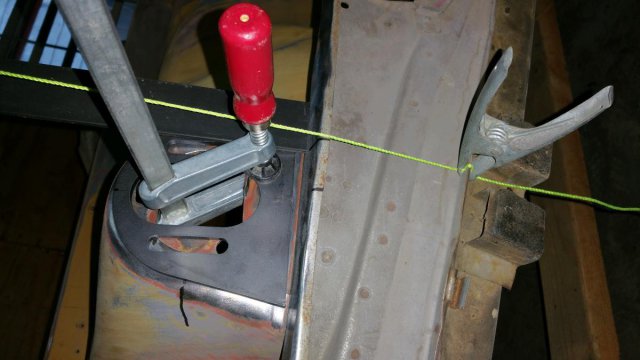
I'm just starting installing AZC coilovers and camber plates on my 240z. It seems there are plenty of ways to skin this cat, I just want to make sure it tastes good when it comes out of the smoker. This all based on my own logic and reading, please correct me if I've got something wrong. The AZC website instructions say to make sure the camber plates are 90 degrees to the centerline of the car. Am I wrong in thinking that it is more important that they be parallel with the front cross member? It may be the same thing, but one is certainly easier to measure than the other. With this thinking in mind, I put centerline marks on the front frame rails. I then ran a string across the engine compartment over the fender rails, put a square on top of the frame rail and lined the string up. Then to the other side with the square, line up the string, rinse and repeat until it's dead on. What this revealed to me was one of the original struts was about 1/8" out of parallel with the cross member. I've yet to double check this, I was short on time last night, but given this is a 40 year old car I'm not at all surprised. And whatever it is, I can bring it back into alignment when weldsing in the new camber plates. Where I place the camber plates with regards to front and back of the car, this effects Caster. Is there any sense to pushing them one way or the other, or do I just want to basically center them as well as I can on top of the towers while ensuring they are in line with each other and the crossmember?
-

1972 240z Procharged LS6, soon to be turbo!
JoeK replied to mistafosta's topic in Gen III & IV Chevy V8Z Tech Board
If you're going to make some passes at Sonoma Raceway, let me know and I'll try to make it out. -

Just starting my ls1/t56 build!
JoeK replied to CableSrv's topic in Gen III & IV Chevy V8Z Tech Board
Hmmm, wonder if I'd get $125 for my stock '98 harness and PCM. -

Just starting my ls1/t56 build!
JoeK replied to CableSrv's topic in Gen III & IV Chevy V8Z Tech Board
Is the ChevyThunder harness all new with new connectors, or a reworked harness? -
What about removing one or both of the quarter windows, go for a drive and see if you notice a difference? Tie the hatch open a couple inches, see what that does to the airflow (will probably draw in exhaust fumes) in the cabin. How about a piece of Plexiglas right behind the seats, to stop the air from going in the back. You could mock that up with some cardboard/Masonite/door skin. Heck, you could probably test the rain deflector delete by using the some blue tape across to the windshield.
-

"Project Beer Can" turbo lsx 280z
JoeK replied to streetrat18201's topic in Gen III & IV Chevy V8Z Tech Board
Looks like he's going with JCI- 14 replies
-
- straight axle
- build
- (and 4 more)
-
Great stuff, thanks for the write up. I'll be adopting a few of your ideas.
-

S13 Up Garage Coilovers for 280z.
JoeK replied to rickyellow zee's topic in Brakes, Wheels, Suspension and Chassis
The link Hypertek sent you is for bolt in camber plates. TTT makes both types. -

JCI Install Kit Instruction Manual?
JoeK replied to JoeK's topic in Gen III & IV Chevy V8Z Tech Board
Yeah, I see that. But there are some useful bits, like what bolts are for what, where the spacers go, reminder to install oil filter. I literally just got a box of parts wrapped in old bedding, and still don't really know what is part of the motor mount kit, tranny mount or vital liquids, etc. Thanks goodness I have some common cents. -

JCI Install Kit Instruction Manual?
JoeK replied to JoeK's topic in Gen III & IV Chevy V8Z Tech Board
Thanks. Someone is sending me a copy. I always ere on the side of more info is better than less. -
I bought my mount kit from a HybridZ user who had abandoned their project, but they didn't provide the manual. I emailed John's Cars a month ago, but no response. Wondering if anyone has a the instruction manual that came with their JCI mount kit. Maybe you are done with your swap and don't need it anymore, or would be willing to make a copy or scan of it for me? Thanks for the help.
-

Just starting my ls1/t56 build!
JoeK replied to CableSrv's topic in Gen III & IV Chevy V8Z Tech Board
I totally get that. I was recently laid up after surgery, and there isn't anything you can do but think about how much you could be getting done! And order parts... -

Slow Build 240Z LS1/MN12 - Build Thread
JoeK replied to JoeK's topic in Gen III & IV Chevy V8Z Tech Board
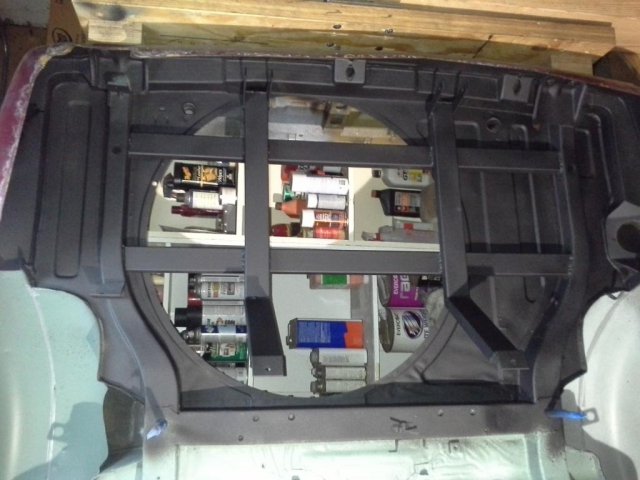
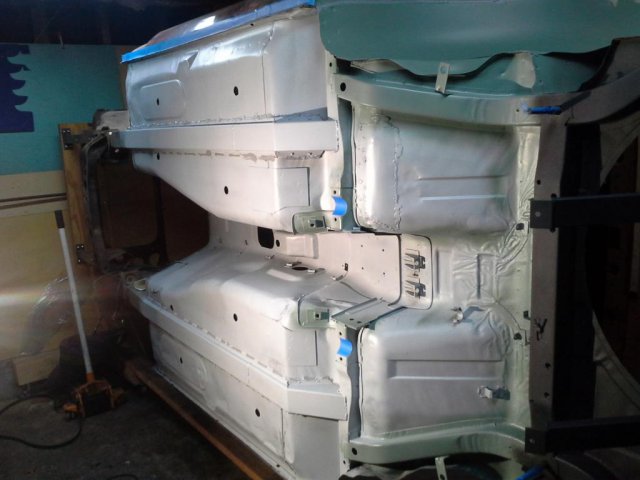
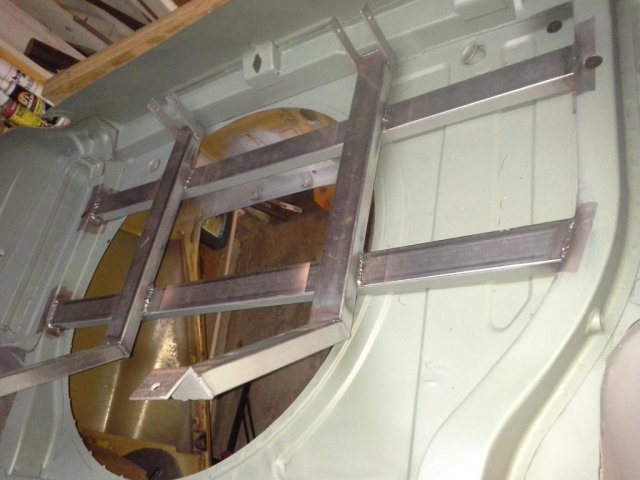
Some progress, albeit slight, it is a milestone of sorts. Finished up the tank mount, welded it in the car, and undercoated the back half. Using the 3M rattle can undercoating. I really like the look of this stuff, it lies pretty flat with just a little texture. I did a test about a month ago, after 24 hours it was still soft, but after a week it was quite hard and pretty tough to scratch. Also got the rest of the floors primed, seam sealed, and ready for undercoating as well. And got my TTT R230 mount stuff test fitted, to be sure I wouldn't have any conflicts with the tank placement. No pictures of that, but it sure looked nice. Ordering some more of the undercoater next. That stuff flies out the can fast. I think I'll need at least 4 more cans. -
Keep hearing about the bacon sizzle. Might have to make BLT's for dinner, so I can pay attention to the sound of the bacon.
-
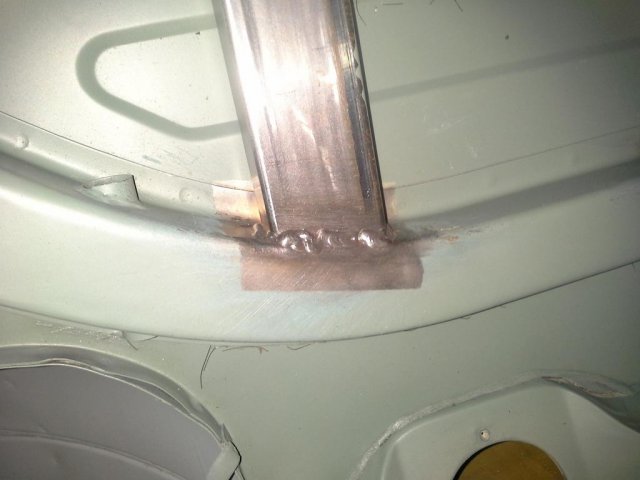
Yes, I typically use one hand to hold the gun and the other further forward holding the front of the gun. This is my guide hand, usually with one finger resting on the work to keep a consistent distance but also to guide the little "C" movement they talk about in alot of the videos I've watched on YouTube. Also, I didn't know about the thicker plate underneath the sheetmetal, I guess I thought it was 2 layers of sheetmetal. Any idea how thick that plate is? I'm guessing I'll be able to see it when I cut out for camber plates. I guess the terminology is a little lost on me. I thought butt welds were only when butting pieces together, basically end to end, like bodywork. Which one did you see as the butt weld? I did weld this piece into car today. I turned up the feed speed a touch, took more time to find a better body and hand position (when possible, sometimes it just isn't), paused a heartbeat at the start of the weld, got better lighting and snipped the tip every time. All that, and I'm much happier with the results. Not perfect but acceptable, fairly consistent and I'm confident they will hold. One tip I'd add for others. When I first started, I had a terrible time with consistency, usually with getting the arc started and maintained. The biggest improvement I made was getting a better ground clamp. The copper colored stamped sheet metal excuse for a clamp that came with the welder was replaced with one of those solid bronze heavy duty clamps and my welds improved instantly by at least double.

