Pharaohabq
-
Posts
1959 -
Joined
-
Last visited
-
Days Won
5
Content Type
Profiles
Forums
Blogs
Events
Gallery
Downloads
Store
Everything posted by Pharaohabq
-
Reunited after 20 years.....what will happen???
Pharaohabq replied to DRKNGHT's topic in S30 Series - 240z, 260z, 280z
Pretty cool! How'd things go when you picked it up? 2012 + 6 years to buy it back is a good 20 years. A lot can happen in that time, especially the price of parts. If the body didn't rot out while it was sitting then you should be able to fully restore it. I'd love to find my 260z from when I was 17, but I'm sure it's long long ago been gone and rusted away, crushed or whatever. You haven't posted here since July so I'm not sure if you're going to see this, but I'd love to see some "now" picts, since we've seen the "then" picts. Let us know if you have any questions on where to get the missing parts/repros. Phar. -
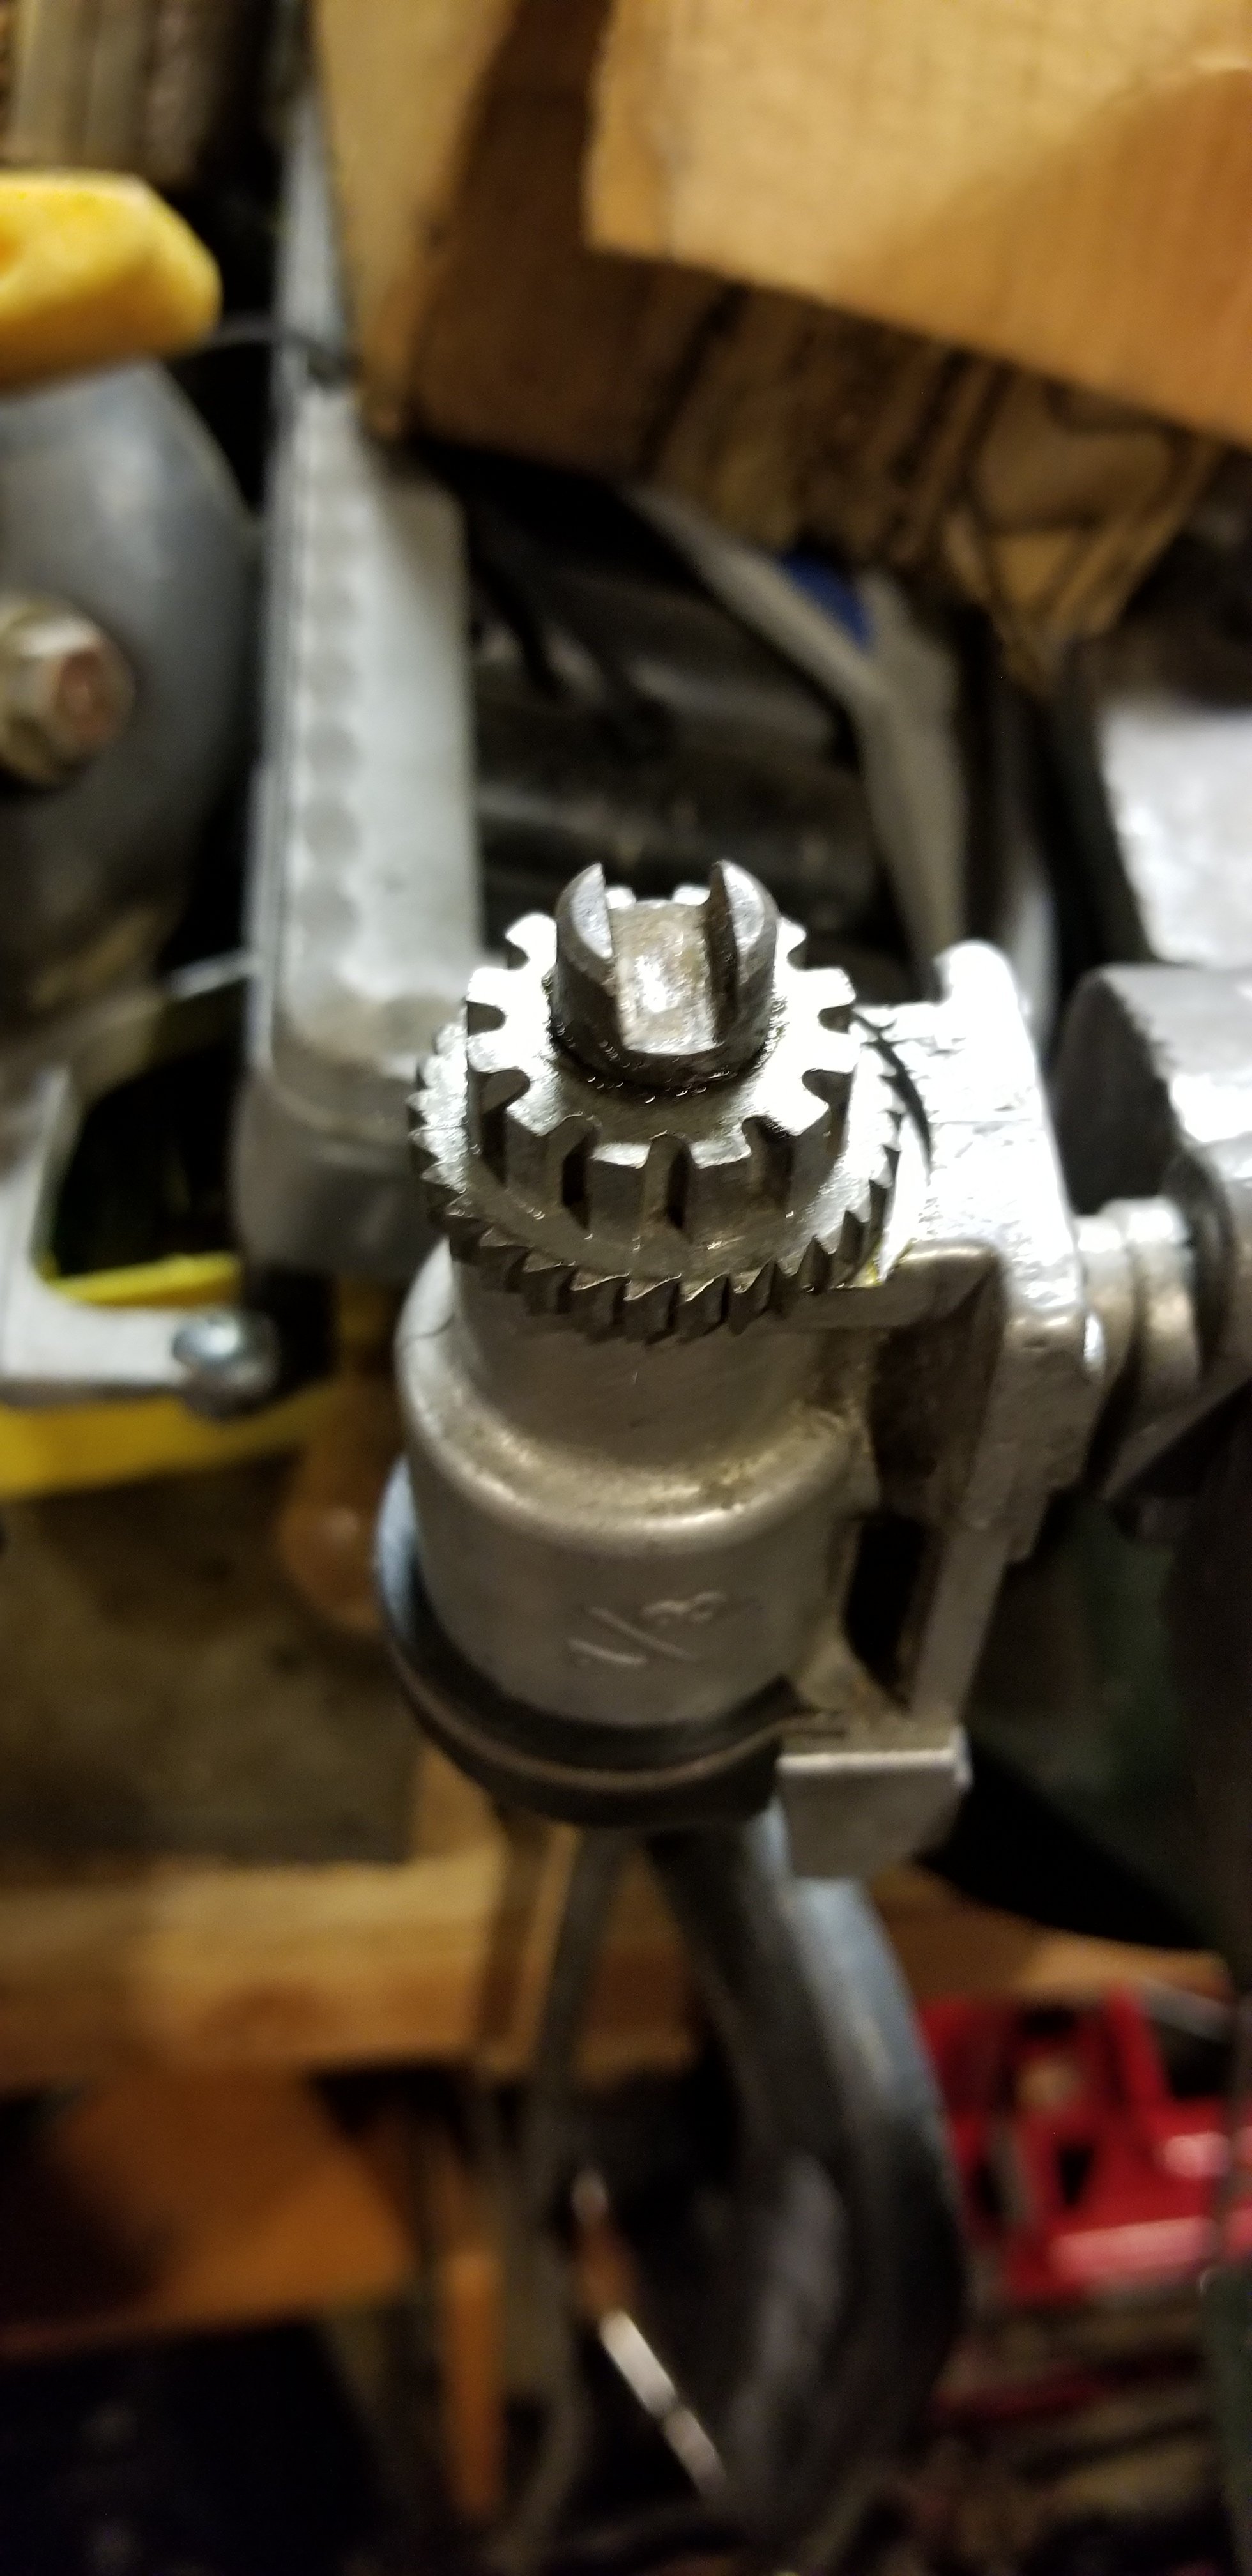
ANother Way I've got those stupid nuts loose was to wedge the tire iron in the Ujoint, and the other end up on a block to hold the drive shaft from turning. Then put a box end wrench on the nut, and use a jack on the other end of the wrench to turn the nut. The nuts will just pop loose and you can then get a rachet on them. Make sure you're turning the right direction! All this or a decent impact wrench and an extension will also pop them loose if you can get on it. you might have to pull the shaft from the tranny to do that, and that's really hard with the Diff still connected. The Ujoints aren't that hard to find. They ARE user serviceable, but any drive shaft shop should be able to do that job for you easier. I seem to remember it was a pain to pull the cups
-
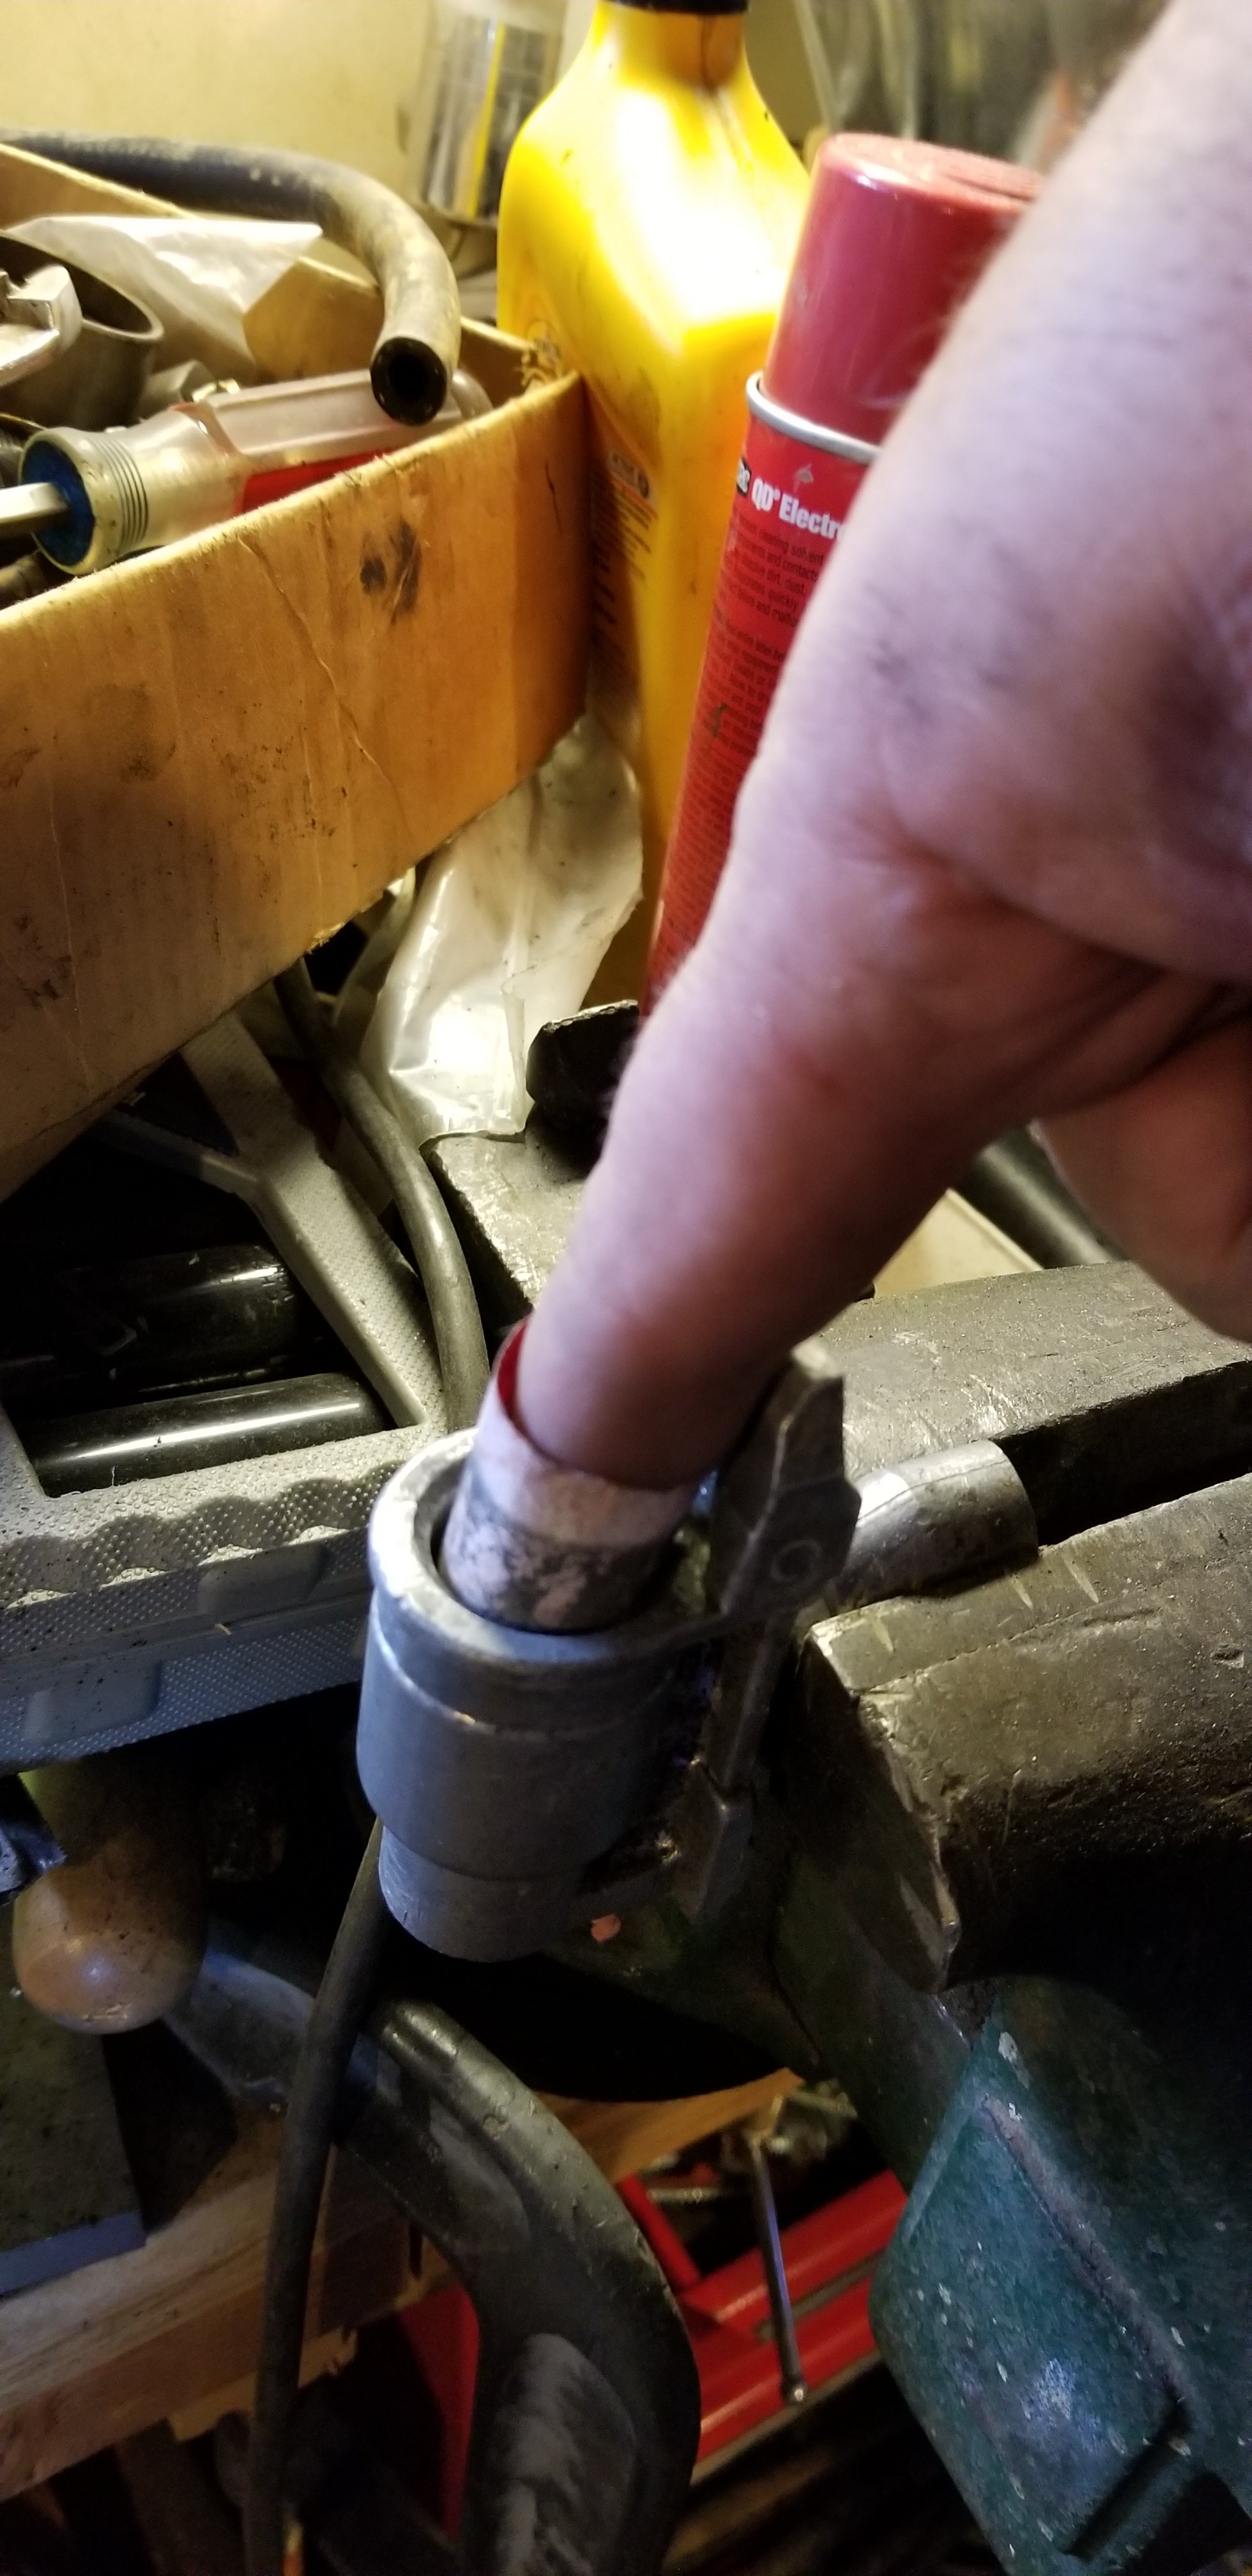
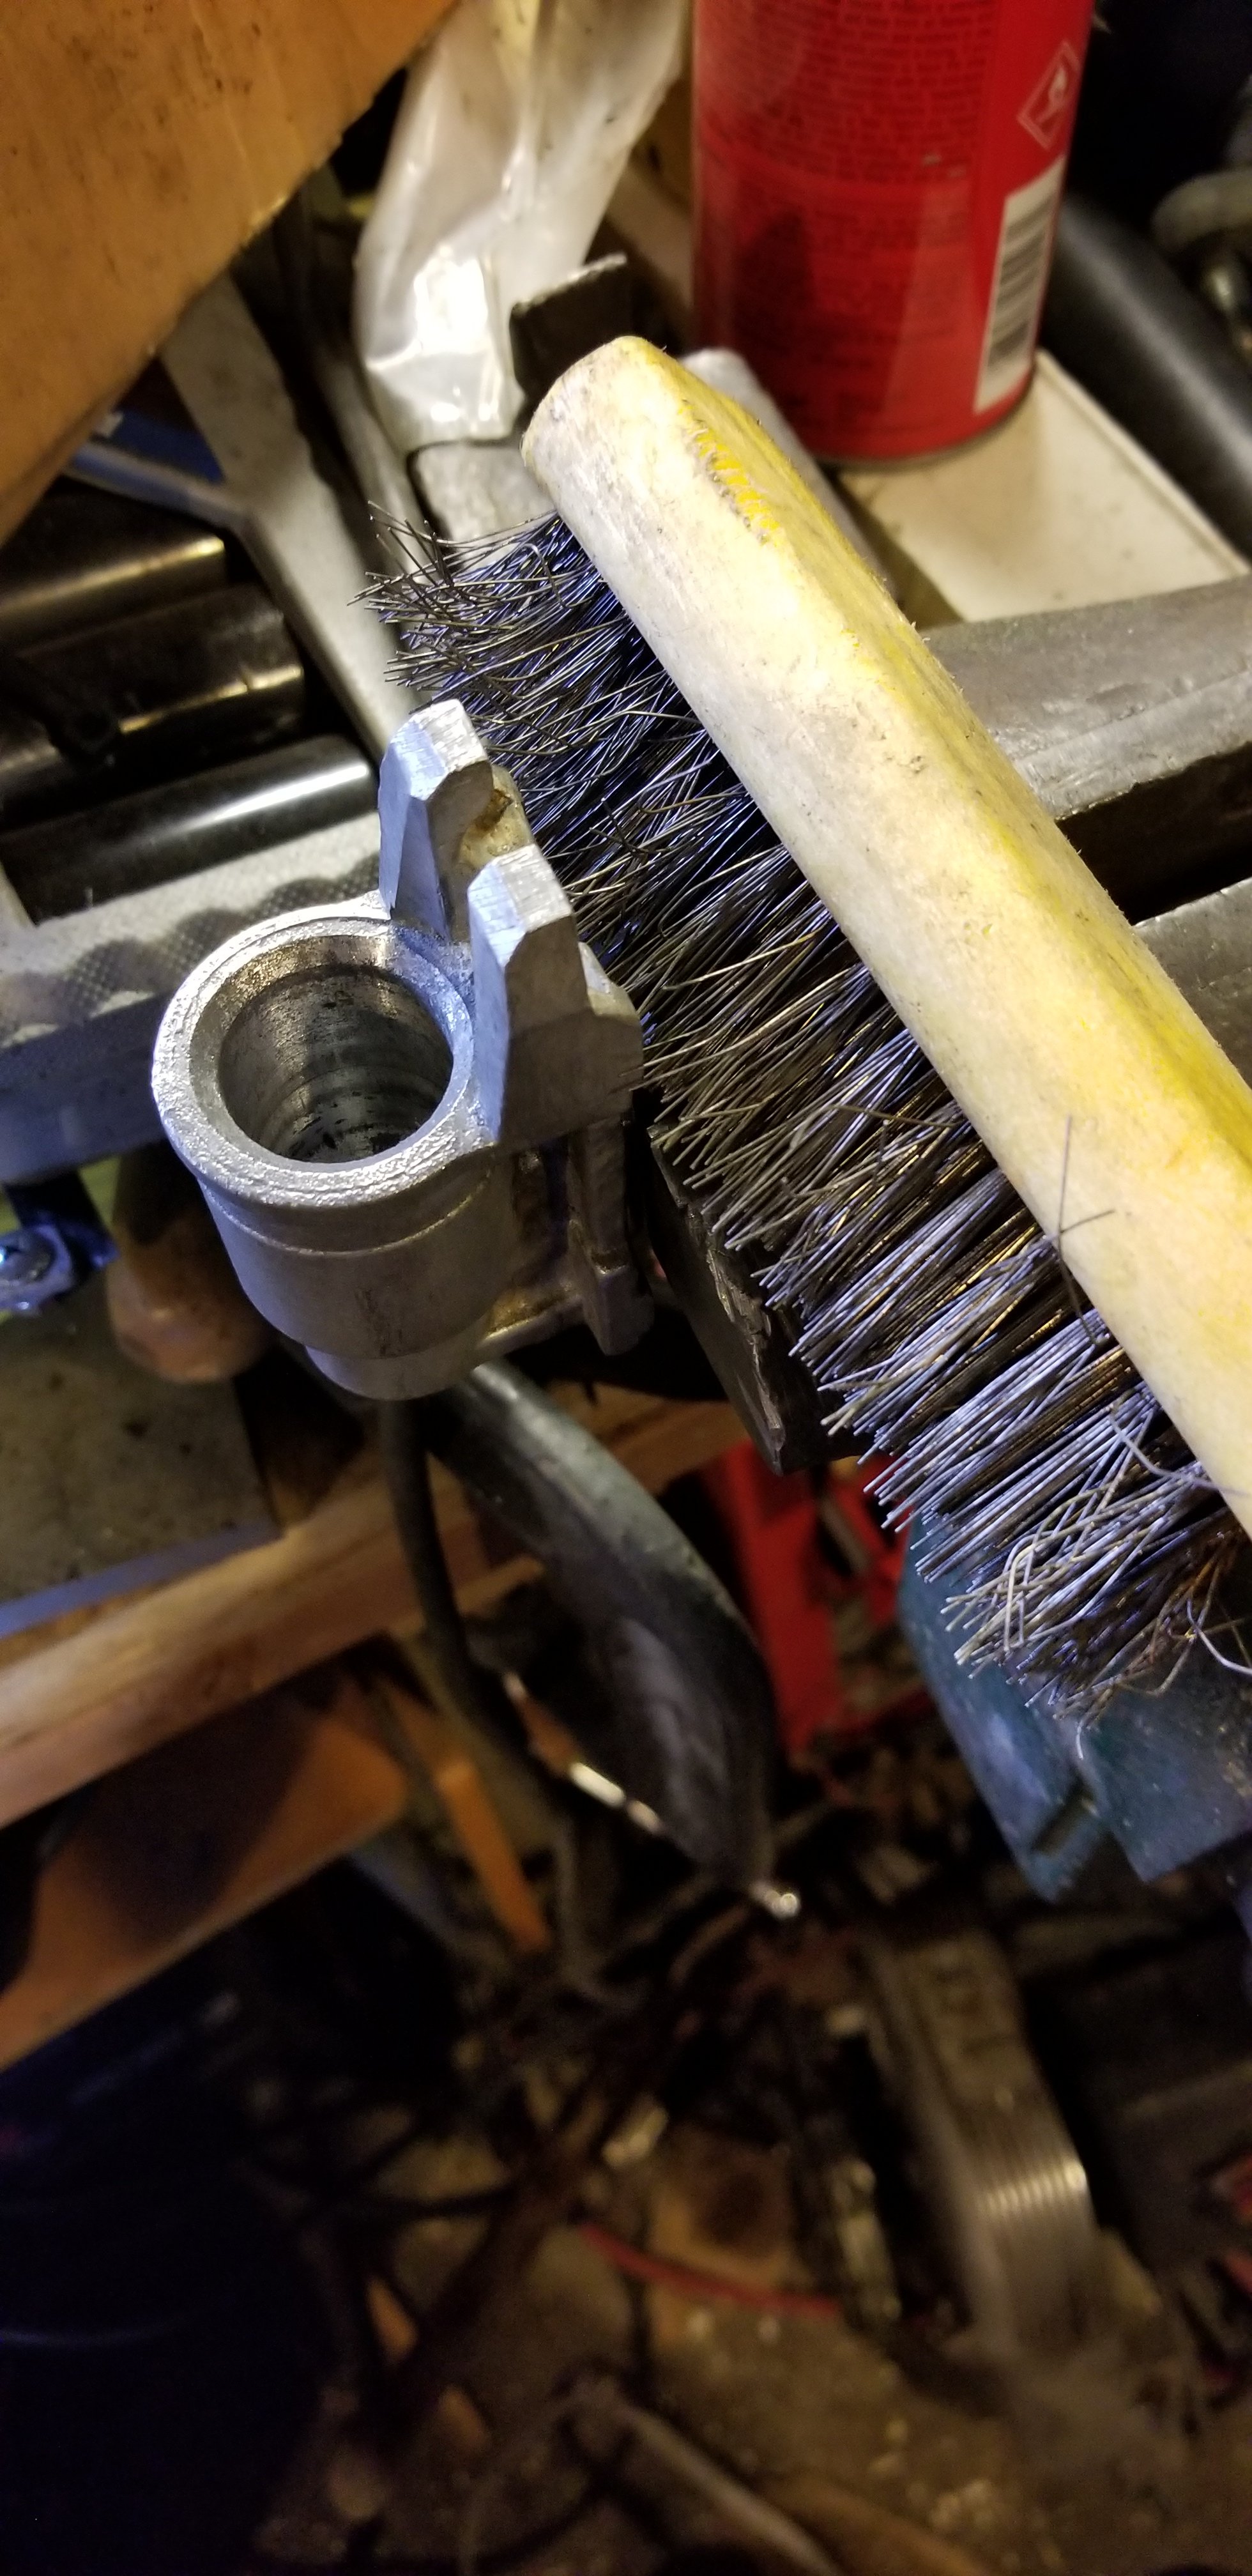
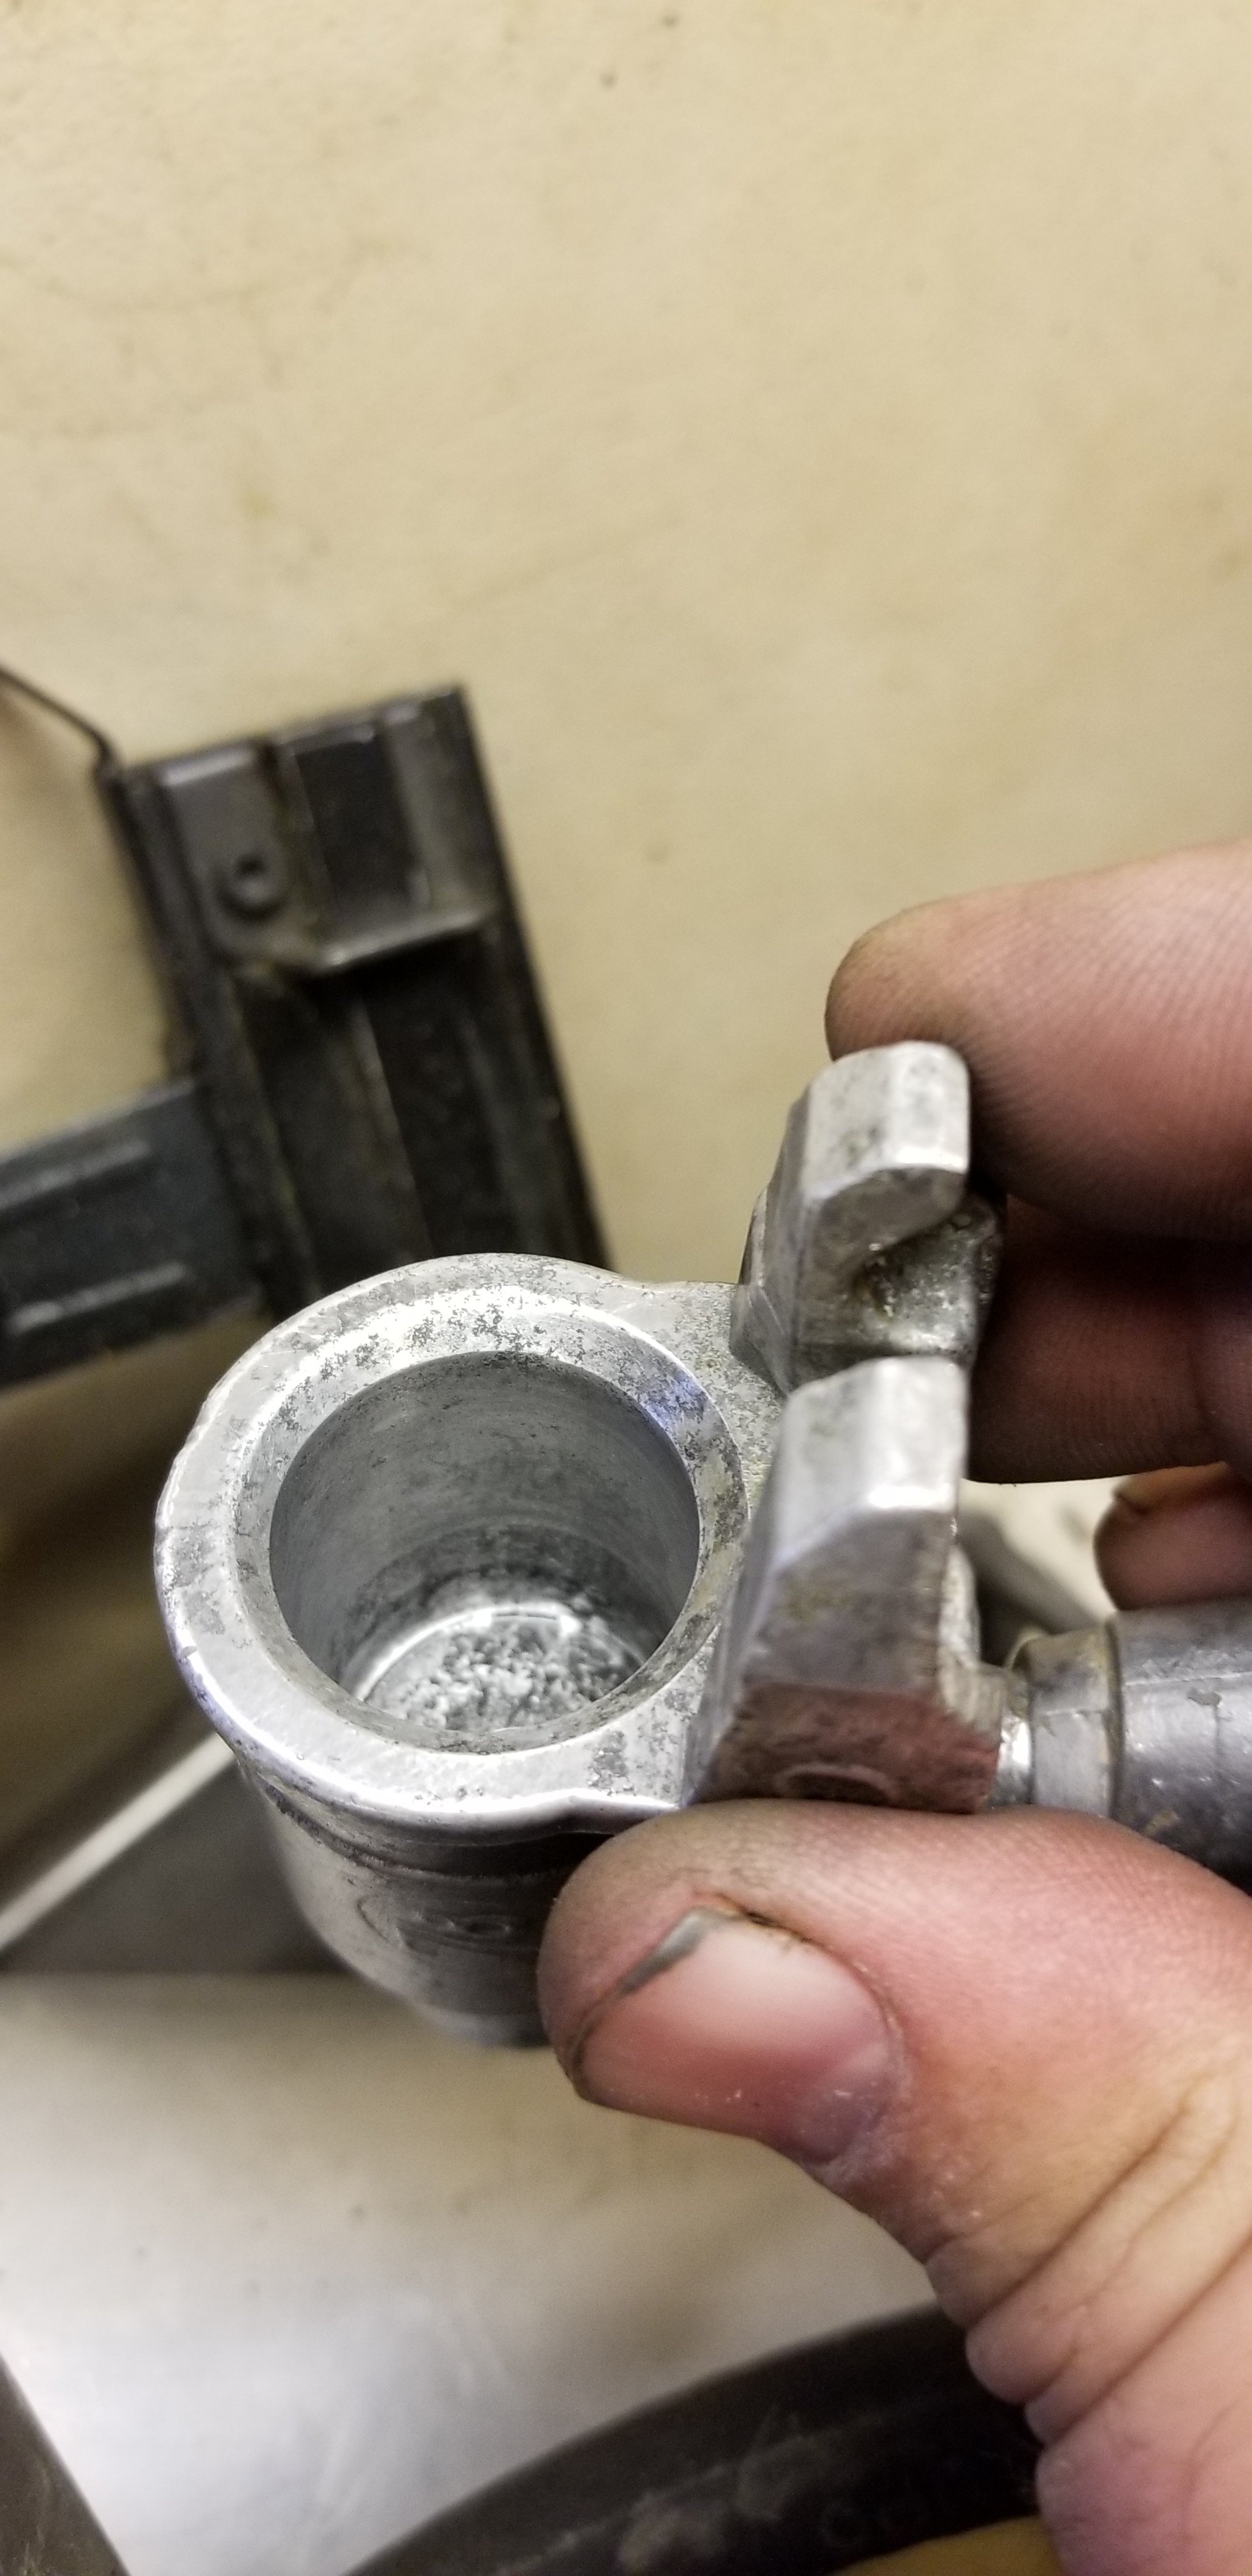
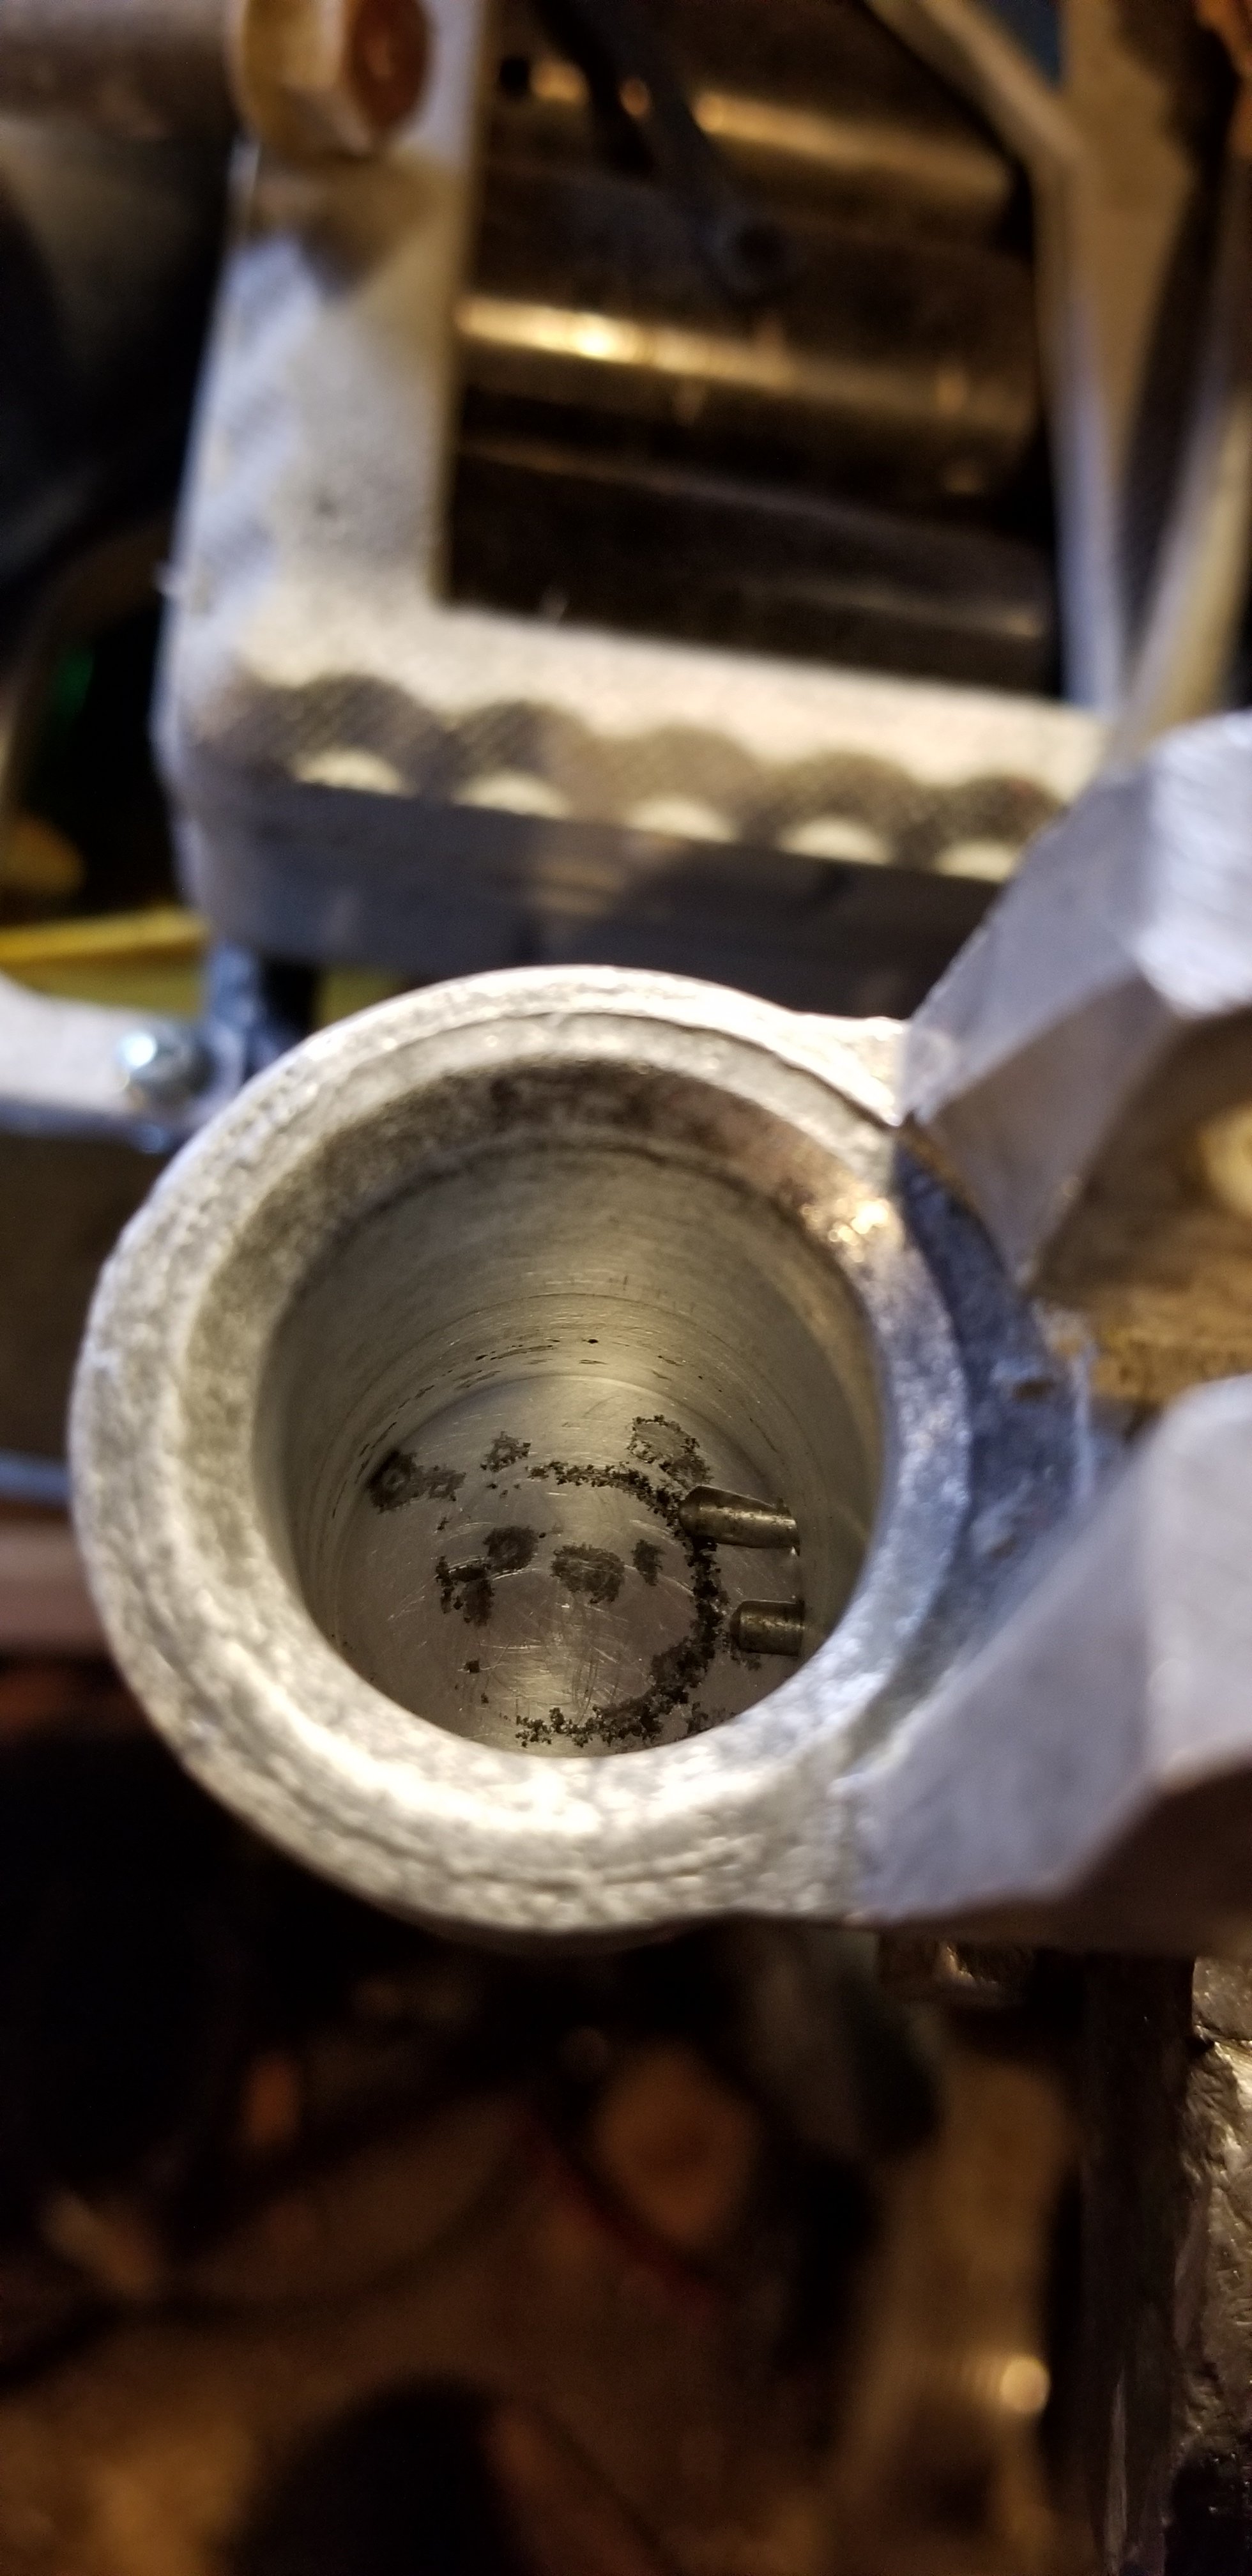
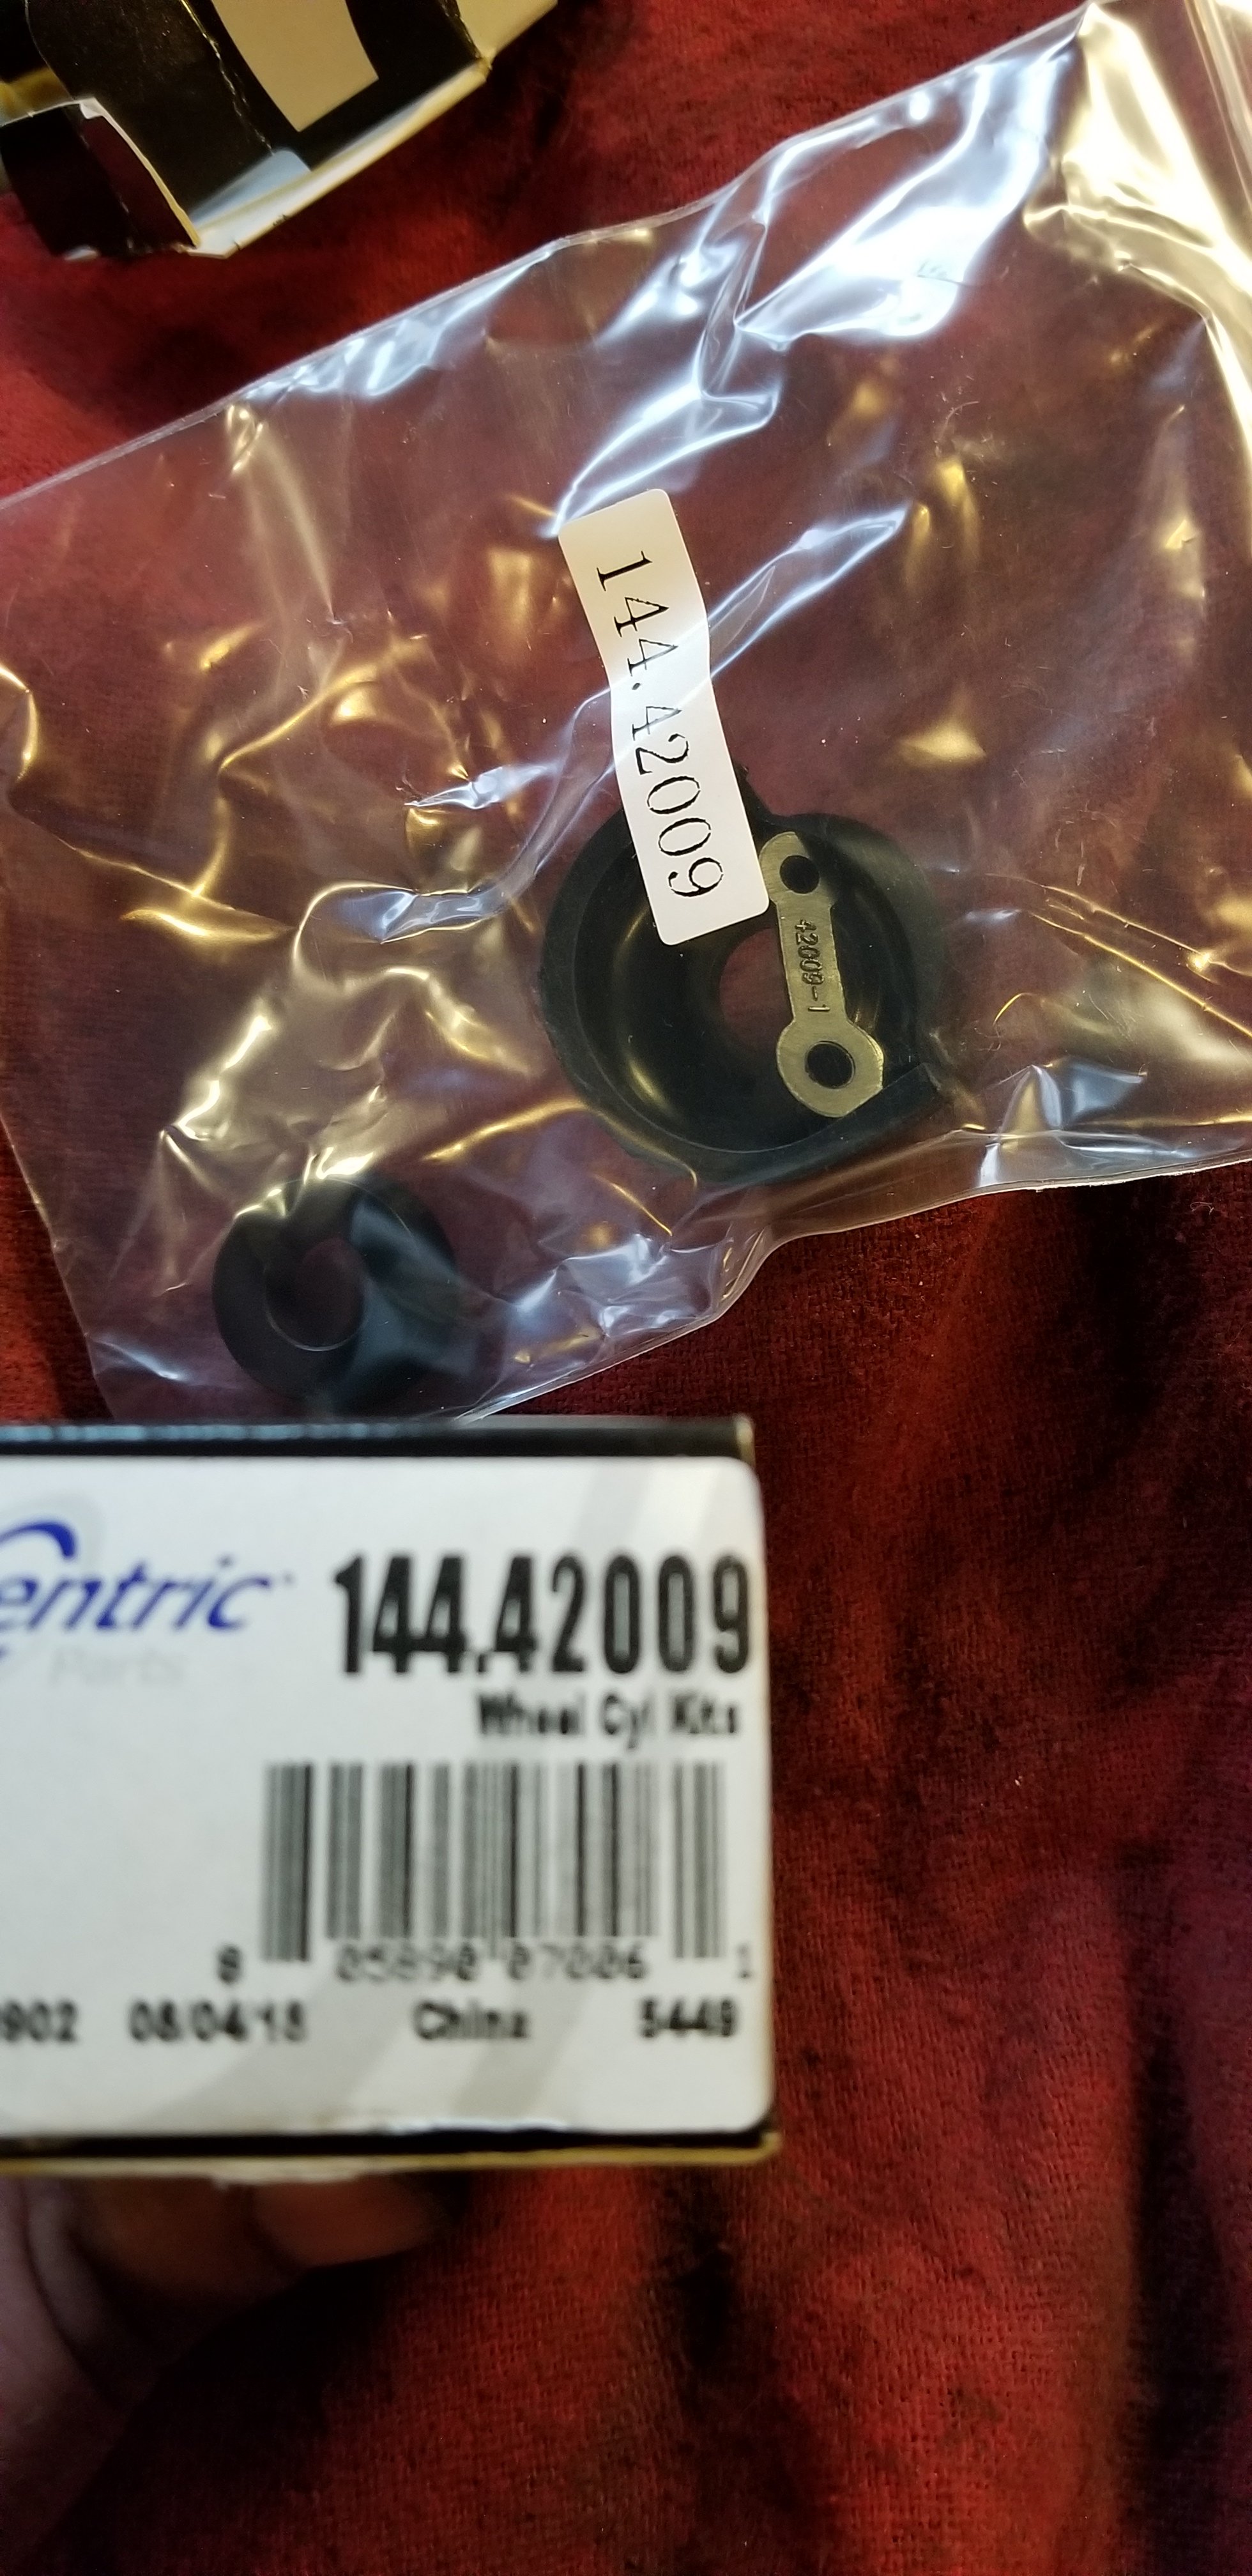
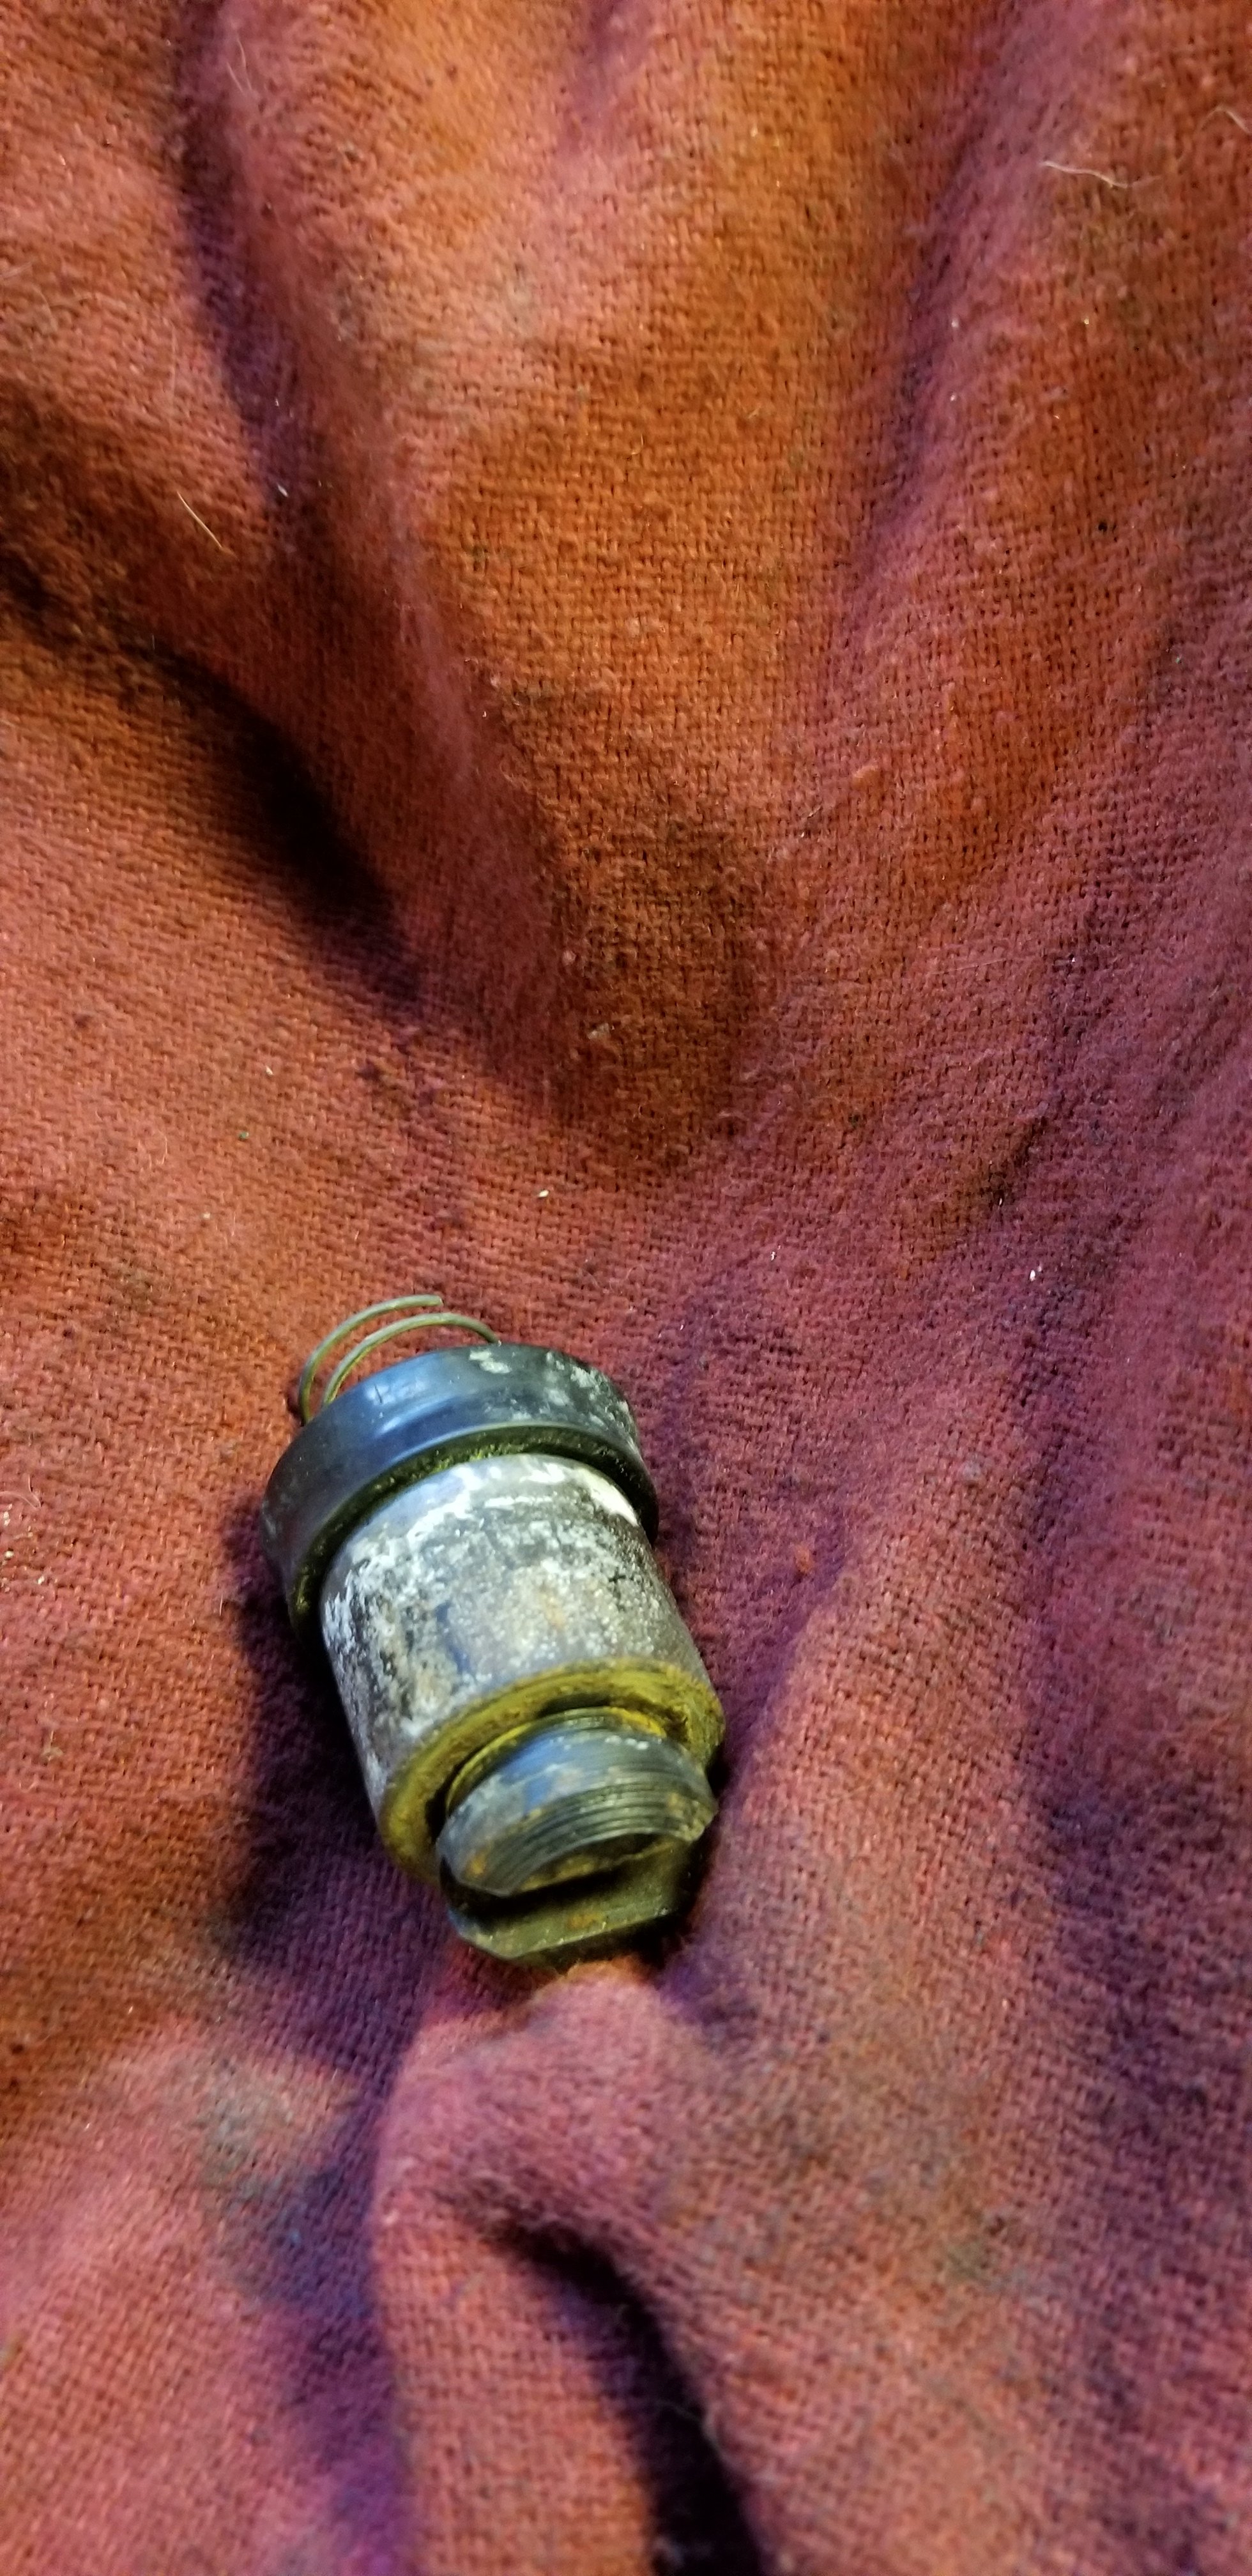
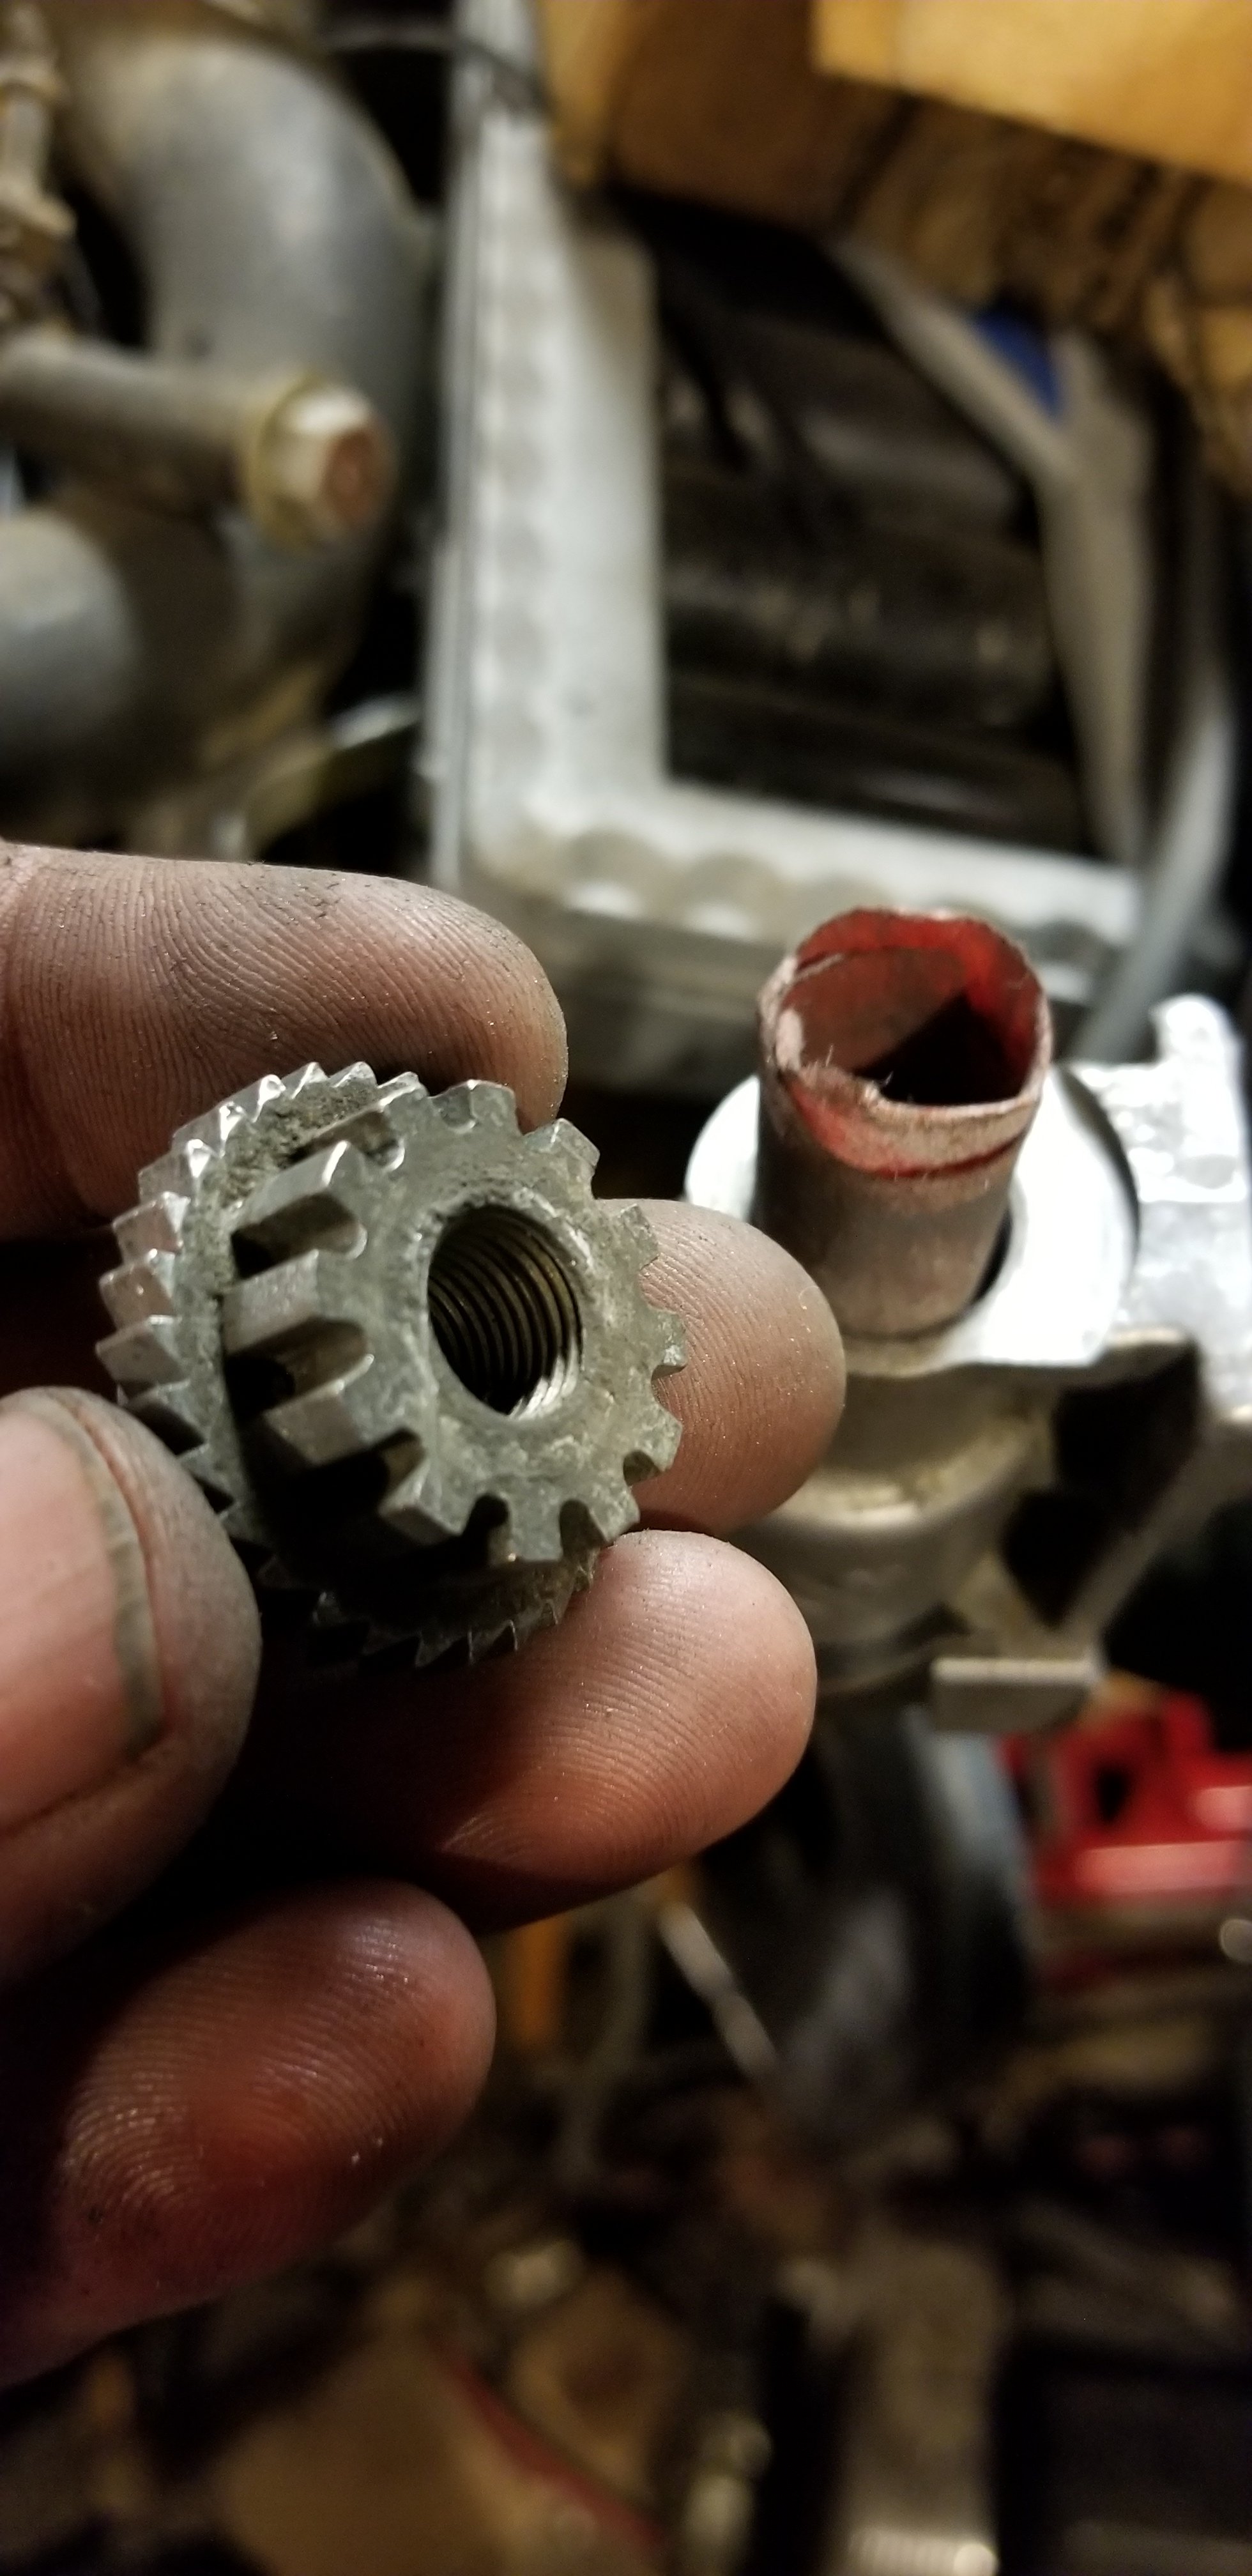
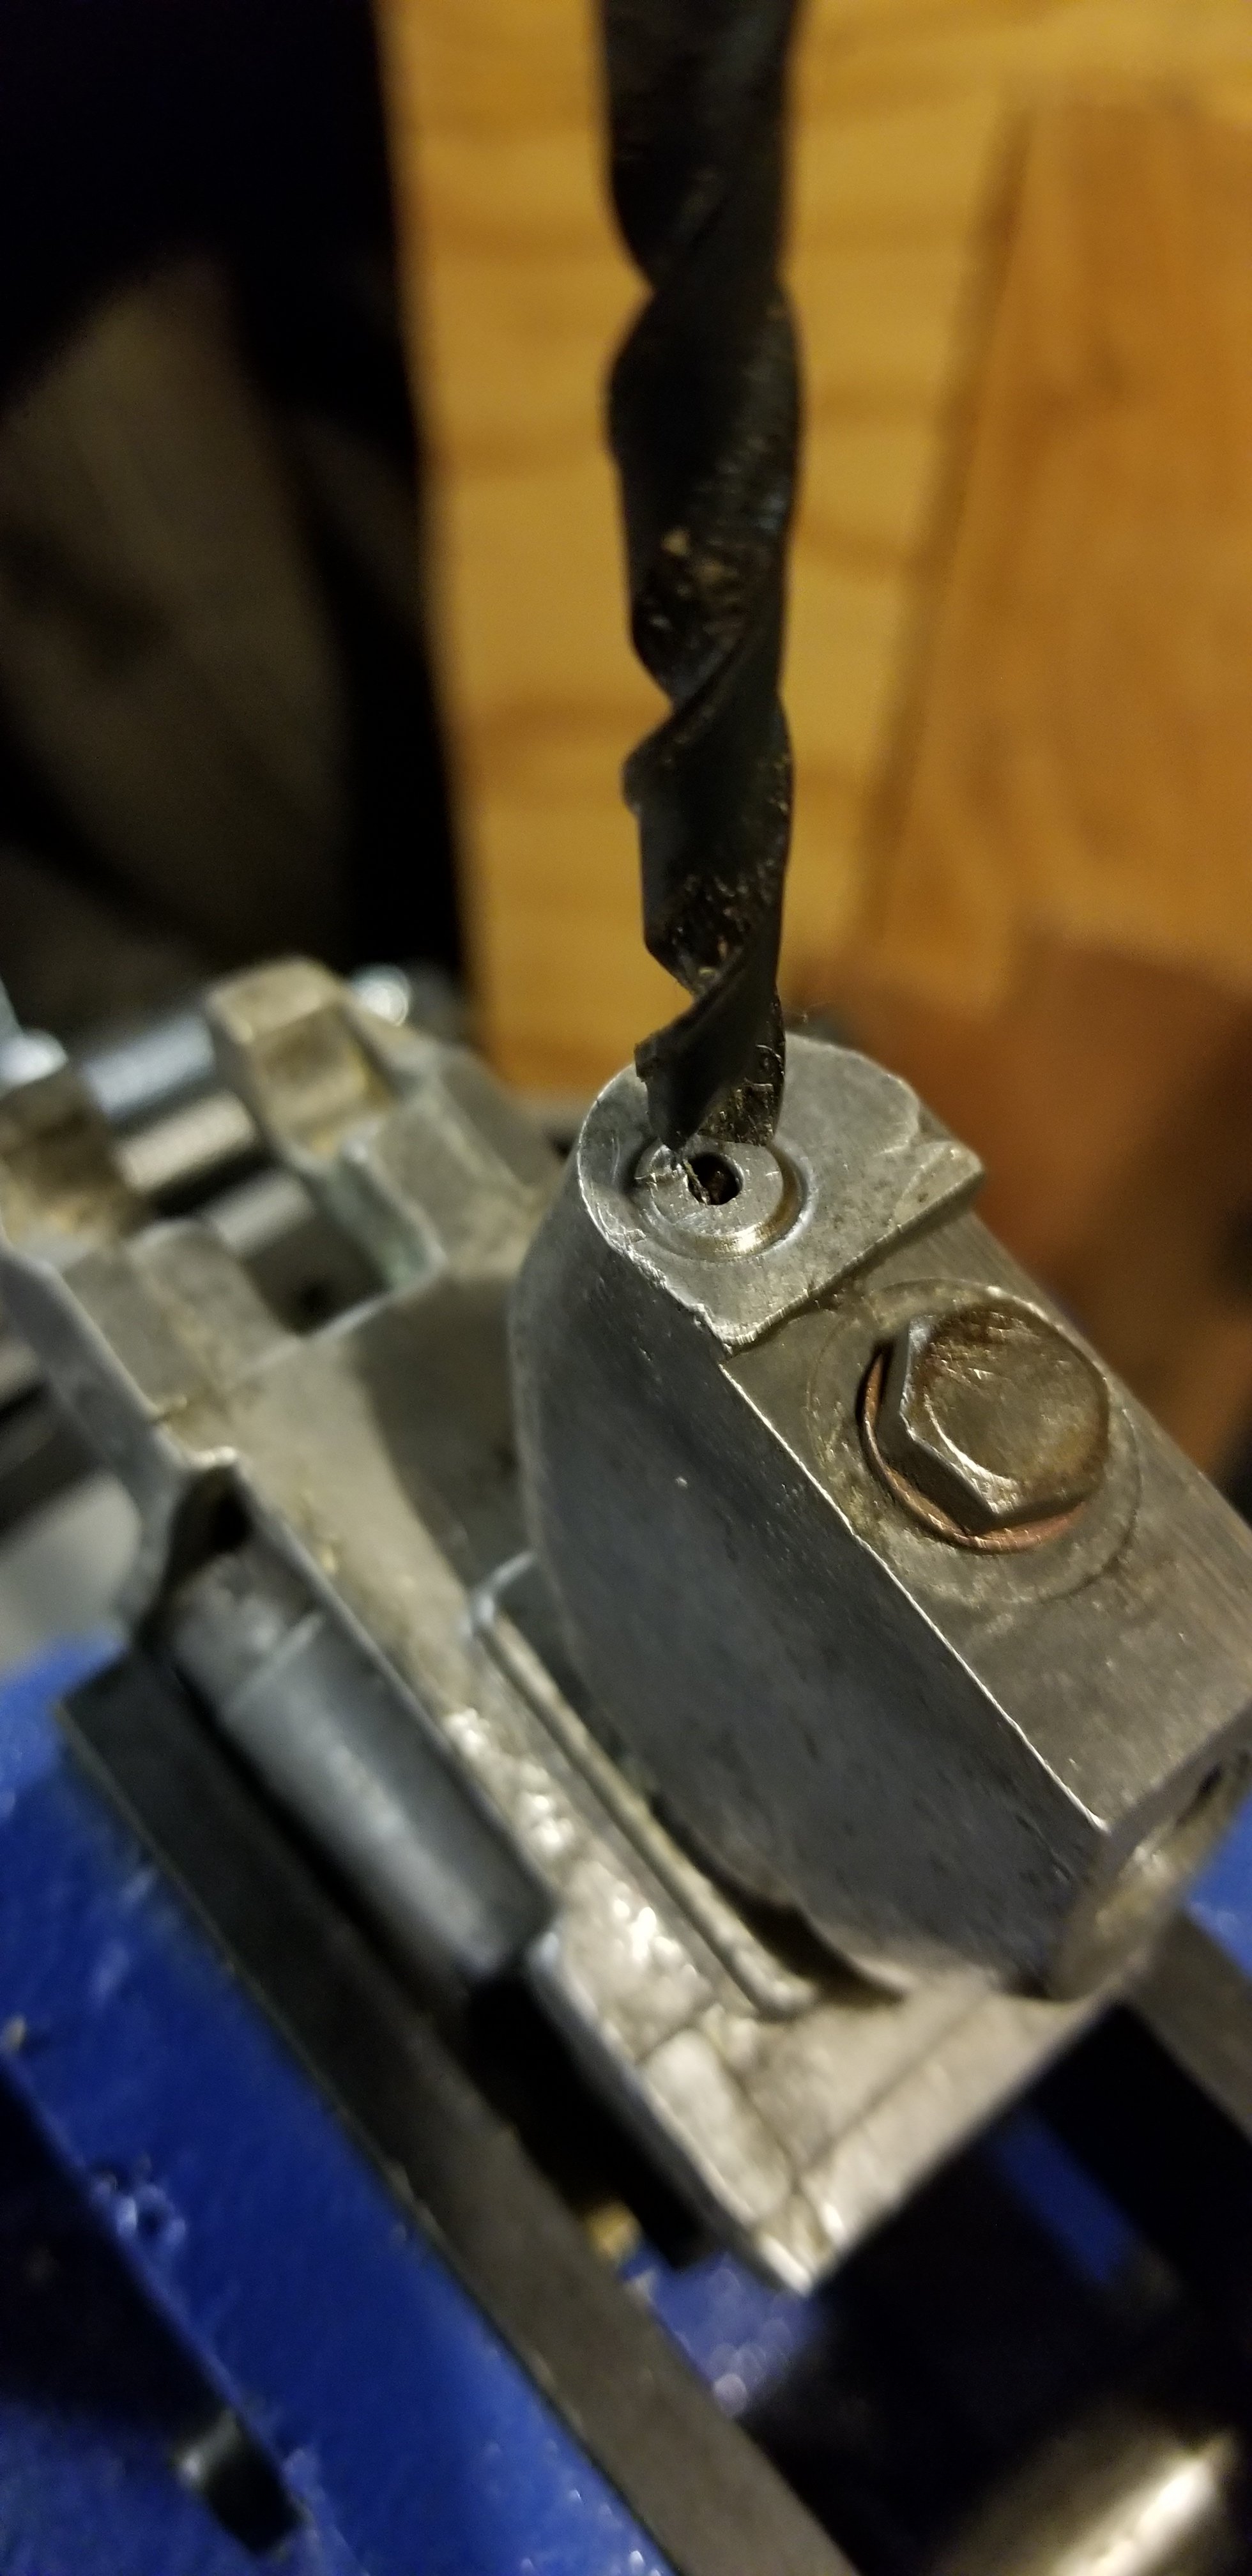
Thanks, yeah I was thinking to JBweld it, but I might just drill that section and thread in a bolt since it's in an area where it was rubbing on the Belly pan. I'm adding a rubber bumper to keep it from flopping around. the stock mount is 1/2 torn through. Anyhow that's here nor there, and not really related. So back to what is. (again Pictures are forthcoming. I am trying to locate the usb3.1 roundy cable for my camera. ) So I'd left off after swapping the Brake MC and Clutch MC, The Clutch slave rubber line leaks, I just have to get back to that since I was waiting on parts. I went to check the wheel cylinders since the Brake MC is just pushing fluid. Looking under the car I can see fluid running out of the passenger side rear brake, so I jacked it up this past weekend, and put it up on stands, and pulled the wheels off. 240Z's have rear drums as you know, and I could see fluid dripping out of the drum. it was stuck on hard, (this is common, you just need the BFH to get it off) So a few whacks with the BFH and the drum comes loose. (oh another tech tip, a 4x4 block will allow you to use a claw hammer to lever the drum pressing against the strut. ) but suprise! when I pulled the drum off, There was NO SHOES, no hardware, nothing, they had sometime before yanked the shoes for some reason. (note Ebrake cable rusted through) so yeah, it was leaking because the cylinder had nothing behind it. No big deal, except the brake hardware kit is online order only, so that and new shoes will show up this week sometime. I pulled the wheel cylinder and the rubber line since I have a replacement. The hard line was frozen at the cylinder so I pulled it too. I was supposed to remove the bleeder valve but it just snapped off when I tried to turn it. not good With the cylinder out, I took a closer look. The rubber didn't "look" bad, but it was brittle. Fortunately I planned on rebuilding it. The Cylinder itself was frozen in there with hardened fluid. Not a good thing. I'm going to need to flush all the hard lines. I wedged the cylinder out and it didn't look too bad, but not too good either. New 240z drum cylinders are out of stock everywhere you look so it's either fix these or find something newer. I inspected the cylinder and piston and fortunately it was just gunked up but not pitted. So I started with oil and 400 grit paper, then 600 grit paper and smoothed the inside of the cylinder out, visually there's some staining, but it's nice and smooth. I cleaned it with brake cleaner. rubber gloves were difficult with the sandpaper. once I was happy there it was time to look at the bleeder that snapped off. it looks like it was overtightened at one point. Sucky part is it's two angles off from square. I pulled off the other rear wheel, and pulled off the Drum, Tada! brake shoes, no matter, it's getting replaced. New shoes are $20. so I took it all out and pulled the wheel cylinder. This one wasn't leaking, but also had no fluid in the line, so that's interesting. It's a lot easier to pull it without brake fluid everywhere. I took that one back to tthe bunch, and yup, frozen like the first. I wedged out the piston, same deal, cruddy put not pitted. so back with the oil and sandpaper. I wire brushed all the outside. The Ebrake adjuster was frozen in place too, but a couple taps popped that out. I put it in the vice and estimated the angles on the bleeder valve. Then I tried to match these up on the first cylinder on my drill press. I slowly drilled out the snapped off bleeder valve then went in with the right thread tap, fortunately I was close enough that the old threads popped loose and pulled out. A few times in and out, and I could knock the last of the old bleeder remains from the hole. I swapped over the good bleeder and it seemed to fit perfect. but that was a pucker moment since I don't know where I'd find another cylinder. I had to clean out solidified brake fluid from all the passages with a piece of wire, and I blew out all the crud. The Ebrake adjusters were cleaned out, and greased, the little bolt has reversed threads, so don't lose that I cleaned up the piston and with a little oil pushed on the new rubber. The new kit fit well. The little spring is important though I don't know exactly what it does. I haven't put pressure in these yet, since I don't have the new shoes yet, but I'm looking forward to it. I'll put these back in, get them connected, then when the new hardware shows up I'll close both sides back up, put on a new Ebrake cable and then look into the front. If the rears are this bad, I expect the front Calipers to be in not so good shape. Though Those are still availible so I'd just swap them out along with the rubber lines. Look I added the pictures! Phar

-
Okay, Whatever, my point is that a short nosed Diff can and has been done. Maybe I had the name of the mount incorrect, but I only knew it as an RT mount. If RTz would comment then we'd know. Until then I'll stick with my shortnosed plans.
-
Earlier RT mounts were for the short nosed diffs. I was looking and I can't find the pictures but the Techno Toys Short nosed mount is what I'm talking about. It moved the nose mount back a ways, yes you have to have your moustache bar modded too. But you CAN put in a short nosed without too much trouble. In J mortisen's link above, this is the RT mount I had seen before.
-
Yeah I've been busy raising a daughter and changing jobs, it's been tough to get back to things. I'll post up some pictures soon I need to take some when I get back out there. Not a Z note, but I have an 87 jeep wrangler that has a pinhole leak in the xfercase, any thoughts on how to patch that? it was from rubbing on the belly pan. Phar
-
First Project post - BadDog Missing?
Pharaohabq replied to JLuff240's topic in S30 Series - 240z, 260z, 280z
Z cleaned up nice. I assume you got your rails no issue? -
+1 on Tabco. They have just about every part. It'd be a good idea to check Rock auto on the same parts sine I was able to get the same tabco parts for nearly $40 of the set of rear arches.
-
I think we already handled that for you. I still make these rings and a lot of other Z parts. Just let me know if you're looking to reproduce anything. We can always try. Are there any plastic engine parts that we have trouble finding anymore? I had a guy contact me about the z31 mirror window interface, but I need to look into Ninjaflex to see how rubber parts turn out and hold up to sunlight. I've made replacement z32 window sliders that've held up for nearly 5 years now. Let me know what you're looking for and we can see what is possible.
-
Series 1 240z front bumper. Fix it or scap it?
Pharaohabq replied to 5 Star Rising's topic in S30 Series - 240z, 260z, 280z
Dings like that could have been saved if you didn't hammer on it metal to metal. a rounded wooden dowl would have saved you a lot of headache. You can save that bumper, but it's going to need to be rolled, or tapped a lot to get t straightened. Becareful if you have to heat it since you can mess up the chrome. There's a guy in here who was selling polished stainless bumpers, but I dunno if he's still around/got them. . Ebay might be a source, or if there's a local Z club. -
Is this the correct door for my Early 71 240Z
Pharaohabq replied to 5 Star Rising's topic in S30 Series - 240z, 260z, 280z
Have you taken a tape and measured the passenger side and driver side door dimensions? Those gaps look rather large, large enough I'm wondering what's going on. Your car isn't a 2+2 right? have you checked underneath at your frame? -
You can also install short nose R200's using an RT mount. Techno-toys, among others, Sells these so you can put in LSD's from 350/370Zs. Just make sure you know what diff you're buying. I don't remember what z31's had the long nose bolt up LSD's maybe 87/88' turbos?
-
ahh okay, thanks.... wasn't sure about that, I just knew they could have lower numbers.
-
Yeah that's looking pretty rough. White interior. Do you have the headliner? I have a white interior minus the headliner. It's really really uncommon to find it in decent shape. From your pictures, I'd recommend parting it out and getting another vehicle. You're going to spend a LOT on repairs on just the rust, even before the actual body damage. If you do part it, let me know about the white panels/vinyl. Tabco has most of the repair panels including the wheelwell. though you might buy it all through RockAuto, I got my rear panels for $40 cheaper through there. Depends on how much pain you like I suppose. Did you check the firerwall vin to make sure it matches the title? Missing Vin plate is a huge red flag since someone has to specifically try to remove it. Might do a title search on that Vin# just to be sure another (maybe stolen) car isn't registered under that number, befor eyou do much more work on this one. Title issues are super sticky. Phar
-
I'll check it out. I'd like to see his process.
-
Yeah HLS30... That's not JDM usually. He might have bought it in Japan, but for the US market, who knows. There's few records. We'd need the full vin to be able to realy search anything. HLS30-004xxx would be an earlier car, but could be a 260z too. If you get us a picture of the Vinplate it'll tell even more since we'd be able to see what the engine is supposed to be etc. That being said, if it's sitting in boxes, then it's a project with no real worth other than parts (I need a decent dash ) until you put it together. Download the FSM off xenons30 and go from there. only you can tell us what you have. We can give you estimates based on what you tell us but until then it's just conjecture. We will be able to tell you what goes where and a general process for putting it together. Obviously we're not going to be able to do it for you, nor would we want to. But don't be thinking you're sitting on a gold mine, unless your car has some really rare parts, such as anything that says 432 on it. Hagarty can help you with insuring it even while it's a project, so you might look into that. Otherwise give us more pictures, We are a hungry lot and a picture is worth 1000 words. Phar
-
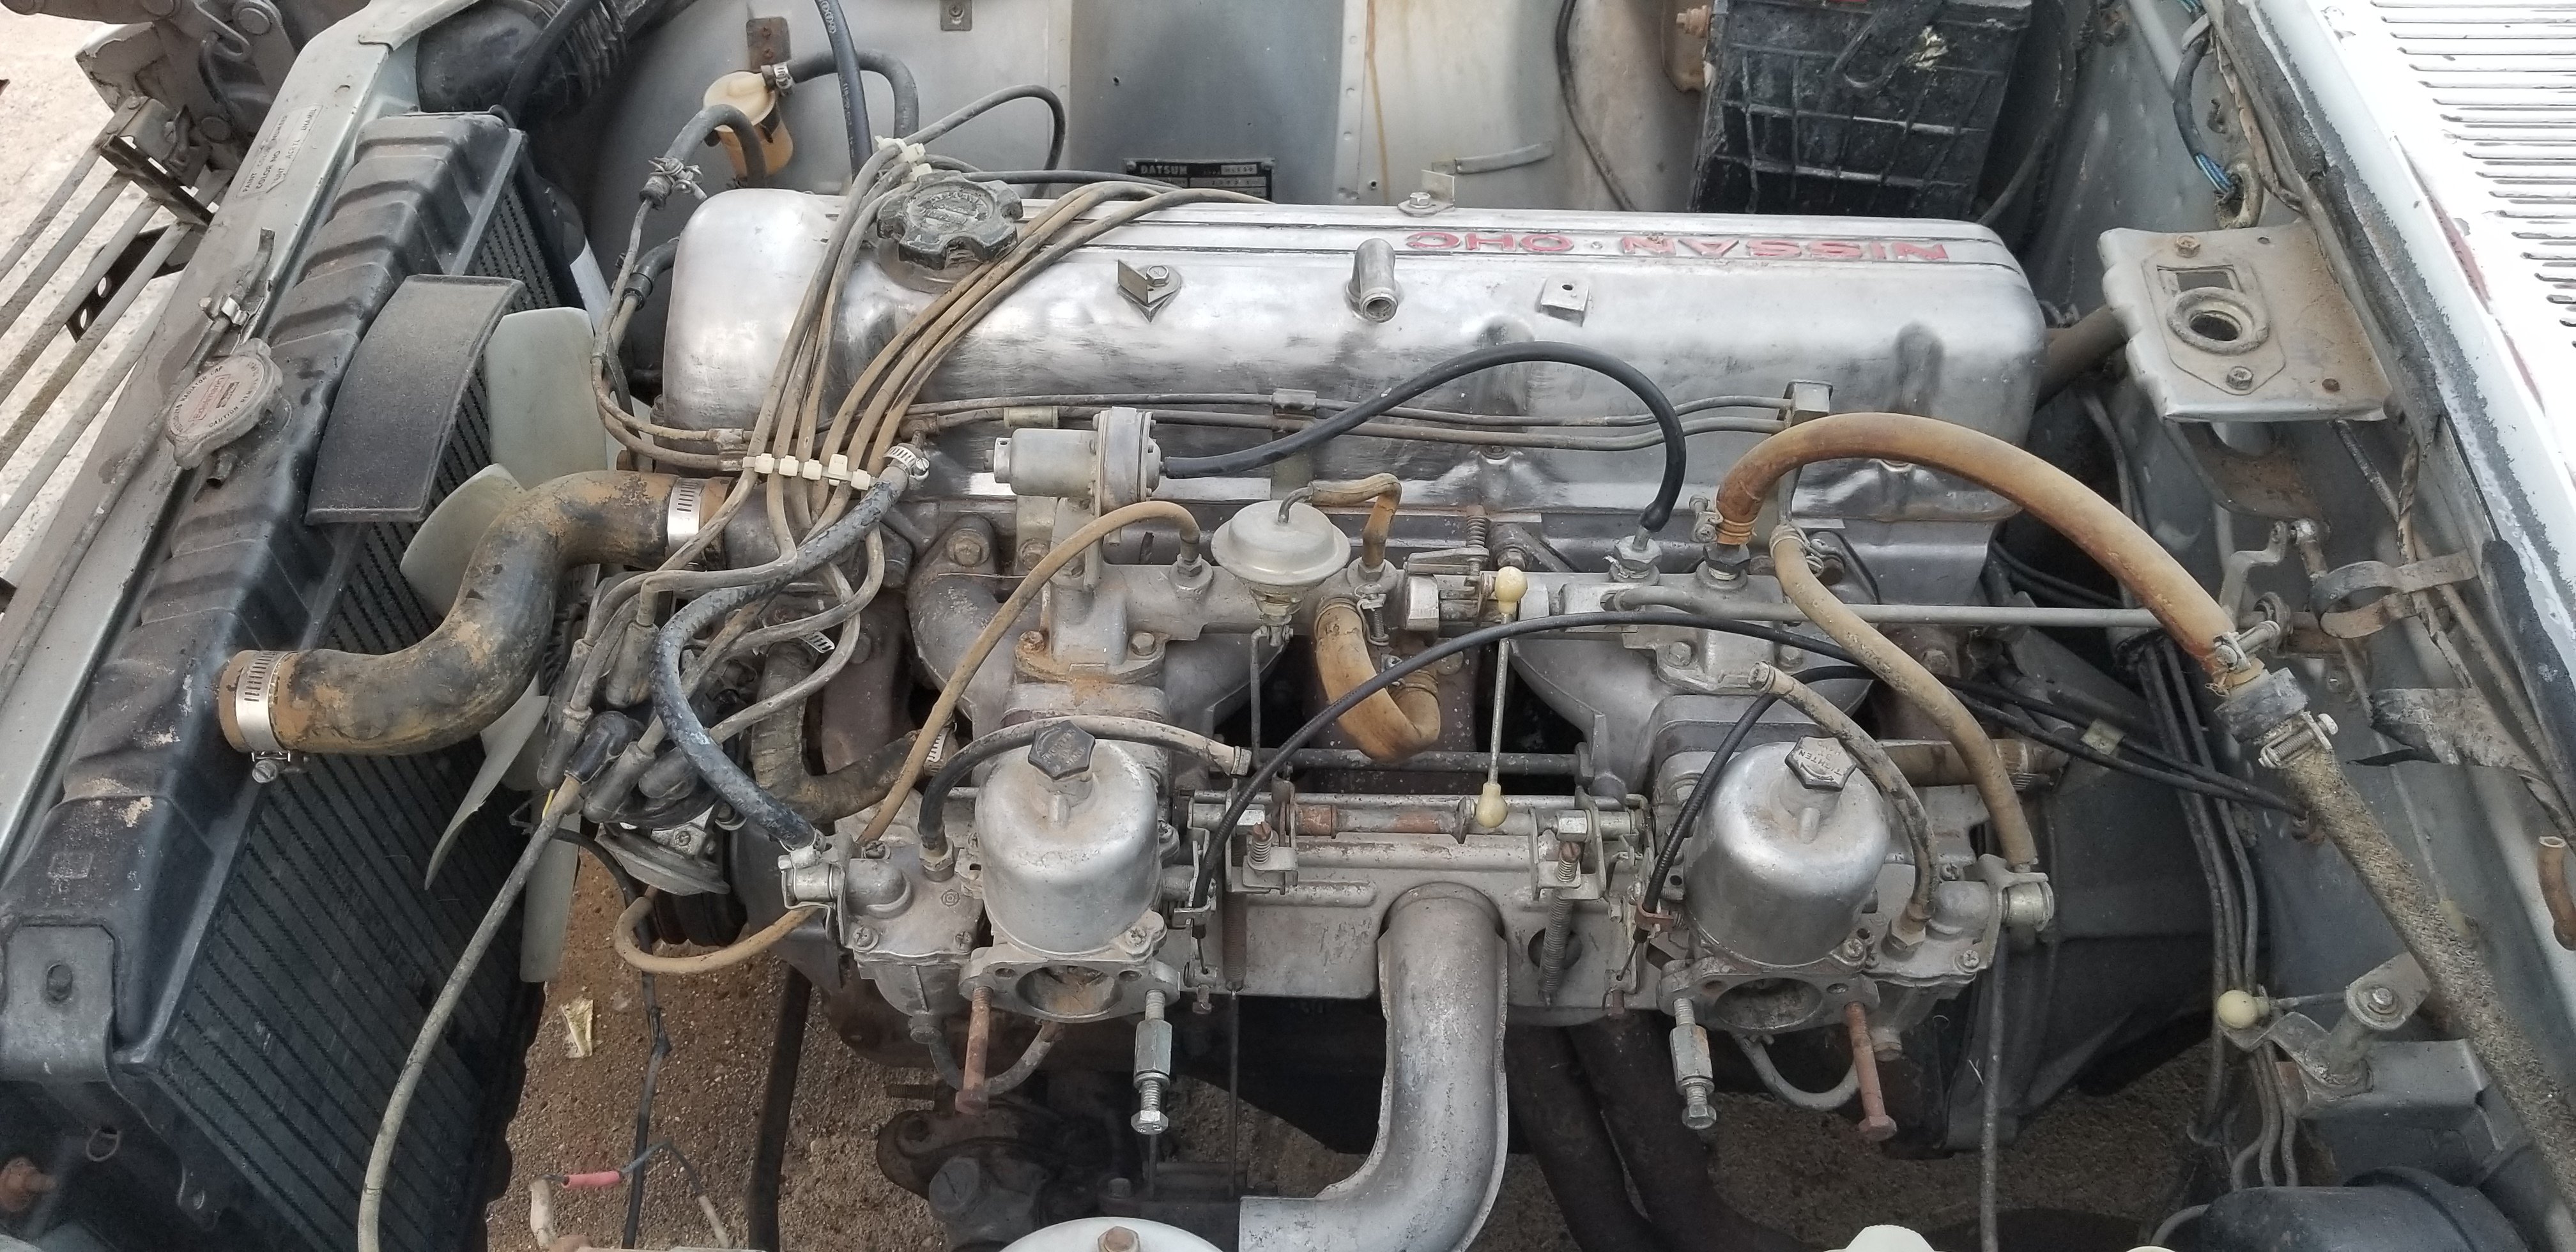
My 70' 240z is #5837. It was last registered in 1990. I expect it's been at least since then that it's actually run. Story was that they bought it, towed it home, pulled it apart and got in over their head, so they put most everything in side and parked it out in a field in rural NM. I bought it about 3 years ago, or so and recently have found time to start working on it. What I've done so far: I've looked over the engine and replaced obviously cracked hoses. I found the engine, though it's an L24/e88, is not the original engine #. That's unfortunate, but not a show stopper. It looks like the Motor was at least looked over because there's no oil leakage, or obvious damage. The engine does have a plastic fan, and the Radiator shroud was in the back. So I'd guess it was rebuilt at one point. Oil is still clear. Months ago, I pulled the plugs and squirted 30weight oil into the cylinders. let it sit a month, then I came back with a battery pack and cranked it over with no fuel/spark a few times. then I let it sit a while. 3 weeks ago I looked through the carbs and made sure they were hooked up correctly and sealed off anything that would be a vaccum leak. I put on new plug wires, adjusted the points, and noted the dist was loose, no biggie.. Then I got a jar and put about a pint of fuel in it with a new hose leading to the mechanical pump. Connected the battery pack and cranked it over (no water in the system) it actually started with a cloud of sand and dust and noise since the exhaust header is held by one bolt and no gasket. it ran fine for about 45 seconds, when I shut it off. The oil pressure gauge read pressure. I let it cool an hour or so while I went to lunch and to get parts, then came back and filled the Radiator, (Which leaks), filled the jar with another pint and started the engine again, just letting it idle. The Dist is loose and for good reason, it's one tooth off, so I'll have to fix that, no big deal. It idles about 3 minutes on a pint of fuel before it cycles that fuel back to the tank. I don't want much in that tank since I've got to drop it an look. The heat from the engine pushed water out the leak in the radiator. It's the drain plug, I tried to order a new petcock, but it showed up at 7/16" rather than the 5/16" that the plug looks like it should be. so if anyone knows the right part # for that, let me know. I found one of the freeze plugs is seeping so I ordered a new kit for those, not too hard to put in. On to the body. It's pretty rough, the paint is so bad, and they'd sanded and primered about 1/2 of it before they parked it. I'm going to need to patch a bit. pinholed floorpans. I'm going to need a full rubber replacement kit. Does anyone know if those kit include the welting and rubber seals for the doors? I ordered new hatch struts. My Series one glass is good, but the defrost lines look like they've been scratched pretty bad. I don't know if those are worth trying to repair. I replaced the hood and left fender along with a new (used) fiberglass sugar scoop. since the hood had rust and had ben hit, and the left fender was sanded but not protected 27 years ago. The car had a slight repair in the inner nose next to where the horns mount, so it was obvious this was hit at some point. The metal sugar scoop I replaced being another hint. I had tried the brake pedal and the clutch pedal, the clutch went right to the floor and the brake master was frozen, so replacing those was needed. I replaced the clutch master and went to replace the slave, and found the slave was missing. Replaced it with new, and as expected, the rubber line leakes like a sieve, so I have that and all 4 wheel rubber lines on order. I tried to find a replacement Brake MC for a 70' and no existy, unless I want to pay near $300 for a rebuilt. I found the early S30 MC has the Front reservior at the back of the MC, while 71-73' MC ($50) has it in the middle of the MC. After some reading people have said you can just re-route the "front brake" line to the middle, and "rear brake" line to the end. It should work fine. I did this and all it took was a couple slight bends to swap the hard lines from the manifold to the MC, front to back. Both are 7/8" MC's. I bled it and connected the hard lines, and sure enough the wheel hoses are leaking. (nevermind I'm expecting to have to replace/rebuild the wheel cylinders.) So until parts are delivered I'm stuck on that part. I cleaned out the car and I found a lot of EFI parts from S130's and most of the interior vinyl and some removed parts like the fan shroud. I'll need a full set of emblems and the Series 1 hatch parts, but it's mostly complete. I found the shift lever from a S130 and put that on (it was missing) and found this is a 4 speed, (possibly stock) I have a driveshaft from a 280z that will hopefully fit. I need to find bolts though since the tranny is held to the engine by the starter bolts and 2 bolts on the top. There's a lot of missing bolts. Does anyone have a good source for the M5, m8 and m12 bolts. I'll put in a 5speed since the engine isn't original it won't make any value difference. I'll post pictures shortly... Phar
-
Good info here. My 70' 240 tank has sat since 1990 out in a field. I'm sure it's filled with sand if not rusted. There's no holes that I can see, but I'm certainly going to drop it for a look before trying to put anything in it. I've used phosphoric acid for rust before, and I'm going to use a lot of it for the body. that redkote sounds like it should be a standard procedure. I'm going to try what you've posted here and I'll let you all know how it works out. Likely this weekend I'll drop the tank. Phar
-
My Dash is at least as cad if not worse on both my cars. One has complete splits and the other has ruptures that are raised easilly more than an inch. I've seen people try these repairs, but fragility is an issue, as is later cracking in the hot sun. It looks like you've use Great stuff for the foam repairs, but what about underneath, has any repairs been done to the underside to help stabilize the dash on the frame? I like how the bedliner looks like it's coated very well. The Just dashes guy wants near $2K for a new dash, but that includes a full rebuild and vaccuum formed overlay.
-
Twin cam head for the L6 from Derek at Datsunworks
Pharaohabq replied to Derek's topic in Nissan L6 Forum
This is so amazing... I can't wait to hear the next version run. Which will make it first? The #0005 or the VCT head. #0005 sounds like they're going to do an amazing job. Have they contacted you for consultation? I wonder what their CR will end up with after all that work. What will your CR be with the VCT head? Will you require higher octane? Lastly what engine control are you going to use? Does Megasquirt handle VCT, or is this an oil pressure thing? So... stupid numbers, but a turnkey bolt on head complete might run how much $$$$??? Are you relying only on Rebello or another distributor or could we buy one straight from Datsunworks Complete? Sorry I haven't checked your site yet. Phar -
-
Twin cam head for the L6 from Derek at Datsunworks
Pharaohabq replied to Derek's topic in Nissan L6 Forum
Derek, I came to the L6 forum looking for tips on updating an L28 during rebuild and what did I find? THIS! This is amazing, I just read all 50 pages of this, and this has been a fantastic thread. I'll definitely keep watching. The 3D sand printing is intriguing, and seems to have great resolution. You know I love 3D printing, and I understand what a big job this has been The Fact that v1 lasted a good long time was great! I look forward to hearing how V2 and V3 (+VTC) will work out. you've got a lot of great partners that realize how amazing this is. I won't be able to afford one of these for some time, if ever, but I would bet they'll hold their value well! Hopefully next time I'm in FL I can come by and see your shop! Question though, How did you figure the cam profile for 6 cylinders vs the Honda 4cy? Is it based on any existing L6 cam, or fully custom, derived from L28 cams? I will keep watching this thread and lurk your Datsunworks site. Amazing work! Phar -
I'm uncertain about the G37X though, since I believe that's an AWD vehicle. We would have to see what the tranny looks like and how it's attached to the front wheels.
-
Thanks for the measurements Neverdone... It's good to point out that the Tranny in the S30 will need to be shortened at the shift linkage. Ahoke was selling CNC'd brackets for this. those mount at the 12" line, and shorten it about 5-6". you weld the U joint shorter or pull it apart. This puts the tranny at roughly +2" longer than the stock S30 Tranny while putting the engine still behind a modded Steering X member.
-
I can't believe I wrote this nearly 5 years ago. There's a few things to update. AEM and Haltech both support this engine and have profiles for it. McKinney I believe still makes a decent mounting kit. and I'd highly recommend running an external fuel pump/filter. My car is still torn down for paint, and I hope to get that done this summer. Kidlet has taken most of my spare time, so I'm moving slowly. Feel free to ask me VQ questions. I still lurk around here often even if I don't get to post so often. If you find this thread helpful, please let me know. Thanks, Phar