

Evlevo
-
Posts
57 -
Joined
-
Last visited
Content Type
Profiles
Forums
Blogs
Events
Gallery
Downloads
Store
Everything posted by Evlevo
-
That seatbelt mount looks damn near OEM. If i didnt know any better id say it was. Good work! Bookmarked for when i get around to the seatbelt point of my build. Must have been in a different seat thread, but last year i posted a picture of 2010 wrx seats in my z. IIRC they are slightly narrower than the stock z seat and fit quite well.
-
I think i know the spot you mean. Panels like that usually use a foam glue not just a foam pad. Heres the stuff we have at my work for that. https://www.3m.com/3M/en_US/company-us/all-3m-products/~/3M-Flexible-Foam/?N=5002385+3293193646&rt=rud Most people dont have the applicator gun. Id recommend maybe cutting up a piece of Box Cap Tape and using that on the little plate.
-
Looks amazing! I like the flag on the underside of the hood.
-
If you haven't tried it already, i would recommend heading down to your local paint supplies store and trying some gun wash. That's usually our go to for stubborn glue residue.
-
Does it click if you latch it manually? As in by hand, not closing the door on the striker.
-
Idea for front knuckles.
Evlevo replied to AkumaNoZeta's topic in Brakes, Wheels, Suspension and Chassis
Im digging the price on those. Thats kinda where im at with my s13 suspension. Cut knuckles to correct the ackerman, or pickup drift knuckles with No ackerman, or adjustable ackerman. -
I use them at work from time to time, most lock rods and handle rods are very close in size. Check out your favourite body shop or car dealer, they may have something close that will work. At my shop we have a cabinet of clips and there is 4 or 5 different sizes. usually one works.
-
S13/S14 subframe vs T3
Evlevo replied to Casper0878's topic in Brakes, Wheels, Suspension and Chassis
I did this swap on a Z im restoring. Front and rear. This isnt a beginners project, but not as bad as i expected going into it. Anyone who says it will hang low or sit like a truck is talking out their ass. Mine sits basically flush with the bottom of the car, as it does in the s13/14. I thought about starting a thread to combined all the info i found and discuss the things i ran into but never got around to it. **I would recommend this only if someone was doing the work on their own car** The rear subframe took me about 8-10 hrs, over 5 days. not including running the brakes. I was on vacation and would go inside when i figured i had too many beers to be working under a car. I would also recommend using a parts car. I bought a junk 240sx with some aftermarket goodies (coilovers) on it for 500 bucks. I stripped it of the parts i needed and sold the rest of the car for 400 bucks. -
Not much to explain really. Everything column related on my car is trashed. The switches were bad, theres play in the column itself, was missing the key, and the wheel was destroyed. I also did a full front and rear s13 suspension swap on my car, so im not limited by trying to stay original, and since the wiring in the car was also trashed, i plan to use a column from something else (most likely a sentra) andd gain the modern wheel and functioning switches. I considered buying a smashed car and using a column and body harness from it but im not sure if modding a harness or a custom harness will be more work.
-
One of 100 names for the same product really. My work is a 3m shop. Id recommend most of their products.
-
Epoxy should go without saying, Most of these products wont stick to bare metal, but you know rockershutz is just gravel guard in a schutz gun thats allowed to be thinned for different textures right?
-
Anythings possible with enough time and money lol. I personally havent seen a 370z in a s30 done before, but modern Column upgrades for the wheel, switches and ignition are very common in classic cars. For example This guys full r32 interior swap.... and whole car. http://jdm-culture.com/adree-hamid-r32-in-disguised-s30-240z/ For my restoration i actually plan to do something similar. I have my eyes on a sentra ser column. My ignition, switches and wheel were trashed so im starting fresh with something more modern.
-
If you insist on using raptor liner id recommend prepping it more aggressively than the instructions recommend. Its a heavy bodied product and i dont think the scotch pad prep is really enough for it. Also how you discribed undercoat is exactly what it is and why you need to know what products do and which ones are best for your application. The "never fully cure products are ment to be additional corrosion protection ontop of your hard coats. Hell you can use used oil technically. Im sure a lot of us have made the mistake (yes including me) of grabbing an undercoat can instead of a gravel guard can and spent messy hours cleaning it off.
-
Lizard skin seems to be a good choice. Never personally used it but its designed for what people seem to miss use other products for. Worth noting, not all bed liners are hard. Lots of bed liners are thin, and often heavily textured for excellent grip and not really good for under cars but good in boxes. There are some thick rubbery ones like Reflex that are super flexible and softer. We use it at my work. Ive made bushings with it. IIRC it also has a heat resistance property and is self extinguishing if its exposed to a flame.
-
If you lost me when i said column in reference to the steering column im sorry but i think this project may be best left to a professional. Having full function of the applicable features will require rewiring youre whole wipre stock, signal stock, ignition, and steering wheel stuff. Ontop of that custom mounting and welding of the shafts.
-
This is is actually a good question and can vary in answer. This really depends on the brand, and result you desire. Some "chip resistant materials" are applied between the base coat and sealer (such as factory rocker guard/rocker foams) There are different types that are paintable and non paintable in almost identical cans which can complicate things. Then there is bed liner products. Some require different levels of prep. some can be Painted over, some cant, some can be bought without pigment and can be tinted to ANY color you wish to match youre car/truck. Then there is undercoating which is usually a soft product that never fully cures. which can NOT be painted. There is also rubberized undercoating so now you can see how complicated this gets. Now back to your original question. Bedliner undercoating and rocker guards are all different but They can be used for the same thing, but knowing which one you are using will determine how to apply it and if you should be using it in the first place.
-
What sort of end result are you hoping for? just the wheel is one thing, but if you want to have the buttons functional for something youll have to swap the whole column.
-
Im not well educated on the topic, but would an adaptor plate be an easier or cheaper or more achievable option vs a full on custom bellhousing?
-
Im also curious what people have been doing. I pulled mine to clean it as it sat for almost 30 years. I rinsed it out and took the waste wash water for proper disposal and thats as far as i got. Mine looked similar to siteunseen's pictures. I strongly recommend being as careful as possible. I spilled some and i could smell it in my yard for weeks. I may have to expand my searches to online. I priced some out local to me in Canada, and most cost the same as a fuel cell which seems to defeat the whole point if i can get a new fuel cell for less than repairing my stock one.
-
Arent Modified cars fun? haha. Sounds like you have it figured and the one relay harness is bad. Good luck with the repair!
-
That is a strange design ive never seen that before myself with 2 harnesses. Did you try swapping the ballasts side to side? You mentioned there is 12v to the headlight plug, did you use the ground in the plug to test voltage? ground to the frame? or test with a regular bulb? If you know the car side electrical is ok, then you should test your new ballast and bulb on the side you know works. If it works, your other HID relay harness is broken.
-
Buying a 72 240z. Have questions.
Evlevo replied to dfknoll's topic in S30 Series - 240z, 260z, 280z
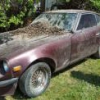
Looks like a solid base. Good luck with the project. -
Buying a 72 240z. Have questions.
Evlevo replied to dfknoll's topic in S30 Series - 240z, 260z, 280z
Pictures! Couple years ago i had something similar do to with my z when i picked it up. I never tried penetrating fluid but i did drop a bit of oil in the cyls and manually cranked it after it sat for a bit. Did an oil change, and a few other cleaning related things. i can assure you that you will need to just go ahead and order a carb rebuild kit and replace the fuel pump. I didnt even bother putting fuel in the tank. I put a line into a fuel can. Clean the tank out for sure. -
I Completed my front AND rear swap recently. I spent 10 times as long researching it than how long it actually took. Some info i found made it out to be way worse than it actually was. If you have any specific questions ask away. For the price the parts can be acquired for its worth it IMO.
-
My 2 cents would be if its a bushing you can upgrade to poly (except the tension rods) id do it. My old silvia was mostly poly, except the subframe bushings which used lock collars, and coilovers. Still rode super smooth. I had another S13 which had solid engine mounts, which i didnt like. That was a bit too much.