Dat73z
-
Posts
852 -
Joined
-
Last visited
-
Days Won
8
Content Type
Profiles
Forums
Blogs
Events
Gallery
Downloads
Store
Everything posted by Dat73z
-
Tonight I fixed my hot side charge pipe. Bead rolled the ends and reapplied a brushed finish to the pipe by hand, which was a massive pita.

-
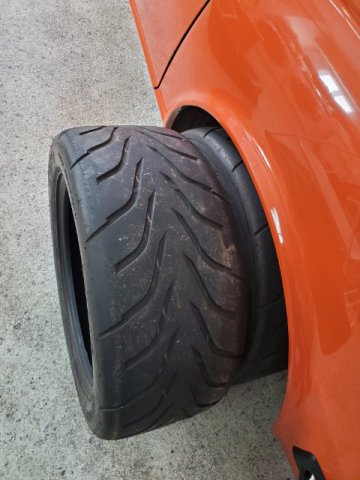
Waiting on parts again, so this AM I started test fitting the new tire size. I'm hoping running 245s or wider rcomps will help with traction. Likely I'll need to run shorter springs in the rear to move the perch up, but the first step is to get all the measurements specific to my setup for the wheel builder.
-
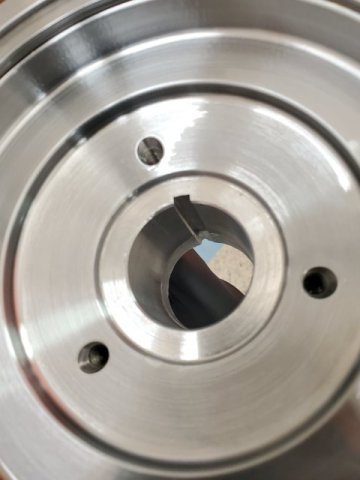
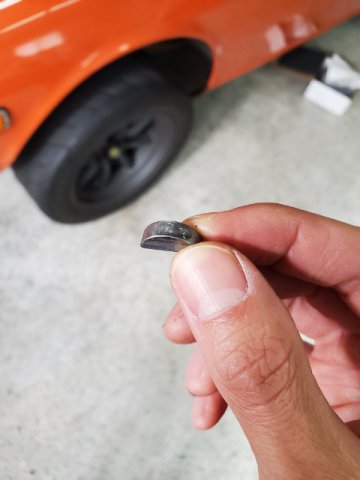
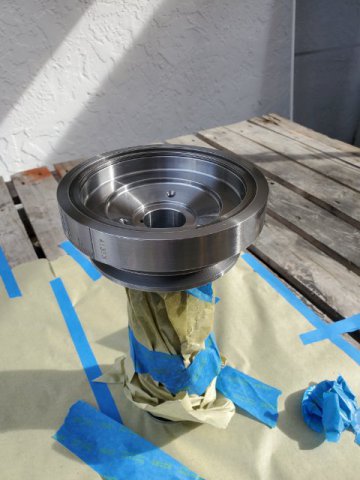
Over lunch I drew on the crank damper using the old bolt. The fit of this damper is definitely tighter than the last. I gave the inside end of the damper a light skim of hondabond and ensured the key was aligned in the keyway as the damper bottomed out. I'm going to take some final measurements and see if I can get the new bolt torqued on there over this next few days and retime the ignition. After that it's all minor reassembly from there.
-
@Zetsaz full spool around 3k is also where my engine makes peak torque. For a "livable" street car you start running into traction issues as well. Punching it in 2nd on onramps I was lighting up 225 rcomps at 60mph lol
-
Livable is subjective, with a modern properly sized single on the L paired with modern compression and tuning you're already spooling off idle with good drivability. Nowadays I think it comes down more to the novelty aspect, as the packaging gets pretty crazy in the s30 chassis.
-
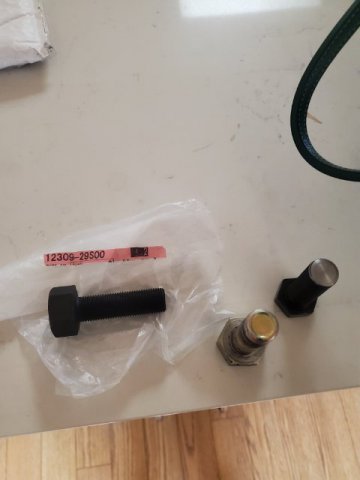
I had ordered an OE KA crank bolt a while back and they were backordered all over the US. Somehow mine was shipped directly from JP, so I figured I'd wait for it to come in. At this point I just need a solid few hrs window to reassemble and get back on the road, it's been hard to find time. Hopefully over this next week.
-
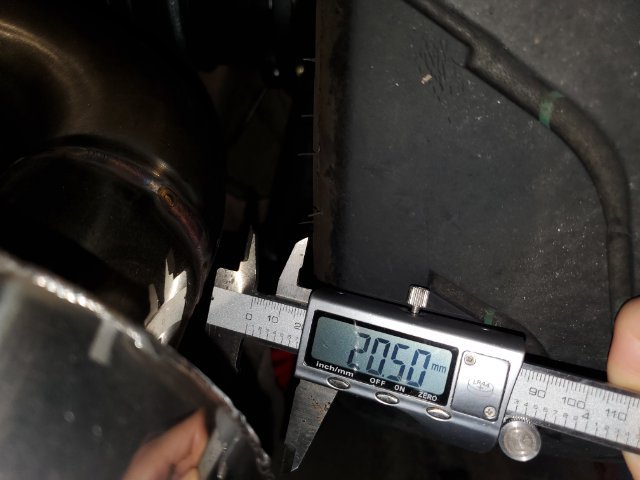
Measuring a bit more I think I may be able to get away with doing a tight turn or series of pie cuts off the rear of the muffler. Initially I was thinking to shorten the muffler an inch or two, repack and reweld it. Not sure yet, but I'd like to find the option which gives me the most headroom for the least amount of refabrication work. Inboard I'll likely need to run shorter springs on my coilovers to clear the additional backspace to go up to 275s, will need to get the tires on there to measure later
-
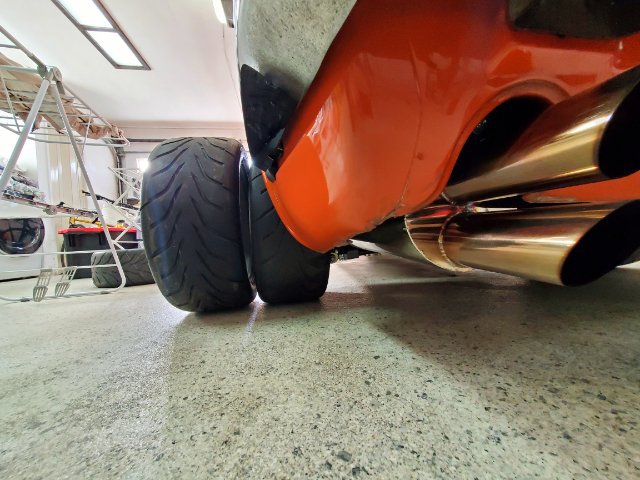
Another busy weekend but had a couple mins this AM so picked up 245 45 16 rcomps. I realize that every time I touch this car it turns into some epic fabrication project. So this time I am going to fabricate the exhaust such that I can fit 275 slicks or wider in the back if I want, but the plan is to run 245 square rcomps for now and go from there.
-
To help with traction issues I'm having a custom set of wheels barreled with the option to stay 15 or upsize the barrels to 16. Initially I wanted to run 245 45 16 R comps which I know will fit the chassis, but I fabricated the exhaust around 225 50 15 R comps. It seems with 245s I'd have less than 1/2" clearance to the exhaust which seems close. I'm thinking of picking up some 245 tires tomorrow to start measuring. I really want to run 245s or wider on the stock body but I'm not sure if I want to cut and reweld that section of the exhaust to do it.
-
240z SCCA vintage race car, restoration
Dat73z replied to AydinZ71's topic in S30 Series - 240z, 260z, 280z
Sounds like you've got this 👍. I've heard mixed feedback from multiple builders on knife edging as well. You definitely feel a difference in response with it, but I can understand the longevity concerns. -
Some sidebar projects have been going on in the background. For the turbo setup, I've been upsizing everything boost control related from 4mm to 6mm.
-
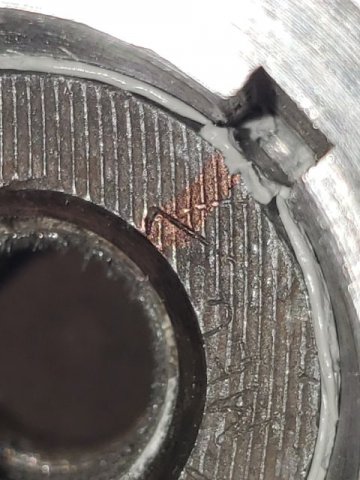
Still waiting on some parts from Japan so I installed the woodruff key for the damper, along with the crank seal. Super basic but I may as well document, light dab of loctite super glue for the key, and a skim of hondabond for the seal pressed flush to the timing cover.
-
240z SCCA vintage race car, restoration
Dat73z replied to AydinZ71's topic in S30 Series - 240z, 260z, 280z
@AydinZ71 I went through something similar, the dims my crank was done to from one builder ended up being NLA so the entire crank had to be welded and reground which cost maybe 1k overall so fairly reasonable. The knife edging and a bunch of other work was already done, and I got the crank in a deal so it made sense to keep it. Depending on how far you want to go with it, choosing your bearing types are still on the table if you're willing to do that. -
Ime the loctite didn't help at 120ftlbs, but I was also shifting 7k+ at 10-15psi of boost on a larger stroker. I'd go with Dave's suggestion of 150ftlbs
-
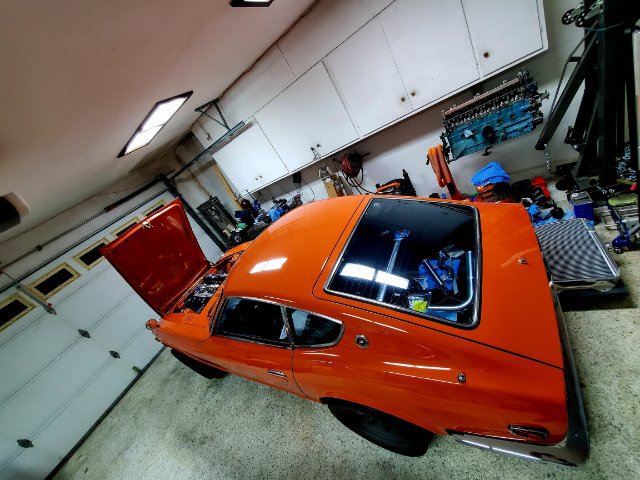
Tonight I did a mid project clean up around the car. It's hard to stay organized with multiple projects going on. I think I've have this shell for almost a decade now. The original plan with the first rebuild was to spray it in quick and have a clean driver. When I got the car it looked like a chalkboard but I gave it a quick buff maybe 7 years ago and kept it in survivor patina since. Every time I was going to work the body and paint it, I ended up stripping it back down to a shell and rebuilding it or something else came up in life where I just needed to daily it. I've been thinking over the weekend, to maybe strip it back down to a shell again and spray it all in glass out. But that would be a 3-6 month project at a minimum.
-
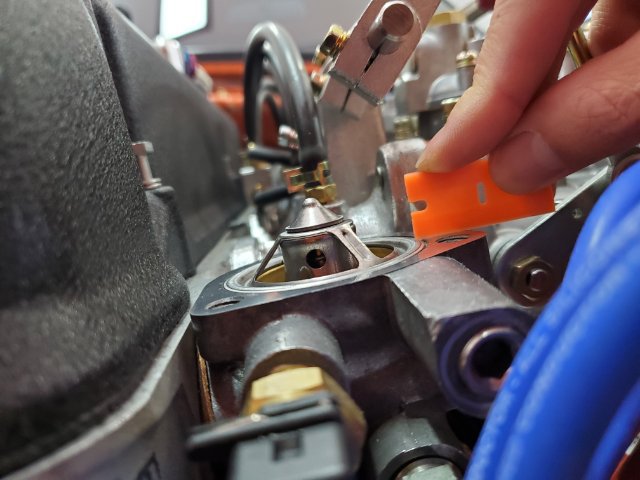
On the tstat install, as is typical I had to make some light modification, grinding the housing ribs to fit the modified Robertshaw unit. No big deal, but maybe someone can find this helpful.
-
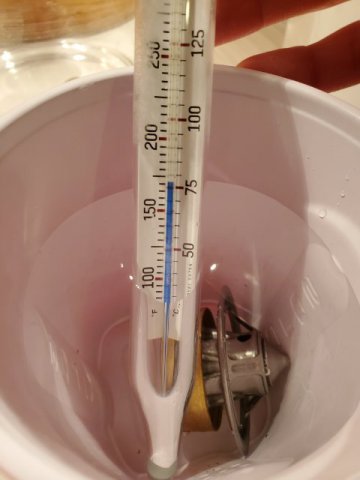
Realized I'm missing a couple parts for the full reassembly so I ordered those last night, hopefully they'll be in sometime next week. This AM I swapped out the tstat from the 170F unit to a 160F unit, mainly for cyls 5 and 6 since I'm not running the head cooling bypass.
-
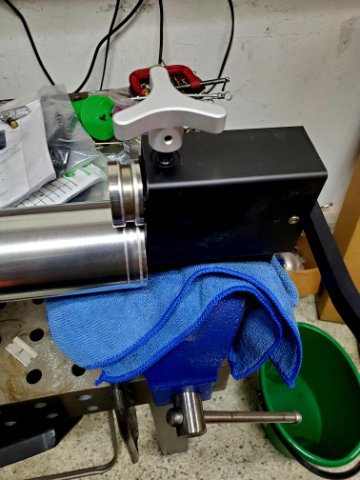
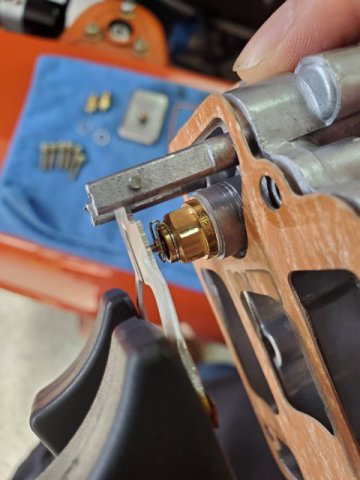
Had a few mins today and started the reassembly process. I figured I'd take lots of pics this time, in the event I have some other failure in the future the forensics will be easier. I started by installing the key for the timing worm gear which ended up turning into a fishing expedition after I dropped the key into the pan. I got it out with my borescope, some safety wire, and a magnet. I then hit the bottom of the key with some loctite super glue to hold it in place, and slotted in the timing worm gear.
-
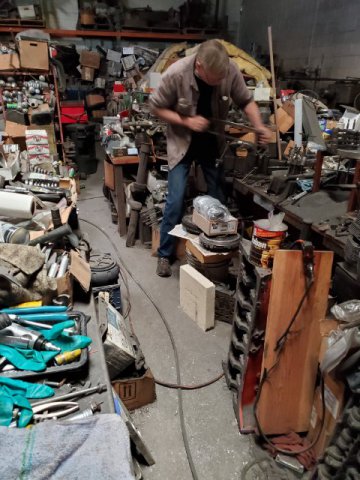
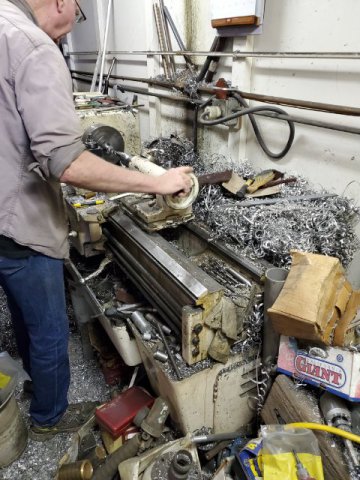
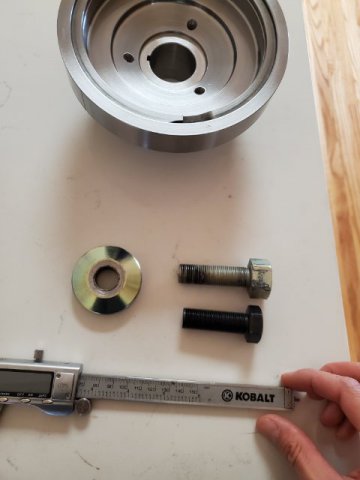
This AM has been crazy busy but I managed to make a quick stop by my machinists shop between errands and get the new crank bolt machined down 2 tenths of an inch just in case. I don't suspect any bottoming issues with the length of the original bolt but this will give me peace of mind.
-
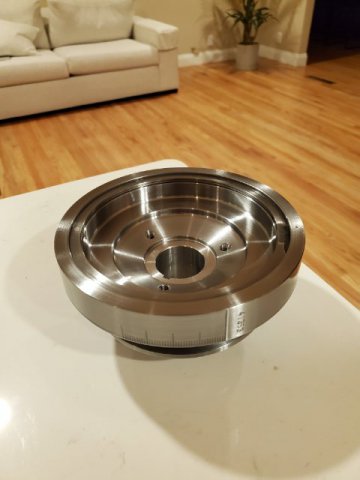
The crank damper cured out overnight, I brought it indoors as it's been pouring rain. Some imperfections in the paintwork as it was windy and cold, in the low 60s when I painted it but overall I can't complain as it'll be protected from rust. This AM I'm going to double check the thread engagement of the damper bolt and finish reassembly prep.
-
It is supposed to rain here for a few days and temps are going to start dropping into the 50s during the day. Since I don't like to spray anything with a catalyst indoors unless I absolutely need to I sprayed in the damper in clear over lunch today. It should be cured out and ready for assembly within a day or so but I'll give it a few days as the weather is cooling quickly.
-
Took a quick look this AM of how I want to mount the AC condenser. I figured since I have the rad out, it wouldn't be a bad time to fabricate some more bracketry. The tightest areas are by the fittings on the DS, but I had mocked it all up prior in the build so I know it will fit along with the lines. I need to take a look at my scrap AL pile and see what I can make work. I have some random pieces I think I can tig into something that will look decent and work well.
-
Been really busy this past week but I now have all the seals I need to put everything back together, along with some extra parts for some non-turbo related aspects of the car I've been putting off. My engine builder called me again today to check in and after thinking about what I was seeing and tuning around like loss of power on some pulls, spitting fire out the exhaust on quick on/off boost transitions, and losing the alternator bolt were all likely related to the crank damper walking off and losing timing as the distributor worm gear was moving around. Either way I'm thankful for all of the support I've been receiving on this. A lot of other projects in play at this point, but for the turbo build the plan is to shoot the new damper in clear this weekend and start reassembling. Since I need to get the Z out of the garage and other builds in, I'm starting back on 1 thing per day until the car is rebuilt starting with sweeping up the garage tonight.
-
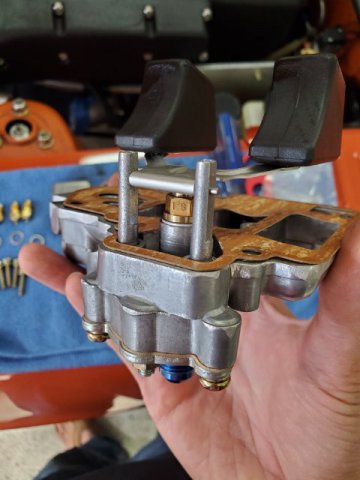
Out of time this weekend, but my buddy dropped off the 2.5 needle and seats yesterday. The OERs come with 1.8 needle and seats. WOT full boost 2nd-4th gear redline pulls I was running the float bowls out of fuel shifting into 4th. I think this sizing is what the monster/race NA guys run so hopefully with the 20-30psi of fuel pressure I see under boost and high volume EFI pump this issue is resolved.
-
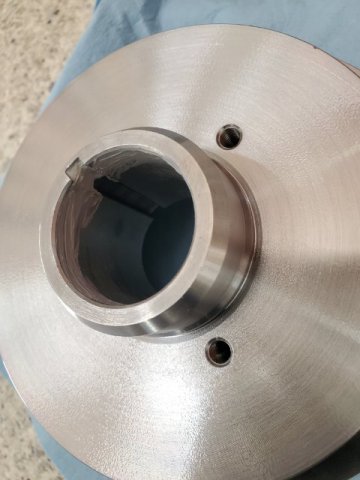
A lot going on lately but I did manage to check the runout on the crank snout. It's around 0.001" so I feel good about cleaning things up and getting the damper on. It's difficult to get a good measurement so there's some error in there but I was mostly checking to ensure nothing is massive bent and I'm not even sure if there is a factory spec for this. I need to call Rebello next week and verify a couple of items, mainly the interference fit between the new damper and crank. Edit: turning the engine over by hand, the runout is <0.0005". So I think the last major thing to check is the interference fit. 20221030_133359.mp4