Dat73z
-
Posts
852 -
Joined
-
Last visited
-
Days Won
8
Content Type
Profiles
Forums
Blogs
Events
Gallery
Downloads
Store
Everything posted by Dat73z
-
I'm running a Q45 R200 SN 3.54 rear end. I think our #s are similar though, at 9PSI on Rebello's dyno my engine made 370HP @ 6k rpms, and 370 trq around 4k rpms. I've spun the R compounds in 2nd and going into 3rd. Our driving styles are different, I'm setting my car up for street and occasional HPDE targeting 3-400whp/trq. At 8psi or so I'm happy with the car as-is since I mostly like to go cruising with friends.
-
Dude are you my twin? Pic of my car from like 2016-2018 timeframe Lol. Yeah if it was me I'd just run the r180 until it blows. Tbh I would still be running my sti r180 clsd but I found a buyer who wanted it all and my buddy was parting out his rear end to go with an 8.8 (turbo nitrous LS drag car). Maybe post it for sale and see if there's any interest at a good price while you keep driving it. With your driving style though it sounds like you've been blowing trans as a "fuse" before your rearend goes. So maybe after the CD something else would let go.

-
Thanks, I would appreciate that @rossman. Generally I'm looking at how the compressor is mounted and the lines are ran. I've been templating things up with cardboard on my car and I think I want to run the lines with angled fittings from the compressor through the rad support to the condenser. Then from there run the lines in front of the rad support with the dryer and tuck them in the pass side fresh air duct into the cabin. I like how your setup looks tucked above, it's really clean. Looking at pics from your build and others help me visualize the routing.
-
What does your trq look like? I have spoken to a few thay have dynod Rebello motors on chassis dynos. I will be one of them as well in a few weeks. Assuming a 20-25% correction factor, you're sonewhere around 250whp/wtrq. I think the 8.8 would be overkill for just about all driving conditions at those levels, but you do get the tunability benefits of the 8.8. Fwiw Edit: What trans are you running? I have a setup that had once carried the tires on a nitrous v8 (R200 SN) but the weak point in my system is the trans. I will grenade my trans before exceeding the limits of my diff.
-
After some discussion on FB groups with Tony D, I may try some different vacuum line routings for the FPR in addition to the tunable BOV. The SQV is close but it seems for blowthrough applications the immediate vent and fuel pressure drop is critical for transient street drivability. If I was building this car as a dedicated track machine, I wouldn't care. As-is the drivability is good, but I'd like to make it better. I've been trying to find an adjustable BOV to borrow and test before dropping the coin on a new one but no luck so far. If anyone has a lead in the Bay Area, CA please let me know.
-
Did one more long test drive yesterday evening and realized now with the 70-80F temps I'll need to obscure my oil cooler. It takes 20-30mins to hit 140F at the pan from slightly warm/fully cold and on the freeway it just drops into the 130s and keeps going down. So since we're going into the fall I think a piece of cardboard will do it. The 105F days were unbearable but they let me fully stress test the cooling systems and everything stayed cool even after boosting around and idling through CA traffic. I really do need to install AC though to keep the occupants cool because at 105F in stop and go traffic you are melting into the seat.
-
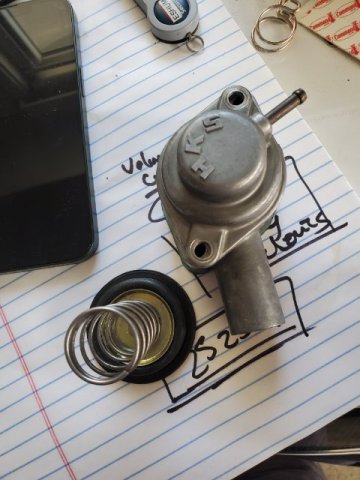
Thanks @rossman. Still havent had the chance to do more research but I did bookmark some install threads to read this next few evenings. Tonight I spent my 30 mins investigating the BOV further so I went boosting around. I had a vintage 80s HKS standard BOV which uses a standard spring and diaphragm. As I suspected, it actually responds slower than the SSQV4 as verified on my AFR gauge. The SQV works ok and an improvement over what the surge tanks came with but I want to get this dialed before dyno day so I'll need to order a new BOV which varies the opening pressure based on boost level. Fortunately I think the SQV4 is popular now with the modified car crowd due to the flutter noise so hopefully I can recoup most of my cost at sale.
-
Aydin, fwiw on a street driven turbo Z and setrab cooler I was struggling to hit 180F oil temps boosting around for hours during this last heatwave of >100F days in CA.
-
So I finally got a dyno date set with a local tuner this AM for the 1st week of November. For allocating my limited time to actually work on the car, on the critical list of items to resolve between now and then are: 1. I need to source a new BOV and plumb that in (maybe Synapse Synchronic) as my current HKS SQV4 flutters at low RPMS/boost and that affects response. Unfortunately I think they've been backordered for a while but I'll give them a call and see when I have some time. 2. Continue street tuning the fuel circuits to the best of my mediocre tuning abilities. I'll save the timing curves for the expert as I don't trust my ability to sense knock/detonation since the car is just so damn loud. 3. Add a boost controller as I'd like to ultimately run the car around 1 BAR of boost. 4. General tuneup and inspection 5. More heatshielding/ducted blower fans I think if I dedicate maybe 15-30 mins/day I can accomplish these tasks between now and then.
-
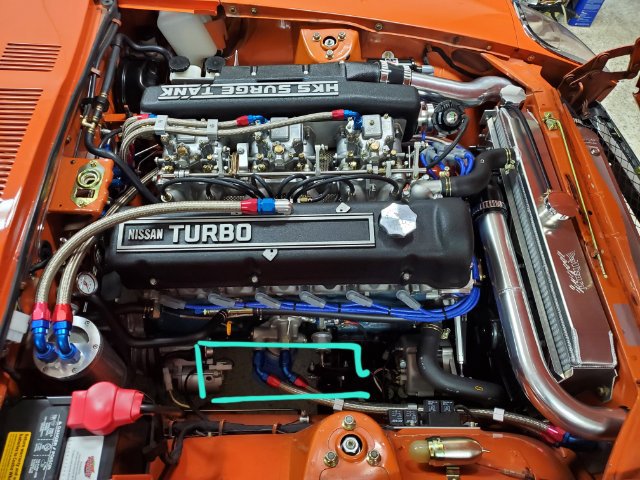
Tonight I started back in on the AC fab and started templating the brackets for the compressor mount in cardboard. I think I will make this my fall/winter project. I'd like to also fully upgrade the hvac unit to a vintage air but I'm not sure which model to get. I'd like to somehow retain the OE hvac faceplate and controls for that aesthetic so I'm not sure how I'd integrate that but I'll spend the next few days doing some research. I also started measuring again for an Accusump. I think I had determined a 2 or 3 quart unit would fit perfectly in the teal location. Still undecided if I'll pursue this mainly because my car already takes 10 quarts of oil.
-
Since I have the car moderately street tuned I figured it's time to start returning jets to my buddies who graciously lent them to me. It was a nice moderate day for some boosting so we went out cruising. The mic doesn't really do a good job of picking it all up but it's pretty visceral. The turbo/stroker noises and the feeling of raw torque just sucking you into the seat. I'm really glad I decided to start building this car again. Over this past year I've met a lot of cool people and seen a lot of sick builds. Can't wait to get this thing on the dyno and really dialed in. VID_35530614_121347_916.mp4 VID_35530615_100712_812.mp4 VID_35530616_012528_333.mp4
-
As a follow-on to the above post, another benefit of running smaller jets is how the surge tank amplifies all circuits. For a race car perhaps it doesn't matter but since I'm mostly street driving for now, for example, if I'm quickly going into boost and skipping the progression and say I need to slam the brakes to quickly stop for a traffic light, I can make the mains come on so hard and with fuel demand dropping so quickly/bov immediately venting the engine will just start to rich stall then quickly recover at idle braking down to 0mph. Sizing down the mains/airs to maintain 11-12afrs and bumping the idle timing anti stall resolved most of this. So it's a fairly delicate balance for a wide range of street operating conditions. It was clear with the tune from the engine dyno session that it was set up for race car WOT power rips.
-
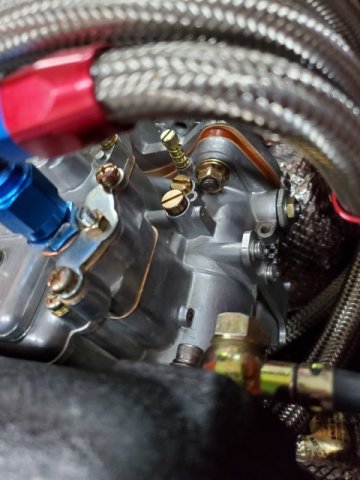
This morning I played with some jetting a bit more and performed a general inspection. I had reseated some gaskets on Carb #3 which was leaking a bit of fuel a few a few weeks ago and it looks completely dry. On tuning, I've observed the surge tank basically amplifies the characteristics of whatever emulsion tube and jets you're using compared to NA. So for example, the f9 emulsion tube which leans the transition and richens the topend was barely doing that NA, but on boost it was doing that a solid pt afr on either end of the afr spectrum. I wanted to richen the transition and lean the top end so I put in f16 tubes back in yesterday and it did exactly that. I have the majority of the curves 11-12afrs across the board so now I'm fine tuning at the transition, which sometimes leans to 13s if I'm high gear, high load, low rpms transitioning/rolling into boost on the progression but not a problem gears 1-3. Simple solution is to drop a gear but when I'm cruising on the freeway (s13 jdm trans/3.5 rear end) I'm at 2-3k rpms in 5th which is right before the mains tip in and the turbo is just starting to spool, so it would be nice to just be able to roll into it in 5th for passing off cruise instead of dropping to 4th. AFRs cruising in 5th are 11-12 so they'll creep into the 13s easily rolling into boost at that rpm range. Perhaps I can raise the fuel level just a bit as well to richen the curves up and lower the tip in rpms...but I also want to stay out of the mains on cruise for economy. But I could also take the easy way out and raise the levels anyways since I'm not exactly driving this car for economy. After months of fine tuning my strategy here is to use the smallest fuel sizes with the largest air bleeds possible. I've found this makes everything more responsive off boost. Since the dcoe type is basically 3 overlapping circuits/fuel curves (idle, main, pump) I may not be able to tune this out without making a compromise elsewhere like richer idle/cruise but this isn't EFI where a few keystrokes can tune it 😄.
-
AME complete chassis '77 280Z
Dat73z replied to lifeprojectZ's topic in S30 Series - 240z, 260z, 280z
Maybe ask to speak to another engineer. Do you have a picture of what you're torquing into? For some reason I'm thinking the floating hub adaptor for the rotor but perhaps I have the wrong idea. I ask because for steel into AL which is constantly heat cycling through the extremes, I always use some form of anti seize to prevent thread galling but that can also change the torque spec. One thing you may also want to consider is drilling and safety wiring all brake and hub hardware. It's a bit more incremental effort on the frontend, but worth it for peace of mind. -
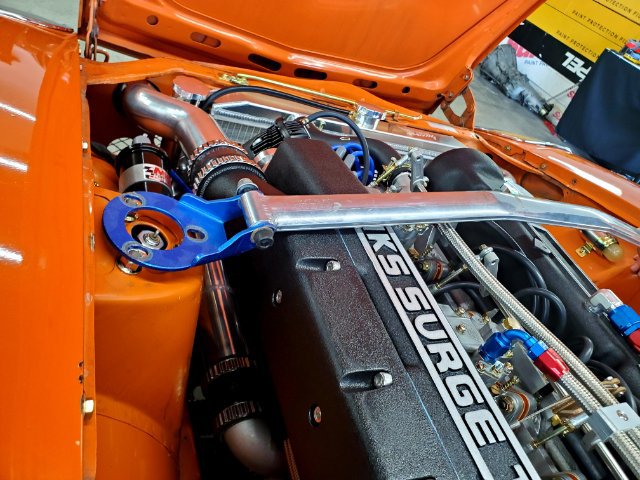
Looks great Ross, looking forward to seeing more updates. Do you have anymore pictures of your AC setup? Also not sure if it matters as it all articulates but should the heim joint on the alternator be towards the front of the cast tab?
-
AME complete chassis '77 280Z
Dat73z replied to lifeprojectZ's topic in S30 Series - 240z, 260z, 280z
77ft lbs into aluminum doesn't sound right for a 1/2 sae fastener. I took a quick look online and found this for 6061 T6: https://www.wermac.org/bolts/bolts_bolting-torque-tables_stud-bolts_flange-bolt-up_table4.html I would call Wilwood and ask. I used to be an ME and had lots of books around this. I'm sure if you searched around, you'd find the table for your material. Here's another for 2024 t4: https://www.engineersedge.com/torque_table_sae.htm For something as critical as brakes call the OEM. -
This morning I installed my bmc heat shield. As with everything else on this build clearances are ridiculously tight but it clears and works great. The bmc which was scalding hot to the touch after boost sessions is now just warm. The double layer design with an air gap really works well. I also drove over to another local Z guy's shop and found out the cusco front strut brace won't fit. Actually looking at all the aftermarket options I don't think any of them would fit. I think I'll attempt welding something up since I haven't really touched the tig since I made the oil cooler brackets.
-
I've seen them on ZCD and ebay. Didn't realize this type of failure was so common.
-
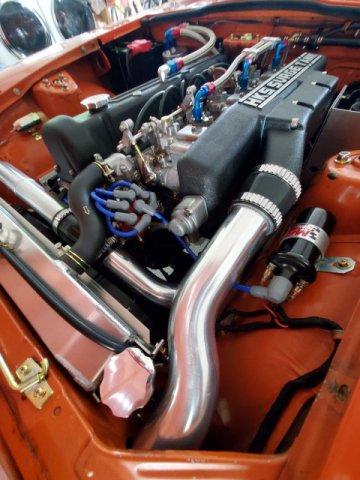
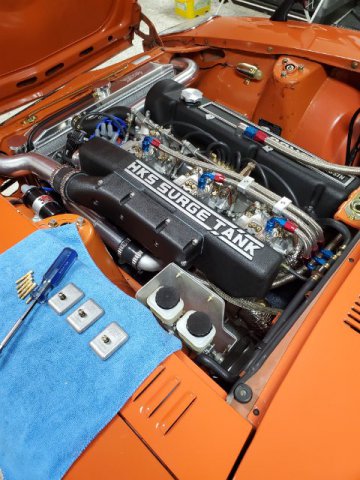
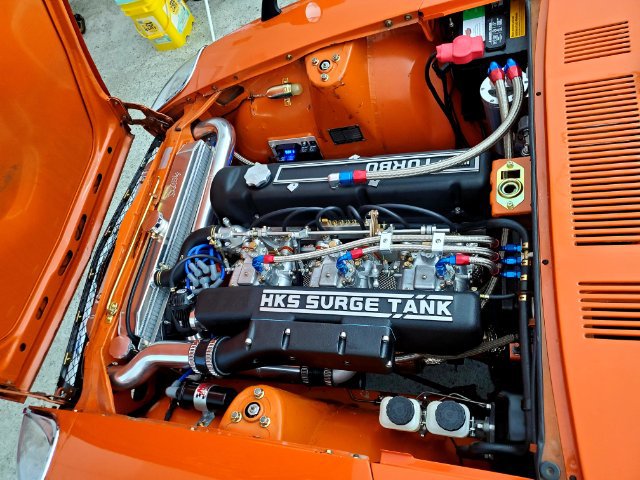
A couple of notes which I found interesting. One byproduct of having the triples enclosed by the surge tank along with all of the charge piping, turbo and air filter is the smell of raw fuel like you'd get with open trumpets is significantly reduced in the garage even after a hot shutdown. My wife welcomes this change. Also I jetted for NA with afrs 11-12 across the board. With the type 2 surge tank, I've noticed the afrs drop as rpms climb. @ 6-7k rpms what was mid-high 12s/low 13s NA is solidly 10afrs on boost. The rpms climb so fast in 2nd and 3rd gear I'm not sure if I want to attempt to pull fuel or wait for the dyno. Cruise @70mph is 11-12afrs.
-
Realized I haven't updated this thread in a while. I've been continuing to tune and I feel that I've got it 90% of the way there. This thing is crazy. The turbo starts spooling right off idle and the way it picks up speed is insane, and I'm only running 10lbs right now. Drivability is excellent since it's basically building boost right off idle/cruise. Next steps are to get this thing on the dyno and really get it dialed in. I especially want to get the timing curves dyno tuned as I'm running super conservative timing.
-
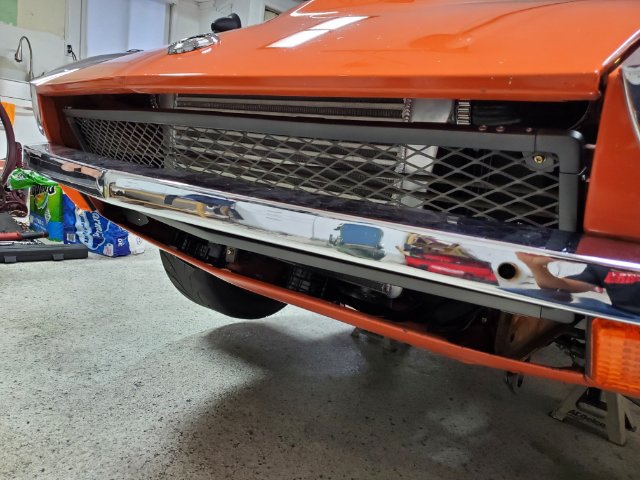
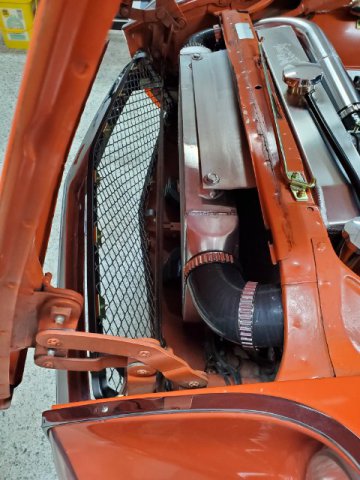
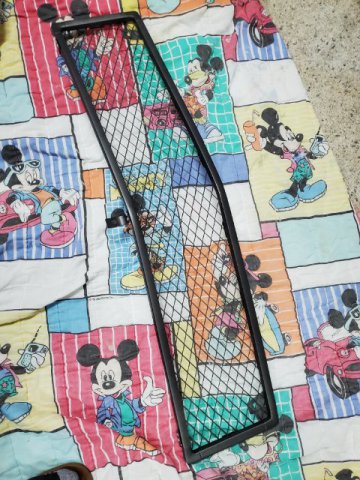
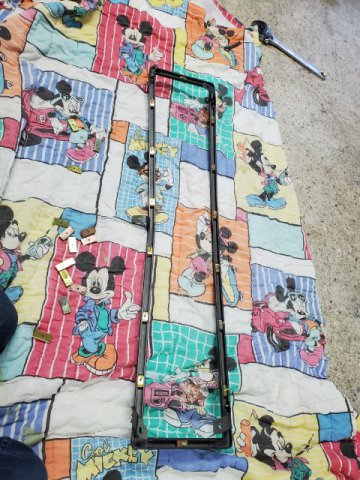
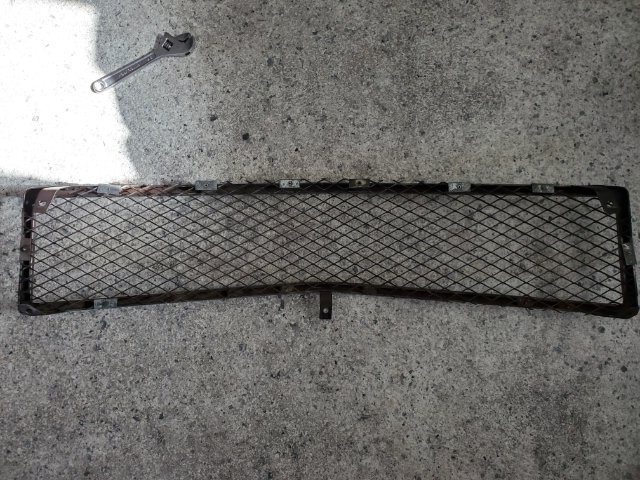
I haven't had much time to work on the car this week, but fortunately we're coming up on a long weekend. I was able to finish restoring the Fairlady Z grille which has been sitting for far too long and mount it up to ensure everything cleared the setup. If you ever get a chance to purchase a poor condition JDM grille for cheap thinking you can save some money restoring it- don't do it. Even paying a few hundred more will save you days of labor welding, sanding, painting, plating, and material costs.
-
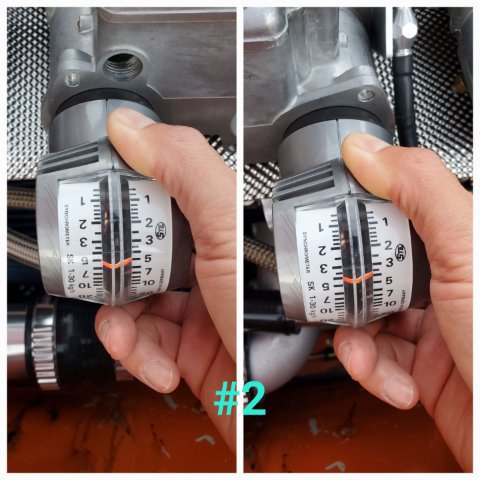
Yesterday I got everything dialed in a bit more with the tune. Even with the slight imbalance the engine idles smooth so I think I'm going to wrap up the jetting and work this next couple of days to get the surge tank on and start boosting. Someday in the future when I take things back down for another service I'll play with the shafts and butterflies a bit more. A lot of tinkering but getting closer.
-
So I got everything back together last night and went for a few long drives. Unfortunately it seems I have some bent plates and shafts. I have the same/close imbalance readings. In conferring with my friend who rebuilds and tunes sidedrafts, a 1-2pt difference on the flow gauge which is what I see isn't really perceptible to the eye. Really delicate stuff I guess so I've ordered some new shafts and plates from Japan. Lots of global delays nowadays due to supply chain and the war in Europe so hopefully I won't be waiting months for that. I've heard horror stories where people have been waiting for arp hardware for more than a year at this point. In the interim since the afrs are good and the cooling system is working well, I'm going to start getting the surge tank back on and boosting for a bit.
-
Another busy week but I've been putting 30 mins or so per day into the turbo build. My jets came in so I put those in. I wanted to richen up the top end a bit and pull some fuel from the midrange after swapping to f2 emulsion tubes. So 1 size down on the mains, 2 sizes down on the airs. My engine seems to like the f2s more than the f16s I had prior perhaps due to my cam profile/compression ratio/venturi sizing. I also adjusted the valves to ensure airflow between cylinders would be balanced. It was interesting that almost all of the valves had fairly limited/reduced clearances. From some research perhaps this is due to the valves wearing into the seats after a few hundred miles. I'll be sure to check again in a few hundred more miles. Shooting for this weekend to get it all back together.
-
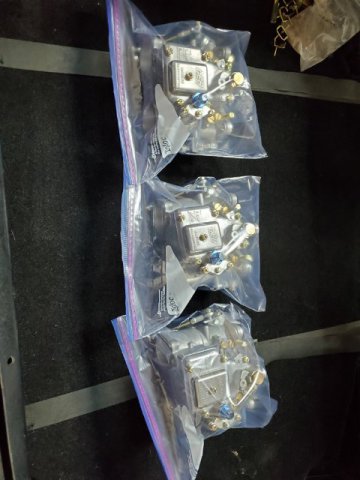
Tonight I got all carbs sealed and cleaned out. I feel pretty good about the butterfly and shafts having inspected and done the tap test on all but the ultimate test will be running again. I'm going to give them a solid few days for the sealant to cure this time and get them back on later on the week.