JMortensen
-
Posts
13742 -
Joined
-
Last visited
-
Days Won
68
Content Type
Profiles
Forums
Blogs
Events
Gallery
Downloads
Store
Everything posted by JMortensen
-
The Nissan clutches are thicker than Gary's clutches. Run 4 of his with the 2 stock Nissan clutches and that should get you in the ballpark. If you did it the other way, I think you'd have something like .020" thicker clutch stack. You can double check in the other FAQ thread about adding clutches. I just PM'd this to RebekahsZ, but might be useful for others too: There's two interrelated things going on: 1. Preload friction: This is the load on the clutch pack when you're off the gas. It has an effect on the total lockup also. 2. Clutch friction: By installing the extra clutches you're adding A LOT more surface area for friction to be generated. If you do that, then I don't think the extra shimming is really necessary. Without having tested it, I would think that you would have WAAAAAY more lockup with the extra clutches than you would with the stock unit shimmed to 100 lbs. I think of it like a single disk clutch that a street car uses vs a triple disk NASCAR clutch for a transmission. You can run a super tight single pressure plate where you are basically doing a leg press with your left foot every time you switch gears, or run a triple plate with very light weight pressure plate springs, and the multiple surfaces will still hold down a ton more power than the single.
-

Caliper bolt spacing?
JMortensen replied to philip1's topic in Brakes, Wheels, Suspension and Chassis
3.5" -
There is no advantage to a fuel cell other than they are less fire prone, and the disadvantage of needing to fill it up through the hatch is a big one. The stock tank is probably 15 or so lbs lighter than the cell too. I swapped to a cell because I will have this car on a road course and the cells are safer, and because my stock gas tank was leaking and I had tried to fix it a number of times. I think it was leaking at the seam. I'd follow the typical LS1 swap advice for yours. I think the Camaro tank is pretty popular, and I'd guess that is because it is less hassle. For removing the spare tire well, you can do that in two ways: either drill out the spot welds around the top of the tire well or cut the sheet metal out around the frame. If you don't need to do a bunch of modifying to get the tank in, I'd drill out the spot welds. That would be really easy to cover compared to what I did.
-
Beta makes the only subaru stubs. Mine were shortened shafts for the Z31T swap.
-
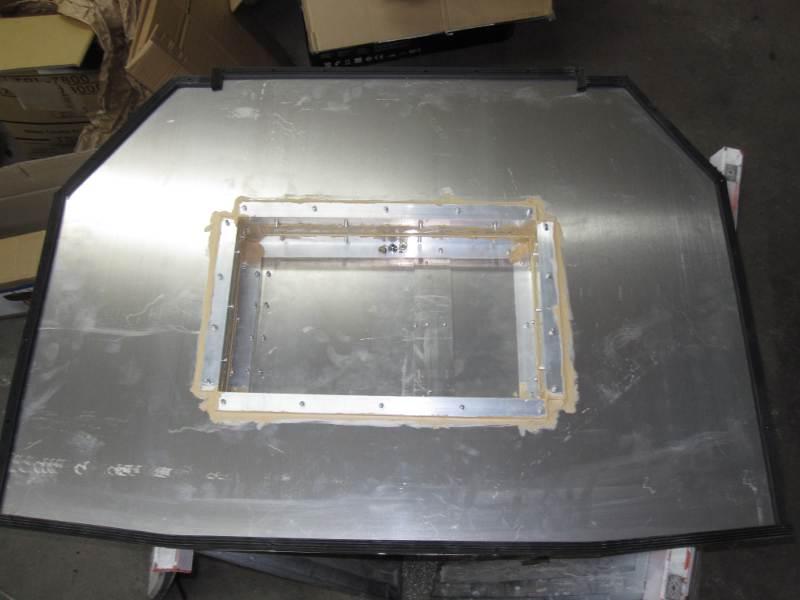
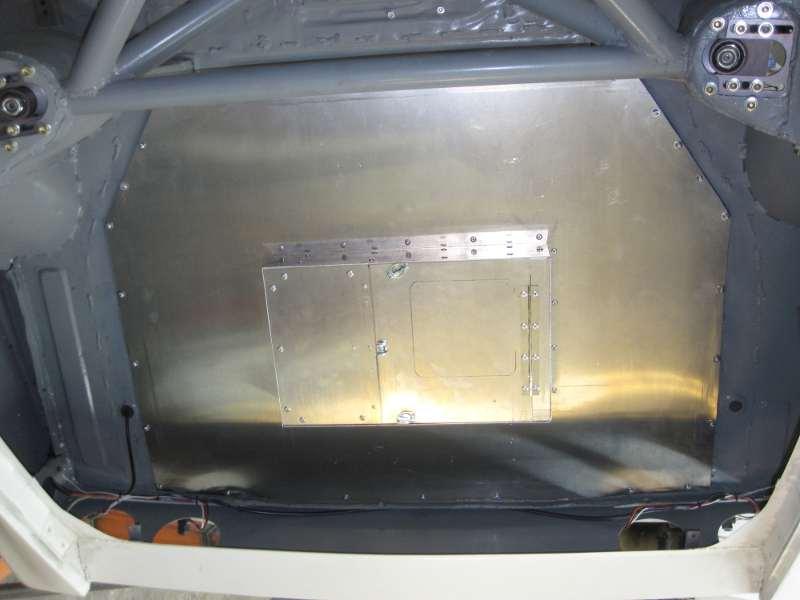
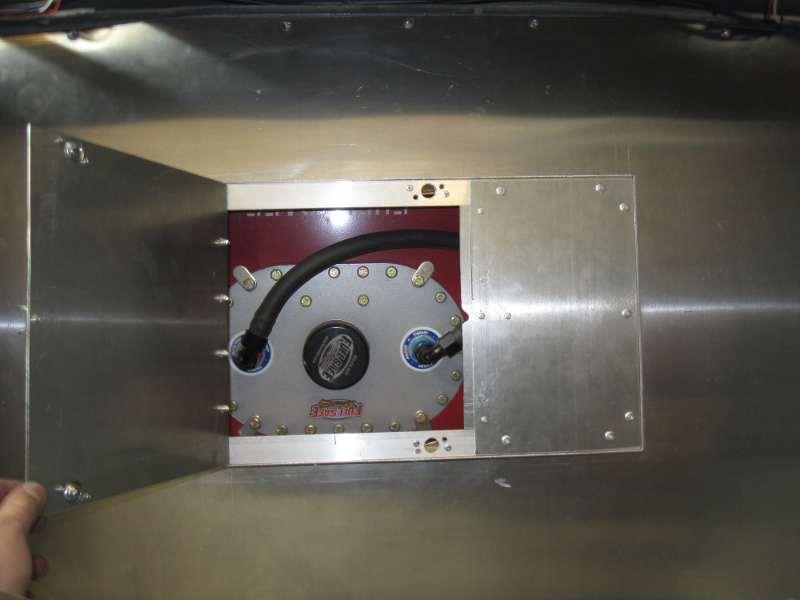
Thanks! It's just a one piece door, but I wanted it to be big enough to get to the fittings if I should need to, and the Moroso cover was too small for my liking. The pump is external (carbed 5.3L) and it attaches to the frame for the cell, so if I need to get to that or the filters, I'll have to go under the car, but they're easily accessible.
-
Finally got around to doing my fuel cell cover. I had bought some .030" AL and started on it, then decided it was too thin and just let it set there for a year or two. For my next attempt I got some .062" AL sheet and some 1x.062 angle. I cut out the hole for access and intended to use a Moroso fuel cell access door. I pop riveted the raised box together. Tough to do that anything close to tight, so I used some seam sealer on the inside. Then I went to install the Moroso access door and it just seemed too small, so I put it aside and decided to make my own door. I used a small piece of piano hinge from the hardware store and a couple of spring loaded wingnut dzus fasteners. Actually tried a hasp type latch first, but when I pulled it shut it would open the top panel about 1/8". Added some hardware store peel and stick rubber weatherstripping to seal the cover to the chassis, and put in a bunch of 10/24 nutserts and screwed it in. When you use the nutsert tool the threads don't stay centered, so on a few I really had to force the screws in, but it looks OK and I think it's sealed up pretty well, and that's what I was really concerned about. If anyone is interested in the door, they run about $50 new and I'd let it go for $30 and I'll pay shipping.

-
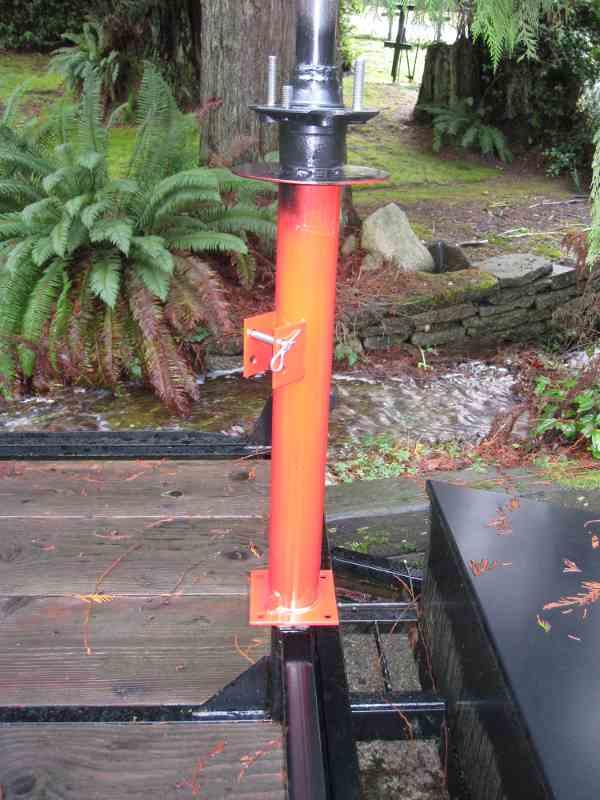
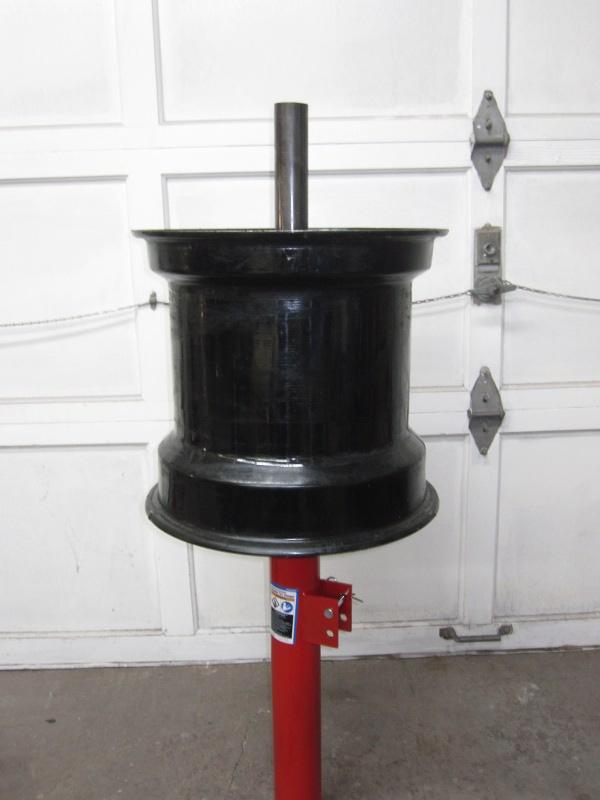
Did the bottom today and made a mistake. I was concentrating on getting the post squared up, and neglected to notice that the bead breaker is coming off at a 45 degree angle. I figured there might be some mods to the breaker anyway, so if necessary I'll cut the mount off and move it or cut the square tube off the bottom, clock it 45 degrees, and weld it back on. Hardware stores don't have this 2" square tubing, and rather than order it online, paying for shipping and waiting or driving all over town, I called the place that I bought the trailer from and they sold me a piece of 1/8" wall for $5.
-
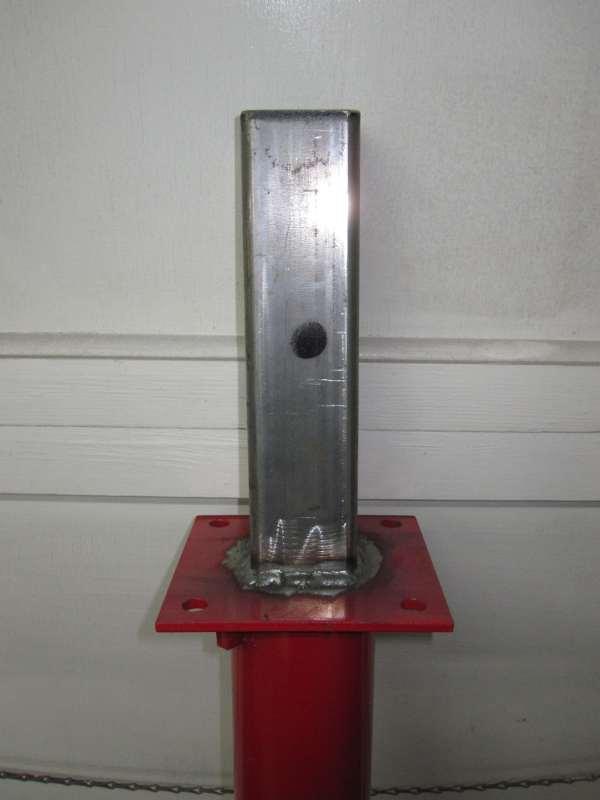
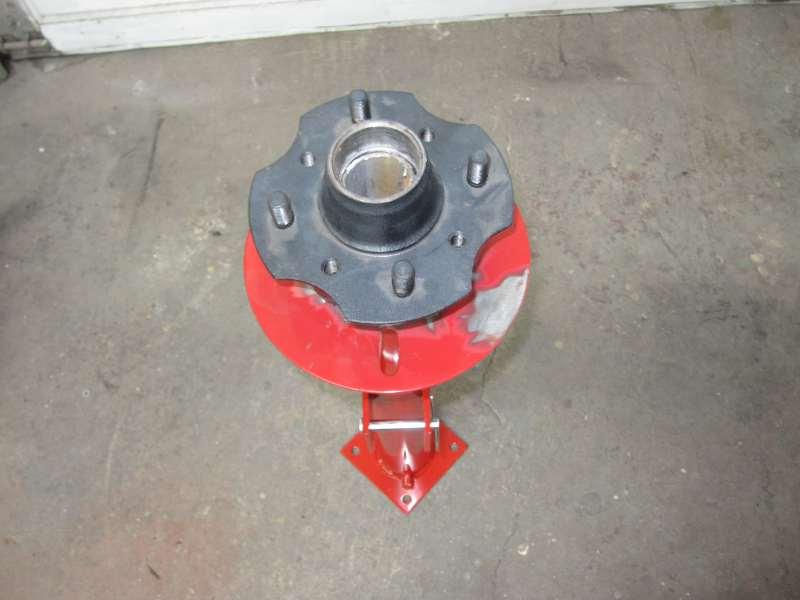
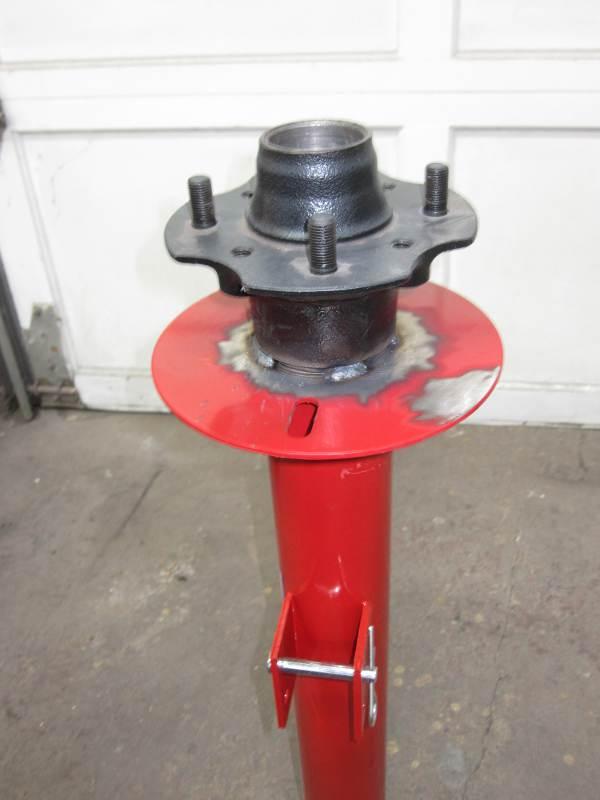
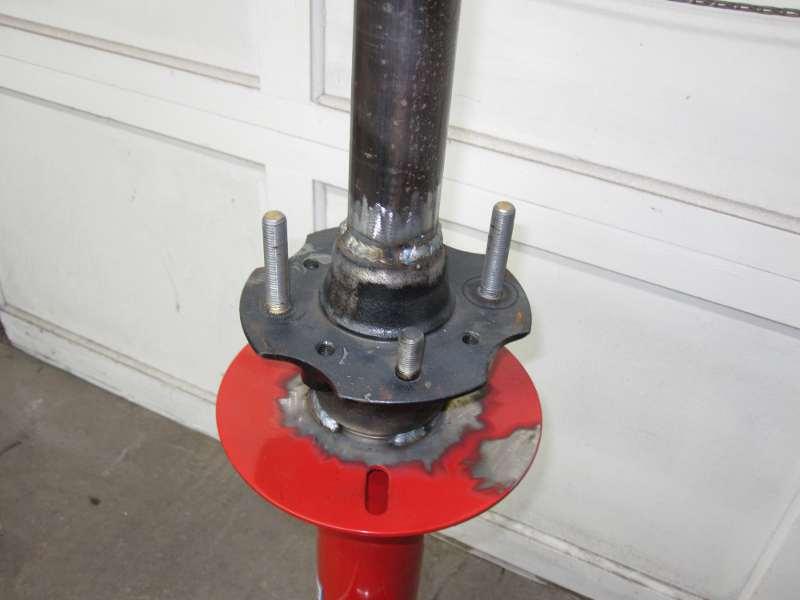
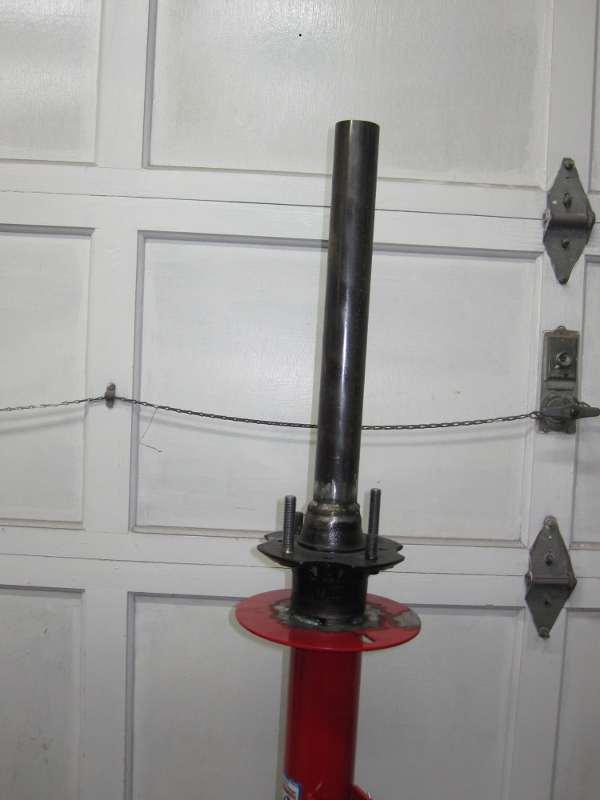
I was concerned about finding a shop that could put tires on my 15x14 wheels. Cary suggested that I go get a Harbor Freight tire changing machine and mod it to work. At $39.95 and with the prospect of not having to pay for tire changes in the future, I decided to go for it. I bought the machine last night and started looking at it to see what I had to do. Cary mentioned using an old hub on it, so that was the first thing to try. I have a bunch of old hubs so that wasn't an issue. The hub wouldn't slide onto the tube, because the stop for the outer bearing race is just a little bit too thick. With a die grinder and burr I was able to open up the center hole until it just slid down the tube. I cut the tube right where the stop was so that it didn't interfere with the top tube that I would install later. This allowed the top tube to sit on the bearing stop, providing a nice square surface. For the top tube I took a look around the shop and found that an old 1.75" piece of roll bar tubing fit pretty darn nicely into the end of the hub. It's not a perfect fit, but snug enough that welding it in wasn't an issue. I cut the tube to a 16" length which will give me about 5" over the rim face to use the tire mounting bar on. After setting it into the hub, I checked to make sure it was straight by measuring from the rim edge to the tube at 4 points, and tacked it in place. Double checked again to make sure it was still straight, and then welded it in. All I have left to do is get a piece of 2" square tube and weld it to the bottom of the unit, and perhaps drill a hole for a hitch pin. The plan is to plug this into the winch receiver on my trailer and use it right there. I was kind of skeptical at first, but having gotten this far this looks like it will work out nicely, and this is a pretty easy modification to do if you have the parts and a welder. Cary suggested using the No-Mar tire mounting bar. I haven't ordered that yet, will probably do so relatively soon. Since I have wheels and tires separated, I might try to install them without the No-Mar tool. Sometimes if you do it right and use enough lube you can get the tire on there without using the lever. Also bought the HF static tire balancer, figuring that should be good enough for autox usage. Tire mounting machine: http://www.harborfreight.com/portable-tire-changer-69686.html
-
Tube frame repair? Cage and front clip replacement
JMortensen replied to rayaapp2's topic in Fabrication / Welding
Scans of those pics used to be in the download section, I think bjhines put them there. A few of us used them to draw out roll cage designs. Might check to see if they're still there. -
I remember you messing with those a year or two ago Justin. How could you install them without a gland nut though? Seems like you'd need something to hold the top of the strut tight within the housing, otherwise all of the stress would be handled by the stud at the end, not good.
-
I hope it works out.
-
So that's it?
-
My understanding is that the larger the piston the more fine tuned the valving can be. Is that wrong? Looking at the flyer, 6" stroke is more than I would want and linear valving is also not the best. John, you said the other option was 36mm, I believe in that size they have adjustables and they have digressive pistons, remote reservoirs, etc. You going to have all that figured out for us too?
-
NA 3.1L=>head & camshaft questions. No shortcuts, max
JMortensen replied to zredbaron's topic in Nissan L6 Forum
If it doesn't ping and you can get a decent amount of advance (~35 degrees total) don't use higher octane. I'd suggest that maybe different pilots might help with the low rpm issues. The pilots should be 1.25 to 1.5 turns out (even on all of them) and if the car is lean, then you should go with a larger pilot rather than turning the adjusters out farther. If you have a small cam, you need big pilots. Most people go with the Schneider stage III, which is not big enough for Mikunis IMO. Stage IV is better, but really, I'd opt for a regrind rather than using anything Schneider. You should probably start your own thread or post in one of the Mikuni tuning threads, as this info really doesn't pertain to zredbaron's thread at all. -
My Dream LS7GTZ.......project underway
JMortensen replied to cobramatt's topic in S30 Series - 240z, 260z, 280z
You can buy a sheet of 1/8" Lexan for ~$80 or so and then cut out the side and rear windows. The stuff is really easy to cut with a jigsaw, just use some sandpaper to clean up the edges and you're done. You can put it in the stock quarter window frames, or just attach it with some angle aluminum if you prefer (the quarter window frames are pretty heavy). You'll need retention straps for a rear window (1/8" strap aluminum is the usual) and windshield tabs in the windshield. bjhines did a really nice job with his rear window, if you search you'll find it. You really don't want Lexan in the door windows if you intend to roll them up and down, and you don't want it on a windshield if you're going to need to use the wipers. It scratches easily, and discolors over a couple year period, especially with exposure to chemicals. -
Let it go Jon... let it go.
-
Tokico inserts too short??
JMortensen replied to Datz350's topic in Brakes, Wheels, Suspension and Chassis
The fronts shouldn't have a spacer. -
Woodward power steering project
JMortensen replied to JMortensen's topic in Brakes, Wheels, Suspension and Chassis
Well, I learned something today! Inner tie rods are adjustable. Just back off the locknut, turn the main nut down until the slack is gone, and tighten up the locknut again. Good to go. -
Woodward power steering project
JMortensen replied to JMortensen's topic in Brakes, Wheels, Suspension and Chassis
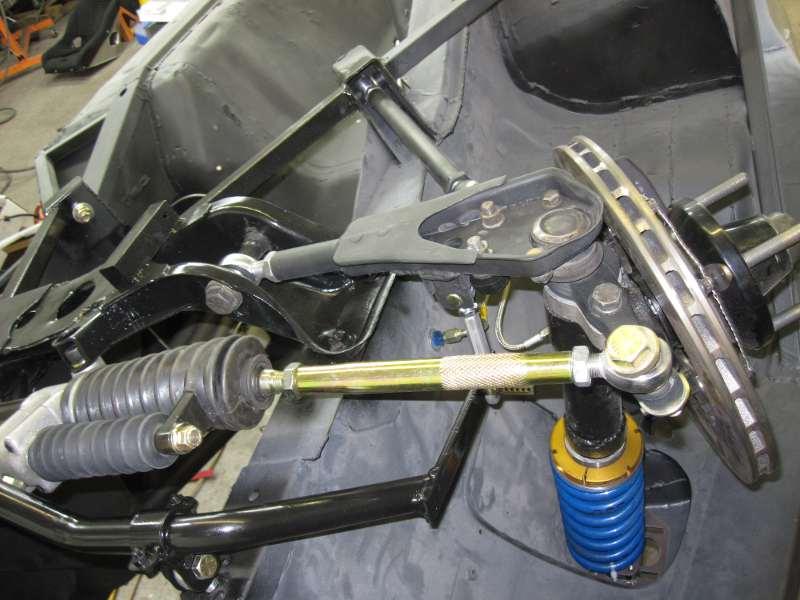
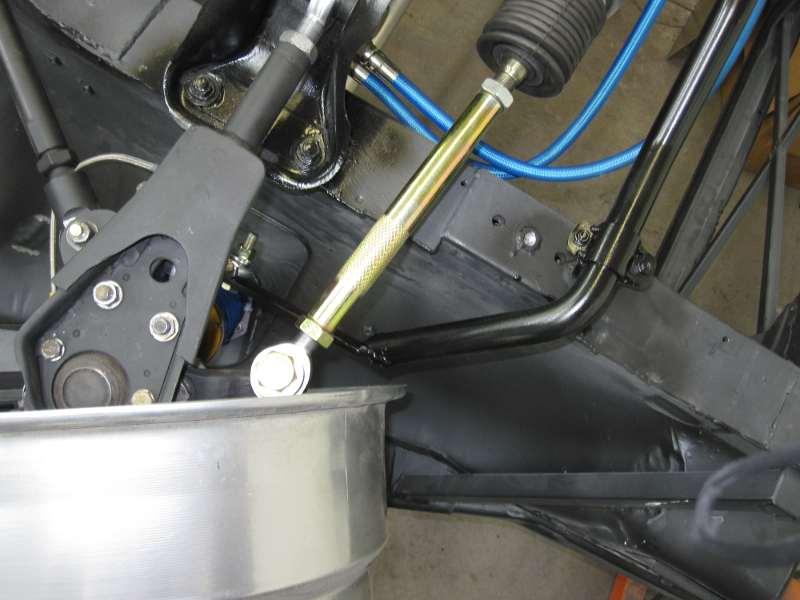
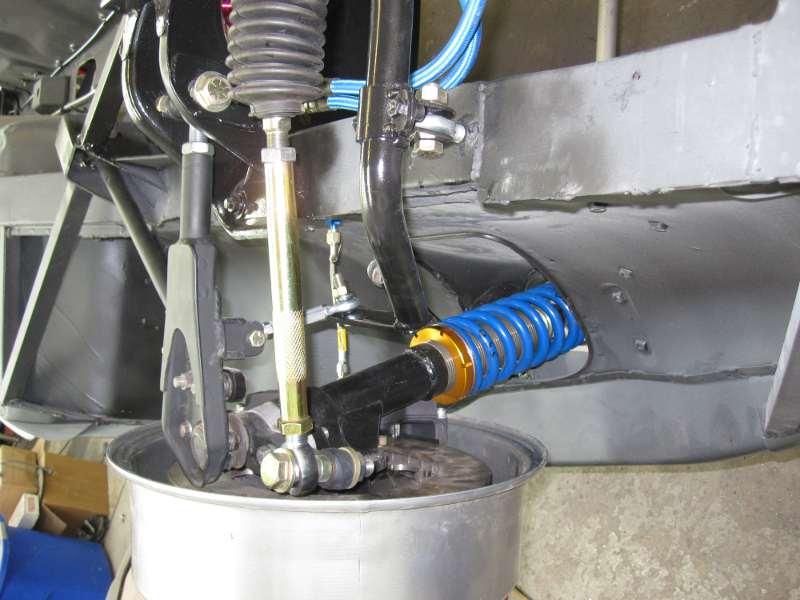
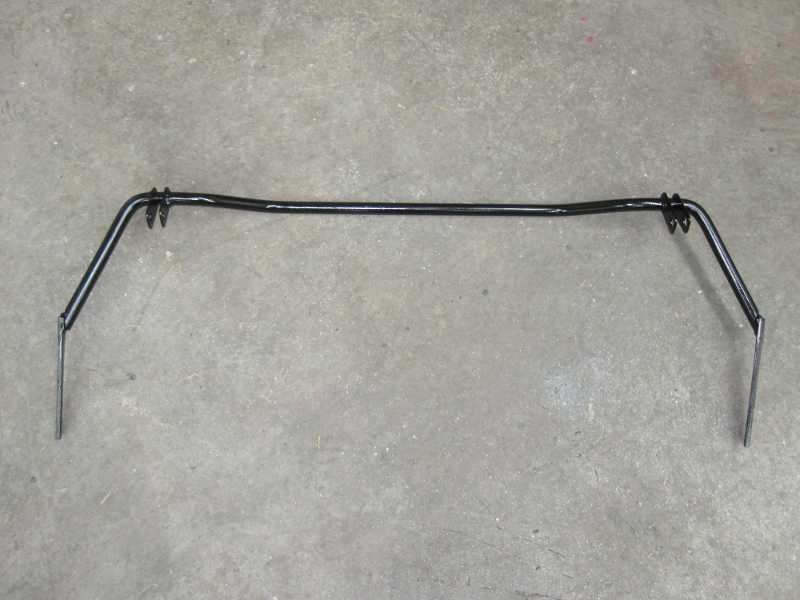
Maybe you can come watch it autox next year. You might even get a ride if I get around to putting a passenger seat in it (planning on it but don't have a 2nd seat yet and have a lot more stuff to buy, so it's down the list a ways). So here's the update on the sway bar(s). I got the stock 280 bar modded and had to cut the ends off of my old 1" bar to make it fit in the new location also. Serious PITA. Got it all in and checked for clearances. This diamond wheel is really the wrong offset. It's 3.75" offset and should be more like 4". Still there is about 5/8" of space between the wheel and the tire. I think that will be OK because the tires will be pretty narrow for the wheel width, 13" tread on a 14" wheel, so I don't think the sidewall will pooch out too far. If it does I may have to add rack limiters or wheel spacers. Hoping that it clears with no more hassle. In getting the thing all together I realized that my brand new inner tie rod on the LH side is loose and has about 1/8" slop in it. That's not cool. Have to check with Woodward and see if they'll help me out or if I just need to buy another one. The suspension is sitting on the bumpstops in the pics. You can see how little ground clearance there is going to be. I might actually have to run a longer external bumpstop to keep the splitter off the ground. We'll see.
-
Yes, that's the kind of side splitter I'm talking about. There are some generic CF side splitters appearing in the import tuner market. I think it is an idea with some merit but as usual most of the people are just looking for another carbon fiber doohickey to stick on the car. The second one is trying to pull air out from underneath. The blue car in the wind tunnel had something similar. I think this would work best if you had fender liners in so that there was a smooth path for the air from the engine compartment to the outside.
-
The new hotness seems to be side splitters. I guess the idea is that they create a vortex along the side of the car that prevents the air from getting underneath. My thought was garden edging on the pinch weld.
-
My Dream LS7GTZ.......project underway
JMortensen replied to cobramatt's topic in S30 Series - 240z, 260z, 280z
Ha! That's funny. Don't you think that it might entice people to break into / steal the trailer though? I always figured that with an enclosed I'd leave it plain white, so potential thieves don't know what if anything is in there. "I think she is the definition of HybridZ.........." The rolling embodiment of what this site is about for me, anyway. -
hood vents: ideas...
JMortensen replied to OlderThanMe's topic in Windtunnel Test Results and Analysis
Might need some stiff springs to control the height when the splitter gets close to the ground and becomes more effective. -
hood vents: ideas...
JMortensen replied to OlderThanMe's topic in Windtunnel Test Results and Analysis
It's worth buying as is Katz's Race Car Aero, but just FYI, the image shows a line drawing side view of a NASCAR front end (pre-COT) and the high pressure zone goes all the way up to the hood. -
hood vents: ideas...
JMortensen replied to OlderThanMe's topic in Windtunnel Test Results and Analysis
If you cut into the aluminum part then I think you'll reduce the pressure on the splitter by letting more of the air on top of the splitter divert to the radiator. I would think you would want a taller airdam if the goal was more downforce. If you have Competition Car Aerodynamics by McBeath, you can see how tall the high pressure area in front of a splitter can be on p.65.