AydinZ71
Members-
Posts
1073 -
Joined
-
Last visited
-
Days Won
27
Content Type
Profiles
Forums
Blogs
Events
Gallery
Downloads
Store
Everything posted by AydinZ71
-
Torsten was an autocorrect (odd?) oopsie poopsie. Acknowledged, it is Torsen. I thought it was just a fancy word for a helical-type LSD 🤷🏽♂️
-
@madkaw i have the same axles as Derek, and a 17’ 3.54 STI Torsten (helical). I believe they were 3.9 and a clutch-type LSD from 05-07’, then all the future models (until last year to my knowledge) were 3.54’s. you will need shorter mounting studs on the diff cover. Swap your OEM studs with the longer Subbie studs, or buy new from Zcardepot.
-
240z SCCA vintage race car, restoration
AydinZ71 replied to AydinZ71's topic in S30 Series - 240z, 260z, 280z
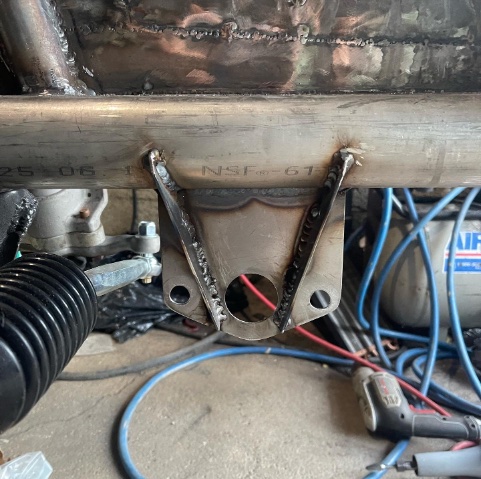
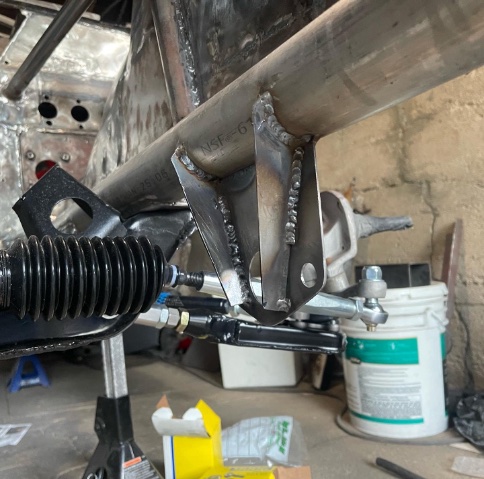
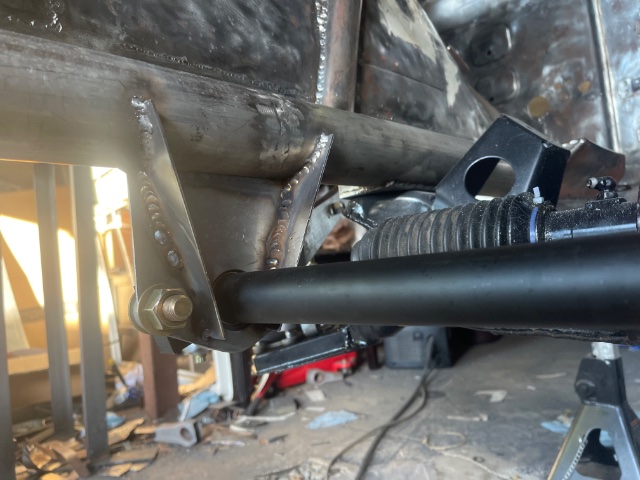
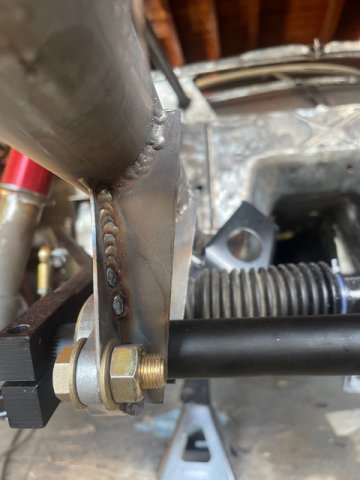
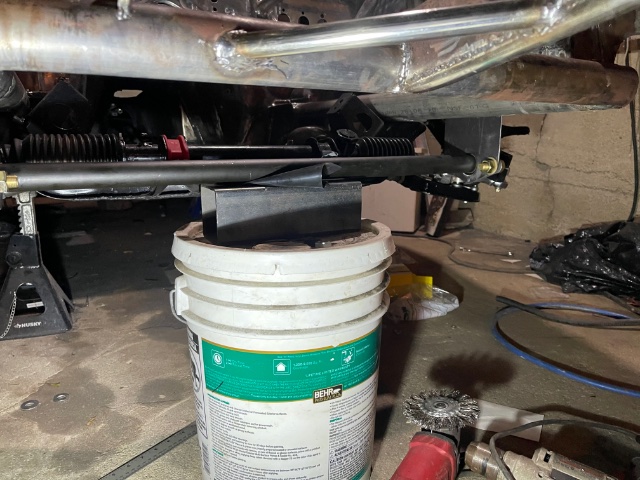
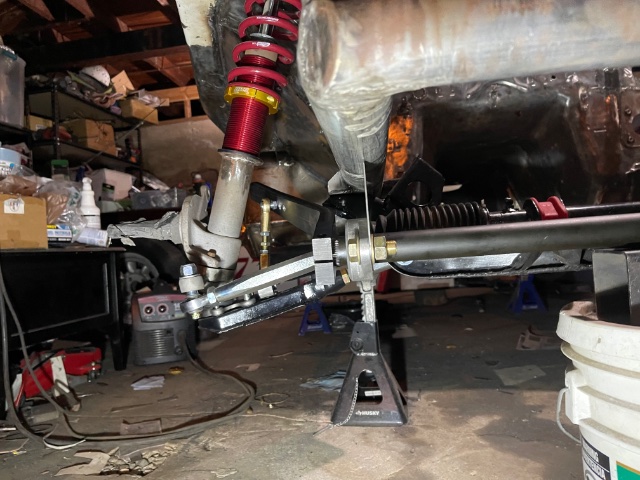
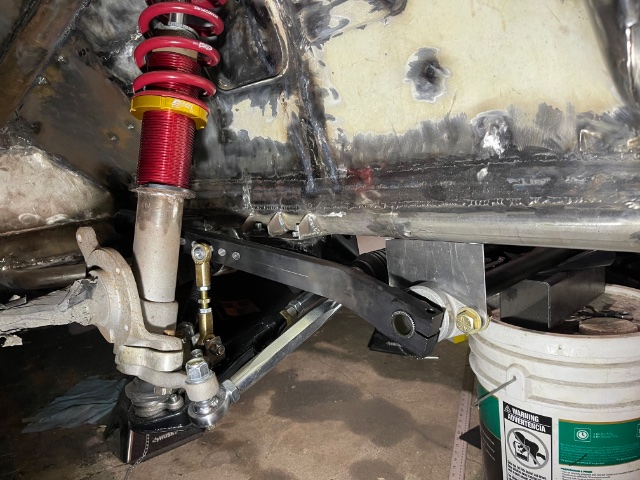
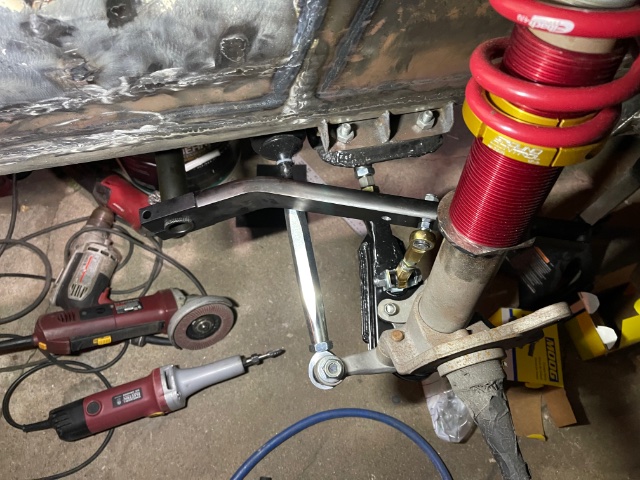
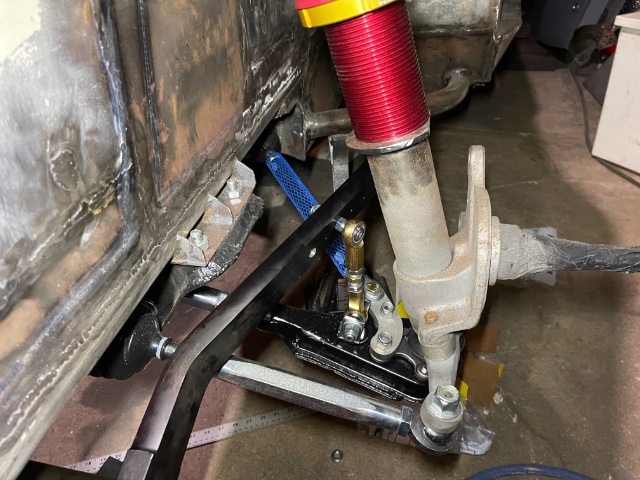
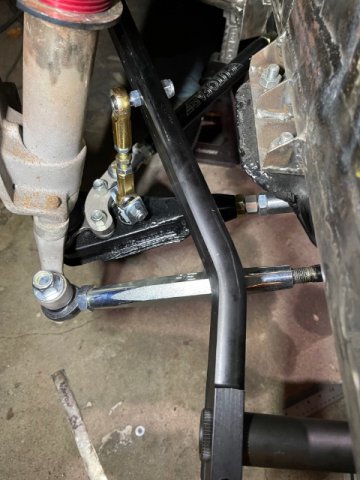
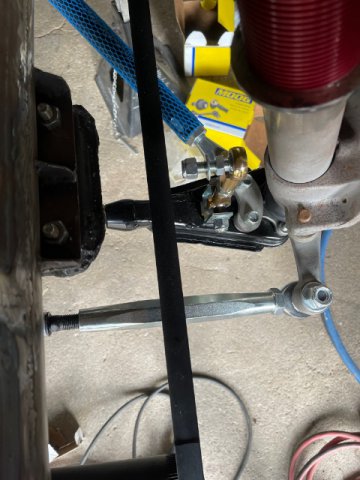
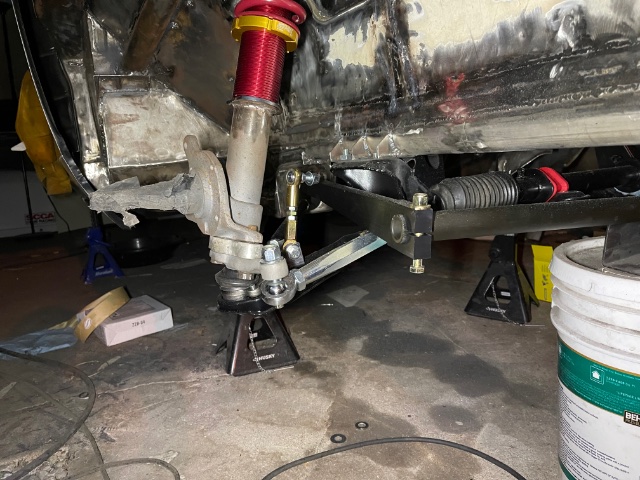
@tube80z thank you for all of the golden insight, as always Cary! i especially like the idea of having different end-link positions on both sides. I didn’t think about how that would work until you mentioned it! I plan to run the current setup and shake out the cobwebs before I worry too much about the transience of the bar resistance. What you describe makes perfect sense! I likely have several months of tweaking the suspension and engine before I hit the track, but I plan on buying several bars used as well (thinner and thicker wall thickness). Hopefully the bar o have now will be “broken-in” before I get to the track this summer. Since I had the whole suspension installed temporarily, I was able to weld the uprights to the frame with the bar attached. This ensured I had perfect alignment and zero pre-load in its resting position. After the uprights got welded to the frame, I added two 14/gauge gussets to each side. 90% of the resultant force should be up/down so this setup should do just fine. I may add one more horizontal to tie the bottom of the gussets, but have not made up my mind yet. time to disassemble the front suspension, get everything painted/coated, set it aside, and prepare the engine bay for primer. -
240z SCCA vintage race car, restoration
AydinZ71 replied to AydinZ71's topic in S30 Series - 240z, 260z, 280z
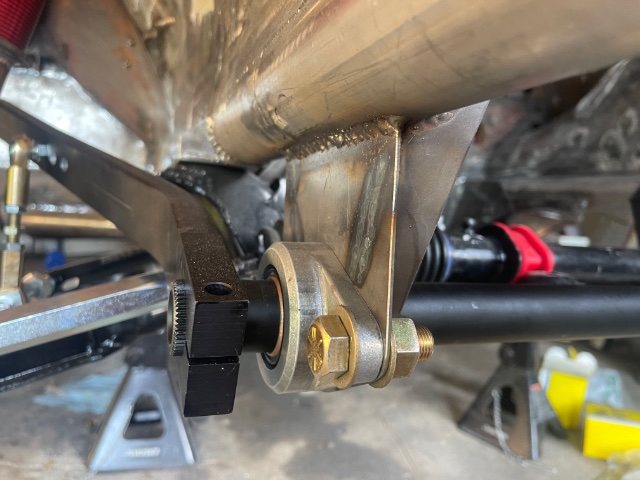
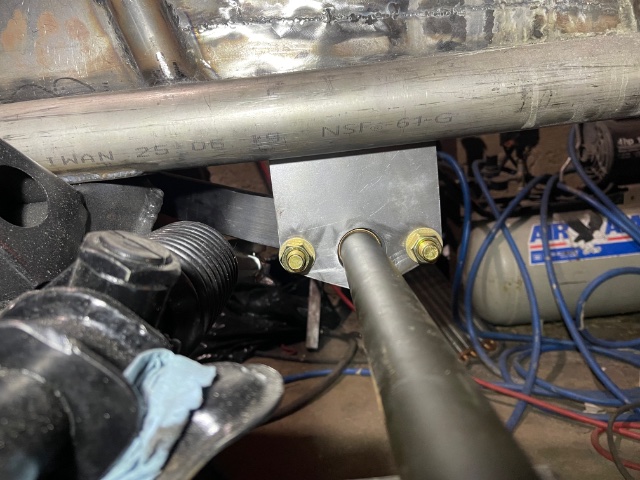
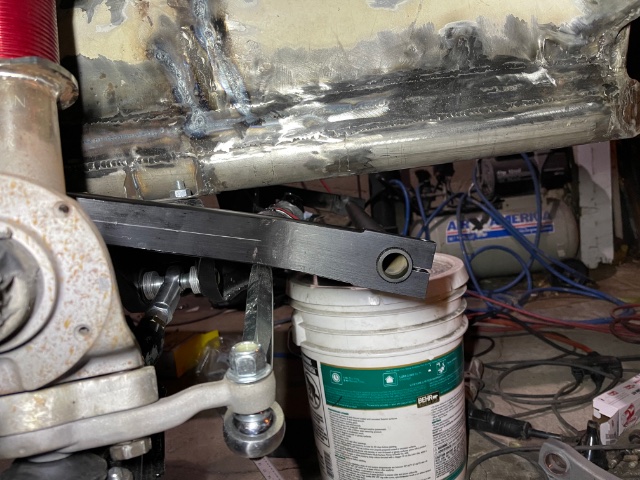
Okie dokie… progress is slow on account of having offspring and needing to work for a living, but the 14-gauge plates are done and mocked-up ready to weld. Once welded to the bottom of my stainless frame rail, I will reinforce the rear (engine side) with reinforcing to stiffen the mount. I’m happy with everything so far. As long as everything articulates as expected with the car on wheels, this should work out quite well! I feel no slop in the system, as the brass bearings are a zero clearance fit, and the end links are heim joints. PS: I downsized from a 36” bar to a 33”. Greg runs the 36, but this worked better for me. -
@Dat73z I wouldn’t mix-and-match regulation from different race classes/leagues for a street application. Never seen/heard of a clutch exploding on a street car, but a scatter shield is required in many race classes. you are allowed to route fuel lines into your cabin in my race class, and the previous owner did just that. To say that is any safer than the lines being in the tunnel is crazy. If you have a fuel leak, you do not want it anywhere inside the cabin, and fittings do leak from time-to-time. I removed all his cabin lines and ran a new steel hard-line in the trans tunnel, similar to what you have. I would have transitioned the fuel line from the top of the tunnel to the lower passenger side (similar to OEM) near the bellhousing. That’s what I’m doing. The top of the tunnel is a high-heat area thanks to the nearby exhaust, and the fact that hot-air rises. The closer to the drivers side bellhousing, the hotter it gets. Fire suppression is required in my race class. Overkill for a street car (just get a hand extinguisher), and would require a lot of fabrication work. in general, hard-lines are more reliable and safer (assuming you pick the right wall thickness) than a flexible line. Braided stainless is very resilient, but it’s still capable of leaks and still has an elastomer inside. like I said before, the two most important things for the fuel system (street) is they should not be physically touching your engine anywhere, and they should ideally be as far from significant heat sources like your exhaust. the firewall comment I made earlier… see those heater hoses? In a fire, they will burn/melt. Your regulator is not far, so if that is where a fuel leak shows up, you can see a case where fire/fuel can get into your cabin at the heater hose bulkhead. We are talking worst-case, unlikely events so I’m still not convinced they are deal-breakers for a street car.
-
The three outlets of your distribution block look a little close to where the valve cover & manifolds would be for an L-series. Is that what you mean? I couldn’t say they are “too close” though. In general you should avoid any penetrations in your firewall near where your fuel carrying components are, and most folks put their fuel instruments/filters/regulators on the passenger side of the car to avoid exposing them to engine heat. That way, if there is a fuel leak you may notice/smell it before it has a chance to ignite. You will always have at least one line going to your intake manifold/carbs, so that line just needs to avoid direct contact with engine and be a few inches above the manifold.
-
240z SCCA vintage race car, restoration
AydinZ71 replied to AydinZ71's topic in S30 Series - 240z, 260z, 280z
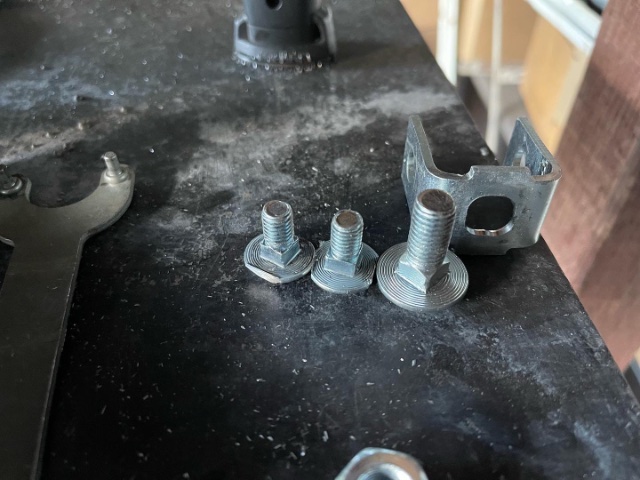
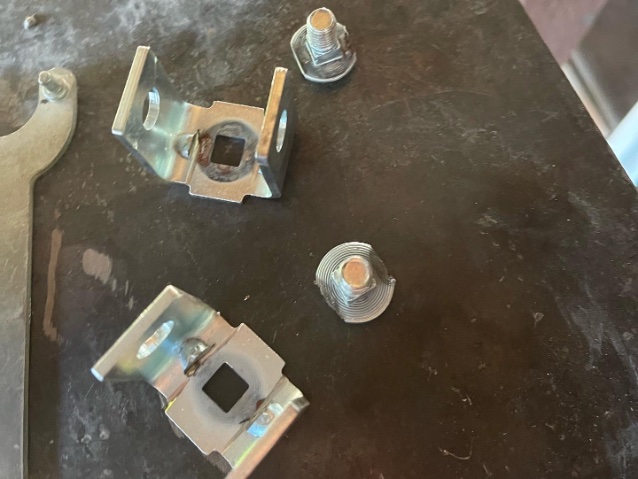
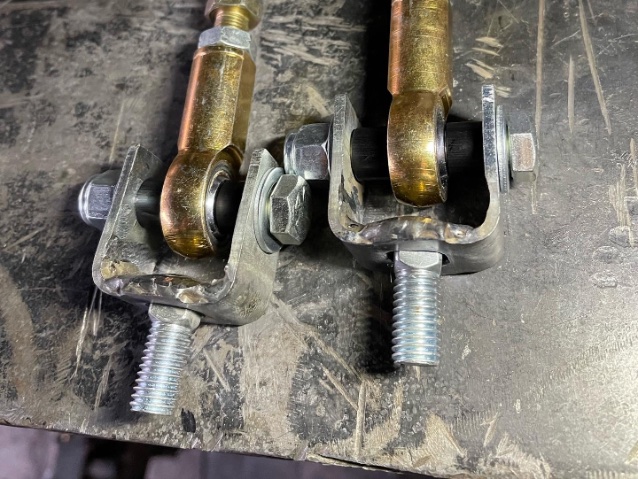
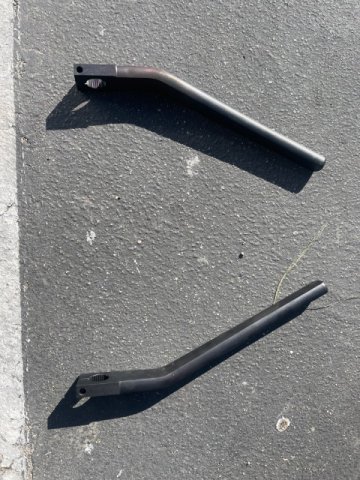
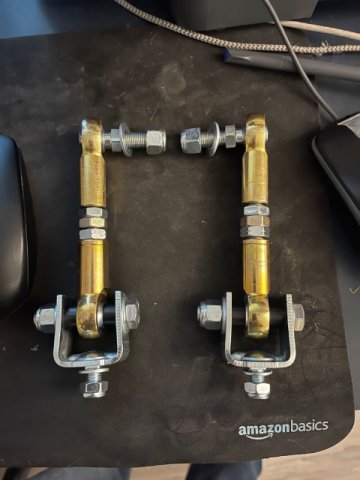
Thanks John! Clark! The more research I did, the more I became convinced it was a matter of will (on the part of the shop), and less a matter of technical feasibility. 6061-t6 just won’t bend… it will snap like a branch. Looking at tables, YouTube videos, and my material science book, heating to it’s annealed temperature WHILE still on the press is the key. If you tried to anneal the whole piece before bending, it needs to spend more than a day in the oven (at a whopping 950 degrees), slowly dropping the temperature to avoid hardening. This alloy is a tricky beast! It transmits heat so well and has so little heat capacity, that letting it cool in open air after heating is enough to kick-start the hardening process. The BMW end links are 10mm, with the exception of a dinky 8mm stud used to attach to the LCA. I’m sure it was a size restriction as a bolt-in replacement for the beemer, otherwise it makes no sense. I cut out the old carriage bolt and modified the clevis for a 10mm. Now I can get on with the mounts. -
240z SCCA vintage race car, restoration
AydinZ71 replied to AydinZ71's topic in S30 Series - 240z, 260z, 280z
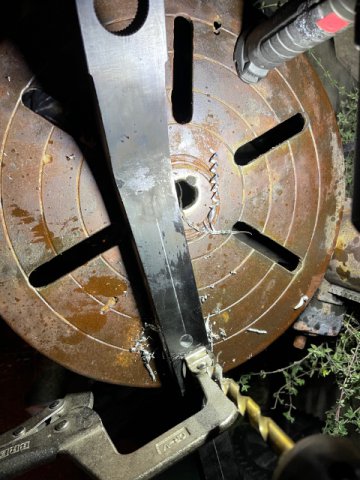
On my 20th try, I struck gold! Thank you to Jon and Clark for the alternate suggestions. I was about to return them for steel as Jon suggested. Clark, I decided against buying my own press for all the same reasons you thought of. The shop is called Bert’s sheet metal in chatsworth. They heated up the radius, annealed it, and it bent without any noticeable distortion. After some test mock-ups, drilled some holes and voila. Now all that’s left is welding the attachment to the chassis with the aluminum/brass bearings to hold the bar. -
240z SCCA vintage race car, restoration
AydinZ71 replied to AydinZ71's topic in S30 Series - 240z, 260z, 280z
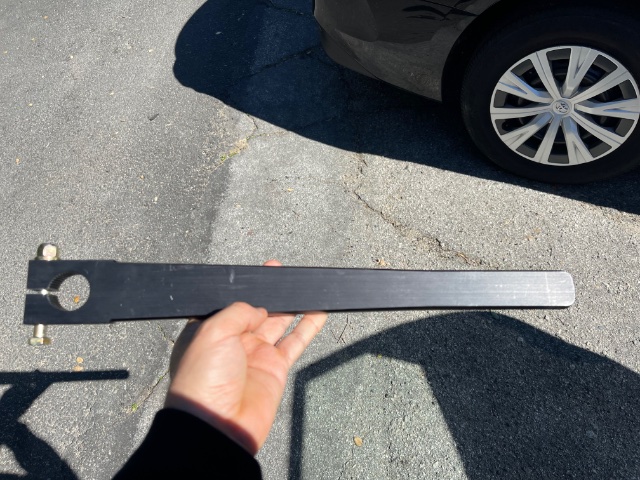
Man I have really struck out on finding a way to get these aluminum sway bar arms bent. Had one shop lined up, but once they saw the part they declined (didn’t have the right die). i did do a ton of research into bending 6061. Without a 7X radius to thickness and the right tooling, it is very hard to bend in it’s tempered (t4, t6) states, so you HAVE to anneal it. The tempered states have a tight gap between yield and ultimate, so they tend to crack. Heating the part as you apply pressure will reduce the temper. There are some tips on how to get to the annealing temp, but they are difficult on something as thick as 3/4”. I might just have to buy a HF press and give it a try myself -
IMSA GTU vintage racer build
AydinZ71 replied to clarkspeed's topic in S30 Series - 240z, 260z, 280z
Makes total sense! He does have a remarkable bullshit radar, after this many years of experience. I’m surprised he still has patience for me. I too have budget limitations, which explains why you and I are doing most, if not all of our own work. You certainly have more experience than I do, so I’m certainly learning from you too. It looks like you are going to have one heck of a car! -
IMSA GTU vintage racer build
AydinZ71 replied to clarkspeed's topic in S30 Series - 240z, 260z, 280z
@clarkspeed thanks Clark. Excited to see your chassis progress. I have picked a wall OD from Greg’s experience so it’s a good starting point before she is all together. fi ally found a shop to bend my AL arms too. In your arrangement, it looks like having the arms straight works just fine? -
240z SCCA vintage race car, restoration
AydinZ71 replied to AydinZ71's topic in S30 Series - 240z, 260z, 280z
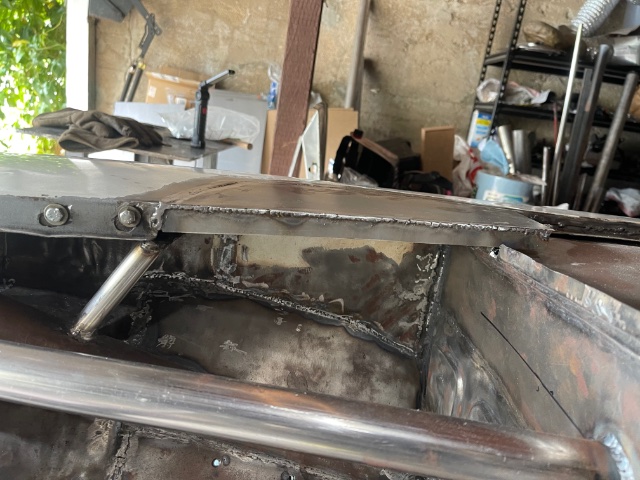
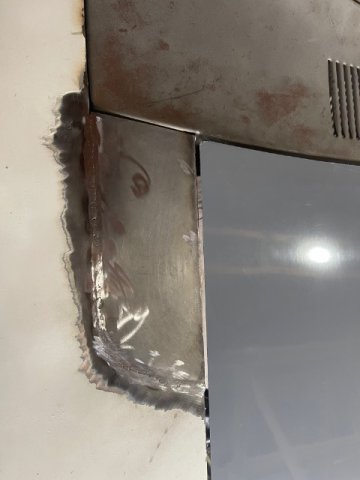
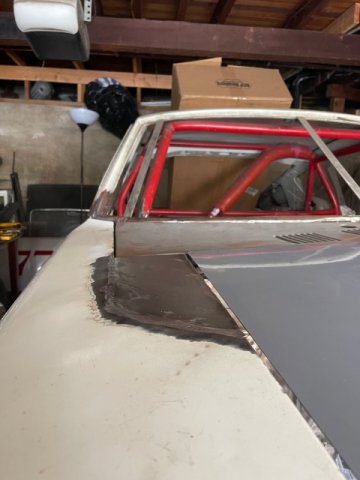
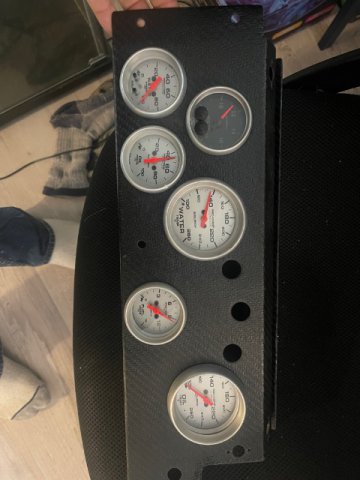
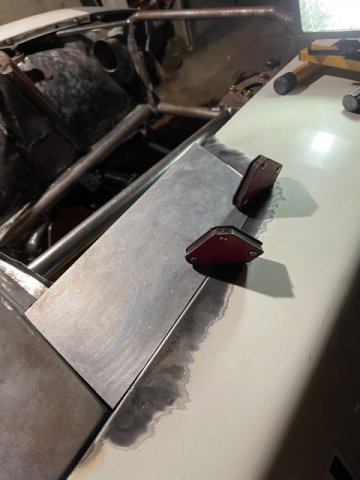
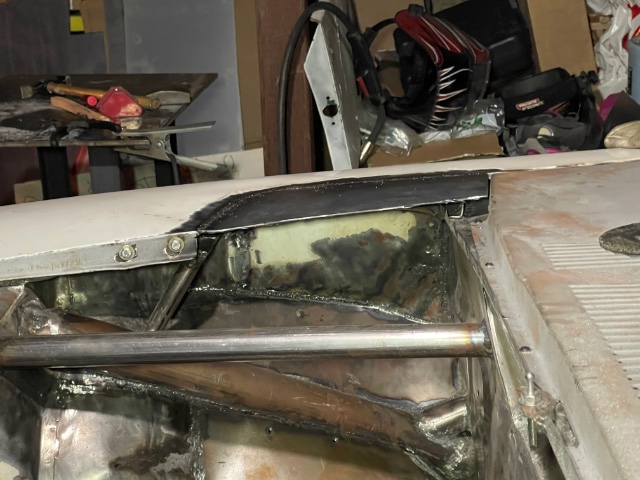
@JMortensen ah cool! I figured from the emphasis on spline count that the industry has more or less standardized. Since they only sold one OD for the “standard” bar, I also assume this was for swapping convenience. What I’m really missing is tangible experience on how critical the sway bar is in the overall handling of the car for a road coarse. I have a bit of experience on just how important it is an autoX, since you are constantly changing directions. I need to get on a track! @tube80z absolutely! I have not experienced swapping out bars with different spring rates myself, but it makes total sense. I assume this has to be based on “feel” after a test drive, since it’s hard to factor in so many variables ahead of time. Precise length of arms from mounting hole to bar, bar material and dimensions (AL in my case), how orthogonal the forces from the links are relevant to the radius of the arm/bar, so on… I have noticed some great deals on eBay race shops, in my case for instruments. I got this (pic) CF panel complete with auto meter electric gauges (most of which I need) for $200. Two gauges would have easily cost that much. I just need to buy the sensors/transducers, which are also sold at deep discounts. Updates, finished the silly inspection door delete. I still have steel fenders so this was as easy as welding 20-gauge to the fender, adding an 18-gauge stiffening rib to the underside, and checking contour and fitment. Only saved me 1lb overall, but my issue here was fitment of the OEM doors, not weight. This ended up eating my whole weekend though, but now I can toss the fenders asside and get back to the bar. -
240z SCCA vintage race car, restoration
AydinZ71 replied to AydinZ71's topic in S30 Series - 240z, 260z, 280z
PS: anyone else have trouble getting one side of the urethane rack bushings on? Wtf… way oversized. Took a razor blade to it for many minutes and it’s still a PITA. I think these are prothane. Dumb. -
240z SCCA vintage race car, restoration
AydinZ71 replied to AydinZ71's topic in S30 Series - 240z, 260z, 280z
@JMortensen thanks as always Jon! So I still have not gotten to trying to bend the AL arms, but more on that later. At 3/4” thick and 1-1.5” wide where it meets the link, I agree it’s plenty stiff to resist whatever motion my 350lb springs don’t already resist. And as you said, if they deflect more than I want, I can just up the wall thickness of the sway bar itself. Where did you get your bar from? Speedway engineering makes these bars for dirt, autoX, even nascar, and for vehicles much heavier than a Z. In fact, the bar looks to be the beefiest single suspension component on the car. I am optimistic. the end links I got are a Clevis on the LCA side and a cantilevered (single sheer?) rod end on the sway bar arm side. If they fail, I can always consider doing a clevis-like joint like the one you have, but would need to switch to steel arms for that. Today I put the rack back on to establish clearance. It will be close. As I was fiddling around, I realized how much easier this would be without the fenders on. But, I have not yet tried to mate my inspection lids and naturally they don’t fit anymore with all the modifications and rust repair I have made to the cowl and fenders. Shit… after spending 30 min trying yo make them fit, I gave up and decided to just weld a sheet of 20-gauge to the fenders to close out the hole. I still need to stiffen it a bit so it doesn’t flop in the wind, but the fitment works with the hood. Il finish the other side tomorrow, then I can toss the fenders aside and get back to the sway bar. -
240z SCCA vintage race car, restoration
AydinZ71 replied to AydinZ71's topic in S30 Series - 240z, 260z, 280z
Thanks Clark. I’m going to clamp the AL bar to my welding table and hit it with my 2lb hammer tomorrow, without heating, and see if she budges. It is 3/4” thick, 14” long (I will be trimming) and 6061 alloy. Thanks for your support. We’ll see how she goes tomorrow! -
240z SCCA vintage race car, restoration
AydinZ71 replied to AydinZ71's topic in S30 Series - 240z, 260z, 280z
-
240z SCCA vintage race car, restoration
AydinZ71 replied to AydinZ71's topic in S30 Series - 240z, 260z, 280z
Will fabricate the mounts for the sway bar this weekend. Another topic: My wider track will need flares. I saw these on RHDJapan with John's help. Any feedback from ya'll? https://www.rhdjapan.com/marugen-shoukai-rear-extra-wide-over-fenders-s30-s31.html -
240z SCCA vintage race car, restoration
AydinZ71 replied to AydinZ71's topic in S30 Series - 240z, 260z, 280z
i can tell ya, on mine it was completely rusted out. So much so, that the die-pressed steel gusset supporting the nuts and sway bar mount inside the frame rail, was half gone. Meanwhile, there was little surface rust on the outside of the rail. Another classic situation where water had worked its way in between the lap joints, and the PO had no idea it was happening until holes showed up in the usual spots. -
240z SCCA vintage race car, restoration
AydinZ71 replied to AydinZ71's topic in S30 Series - 240z, 260z, 280z
yeah… that makes sense. Once the bolt is torqued, the nut is just squishing whatever amount of steel you have between the mounting surface and the nut inside the frame rail. -
240z SCCA vintage race car, restoration
AydinZ71 replied to AydinZ71's topic in S30 Series - 240z, 260z, 280z
@Alexander240z thanks! I’l start by saying only 1/3 of the steel from the area behind the seats to the front tip of the car is OEM metal. Over a year of rust repair, fabrication and reinforcement. Hence, my lower frame rails are now ~2.5” 316SS tubes. The mounts for my engine/steering/suspension crossmember are fabricated out of 14-gauge steel. Attached is a pic of the mount. I’m thinking of adding a 3rd bolt attachment here as well. The OEM design allows the crossmember to “lean”, since it’s only being held on by 2 bolts in a single plane, on each side. I plan to mount the bearing to some mild steel box tube or angle, and use 14-gauge steel as the mounting surface. I went with the face-mount bearings so I can adjust the height with the steel mounting surface, instead of adding bushing material to a foot-mount bearing. Here is a pic of the bearing. Alluminum housing but still not light. To save some weight and a lot of time, the mounting surface will be welded to the stainless frame rail instead of bolted. as a matter of fact, I weighed the OEM bar and links (11.5lbs), and it looks like the whole assembly (including mounts) for the new one will be 2-3lbs heavier. I don’t have a lot of tangible experience on how critical a sway bar stiffness and response is to overall road track handling, but I can tell ya this will definitely be solid! -
240z SCCA vintage race car, restoration
AydinZ71 replied to AydinZ71's topic in S30 Series - 240z, 260z, 280z
Yeah 😕 that’s what I was afraid of. annealed metal is definitely not what we are going for. Between the two options, it does sound like bending would be a better option. It’s gotta angle somehow! -
IMSA GTU vintage racer build
AydinZ71 replied to clarkspeed's topic in S30 Series - 240z, 260z, 280z
Whoa! Those are long! Makes sense, given the location of the arm. Do you plan on running a rear bar as well? I hear from several folks they prefer running a stiff front bar and no bar in the rear. -
@katman yes indeed! Regional EP here in Southern California, so most of my time will be at Willow springs. Greg has been my mentor for the past year but I try not to bug him too much on the stuff I need to hand fabricate. He points me in the general direction which is a huge help! I will try to mirror what you accomplished on your ITS car. Any particular strategy? Trying to get air flow to the leading edge of the rotor? I definitely lack experience here. I acknowledge eliminating as much of the backing plate as possible. I don’t even have one at this time, so I will be fabricating it from scratch. I have one 3” duct nozzle to draw from on my air dam. Unfortunately I enclosed my headlight buckets without realizing its forbidden in EP, so il probably run vintage to start. I do have spare steel buckets I can swap out when attempting EP. In that event, il duct air straight from the OEM headlight opening to the brakes like Greg did on his EP car.
-
240z SCCA vintage race car, restoration
AydinZ71 replied to AydinZ71's topic in S30 Series - 240z, 260z, 280z
Nice! glad you can avoid bending the arms. Honestly, I know nothing about aluminum metallurgy. Heating and bending mild steel does tend to make it harder and more rigid due to work hardening. I believe mild steel is the most ductile/soft state of steel we work with. You can also hammer the drawn surfaces while hot, which will further case-harden the steel. Heating and bending forged steel will weaken it of course. Will heating and bending 6061AL weaken the material and make it less rigid? No idea... If I had a TIG, i would consider just miter-cutting the bar and welding it back at an angle with a full-penetration weld. I am going to try to heat the bar with a torch and strike it with my 2lb hammer. Heat dissipates FAST in AL though so i will need to work fast. If it doesn't budge, I'm going to find a local shop with a press, mark the bar with a seam line for the bend, and just ask them to bend it to an estimated angle based on my mock-up. My bearings and end-links will be here by Friday, so we may both be working on it this weekend. -
240z SCCA vintage race car, restoration
AydinZ71 replied to AydinZ71's topic in S30 Series - 240z, 260z, 280z
Thanks! I think I enjoy the problem-solving challenge more than anything. Greg definitely helped with the concept as usual. I do need to bend the arms to reach the mounting point on the LCA’s, but il have to find a shop with a press. I don’t have anything that can bend 3/4” thick 6061AL. I plan to mount bar a little closer to the crossmember than the OEm mounting location. Thanks for your help too Clark! PS: this stuff ain’t cheap! The bar and arms were a bit over $300. Bearings were $50 a piece and the end links were 80 shipped for the pair.
