A to Z
-
Posts
1077 -
Joined
-
Last visited
-
Days Won
34
Content Type
Profiles
Forums
Blogs
Events
Gallery
Downloads
Store
Everything posted by A to Z
-
 Link for Juggernaut welding. Cool website. https://l.facebook.com/l.php?u=https%3A%2F%2Fwww.juggernautwelding.com%2F%3Ffbclid%3DIwZXh0bgNhZW0CMTAAAR3EGU-Dqu0cfw2_m63F1YQu-CW318pQXZ_Ush6pggNbeHl8OQNLlR5f4Do_aem_ac5vXnq35WvOclQePkEbLw&h=AT0IhM7k5JMUmU4Da3JegoaFkYJi94JIpgCojduk9VuiZ3kpkgxoK37LEOmHxABvp0Qgj1AMVoPGScUuqmDpxbOOvHp49FuU_pWfpnWcuXN7KiwxEevWjswpH2lwGYs0zxUv&__tn__=R-R&c[0]=AT0k28CDcTUFU3EQVKLS_gVtj8TBYncoOs4GZlXwfM6VDYMIzCwzP9MPcYCFw4y3NS1BI57rNbNSol7ImG8BcVDJcAprSLckoG-ozRnwxaGlgyKOmnoft5id6PzK8HDN8Yp_cPwaTN1lvmKYXbH5BnMZry1voXvE41Pgor9jpkmGgKsmUBRJLQOD-UE7ya_Gklr_D1ctMJ6NDJcQqPqokvOZBxoP2M_8
 -
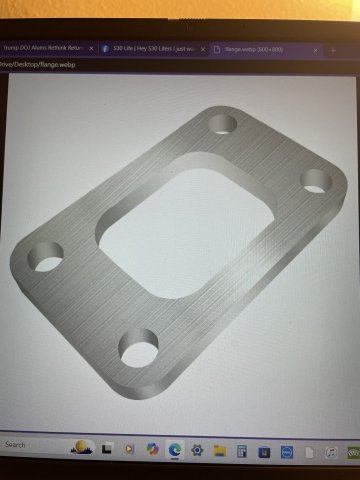
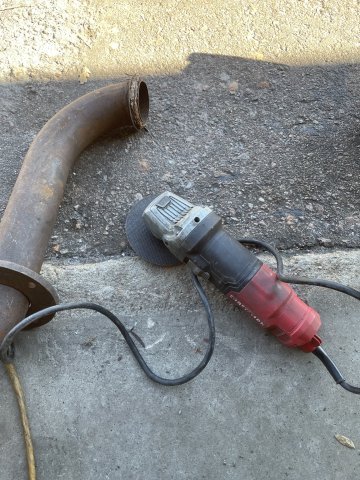
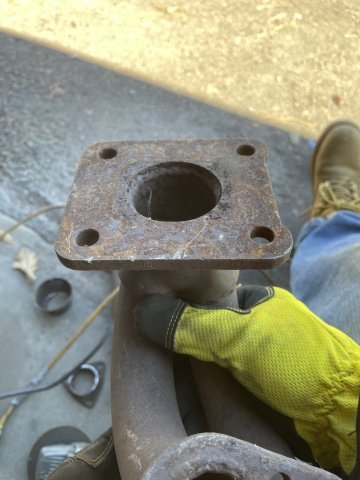
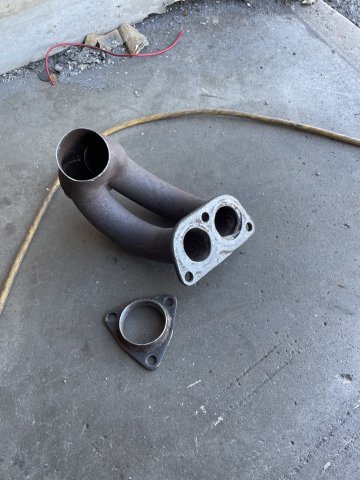
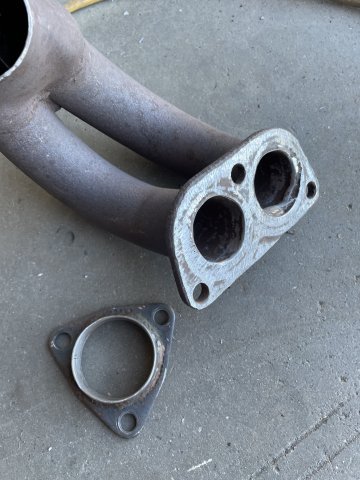
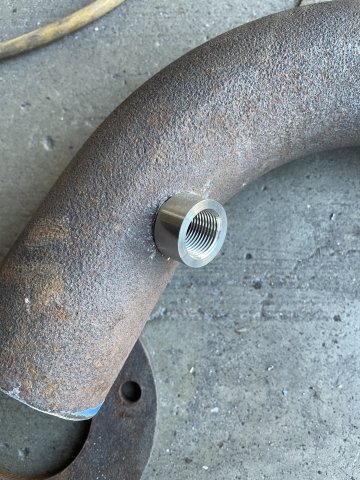
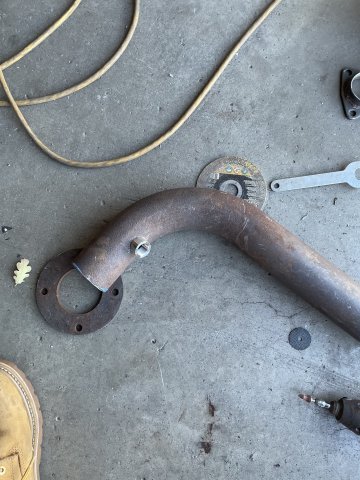
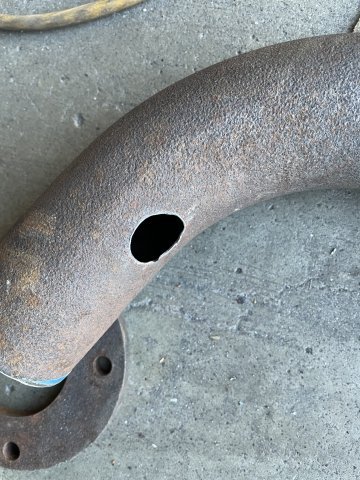
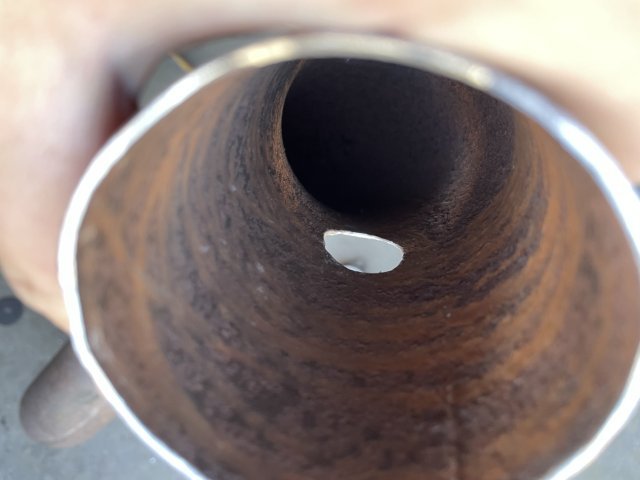
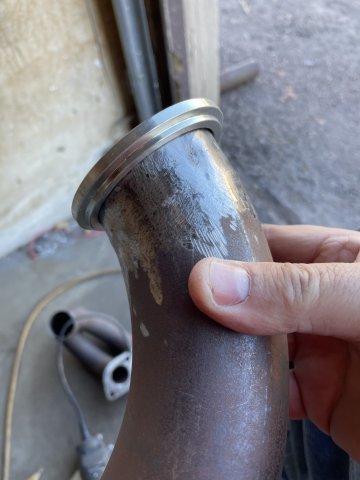
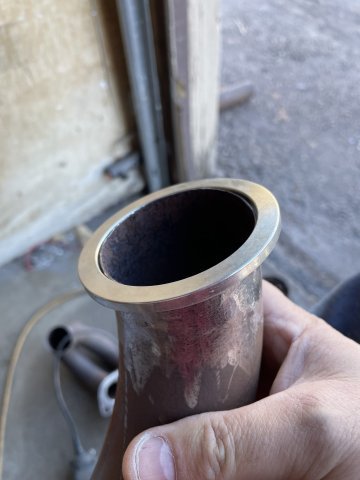
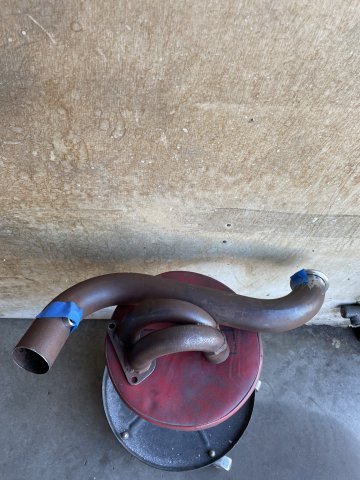
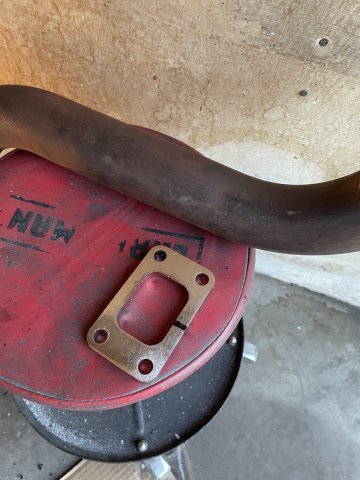
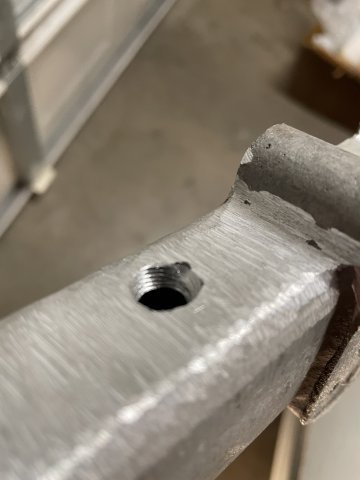
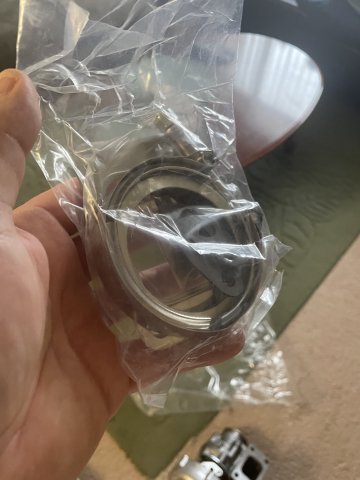
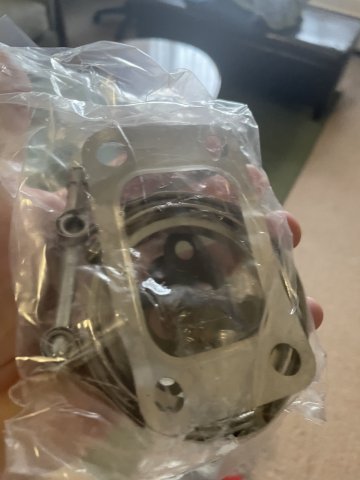
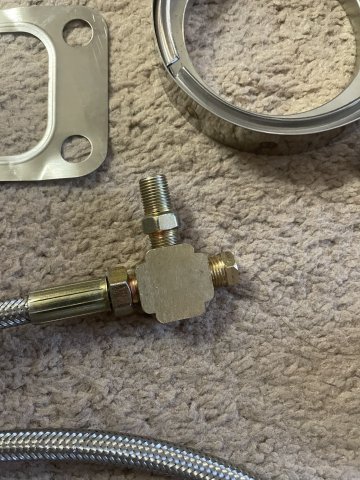
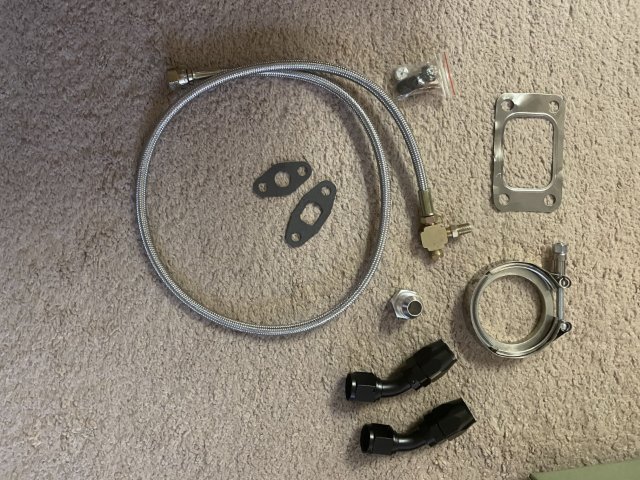
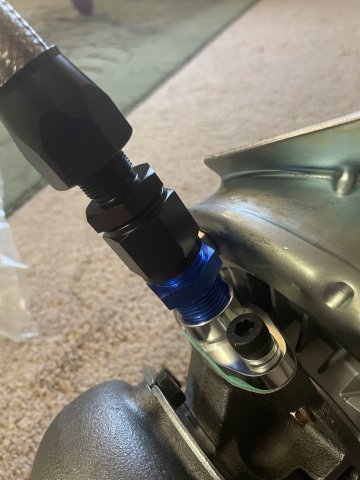
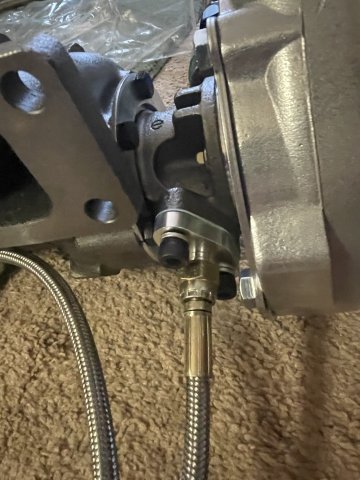
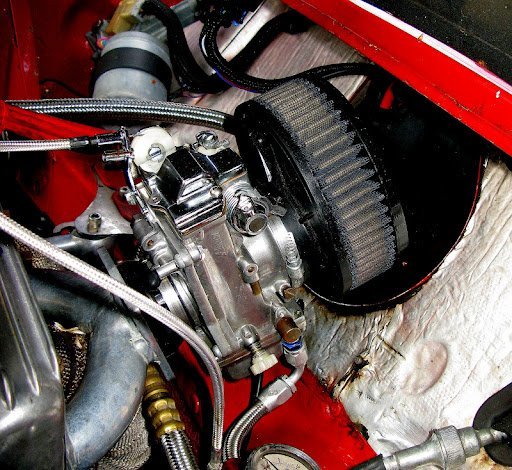
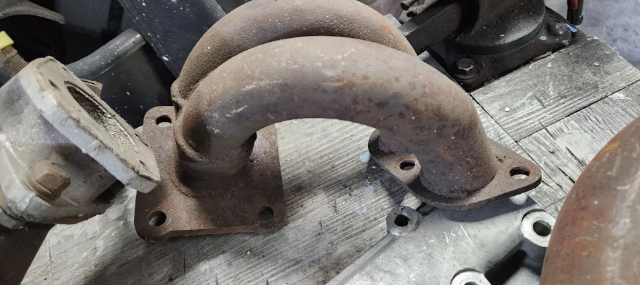
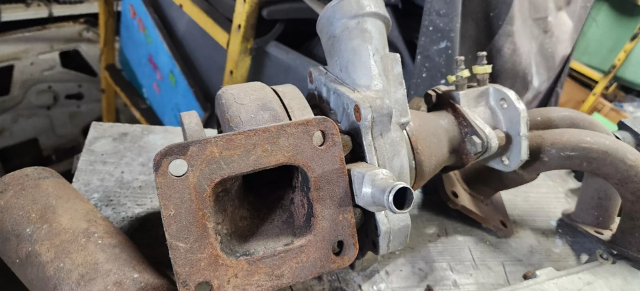
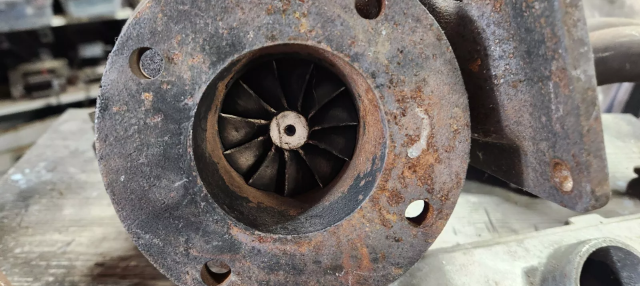
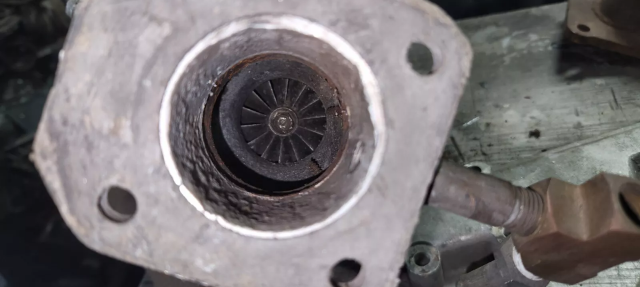
I dropped my turbo in the mail today to go to G Pop Shop to have it updated with Carbon seals, which apparently are necessary when using a draw through turbo system. I also dropped off my J pipe to get a T3 flange welded on, and my down pipe to weld on a V band clamp, M11x18.5 bung for my AEM A/F gauge and a flange on the bottom at Juggernaut Welding. We go forward. https://www.gpopshop.com/
-
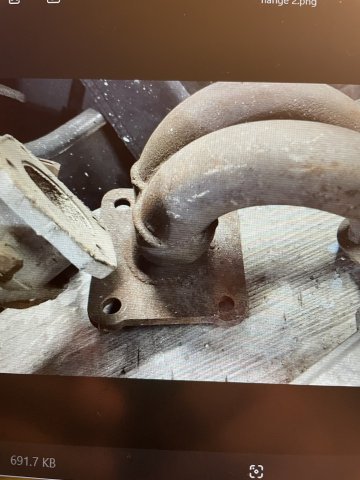
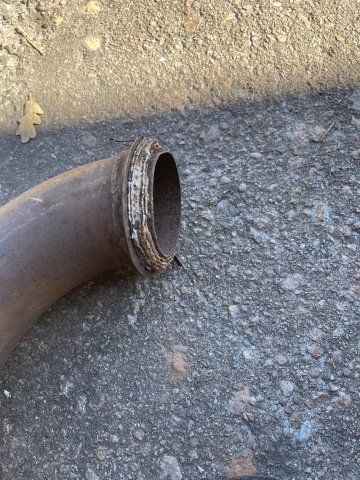
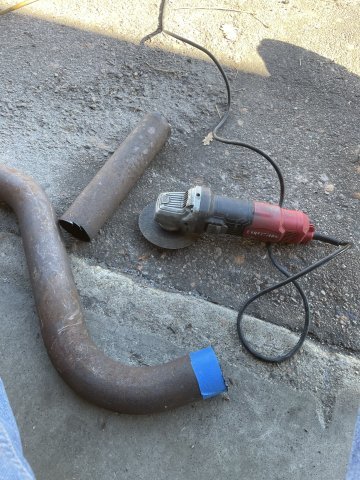
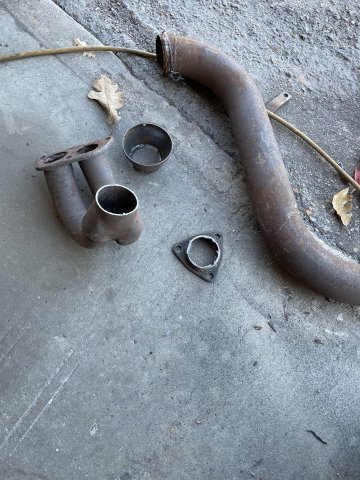
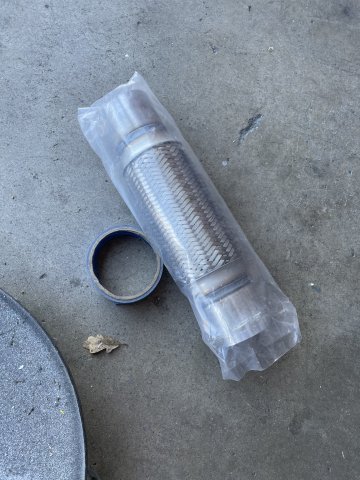
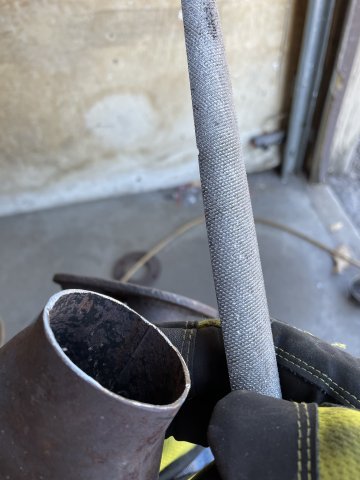
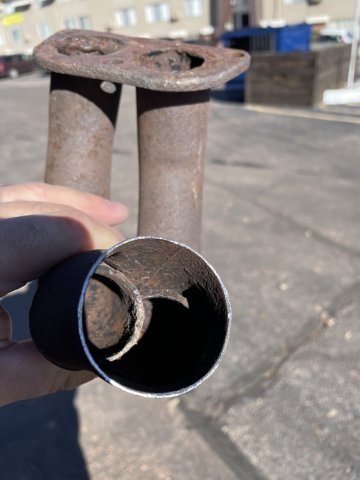
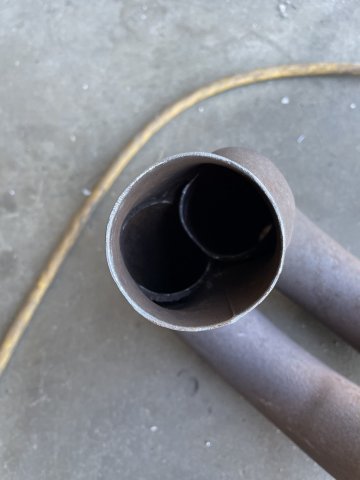
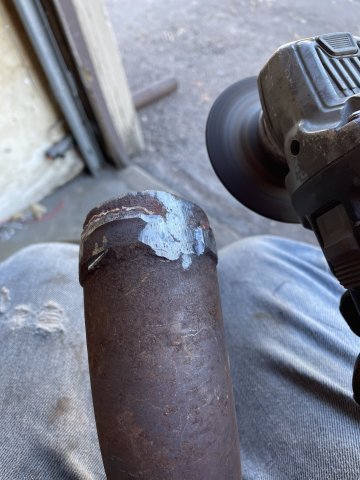
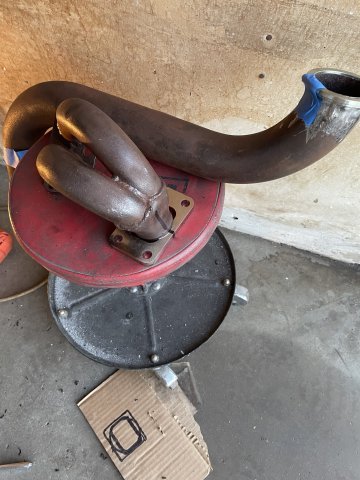
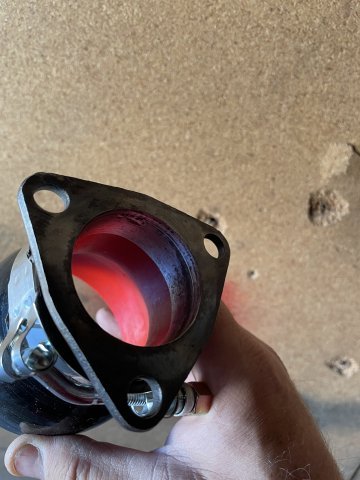
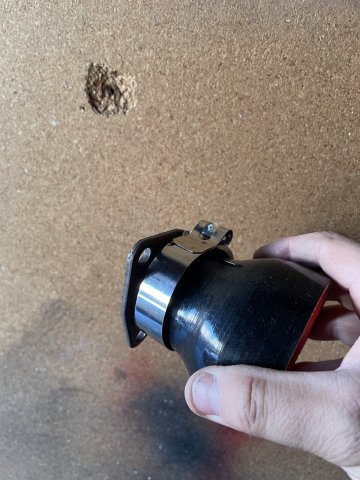
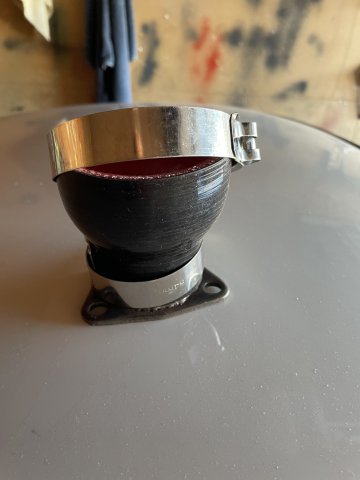
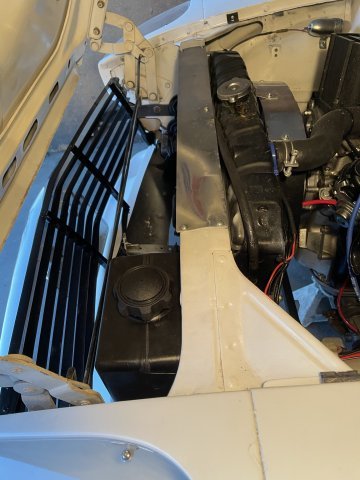
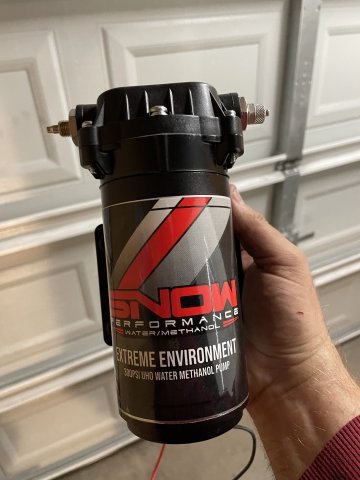
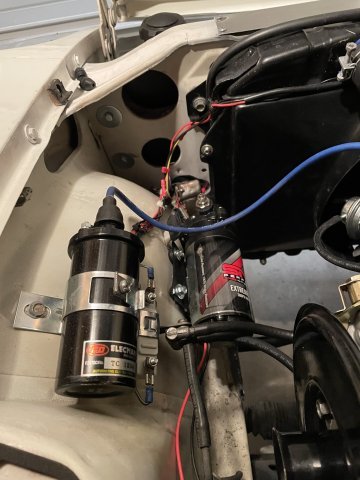
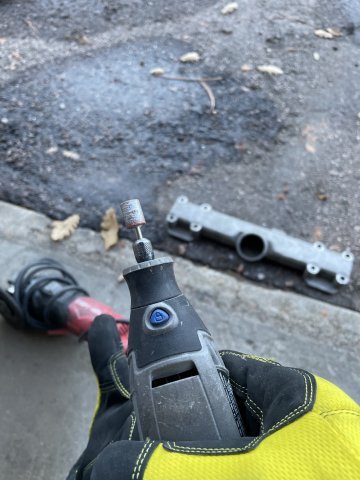
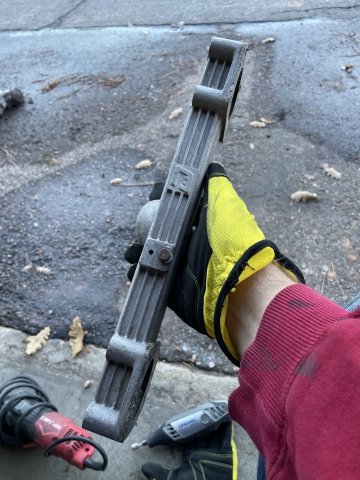
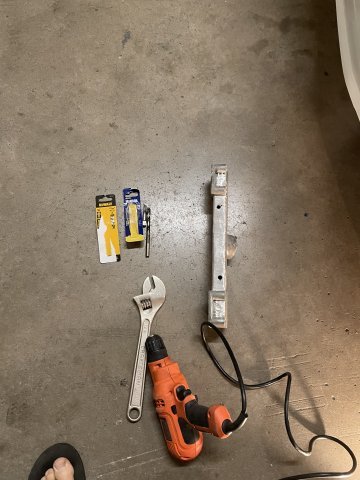
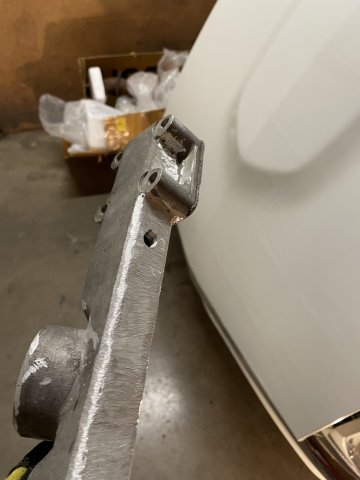
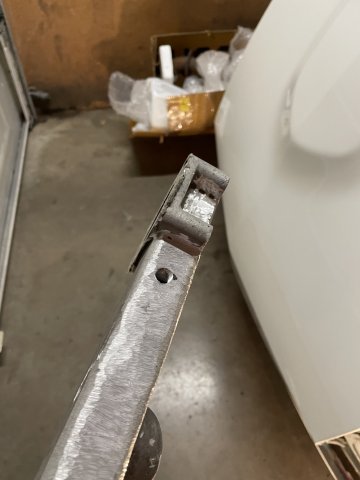
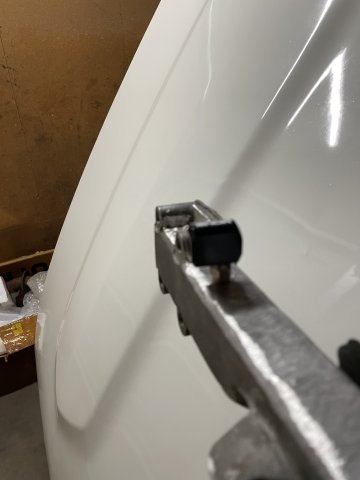
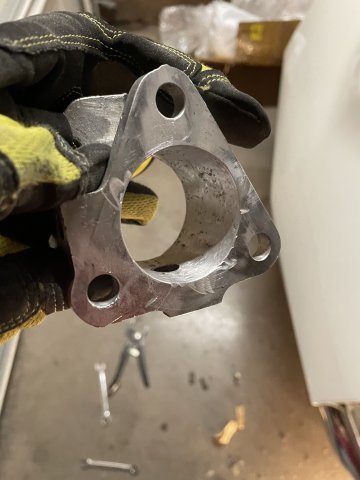
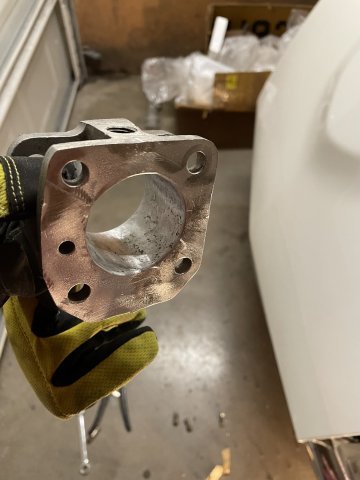
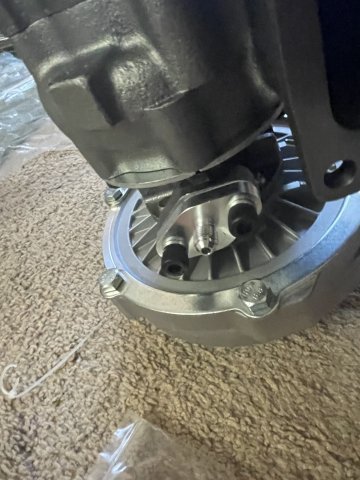
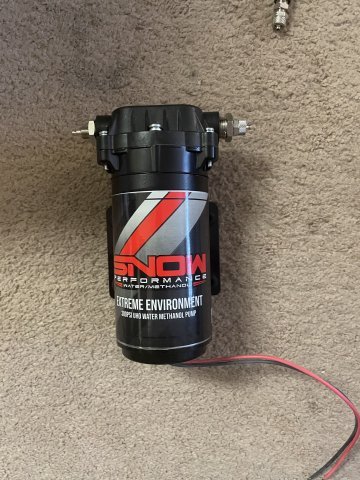
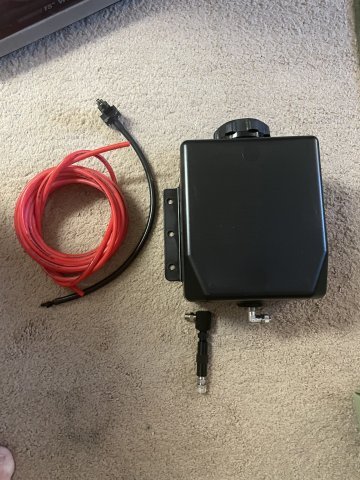
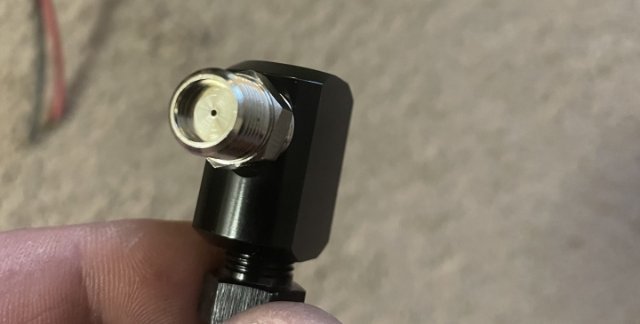
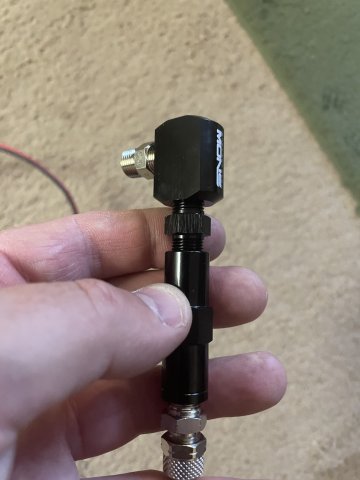
11-16-2024 TURBO PROJECT UPDATE: wow...busy day. I got my down pipe cleaned up and ready for some welding....V band on the top, flange on the bottom and a bung for my A/F down low. I have a length of flex pipe to get in there when I connect the pipes together. I also went ahead and cut off the old Rayjay flange on the J pipe and I got a T3 flange...sure wish they hadn't chrome plated it. Then I took some time to try and clean up the ports on it a bit. Looks like my welder will have to fill in around the pipe where it meets the flange...maybe plate steel on the outside and fill it in on the back side? We'll see. My crown turbo inlet to carb spacer piece I cut down and got my 2 inch to 3 inch hose to fit on nice....just needs a coat of paint. After getting all of that done, I went ahead and mounted my Snow Performance water/meth injection tank and pump and ran the lines between them. Almost all the parts I need have now arrived, so now it is just welding and then putting it all together. V Performance modded Mikuni HSR 45 Carb and J&S Safeguard (knock protection) are still enroute. Pics follow. Cheers!

-
Many guys have done high compression and boost. the main issue is detonation. The way to curb the detonation is with water/Methanol injection. The other way is through a knock sensor (J&S Safeguard) that pulls the timing to each cylinder individually. I have elected to do both. My setup is a mild turbo setup......it is mainly for looks. As a by product I'll gain 20-30 horsepower minimum. This is a hobby car, and this is fun. I set it up and run it, if it is rich, then I turn the boost up little by little until it isn't rich anymore. same with timing, as much timing as I can get away with, and if it is rich or lean, change a jet in the carb. when it is running great and the A/F Ratio is good, then that's it. Whatever the boost level is....I'll know then. I anticipate 5-7 psi. 5500-6000 redline. I like torque.
-
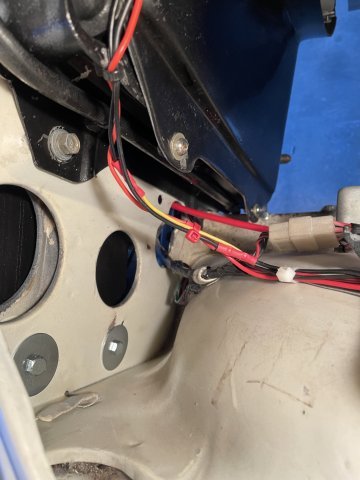
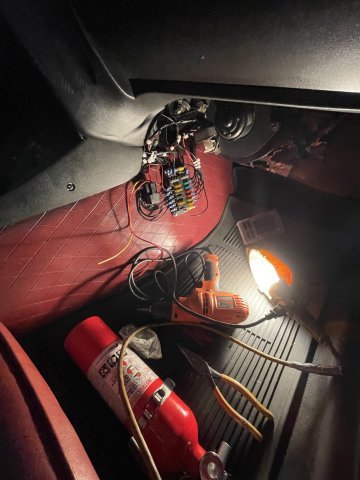
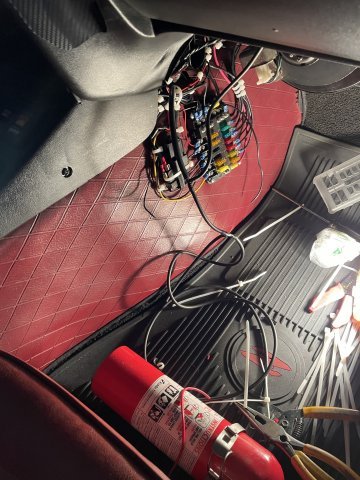
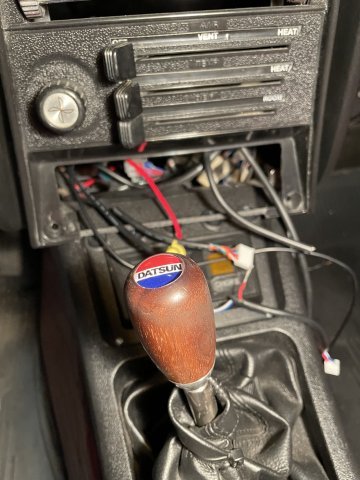
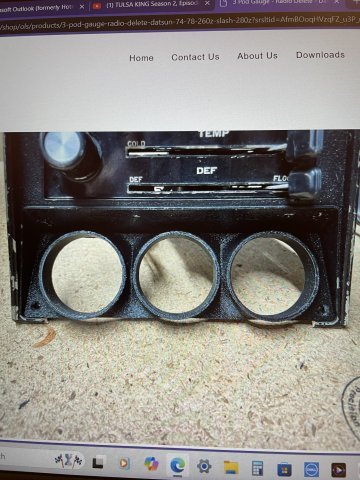
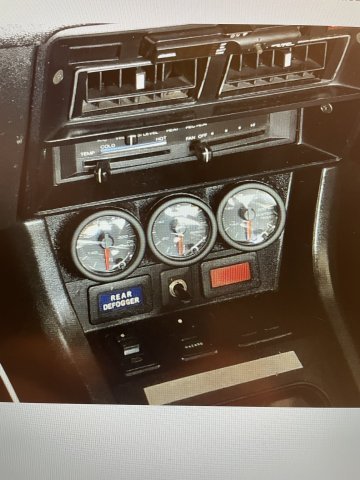
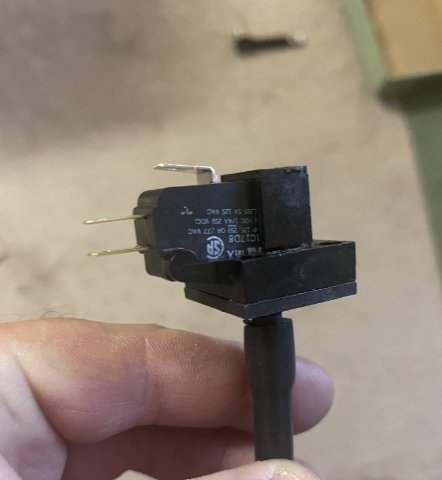
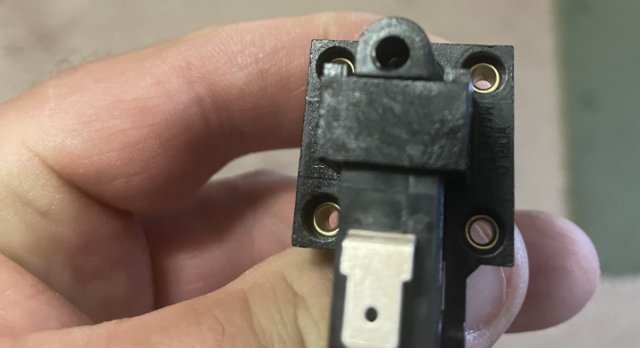
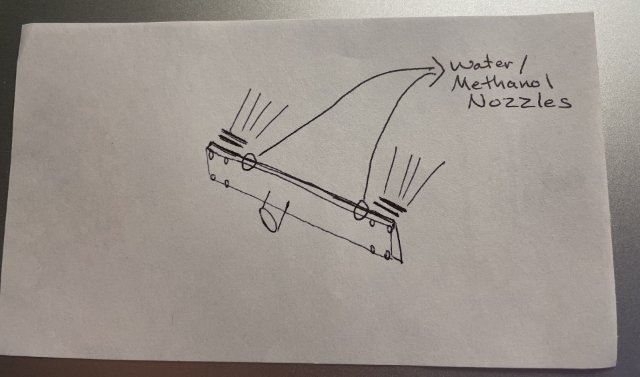
11-10-2024 Turbo project update. I started on the interior, mounting the relay and boost pressure switch for the Snow Performance Water/Methanol injection, and then went ahead and removed the 432R stereo delete plate, and re-routed the wires for my A/F ratio gauge down to that area. I bought a 3 gauge pod panel from Milkfab Engineering to go in there. I will house my AEM A/F ratio gauge, my AEM boost gauge, and my J&S engine knock/ignition retard gauge. AFter that I went and started on the Crown intake plate. I decided to prep the piece for polishing by removing all the fins and stuff so it is smooth, and then I drilled and tapped for the Water/Methanol spray jets. Yeah, the holes aren't perfectly aligned...I double measured, dang......but I can make it look good once installed. I also worked on the aluminum block that mounts the carburetor to the turbo. I can't believe how rough cast it was inside the bore area. I can't believe the previous owner mounted it and used it like that. I went ahead and cleaned it up. So those 2 pieces are going to J&S Polishing in Colorado Springs in a day or two and will be a thing of beauty when I get them back. I have attached pics, and added a pic from Milkfab of a 280Z gauge pod with gauges, as they didn't have a 240Z pic, and the other pic is also from them, to get an idea. Thanks!
-
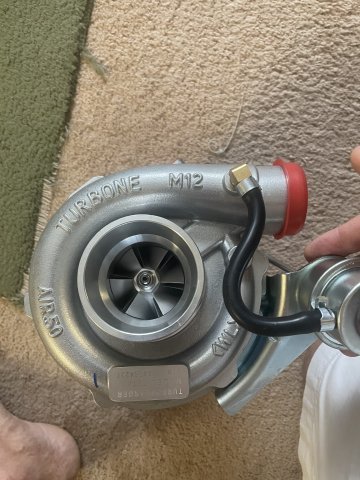
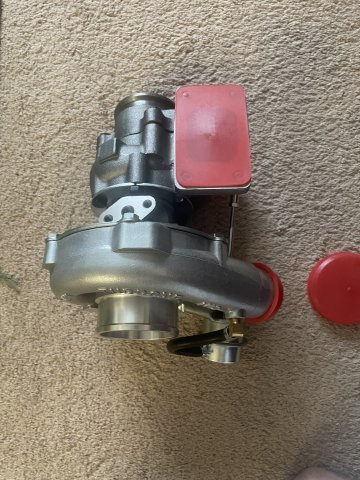
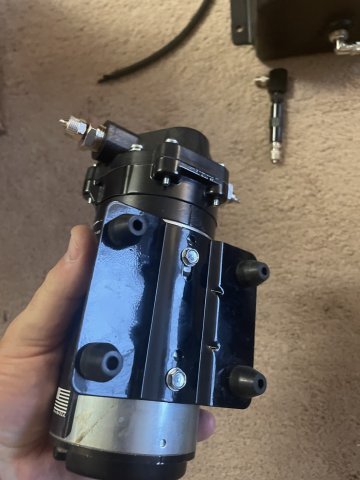
11-08-2023 Turbo Project Update: My Turbo it's a "Turbone M12" and my turbo oil lines arrived today, and I laid out the Snow Performance Water/Methanol injection Stage 1 kit today, and got it "sorted". Awaiting more parts. See attached pics.
-
Warning - poor R&D and customer service + credit card dispute
A to Z replied to idiot280's topic in Non Tech Board
"it's the Russians" -
Thanks mate.
-
Performance Parts - Vintage Performance Developments
-
11-06-2024 Turbo project update: I have decided to not use the SU carburetor....I am switching to the Mikuni HSR 45mm carb. It's a motorcycle carb, and some of you have seen how guys use multiple ones instead of sidedraft carbs. I reached out to John at V Performance, and he is going to build and prep one for my setup. NO BUTTERFLIES! Butterflies in a draw through turbo cause a real vacuum problem, and is terribly hard on turbochargers, especially the seals. For years, guys have been adding "carbon seals" to combat this issue...this should combat the issue, and it has the benefits of having an accelerator pump, it's a true 45mm bore all teh way through and many other benefits. Here is an excerpt from a Corvair Forum from guys using it on their draw through Turbo Corvairs: Mikuni HSR carbs were last used in O.E. applications on Harley motorcycles and also Yamaha's. kmart356 over at Corvair Center has been a pioneer in using this carburetor, and he worked with the folks at Vintage Performance to make it happen! Slide carbs have always been a better carb than butterfly types because the fuel air ratio can track the actual airflow over a wide range of throttle openings and flow much more air for their size than a butterfly type can. They have a natural variable venturi as opposed to a fixed venturi and variable area like butterfly types. Also, because of the slide movement, area is gained in a proportional way instead of a wild magnetic hysterisis type curve that is typical of a butterfly opening. They were the last carburetors used in F1 before going to fuel injection!! Perhaps these would have been used in automotive applications more often long ago, but the big bugger in the old days was that the only other application for them were small displacement motorcycles and those did not need accelerator pumps so they didnt have them! The HSR's do have accelerator pumps and do lend themselves to automotive use. The HSR45 is an ideal fit for use on the F-flow Corvair Turbo, as it is nearly the same size as the turbo inlet!
-
Features: -High Quality Material, Cast Housing with Durable Steel -Boost Engine Horsepower Significantly -Increase Engine Power and Torque Outpout; -Maintain Combustion Chamber Pressure and Fuel/Air Load -Contructed with High Quality Material -Built for Durability and Strength OUR ADVANTAGE 1.100% BALANCING TEST, This Turbocharger you will receive has been balanced using the VSR machine technology. Through the comprehensive and high-precision static and dynamic balance detection technology, and reliability. 2. All of the materials we use are the best materials,and we believe that only the best materials will guarantee the life of the turbo. Turbine Wheel: the special K418 alloy to achieve stability under high temperatures up to 900 degrees Celsius, and never use K13 Inconel alloy. Turbine housing : Ductile iron QT450-10 can withstand temperatures up to 700 degrees Celsius Aluminum blades : Precision machining forging. The lightweight design enables reduced noise and increased response without compromising comfort or longevity *Factory direct price, ship worldwide; Offering any turbo part leading 2 years warranty under normal use, unlimited mileage. 2 YEARS WARRANTY Factory direct price, ship worldwide; Offering any turbo part leading 2 years warranty under normal use, unlimited mileage.
-
Turbo Specifications: Exhaust Inlet (Turbo Manifold) Flange: T3 T4 4 bolt Flange Patterns Exhaust Outlet Flange: V-Band Flange (ID/OD: 2.5"/3.1") Turbine Side: Turbine Trim: 74.2 Turbine A/R: 0.63 Turbine Inducer: 64.8mm Turbine Exducer: 55.8mm Turbine exhaust outlet : 79mm Turbine exhaust inlet: 44.7mm(length)/85.8mm(width) Compressor Side:Compressor Trim: 48.1 Compressor A/R: 0.5 Compressor Inducer: 52.7mm Compressor Exducer: 76mm Compressor outlet:78 mm Compressor inlet:51.5 mm Bearing: Journal Bearing Cooling Type: Oil Cooled Wastegate: Internal Wastegate Thrust Bearings: 270 Degrees Hosepower: Up to 420 HP Turbo Type: Individual Condition: 100% Brand New Accessories: You will get exactly as shown as picture above Package Size: 30x 28x 24 cm Package Weight: 9180g
-
11-03-2024 Turbo project update. I Went ahead and snagged the turbo for my project. Ebay special... "T3/T4 T04E V-BAND Turbocharger Turbo .63 A/R with Internal Wastegate New" The seller is "TurboBoosts" which has a really good reputation. Good cheap unit for what I am doing, just putting around town in my toy a little bit Here is the link if interested https://www.ebay.com/itm/203047116629 Here are some pics
-
Man everything looks great! I have a Yoes oil spray bar, the one you have is HUGE in comparison! I do have a question though......running carburetors....why a fuel setup more in line with EFI?? Surely 3-4 psi / standard carb flow is sufficient, or are you overbuilding for the future? I don't even know HOW you found the HKS surge tank and stuff.
-
I was searching online, and this is the cheapest price I found for the Snow Performance Water/Methanol injection Stage 1 kit:
-
Click to watch video from the above post. V1.MOV
-
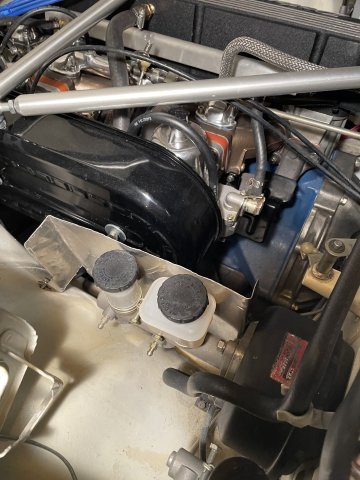
11-02-2024 Turbo project update. Since the turko kit I bought hasn't arrived yet, I started work on an aluminum plate heat barrier around my brake master cylinder. I also went ahead and ordered t a Snow Performance stage 1 water/methanol injection kit, that will make my 11.54 to 1 compression motor survive a little bit of boost on top of it all. I have also decided to go with an internal wastegate, and the video I posted earlier, shows a neat way to lower the boost setting on an internal wastegate with a spring and and a couple spacers. I now want to figure out how the throttle cable or hopefully rods will work for the single SU carb. Here is a quick video and then a few pics of the heat shield, keep in mind, it is NOT finished, just started. (video from today on post below this)
-
11-02-2024. Well, I found a new project. An old Crown Turbo kit in pieces, that I am going to clean up and install with a new Trubo, some water/methanol injection, and run it on my 11.54 to 1 compression stroker L series. I will keep the boost LOW. It is primarily for looks, and that little shot of power will be cool also. I am at high elevation, so the overall compression is lower, .....at 5 Psi I will be at 14.27 to 1 compression. I really only want 3 psi, no more, so that compression figure would be 12.7 to 1. Methanol water injection 50/50 mix will make the 91 octane act like it's 116 Performance (octane) rating.
-
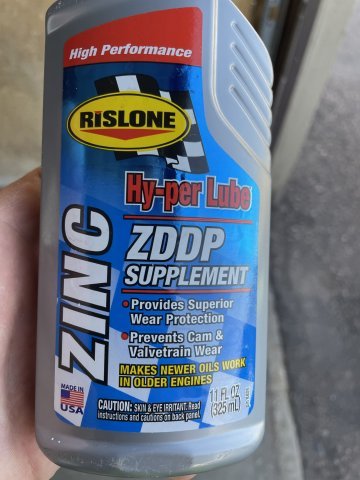
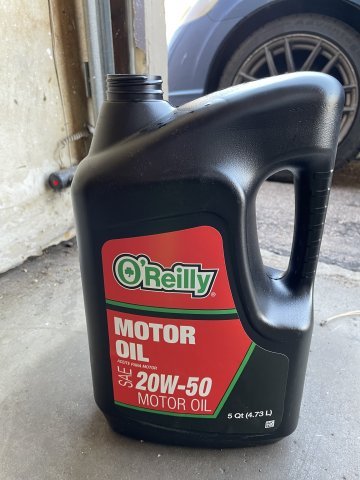
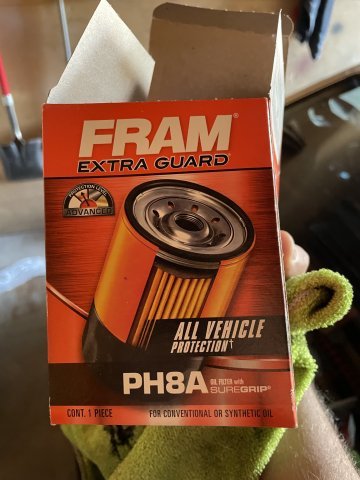
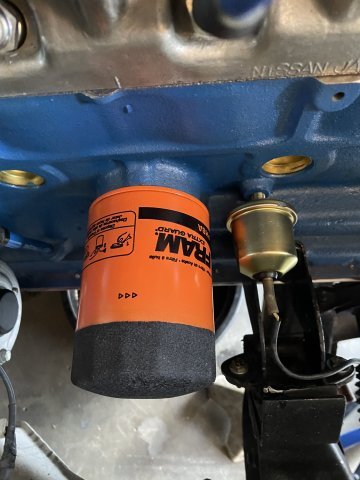
First oil change today. 523 miles. I pulled the drain plug and the oil came out BLACK as expected. I had a buildup on the end of the plug, which I also expected being a fresh engine. Topped her off again, with the Risilone ZDDP and went from 10W30 to some thicker 20W50 cheap oil "O'Reilley's 20W50" (hey its got the ratings....) to see if it raises the oil pressure up a tad. So, this will stay in for 1,000 miles, then I will switch to a synthetic and a new filter of course. The rear main seal weeps a tiny bit on the ground, but very acceptable. Perhaps this thicker oil will stop that. Overall, the engine has performed as expected. So, for those that have been following along, this is a pretty good way to go for a Z car engine. Pics to follow. Cheers!
-
The Factory manual states 18 degrees at idle. I did 20. It runs GREAT! 91 octane fuel up here, which is 93 everywhere else, 11.5 to 1 compression...no pinging, pulls like a frieght train. When all else fails, follow the manual I guess. Everyone told me the "A" cam was too weak.....my exhaust manifold won't work......well, it WORKS. Its a quick Z car.
-
P30 block versus N42 and F54. besides larger bore what else is better?
A to Z replied to A to Z's topic in Nissan L6 Forum
in a d? As in Datsun? what? we bore until 3/8 from the end and stop. that leaves a 3/8" thick shelf for the liner to rest on. If I bevel the top of the bores, it would allow for welding the top of the liners in. You could also weld the liners at the bottom at the step. cleanup decking and a clean up bore to smooth up the liner to step area and you're golden. Cooling could be a concern. -
I know F54 has the siamesed bores, and the N42 does not. Both have a bore of 86mm. P30 is a 240/260 block, and has a bore of 83mm. Someone today told me he read somewhere that the N42 casting has better oiling than a P30 block. I also read that the N42 block has a higher nickel content than ANY other L6 block. SO.....If one were to bore out all 6 cylinders and sleeve it for BIG pistons, why wouldn't the P30 be just as good as say an N42 or even f54? Thanks in advance.
-
I consider it finished, in that, it is a ready to be driven at any moment. Small little projects as you said are never ending. If it ever gets to where nothing can be done, it will become another boring toy that just sits.
-
It was done.....then the stuff that was never touched decided it wanted to be "touched". Sure is nice and strong in the midrange with the diesel crank