-
Posts
970 -
Joined
-
Last visited
Content Type
Profiles
Forums
Blogs
Events
Gallery
Downloads
Store
Everything posted by ezzzzzzz
-
It is a press fit typically. I think my 4L60E actually has an o-ring seal but I'd have to look. What fluid is leaking? Which engine do you have? I recall a SBC that had a small oil leak where the engine shop had installed a freeze plug into a NPT hole for the oil galley. The mechanic had no respect for me until I cured his mystery leak...
-
I picked up an 82 280zxt (with 201300 miles on the OD) the other week. The F54/P90a engine supposedly had no compression on cylinder 5. Someone had pulled the valve cover, water pump, oil pump, etc. for reasons I'm not sure about. I pulled the engine yesterday and removed the head expecting to find a burnt valve, blown head gasket or damaged piston/rings. Nada...nothing wrong. There's lots of oil every where and the plugs were heavily fouled. The block has no ring ridge and crosschecking is still evident in the bores. One of the torque convertor bolts was lightly damaged. I'm convinced this is a relatively recent rebuild. All of that said, I am wondering if this is an overbore or ridge-reamed block. The pistons all have P90 stamped into them. Four of them are also stamped 23 (1,3,4,6) and two are marked 45 (2,5). Can someone possibly help identify what I have here?
-

LS1 guys - ?? about coolant line under TB
ezzzzzzz replied to VinhZXT's topic in Gen III & IV Chevy V8Z Tech Board
Those vents are required. GM engineers wouldn't have gone to the trouble to incorporate these into the system if it wasn't needed. Yes, you can burp the hoses and plug them up but if a stream pocket is created you'll trash a perfectly good cylinder head. Let's see, a few hundred $ for a head and the labor involved to replace it or a small investment in a "T" coupling. It's a no brainer. -
You can ask anything. The only question that really matters is are they going to be truthful. Do they have a viable reputation or is it some fella clearing his garage of parts? Are they willing to back up their word and refund you $$$ if it isn't what it's claimed to be? Is it in the car? Does it run, smoke, knock? Can you see what the oil pressure holds at? Can you run a simple compression test? Pull the valve cover and look for signs of old age, damaged/worn parts? Pull the distributor cap and wiggle the shaft to look for excess play? Pull all spark plugs and look for signs of oil consumption? The question is do you want a plug and play or plan to rebuild. I have a general distrust of people built upon experience. I've even seen a local shop do a simple seal and rings replacement using all the old parts, paint it up pretty and sell as a full rebuilt.
-
After much thought processing I've decided to "T" the rear vent hoses together and tie this into the expansion tank. I'll also use the front vent hose. I'll "T" it into one of the other two hoses at the expansion tank. I did have my fuel tank flushed and lined although it was in excellent condition (just VERY minor rust at some of the seams). My 11/70 tank only has one baffle about three inches high dividing the tank, front to back and just off center (does that make sense?). I also have a late 72 tank built to same way. The baffling does allow fuel to flow underneath it through open seams. It would interesting to actually determine if earlier or later tanks had multiple baffling.
-

Help me install my S30 suspension (pics)
ezzzzzzz replied to Gavin's topic in Brakes, Wheels, Suspension and Chassis
Look for "spindle" and you'll find a wealth of info on the rear suspension. One quick note and it'll be a bit before you get here during re-assembly, that small taper bolt shown in your pics is there ONLY to keep the spindle pin from rotating when installing the associated nuts. Your picture shows it driven much further in than required. That's why you're having trouble removing it. When you put this taper bolt back in just be sure the flats of the bolt and the pin are oriented correctly, apply some anti-seize, and tap it in just snug. Use a nylock nut and washer to retain it and tighten just until snug again. Also, be sure to anti-sieze the spindle pin during re-assembly (assuming you intend to replace those bushings). -
You might try http://www.carfiche.com and look for your vehicle. It is a free site kept open through small donations. You can find manuals and microfiche of different cars at different times. Some are more legible than others though. You can also purchase the microfiche on eBay (for example) and get a cheap viewer to use these. That's what I did. What part numbers are you looking for?
-
http://www.hpsalvage.com (San Antonio, TX) is a good source. They are very knowledgable and pull the engine with all hardware and uncut harnesses. The average used car parts suppliers will blue torch everything and you are on your own. It pays (really) to buy from a reputable person! My COMPLETE (16k miles) '00 LS1, 4L60E and all parts including the convertors was $4500 to the door, Texas to Virginia.
-
You could gut a late 80's/ early 90's camaro tank or look in one with the pump removed to see the factory baffling. Later assemblies are built with the baffle as part of the pump housing. No baffles in the tank itself. That was done in part to allow production of plastic tanks. The problem is fabbing a lock ring assembly to hold the fuel pump housing. A round baffle can be attached to the tank bottom. Spot welding at several places would allow fuel to migrate through small open slots at bottom. Even trap door baffles could be designed to hold fuel in the pickup area whether turning right or left. The idea of foam inserts is excellent. It keeps sloshing to minimum and pretty much guarantees no starvation even with low levels.
-
I'll pull the valve cover and look. I picked up an 82 ZXT to part out and pick through. The engine apparently has one dead cylinder. Maybe a bad hydraulic lifter, burnt valve, or damaged piston/rings? The body is mostly clean though. It's complete except for the CAS (don't know why it was removed except maybe for another Z). I was thinking about turboing my triple dellorto 240Z down the road.
-
Excuse my ignorance but how do you quickly determine if the lifters are solid or hydraulic in a P90a head. Is there an obvious visual cue?
-
I'm completing my rear suspension build and disc brake conversion. I am using the MM brackets and 240SX calipers. 280ZX braided lines were ordered per recommendations some time back. Of course, the rear lines do not have the banjo fittings required for the 240SX calipers. What is the best fix here? I've done some searching in here and on the web with little results. I'm tired and looking for quick resolution. Thanks for your help.
-
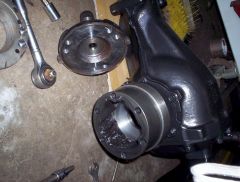
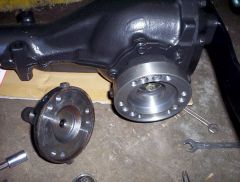
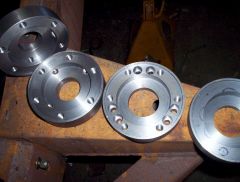
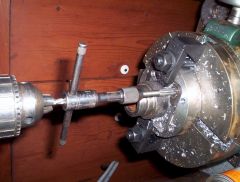
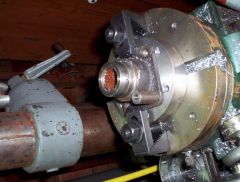
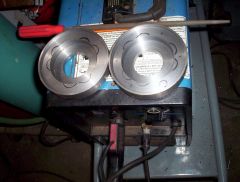
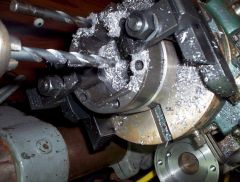
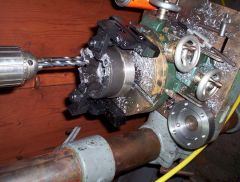
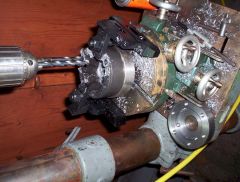
After seeing Blueovalz' 930 CV adapters and axles I just had to follow. These things are hugh! I had the basic adapters machined at a local shop per my drawings. The cold-rolled round stock mild steel cut into four pieces cost $44.00. The machine work was another $275. I did the final drilling and tapping in about 6 hours. The adapters are held to the stub axle companion flange using 10-1.25 mm bolts or studs. The 930 CV's use 3/8-24 bolts. The original 82 Nissan 720 R180A front differential companion flanges are stock. The original CV bolts are machined down (for a prior Type II CV adapter) but the stock bolt would likely work fine. I need to install the rearend and measure for Sway-A-Way axles now. I suspect I'll need the same ones Blueovalz used and machine to accomodate the required length. These will never blow up! Check out my gallery for updated photos!
-
-
-
-
-
-
-
-
-
I was always fond of the Baracuda and Challenger body styling. Chrysler is building some very cool cars...too bulky in many cases but great styling just the same (excludes the PT Cruiser and it's front wheel drive). The downside is their quality control is still the pits. After years of the K car platform and recovery in the market it seems they could get that together. Of course, I'm not just beating up on Chrysler as the other two players aren't in the arena either. It baffles me that the Asian and Euro manu's can build such better cars at competitive prices.
-
To reiterate what Jamie said... High gas flow 45-50 cfm is imperative (if it is blacking with soot you're too low on gas) Argon is best on aluminum and stainless while helium is tops! A mixed gas is best for mild steel Push do not pull the wire feed Clean well and only use clean stainless steel brushes Get a few spare tips and cups (splatter shield spray can prolong the life of the tip and cup when applied directly to both but they do away quickly with such a hot transfer) Plan on lots of "birdcaging" using the teflon liner and gun Plan on buying a spool gun and controller if you want to weld aluminum in any quanity (about a $600-700 investment) but well worth it Go to TIG otherwise P.S. I've used splatter shield spray with some success in reducing the excess molten metal from marring the surrounding surfaces too.

